Home>Furniture & Design>Interior Design Trends>How To Dye Glass
Interior Design Trends
How To Dye Glass
Modified: February 18, 2024
Learn how to dye glass to keep up with the latest interior design trends. Discover the best techniques and tips for achieving stunning results.
(Many of the links in this article redirect to a specific reviewed product. Your purchase of these products through affiliate links helps to generate commission for Storables.com, at no extra cost. Learn more)
Introduction
Dyeing glass is a captivating and creative way to add a pop of color and personality to your home decor. Whether you're looking to revamp old glassware or create stunning decorative pieces, the process of dyeing glass offers endless possibilities for customization. By infusing your personal style and creativity, you can transform ordinary glass items into eye-catching accents that elevate the aesthetic appeal of any space.
Dyeing glass is a versatile and budget-friendly DIY project that allows you to experiment with different hues and effects. From vibrant, translucent tints to subtle, frosted finishes, the art of dyeing glass empowers you to unleash your imagination and bring your design visions to life. Whether you're a seasoned crafter or a novice enthusiast, the process of dyeing glass is both accessible and rewarding, offering a delightful way to express your individuality through home decor.
As we delve into the world of glass dyeing, you'll discover the essential materials needed to embark on this creative endeavor. From specialized dyes to basic household items, the key to achieving stunning results lies in the careful selection and preparation of your materials. With the right tools at your disposal, you'll be well-equipped to embark on your glass dyeing journey with confidence and enthusiasm.
Throughout this guide, we'll explore the step-by-step process of dyeing glass, from meticulous preparation to the application of vibrant dyes. By following these detailed instructions, you'll gain valuable insights and techniques to ensure a seamless and successful glass dyeing experience. Additionally, we'll share expert tips and tricks to help you overcome common challenges and achieve professional-quality results that will impress and inspire.
So, whether you're eager to breathe new life into old glassware or create stunning custom decor pieces, the art of dyeing glass offers a world of creative possibilities. Get ready to unleash your artistic flair and embark on an exciting journey of color, creativity, and self-expression through the captivating process of dyeing glass.
Key Takeaways:
- Unleash Your Creativity: Dyeing glass is a fun and budget-friendly way to add vibrant colors to your home decor. Experiment with different techniques and create personalized accents that reflect your unique style.
- Transform Ordinary Glass: With the right materials and techniques, you can turn plain glass items into stunning, one-of-a-kind creations. From marbling effects to custom color blending, the possibilities for personalized decor are endless.
Read more: How To Dye Curtains
Materials Needed
Dyeing glass is an engaging and rewarding DIY project that requires a selection of essential materials to ensure successful results. Before embarking on your glass dyeing journey, it's crucial to gather the following items to facilitate a seamless and enjoyable creative process:
-
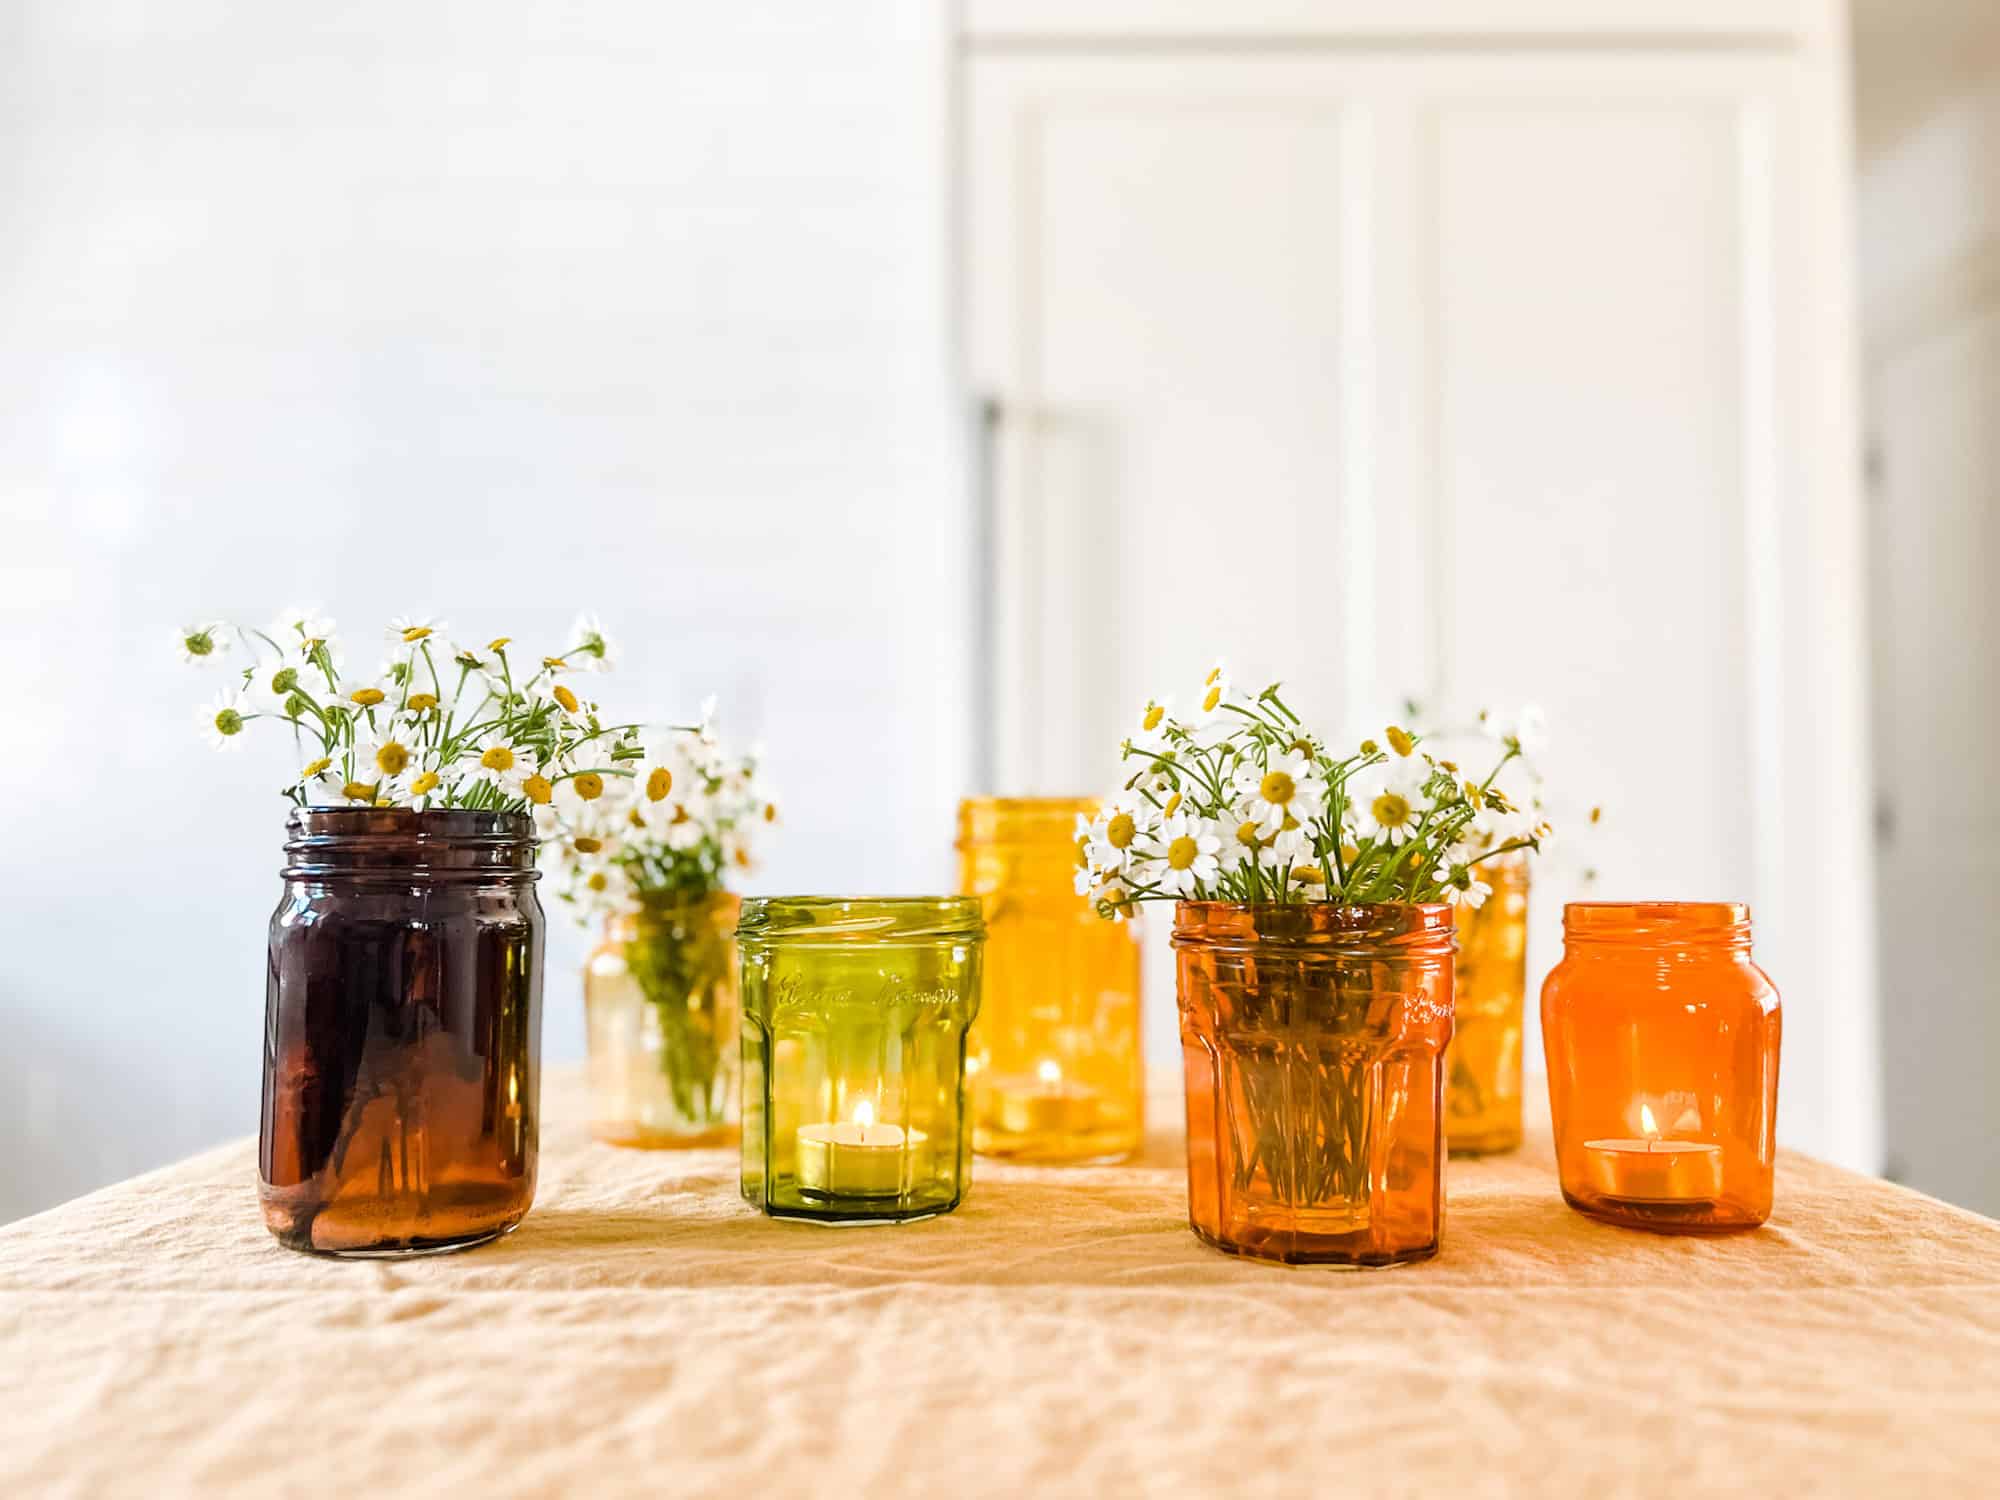
Glass Items: Select a variety of glass items to dye, such as vases, jars, bottles, or decorative glassware. Ensure that the surfaces are clean and free from any residue to achieve optimal dye absorption.
-
Glass Dye or Stain: Choose high-quality glass dyes or stains specifically formulated for glass surfaces. These dyes are available in an array of vibrant colors and are designed to adhere to glass, creating stunning, translucent effects.
-
Protective Gear: Prioritize safety by wearing protective gear, including gloves and a protective apron or clothing, to shield your skin and garments from the dye and any potential spills.
-
Mixing Bowls and Stirring Utensils: Use non-reactive mixing bowls and stirring utensils to prepare and mix the dye solution. Opt for materials such as plastic or stainless steel to avoid any adverse reactions with the dye.
-
Cleaning Supplies: Ensure you have glass-cleaning supplies, such as glass cleaner and lint-free cloths, to thoroughly clean the glass items before dyeing. A clean surface promotes better dye adhesion and ensures a flawless finish.
-
Drying Rack or Paper Towels: Prepare a drying rack or lay down paper towels to place the dyed glass items after the dyeing process. This facilitates proper drying and prevents the formation of streaks or smudges on the newly dyed surfaces.
-
Protective Covering: Lay down a protective covering, such as a plastic tablecloth or disposable drop cloth, to safeguard your work surface from potential dye spills and splatters.
-
Timer: Have a timer on hand to monitor the dyeing process and ensure that the glass items remain submerged in the dye solution for the recommended duration.
-
Ventilation: If working indoors, ensure adequate ventilation in the workspace to disperse any fumes emitted by the dye and promote a comfortable working environment.
-
Optional: Sealant or Fixative: Depending on the type of dye used, consider having a sealant or fixative to preserve and protect the dyed glass surfaces, enhancing their longevity and durability.
By assembling these essential materials, you'll be well-prepared to embark on your glass dyeing project with confidence and enthusiasm. With the right tools at your disposal, you can unleash your creativity and transform ordinary glass items into captivating, personalized accents that reflect your unique style and artistic vision.
Preparation
Before immersing yourself in the vibrant world of glass dyeing, thorough preparation is essential to ensure a seamless and successful creative process. By meticulously preparing the glass items and creating an organized workspace, you can set the stage for a rewarding and enjoyable dyeing experience. Here's a detailed breakdown of the crucial steps involved in the preparation phase:
-
Selecting Glass Items: Begin by carefully selecting the glass items you intend to dye. Whether it's a collection of vases, decorative jars, or glass bottles, ensure that the surfaces are clean and free from any dust, fingerprints, or residue. Thoroughly inspect each item to identify any imperfections or blemishes that may impact the dyeing process.
-
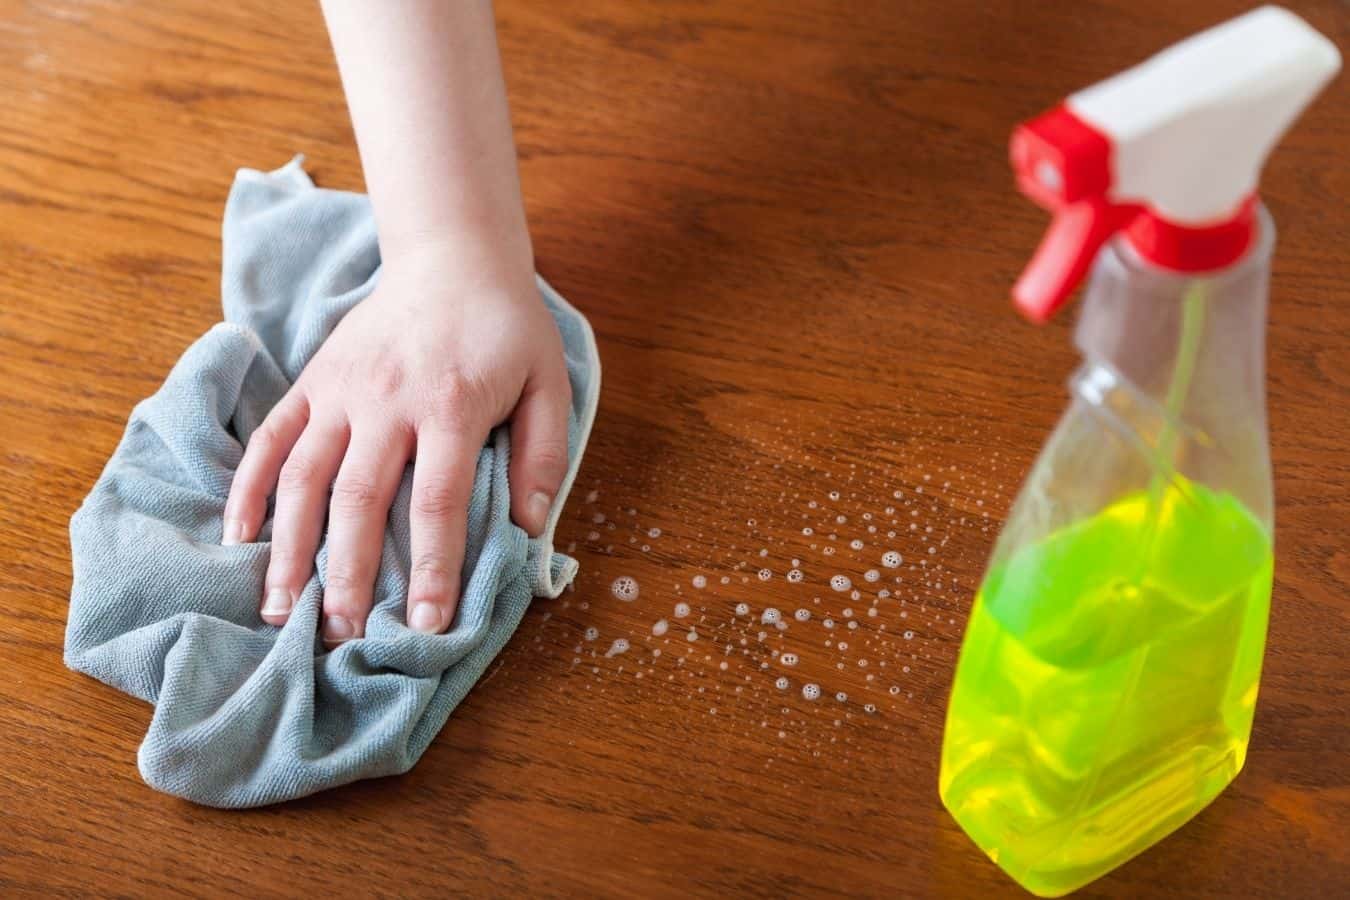
Cleaning the Glass Surfaces: Prior to dyeing, it's imperative to clean the glass surfaces with a high-quality glass cleaner and lint-free cloths. Removing any dirt, grime, or oils from the glass is crucial for promoting optimal dye adhesion. Pay close attention to intricate details and crevices, ensuring that every nook and cranny is meticulously cleaned.
-
Protecting Surrounding Areas: Lay down a protective covering, such as a plastic tablecloth or disposable drop cloth, to safeguard the surrounding work surface from potential dye spills and splatters. This proactive measure helps maintain a tidy and organized workspace while minimizing the risk of accidental stains on furniture or flooring.
-
Setting Up the Dyeing Station: Designate a well-ventilated and well-lit area as your dedicated dyeing station. Ensure that all necessary materials, including the glass items, dye solutions, mixing bowls, and protective gear, are within easy reach. Organizing the workspace in advance streamlines the dyeing process and minimizes disruptions during the application phase.
-
Assembling Protective Gear: Prioritize safety by donning protective gloves and a protective apron or clothing to shield your skin and garments from the dye and any potential spills. Additionally, if working with dyes that emit fumes, ensure adequate ventilation in the workspace to promote a comfortable and safe environment.
-
Preparing the Dye Solution: If using concentrated glass dyes or stains, carefully follow the manufacturer's instructions to prepare the dye solution in non-reactive mixing bowls. Use appropriate stirring utensils to thoroughly mix the dye, ensuring a consistent and uniform solution that is ready for application.
By meticulously attending to these preparatory steps, you can lay a solid foundation for a successful glass dyeing endeavor. With the glass items cleaned, the workspace organized, and the necessary materials at your fingertips, you're poised to embark on the exciting next phase: the glass dyeing process.
When dyeing glass, make sure to clean the surface thoroughly to remove any dirt or oils. Use a dye specifically made for glass and follow the instructions carefully for best results.
Dyeing Process
The dyeing process is the pivotal stage where creativity and technique converge to transform ordinary glass items into captivating, personalized accents. With meticulous preparation complete, it's time to immerse the glass items in vibrant dyes, infusing them with stunning hues and translucent effects. Here's a comprehensive guide to the step-by-step dyeing process, empowering you to achieve professional-quality results and unleash your artistic vision:
-
Submerging the Glass Items: Carefully lower the prepared glass items into the dye solution, ensuring that they are fully submerged. The duration of immersion varies based on the desired intensity of color and the specific instructions provided by the dye manufacturer. Use a timer to monitor the immersion time, allowing the glass items to absorb the dye and achieve the desired vibrancy.
-
Agitating the Dye Solution: Gently agitate the dye solution at regular intervals to promote even color distribution and enhance the saturation of the glass items. This gentle agitation facilitates uniform dye absorption, resulting in consistent and professional-looking finishes across all dyed surfaces.
-
Monitoring the Dyeing Process: Throughout the immersion period, closely monitor the glass items to gauge the progression of color development. Keep an eye on the depth of color and adjust the immersion time as needed to achieve the desired tint or intensity. This attentive monitoring ensures that the glass items attain the perfect hue, reflecting your design vision with precision.
-
Removing and Drying the Glass Items: Once the glass items have achieved the desired color saturation, carefully remove them from the dye solution. Place the dyed items on a drying rack or lay them on paper towels to allow excess dye to drip off and the surfaces to air dry. Avoid wiping or touching the dyed surfaces during this crucial drying phase to prevent smudges or streaks.
-
Optional Sealant Application: Depending on the type of dye used, consider applying a sealant or fixative to preserve and protect the dyed glass surfaces. This optional step enhances the longevity and durability of the colors, ensuring that your custom creations maintain their vibrancy over time.
By following these detailed steps, you can navigate the glass dyeing process with confidence and precision, achieving stunning results that reflect your unique style and creative flair. With each dyed glass item serving as a canvas for self-expression, the dyeing process empowers you to infuse your living spaces with personalized accents that captivate the eye and elevate the aesthetic appeal of your home.
Tips and Tricks
Embarking on a glass dyeing journey opens the door to a world of creative possibilities, and mastering the art of dyeing glass involves a blend of technique, innovation, and attention to detail. To elevate your glass dyeing endeavors and achieve professional-quality results, consider the following expert tips and tricks:
-
Layering for Dimension: Experiment with layering multiple colors of dye to create captivating dimension and depth within the glass items. By strategically applying different hues, you can achieve mesmerizing gradient effects and intricate color transitions, adding visual interest and complexity to your dyed creations.
-
Masking Techniques: Explore masking techniques using adhesive stencils, painter's tape, or liquid latex to create intricate patterns or designs on the glass surfaces. By selectively shielding areas from the dye, you can introduce striking contrasts and personalized motifs, infusing your glass items with a touch of artistic sophistication.
-
Marbling Effects: Embrace the art of marbling by gently swirling and manipulating the dye solution to create mesmerizing marbled patterns on the glass surfaces. This technique yields unique and organic designs, resulting in one-of-a-kind pieces that exude elegance and charm.
-
Etching Complement: Consider pairing glass dyeing with etching techniques to embellish the dyed surfaces with delicate frosted or translucent designs. Etching adds a tactile dimension to the glass items, enhancing their visual appeal and creating a captivating interplay of textures and colors.
-
Temperature Control: Pay attention to the temperature of the dye solution and the glass items, as variations in temperature can impact the dyeing process. Optimal dye absorption often occurs at room temperature, so ensure that both the glass items and the dye solution are comfortably acclimated to the ambient environment.
-
Precision Application: Exercise precision when applying the dye solution to intricate or detailed areas of the glass items. Utilize fine-tipped applicators or brushes to achieve meticulous color placement, ensuring that every contour and embellishment receives the intended dose of vibrant color.
-
Custom Color Blending: Embrace the art of custom color blending by mixing different dye hues to create bespoke shades that align with your design vision. This personalized approach allows you to tailor the color palette to suit specific decor themes or color schemes, resulting in truly unique and harmonious glass accents.
-
Post-Dyeing Care: After the dyeing process, handle the dyed glass items with care to prevent scratches or abrasions that may compromise the vibrant finishes. Consider displaying the dyed items in well-lit areas to showcase their translucent beauty and maximize their visual impact within your living spaces.
By integrating these tips and tricks into your glass dyeing repertoire, you can elevate your creative pursuits and unlock a spectrum of design possibilities. With a blend of innovation, technique, and artistic intuition, you'll embark on a captivating journey of self-expression, infusing your living spaces with personalized, vibrant accents that reflect your unique style and creative vision.
Read more: How To Dye Lamp Shades
Conclusion
In conclusion, the art of dyeing glass presents a captivating avenue for self-expression and creative exploration within the realm of home decor. By infusing ordinary glass items with vibrant hues and personalized touches, individuals can transform their living spaces into dynamic showcases of individuality and artistic flair. Throughout the glass dyeing process, meticulous preparation, thoughtful application techniques, and innovative approaches converge to yield stunning, one-of-a-kind creations that captivate the eye and elevate the aesthetic appeal of any environment.
As we reflect on the journey of dyeing glass, it becomes evident that this craft transcends mere customization; it embodies a fusion of artistry and functionality. The resulting dyed glass items serve as more than decorative accents; they embody the essence of personal style, reflecting the unique tastes and preferences of their creators. Whether adorning tabletops, shelves, or mantels, these dyed glass pieces infuse living spaces with a vibrant energy, becoming focal points that spark conversations and evoke admiration.
Furthermore, the versatility of glass dyeing empowers individuals to experiment with an array of techniques, from layering and marbling to precision application and custom color blending. This diversity of approaches fosters a sense of boundless creativity, allowing enthusiasts to continually push the boundaries of their artistic endeavors and explore new horizons of design innovation.
As we bid farewell to this comprehensive guide on dyeing glass, it's essential to recognize the enduring impact of personalized, dyed glass accents within the realm of interior design. These bespoke creations not only enliven living spaces but also serve as tangible expressions of creativity and individuality. With each dyed glass item, a story unfolds—a narrative of inspiration, innovation, and the seamless fusion of art and functionality.
In essence, the art of dyeing glass transcends the confines of a mere DIY project; it embodies a celebration of creativity, self-expression, and the transformative power of design. As enthusiasts embark on their glass dyeing journeys, they embark on a path of discovery, innovation, and the boundless potential of infusing everyday objects with extraordinary beauty.
In the end, the art of dyeing glass is not merely about coloring glass; it's about infusing life and personality into inert surfaces, transforming them into vibrant, personalized reflections of individuality. With each dyed glass creation, a piece of the creator's spirit is immortalized, enriching living spaces with a touch of artistry and a kaleidoscope of color.
Frequently Asked Questions about How To Dye Glass
Was this page helpful?
At Storables.com, we guarantee accurate and reliable information. Our content, validated by Expert Board Contributors, is crafted following stringent Editorial Policies. We're committed to providing you with well-researched, expert-backed insights for all your informational needs.
0 thoughts on “How To Dye Glass”