Home>Furniture & Design>Outdoor Furniture>How To Install An Outdoor Electrical Outlet
Outdoor Furniture
How To Install An Outdoor Electrical Outlet
Modified: October 27, 2024
Learn how to install an outdoor electrical outlet to power your outdoor furniture and design. Follow these easy steps for a safe and functional outdoor setup.
(Many of the links in this article redirect to a specific reviewed product. Your purchase of these products through affiliate links helps to generate commission for Storables.com, at no extra cost. Learn more)
Introduction
Welcome to the world of outdoor electrical installations! Whether you're looking to power up your outdoor entertainment area, illuminate your garden, or run tools in your backyard workshop, installing an outdoor electrical outlet can significantly enhance the functionality and convenience of your outdoor space. However, it's essential to approach this task with caution and attention to detail to ensure safety and compliance with electrical codes.
In this comprehensive guide, we'll walk you through the step-by-step process of installing an outdoor electrical outlet. From understanding the necessary safety precautions to identifying the materials and tools you'll need, we've got you covered. By following these instructions, you'll be well-equipped to tackle this project and enjoy the benefits of a versatile outdoor power source.
So, let's dive in and explore the world of outdoor electrical installations. Get ready to elevate your outdoor living experience while ensuring the safety and functionality of your electrical setup. Whether you're a seasoned DIY enthusiast or a first-time homeowner embarking on a new project, this guide will equip you with the knowledge and confidence to install an outdoor electrical outlet with ease and precision.
Key Takeaways:
- Safety First!
Before installing an outdoor electrical outlet, always prioritize safety by turning off the power, using weather-resistant materials, and following local codes to prevent accidents and ensure a secure setup. - Step-by-Step Success
By carefully choosing the location, running the cable, and testing the outlet, you can successfully install an outdoor electrical outlet, creating a reliable power source for your outdoor activities.
Read more: How To Replace An Outdoor Electrical Outlet
Safety Precautions
Prior to embarking on any electrical installation project, prioritizing safety is paramount. When working with electricity, there are inherent risks, and taking the necessary precautions is crucial to safeguard yourself and others. Here are the essential safety measures to observe before and during the installation of an outdoor electrical outlet:
- Turn Off Power: Before beginning any work, turn off the power supply to the area where you plan to install the outdoor electrical outlet. Locate the corresponding circuit breaker in your electrical panel and switch it off to ensure that no electricity is flowing to the designated location.
- Use Ground Fault Circuit Interrupter (GFCI) Outlets: Outdoor outlets should be equipped with GFCI protection to prevent electrical shocks in wet conditions. Ensure that the outlet you install is GFCI-rated and compliant with outdoor use.
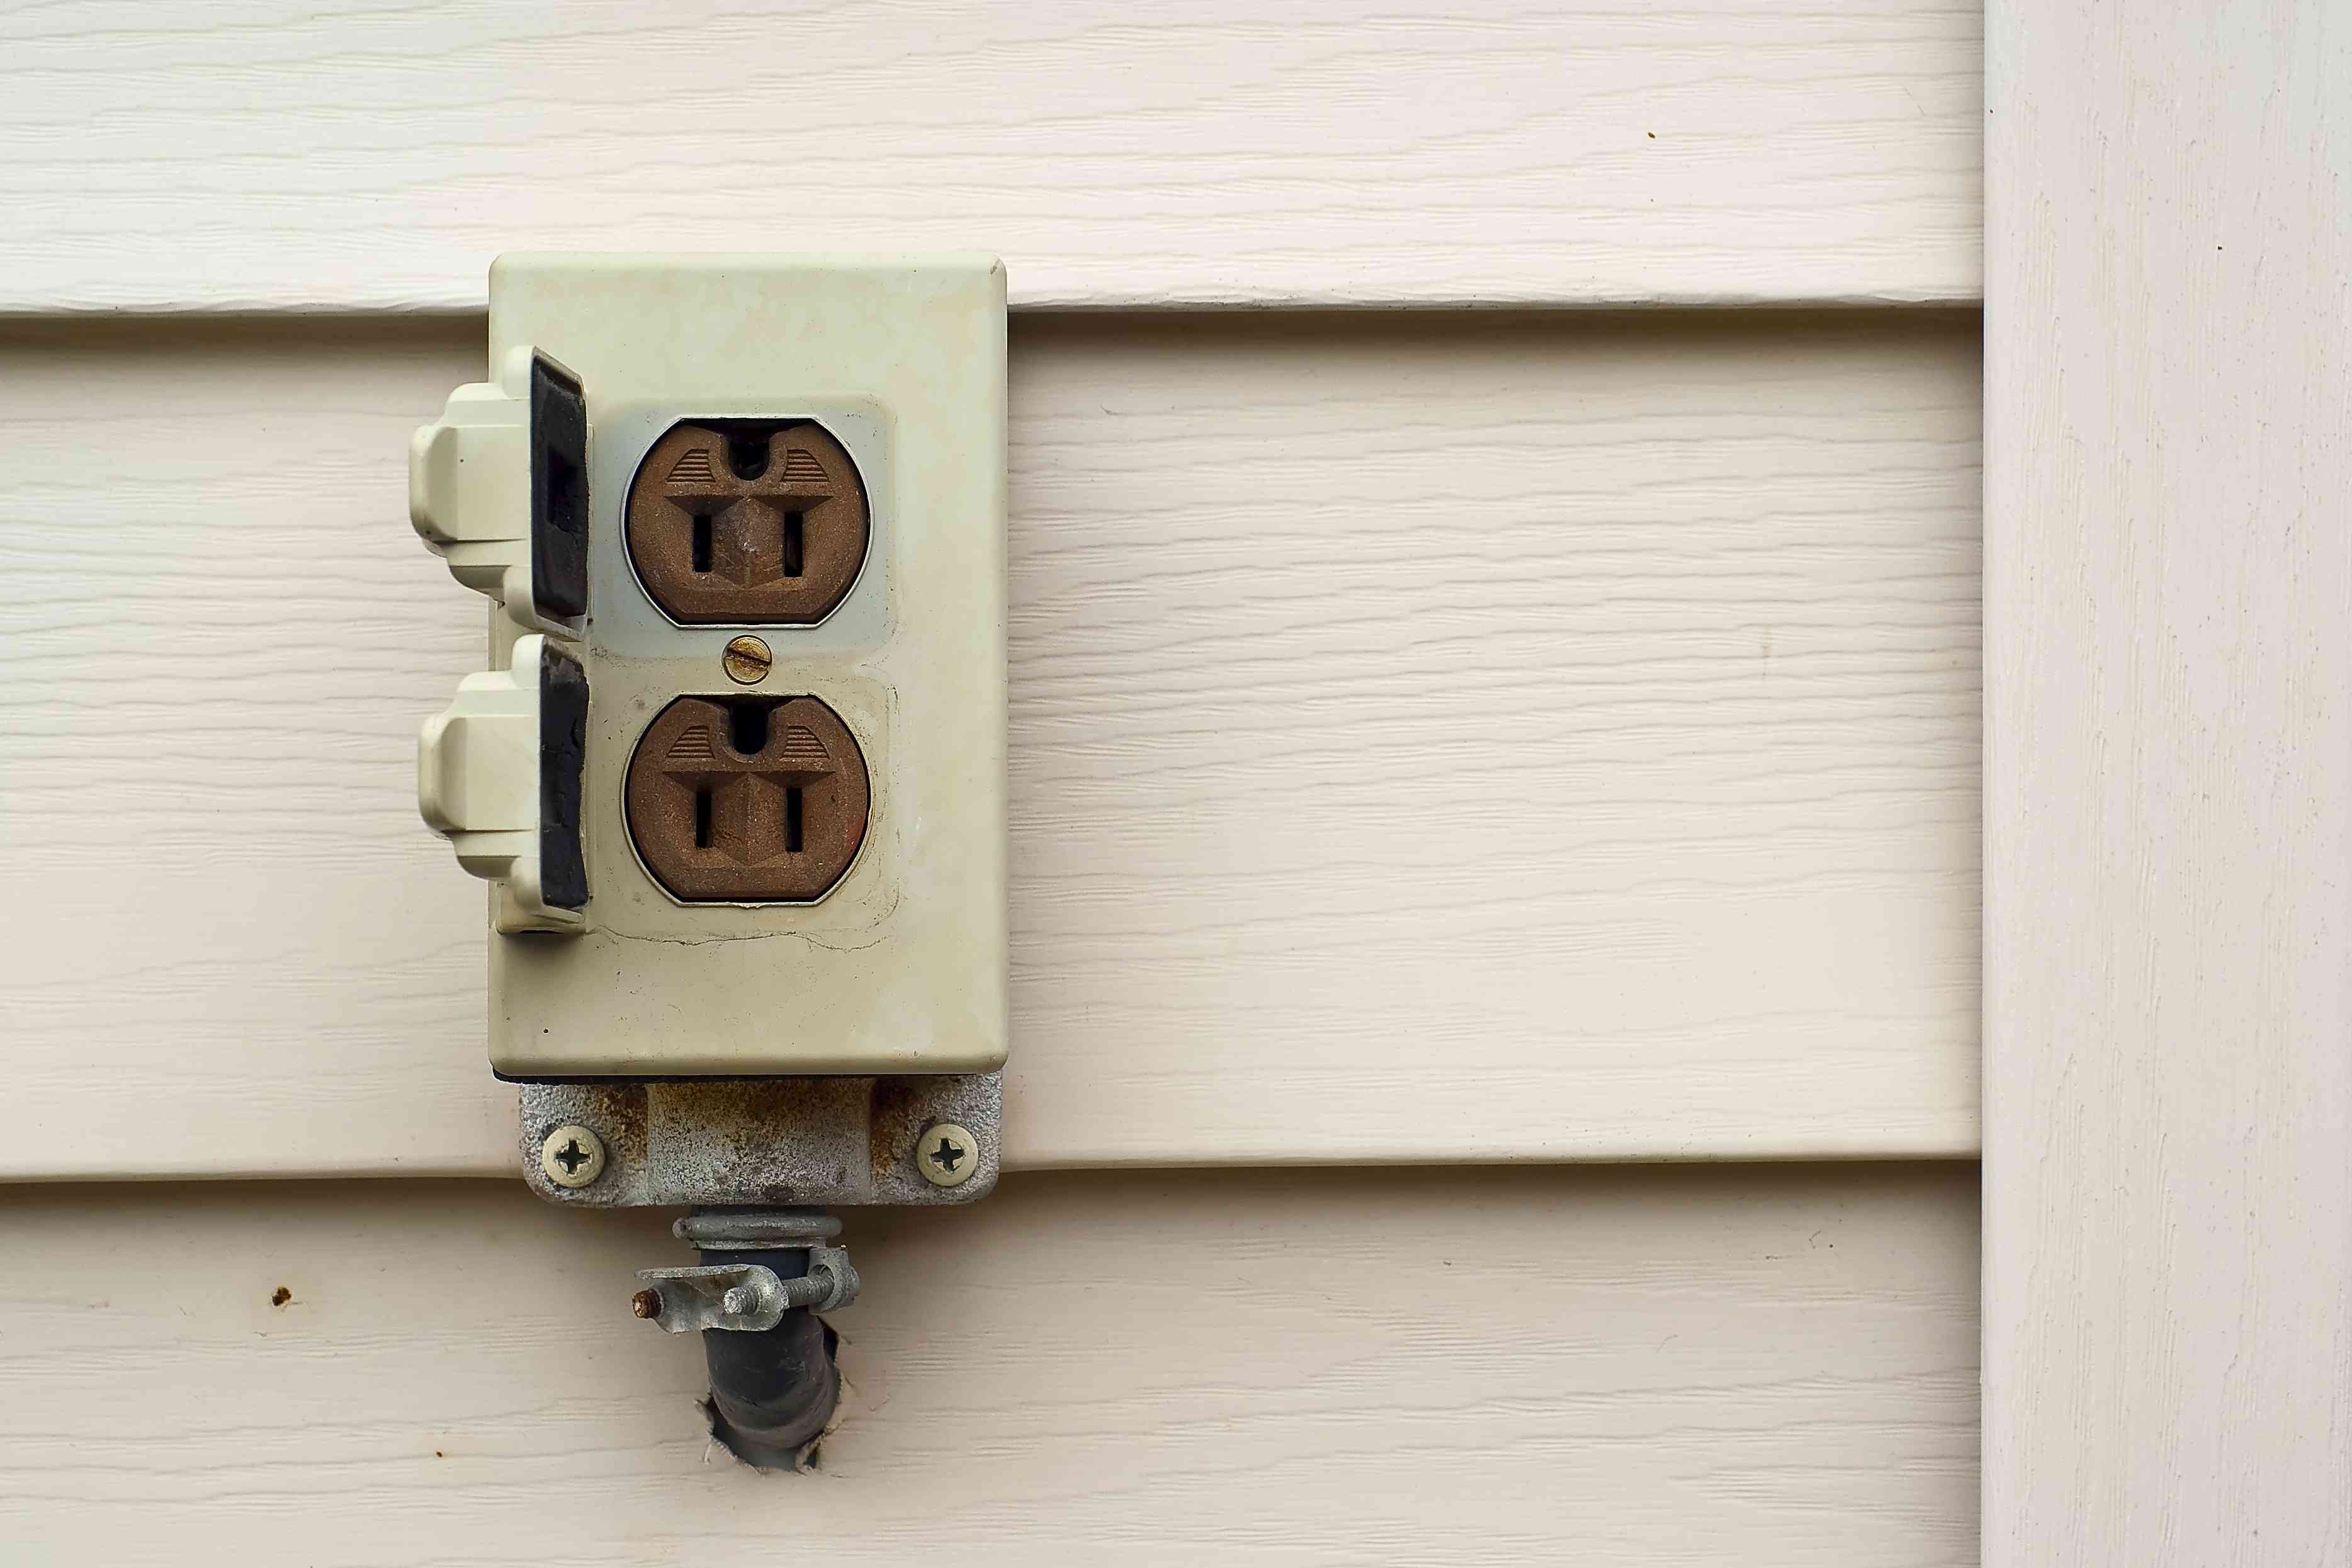
- Weatherproofing: Select weather-resistant materials designed for outdoor applications. This includes the electrical box, outlet cover, and conduit. Verify that all components are rated for outdoor use and can withstand exposure to the elements.
- Check Local Codes: Familiarize yourself with the electrical codes and regulations specific to your region. Adhering to these guidelines is essential for ensuring the safety and legality of your outdoor electrical installation.
- Avoid Overloading Circuits: Be mindful of the electrical load that will be connected to the outdoor outlet. Avoid overloading the circuit by connecting too many devices, as this can lead to overheating and potential fire hazards.
- Inspect for Underground Utilities: Before digging to bury the cable, contact your local utility companies to locate and mark any underground utilities, such as gas, water, or communication lines. This prevents accidental damage and ensures a safe digging environment.
- Protective Gear: Wear appropriate personal protective equipment, including insulated gloves and safety goggles, when handling electrical components. These items provide an additional layer of protection against potential electrical hazards.
By adhering to these safety precautions, you can mitigate the risks associated with outdoor electrical installations and create a secure and reliable power source for your outdoor activities. Prioritizing safety ensures that your electrical project proceeds smoothly and minimizes the potential for accidents or electrical hazards.
Materials Needed
Before commencing the installation of an outdoor electrical outlet, it’s essential to gather the necessary materials to ensure a smooth and efficient process. Here’s a comprehensive list of the materials required for this project:
- Outdoor-Rated Electrical Box: Select a weatherproof electrical box designed for outdoor use. This box will house the electrical connections and provide protection against the elements.
- GFCI-Protected Outlet: Choose a Ground Fault Circuit Interrupter (GFCI) outlet specifically rated for outdoor applications. The GFCI feature provides essential protection against electrical shocks, particularly in wet conditions.
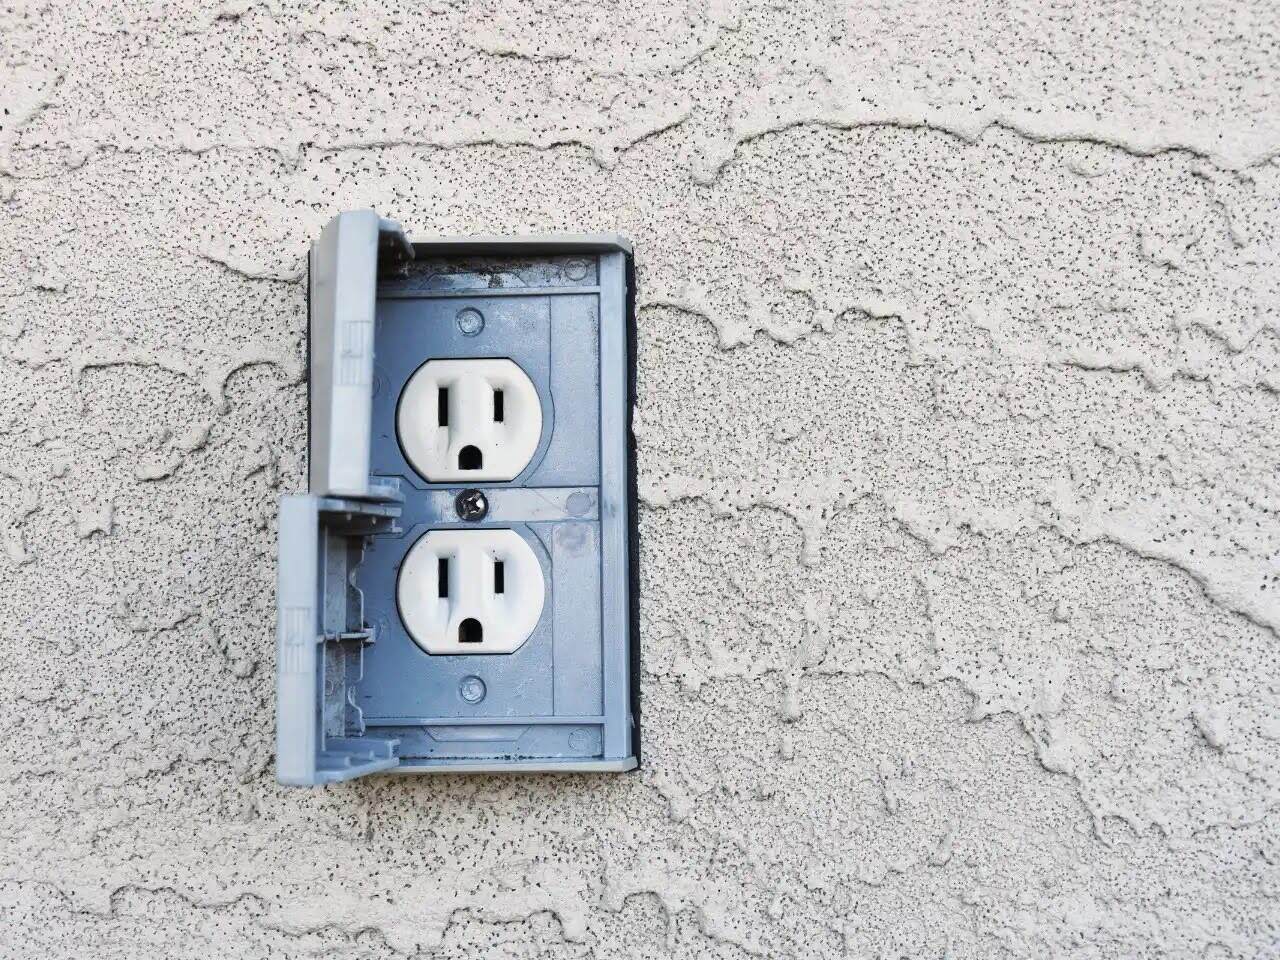
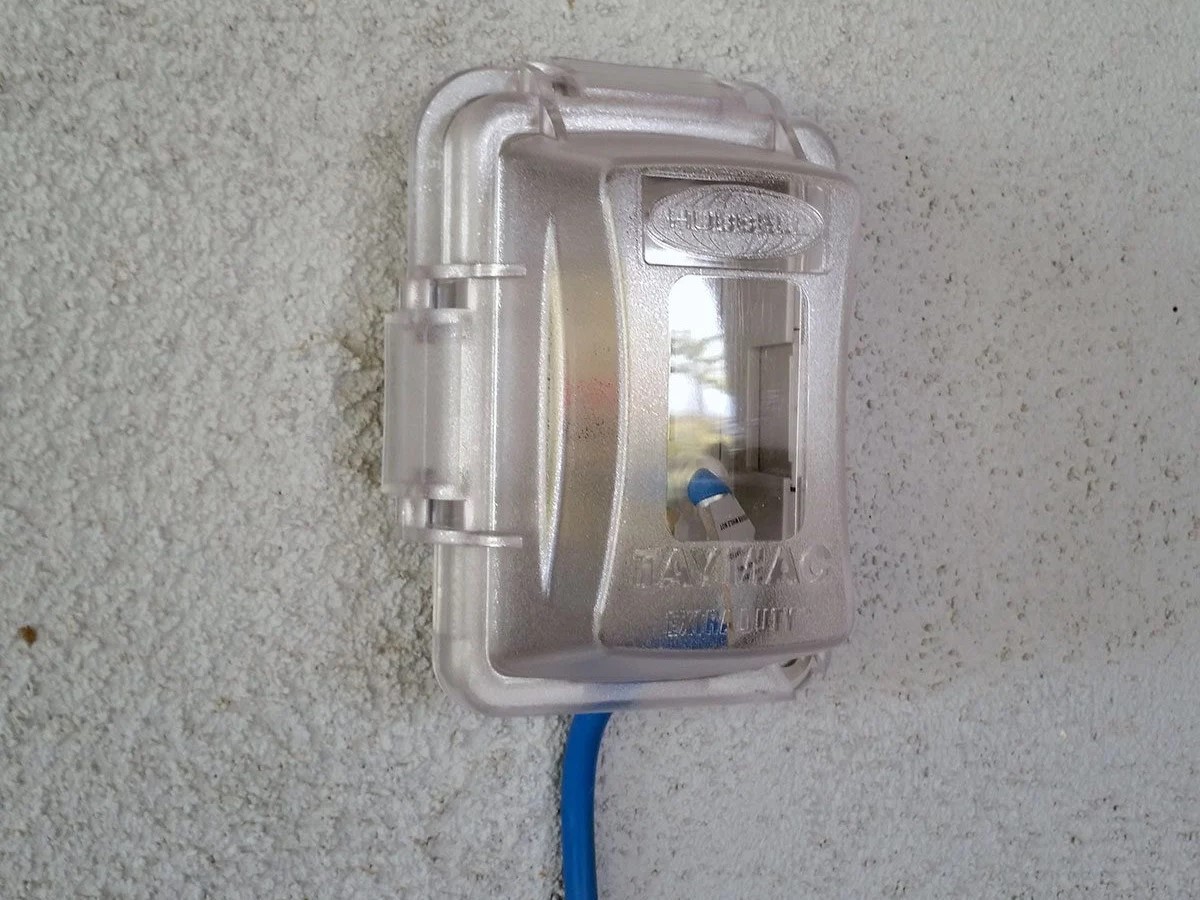
- Weatherproof Outlet Cover: Acquire a weather-resistant outlet cover to shield the GFCI outlet from rain, snow, and other environmental factors. The cover should seal tightly to protect the outlet from moisture and debris.
- Weatherproof Conduit: Use a weatherproof conduit to protect the electrical cable from exposure to the elements. The conduit shields the cable and provides an additional layer of insulation and weather resistance.
- Weather-Resistant Cable: Obtain outdoor-rated electrical cable suitable for direct burial. The cable should be designed to withstand outdoor conditions and be approved for use in wet locations.
- Wire Connectors: Secure wire connectors to facilitate proper and secure connections between the electrical wires. Choose connectors suitable for outdoor use and compatible with the size and type of wires being connected.
- Waterproof Wire Nuts: Utilize waterproof wire nuts to protect wire connections from moisture and ensure a reliable and long-lasting electrical connection. These wire nuts are specifically designed for outdoor and wet environments.
- Concrete or PVC Encasement: If the electrical cable needs to be buried, consider using a concrete encasement or PVC conduit to protect the cable from physical damage and corrosion when buried underground.
- Marker Flags: If trenching is required, marker flags can be used to indicate the location of the buried electrical cable, providing a visual guide to prevent accidental damage during landscaping or excavation activities.
By gathering these essential materials, you’ll be well-prepared to proceed with the installation of your outdoor electrical outlet. Ensuring that all components are weatherproof and designed for outdoor use is crucial for creating a safe and reliable electrical setup in your outdoor space.
Tools Needed
Equipping yourself with the appropriate tools is essential for executing a successful outdoor electrical outlet installation. From preparing the installation site to making electrical connections, having the right tools at your disposal will streamline the process and ensure precision. Here’s a comprehensive list of the tools required for this project:
- Voltage Tester: A non-contact voltage tester is essential for verifying the absence of electrical current before beginning work. This tool helps ensure that the power supply to the designated area is safely turned off.
- Trenching Shovel: If burying the electrical cable, a trenching shovel is necessary for digging a trench to the required depth. Choose a shovel suitable for the soil type in your outdoor space.
- Wire Strippers: Quality wire strippers are indispensable for removing the insulation from the electrical wires, preparing them for connection to the outlet and electrical box.
- Screwdrivers: Both flathead and Phillips screwdrivers are commonly used in electrical installations for securing wire connectors, attaching the outlet to the electrical box, and other fastening tasks.
- Adjustable Wrench: An adjustable wrench is useful for tightening conduit fittings and securing the electrical box in place during the installation process.
- Level: A level ensures that the electrical box and outlet cover are installed horizontally, maintaining a professional and aesthetically pleasing appearance.
- Hammer: If using concrete encasement or PVC conduit for burying the electrical cable, a hammer is necessary for securing these protective components in place.
- Cordless Drill: A cordless drill equipped with the appropriate drill bits facilitates the installation of the electrical box and conduit, allowing for efficient and precise drilling in various materials.
- Utility Knife: A utility knife is handy for cutting and stripping the electrical cable to the required length, ensuring a neat and accurate installation.
- Work Gloves: Durable work gloves provide protection and enhance grip when handling materials and performing manual tasks during the installation process.
By assembling these essential tools, you’ll be well-equipped to tackle the installation of your outdoor electrical outlet with confidence and efficiency. Having the right tools at your disposal streamlines the process and contributes to the successful completion of your outdoor electrical project.
Step 1: Turn Off Power
Prior to initiating any work on the outdoor electrical outlet installation, it is crucial to ensure that the power supply to the designated area is completely deactivated. Follow these steps to safely turn off the power and prevent any electrical hazards:
- Locate the Circuit Breaker: Identify the circuit breaker in your electrical panel that controls the power supply to the area where you intend to install the outdoor electrical outlet.
- Switch Off the Circuit: Carefully switch off the corresponding circuit breaker to cut off the electricity flow to the designated location. Confirm that the power has been successfully shut off by testing nearby electrical devices or utilizing a voltage tester.
- Verify the Absence of Power: Use a reliable voltage tester to confirm that no electrical current is present in the outlets, switches, or wires within the installation area. This precaution is essential for guaranteeing a safe working environment.
- Secure the Circuit Breaker: Once the power has been turned off and verified, secure the circuit breaker in the off position to prevent accidental reactivation during the installation process.
By diligently following these steps to turn off the power, you will create a secure environment for carrying out the subsequent stages of the outdoor electrical outlet installation. Prioritizing safety at the outset of the project sets the foundation for a smooth and hazard-free installation process.
Step 2: Choose Location
When installing an outdoor electrical outlet, selecting the ideal location is a crucial decision that influences the functionality and convenience of the power source. Consider the following factors to determine the optimal placement for your outdoor outlet:
- Accessibility: Choose a location that offers convenient access to the power source for various outdoor activities, such as using power tools, operating lighting fixtures, or plugging in electronic devices.
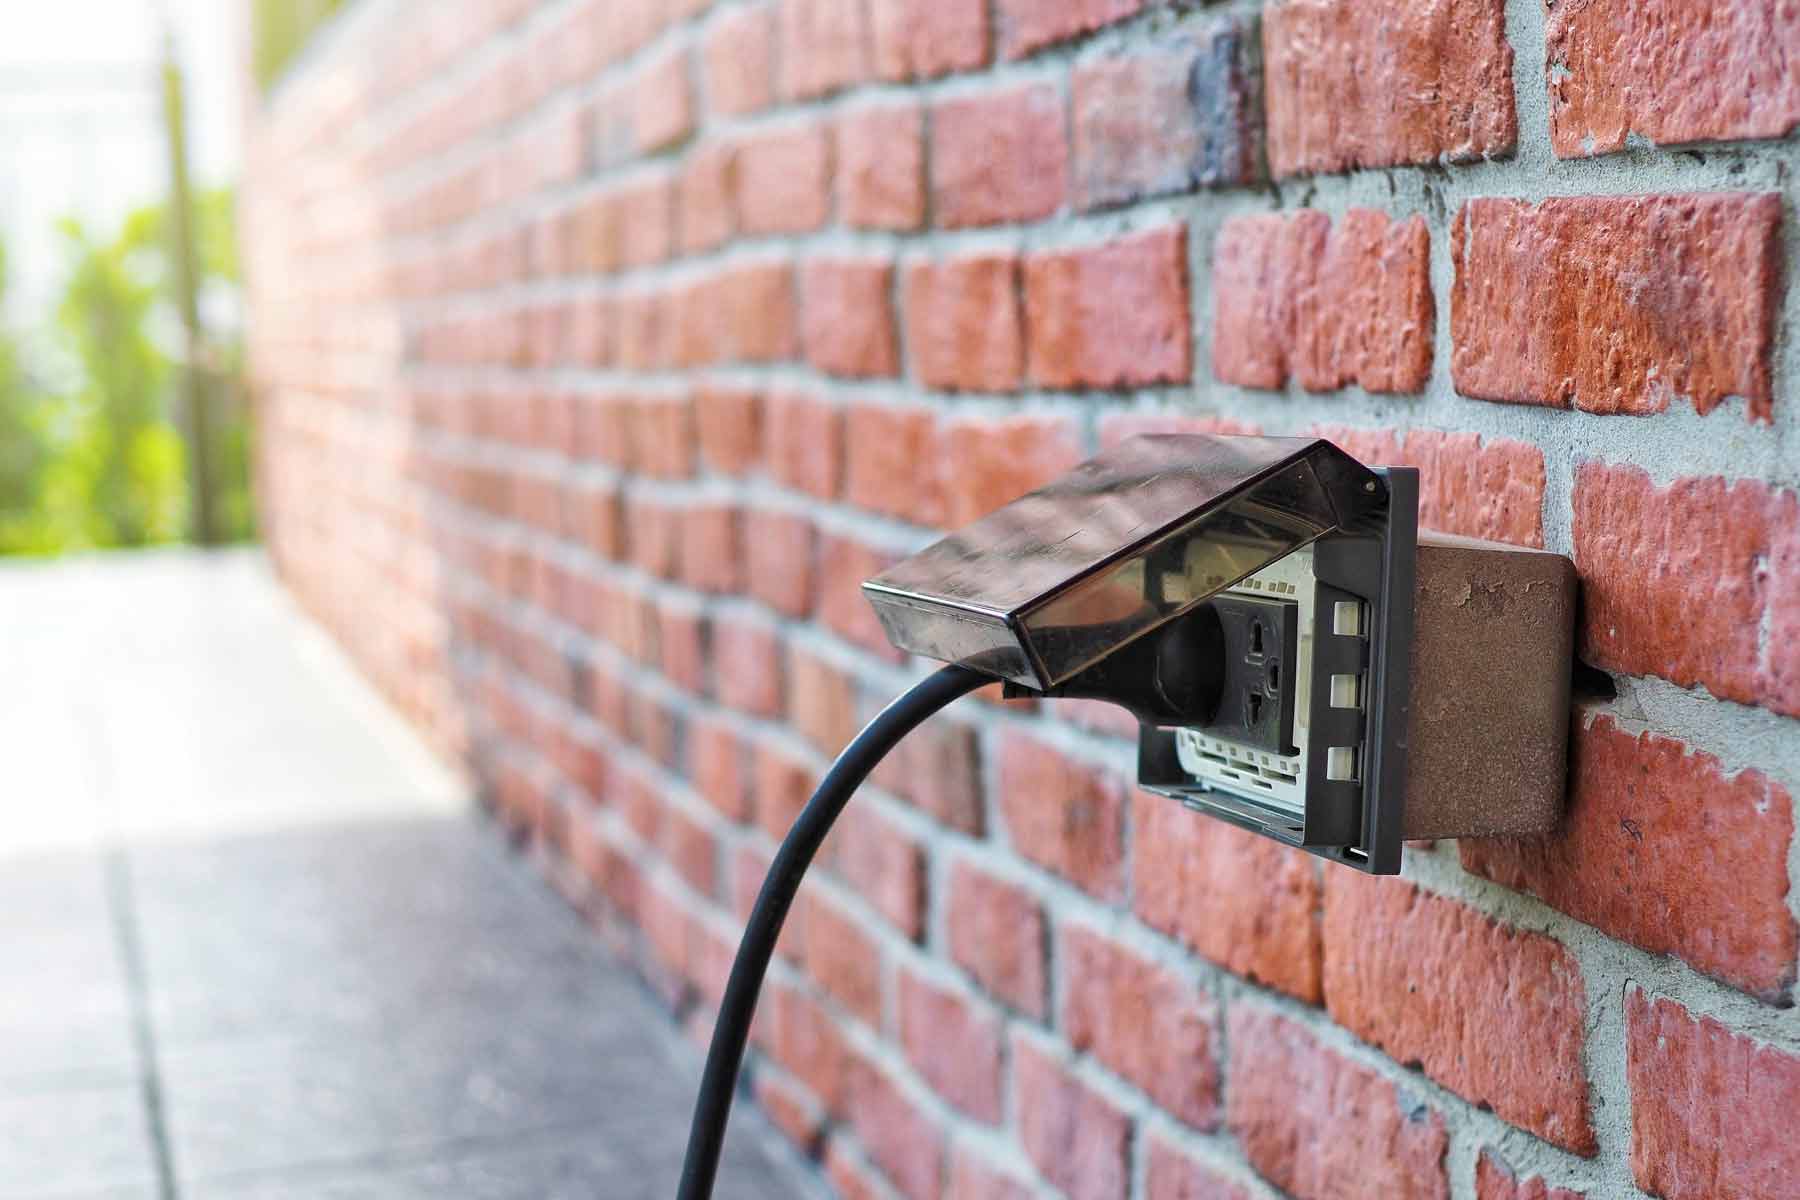
- Weather Protection: Select a spot that provides adequate protection from the elements, such as rain, snow, and direct sunlight. Positioning the outlet under an eave or installing a weather-resistant cover can help shield it from environmental exposure.
- Ground Elevation: Ensure that the chosen location is elevated to prevent water accumulation around the outlet during wet conditions. This helps mitigate the risk of water damage and enhances the outlet’s longevity.
- Proximity to Utilities: Consider the proximity to water sources, such as outdoor faucets, and the availability of underground utilities when choosing the location. Avoid installing the outlet in close proximity to water features to reduce the risk of electrical hazards.
- Future Landscaping Plans: Anticipate any future landscaping or outdoor living space enhancements when selecting the outlet’s location. Choose a position that accommodates potential changes and additions to your outdoor environment.
- Regulatory Compliance: Verify that the chosen location complies with local building codes and regulations governing the installation of outdoor electrical outlets. Adhering to these guidelines ensures the safety and legality of your electrical setup.
By carefully considering these factors, you can identify the most suitable location for your outdoor electrical outlet, optimizing its functionality and ensuring its resilience in various weather conditions. Thoughtful planning at this stage contributes to the long-term effectiveness and safety of your outdoor power source.
When installing an outdoor electrical outlet, make sure to use a weatherproof outlet box and cover to protect it from the elements. This will help prevent any water damage and ensure the outlet’s safety.
Step 3: Install Electrical Box
Installing the electrical box is a critical step in the process of setting up an outdoor electrical outlet. The electrical box serves as the enclosure for electrical connections, providing protection and support for the outlet and associated wiring. Follow these guidelines to effectively install the electrical box for your outdoor outlet:
- Positioning the Box: Choose a suitable location for mounting the electrical box, ensuring that it meets the criteria for accessibility, weather protection, and regulatory compliance established in the previous step.
- Marking the Mounting Holes: Use the electrical box as a template to mark the positions of the mounting holes on the mounting surface, whether it’s a wall, post, or other structure. Ensure that the marked holes align with the designated location for the outlet.
- Drilling and Securing: Utilize a drill and appropriate fasteners to secure the electrical box to the mounting surface. Ensure that the box is firmly attached and level, providing a stable foundation for the outdoor outlet installation.
- Routing Cable Entry: Create a suitable entry point for the electrical cable to enter the electrical box. This may involve drilling a hole in the box or utilizing a knockout designed for cable entry, ensuring a secure and weatherproof connection.
- Sealing Openings: Apply a suitable sealant or gasket around the cable entry point to seal any gaps and prevent moisture from entering the electrical box. This step is crucial for maintaining the weather resistance of the installation.
- Verifying Stability: Confirm that the installed electrical box is securely fastened and offers a stable and level platform for accommodating the outlet and associated wiring. This verification ensures the reliability and safety of the electrical box installation.
By meticulously following these steps, you can effectively install the electrical box, laying the groundwork for the subsequent stages of the outdoor electrical outlet setup. The secure and weatherproof installation of the electrical box is essential for maintaining the integrity and functionality of the outdoor power source.
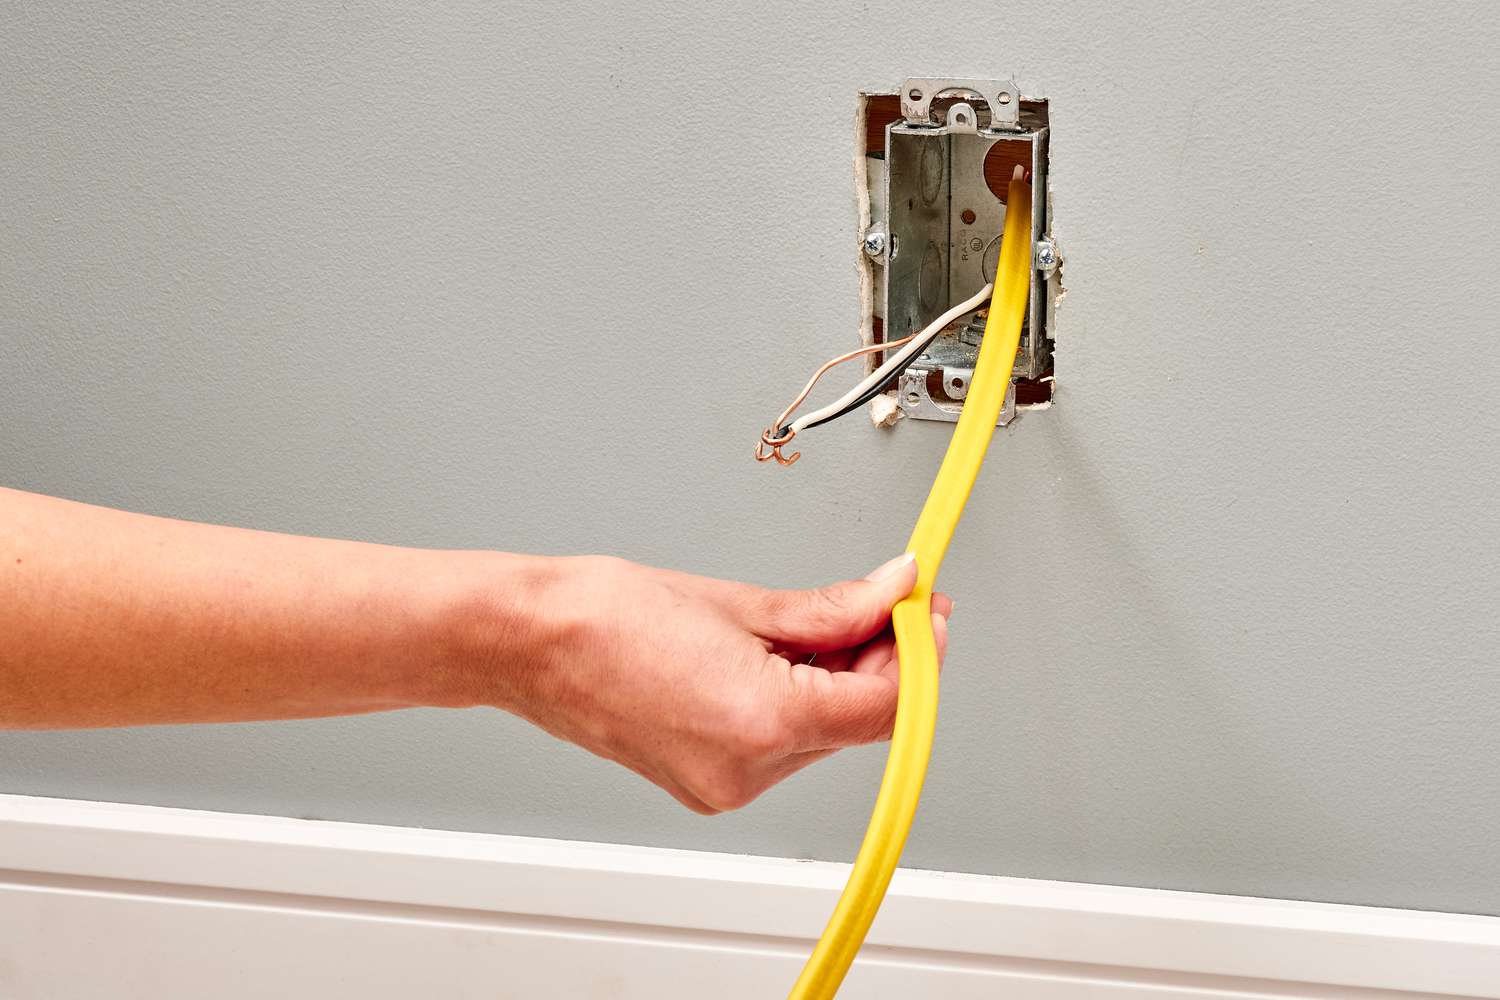
Step 4: Run Cable
Running the electrical cable is a pivotal stage in the installation of an outdoor electrical outlet, as it establishes the connection between the power source and the outlet itself. Follow these steps to effectively run the electrical cable for your outdoor installation:
- Determining Cable Route: Plan the route for the electrical cable, considering the distance from the electrical box to the desired location of the outlet. Choose a path that minimizes exposure to potential hazards and provides a clear and accessible route for the cable.
- Burying the Cable: If the cable will be buried underground, dig a trench to the appropriate depth, ensuring compliance with local regulations and codes. Lay the electrical cable in the trench, maintaining a consistent depth and avoiding sharp bends or kinks in the cable.
- Securing the Cable: Use suitable fasteners and clamps to secure the electrical cable along its route, preventing movement and minimizing stress on the cable. Ensure that the cable is adequately supported and protected from potential damage.
- Creating Service Loops: Allow for service loops at both ends of the cable to provide flexibility for making connections and adjustments during the installation process. Service loops facilitate future maintenance and modifications, if necessary.
- Protective Encasement: If the cable is exposed to potential physical damage, such as in high-traffic areas, consider utilizing a protective conduit or encasement to shield the cable and enhance its durability.
- Testing Accessibility: Verify that the installed cable is easily accessible for making connections at both the electrical box and the outlet location. This assessment ensures that the cable route facilitates efficient and secure electrical connections.
By methodically executing these steps, you can successfully run the electrical cable for your outdoor outlet, establishing a reliable and secure connection between the power source and the outlet location. Attention to detail during the cable installation process contributes to the safety and functionality of the outdoor electrical setup.
Step 5: Connect Wires
Connecting the wires is a pivotal stage in the installation of an outdoor electrical outlet, as it establishes the essential electrical connections that power the outlet. Follow these steps to effectively connect the wires for your outdoor installation:
- Prepare the Wires: Strip the insulation from the ends of the electrical wires, exposing the conductors to facilitate secure and reliable connections. Use quality wire strippers to carefully remove the insulation without damaging the underlying conductors.
- Identify Wire Types: Differentiate between the hot (black), neutral (white), and ground (green or bare copper) wires, ensuring that each wire is correctly identified and prepared for connection. Adhere to the color-coding and standard practices for electrical wiring.
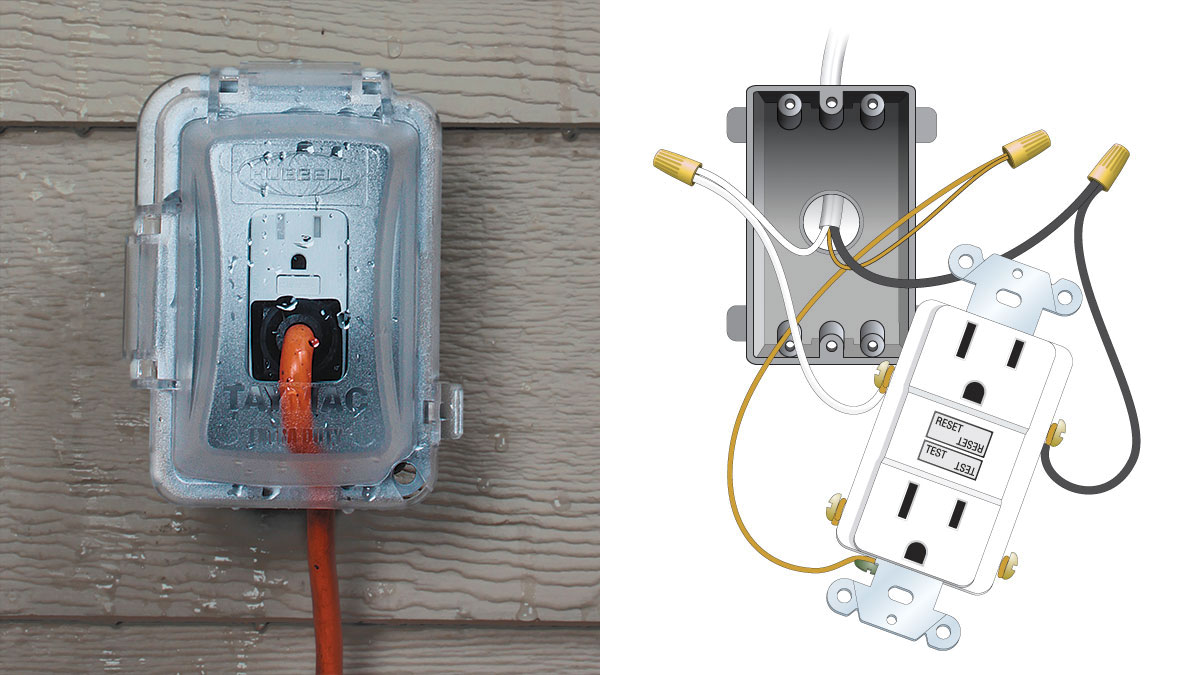
- Connect Ground Wires: Securely connect the ground wires from the electrical cable to the grounding terminals within the electrical box and the outlet. Proper grounding is essential for safety and provides protection against electrical faults.
- Establish Hot and Neutral Connections: Make the necessary hot and neutral wire connections, ensuring that the conductors are securely fastened using appropriate wire connectors. Follow the specific wiring diagram or manufacturer’s instructions for your outlet type.
- Verify Tight Connections: Confirm that all wire connections are tight, secure, and free from any exposed conductors. Tug gently on each wire to ensure that it is firmly held in place and that the connections are reliable.
- Neatly Arrange Wires: Arrange the connected wires within the electrical box, ensuring that they are neatly organized and do not interfere with the installation of the outlet. Avoid overcrowding the box with excessive wiring.
- Test Continuity: Utilize a continuity tester or multimeter to verify the integrity of the electrical connections and ensure that there are no unintended breaks or faults in the wiring. This testing process confirms the reliability of the electrical connections.
By meticulously following these steps, you can effectively connect the wires for your outdoor electrical outlet, establishing the essential electrical pathways that power the outlet and enable its functionality. Attention to detail during the wire connection process contributes to the safety and reliability of the outdoor electrical setup.
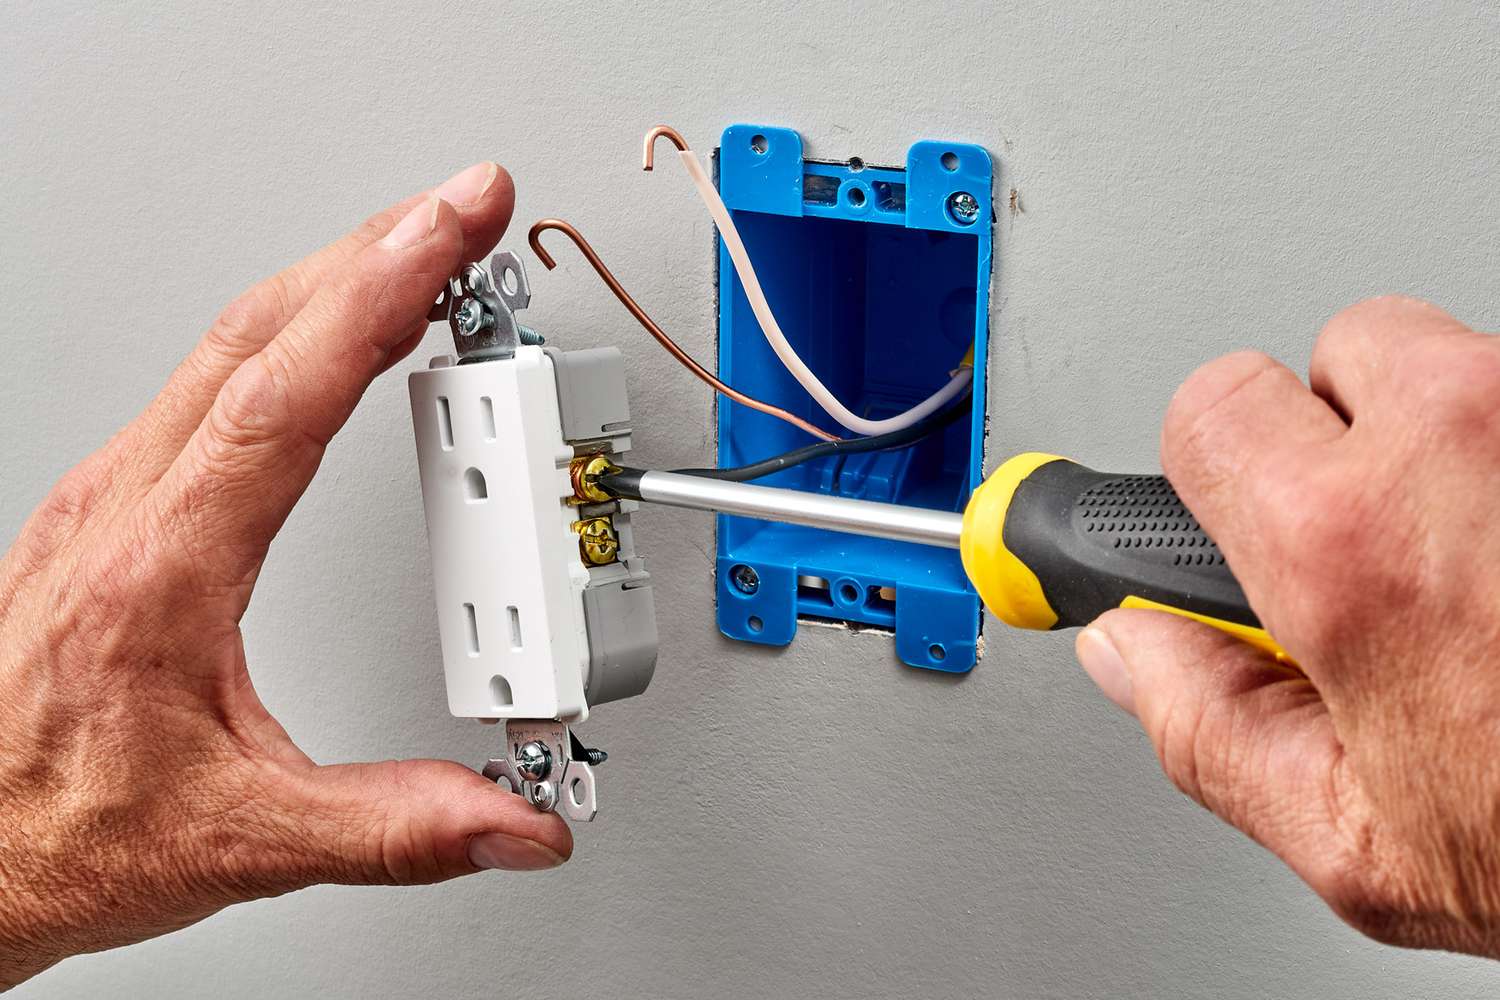
Step 6: Install Outlet
Installing the outlet is a crucial phase in the process of setting up an outdoor electrical outlet, as it provides the access point for connecting electrical devices and appliances. Follow these steps to effectively install the outlet for your outdoor installation:
- Positioning the Outlet: Mount the outlet securely in the electrical box, ensuring that it is level and properly aligned for a neat and professional appearance. Orient the outlet so that the ground fault circuit interrupter (GFCI) test and reset buttons are easily accessible.
- Connecting the Wires: Attach the hot (black), neutral (white), and ground (green or bare copper) wires to the corresponding terminals on the outlet. Follow the manufacturer’s instructions and wiring diagram to ensure accurate and secure connections.
- Securing the Outlet: Fasten the outlet to the electrical box using the provided screws, ensuring that it is firmly anchored and does not wobble or move when in use. Confirm that the outlet cover gasket creates a weatherproof seal when the cover is closed.
- Installing the Weatherproof Cover: Attach a weather-resistant cover to the outlet, ensuring that it seals tightly and provides protection against moisture, debris, and environmental elements. The cover should effectively shield the outlet from the outdoor conditions.
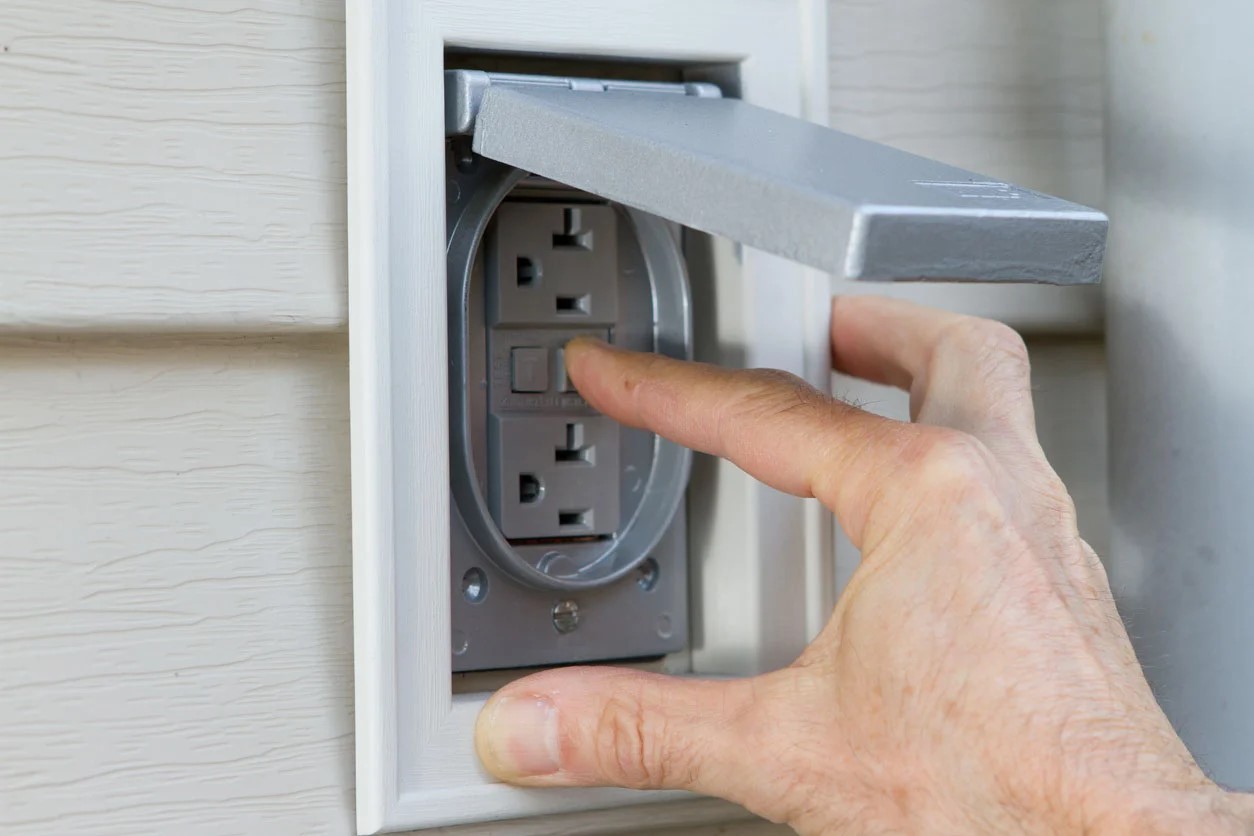
- Testing the GFCI Functionality: Press the test and reset buttons on the GFCI outlet to verify that the ground fault protection functions as intended. This test ensures that the outlet provides essential protection against electrical shocks in wet conditions.
- Verifying Proper Operation: Test the outlet with a reliable electrical device to confirm that it functions correctly and delivers power as expected. This verification process ensures the functionality and reliability of the installed outdoor outlet.
By diligently following these steps, you can effectively install the outlet for your outdoor electrical setup, establishing a reliable access point for connecting electrical devices and equipment. Attention to detail during the outlet installation process contributes to the safety and functionality of the outdoor electrical setup.
Step 7: Test the Outlet
Testing the outlet is a crucial final step in the installation of an outdoor electrical outlet, ensuring that the electrical connections are secure and that the outlet functions as intended. Follow these steps to effectively test the outlet for your outdoor installation:
- Visual Inspection: Conduct a visual inspection of the outlet, ensuring that all connections are secure, the cover is properly sealed, and the outlet is free from any visible damage or defects. Address any issues identified during the inspection before proceeding with testing.
- Power Restoration: Turn on the power supply to the outdoor outlet by switching on the corresponding circuit breaker in the electrical panel. Verify that the outlet receives power and is ready for testing.
- Use of Test Device: Utilize a reliable test device, such as a lamp or small electrical appliance, to verify that the outlet delivers power and that the electrical connections are functioning as intended. Connect the test device to the outlet and assess its operation.
- Ground Fault Testing: Test the ground fault circuit interrupter (GFCI) functionality by pressing the test button on the outlet. This action should cause the GFCI to trip, indicating that the ground fault protection is operational. Reset the GFCI to restore power to the outlet.
- Weatherproofing Assessment: Confirm that the weatherproof cover effectively shields the outlet from moisture and environmental elements. Verify that the cover seals tightly and protects the outlet from rain, snow, and debris.
- Comprehensive Functionality Check: Test the outlet under various conditions, such as dry and wet environments, to ensure its consistent and reliable operation. Verify that the outlet functions as expected and delivers power without any issues.
By meticulously following these testing steps, you can effectively verify the functionality and safety of the installed outdoor electrical outlet. Thorough testing ensures that the outlet operates as intended and provides a reliable power source for your outdoor activities.
Conclusion
Congratulations on successfully completing the installation of your outdoor electrical outlet! By diligently following the step-by-step process outlined in this guide, you have established a reliable and convenient power source for your outdoor space. As you reflect on this accomplishment, it’s essential to recognize the importance of safety, precision, and attention to detail throughout the installation process.
From prioritizing safety precautions and selecting the optimal location to securing electrical connections and testing the outlet, each step has contributed to the creation of a functional and secure outdoor power supply. By adhering to electrical codes and regulations, utilizing weather-resistant materials, and ensuring proper grounding and GFCI protection, you have established a setup that prioritizes safety and longevity.
With the installation complete, you can now enjoy the enhanced versatility and utility of your outdoor area, whether it’s for powering lighting fixtures, operating garden tools, or facilitating outdoor entertainment. The reliable power source provided by the outdoor outlet opens up a world of possibilities for outdoor activities and enhances the overall functionality of your outdoor space.
As you move forward, it’s important to conduct periodic checks and maintenance to ensure that the outdoor electrical outlet continues to operate safely and efficiently. Regular inspections, weatherproofing assessments, and adherence to electrical best practices will contribute to the sustained reliability of your outdoor power supply.
Thank you for embarking on this electrical installation journey with diligence and commitment to safety. Your proactive approach to creating a secure and functional outdoor power source is a testament to your dedication to maintaining a safe and enjoyable outdoor environment.
Now, as you bask in the satisfaction of a job well done, take pride in the knowledge that you have successfully installed an outdoor electrical outlet, enriching your outdoor living experience and setting the stage for countless enjoyable moments in your outdoor oasis.
Frequently Asked Questions about How To Install An Outdoor Electrical Outlet
Was this page helpful?
At Storables.com, we guarantee accurate and reliable information. Our content, validated by Expert Board Contributors, is crafted following stringent Editorial Policies. We're committed to providing you with well-researched, expert-backed insights for all your informational needs.


0 thoughts on “How To Install An Outdoor Electrical Outlet”