Articles
How To Install Electrical Box
Modified: October 20, 2024
Learn how to install an electrical box safely and efficiently with our comprehensive articles on electrical installation and wiring tips.
(Many of the links in this article redirect to a specific reviewed product. Your purchase of these products through affiliate links helps to generate commission for Storables.com, at no extra cost. Learn more)
Introduction
Welcome to the comprehensive guide on how to install an electrical box. Whether you’re a seasoned DIY enthusiast or a beginner looking to tackle your first electrical project, understanding how to properly install an electrical box is crucial. The electrical box serves as the housing for electrical connections, providing a safe and organized way to connect wires and devices.
Before we dive into the step-by-step process, it’s important to note that working with electricity can be dangerous if proper precautions are not taken. This guide is intended to provide general information and guidance. If you don’t have prior experience with electrical work, it is recommended to consult a licensed electrician or professional.
In this article, we will cover each step of the installation process, from gathering the necessary tools and materials to restoring power and testing the electrical box. By following these instructions carefully, you can ensure a successful and safe installation.
Now, let’s get started with the first step: gathering the necessary tools and materials.
Key Takeaways:
- Safety First!
Before installing an electrical box, always gather the necessary tools, turn off the power, and follow local building codes. Safety is paramount when working with electricity. - Proper Installation Matters
From marking the location to testing the box, each step is crucial for a successful electrical box installation. Secure mounting, wire preparation, and testing ensure a safe and functional outcome.
Read more: How To Install Ceiling Electrical Box
Step 1: Gather Necessary Tools and Materials
Before you begin the installation process, it’s important to gather all the necessary tools and materials. Having everything prepared beforehand will make the installation process smoother and more efficient.
Here’s a list of the tools and materials you will need:
- Electrical box
- Electrical box cover
- Screwdriver
- Wire stripper
- Needle-nose pliers
- Electrical tape
- Utility knife
- Measuring tape
- Pencil
- Power drill
- Drill bit
- Screws
- Wire connectors
- Wire nuts
- Electrical wires
Make sure to use the appropriate tools and materials for your specific Electrical box installation. The size and type of electrical box may vary depending on your project, so consult the manufacturer’s instructions for guidance.
Once you have gathered all the necessary tools and materials, you are ready to proceed to the next step: turning off the power.
Step 2: Turn Off Power
Prior to any electrical work, it is crucial to ensure that the power is turned off to the area where you will be installing the electrical box. This step is crucial for your safety, as working on live wires can result in serious injury or even death.
Follow these steps to turn off the power:
- Locate the circuit breaker box in your home or building. This is usually found in the basement, garage, or utility room.
- Open the circuit breaker box cover. Inside, you will see rows of switches or fuses.
- Identify the circuit breaker that corresponds to the area where you will be installing the electrical box. If you are unsure, you can turn off the main circuit breaker to cut power to the entire building.
- Flip the switch or remove the fuse for the designated circuit to the “off” position.
- Use a voltage tester to verify that the power is off. This handheld device will indicate whether there is any electrical current present.
It is important to double-check that the power is off before proceeding with any electrical work. If the voltage tester indicates that there is still electrical current, do not continue with the installation. Contact a licensed electrician for further assistance.
Once you have successfully turned off the power and verified that there is no electrical current, you can proceed to the next step: determining the installation location for the electrical box.
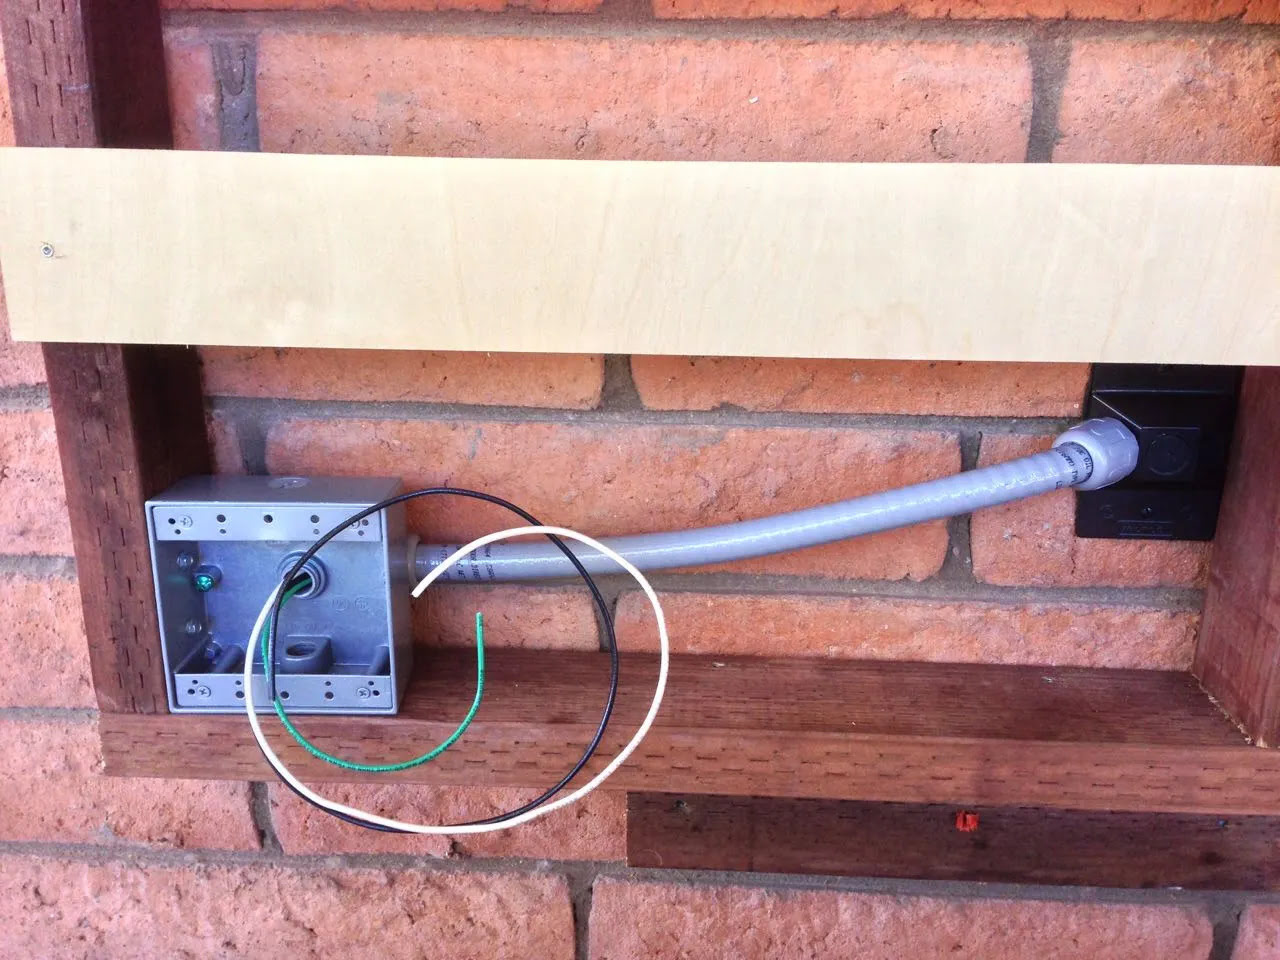
Step 3: Determine Installation Location
Now that the power is turned off, it’s time to determine the ideal location for installing the electrical box. The location will depend on the specific purpose and requirements of your electrical project.
Consider the following factors when selecting the installation location:
- Proximity to electrical source: The electrical box should be installed near the power source to minimize the length of wire needed.
- Accessibility: Ensure that the electrical box will be easily accessible for future maintenance or repairs.
- Building codes: Check local building codes and regulations to ensure compliance with the installation location and spacing requirements.
- Load-bearing structures: Avoid installing the electrical box on load-bearing walls or in areas that may hinder the structural integrity of the building.
- Clearance requirements: Leave adequate clearance around the electrical box for devices, such as switches or outlets, that will be installed.
Once you have considered these factors, use a measuring tape and a pencil to mark the exact location for the electrical box. Take accurate measurements to ensure proper alignment and fit.
In addition, use a utility knife or a power drill with a suitable drill bit to create a small pilot hole at the center of the marked location. This will make it easier to cut the opening for the electrical box in the next step.
With the installation location determined and marked, you are now ready to move on to the next step: marking and cutting the opening for the electrical box.
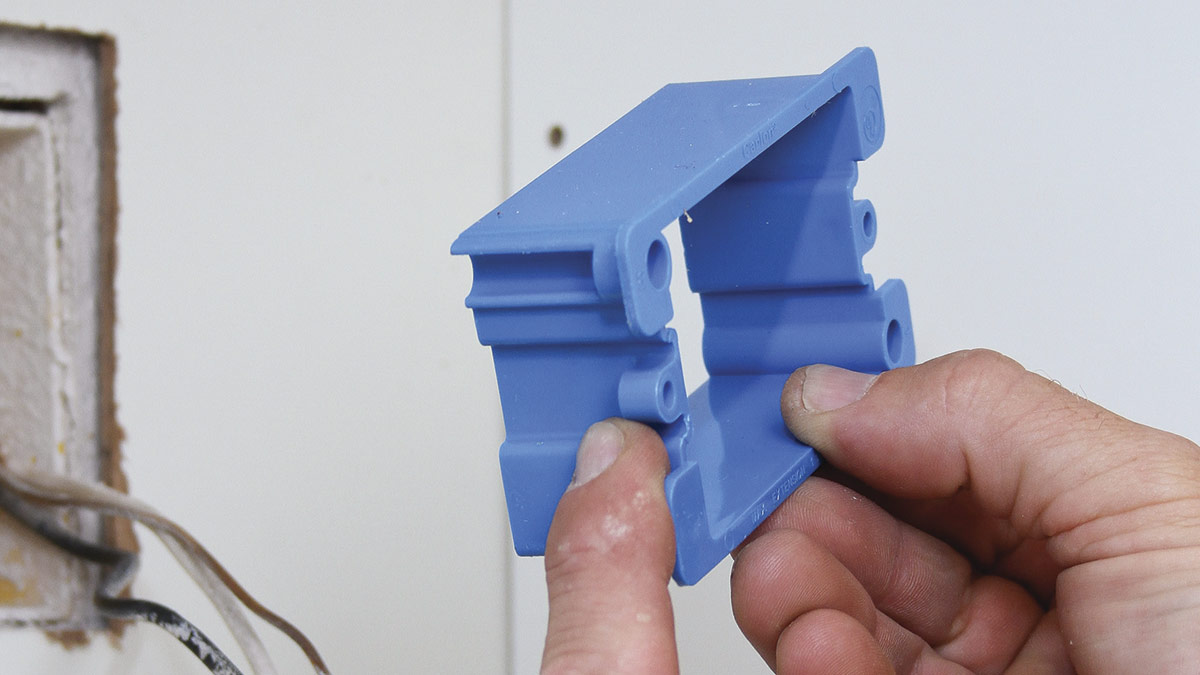
Step 4: Mark and Cut Opening
Now that you have determined the installation location for the electrical box, it’s time to mark and cut the opening in the wall. This opening will accommodate the electrical box, allowing it to be recessed and securely mounted.
Follow these steps to mark and cut the opening for the electrical box:
- Using a measuring tape, measure the dimensions of the electrical box.
- Transfer these measurements onto the wall, ensuring that they are centered on the previously marked location.
- Using a pencil, draw a square or rectangle on the wall, following the measurements you have marked.
- Double-check the accuracy of the markings and make any necessary adjustments.
- Using a utility knife or a keyhole saw, carefully cut along the marked lines to create the opening for the electrical box.
- Be cautious when cutting to avoid damaging any electrical wires or other structures behind the wall.
Once you have cut the opening, test-fit the electrical box to ensure a proper fit. The box should be flush with the wall surface and firmly seated within the opening.
If the opening is too small or uneven, use a utility knife or a file to carefully trim or smooth the edges until the electrical box fits securely.
With the opening cut and the electrical box properly fitted, you can now proceed to the next step: preparing the wires for connection.
Read more: How To Install A Ceiling Fan Electrical Box
Step 5: Prepare Wires
With the electrical box installed and secured in the wall opening, it’s time to prepare the wires for connection. Proper preparation ensures a safe and reliable electrical connection.
Follow these steps to prepare the wires:
- Ensure that the power is still turned off by checking the circuit breaker or using a voltage tester.
- If necessary, remove the outer sheathing from the electrical wires using a wire stripper. Be careful not to damage the inner wires while stripping the outer covering.
- Strip about ¾ inch of insulation from the tips of the inner wires using the wire stripper. This will expose the bare copper or aluminum conductors.
- Inspect the wires for any signs of damage or fraying. If any wires are damaged, they should be replaced before proceeding. Use wire strippers to cut and strip the wires as needed.
- Depending on your specific installation, you may need to connect multiple wires together. Use wire connectors or wire nuts to make the necessary connections.
- Twist the exposed ends of the wires together in a clockwise direction, ensuring a secure connection.
- Slide the wire connector or wire nut over the twisted wires and twist it clockwise until it is tight and secure.
- Gently tug on the wires to ensure they are tightly connected and will not come loose.
Continue preparing the wires according to your specific wiring configuration. If you are unsure about any aspect of the wiring or connections, consult a licensed electrician for guidance.
With the wires properly prepared and connected, you are now ready to move on to the next step: mounting the electrical box.
When installing an electrical box, make sure to turn off the power to the area where you will be working to avoid any electrical hazards. Always use the appropriate tools and follow the manufacturer’s instructions for installation.
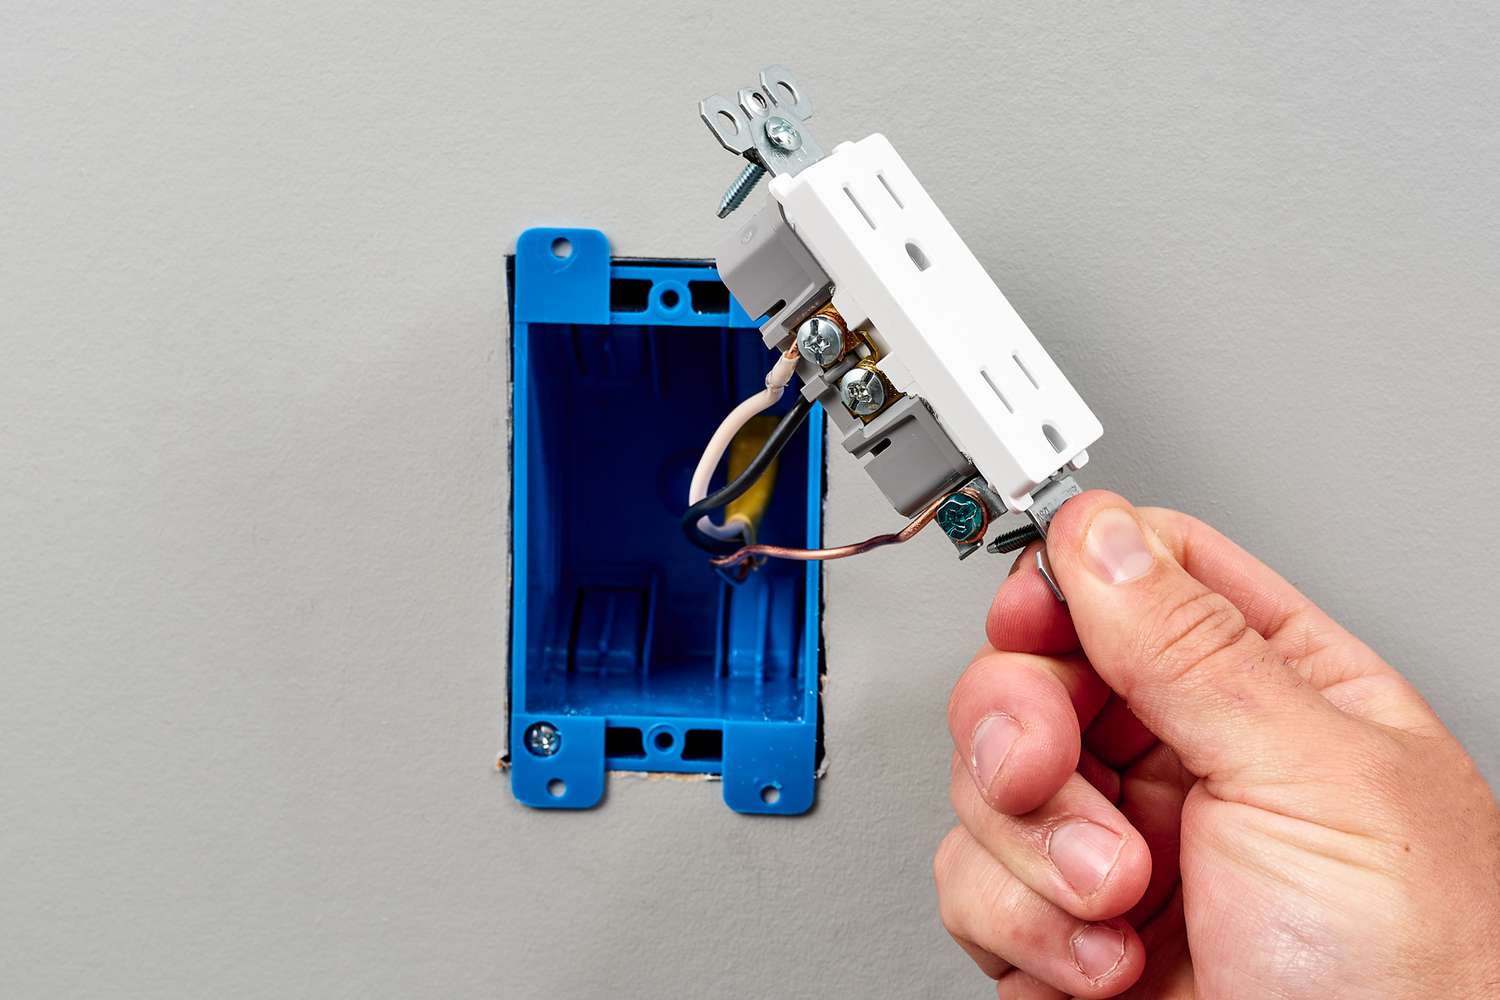
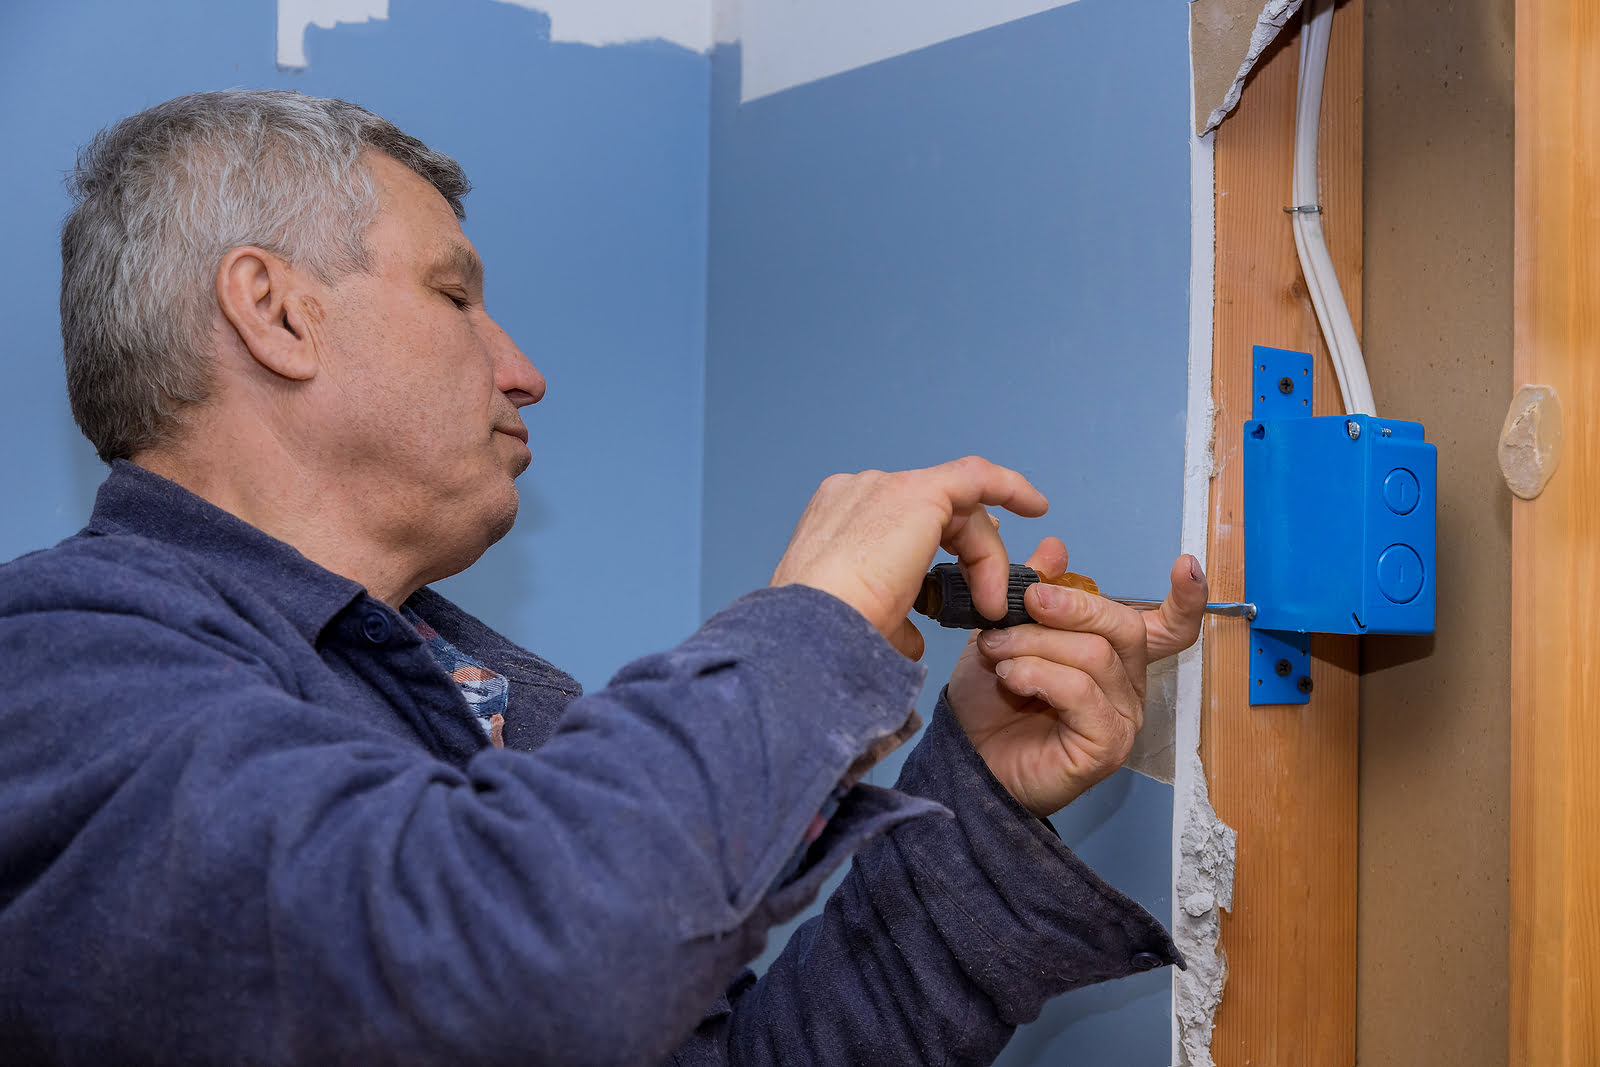
Step 6: Mount the Electrical Box
Now that the wires are properly prepared, it’s time to mount the electrical box securely in the wall opening. The mounting process ensures that the electrical box is stable and safe for use.
Follow these steps to mount the electrical box:
- Place the electrical box into the wall opening, ensuring that it is flush with the wall surface.
- Using a screwdriver or a power drill, drive screws through the mounting holes in the electrical box and into the wall or supporting structure.
- Tighten the screws until the electrical box is firmly secured in place.
- Double-check that the electrical box is level and properly aligned.
- If the electrical box has adjustable mounting tabs or wings, adjust them as needed to ensure a secure fit.
- Once the electrical box is securely mounted, ensure that there is enough clearance inside for the wires and devices that will be connected.
Properly mounting the electrical box is essential for the safety and functionality of the electrical installation. A secure mount ensures that the box will not move or come loose over time.
With the electrical box successfully mounted, you can now move on to the next step: connecting the wires to the electrical box.
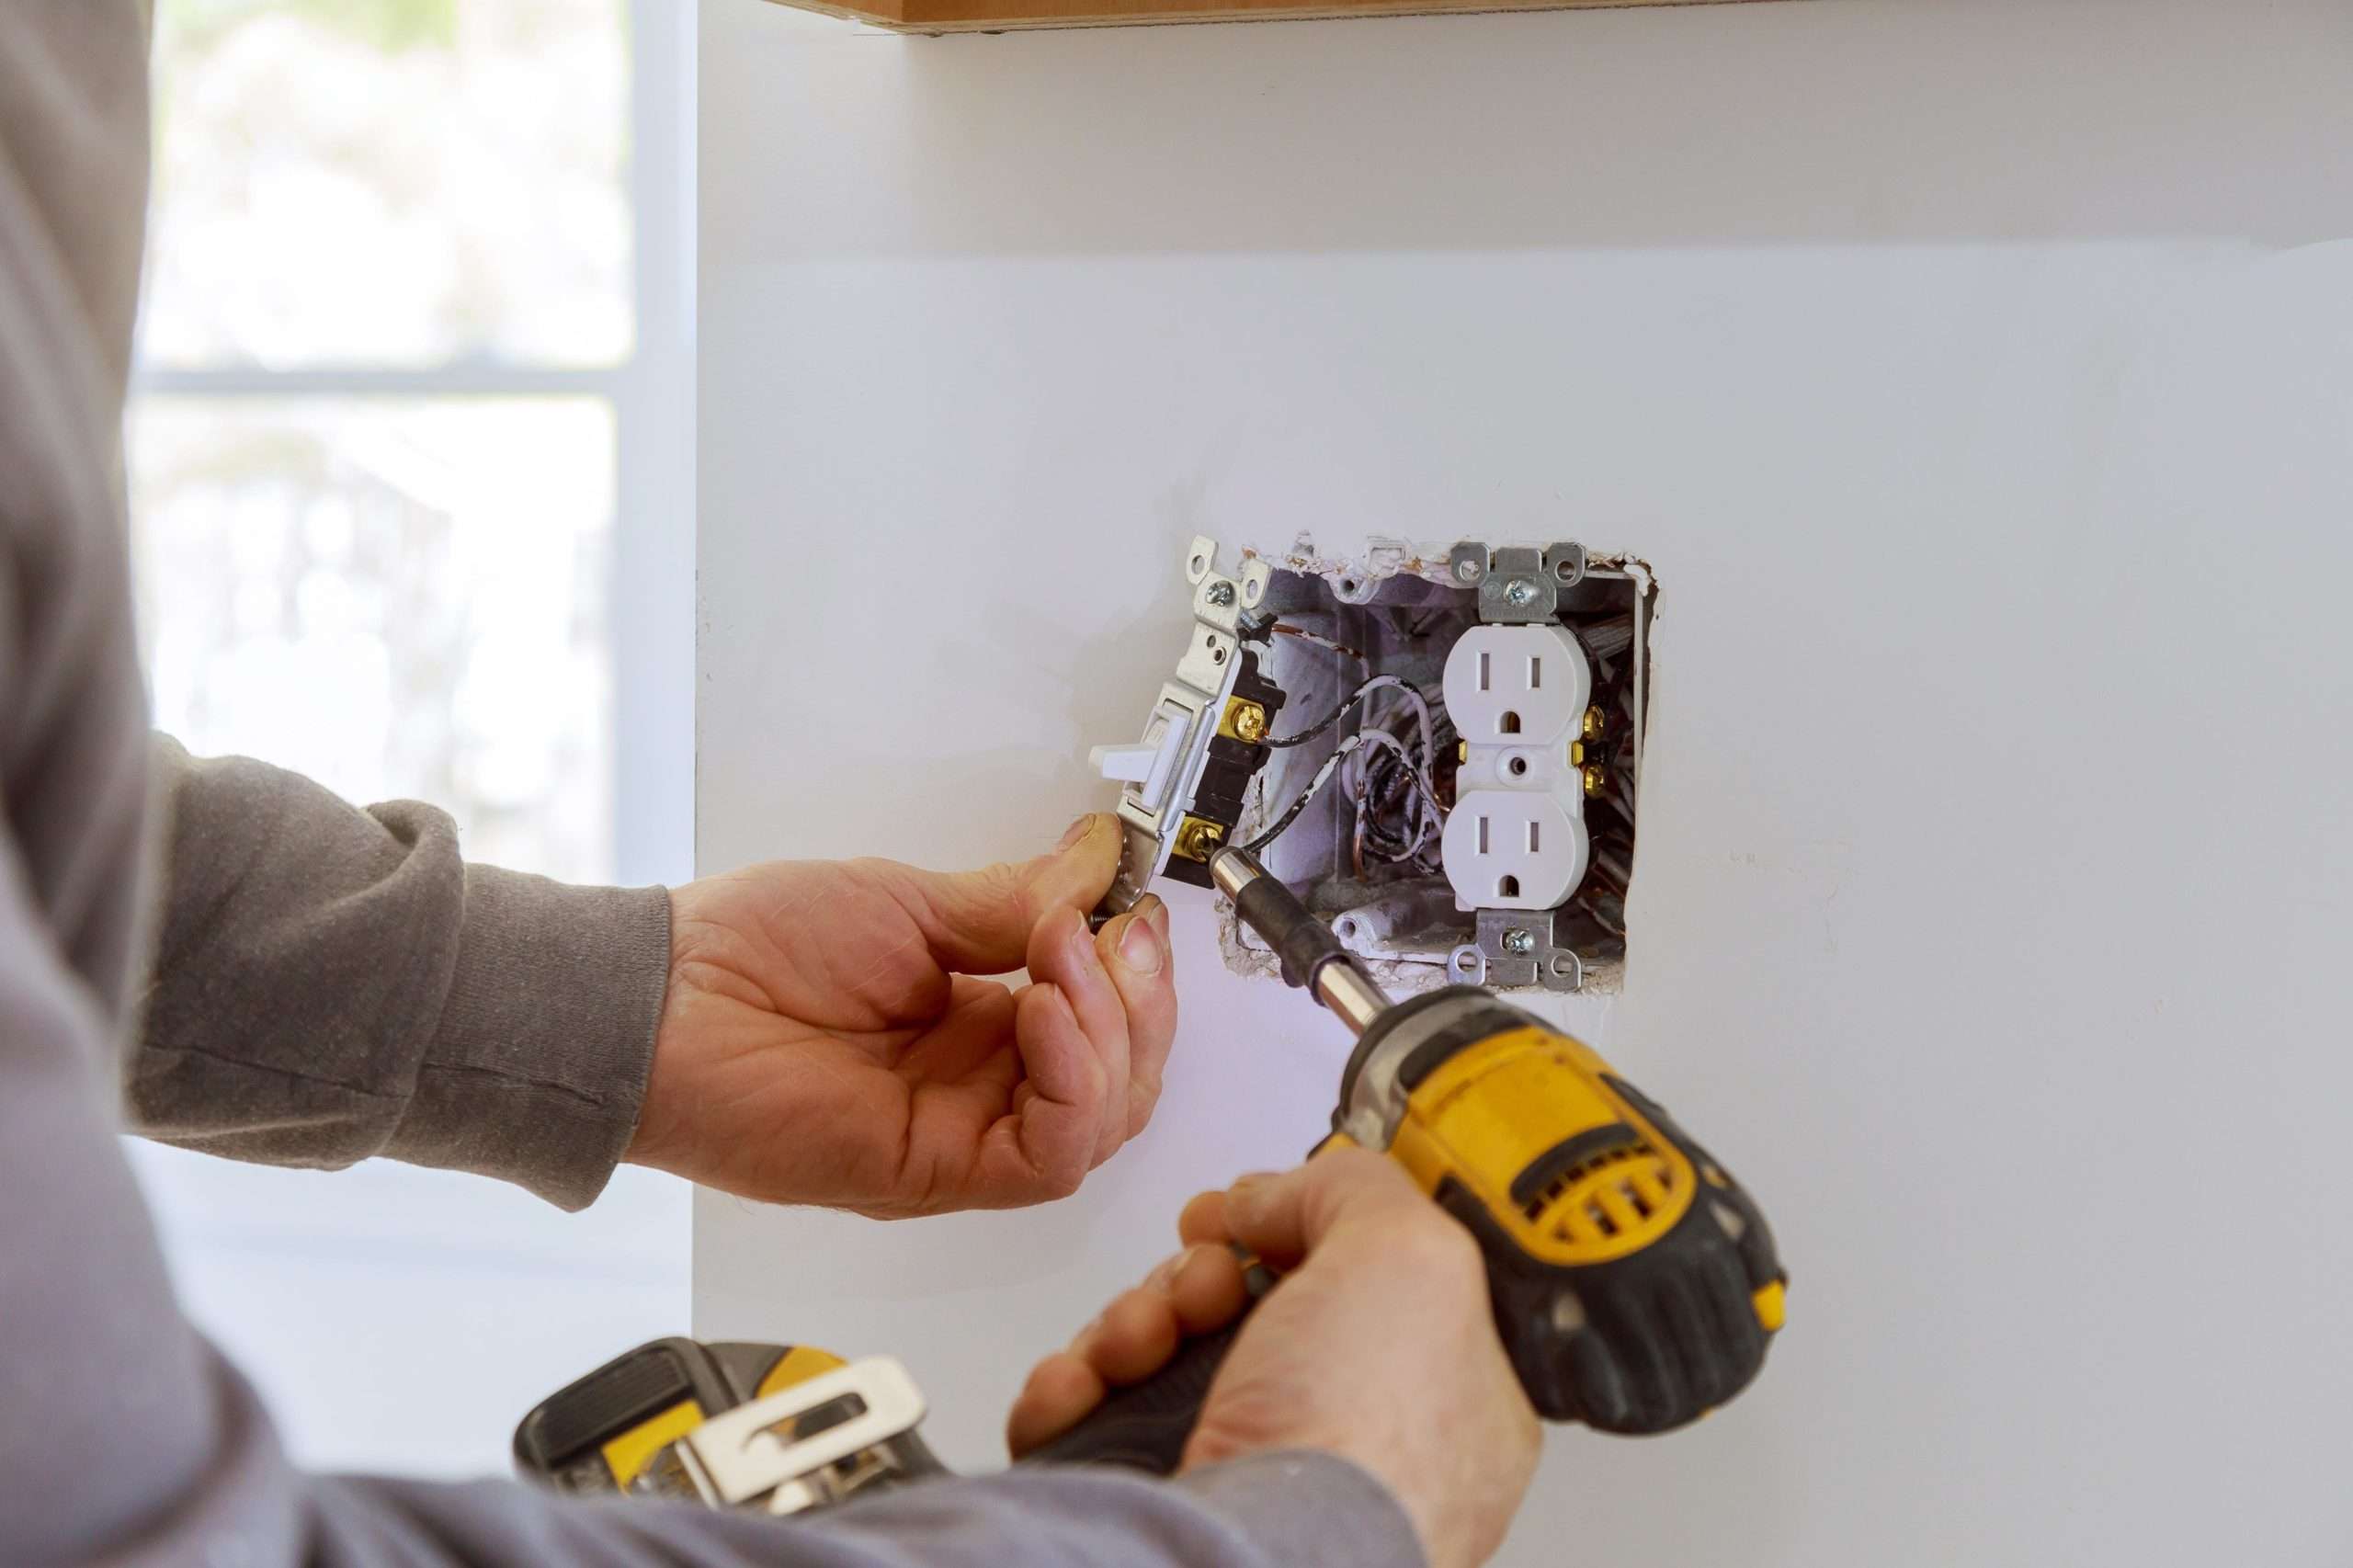
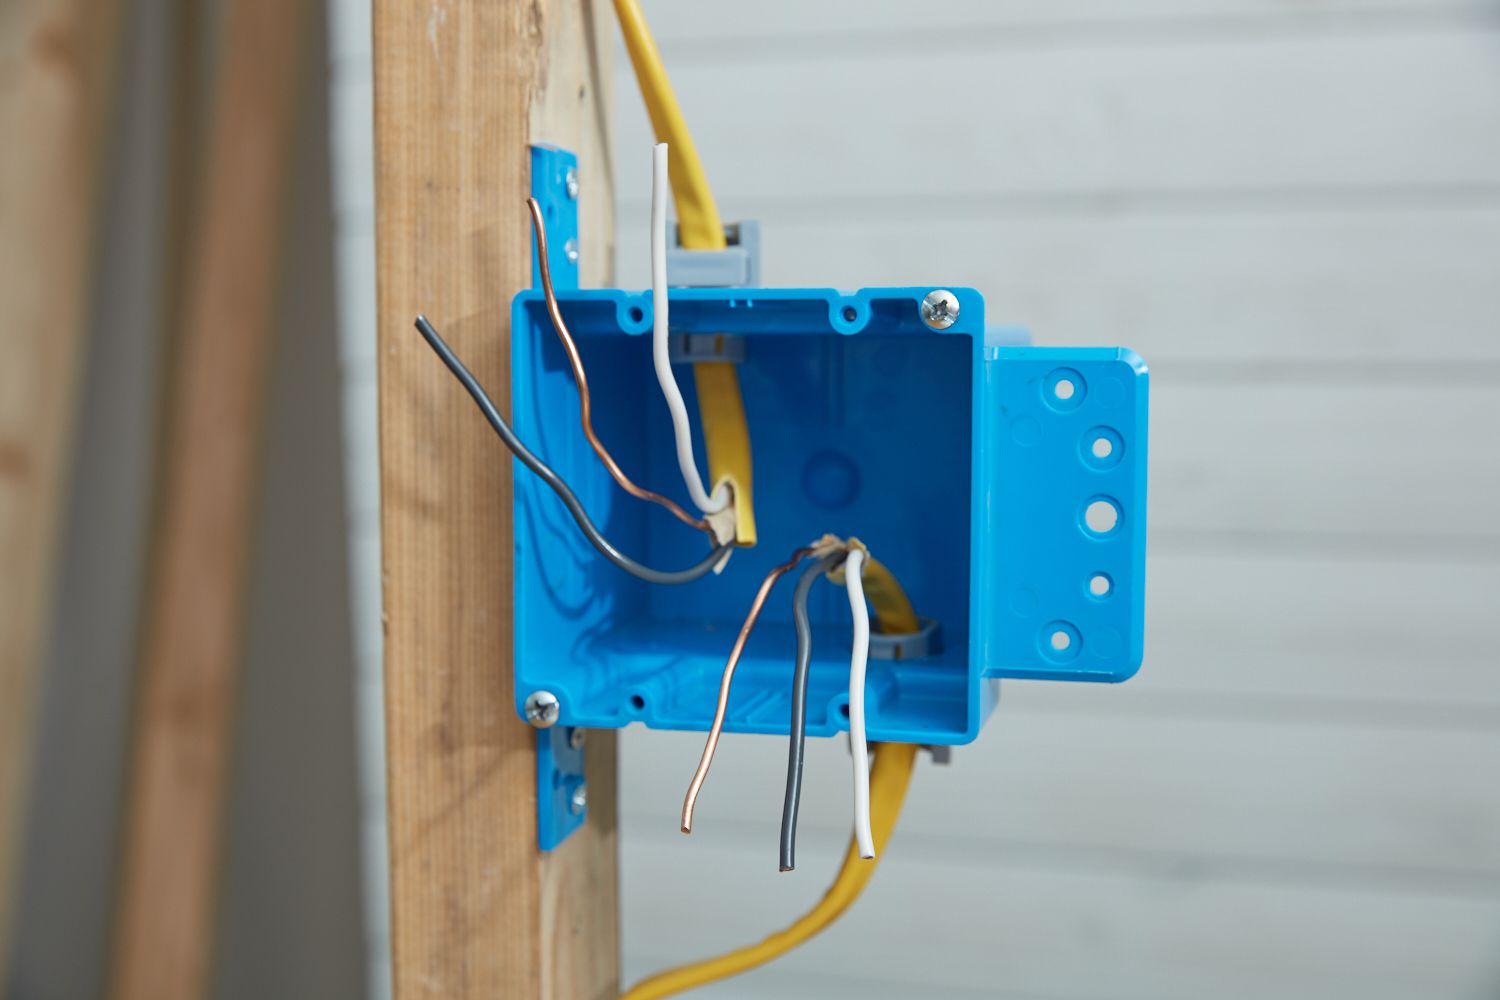
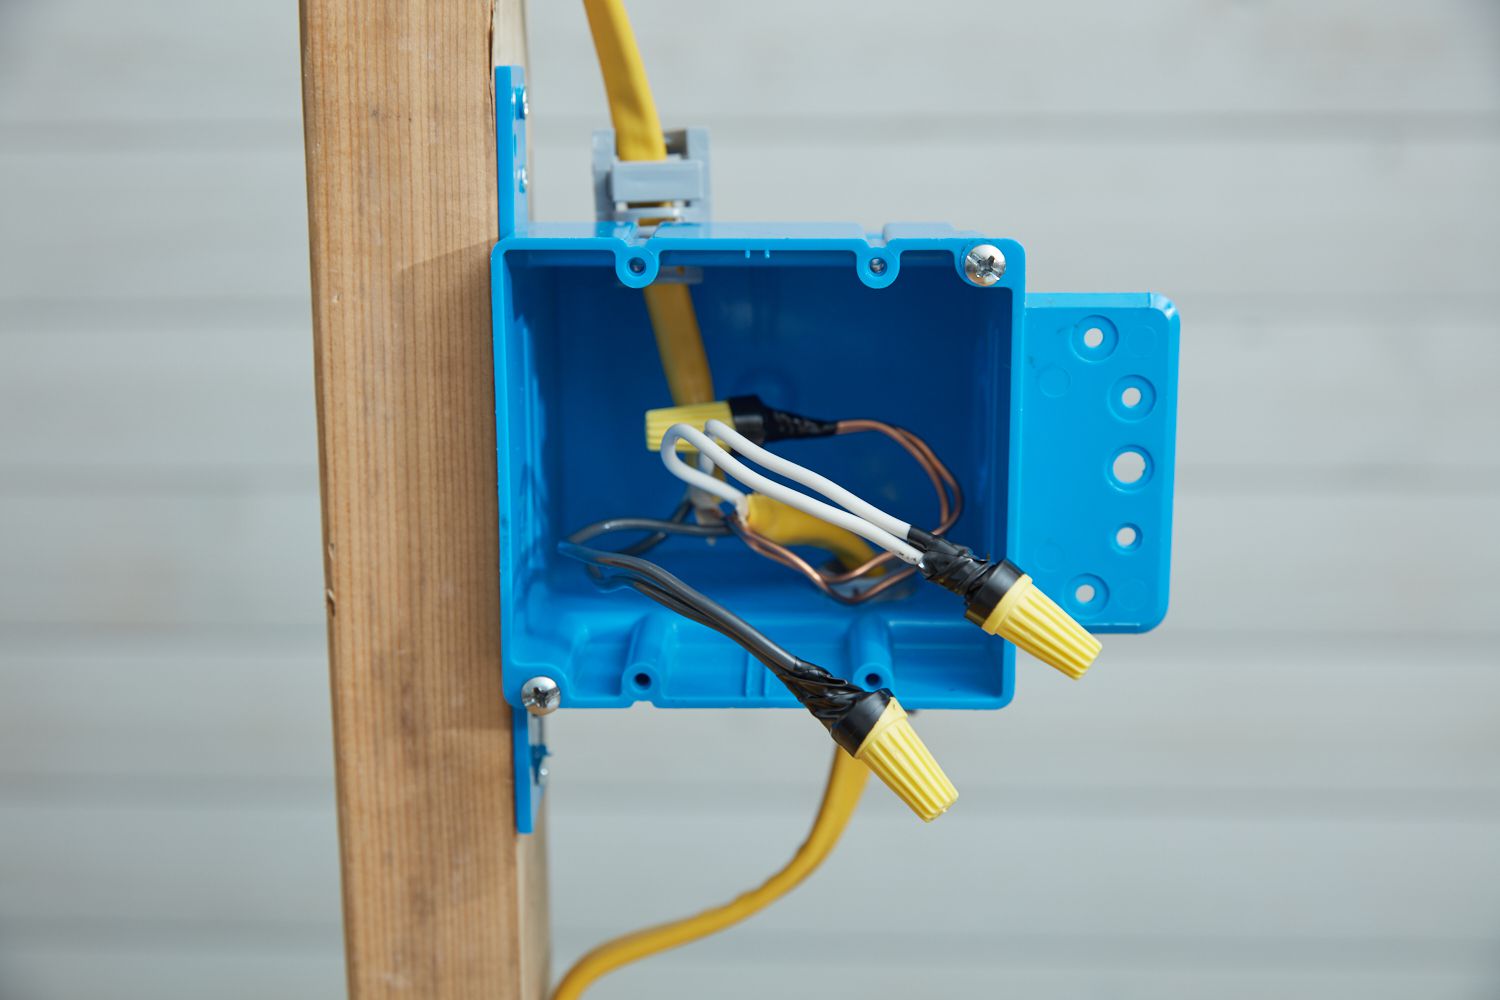
Step 7: Connect Wires to the Electrical Box
With the electrical box securely mounted, it’s time to connect the wires to the box. Properly connecting the wires ensures a safe and reliable electrical connection.
Follow these steps to connect the wires to the electrical box:
- Begin by carefully threading the prepared wires through the back or side openings of the electrical box. Be mindful not to damage the insulation or strain the wires.
- Separate the wires as needed for the specific wiring configuration of your project.
- For each wire, strip about ¾ inch of insulation from the tip using a wire stripper.
- Insert the exposed end of each wire into the appropriate terminal in the electrical box.
- Ensure that each wire is securely inserted and making proper contact with the terminal.
- If your electrical box has screw terminals, tighten the screws to secure the wires in place.
- If your electrical box has push-in terminals, use a small screwdriver or wire tool to press down on the corresponding release mechanism while inserting the wire.
- Once all the wires are connected, double-check that they are properly secured and making good contact.
It’s important to follow the manufacturer’s instructions for your specific electrical box to ensure proper and safe wire connection. If you are unsure about any aspect of the wiring or connections, consult a licensed electrician for guidance.
With the wires successfully connected to the electrical box, you can now move on to the next step: securing the electrical box in place.
Step 8: Secure the Electrical Box
Once the wires are properly connected to the electrical box, it’s essential to secure the box in place to ensure stability and safety. Properly securing the electrical box prevents it from shifting or coming loose over time.
Follow these steps to secure the electrical box:
- Inspect the inside of the electrical box to ensure there are no exposed wires or loose connections.
- Use electrical tape or wire connectors to secure and insulate any exposed wires or connections as needed.
- If the electrical box has built-in clamps, position them over the wires inside the box and tighten them to secure the wires.
- Check that the electrical box cover matches the type and size specified by the manufacturer.
- Place the electrical box cover over the electrical box and align it with the screw holes.
- Using a screwdriver or a power drill, insert the screws through the cover and into the corresponding holes in the electrical box.
- Tightly screw in the screws until the electrical box cover is securely attached to the box.
- Gently tug on the cover to ensure it is firmly in place and will not come loose.
Properly securing the electrical box and cover is crucial for the overall safety and functionality of the installation.
With the electrical box secured and the cover attached, you are now ready to move on to the next step: restoring power.
Read more: How To Install Old Work Electrical Box
Step 9: Restore Power
With the electrical box properly secured, it’s time to restore power and bring electricity back to the area. Restoring power allows you to test the installation and ensure that everything is functioning correctly.
Follow these steps to restore power:
- Return to the circuit breaker box where you previously turned off the power.
- Locate the circuit breaker that corresponds to the area where you installed the electrical box.
- Flip the switch or reinsert the fuse for the designated circuit to the “on” position.
- Ensure that other circuit breakers or fuses that were turned off are also reactivated if needed.
- Observe the electrical box and surrounding area for any signs of malfunction, such as sparks, smoke, or unusual noises.
- If everything appears normal, proceed to the next step: testing the electrical box.
- If you notice any issues or abnormalities, immediately turn off the power and consult a licensed electrician for further assistance.
Restoring power should be done with caution and awareness of potential hazards. If you are unsure about any aspect of the process, it’s always best to seek professional guidance.
With the power restored, it’s time to move on to the final step: testing the electrical box.
Step 10: Test the Electrical Box
The final step in the installation process is to test the electrical box to ensure that it is functioning properly. Testing allows you to verify that all connections are secure, and that the electrical box is ready for use.
Follow these steps to test the electrical box:
- Turn on any switches or devices connected to the electrical box, such as lights or appliances.
- Check that the power is flowing to the connected devices and that they are operating as expected.
- Verify that all the switches are working correctly, and that the devices are responding to their on/off commands.
- Use a voltage tester to check for proper voltage in the electrical box and at the connected devices.
- Ensure that there are no electrical shocks or unusual heat emanating from the box or any connected devices.
- If any issues or malfunctions are detected during the testing process, turn off the power immediately and seek professional assistance to address the problem.
- If everything is functioning properly and there are no signs of trouble, you can consider the electrical box installation a success.
Regular maintenance and periodic inspections are recommended to ensure the ongoing safety and performance of the electrical box.
With the electrical box tested and proven to be functioning correctly, the installation process is complete. You can now enjoy the benefits of a properly installed electrical box and confidently use the connected devices.
Remember, if you have any doubts or concerns about the installation process, it’s always best to consult a licensed electrician for professional guidance.
Thank you for following this step-by-step guide on how to install an electrical box. Stay safe and enjoy your newly installed electrical box!
Conclusion
Congratulations! You have successfully completed the installation of an electrical box. By following the step-by-step process outlined in this guide, you have learned how to safely and effectively install an electrical box in your home or building.
Installing an electrical box is an essential skill for any DIY enthusiast or homeowner looking to tackle electrical projects. A properly installed electrical box ensures a secure and organized connection point for wires and devices, promoting safety and efficient electrical distribution.
Throughout the installation process, you have learned valuable techniques such as gathering the necessary tools and materials, turning off the power, determining the installation location, marking and cutting the opening, preparing and connecting the wires, mounting and securing the electrical box, restoring power, testing the electrical box, and ensuring everything is functioning correctly.
Remember, safety is paramount when working with electricity. Always turn off the power before beginning any electrical work and use proper precautions to avoid electrical hazards. If you are unsure about any aspect of the installation process, it is recommended to consult a licensed electrician for guidance and assistance.
We hope this comprehensive guide has provided you with the knowledge and confidence to install an electrical box. Properly installed electrical boxes guarantee a reliable and efficient electrical system in your home or building.
Thank you for following this guide, and good luck with your future electrical projects!
Frequently Asked Questions about How To Install Electrical Box
Was this page helpful?
At Storables.com, we guarantee accurate and reliable information. Our content, validated by Expert Board Contributors, is crafted following stringent Editorial Policies. We're committed to providing you with well-researched, expert-backed insights for all your informational needs.


0 thoughts on “How To Install Electrical Box”