Home>Furniture & Design>Outdoor Furniture>How To Replace An Outdoor Gfci Outlet

Outdoor Furniture
How To Replace An Outdoor Gfci Outlet
Modified: August 17, 2024
Learn how to replace an outdoor GFCI outlet with our step-by-step guide. Ensure the safety of your outdoor furniture and design with this easy DIY project.
(Many of the links in this article redirect to a specific reviewed product. Your purchase of these products through affiliate links helps to generate commission for Storables.com, at no extra cost. Learn more)
Introduction
Welcome to our guide on how to replace an outdoor GFCI outlet. GFCI (Ground Fault Circuit Interrupter) outlets are crucial for outdoor electrical safety, as they can help prevent electrical shocks and potential hazards caused by ground faults. Over time, these outlets may wear out or become damaged due to exposure to the elements, necessitating replacement to maintain a safe outdoor electrical system.
In this comprehensive tutorial, we will walk you through the step-by-step process of replacing an outdoor GFCI outlet. Whether you're a seasoned DIY enthusiast or a novice homeowner looking to tackle this project for the first time, we've got you covered. With the right tools, materials, and guidance, you can successfully replace your outdoor GFCI outlet and ensure the safety of your outdoor electrical connections.
So, let's dive in and learn how to replace an outdoor GFCI outlet to keep your outdoor spaces safe and functional.
Key Takeaways:
- Stay Safe and Prepared
Before replacing an outdoor GFCI outlet, gather the right tools and materials, and always remember to turn off the power to ensure a safe and smooth process. - Test and Verify
After installation, test the new GFCI outlet to ensure it’s working properly. Regular testing and maintenance are crucial for ongoing safety and performance.
Tools and Materials Needed
Before you begin replacing your outdoor GFCI outlet, it’s essential to gather the necessary tools and materials to ensure a smooth and efficient process. Here’s a list of what you’ll need:
Tools:
- Flathead screwdriver
- Phillips screwdriver
- Needle-nose pliers
- Wire cutters/strippers
- Voltage tester
- Adjustable wrench
- Wire nuts
- Electrical tape
Materials:
- Replacement GFCI outlet
- Weatherproof outlet cover
- Outdoor-rated electrical box (if needed)
- Replacement electrical wiring (if necessary)
Ensuring that you have these tools and materials on hand will help you complete the project without interruptions and guarantee that you have everything you need to safely and effectively replace your outdoor GFCI outlet.
Step 1: Turn Off Power
Prior to beginning any electrical work, it is imperative to turn off the power to the outlet you will be replacing. This crucial step ensures your safety and prevents the risk of electrical shock or injury. Here’s how to turn off the power safely:
- Locate the Circuit Breaker: Identify the circuit breaker that controls the power supply to the outdoor GFCI outlet. Circuit breakers are typically located in the main electrical panel of your home.
- Switch Off the Circuit Breaker: Once you have located the correct circuit breaker, switch it to the “off” position. You can verify that the power has been successfully turned off by plugging in a lamp or using a non-contact voltage tester to ensure that there is no electricity flowing to the outlet.
- Double-Check the Power: After switching off the circuit breaker, double-check that the power to the outlet has been effectively shut off using a voltage tester. This additional step provides an extra layer of safety and certainty before proceeding with the replacement.
By following these steps to turn off the power, you can create a safe working environment for replacing the outdoor GFCI outlet without the risk of electrical hazards.
Read more: How To Replace An Outdoor Electrical Outlet
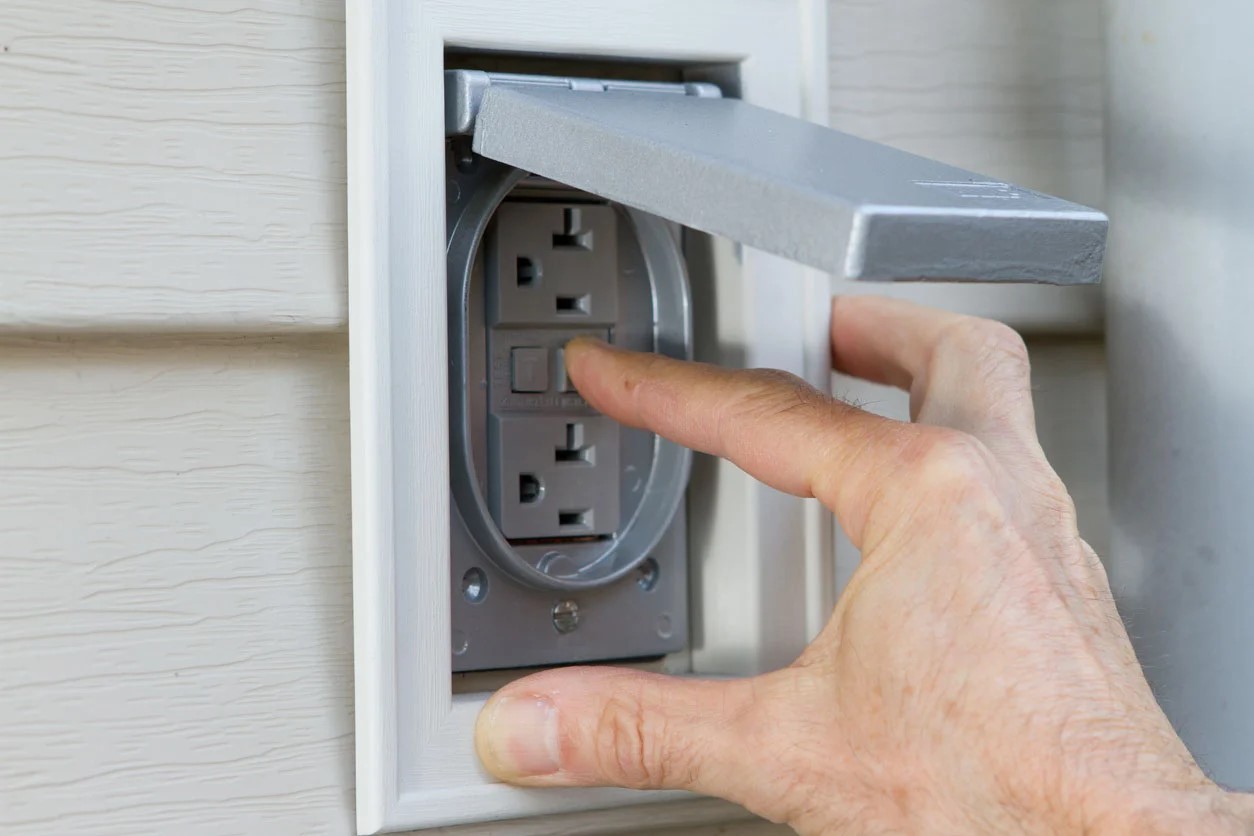
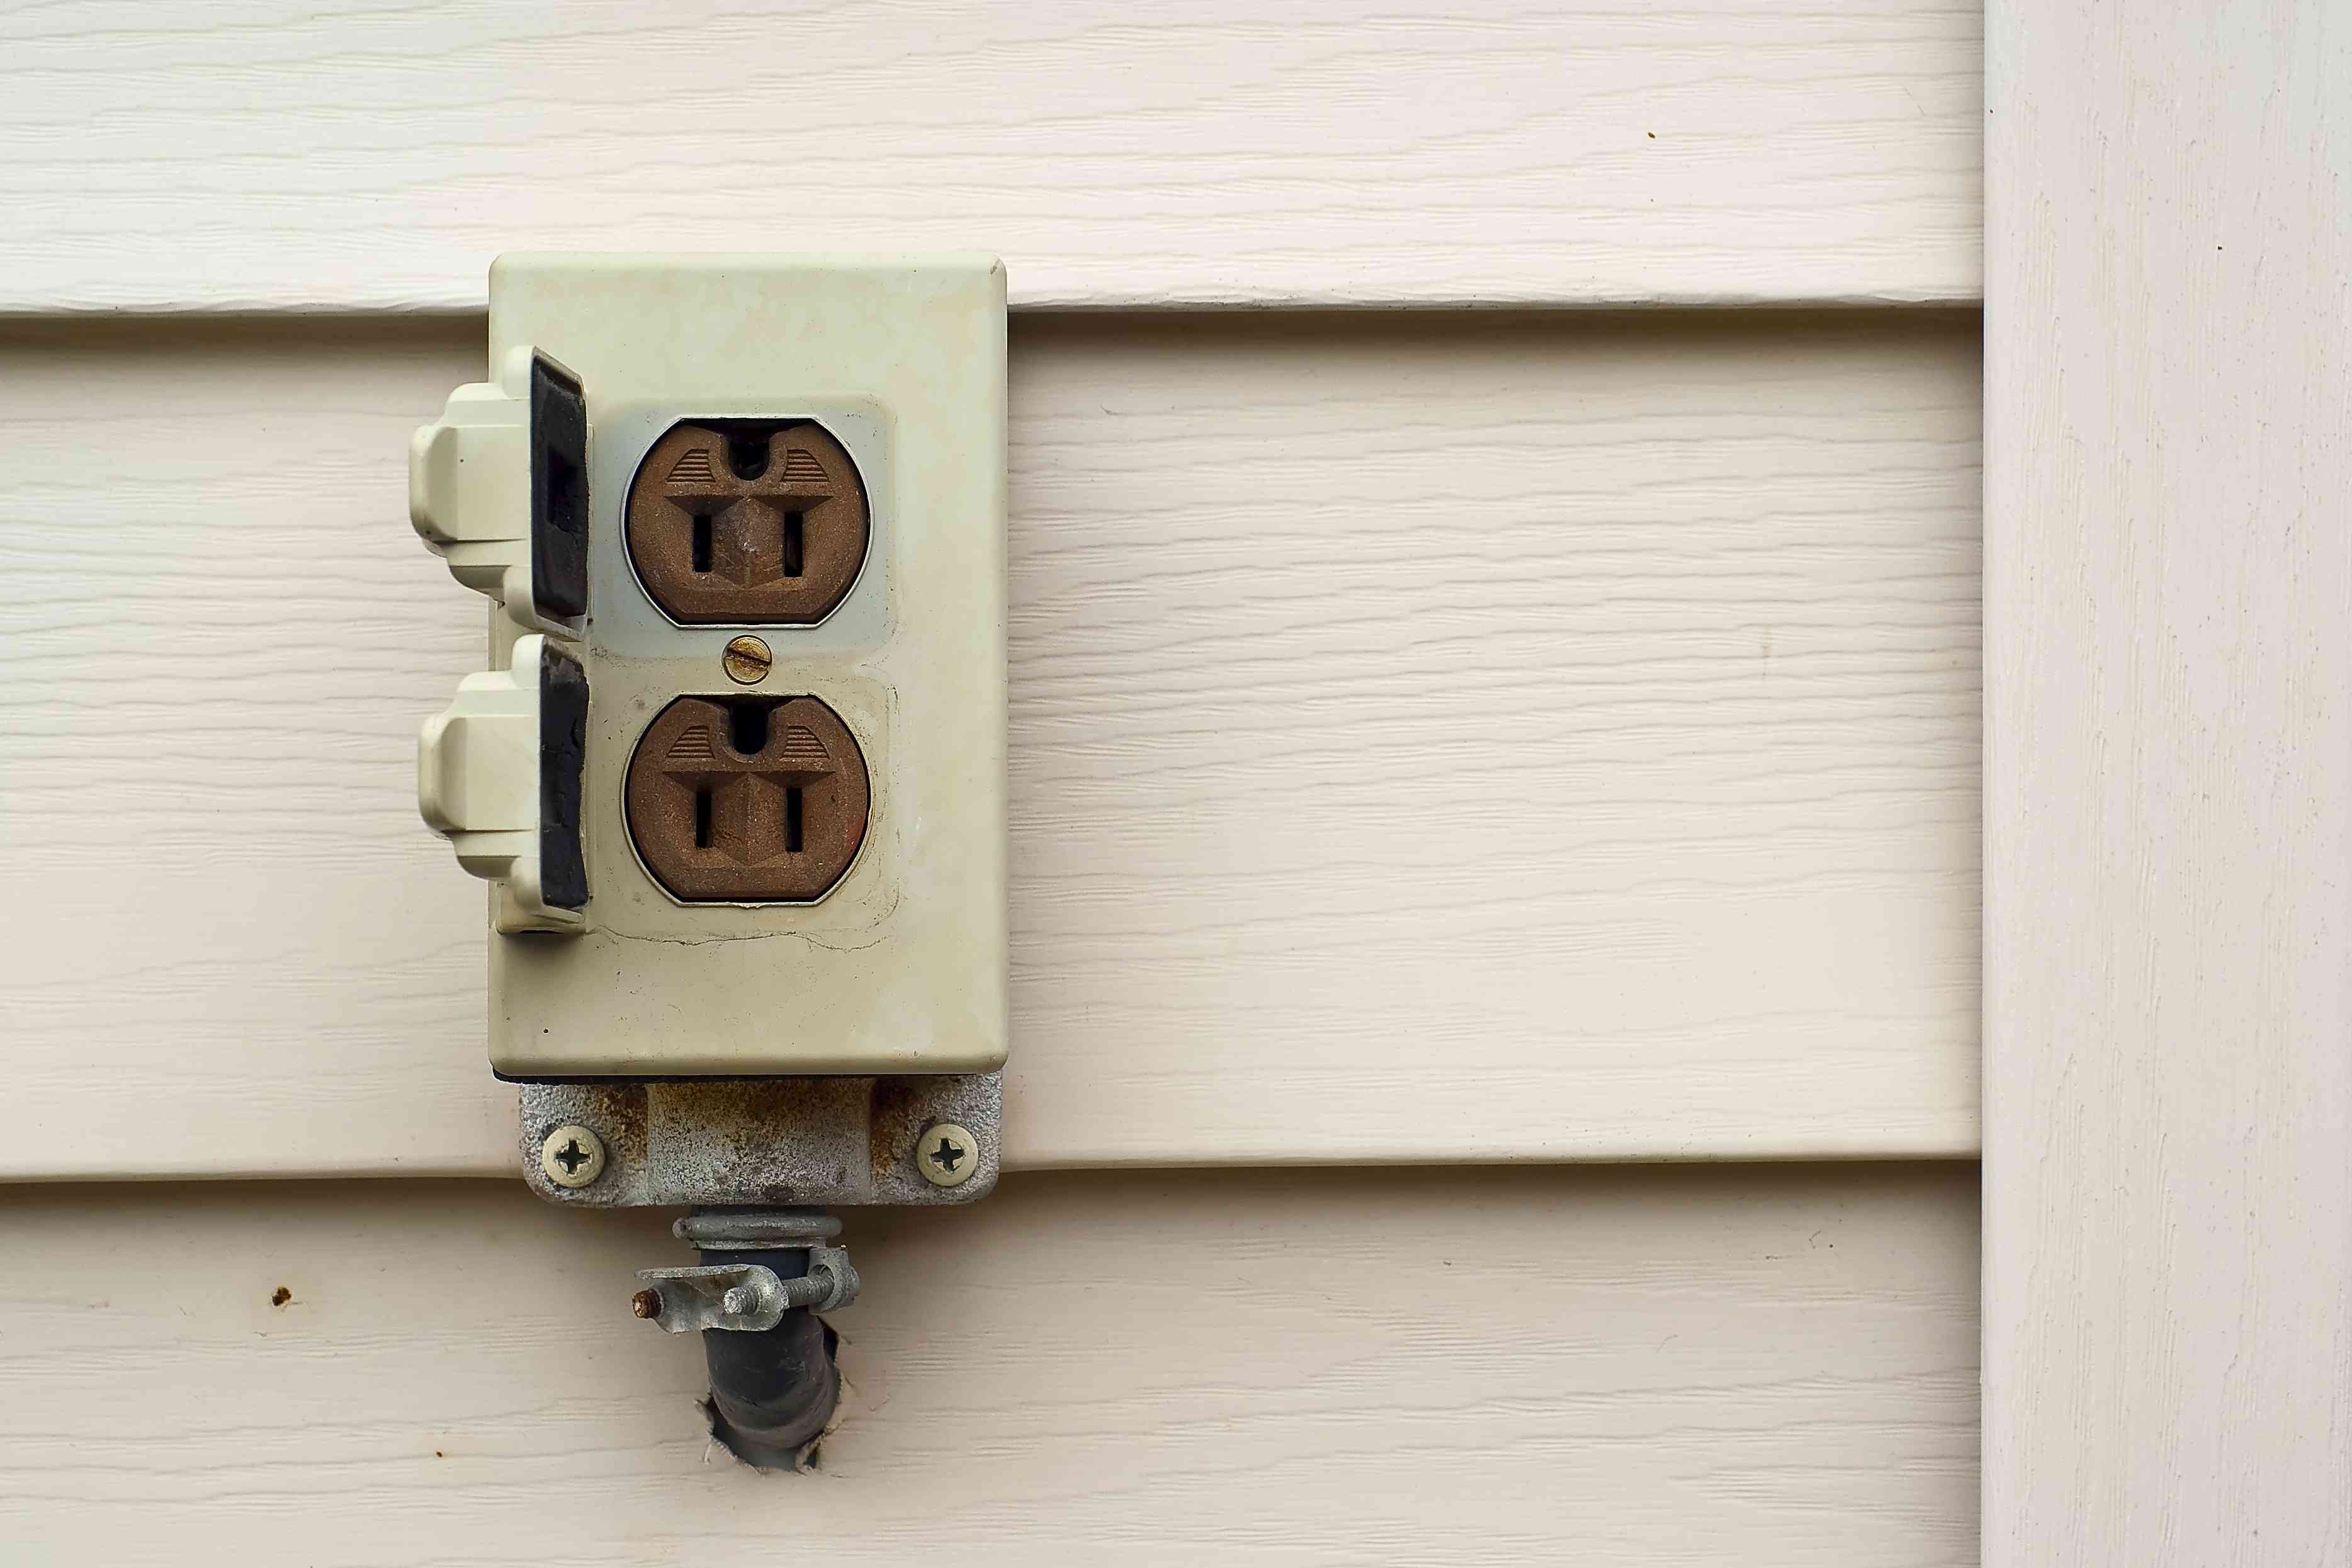
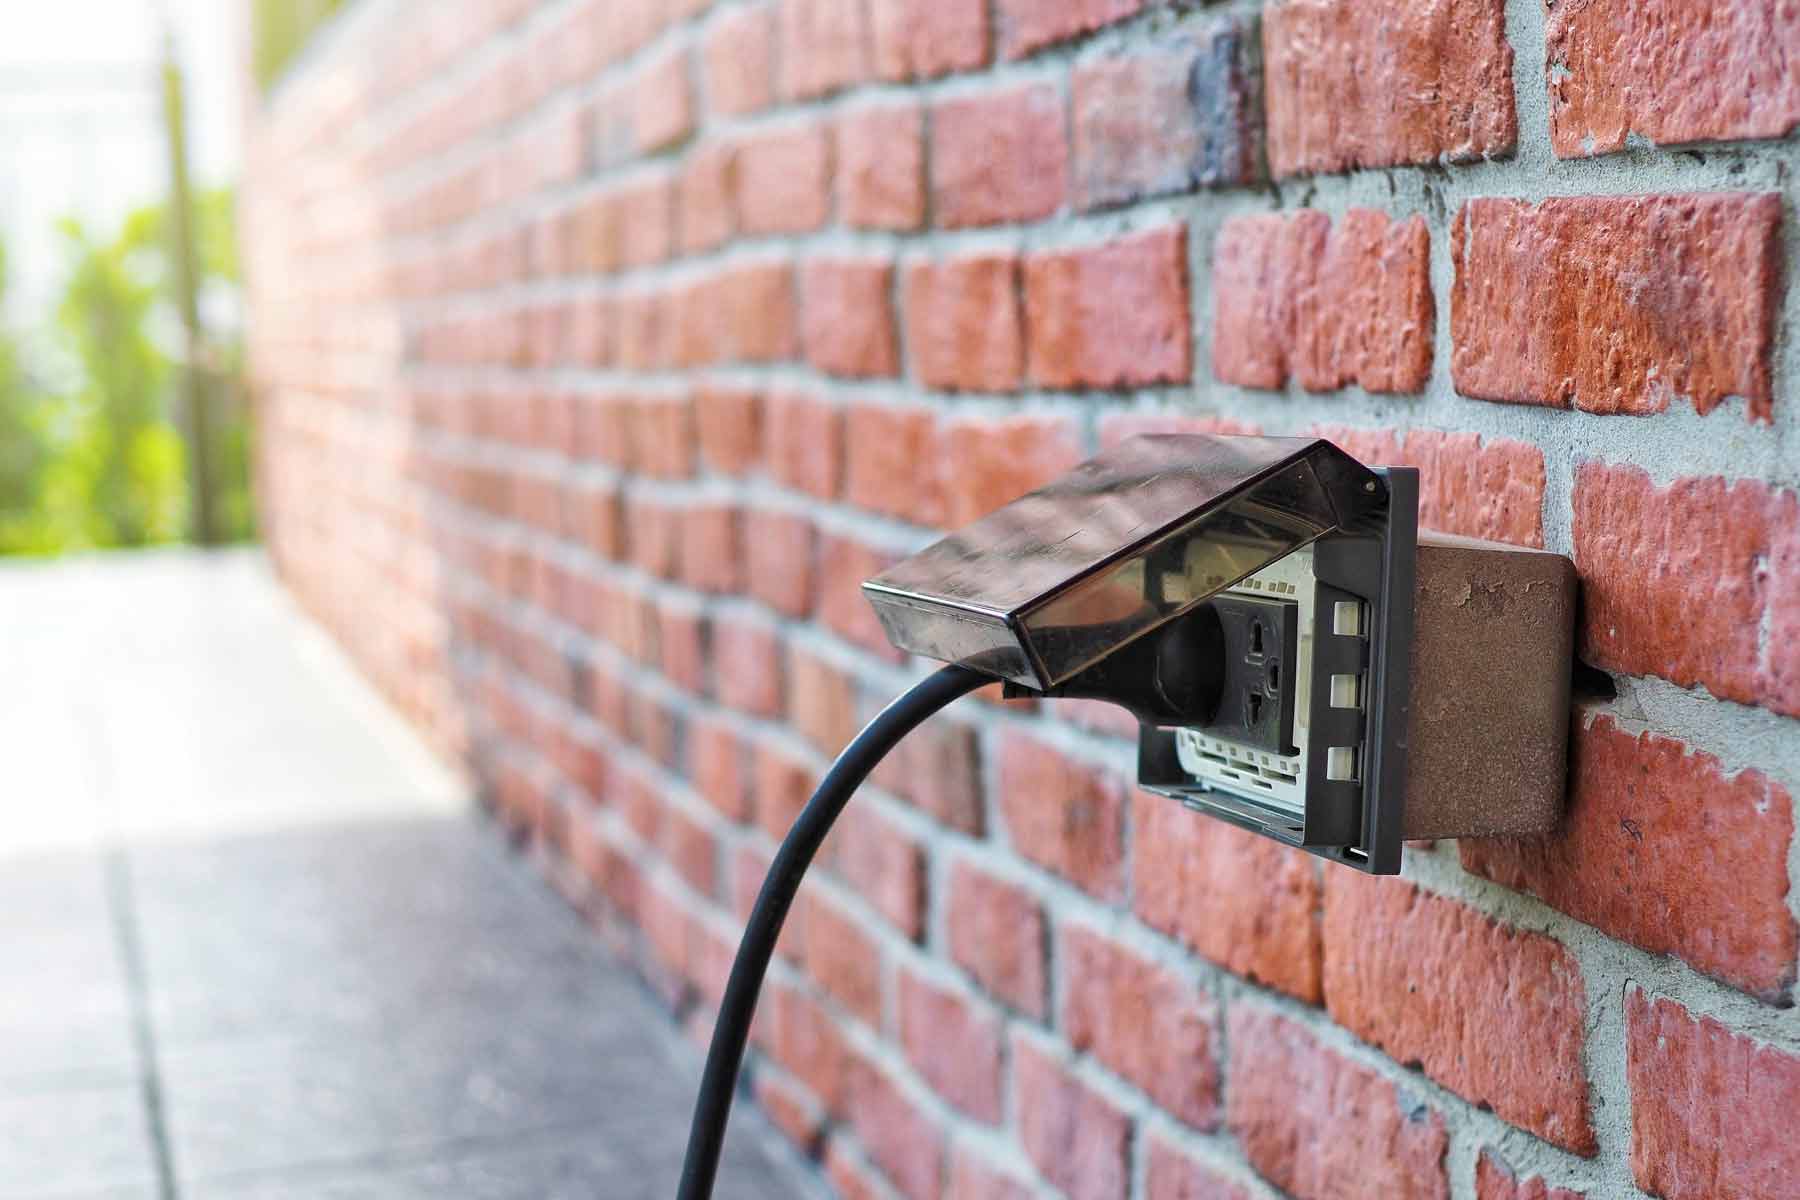
Step 2: Remove the Old GFCI Outlet
After ensuring that the power to the outlet has been turned off, you can proceed with removing the old GFCI outlet. Here’s a detailed guide on how to safely remove the existing outlet:
- Remove the Outlet Cover: Using a flathead screwdriver, carefully unscrew and remove the cover plate of the GFCI outlet. Set the cover plate and screws aside for reinstallation later.
- Test for Power: Prior to touching any wires, use a voltage tester to confirm that there is no electrical current running to the outlet. This is a crucial safety measure to prevent accidental shocks.
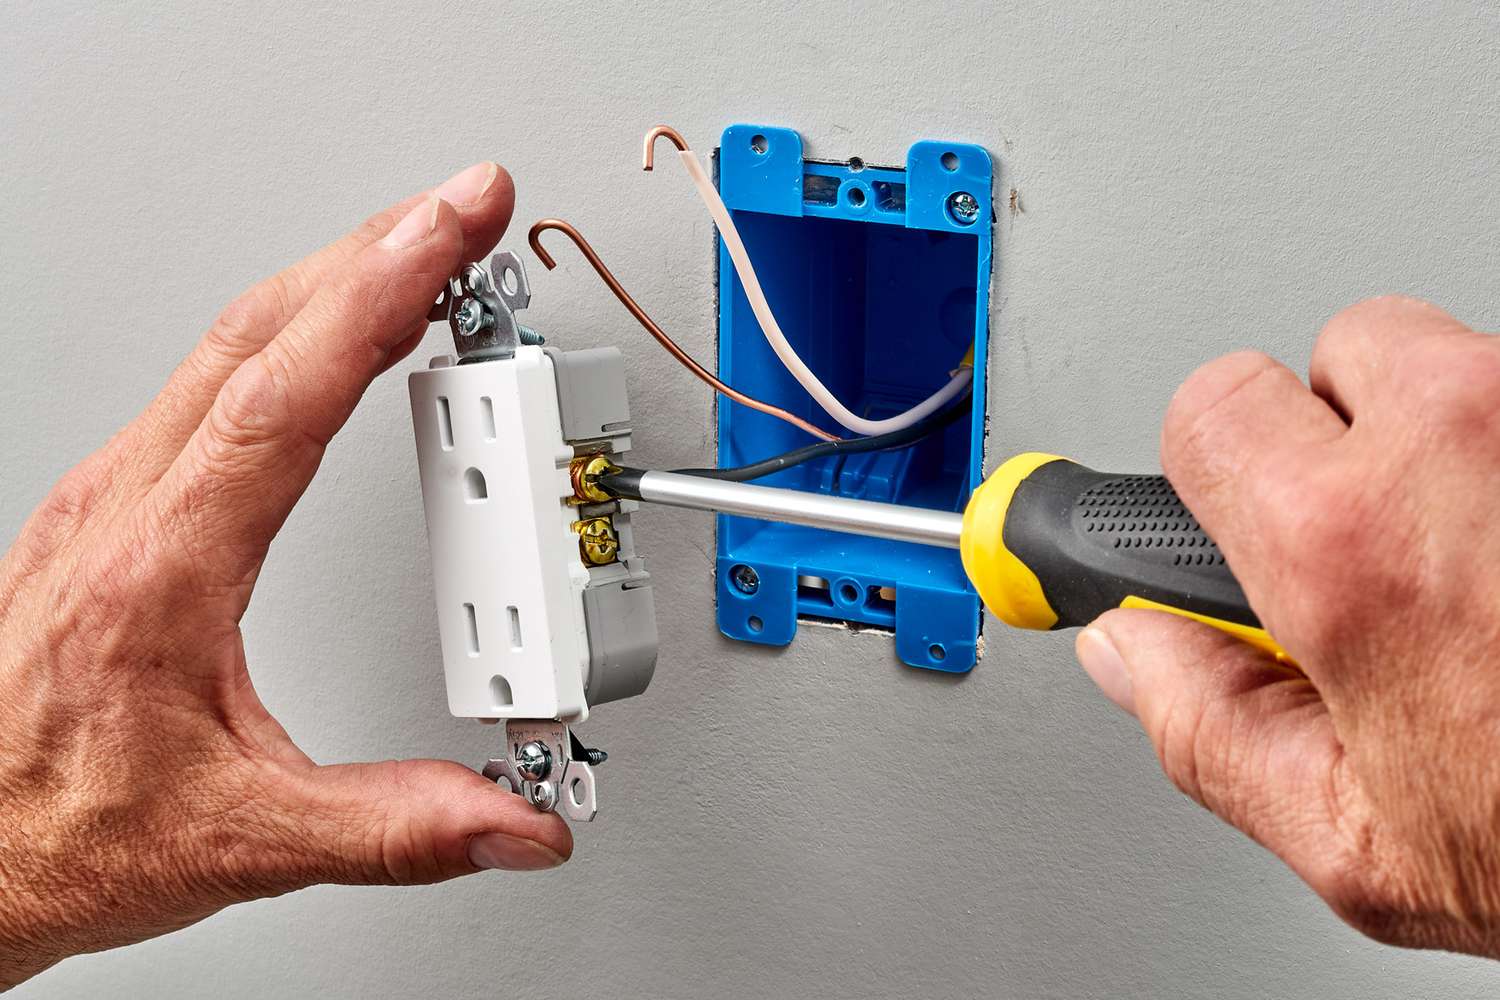
- Unscrew the Outlet: Once you have confirmed that there is no power, use a screwdriver to loosen the screws securing the outlet to the electrical box. Gently pull the outlet out of the box, being mindful of any attached wires.
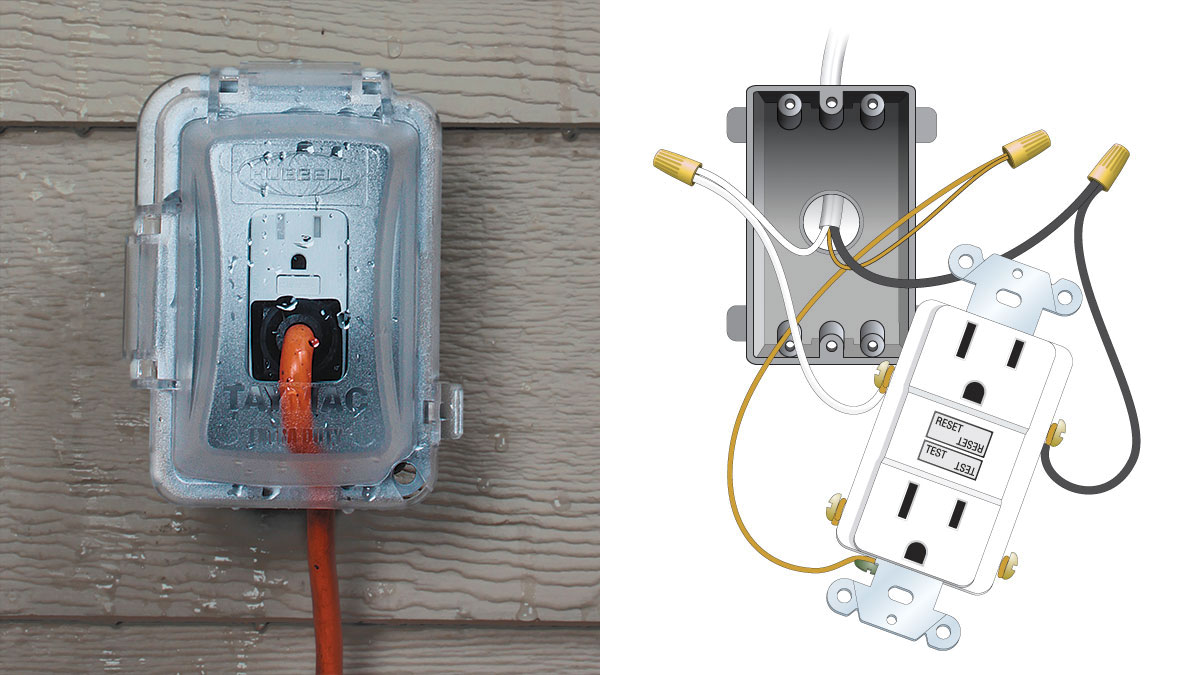
- Disconnect the Wiring: Carefully disconnect the wires from the old GFCI outlet. Note the placement of each wire and its corresponding terminal (typically labeled “line” and “load”) to ensure correct reconnection with the new outlet.
- Remove the Outlet: After disconnecting the wiring, remove the old GFCI outlet from the electrical box and set it aside. Take note of the condition of the wiring and inspect for any signs of damage or wear that may require attention.
By following these steps, you can safely and methodically remove the old GFCI outlet, preparing the space for the installation of the new outlet.
Step 3: Install the New GFCI Outlet
With the old GFCI outlet removed, it’s time to install the new outlet to ensure the continued safety and functionality of your outdoor electrical system. Follow these steps to correctly install the new GFCI outlet:
- Prepare the Wiring: If necessary, trim and strip the ends of the wires to ensure clean, undamaged conductors for connection to the new outlet. Check the manufacturer’s instructions for the appropriate length to strip.
- Connect the Wires: Carefully connect the wiring to the new GFCI outlet, ensuring that the line and load wires are correctly attached to their designated terminals. Typically, the line wires (incoming power supply) are connected to the “line” terminals, while the load wires (outgoing power to additional outlets) are connected to the “load” terminals.
- Secure the Outlet: Gently tuck the connected wires into the electrical box, then secure the new GFCI outlet by screwing it into place. Ensure that the outlet is flush with the wall and level to maintain a neat and professional installation.
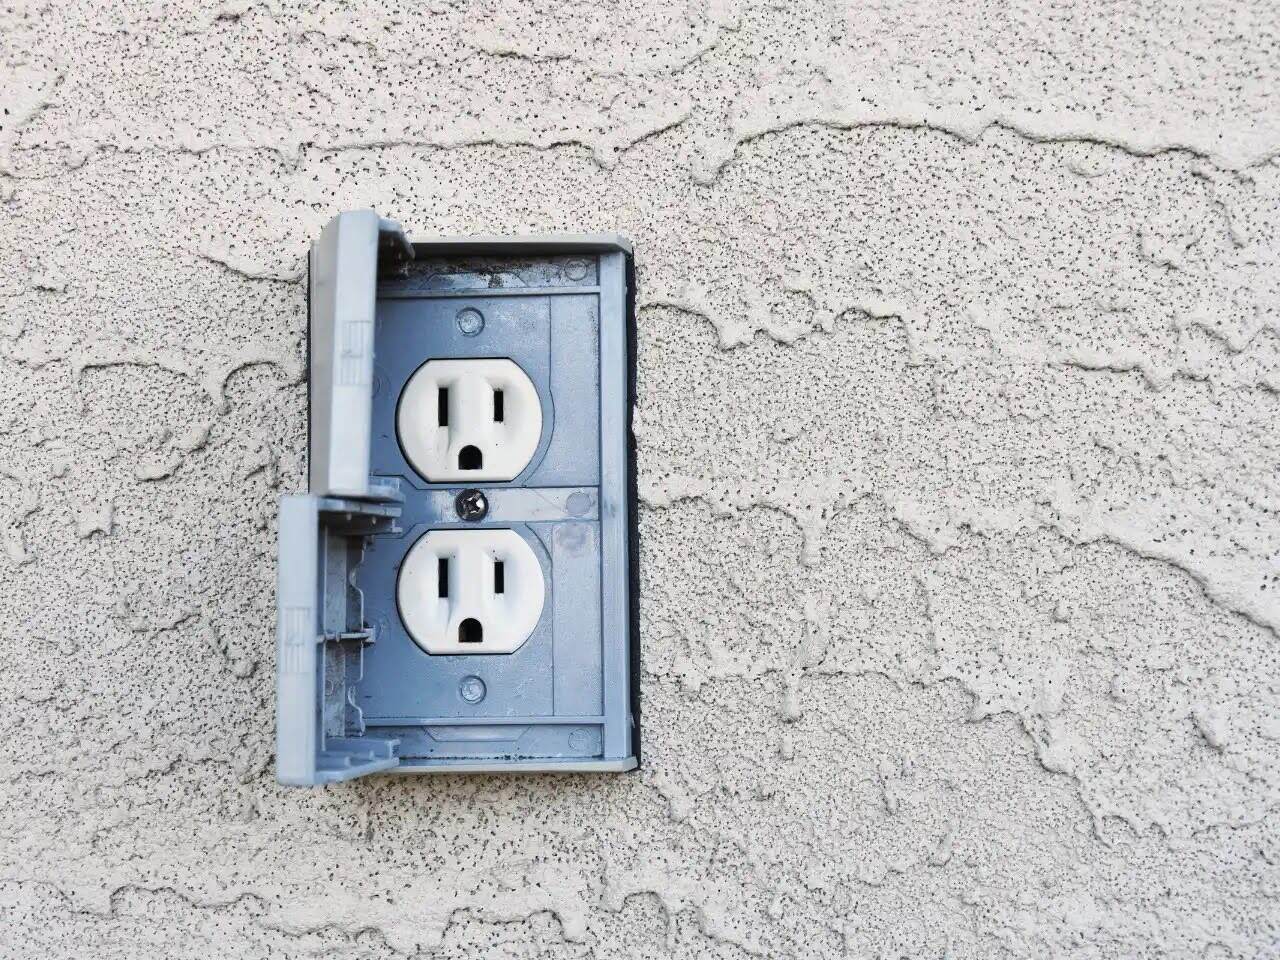
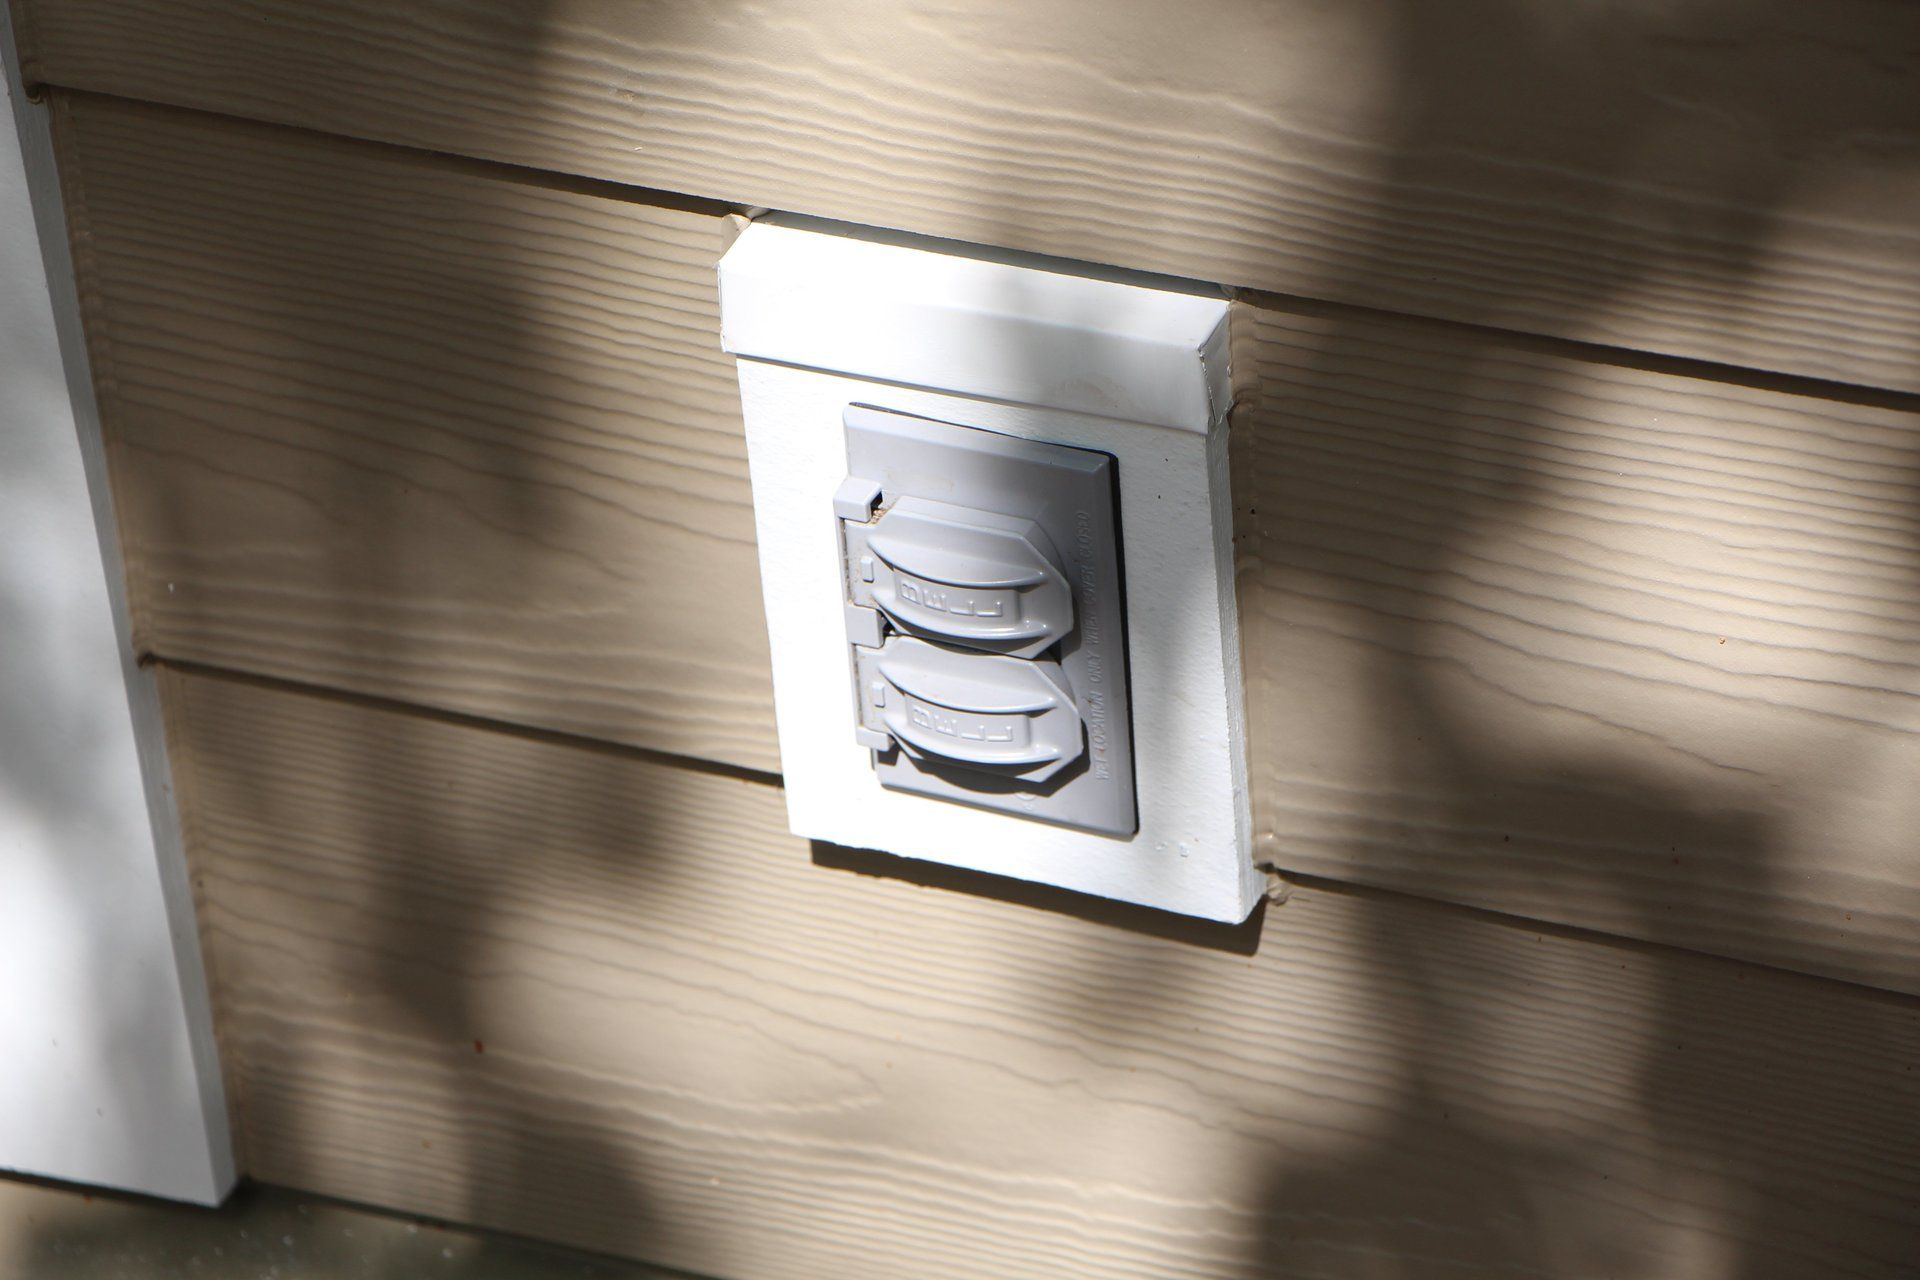
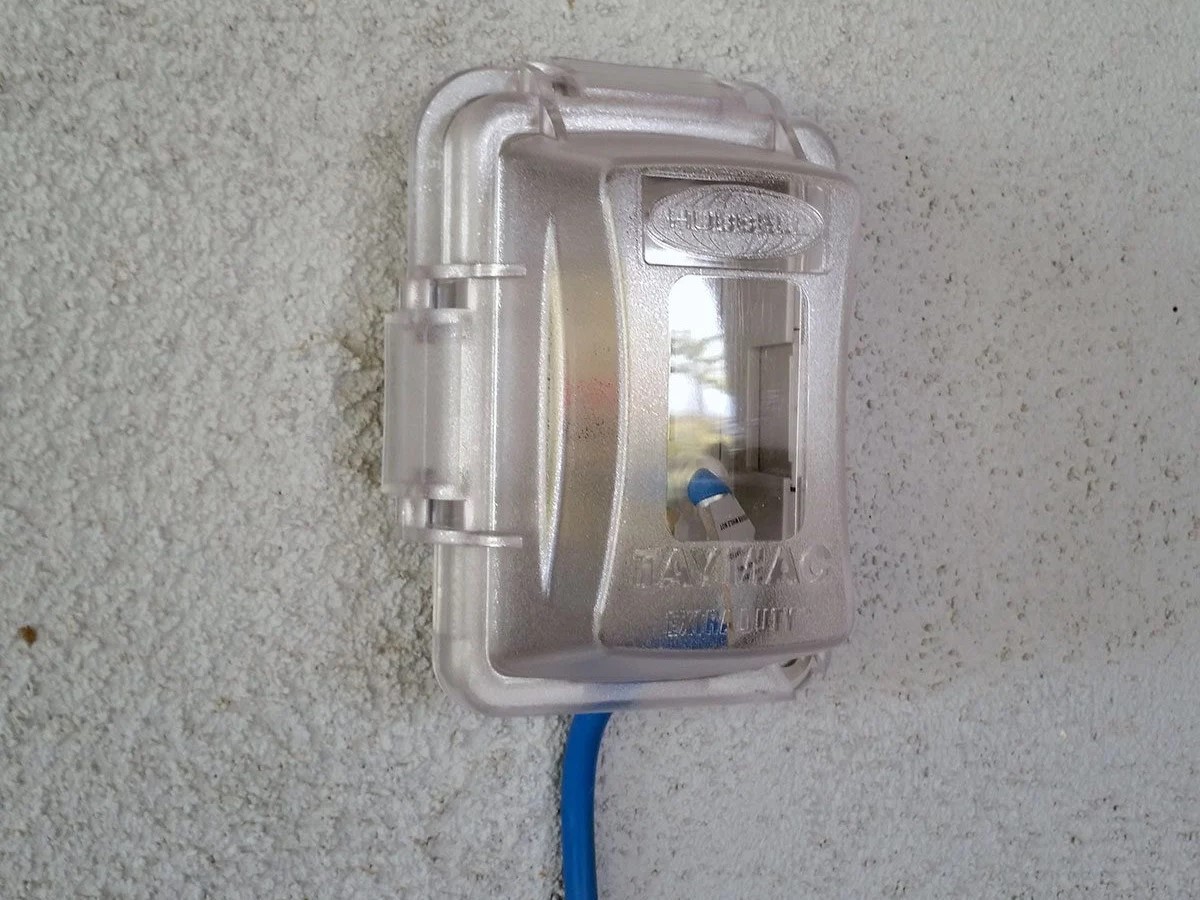
- Attach the Cover Plate: Once the outlet is securely installed, attach the weatherproof cover plate by screwing it into place. This cover plate provides protection against the elements, safeguarding the outlet from moisture and debris.
- Restore Power: After confirming that the wiring is securely connected and the outlet is properly installed, restore power to the GFCI outlet by switching the circuit breaker back to the “on” position. Test the outlet to ensure it is receiving power and functioning correctly.
By following these steps, you can successfully install the new GFCI outlet, providing reliable and safe electrical power to your outdoor space. It’s essential to pay close attention to the wiring connections and ensure that the outlet is securely mounted for optimal performance and safety.
Before replacing an outdoor GFCI outlet, make sure to turn off the power at the breaker. Use a voltage tester to double-check that the power is off before starting the replacement.
Step 4: Test the New GFCI Outlet
After installing the new GFCI outlet, it’s crucial to perform thorough testing to verify its proper functionality and ensure that it provides the necessary protection against ground faults. Follow these steps to test the new GFCI outlet:
- Initial Power Test: Once the power has been restored to the outlet, use a voltage tester to confirm that the GFCI outlet is receiving electrical power. This step ensures that the wiring connections are secure and that the outlet is properly energized.
- Test the GFCI Function: Press the “Test” button on the GFCI outlet to simulate a ground fault. The outlet should immediately trip, cutting off power to the receptacles. This action indicates that the GFCI is functioning correctly by detecting and responding to a potential ground fault.
- Reset the GFCI Outlet: After testing the GFCI function, press the “Reset” button on the outlet to restore power. The GFCI should reset without issues and resume normal operation, allowing electrical power to flow to the connected devices.
- Test Receptacle Function: Plug in a lamp or small appliance to the GFCI outlet and test its functionality. Ensure that the connected device receives power and operates as expected. This step confirms that the GFCI outlet is providing safe and reliable electrical power.
- Test Additional Outlets: If the GFCI outlet is protecting downstream receptacles, test these outlets by using the “Test” and “Reset” buttons on the GFCI to ensure that they are also protected against ground faults.
By diligently testing the new GFCI outlet and verifying its protective functions, you can have confidence in its ability to safeguard against electrical hazards and provide a secure power supply to your outdoor space. Regular testing and maintenance of GFCI outlets are essential for ensuring ongoing safety and performance.
Conclusion
Congratulations! You have successfully learned how to replace an outdoor GFCI outlet, enhancing the safety and functionality of your outdoor electrical system. By following the step-by-step process outlined in this guide, you have taken a proactive approach to maintaining a secure and reliable power supply to your outdoor space.
Replacing an outdoor GFCI outlet is a valuable skill that empowers homeowners to address electrical issues and ensure the safety of their outdoor electrical connections. By adhering to safety protocols, using the appropriate tools and materials, and following the recommended procedures, you have demonstrated a commitment to maintaining a safe and efficient electrical infrastructure.
Remember to perform regular checks and testing on your GFCI outlets to ensure continued protection against ground faults and electrical hazards. Additionally, if you encounter any complexities or uncertainties during the replacement process, don’t hesitate to seek professional assistance from a qualified electrician.
By prioritizing electrical safety and staying informed about proper installation and maintenance practices, you contribute to a secure and functional outdoor environment for yourself, your family, and your guests. We hope this guide has equipped you with the knowledge and confidence to tackle outdoor GFCI outlet replacements with ease and proficiency.
Thank you for joining us in this instructional journey, and we wish you continued success in your DIY electrical projects and home maintenance endeavors.
Frequently Asked Questions about How To Replace An Outdoor Gfci Outlet
Was this page helpful?
At Storables.com, we guarantee accurate and reliable information. Our content, validated by Expert Board Contributors, is crafted following stringent Editorial Policies. We're committed to providing you with well-researched, expert-backed insights for all your informational needs.


0 thoughts on “How To Replace An Outdoor Gfci Outlet”