Furniture
How To Replace An Outdoor Lamp Post
Modified: October 18, 2024
Learn how to replace an outdoor lamp post with our step-by-step guide. Find the perfect furniture for your outdoor space and enhance its ambiance.
(Many of the links in this article redirect to a specific reviewed product. Your purchase of these products through affiliate links helps to generate commission for Storables.com, at no extra cost. Learn more)
Introduction
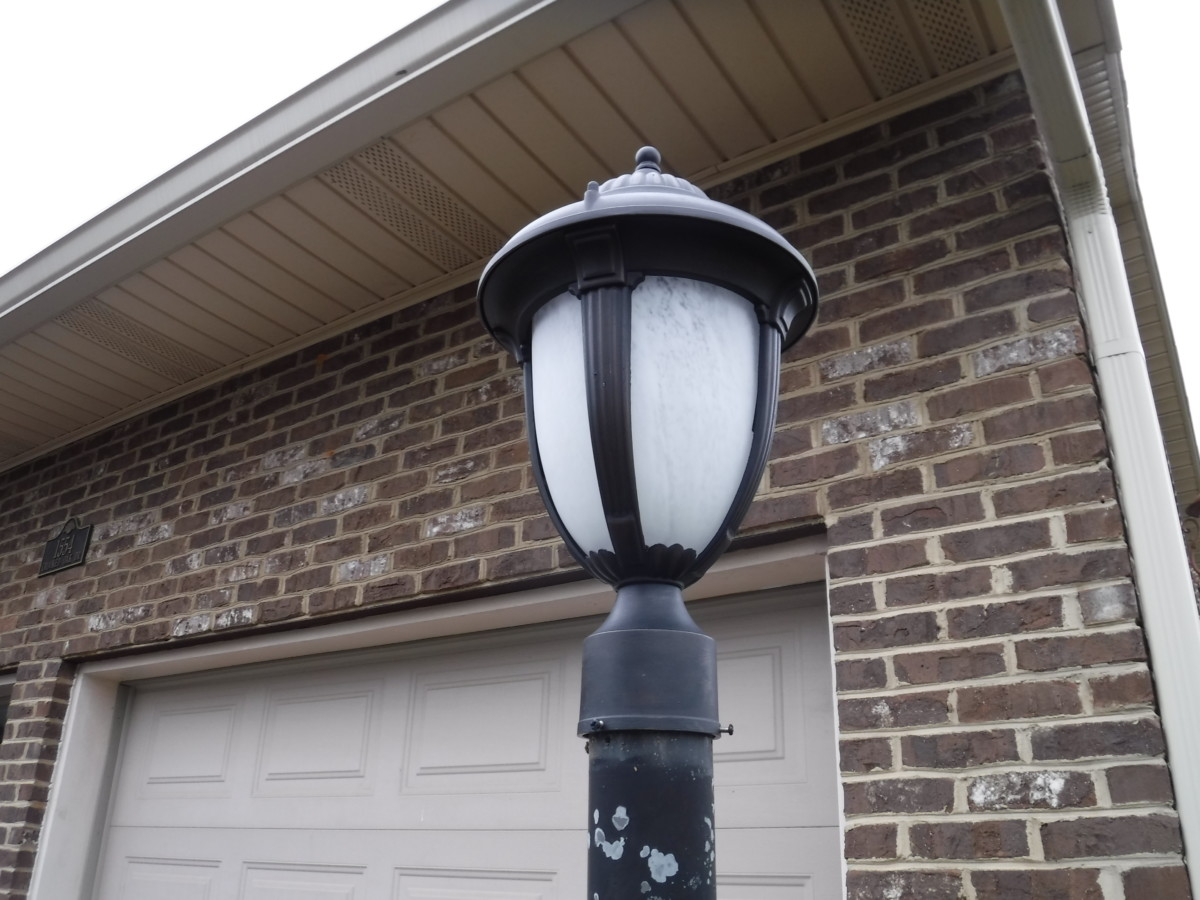
Welcome to our comprehensive guide on how to replace an outdoor lamp post. Whether you’re looking to upgrade your existing lamp post or need to replace a damaged one, this step-by-step tutorial will walk you through the process. A properly functioning outdoor lamp post not only provides you with enhanced safety and security but also adds a touch of beauty and sophistication to your outdoor space.
Before we embark on this DIY journey, it’s important to prioritize safety. Make sure to follow all safety measures outlined in this guide and use caution when working with electrical components. If you’re not comfortable or confident in your abilities, it’s always best to consult a professional electrician for assistance.
Now, let’s gather the necessary tools and materials and get started on replacing and installing your outdoor lamp post.
Key Takeaways:
- Prioritize safety by turning off power, wearing protective gear, and following manufacturer’s instructions. Properly prepare the installation area and secure the new lamp post for enhanced safety, security, and aesthetic appeal.
- Carefully assemble, wire, and test the new lamp post, ensuring proper functionality and troubleshooting any issues. Complete the process by securing the lamp post, tidying up the area, and enjoying the benefits of reliable outdoor lighting.
Read more: How To Decorate A Lamp Post
Safety Measures
When working with electricity and outdoor installations, safety should always be the top priority. Taking the necessary precautions will help ensure a smooth and risk-free process. Here are some essential safety measures to keep in mind:
- Turn off the power: Before starting any electrical work, locate the circuit breaker or fuse box and turn off the power to the existing lamp post. Use a voltage tester to double-check that there is no electricity flowing to the area.
- Wear protective gear: Put on protective gloves and safety goggles to shield your hands and eyes from any potential hazards. Additionally, consider wearing appropriate footwear with non-slip soles to prevent accidents.
- Work on a stable surface: Ensure that you are working on a stable and flat surface to maintain balance and stability throughout the installation process. Avoid working on wet or slippery surfaces to prevent accidents.
- Use insulated tools: When handling electrical components, use insulated tools to minimize the risk of electrical shock. Insulated screwdrivers and pliers can provide an extra layer of protection.
- Check for underground utilities: Before digging any holes for the new lamp post, call your local utility companies to mark the location of any underground utilities. This will help prevent accidental damage to gas, water, or electrical lines.
- Follow manufacturer’s instructions: Read and follow the instructions provided by the manufacturer for both the old and new lamp post. This will ensure that you are using the right methods and techniques for installation and wiring.
- Avoid working in adverse weather: Perform the replacement and installation on a clear day, free from rain, snow, or strong winds. Inclement weather conditions can increase the risk of accidents or damage to the electrical components.
By adhering to these safety measures, you will create a secure environment for yourself and minimize any potential risks associated with the task at hand. Prioritizing safety will allow you to complete the installation with confidence and peace of mind.
Tools and Materials Needed
Before diving into the replacement and installation process, let’s gather all the necessary tools and materials. Having these items readily available will streamline the project and ensure that you have everything you need to complete the task at hand.
Here’s a list of the essential tools and materials needed:
- Screwdriver set: A set of screwdrivers with various sizes and types (flathead and Phillips) will come in handy for removing screws and securing the new lamp post.
- Wire strippers: Wire strippers are essential for removing the insulation from the electrical wires to prepare them for connecting to the new lamp post.
- Pliers: Pliers will be needed to manipulate and secure electrical connections, such as twisting wires or tightening nuts.
- Tape measure: Use a tape measure to ensure accurate measurements for spacing and positioning of the lamp post.
- Shovel: A shovel will be necessary for digging the hole for the new lamp post’s foundation.
- Level: A level will help ensure that the lamp post is straight and properly aligned during the installation process.
- Wire connectors: Wire connectors, such as wire nuts or crimp connectors, are needed to secure the electrical connections between the existing wiring and the new lamp post.
- Waterproof sealant: Use a waterproof sealant to protect the electrical connections from moisture and ensure long-lasting durability.
- New lamp post: Purchase a new lamp post that fits your desired style and meets your outdoor lighting needs. Ensure that it comes with all the necessary components for installation.
- Concrete mix: If the new lamp post requires a foundation, you’ll need concrete mix to anchor it securely into the ground.
- Safety gear: Don’t forget to gather the essential safety gear, including gloves, safety goggles, and appropriate footwear.
Having these tools and materials prepared beforehand will save you time and prevent unnecessary delays during the installation process. It’s always better to be fully equipped before starting any DIY project to ensure a smooth and successful outcome.
Removing the Old Lamp Post
Now that you have gathered all the tools and materials, it’s time to remove the old lamp post. Follow these steps to safely and effectively remove the existing fixture:
- Turn off the power: Make sure the power to the existing lamp post is turned off at the circuit breaker or fuse box to avoid any electrical hazards.
- Remove the lightbulb: Start by unscrewing and removing the lightbulb from the lamp post. Set it aside for later use or disposal.
- Disconnect the wiring: Carefully remove the cover or housing of the lamp post to expose the wiring connections. Use a screwdriver to loosen the screws holding the wires together. Take note of how the wires are connected to ensure proper reinstallation later.
- Detach the base of the lamp post: Depending on the type of lamp post, there may be screws or bolts securing the base to the ground. Use a suitable tool, such as a wrench or socket set, to loosen and remove these fasteners.
- Remove the lamp post: With the base detached, carefully lift and remove the old lamp post from its foundation or mounting bracket. If necessary, have a helper assist you in lifting the post, especially if it is heavy.
- Inspect the wiring: Take a moment to inspect the wiring for any signs of damage or wear. If you notice any issues, it is recommended to replace the wiring or consult a professional electrician for assistance.
- Cap and secure the wiring: To ensure safety, cap the exposed ends of the wiring with wire connectors to prevent any accidental contact with electricity. Secure the excess wiring out of the way using cable ties or electrical tape.
- Clean the installation area: Before proceeding with the new installation, clean the area where the old lamp post was located. Remove any debris, dirt, or old foundation remnants to create a clean and level surface for the new lamp post.
With the old lamp post successfully removed, you are now ready to prepare the installation area for the new fixture. Follow the next steps in this guide to ensure a smooth and efficient installation process.
Preparing the Installation Area
With the old lamp post removed, it’s time to prepare the installation area for the new fixture. Proper preparation will ensure a stable foundation and make the installation process smoother. Follow these steps to prepare the area:
- Check the foundation: Examine the foundation where the old lamp post was located. If it is unstable or damaged, you may need to dig a new hole for the new lamp post or repair the existing foundation.
- Measure and mark the location: Using a tape measure, carefully measure and mark the desired location for the new lamp post. Make sure it is positioned at the correct height and aligns with your outdoor lighting needs.
- Dig a hole: If you need to excavate a new hole, use a shovel or an auger to dig a hole that is deep enough to accommodate the new lamp post’s foundation. Refer to the manufacturer’s instructions for the recommended hole depth and diameter.
- Create a stable base: Ensure that the bottom of the hole is leveled and firm. If necessary, add a layer of gravel or sand to create a stable base for the lamp post foundation.
- Mix and pour concrete (if required): If your new lamp post requires a concrete foundation, follow the instructions on the concrete mix packaging to prepare the mixture. Pour the concrete into the hole, leaving enough space for the lamp post’s base to be inserted.
- Position the lamp post’s base: Insert the lamp post’s base into the hole or onto the concrete foundation, ensuring that it is level and aligned with the markings you made earlier. Make any necessary adjustments to ensure a proper fit.
- Secure the lamp post’s base: Once the base is properly positioned, secure it using screws or bolts, following the manufacturer’s instructions. Ensure that the base is tightly secured to provide stability for the lamp post.
- Allow the concrete to cure (if applicable): If you poured concrete for the foundation, make sure to allow it sufficient time to cure as per the instructions provided. This typically takes at least 24 to 48 hours, but refer to the specific concrete mix guidelines for accurate curing times.
By properly preparing the installation area, you’ll create a solid and stable foundation for your new lamp post, ensuring its longevity and stability. With the area ready, you’re now ready to assemble the new lamp post. Continue reading the guide for the next steps.
Read more: How To Install A Lamp Post
Assembly of the New Lamp Post
Now that you have prepared the installation area, it’s time to assemble the new lamp post. Follow these steps to properly assemble the components:
- Unbox and inspect: Carefully unbox the new lamp post and inspect all the components to ensure everything is present and in good condition. Refer to the manufacturer’s instructions for any specific assembly steps.
- Attach the post: Secure the post to the lamp post’s base according to the manufacturer’s instructions. This usually involves inserting the post into the pre-drilled holes and tightening the screws or bolts to securely attach it to the base.
- Install the mounting bracket: If your new lamp post requires a mounting bracket, follow the manufacturer’s instructions to install it on top of the post. This bracket will be used to attach the light fixture to the lamp post.
- Attach the light fixture: Install the light fixture onto the mounting bracket, ensuring it is securely mounted. Follow the manufacturer’s instructions for wiring and connecting the light fixture to the lamp post.
- Connect the wiring: Take the electrical wires from the new lamp post and connect them to the existing wiring. Use wire connectors, such as wire nuts or crimp connectors, to join the wires securely. Match the corresponding wires by color (e.g., black to black, white to white) to ensure proper electrical connections.
- Secure and hide the wiring: Once the wiring is properly connected, carefully tuck the wires into the lamp post or use provided clips to secure them in place. Make sure the wires are hidden and not exposed to the elements.
- Double-check the connections: Before proceeding, double-check that all wiring connections are secure and tight. Give each wire a gentle tug to ensure they are firmly connected.
- Test the light: Now that the lamp post is assembled and wired, restore power to the circuit at the circuit breaker or fuse box. Flip the switch and test the light to ensure it is working correctly. If there are any issues, double-check the wiring connections and troubleshoot accordingly.
By carefully following these assembly steps, you will have successfully assembled your new lamp post and ensured proper wiring connections. The next step is to secure the lamp post in place and perform any necessary testing or troubleshooting. Continue reading to learn more.
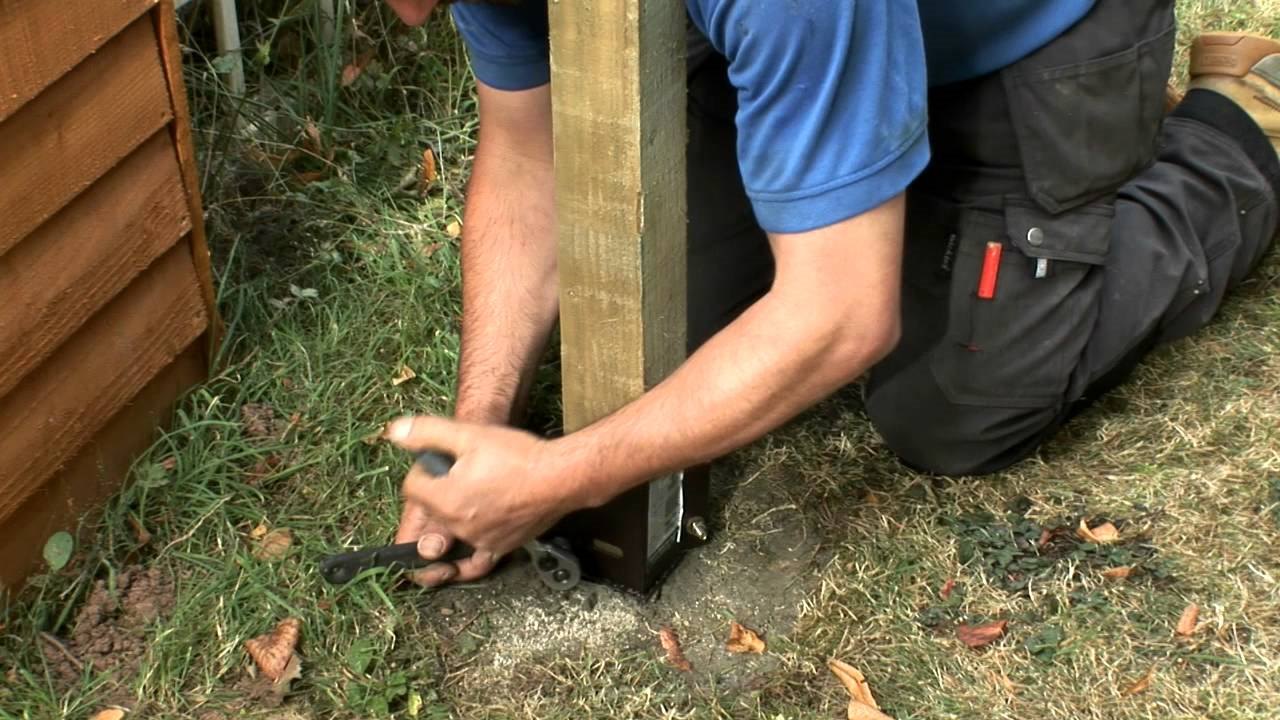
When replacing an outdoor lamp post, make sure to turn off the power at the breaker box before starting any work. This will ensure your safety while working with electrical components.
Wiring the New Lamp Post
Properly wiring your new lamp post is crucial for its functionality and safety. Follow these steps to ensure a successful wiring process:
- Turn off the power: As a safety precaution, turn off the power to the circuit at the circuit breaker or fuse box before working with the electrical components.
- Examine the existing wiring: Take a close look at the existing wiring and assess its condition. If the wiring is damaged or frayed, it is recommended to replace it or seek assistance from a professional electrician.
- Strip the wires: Use wire strippers to carefully remove about half an inch of insulation from the ends of the wires on both the new lamp post and the existing wiring. This will expose the copper conductor to make the electrical connection.
- Connect the wires: Match the corresponding wires by color and twist them together firmly. For example, connect the black wire from the new lamp post to the black wire from the existing wiring, and do the same for the white wires. To secure the connection, twist a wire connector (wire nut) onto each pair of twisted wires.
- Wrap with electrical tape: After connecting the wires, wrap electrical tape around the wire connectors to provide added protection and to keep them securely in place.
- Tuck and secure the wiring: Carefully tuck the connected and taped wires into the lamp post. Use provided clips or fasteners to secure them in place, ensuring they are hidden and protected from the elements.
- Double-check the connections: Before proceeding, double-check that all wiring connections are secure and tight. Give each wire a gentle tug to ensure they are firmly connected.
- Turn on the power: Once you have confirmed that the wiring is properly connected and secured, restore power to the circuit at the circuit breaker or fuse box to provide electricity to the new lamp post.
- Test the light: Flip the switch and test the light to ensure it is working correctly. If the light does not turn on or there are any issues, double-check the wiring connections and troubleshoot accordingly.
By following these steps, you will successfully wire your new lamp post and ensure a reliable electrical connection. The next step is to secure the lamp post in place and perform any necessary testing or troubleshooting. Continue reading to learn more.
Securing the Lamp Post
Securing the lamp post properly is essential to ensure stability and longevity. Follow these steps to secure the lamp post in place:
- Position the lamp post: Carefully position the assembled lamp post in the desired location, aligning it with any markings you made during the preparation stage. Make sure it is level and straight.
- Adjust the base: If the lamp post has an adjustable base, use a level to ensure it is perfectly vertical. Make any necessary adjustments to achieve a balanced and straight position.
- Secure the lamp post: Depending on the type of lamp post and base, there are several methods to secure it in place. Common methods include driving screws or bolts into the base’s pre-drilled holes, using anchors or fasteners, or pouring concrete around the base for added stability.
- Tighten the fasteners: Using the appropriate tools, tighten the screws or bolts on the lamp post’s base to secure it firmly in place. Ensure that the lamp post is stable and does not wobble or sway.
- Check for level and alignment: Use a level to confirm that the lamp post is still straight and aligned as you tighten the fasteners. Make any necessary adjustments to maintain the proper level and alignment.
- Inspect the stability: Give the lamp post a gentle shake to test its stability. If it feels loose or unstable, revisit the fasteners and make sure they are tightened securely.
- Make final adjustments: Take a step back and visually inspect the lamp post’s positioning and stability. If any further adjustments are needed, make them now to ensure the post is set securely.
By following these steps, you will securely fasten the lamp post in place, providing stability and ensuring its durability over time. The next step is to test the lamp post and troubleshoot any potential issues. Continue reading to learn more.
Testing and Troubleshooting
After securing the lamp post, it’s important to test the functionality and troubleshoot any potential issues. Follow these steps to ensure that your new lamp post is working properly:
- Restore power: Make sure the power to the circuit is turned on at the circuit breaker or fuse box to provide electricity to the lamp post.
- Flip the switch: Go to the switch that controls the new lamp post and flip it to the “On” position. This should activate the light fixture and illuminate the area.
- Test the light: Observe the lamp post and ensure that the light is functioning correctly. If the light does not turn on, or if there are any issues with the brightness or operation, proceed to the next step.
- Check the wiring: Carefully inspect the wiring connections inside the lamp post. Ensure that all connections are securely fastened and that there are no loose or exposed wires. Check for any signs of damage or fraying.
- Test the power supply: Use a multimeter or voltage tester to check for power at the lamp post’s electrical connections. If there is no power or a weak signal, double-check the wiring connections and consult a professional electrician if needed.
- Replace the lightbulb: If the lightbulb is not working or if it appears dim, try replacing it with a new bulb. Make sure to use the appropriate wattage and type of bulb recommended by the manufacturer.
- Inspect the sensor (if applicable): If your lamp post has a motion sensor or photocell, make sure it is properly positioned and unobstructed. Adjust its sensitivity or settings as per the manufacturer’s instructions if needed.
- Double-check the switch: Ensure that the switch controlling the lamp post is in good working condition. If necessary, replace the switch or seek assistance from an electrician.
- Consult a professional: If you have followed all troubleshooting steps and are still experiencing issues with your lamp post, it may be best to consult a professional electrician for further assistance. They will have the expertise to diagnose and resolve any electrical problems.
By following these steps and troubleshooting potential issues, you can ensure that your new lamp post is functioning properly and providing the desired lighting for your outdoor space. With the testing and troubleshooting completed, it’s time to finalize the installation process. Continue reading for the final steps.
Read more: How Tall Is A Lamp Post
Final Steps and Cleanup
With the lamp post installed, tested, and any issues resolved, it’s time to wrap up the final steps and tidy up the installation area. Follow these steps to complete the process:
- Secure any loose wires: If there are any loose wires or connectors, make sure to secure them inside the lamp post using clips or fasteners. This will prevent them from dangling or becoming damaged.
- Apply waterproof sealant: To protect the electrical connections from moisture and ensure long-lasting durability, apply a waterproof sealant around the openings and connections of the lamp post. Follow the manufacturer’s instructions for the appropriate sealant and application method.
- Trim or hide excess wiring: If there is any excess wiring visible, trim it to an appropriate length or carefully tuck it inside the lamp post. This will create a cleaner and neater appearance.
- Clean the lamp post: Use a damp cloth or sponge to clean the lamp post and remove any dirt or debris that may have accumulated during the installation process. Pay special attention to the light fixture and any glass or decorative elements, ensuring they are clean and clear.
- Dispose of old materials: Properly dispose of any old or discarded materials, including the old lamp post, packaging, and other debris. Follow local recycling and waste disposal guidelines for appropriate disposal methods.
- Inspect and adjust the light angle (if applicable): If the lamp post allows for adjustable light direction, adjust the angle based on your preferences and lighting needs. Ensure that the light is properly illuminating the desired area.
- Enjoy your new outdoor lighting: With the installation and cleanup complete, it’s time to enjoy the benefits of your new lamp post. Step back and admire the enhanced safety, security, and aesthetic appeal it brings to your outdoor space.
By following these final steps and tidying up the installation area, you will have successfully completed the replacement and installation of your outdoor lamp post. Remember to periodically maintain and inspect your lamp post to ensure its continued functionality and appearance. Enjoy the beauty and functionality it brings to your outdoor area!
Conclusion
Congratulations on successfully replacing and installing your outdoor lamp post! By following this comprehensive guide and taking the necessary safety measures, you have improved the safety, security, and aesthetic appeal of your outdoor space. Your new lamp post will provide you with reliable illumination and enhance the overall ambiance of your surroundings.
Throughout the process, you learned how to safely remove the old lamp post, prepare the installation area, assemble the new lamp post, wire it properly, secure it in place, and troubleshoot any potential issues. By adhering to the steps outlined in this guide and consulting the manufacturer’s instructions, you were able to complete the installation with confidence.
Remember to periodically inspect and maintain your lamp post to ensure its longevity and performance. Keep an eye on the wiring, clean the fixtures, and replace the lightbulbs as needed. By taking proper care, your new lamp post will continue to enhance your outdoor space for years to come.
If you encountered any difficulties during the installation or are unsure about any step, it is always a good idea to seek assistance from a professional electrician. They have the expertise and knowledge to handle any electrical complexities and ensure the highest levels of safety and functionality.
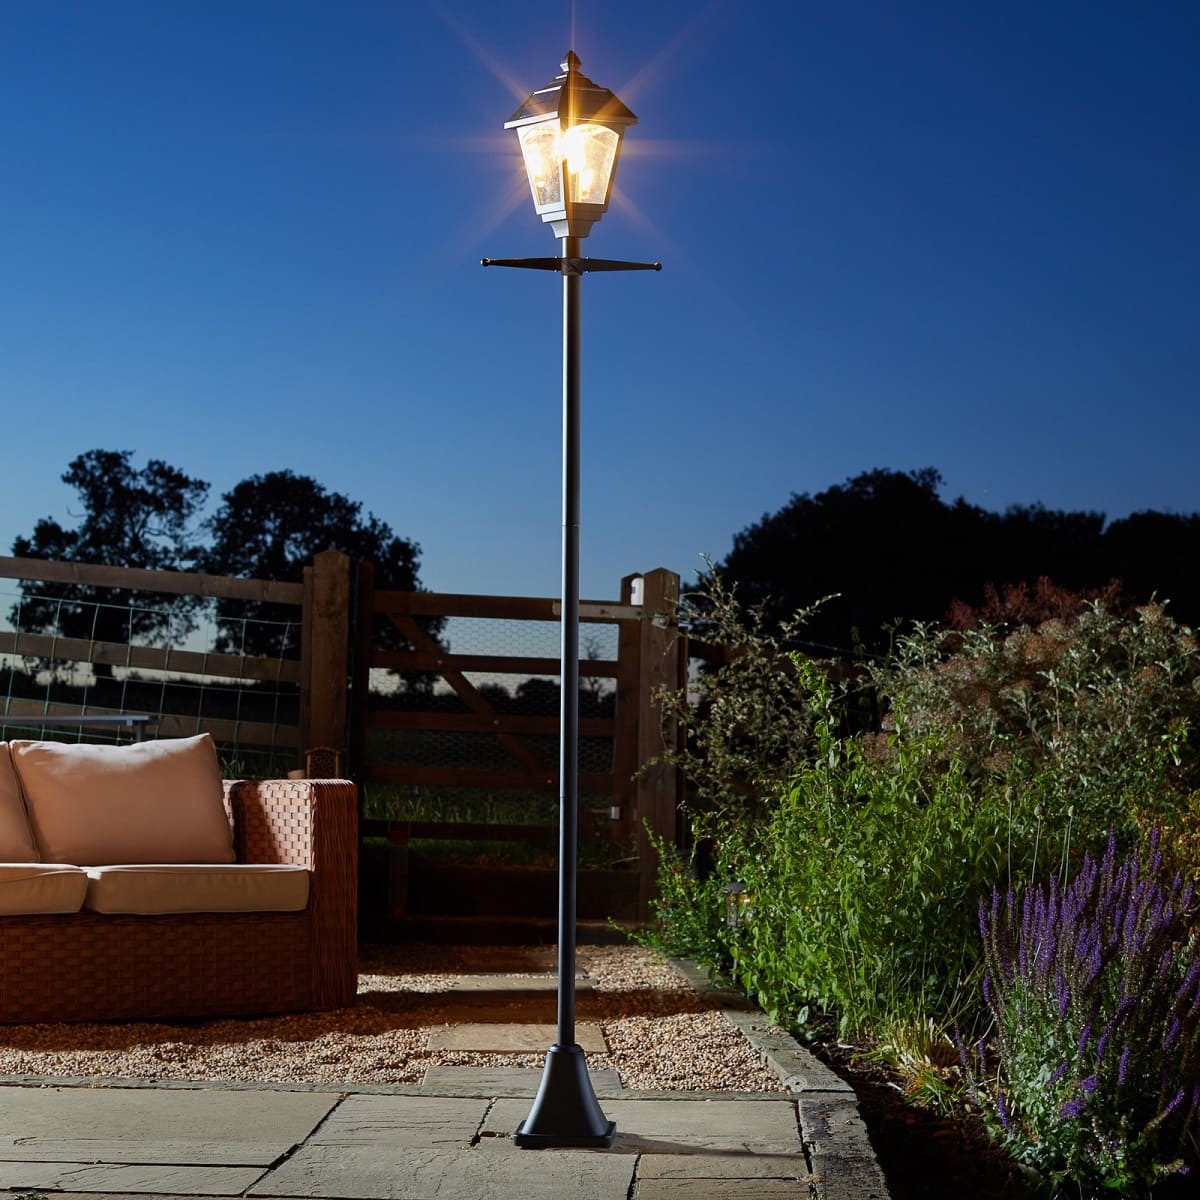
Now, as you step back and admire your newly installed lamp post, bask in the soft, welcoming glow it casts upon your outdoor area. Whether it’s illuminating your pathway, highlighting your garden, or creating a cozy ambiance, your new lamp post will undoubtedly enhance the beauty and functionality of your outdoor space.
Enjoy the benefits of your new outdoor lighting and savor the warm atmosphere it brings to your evenings spent outdoors. Sit back, relax, and let your new lamp post illuminate your outdoor space while you create cherished memories with your loved ones.
Thank you for following this guide, and we wish you many delightful moments with your newly installed outdoor lamp post!
Frequently Asked Questions about How To Replace An Outdoor Lamp Post
Was this page helpful?
At Storables.com, we guarantee accurate and reliable information. Our content, validated by Expert Board Contributors, is crafted following stringent Editorial Policies. We're committed to providing you with well-researched, expert-backed insights for all your informational needs.