Furniture
How To Use A Kerosene Lamp
Modified: December 7, 2023
Discover the charm and functionality of using a kerosene lamp as furniture. Learn how to safely incorporate this timeless piece into your home décor for a warm and inviting glow.
(Many of the links in this article redirect to a specific reviewed product. Your purchase of these products through affiliate links helps to generate commission for Storables.com, at no extra cost. Learn more)
Introduction
Welcome to the world of kerosene lamps! These timeless sources of light have been used for centuries, providing illumination in homes, cabins, and even outdoor settings. While modern lighting options like electricity and LED technology have become the norm, there is a certain nostalgic charm associated with the warm glow of a kerosene lamp.
In this article, we will delve into the basics of using a kerosene lamp and guide you through the process, step by step. From understanding the inner workings of the lamp to properly lighting and maintaining it, we will cover all the essential aspects to ensure you can make the most of this traditional lighting option.
Whether you’re a vintage enthusiast looking to create an old-world ambiance or simply in need of an alternative light source during power outages or outdoor adventures, learning how to use a kerosene lamp is a valuable skill. So, let’s dive in and unlock the timeless beauty and practicality of these illuminating devices.
Key Takeaways:
- Embrace the timeless charm and practicality of kerosene lamps by understanding their basics, preparing them properly, and enjoying their warm glow while prioritizing safety and regular maintenance.
- Experience the nostalgia and resilience of kerosene lamps through proper usage, lighting, flame adjustment, maintenance, and cleaning, ensuring their longevity and cherished ambiance in your home.
Read more: When Was The Kerosene Lamp Invented
Understanding the Basics of a Kerosene Lamp
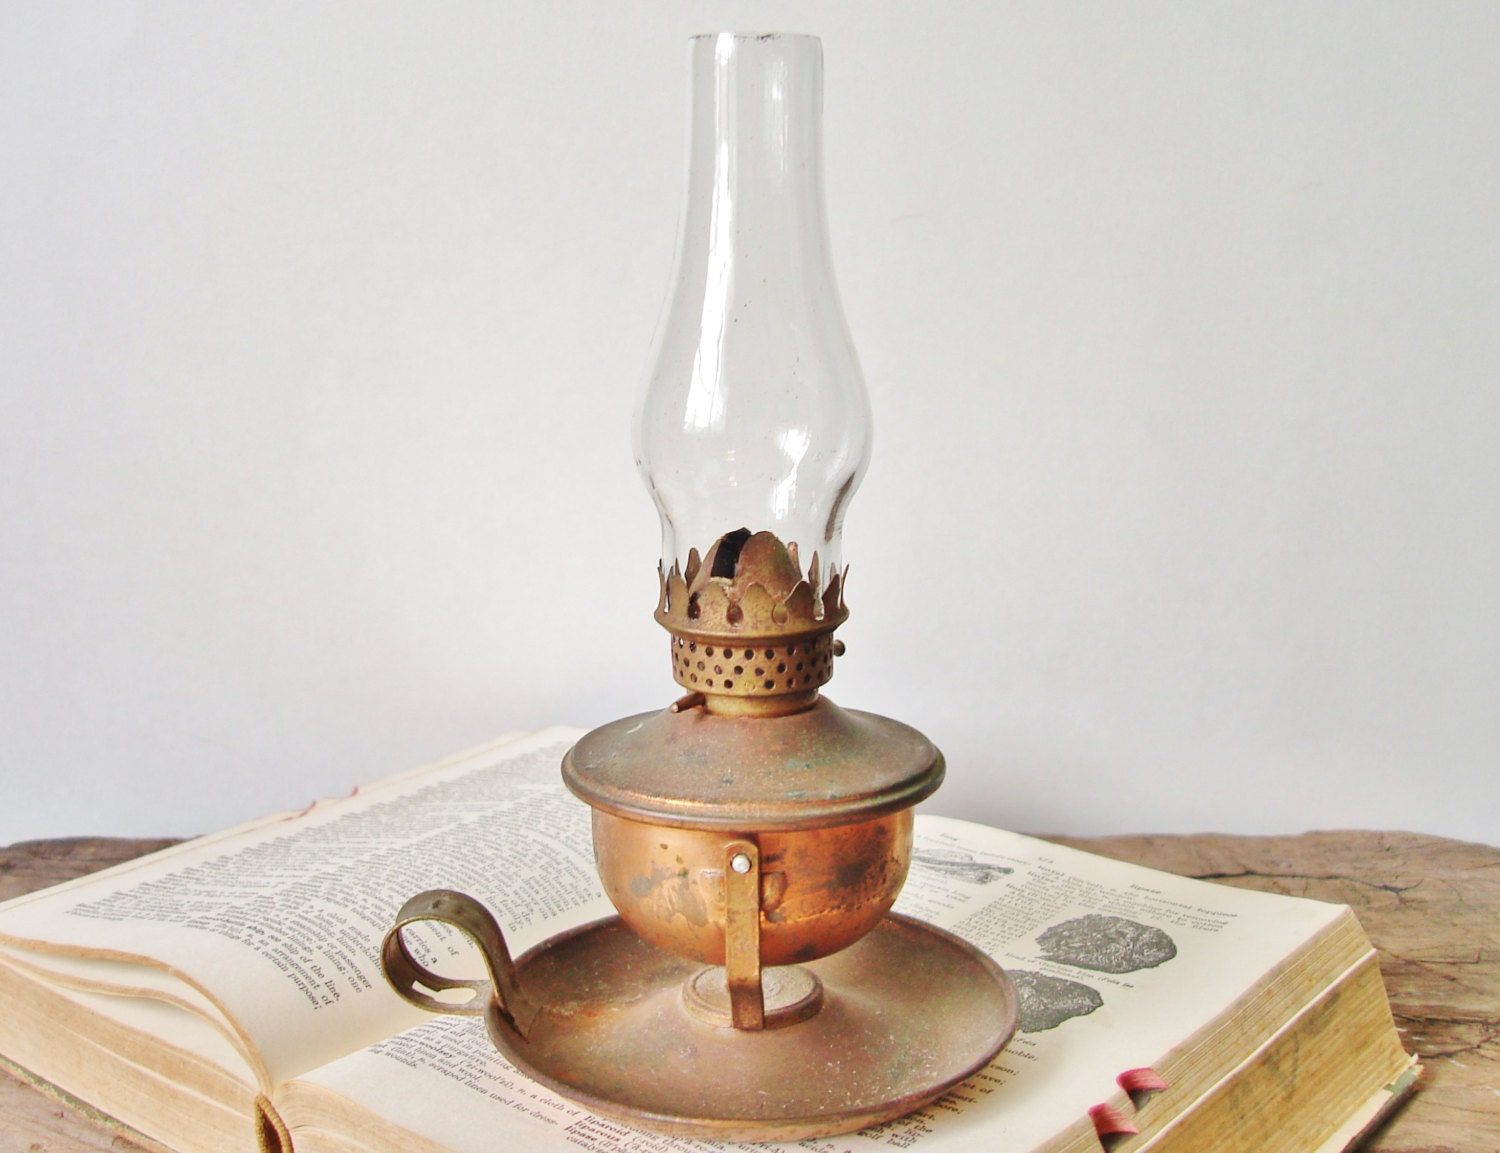
Before we begin using a kerosene lamp, it’s essential to understand its basic components and how they work together to produce light. A typical kerosene lamp consists of the following parts:
- Font: This is the reservoir where the kerosene is stored. It is typically made of glass or metal and has a capacity ranging from a few ounces to several quarts.
- Burner: The burner is responsible for holding the wick and regulating the flow of kerosene. It usually consists of a metal or ceramic base with a wick adjustment mechanism.
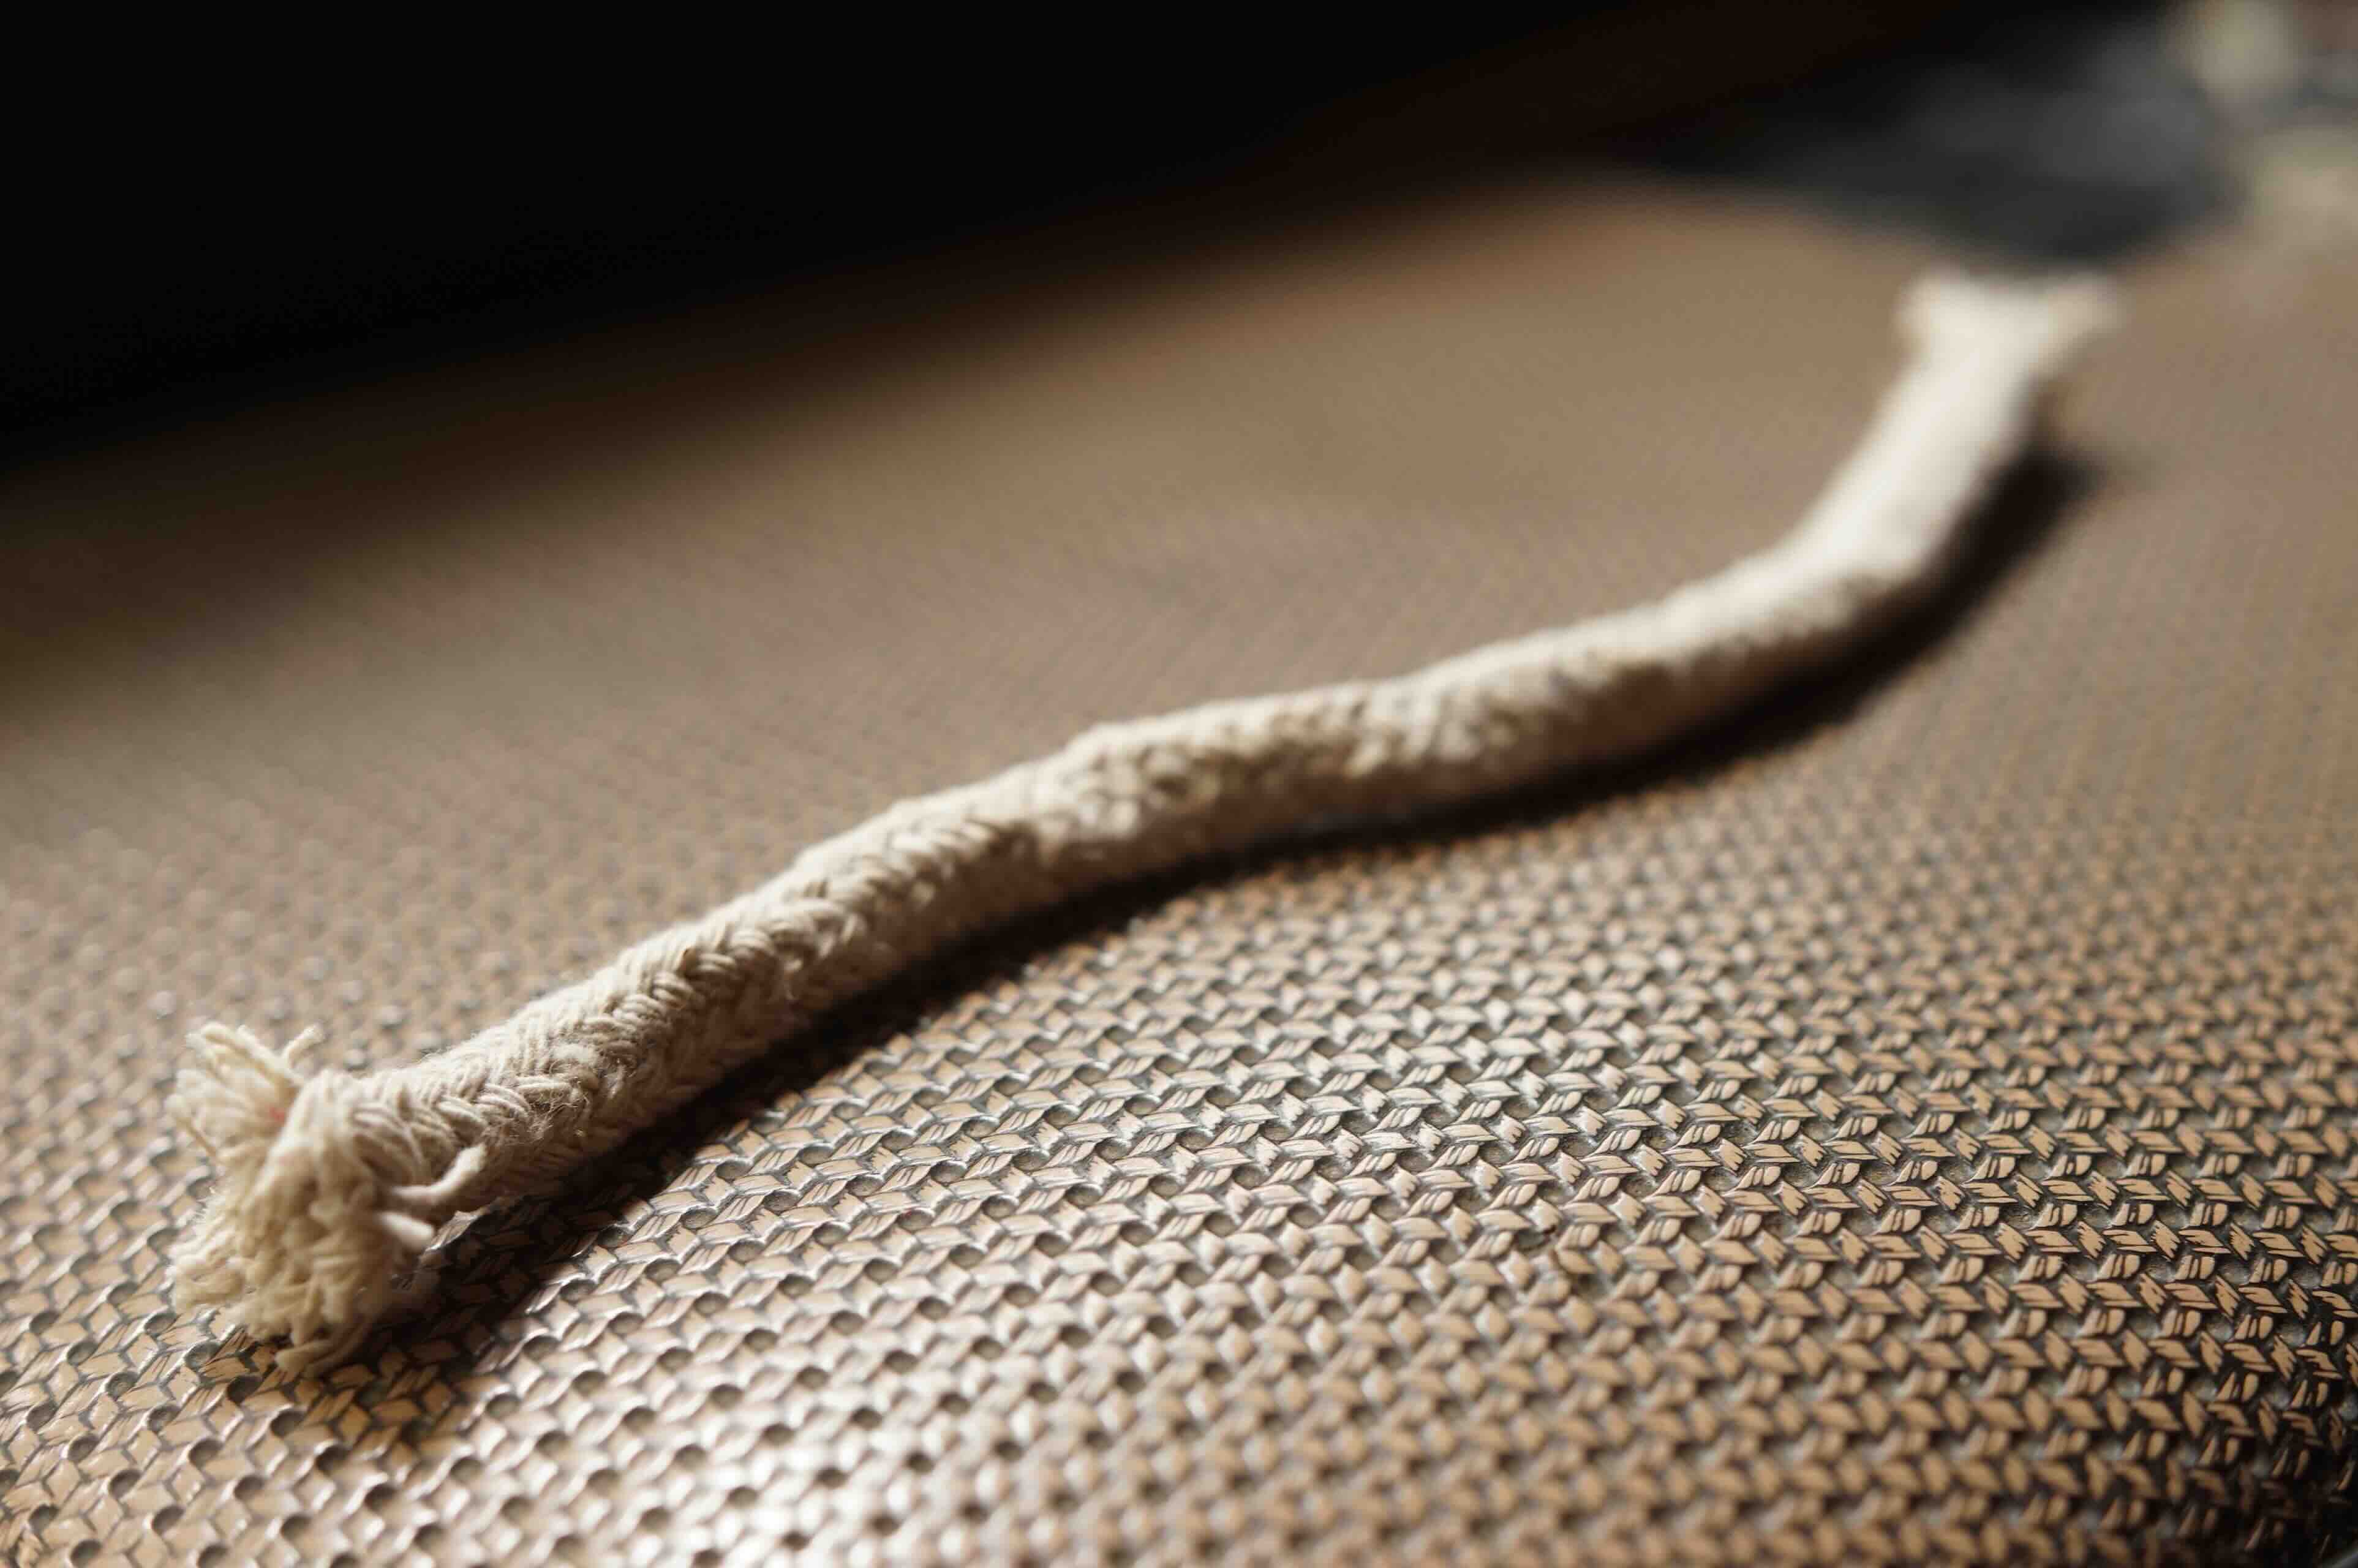
- Wick: The wick absorbs the kerosene from the font and transports it to the burner. It is typically made of cotton or fiberglass and needs to be trimmed regularly to maintain optimal performance.
- Chimney: The chimney is a glass or metal cylinder that encloses the flame and protects it from drafts. It also helps to maximize the efficiency of the lamp by directing the heat upwards.
Now that we know the basic parts of a kerosene lamp, let’s take a closer look at how it works. When the lamp is lit, kerosene is drawn up through the wick via capillary action. The wick acts as a fuel delivery system, allowing the kerosene to reach the burner where it is vaporized and burned. The heat produced creates a flame that produces light and warmth.
It’s important to remember that kerosene lamps should always be used indoors or in well-ventilated outdoor areas. Due to the combustion process, they produce carbon monoxide and should never be used in enclosed spaces without proper ventilation.
Now that we have a better understanding of the fundamental components and workings of a kerosene lamp, let’s move on to preparing the lamp for use.
Preparing the Kerosene Lamp
Before lighting your kerosene lamp, it’s important to properly prepare it to ensure optimal performance and safety. Here’s a step-by-step guide to help you prepare your lamp:
- Clean and inspect the lamp: Start by cleaning the various parts of the lamp, including the font, burner, and chimney. Remove any dust, dirt, or residue that may have accumulated. Inspect the components for any signs of damage or wear and replace any worn-out parts as needed.
- Choose the right type of kerosene: It’s crucial to use only high-quality, low-sulfur kerosene specifically designed for lamps. Avoid using alternative fuels, as they can lead to poor performance and potential safety hazards. Look for kerosene that is clear and free from impurities.
- Fill the lamp with kerosene: Carefully pour kerosene into the font, ensuring not to overfill it. Leave some space at the top to allow for expansion. Take care not to spill any kerosene, as it is flammable. Use a funnel if necessary. Once filled, securely attach the burner to the lamp.
- Prime the wick: Before lighting the lamp, it’s important to prime the wick. This helps to ensure a smooth and consistent flame. To prime the wick, turn the wick adjustment mechanism to its highest position and allow the wick to soak in kerosene for a few minutes.
- Trim the wick: Next, trim the wick to a length of approximately 1/4 inch. A properly trimmed wick ensures a clean and efficient burn. Avoid trimming it too short, as this can lead to a weak flame or difficulty in lighting.
By following these steps, you can effectively prepare your kerosene lamp for use. Once the lamp is prepared, it’s time to ignite the flame. Let’s move on to the next section to learn how to light the kerosene lamp.
Lighting the Kerosene Lamp
Now that your kerosene lamp is prepared, it’s time to light it. Follow these steps to safely ignite the flame:
- Find a safe and stable surface: Place your kerosene lamp on a sturdy, non-flammable surface. Ensure that the lamp is stable and won’t be easily knocked over.
- Ensure proper ventilation: If you are lighting the lamp indoors, make sure there is adequate ventilation to prevent the buildup of carbon monoxide. Open a window or door for fresh air circulation.
- Move away any flammable objects: Keep the area around the lamp clear of any flammable materials such as curtains, papers, or furniture. Maintain a safe distance between the lamp and any potential fire hazards.
- Hold a lit match or lighter above the chimney: Bring a lit match or lighter close to the chimney of the lamp. Gently lower it into the chimney, near the wick, to ignite the flame. Be cautious of your fingers and avoid any contact with the flame.
- Observe the flame: Once the flame is lit, observe the quality of the flame. It should burn steadily, with a bright and steady glow. If the flame appears erratic or dim, you may need to adjust the wick or fuel flow using the adjustment mechanism on the burner.
- Replace the chimney: After the flame is established, carefully place the chimney back onto the lamp. This will help protect the flame from drafts and improve the efficiency of the lamp.
Now that your kerosene lamp is beautifully lit, you can enjoy the warm glow and the gentle flickering of the flame. As with any open flame, it’s important to exercise caution and attend to the lamp while it is burning. Avoid leaving the lamp unattended and keep it out of reach of children or pets.
Now that you have successfully lit your kerosene lamp, let’s move on to the next section to learn how to adjust the flame for optimal lighting.
When using a kerosene lamp, always ensure that the wick is trimmed to 1/8 inch and the lamp is placed on a stable, flat surface away from any flammable materials.
Adjusting the Flame
Once your kerosene lamp is lit, you may need to adjust the flame to achieve the desired brightness and intensity. Properly adjusting the flame not only enhances the lighting but also ensures the lamp operates efficiently. Here are some tips for adjusting the flame:
- Use the wick adjustment mechanism: Most kerosene lamps have a wick adjustment mechanism that allows you to control the flame height. Rotate the mechanism clockwise to raise the wick, increasing the flame, and counterclockwise to lower the wick, decreasing the flame.
- Start with a low flame: Begin by setting the flame to a lower height and gradually increase it until you achieve the desired brightness. Starting with a lower flame helps prevent excessive heat and soot buildup.
- Observe the flame color: Ideally, the flame should appear blue with a hint of yellow at the tip. If the flame is predominantly yellow, it may indicate that the wick needs trimming. Trim the wick and adjust the flame accordingly.
- Watch for soot or smoke: If you notice excessive soot or smoke, it may indicate that the lamp is not burning efficiently. Adjust the wick height or reduce the fuel flow to achieve a clean, smoke-free burn.
- Consider external factors: Keep in mind that external factors such as temperature, air currents, and altitude can affect the performance of a kerosene lamp. Adjust the flame accordingly to compensate for these factors.
By adjusting the flame, you can create the perfect lighting ambiance while ensuring the lamp operates safely and efficiently. Experiment with different flame heights to find the optimal balance of brightness and fuel consumption for your specific needs.
Next, we will discuss how to properly maintain your kerosene lamp to ensure its longevity and reliable performance.
Read more: How To Store Kerosene Long-Term
Maintaining the Kerosene Lamp
Proper maintenance is key to keeping your kerosene lamp in good working condition. Regular care and attention will not only ensure its longevity but also contribute to its safe and efficient performance. Here are some essential maintenance tips:
- Trim the wick: Regularly trim the wick to remove any carbon buildup and maintain a clean, even burn. Use a wick trimmer or scissors to trim the wick to about 1/4 inch. Trimming the wick helps prevent excessive smoking and promotes a steady flame.
- Clean the chimney: Over time, the chimney may accumulate soot or residue from the burning kerosene. Use a gentle cleanser or soapy water to clean the chimney periodically. Rinse it thoroughly and allow it to dry completely before reattaching it to the lamp.
- Check the font: Inspect the font for any signs of leaks or cracks. If you notice any damage, replace the font immediately to prevent fuel leakage. Regularly clean the font to remove any debris or sediment that can clog the fuel flow.
- Store the lamp properly: When not in use, store the kerosene lamp in a cool, dry place away from direct sunlight. This helps prevent deterioration of the materials and maintains the lamp’s overall condition.
- Replace worn-out parts: If you notice any components of the lamp, such as the burner or wick, are worn out or damaged, replace them promptly. Using faulty parts can affect the lamp’s performance and compromise safety.
Additionally, it’s important to follow the manufacturer’s instructions for your specific kerosene lamp model. Different lamps may have unique maintenance requirements, so be sure to consult the user manual for any specific guidelines.
By regularly maintaining your kerosene lamp, you can ensure its reliability, safety, and longevity. With proper care, your lamp will continue to provide you with beautiful illumination for years to come.
Now that we’ve covered the essential maintenance tips, let’s move on to the final section, which discusses cleaning and storing the kerosene lamp.
Cleaning and Storing the Kerosene Lamp
Regular cleaning and proper storage are crucial for maintaining the appearance and functionality of your kerosene lamp. Here’s a step-by-step guide on how to clean and store your lamp:
- Allow the lamp to cool: Before starting the cleaning process, ensure that the lamp has completely cooled down. This prevents any accidents or injuries caused by handling a hot lamp.
- Disassemble the lamp: Carefully disassemble the various parts of the lamp. This typically includes removing the chimney, burner, and font. Follow the manufacturer’s instructions to ensure safe disassembly.
- Clean the parts: Clean each part individually using a mild cleaning solution or soapy water. Gently scrub away any dirt, residue, or soot that may have accumulated. Use a soft cloth or brush to clean hard-to-reach areas. Rinse the parts thoroughly and allow them to air dry.
- Inspect for damages: While cleaning, inspect each component for any signs of damage or wear. Look out for cracks, leaks, or malfunctioning parts. Replace any damaged or worn-out components to maintain the lamp’s safety and performance.
- Polish the lamp: If your kerosene lamp has a metal or brass finish, you can use a polishing agent specifically designed for that material to restore its shine. Follow the instructions on the polishing agent packaging to avoid any damage or discoloration.
- Reassemble the lamp: Once all the parts are clean and dry, reassemble the lamp by following the reverse order of disassembly. Ensure that each component is securely attached and properly aligned.
- Store the lamp: Find a suitable storage location for your kerosene lamp. Ensure that the area is cool, dry, and away from direct sunlight. Consider covering the lamp with a dust cover or cloth to protect it from dust and debris.
Proper cleaning and storage not only prolong the life of your kerosene lamp but also ensure that it remains in optimal condition for future use. By following these steps, you can maintain the lamp’s aesthetic appeal and functional integrity.
Now that you know how to clean and store your kerosene lamp, you’re ready to enjoy its warm glow whenever you desire. Remember to exercise proper safety precautions and regularly maintain the lamp for continued performance.
As we conclude this guide, we hope that it has provided you with valuable insights into using, lighting, adjusting, maintaining, cleaning, and storing your kerosene lamp. Embrace the timeless charm and practicality of this traditional lighting option, and savor the enchanting ambiance it creates.
Conclusion
In a world dominated by modern lighting options, the kerosene lamp stands as a symbol of nostalgia, charm, and resilience. By understanding its basics, preparing it properly, lighting the lamp, and adjusting the flame, you can experience the warm glow and ambiance that it exudes. Maintenance and proper cleaning of the lamp ensure its longevity and reliable performance, making it a cherished addition to your home or outdoor adventures.
Remember, safety should always be a priority when using a kerosene lamp. Ensure proper ventilation, keep the lamp away from flammable materials, and never leave it unattended while lit. By following safety precautions and practicing regular maintenance, you can enjoy the beauty of the kerosene lamp responsibly.
As you embark on your journey with a kerosene lamp, take the time to appreciate its unique character and the remarkable history it represents. Whether you choose to light it during power outages, create a cozy atmosphere, or simply relish in its traditional charm, the kerosene lamp is sure to bring a sense of warmth and wonder to your surroundings.
So embrace the art of using a kerosene lamp, relish in its soft and inviting light, and let its flickering flame transport you to a bygone era. May your kerosene lamp illuminate your space, evoke feelings of nostalgia, and become a cherished part of your home and memories.
Frequently Asked Questions about How To Use A Kerosene Lamp
Was this page helpful?
At Storables.com, we guarantee accurate and reliable information. Our content, validated by Expert Board Contributors, is crafted following stringent Editorial Policies. We're committed to providing you with well-researched, expert-backed insights for all your informational needs.