Home>Furniture>Living Room Furniture>How To Make Cushions With Piping

Living Room Furniture
How To Make Cushions With Piping
Modified: March 16, 2024
Learn how to make stylish cushions with piping for your living room furniture. Step-by-step tutorial with easy to follow instructions. Get creative and enhance your home décor today!
(Many of the links in this article redirect to a specific reviewed product. Your purchase of these products through affiliate links helps to generate commission for Storables.com, at no extra cost. Learn more)
Introduction
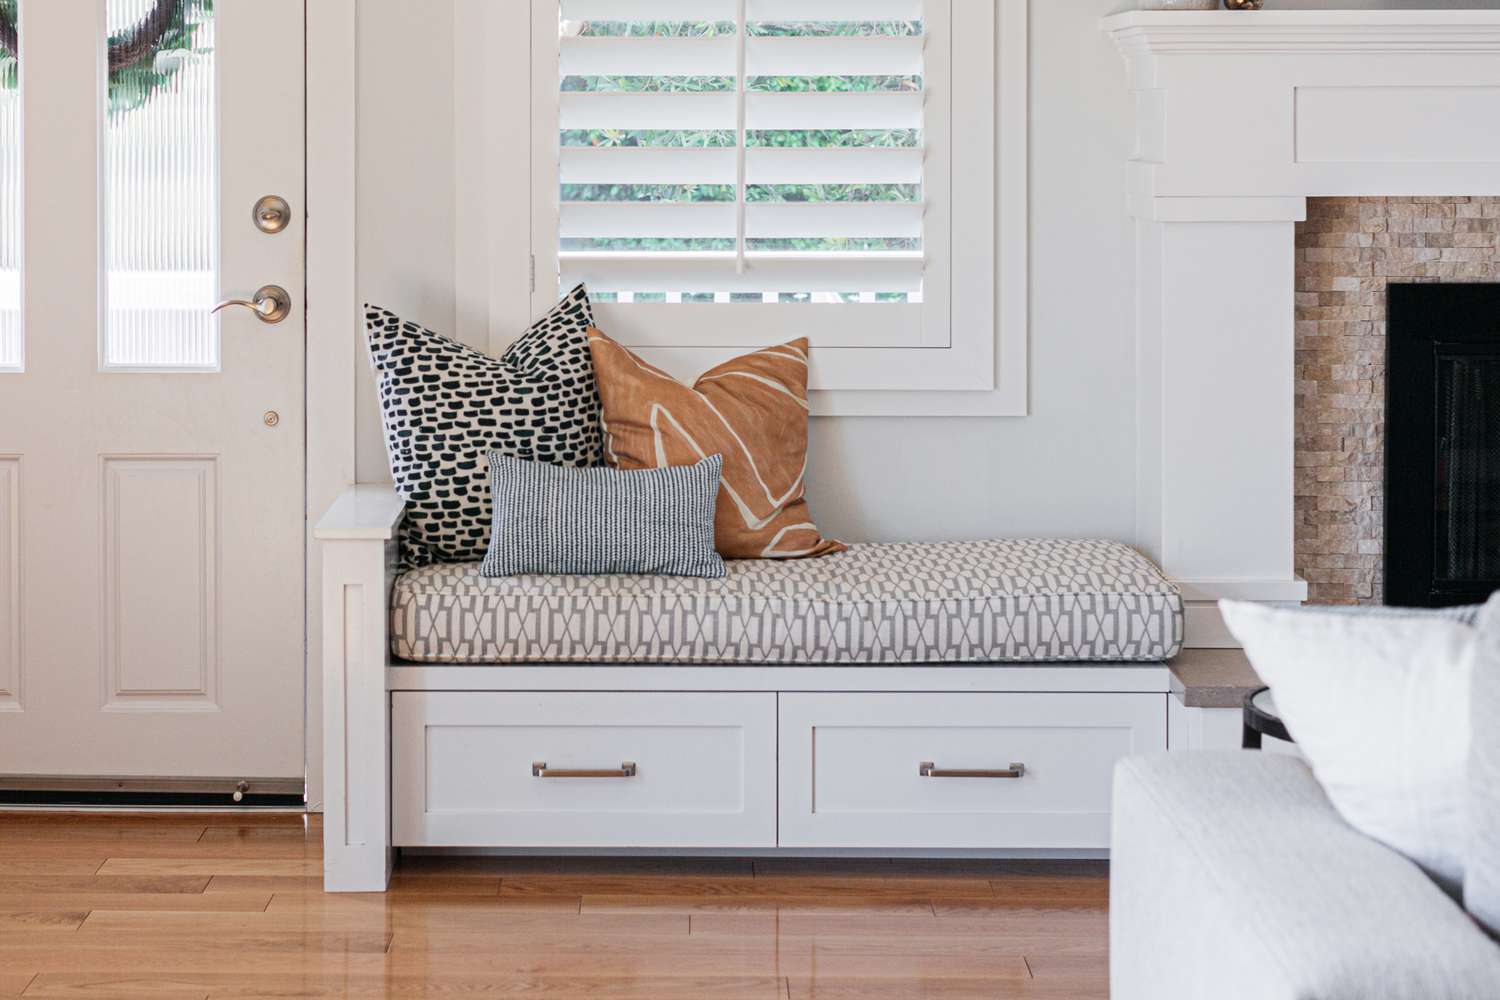
Welcome to the world of do-it-yourself cushion making! If you’re looking to add a touch of elegance and sophistication to your living room furniture, then making cushions with piping is the perfect project for you. Piping, also known as cord or welt, is a decorative trim that adds structure, definition, and flair to cushions. It not only enhances the overall appearance of the cushions but also provides a professional-looking finish.
In this comprehensive guide, we will walk you through the step-by-step process of making cushions with piping. Whether you’re a seasoned DIY enthusiast or a beginner, this article will cover all the essential techniques and tips you need to know to create stunning cushions that will elevate the beauty and comfort of your living room space.
But before we dive into the nitty-gritty details, let’s take a moment to gather all the materials you’ll need for this project.
Key Takeaways:
- Elevate your living room with custom-made cushions featuring piping for an elegant and sophisticated touch to your furniture.
- Follow the step-by-step guide to create stunning cushions that match your style, adding comfort and visual appeal to your living space.
Read more: How To Sew A Window Seat Cushion With Piping
Materials Needed
Before getting started, make sure you have the following materials ready:
- Fabric for the cushion cover: Choose a durable and visually appealing fabric that complements your living room decor. Measure the size of your cushion and add a few inches for seam allowances.
- Piping cord: This is the core of the piping trim. Select a cord that matches or contrasts nicely with your fabric.
- Piping fabric: This fabric will wrap around the cord to create the piping trim. You can use a matching or contrasting fabric to add visual interest.
- Scissors: A good pair of fabric scissors is essential for cutting the fabric and piping.
- Sewing machine: Invest in a high-quality sewing machine with the necessary attachments for sewing a straight stitch and a zipper foot.
- Pins or clips: These will help secure the fabric and piping in place as you sew.
- Thread: Choose a thread color that matches your fabric or piping fabric.
- Zipper (optional): If you want a removable cushion cover, you’ll need a zipper to insert into the back or side of the cover.
- Stuffing: This can be foam, polyester fiberfill, or any other cushion filling material of your choice.
Now that you have all the necessary materials, let’s move on to the step-by-step tutorial on making cushions with piping.
Step 1: Cutting the Fabric
The first step in making cushions with piping is to cut the fabric for the cushion cover. Follow these guidelines to ensure accurate measurements:
- Measure the size of your cushion. If your cushion is square or rectangular, measure the length and width. If it’s round, measure the diameter.
- Add seam allowances to your measurements. A general rule of thumb is to add 1 inch to all sides for seam allowances. For example, if your cushion is 18 inches square, cut your fabric to 19 inches by 19 inches.
- Using a ruler or measuring tape, mark the dimensions of your cushion on the fabric with a fabric pen or chalk.
- Carefully cut out the fabric along the marked lines. Use sharp fabric scissors to ensure clean and accurate cuts.
Remember to cut two pieces of fabric for each cushion, one for the front and one for the back. If you’re making multiple cushions with different fabrics, repeat this process for each fabric.
It’s important to note that if your cushion has a pattern, make sure to align the pattern on both fabric pieces before cutting. This will ensure a professional-looking finish when the cushion is assembled.
Now that you have your fabric pieces ready, it’s time to move on to the next step: sewing the piping.
Step 2: Sewing the Piping
Sewing the piping is the key element in creating cushions with a beautiful, finished look. Follow these step-by-step instructions to sew the piping:
- Measure the circumference of your cushion. This will determine the length of piping you need to cut. Add a few extra inches to ensure you have enough.
- Cut strips of fabric for the piping. The width of the strips should be twice the width of your piping cord, plus seam allowances. For example, if your piping cord is ¼ inch wide, cut fabric strips that are ½ inch wide.
- Fold each fabric strip in half lengthwise, right sides together, and press it with an iron to create a crease.
- Open up the fabric strip and place the piping cord along the crease, with the cord positioned towards the fabric’s edge.
- Fold the fabric strip back over the piping cord, sandwiching it in the middle.
- Pin or clip the fabric strip in place, making sure the edges of the fabric are aligned.
- Attach a zipper foot to your sewing machine to allow for better visibility and control while sewing the piping.
- Starting a few inches from the end of the fabric strip, sew a straight stitch close to the piping cord to secure it in place. Continue sewing along the entire length of the fabric strip, as close to the cord as possible.
- Trim any excess fabric from the edges of the strip.
- Repeat this process to sew the desired length of piping for your cushion.
- Once you have finished sewing the piping, set it aside and move on to the next step: attaching the piping to the fabric.
With the piping ready, you’re one step closer to creating beautiful cushions that will make your living room furniture stand out. Now let’s proceed to the next step: attaching the piping to the fabric.
Step 3: Attaching the Piping to the Fabric
Attaching the piping to the fabric is where the magic happens! This step ensures that your cushions will have that polished and professional look. Follow these steps to attach the piping:
- Place one fabric piece for the cushion cover on your work surface, right side facing up.
- Take the piping and align it along the edge of the fabric, with the cord facing towards the fabric’s center.
- If necessary, pin or clip the piping in place along the entire edge of the fabric.
- Using a zipper foot attachment on your sewing machine, stitch the piping to the fabric, sewing as close to the piping cord as possible. This will ensure a tight and secure attachment.
- When you reach a corner, make small, perpendicular cuts into the seam allowance of the piping fabric to help it bend smoothly around the corner.
- Continue sewing until you reach the starting point, overlapping the ends of the piping.
- Trim any excess piping fabric, leaving a small seam allowance.
- Repeat this process for the remaining fabric piece of the cushion cover.
Now that the piping is securely attached to the fabric, it’s time to move on to the next step: sewing the cushion itself.
When making cushions with piping, use a zipper foot on your sewing machine to easily sew the piping onto the fabric. This will help you get a clean and professional finish.
Read more: How To Make A Pipe Lamp
Step 4: Sewing the Cushion
Now that the piping is attached to the fabric, it’s time to sew the cushion together. Follow these steps to sew the cushion:
- Place the two fabric pieces for the cushion cover on top of each other, right sides together, with the piping sandwiched between them.
- Pin or clip the fabric pieces together, making sure the edges align neatly.
- Using a regular sewing foot, stitch along the edges of the fabric, leaving a seam allowance of about ½ inch.
- When you reach a corner, pivot the fabric and continue sewing.
- Stop stitching a few inches from the starting point, leaving an opening to insert the cushion filling.
- Backstitch to secure the stitches and trim any loose threads.
At this point, you have a cushion cover sewn together with piping. Now, it’s time to move on to the next step: stuffing the cushion.
Step 5: Stuffing the Cushion
With the cushion cover sewn together, it’s time to add the stuffing to create a comfortable and plump cushion. Follow these steps to stuff the cushion:
- Take your desired cushion filling material, such as foam, polyester fiberfill, or down alternative, and fluff it up to ensure even distribution.
- Start by inserting a small amount of filling into the corners of the cushion, using your fingers or a stuffing tool to push it into place.
- Continue filling the cushion, adding an even amount of stuffing to the center and edges.
- Do not overstuff the cushion, as it may affect the shape and appearance. Add enough filling to achieve a firm yet comfortable cushion.
- Periodically check the cushion by pressing on it to ensure it’s evenly filled.
Once you’re satisfied with the amount of filling, it’s time to move on to the final step: closing the cushion.
Step 6: Closing the Cushion
In the final step of making cushions with piping, it’s time to close the cushion by sealing the opening. Follow these steps to complete your cushion:
- Fold in the raw edges of the opening, creating a neat and clean seam.
- Pin or clip the opening closed.
- Using a needle and thread that matches the fabric, hand stitch the opening closed with small, discreet stitches. Make sure to secure the thread with knots at the beginning and end.
- Once the opening is closed, inspect the cushion for any loose threads or imperfections and trim them as needed.
- Give the finished cushion a gentle fluff to evenly distribute the filling and shape it.
- Your cushion with piping is now complete and ready to grace your living room furniture with its beauty and comfort!
Congratulations on successfully making your own cushions with piping! With a little time and effort, you’ve created custom-made cushions that add a touch of elegance and sophistication to your living space.
Remember, you can use these techniques to create cushions of various shapes and sizes, allowing you to customize your living room decor to perfectly suit your personal style.
Now all that’s left to do is sit back, relax, and enjoy the coziness and visual appeal of your newly made cushions!
Happy cushion making!
Conclusion
Congratulations! You have now learned how to make cushions with piping and have completed your very own custom-made cushions. By incorporating piping into your cushion design, you have added an extra touch of elegance and sophistication to your living room furniture.
Throughout this comprehensive guide, we have walked you through each step of the process, from cutting the fabric to closing the cushion. We explored the materials needed, sewing the piping, attaching it to the fabric, sewing the cushion cover, stuffing the cushion, and finally closing it up.
By following these steps and using your creativity, you can make cushions that perfectly match your personal style and elevate the beauty and comfort of your living space. Whether you choose to make cushions with bold and contrasting piping or opt for a more subtle and harmonious look, the possibilities are endless.
Remember to pay attention to details like aligning patterns, sewing close to the piping cord, and evenly filling the cushions for a professional finish. With practice, your cushion-making skills will improve, and you’ll be able to create cushions that look like they came straight from a high-end home decor store.
So, gather your materials, set up your sewing machine, and let your creativity soar as you make beautiful cushions with piping. Your living room will thank you for the added comfort and style!
Now, go forth, and enjoy the fruits of your labor. Sit back, relax, and marvel at the elegance and comfort of your customized cushions with piping.
Happy cushion making!
Frequently Asked Questions about How To Make Cushions With Piping
Was this page helpful?
At Storables.com, we guarantee accurate and reliable information. Our content, validated by Expert Board Contributors, is crafted following stringent Editorial Policies. We're committed to providing you with well-researched, expert-backed insights for all your informational needs.

0 thoughts on “How To Make Cushions With Piping”