Home>Furniture>Outdoor Furniture>How Do You Repoint A Patio
Outdoor Furniture
How Do You Repoint A Patio
Modified: August 17, 2024
Learn how to repoint your patio with this step-by-step guide. Enhance your outdoor-furniture and give your patio a fresh new look.
(Many of the links in this article redirect to a specific reviewed product. Your purchase of these products through affiliate links helps to generate commission for Storables.com, at no extra cost. Learn more)
Introduction
When it comes to creating a comfortable and inviting outdoor space, having a well-maintained patio is essential. However, over time, the mortar between the patio pavers can deteriorate, leading to loose and uneven surfaces. This not only affects the aesthetic appeal of your patio but also poses a safety hazard.
To ensure the longevity and beauty of your patio, it’s important to repoint the mortar. Repointing is the process of replacing the deteriorated mortar with fresh mortar, reinforcing the structural integrity of the patio and restoring its appearance.
In this article, we will provide you with a step-by-step guide on how to repoint a patio. You’ll learn the tools and materials you’ll need, as well as the techniques to effectively repoint your patio and achieve professional-looking results.
Key Takeaways:
- Revitalize your patio by repointing the mortar between pavers. Assess, remove, mix, apply, and finish for a professional-looking result that enhances safety and aesthetics.
- Regular maintenance and proactive care can extend the lifespan of your patio, ensuring a beautiful outdoor space for years to come.
Read more: How Do You Lay A Patio
Tools and Materials Needed
Before you begin repointing your patio, it’s essential to gather all the necessary tools and materials. Here’s a comprehensive list:
- Trowel – used for applying and shaping the mortar
- Jointing Iron – used for finishing and smoothing the mortar joints
- Mason’s Brush – used for cleaning the joints and removing debris
- Chisel – used for removing loose or damaged mortar
- Hammer – used to strike the chisel and loosen the mortar
- Mortar Mixing Tray or Bucket – used for mixing the mortar
- Mortar Mixing Drill Bit – used with a power drill for mixing the mortar
- Protective Gloves – to protect your hands
- Safety Glasses – to protect your eyes from debris
- Dust Mask – to protect your lungs from dust
- Masonry Pointing Trowel – for precise mortar application
- Patio Cleaner – for cleaning the patio before repointing
- Masonry Sealant – for sealing the repointed joints and protecting against moisture
- Portland Cement – for making the mortar
- Masonry Sand – for mixing with cement to make the mortar
- Water – for mixing the mortar
Having these tools and materials on hand will ensure you have everything you need to successfully repoint your patio. Now that you’re equipped, let’s move on to the step-by-step process of repointing your patio.
Step 1: Assessing the Condition of the Patio
Before you begin the repointing process, it’s important to assess the condition of your patio. This will help you determine the extent of the repairs needed and plan accordingly. Here’s how to assess your patio:
- Start by examining the mortar joints between the pavers. Look for any signs of deterioration such as cracks, gaps, or loose mortar.
- Check for any unevenness or sinking of the pavers. This could indicate a more severe problem that needs to be addressed before repointing.
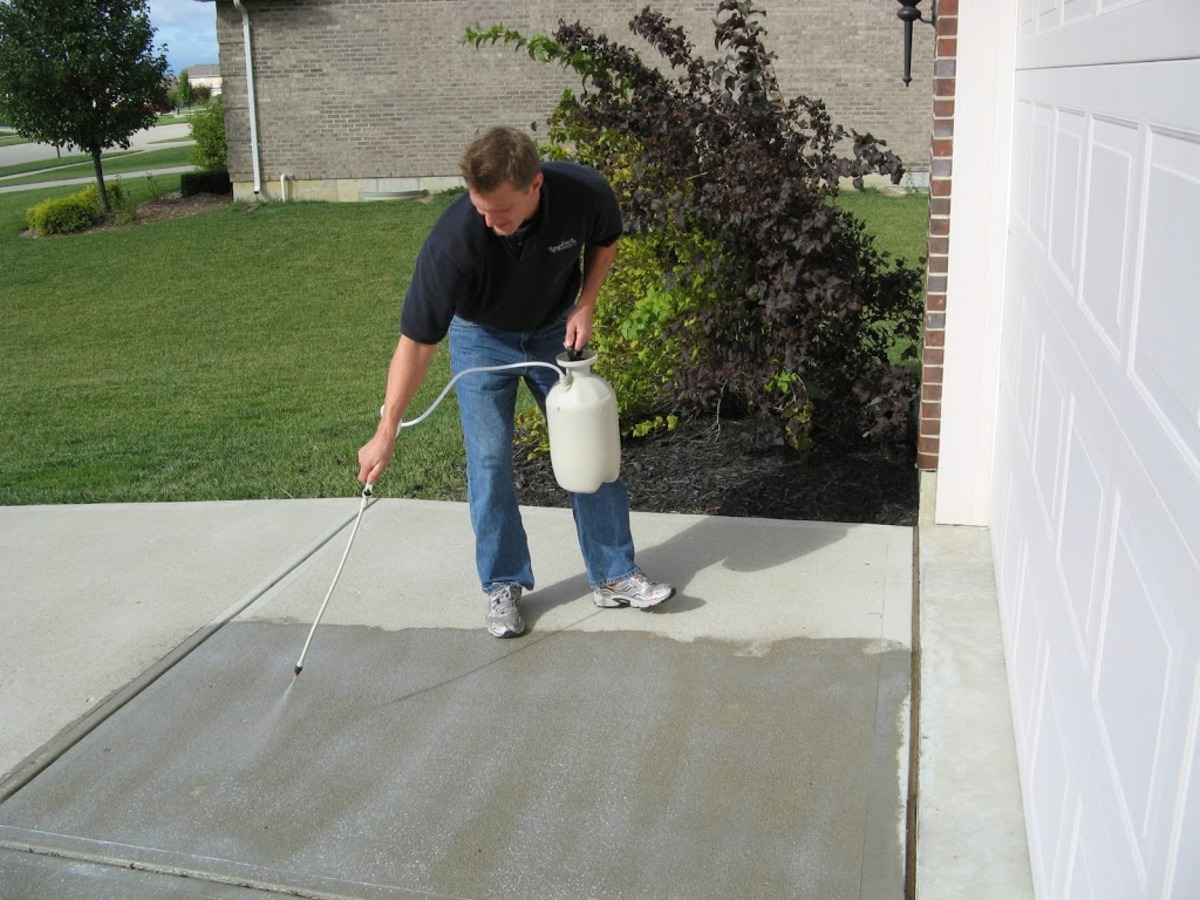
- If the patio is dirty or covered in debris, give it a thorough cleaning using a patio cleaner and a scrub brush. This will make it easier to assess the condition of the mortar joints.
- Use a chisel and hammer to gently tap the mortar joints. If the mortar is loose or crumbles easily, it needs to be replaced.
- Pay close attention to any areas where water is pooling or draining improperly. These areas may require additional repairs to ensure proper drainage.
By carefully inspecting your patio, you’ll have a clear understanding of the areas that require repointing and any other repairs that may need to be addressed. This assessment will guide you throughout the repointing process and ensure that your patio is restored to its former glory.
Step 2: Removing Loose and Damaged Mortar
Once you have assessed the condition of your patio and identified the areas that need repointing, it’s time to start removing the loose and damaged mortar. Follow these steps to effectively remove the old mortar:
- Put on your safety glasses and dust mask to protect yourself from debris and dust.
- Start by using a chisel and hammer to carefully chip away the loose mortar. Work in small sections at a time.
- Hold the chisel at a slight angle and tap it with the hammer to loosen the mortar. Be careful not to damage the surrounding pavers.
- Once the loose mortar is removed, use a mason’s brush to clean out any debris or dust from the joints.
- Continue this process, moving along the entire length of the mortar joint, until all the loose and damaged mortar is removed.
- Inspect the joints to ensure they are clean and free of any loose debris.
By removing the loose and damaged mortar, you are creating a clean and stable foundation for the new mortar. This step is crucial for the longevity and effectiveness of the repointing process. Once the old mortar has been removed, you’re ready to move on to the next step – preparing the mortar mix.
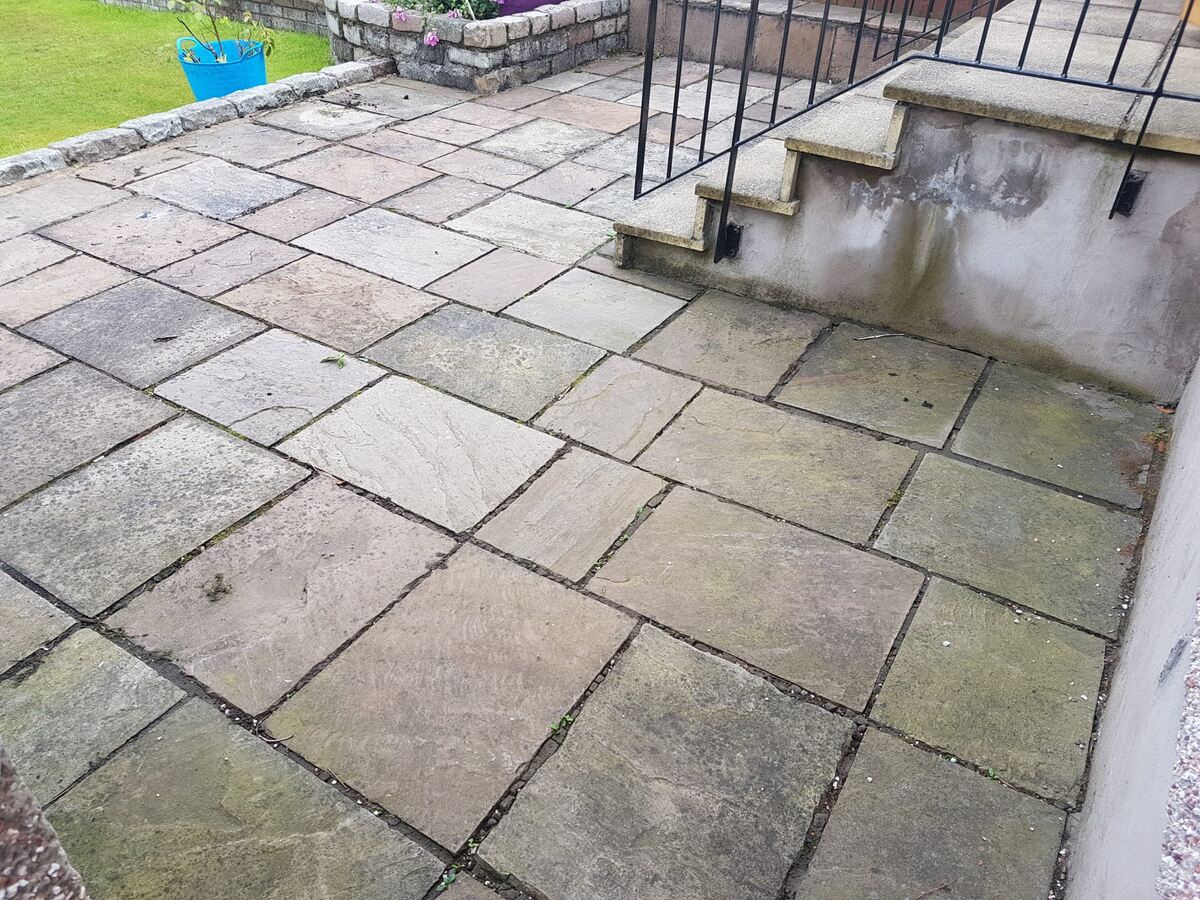
Before repointing a patio, make sure to clean out any old mortar and debris from the joints. Use a pointing trowel to fill the joints with new mortar, pressing it in firmly. Smooth the mortar with a jointing tool for a clean finish.
Step 3: Preparing the Mortar Mix
With the loose and damaged mortar removed, it’s time to prepare the mortar mix that will be used to repoint your patio. Follow these steps to prepare the mortar mix:
- In a mortar mixing tray or bucket, combine the desired amount of Portland cement and masonry sand. The ratio of cement to sand will depend on the specific instructions provided by the manufacturer or the requirements of your project. Typically, a ratio of 1 part cement to 3 parts sand is suitable for repointing patios.
- Using a masonry pointing trowel, mix the dry ingredients together until they are well-blended.
- Add water gradually to the mixture while continuously stirring with the trowel. The amount of water needed will vary, so add it slowly and mix until you achieve a consistency that is similar to toothpaste.
- Ensure that the mortar mix is well-mixed and free of lumps. It should be easy to work with and have a smooth texture.
It’s important to follow the instructions provided by the mortar manufacturer to ensure the proper consistency and strength of the mortar mix. Once you have prepared the mortar mix, it’s time to move on to the next step – applying the mortar to repoint the patio.
Read more: What Is Repointing Brick
Step 4: Applying the Mortar to Repoint the Patio
Now that you have prepared the mortar mix, it’s time to apply it and repoint your patio. Follow these steps to properly apply the mortar:
- Take a small amount of mortar mix with your trowel and place it onto the joint you are repointing.
- Using the pointing trowel, press the mortar firmly into the joint, making sure it fills the entire depth and width of the joint. Be careful not to smear the mortar onto the surface of the pavers.
- Continue this process, working in small sections at a time. Apply the mortar to each joint and make sure it is compacted and evenly distributed.
- Once the mortar is applied, use a jointing iron to smooth and finish the joints. This will help create a neat and uniform appearance.
- Remove any excess mortar from the surface of the pavers using the edge of the trowel or a brush.
- Allow the mortar to dry for the recommended time specified by the manufacturer. This will ensure that the mortar sets properly.
It’s important to take your time and work carefully when applying the mortar. Make sure each joint is filled completely and smoothly for a professional-looking finish. Once you have repointed all the necessary joints, you can move on to the final step – finishing and curing the repointed patio.
Step 5: Finishing and Curing the Repointed Patio
After applying the mortar to repoint your patio, it’s time to complete the finishing touches and properly cure the repointed joints. Follow these steps to finish and cure your repointed patio:
- Use a mason’s brush to lightly brush the surface of the patio, removing any excess mortar or dust. This will give your patio a clean and polished appearance.
- Mist the repointed joints with water using a spray bottle. This will help prevent the mortar from drying too quickly and cracking.
- Cover the repointed patio with a plastic sheet or tarp to protect it from direct sunlight and extreme weather conditions for at least 24 to 48 hours.
- During the curing period, lightly mist the repointed joints with water every few hours to keep them moist. This will promote proper curing and increase the strength of the mortar.
- After the curing period, remove the plastic sheet or tarp and allow the repointed patio to dry completely.
- Inspect the repointed joints for any imperfections or gaps. If necessary, make any touch-ups using additional mortar.
By properly finishing and curing the repointed patio, you’re ensuring the longevity and durability of your work. This process allows the mortar to fully set and harden, providing a sturdy and attractive surface for your outdoor space.
With the completion of step 5, you have successfully repointed your patio. Congratulations! Your patio now looks refreshed and ready for you to enjoy. Remember to regularly inspect and maintain your patio to ensure its long-term beauty and functionality.
Conclusion
Repointing your patio is a worthwhile endeavor that can significantly improve the appearance and stability of your outdoor space. By following the step-by-step guide outlined in this article, you have gained the knowledge and skills to successfully repoint your patio.
Remember to assess the condition of your patio, remove loose and damaged mortar, prepare the mortar mix correctly, apply the mortar with care, and finish and cure the repointed joints. Taking the time to do each step properly will ensure a professional-looking result that will last for years to come.
Regular maintenance and inspection of your patio will help to identify any future repointing needs and address them promptly. By staying proactive and taking care of your patio, you can extend its lifespan and continue to enjoy a beautiful outdoor space.
Now that you have the tools and knowledge to repoint your patio, it’s time to roll up your sleeves and get to work. Turn your worn-out patio into a stunning oasis that you can relax and entertain in. Get started today and give your outdoor area the attention it deserves!
Frequently Asked Questions about How Do You Repoint A Patio
Was this page helpful?
At Storables.com, we guarantee accurate and reliable information. Our content, validated by Expert Board Contributors, is crafted following stringent Editorial Policies. We're committed to providing you with well-researched, expert-backed insights for all your informational needs.


0 thoughts on “How Do You Repoint A Patio”