Home>Furniture>Outdoor Furniture>How Do You Clean Patio Pavers
Outdoor Furniture
How Do You Clean Patio Pavers
Modified: March 7, 2024
Looking for tips on how to clean your patio pavers? Discover effective outdoor furniture cleaning techniques to maintain the beauty and longevity of your outdoor space.
(Many of the links in this article redirect to a specific reviewed product. Your purchase of these products through affiliate links helps to generate commission for Storables.com, at no extra cost. Learn more)
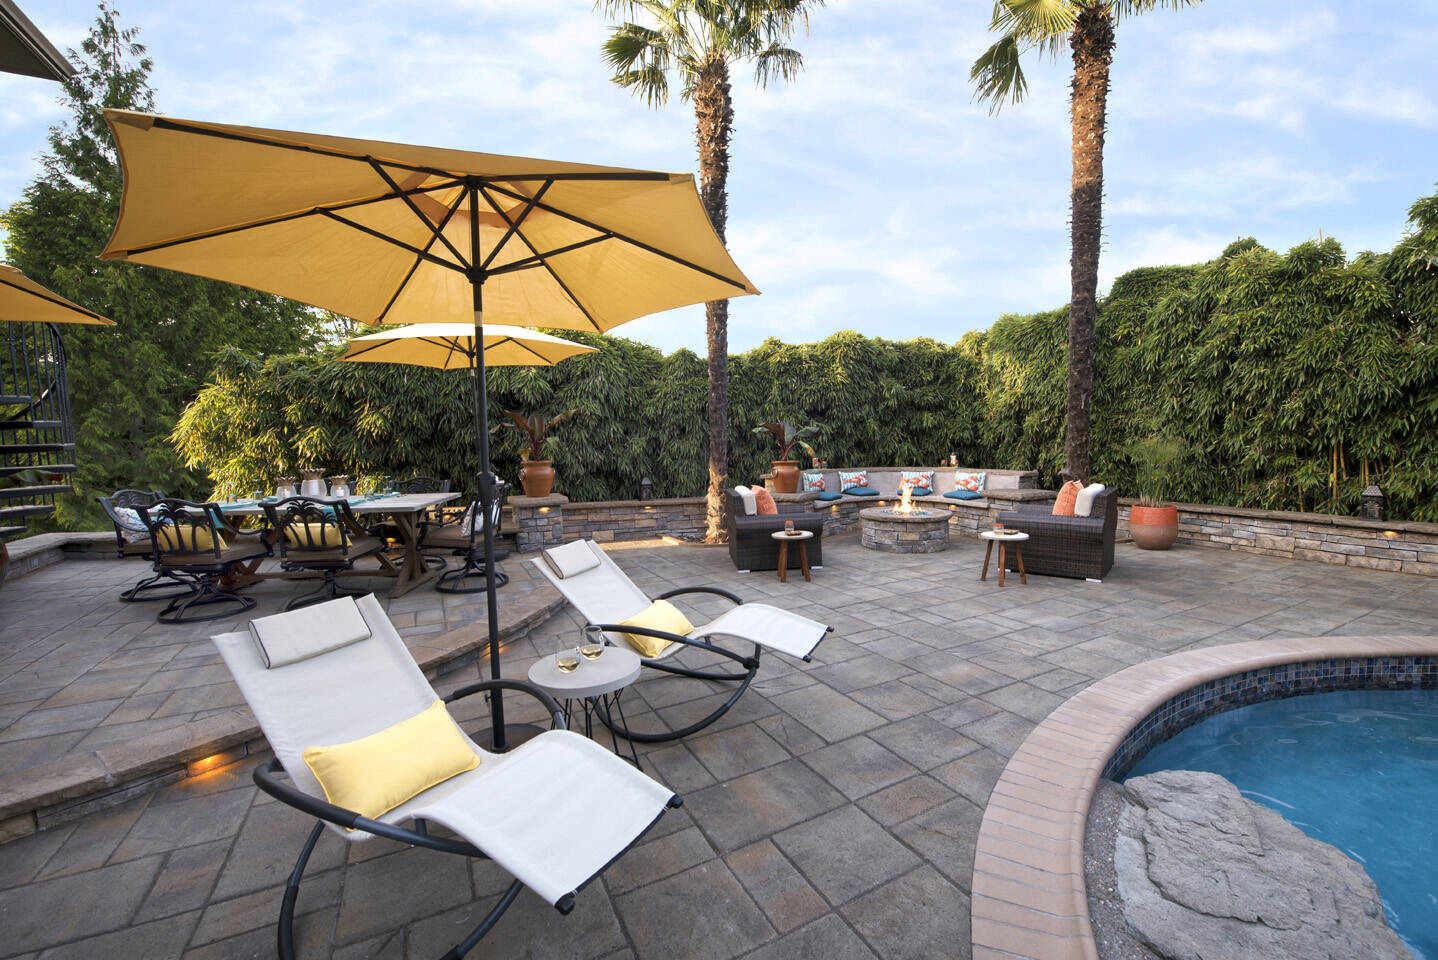
Introduction
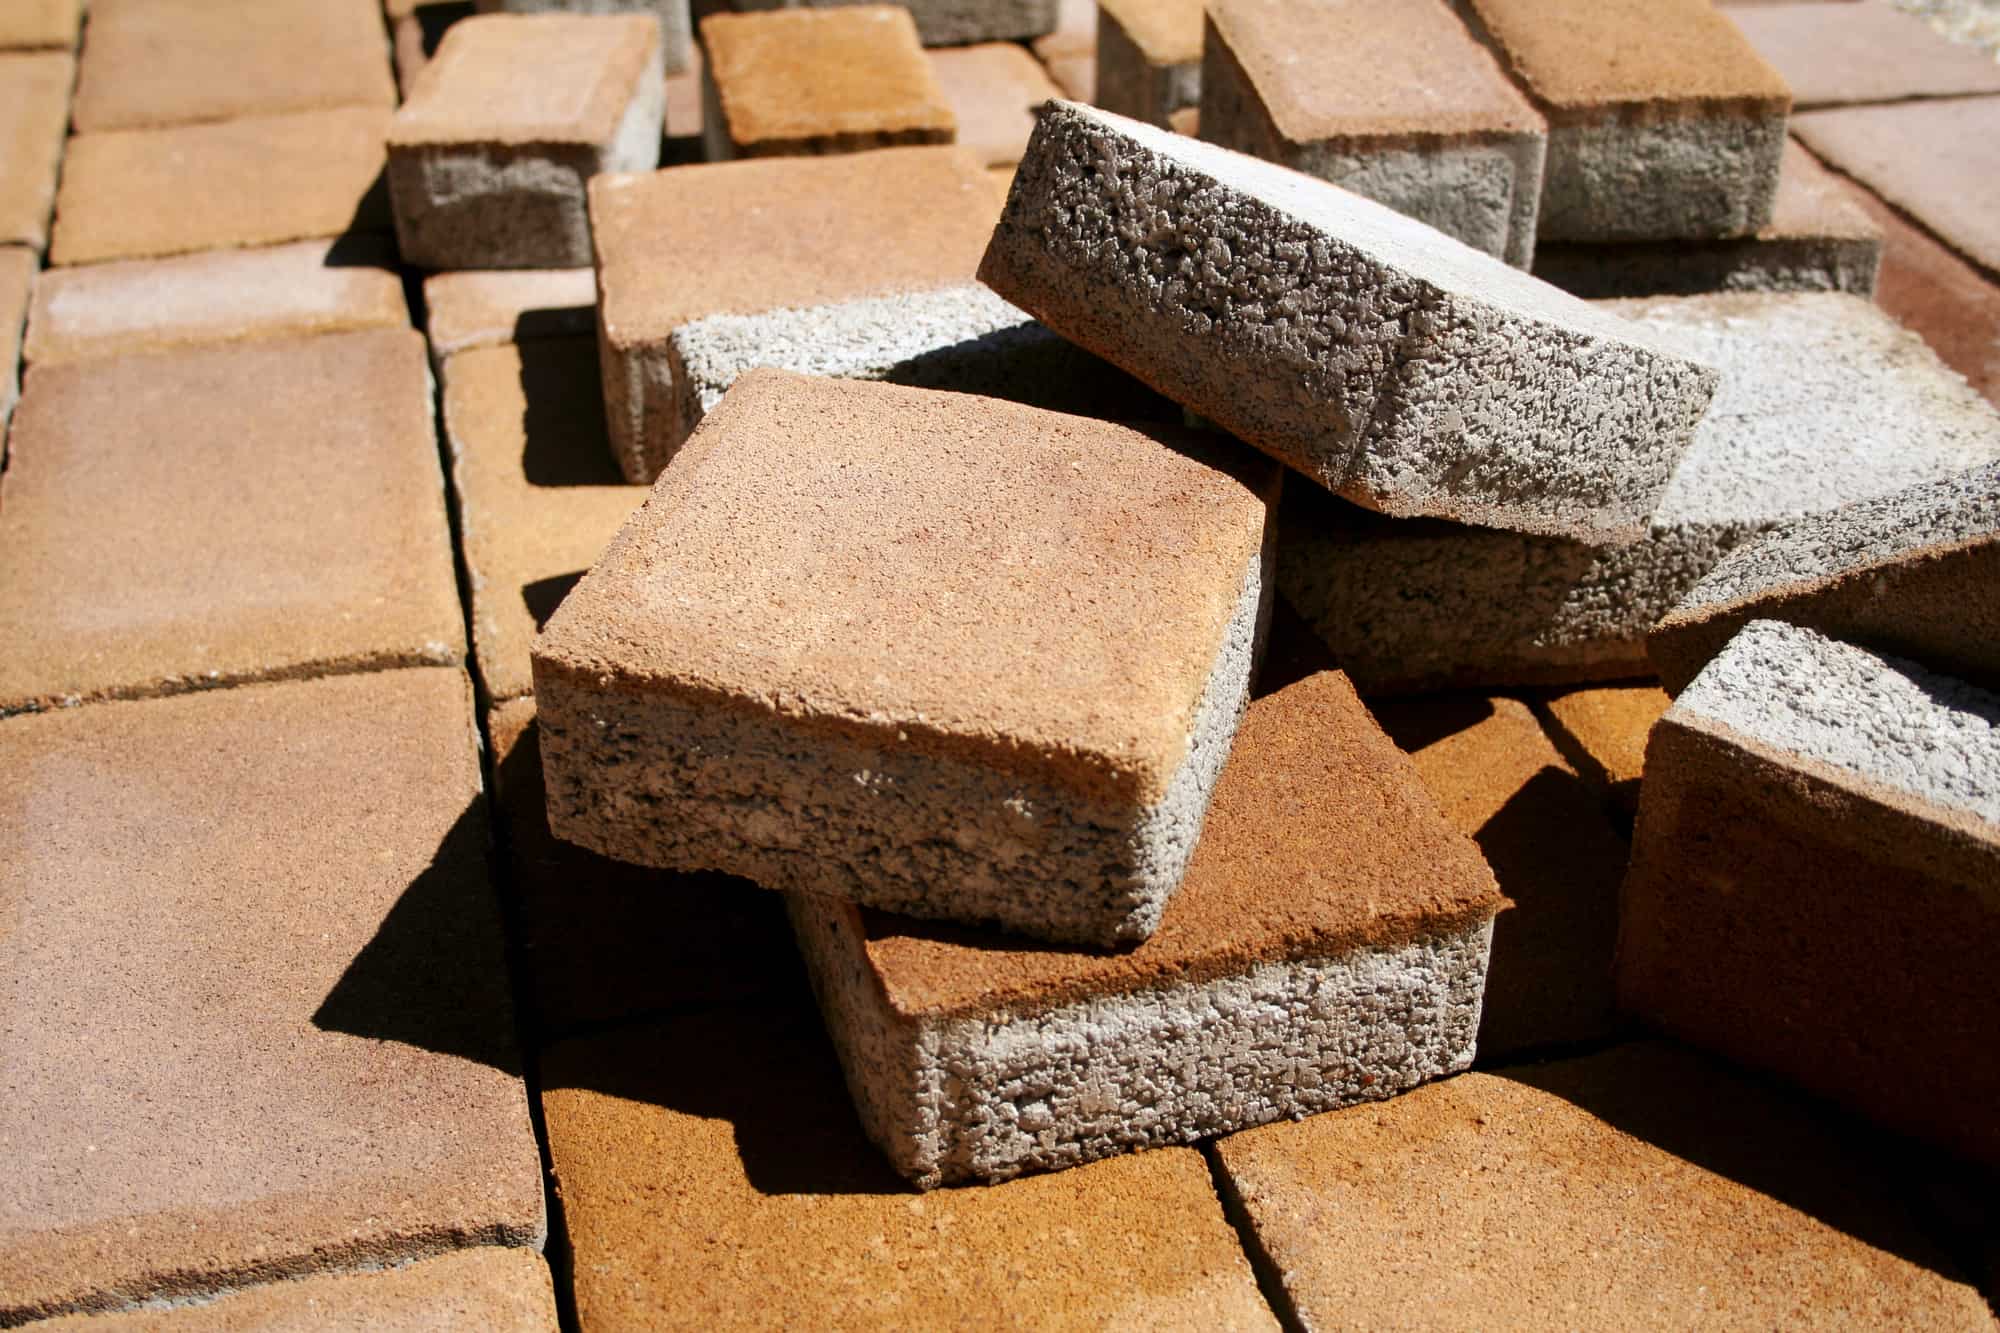
When it comes to creating a cozy and inviting outdoor living space, patio pavers can add a touch of elegance and practicality. However, over time, these pavers can accumulate dirt, stains, mildew, and other unwanted elements, making them look worn and dull. Cleaning your patio pavers not only improves their appearance but also helps prolong their lifespan and maintain their functionality.
In this article, we will explore the step-by-step process of how to clean patio pavers effectively. By following these guidelines and using the right tools and materials, you can restore the beauty of your outdoor space and enjoy a fresh, clean patio.
Tools and Materials Needed
Before getting started, gather the necessary tools and materials to ensure a smooth cleaning process. Here is a list of the items you will require:
– Broom or brush
– Garden hose or pressure washer
– Bucket
– Mild detergent or specialized paver cleaner
– Scrub brush or deck brush
– Pump sprayer (optional)
– Sand for joint re-sanding (if required)
– Paver sealer (if desired)
Preparing the Patio Pavers
Before you start cleaning, remove any furniture or plants from the patio area. This will make the cleaning process easier and prevent any damage or obstruction. Additionally, sweep the surface of the pavers to remove loose dirt and debris. By preparing the area beforehand, you can clean the pavers more efficiently and avoid any unnecessary setbacks.
Sweeping and Clearing the Surface
Using a broom or brush, thoroughly sweep the surface of the patio pavers to remove any loose dirt, leaves, or debris. Ensure you reach the edges and corners of the pavers to eliminate all visible dirt. This step helps to prepare the surface for deeper cleaning and ensures that the cleaning solution can penetrate the pavers effectively.
Removing Stains and Mildew
If there are any stubborn stains or mildew on the patio pavers, it is important to address them before proceeding with further cleaning. Stains can be caused by various factors, such as oil spills, food stains, or rust. Use a specialized stain remover or a mixture of water and mild detergent to tackle these stains. Apply the solution to the affected areas and scrub gently with a brush to lift the stains. For mildew, consider using a solution of bleach and water to kill the spores and remove the discoloration. Be sure to follow the instructions on the cleaning products and wear protective gloves to prevent skin irritation.
Key Takeaways:
- Keep your patio pavers looking fresh by sweeping, clearing, and applying a cleaning solution. Don’t forget to re-sand the joints and consider sealing for added protection and longevity.
- Regular maintenance and proper cleaning techniques can transform your patio into a beautiful and inviting space for relaxation and enjoyment.
Read more: How Do You Cut Patio Pavers
Tools and Materials Needed
Before embarking on the task of cleaning your patio pavers, it is important to gather the necessary tools and materials. Having the right equipment will make the cleaning process easier and more efficient. Here is a list of the items you will need:
- Broom or brush: A broom or brush with stiff bristles will be useful for sweeping loose dirt and debris off the pavers. This will help prepare the surface for deeper cleaning.
- Garden hose or pressure washer: Depending on the condition of your patio pavers, you can use a garden hose with a high-pressure nozzle or a pressure washer for a more thorough clean.
- Bucket: A bucket will come in handy for mixing cleaning solutions or holding water during the cleaning process.
- Mild detergent or specialized paver cleaner: To remove dirt, grime, and stains, you can use a mild detergent mixed with water or a specialized paver cleaner. Be sure to choose a cleaner that is safe for your specific type of pavers.
- Scrub brush or deck brush: A scrub brush or deck brush with stiff bristles will help in scrubbing away tough stains and debris from the pavers’ surface.
- Pump sprayer (optional): If you are using a specialized paver cleaner, a pump sprayer can be useful for evenly applying the cleaning solution onto the pavers.
- Sand for joint re-sanding (if required): If the joints between the patio pavers have become loose or eroded, you may need to re-sand them. Purchase sand that matches the color and texture of your existing joint sand.
- Paver sealer (if desired): Applying a paver sealer after cleaning can help protect the pavers from future stains and damage. Choose a sealer that is suitable for your specific type of pavers.
Having these tools and materials ready will ensure that you can clean your patio pavers effectively and efficiently, leaving them looking fresh and renewed.
Preparing the Patio Pavers
Before diving into the actual cleaning process, it is important to properly prepare the patio pavers. Taking a few simple steps beforehand will ensure that the cleaning process goes smoothly and yields optimal results. Follow these guidelines to prepare your patio pavers:
- Clear the area: Remove any furniture, plants, or decorations from the patio area. This will make it easier to access all areas of the pavers and prevent any hindrances during the cleaning process.
- Sweep the surface: Begin by sweeping the surface of the patio pavers with a broom or brush. This will help remove loose dirt, leaves, and debris that may have accumulated. Pay attention to the corners and edges of the pavers, as these areas are often overlooked and tend to accumulate more dirt.
- Check for any damages: Take a moment to inspect the pavers for any damages or loose stones. If you notice any cracks, chips, or uneven surfaces, make a note of them for later repairs. Ensuring that the pavers are in good condition will ensure a longer lifespan and better overall appearance.
- Safeguard nearby areas: If there are any nearby plants or delicate surfaces, consider covering them or using plastic sheets to protect them during the cleaning process. This will prevent any damage from cleaning solutions or debris that may be sprayed or splashed.
By taking the time to prepare the patio pavers, you will have a clean and clear area to work with. This will make the subsequent cleaning steps more effective and efficient, allowing you to achieve the best possible results.
Sweeping and Clearing the Surface
Once you have prepared the patio pavers, the next step is to sweep and clear the surface thoroughly. This process ensures that loose dirt, debris, and leaves are removed, allowing for a cleaner and more effective cleaning process. Follow these steps to sweep and clear the surface of your patio pavers:
- Start with a broom or brush: Begin by using a broom or brush with stiff bristles to sweep the surface of the patio pavers. Work in a systematic manner, starting from one end and moving towards the other. Make sure to reach all corners, edges, and crevices of the pavers.
- Remove loose dirt and debris: As you sweep, pay attention to any areas where dirt or debris may have accumulated. Use the broom or brush to remove any loose dirt, leaves, or other debris. For hard-to-reach areas, you can use a small hand brush or even a hand-held vacuum cleaner.
- Dispose of the swept debris: Once you have swept the entire surface, gather the accumulated debris in a dustpan or use a shovel to collect it. Dispose of the debris in a proper waste receptacle. This will prevent the debris from being reintroduced onto the cleaned pavers.
- Inspect for any remaining dirt or debris: After sweeping, take a moment to inspect the pavers for any remaining dirt or debris. If you notice any areas that require further cleaning, make a mental note of them and address them later in the cleaning process.
This step of sweeping and clearing the surface is crucial as it helps remove loose dirt and debris, allowing for a more effective cleaning process. By starting with a clean surface, you can achieve better results and ensure that the cleaning solution can penetrate the pavers more effectively for a thorough clean.
Removing Stains and Mildew
Stains and mildew can be an eyesore on your patio pavers, diminishing their overall appearance. It is essential to address these issues before proceeding with the general cleaning process. Fortunately, there are effective methods for removing stains and mildew from your patio pavers. Follow these steps to tackle stains and mildew effectively:
- Identify the type of stain: Before choosing a stain removal method, determine the type of stain on your patio pavers. Common stains include oil, grease, food spills, rust, and organic stains from leaves or berries. Knowing the type of stain will enable you to choose the most appropriate removal technique.
- Blot excess spills: If you encounter a fresh spill, such as oil or food, quickly blot the excess with a clean cloth or paper towel. Do not rub the spill as it can spread and push the stain deeper into the pavers.
- Mix a cleaning solution: Depending on the type of stain, create a cleaning solution using mild detergent, water, and, if necessary, a specific stain remover. For organic stains, mix water with a few drops of dish soap. For rust stains, use a rust remover. Always follow the product instructions and wear protective gloves.
- Apply the cleaning solution: Use a sponge or a cloth to apply the cleaning solution to the stained areas of the patio pavers. Let the solution sit for a few minutes to allow it to penetrate the stain.
- Scrub gently: Using a scrub brush or a toothbrush, gently scrub the stained areas in a circular motion. Be careful not to apply excessive force, which could damage the pavers.
- Rinse with water: Thoroughly rinse the area with clean water to remove the cleaning solution and any loosened stain particles. A hose or a pressure washer with a low-pressure setting can be used for this step.
- Mildew removal: To remove mildew, create a solution of equal parts water and household bleach or use a commercial mildew cleaner. Apply the solution directly to the affected areas and let it sit for a few minutes. Scrub the mildew gently with a brush, then rinse off with water.
- Repeat if necessary: Stubborn stains may require repeat applications or additional treatment. If the stain persists, you may need to try a different stain removal technique or consider seeking professional help.
By following these steps, you can effectively remove stains and mildew, restoring the appearance of your patio pavers. Remember to take appropriate safety measures and test any cleaning solution on a small, inconspicuous area before applying it to the entire stained area.
Read more: How To Clean Brick Pavers Patio
Pressure Washing the Pavers
Pressure washing is a powerful method for deep-cleaning patio pavers. It can effectively remove embedded dirt, grime, and stains from the surface, restoring the pavers’ original appearance. However, it is important to use the pressure washer correctly to prevent damage to the pavers. Follow these steps to safely pressure wash your patio pavers:
- Select an appropriate pressure washer: Choose a pressure washer with a PSI (pounds per square inch) suitable for your patio pavers. A lower PSI (around 1000-1500) is generally recommended for most pavers to prevent damage.
- Prepare the pressure washer: Connect the pressure washer to a water source and ensure it is functioning properly. Familiarize yourself with the different settings and nozzles available on the machine.
- Clear the area: Remove any loose debris and vegetation from the patio area. This prevents them from getting caught in the pressure washer or causing damage during the cleaning process.
- Start with low pressure: Begin by using the pressure washer on a low-pressure setting. This will help you gauge the effect on the pavers and avoid any potential damage. Gradually increase the pressure if necessary.
- Maintain a suitable distance: Keep the pressure washer nozzle at a safe distance from the pavers, usually around 12-18 inches. Holding the nozzle too close can damage the pavers and dislodge the joint sand.
- Work in sections: Divide the patio into sections and clean one area at a time. This ensures that you cover the entire surface uniformly and avoid missing any spots. Move the pressure washer in smooth, sweeping motions.
- Pay attention to stubborn stains: For stubborn stains, you can use a rotating or turbo nozzle for increased cleaning power. Be cautious when targeting specific stains, as excessive pressure may damage the pavers.
- Rinse thoroughly: Once you have pressure washed the entire patio, thoroughly rinse the pavers with clean water. This flushes away any remaining dirt, detergent, or debris.
- Stay aware of joint sand: Take care not to dislodge the joint sand between the pavers while pressure washing. If necessary, re-sand the joints after the cleaning process is complete.
Pressure washing can be an effective method for cleaning patio pavers, but it is essential to use the equipment properly and exercise caution. If you are unsure about pressure washing your pavers, it is always advisable to consult a professional to avoid any potential damage.
To clean patio pavers, start by sweeping away debris. Then, use a mixture of water and mild detergent to scrub the pavers. For tough stains, try a solution of water and vinegar. Finally, rinse the pavers with clean water.
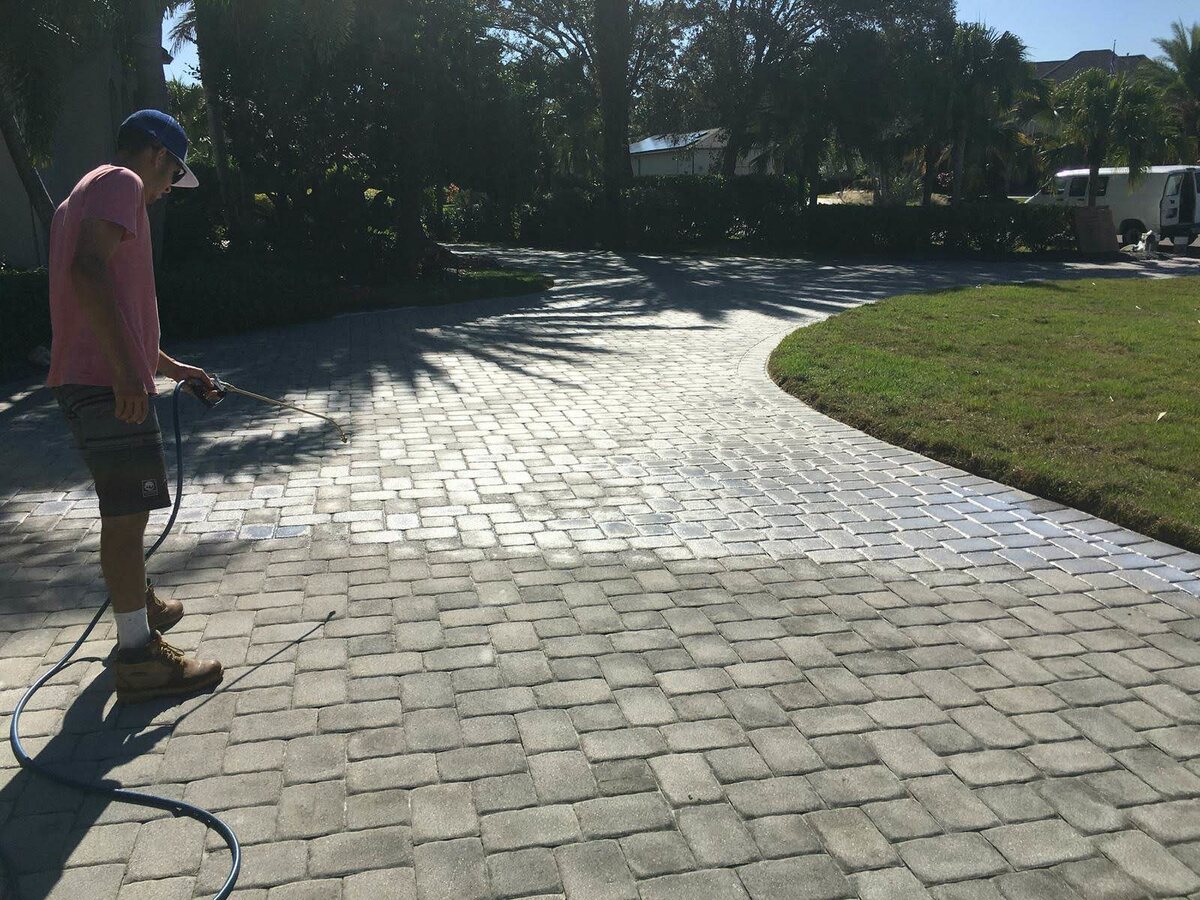
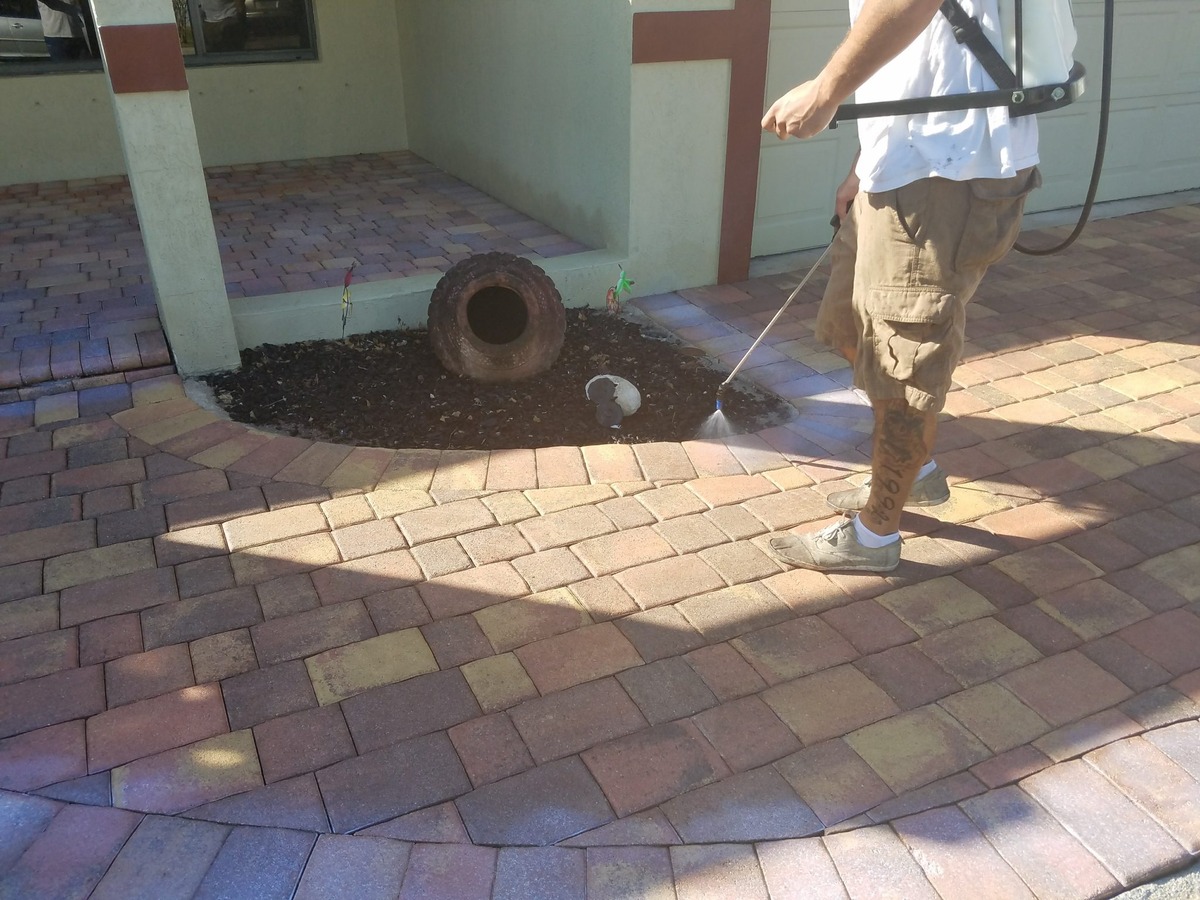
Applying a Cleaning Solution
In addition to pressure washing, applying a cleaning solution can further enhance the effectiveness of the cleaning process. A cleaning solution helps break down stubborn dirt, grime, and stains on the surface of the patio pavers. Follow these steps to apply a cleaning solution to your patio pavers:
- Select the appropriate cleaning solution: Choose a cleaning solution that is safe for your specific type of pavers and suitable for the level of dirt and stains you need to remove. You can use a mild detergent mixed with water or opt for a specialized paver cleaner available in the market.
- Mix the cleaning solution: Dilute the cleaning solution according to the manufacturer’s instructions. Use a bucket or pump sprayer to mix the solution with water, ensuring proper ratios are maintained.
- Apply the cleaning solution: Using a sponge, brush, or pump sprayer, apply the cleaning solution evenly across the surface of the patio pavers. Start from one end and work your way to the other, ensuring complete coverage.
- Let it sit: Allow the cleaning solution to penetrate the pavers for the recommended amount of time. This can vary depending on the specific cleaner used, so be sure to read the instructions carefully.
- Agitate the surface: After letting the solution sit, use a scrub brush or deck brush to agitate the surface of the pavers. This helps loosen any stubborn dirt or stains and allows the cleaning solution to work more effectively.
- Focus on problem areas: Pay extra attention to areas with heavy stains or dirt buildup. Use the brush to scrub these areas more vigorously, ensuring thorough cleaning.
- Rinse with water: Once you have scrubbed the patio pavers, it is important to rinse off the cleaning solution. Use a hose or pressure washer on a low-pressure setting to rinse the surface thoroughly. This eliminates any remaining debris and cleaning solution.
Applying a cleaning solution before or after pressure washing can significantly improve the effectiveness of the cleaning process. It helps to break down stubborn dirt and stains, making them easier to remove. Be sure to choose a safe and suitable cleaning solution for your patio pavers and follow the manufacturer’s instructions for optimal results.
Scrubbing and Rinsing the Pavers
Scrubbing and rinsing the patio pavers is a crucial step in the cleaning process. This is where you will remove any remaining dirt, grime, and cleaning solution residue, ensuring that the pavers are left clean and rejuvenated. Follow these steps to effectively scrub and rinse your patio pavers:
- Select a scrub brush: Choose a scrub brush or deck brush with stiff bristles that can effectively remove dirt and grime from the pavers’ surface. Consider the size and texture of your pavers when selecting a brush.
- Dip the brush in water: Before scrubbing the pavers, wet the brush by dipping it in a bucket of clean water. This helps prevent the brush from scratching the pavers and provides a lubricating effect.
- Scrub in a circular motion: Begin scrubbing the pavers in a circular motion, focusing on small sections at a time. Apply moderate pressure to effectively remove dirt and stains from the surface. Pay extra attention to areas that are heavily soiled or have stubborn stains.
- Rinse the brush frequently: As you scrub, rinse the brush frequently in a bucket of clean water to remove any dirt or debris that may have accumulated. This ensures that you are always working with a clean brush.
- Rinse the pavers: Once you have scrubbed a section of the pavers, use a hose or pressure washer on a low-pressure setting to rinse away any loosened dirt or cleaning solution residue. Move from one section to another, ensuring that every part of the pavers is thoroughly rinsed.
- Inspect for any missed spots: After rinsing, take a moment to inspect the pavers for any missed spots or remaining stains. If needed, go back and scrub those areas again until the pavers are completely clean.
Scrubbing and rinsing the patio pavers is a labor-intensive process, but it’s worth the effort for a thorough clean. The combination of scrubbing to remove dirt and rinsing to remove residue ensures that your patio pavers are left looking fresh and revitalized.
Re-sanding the Joints
Over time, the joints between patio pavers can become eroded or dislodge, leaving gaps and compromising the stability of the surface. Re-sanding the joints is an important step in maintaining the integrity of your patio and preventing weed growth between the pavers. Follow these steps to re-sand the joints of your patio pavers:
- Check the condition of the joints: Inspect the joints between the pavers to determine if they need to be re-sanded. Look for gaps, erosion, or any signs of instability. If the joints are in poor condition, re-sanding is necessary.
- Remove any existing sand: Before re-sanding, remove any loose or dislodged sand from the joints. You can sweep or brush the surface to clear away debris and ensure a clean area for the new sand.
- Select the right sand: Choose a sand type that is appropriate for your patio pavers. Consider factors such as color, texture, and compatibility. Polymeric sand is a popular choice as it hardens when wet, providing stability and resisting weed growth.
- Pour sand into the joints: Pour the selected sand directly into the joints, filling them evenly. Use a broom or brush to sweep the sand into the gaps, ensuring complete coverage and avoiding any air pockets.
- Compact the sand: Use a tamper or a plate compactor to gently compact the sand in the joints. This helps settle the sand and creates a stable foundation for the pavers. Be careful not to apply excessive force, as it can dislodge the pavers.
- Sweep off excess sand: Once you have compacted the sand, sweep off any excess from the surface of the pavers. This prevents the sand from staining the pavers and leaves a clean, finished look.
- Water the joints: Lightly mist the re-sanded joints with water to activate the polymeric sand if you are using it. Follow the manufacturer’s instructions for proper activation. This helps the sand settle and harden, providing increased stability.
- Inspect and re-sand if necessary: After the sand has settled, inspect the joints to ensure that they are filled adequately. If needed, add more sand and repeat the compacting and sweeping process until the joints are fully filled.
Re-sanding the joints of your patio pavers not only enhances the appearance but also ensures long-term stability and minimizes weed growth. By following these steps, you can maintain the integrity of your patio surface and enjoy a clean and well-maintained outdoor space.
Read more: How To Clean Grease Off Patio Pavers
Sealing the Patio Pavers
Sealing your patio pavers is an optional but beneficial step that can provide added protection and enhance their longevity. A quality sealer helps to prevent stains, minimize color fading, and reduce the effects of weathering on your patio surface. Follow these steps to seal your patio pavers:
- Clean the pavers: Before sealing, ensure that the patio pavers are clean and free from any debris, stains, or residual cleaning solutions. Use a broom or brush to sweep away loose dirt and a gentle detergent solution to remove any spots or stains.
- Choose the right sealer: Select a sealer that is suitable for your specific type of pavers. There are various types available, including solvent-based, water-based, and penetrating sealers. Consider factors such as durability, UV protection, and sheen when making your selection.
- Test a small area: Before applying the sealer to the entire patio surface, test it on a small, inconspicuous area. This allows you to ensure compatibility with the pavers and assess the desired level of sheen or enhancement.
- Apply the sealer: Use a brush, roller, or sprayer to apply the sealer evenly over the patio pavers. Work in small sections to ensure uniform coverage. Be careful not to oversaturate the pavers, as excess sealer can create an uneven finish.
- Allow drying time: Follow the manufacturer’s instructions for the recommended drying time of the sealer. This may vary depending on the type of sealer used. Avoid walking on the sealed surface during this time to prevent unwanted marks or damage.
- Apply a second coat (optional): Depending on the desired level of protection and the sealer’s specifications, you may choose to apply a second coat of sealer. This can provide enhanced durability and longevity to your patio pavers.
- Maintain the sealed surface: Regularly clean and maintain the sealed patio surface to ensure its longevity. Avoid using harsh chemicals or abrasive cleaners that may degrade the sealer. Periodically assess the condition of the sealer and reapply as needed to maintain optimal protection.
Sealing your patio pavers can help extend their lifespan and keep them looking vibrant and attractive for years to come. By following these steps, you can effectively seal your pavers and enjoy the added benefits of protection and longevity.
Final Tips and Precautions
While cleaning and maintaining your patio pavers, it’s important to keep in mind some final tips and take necessary precautions to ensure the best results and avoid any potential issues. Here are some important tips and precautions to consider:
- Read and follow instructions: Always read and follow the instructions provided by the manufacturer for any cleaning products, tools, or sealers that you use. This will ensure proper usage and help you achieve the desired outcome.
- Start with gentle methods: When cleaning your patio pavers, start with gentle methods such as sweeping, clearing the surface, and applying a cleaning solution. Only move on to more aggressive methods like pressure washing if necessary.
- Protect surrounding areas: Take proper precautions to protect any nearby surfaces or vegetation from cleaning solutions, pressure washing, or sanding. Cover them with plastic sheets or use a tarpaulin to avoid damage or contamination.
- Use safety gear: When using cleaning solutions or working with a pressure washer, it’s essential to wear appropriate safety gear such as gloves, goggles, and a mask. This will protect you from potential skin irritation, eye injuries, or respiratory issues.
- Avoid harsh chemicals: Avoid using harsh chemicals, bleach, or acid-based cleaners unless specifically recommended by the manufacturer or for treating stubborn stains. These substances can damage the pavers and surrounding areas.
- Maintain regular cleaning: To keep your patio pavers looking their best, establish a regular cleaning schedule. Regularly sweep away debris and perform routine maintenance to prevent the buildup of dirt, stains, and mildew.
- Reapply sealant periodically: If you choose to seal your patio pavers, consider reapplying the sealer every couple of years or as recommended by the manufacturer. This will help maintain the protective barrier and extend the life of your pavers.
- Address issues promptly: If you notice any issues with your patio pavers such as cracks, erosion, or loose stones, address them promptly. Ignoring these issues can lead to further damage and potentially compromise the stability and safety of your patio.
Following these final tips and taking the necessary precautions will ensure that your patio pavers remain in excellent condition and provide you with a beautiful outdoor space for years to come. Remember to assess your specific situation and adjust the cleaning methods or products accordingly to achieve the best results.
Conclusion
Cleaning and maintaining your patio pavers is essential for preserving their beauty and ensuring their longevity. By following the step-by-step process outlined in this article, you can effectively clean your patio pavers and restore their original luster. From sweeping and clearing the surface to removing stains and mildew, and from pressure washing to applying a cleaning solution, each step plays a crucial role in achieving a clean and rejuvenated outdoor space.
Additionally, re-sanding the joints and sealing the patio pavers provide added protection and stability. Re-sanding fills in gaps and prevents weed growth, while sealing helps to maintain the pavers’ color, minimize staining, and prolong their lifespan. These optional steps can further enhance the visual appeal and durability of your patio area.
Remember to take appropriate safety precautions, read and follow instructions carefully, and choose cleaning solutions and sealers that are suitable for your specific type of pavers. Regular maintenance and periodic cleaning will help keep your patio pavers looking their best and ensure long-term enjoyment of your outdoor space.
By investing time and effort into cleaning and maintaining your patio pavers, you can create a welcoming and enjoyable outdoor environment for relaxation, entertaining, and creating lasting memories. So grab your tools, follow the guidelines in this article, and get ready to transform your patio into a clean, beautiful, and inviting space.
Here’s to many happy days enjoying your revitalized patio pavers!
Frequently Asked Questions about How Do You Clean Patio Pavers
Was this page helpful?
At Storables.com, we guarantee accurate and reliable information. Our content, validated by Expert Board Contributors, is crafted following stringent Editorial Policies. We're committed to providing you with well-researched, expert-backed insights for all your informational needs.


0 thoughts on “How Do You Clean Patio Pavers”