Home>Furniture>Outdoor Furniture>How To Set Up A Hammock Stand

Outdoor Furniture
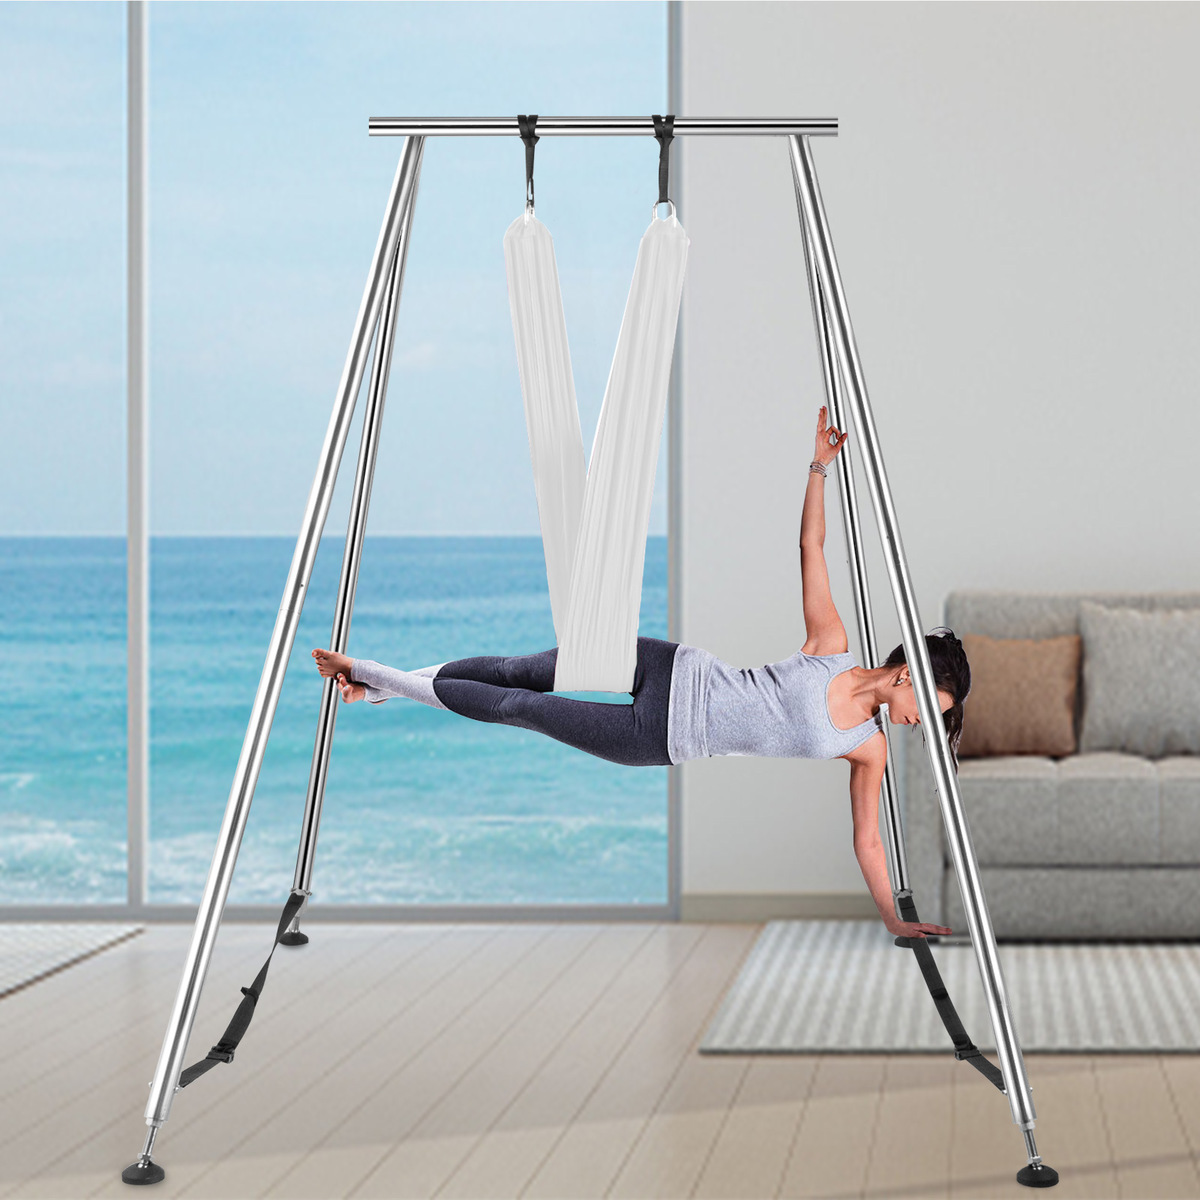
How To Set Up A Hammock Stand
Modified: August 28, 2024
Learn how to set up an outdoor-furniture hammock stand and enjoy ultimate relaxation in your backyard. Step-by-step guide with expert tips!
(Many of the links in this article redirect to a specific reviewed product. Your purchase of these products through affiliate links helps to generate commission for Storables.com, at no extra cost. Learn more)
Introduction
Welcome to the world of outdoor relaxation! There’s nothing quite like lounging in a hammock on a beautiful day, swaying gently in the breeze. But before you can enjoy this blissful experience, you need to set up a hammock stand that will securely hold your hammock and provide a stable foundation.
Choosing the right hammock stand is crucial for your comfort and safety. With so many options available, it can be overwhelming to know where to start. In this guide, we will walk you through the process of setting up a hammock stand, step by step.
From unpacking and organizing the components to adjusting the height and width of the stand, we’ll cover all the important details to ensure a successful setup. So grab your assembly tools and let’s get started!
Key Takeaways:
- Choose a hammock stand based on weight capacity, size, material, portability, design, and budget to enhance your outdoor relaxation experience.
- Follow step-by-step instructions to assemble and adjust your hammock stand for a safe, stable, and comfortable lounging experience.
Read more: How To Build A Hammock Chair Stand
Choosing the Right Hammock Stand
When it comes to selecting a hammock stand, there are a few key factors to consider. These factors will not only determine the stability and durability of the stand but also its compatibility with your hammock.
1. Weight Capacity: The first thing to assess is the weight capacity of the hammock stand. You need to ensure that the stand can support both your body weight and the weight of the hammock. Generally, hammock stands have weight capacities ranging from 250 to 500 pounds.
2. Size and Compatibility: Measure the length and width of your hammock to determine the size of the stand you need. It’s important to choose a stand that matches the dimensions of your hammock to ensure a proper fit. Additionally, consider the height of the stand to ensure there’s enough clearance for your hammock to sway comfortably.
3. Material: Hammock stands are typically made from steel or wood. Steel stands are known for their strength and durability and are well-suited for outdoor use. Wooden stands, on the other hand, have a natural aesthetic appeal and can blend seamlessly with your outdoor decor.
4. Portability: If you plan on frequently moving your hammock stand or taking it on camping trips, consider a portable and lightweight option. Look for stands that are easy to disassemble and come with a carrying case for convenient transportation.
5. Design and Style: Hammock stands come in various designs, including arc-shaped, tri-shaped, and rectangular. Consider the overall aesthetic and style of your outdoor space when choosing a stand. Opt for a design that complements your existing decor or adds a touch of visual interest to your backyard.
6. Budget: Last but not least, consider your budget. Hammock stands come at different price points, so it’s essential to determine how much you’re willing to invest in a stand that meets your requirements. Remember, investing in a high-quality stand will ensure its longevity and your overall satisfaction.
By carefully considering these factors, you can find a hammock stand that not only meets your needs but also enhances your outdoor relaxation experience. Now that you have chosen the right stand, let’s move on to the step-by-step process of setting it up!
Step 1: Assembly Tools and Materials
Before you begin setting up your hammock stand, it’s essential to gather all the necessary tools and materials. Having everything you need on hand will streamline the assembly process and ensure a smooth setup. Here’s a list of the typical tools and materials you will need:
- Hammock Stand Components: This includes the base, feet, crossbars, hooks, and any other specific parts required for your particular hammock stand model. Make sure you have all the components ready for assembly.
- Assembly Manual: Locate the assembly manual or instructions that came with your hammock stand. The manual will provide step-by-step guidance on how to properly set up the stand.
- Allen Wrench or Screwdriver: Most hammock stands require an Allen wrench or screwdriver for assembly. Check the assembly manual to determine the specific type and size of the tool needed.
- Level: A level is an essential tool to ensure that your hammock stand is properly aligned and balanced. This will contribute to a comfortable and secure lounging experience.
- Tape Measure: A tape measure will come in handy for taking accurate measurements and ensuring that the stand is assembled to the correct dimensions.
- Rubber Mallet (optional): For some hammock stand models, you may need a rubber mallet to gently tap the components into place, ensuring a snug fit.
- Protective Gloves: While not mandatory, wearing protective gloves during the assembly process can provide added comfort and prevent any accidental scratches or injuries.
- Padding or Soft Mat: This is optional but recommended if you plan to assemble the hammock stand on a hard surface. Placing a soft mat or padding beneath the components will protect both the stand and the flooring.
- Assistance: Depending on the size and weight of the hammock stand, it may be helpful to have an extra set of hands to assist you during assembly. This will make the process easier and safer.
Ensure that you have all these tools and materials ready before you begin the assembly process. Now that you’re prepared, let’s move on to the next step: unpacking and organizing the hammock stand components.
Step 2: Unpacking and Organizing the Hammock Stand Components
Once you have gathered all the necessary tools and materials, it’s time to unpack and organize the hammock stand components. This step is crucial to ensure that you have everything you need and that all the parts are in good condition.
Begin by finding a clear and spacious area where you can lay out all the components. It’s important to have enough room to move around and arrange the pieces properly. If you are assembling the stand outdoors, make sure the ground is clean and free from any sharp objects or debris.
Take out the contents of the box and carefully inspect each component. Look for any signs of damage, such as bent or dented pieces. If you notice any issues, contact the manufacturer or retailer immediately to address the problem.
Next, refer to the assembly manual to identify each part and familiarize yourself with its purpose. The manual will typically include detailed diagrams and explanations to help you understand how the components fit together.
As you unpack each piece, arrange them in a systematic manner. You can group them according to their function or size to make it easier to access them during the assembly process. This will also help you ensure that you don’t miss any critical components.
If your hammock stand includes any smaller parts or hardware, such as screws or hooks, keep them in a separate container or bag. This will prevent them from getting lost or misplaced during the assembly process.
By unpacking and organizing the hammock stand components, you are setting the stage for a smooth and efficient assembly process. Taking the time to familiarize yourself with the parts and ensuring that they are in good condition will contribute to a successful setup. Now that you have organized all the components, let’s move on to connecting the base and feet in the next step.
Step 3: Connecting the Base and Feet
With the hammock stand components unpacked and organized, it’s time to move on to the next step: connecting the base and feet. This step forms the foundation of the stand and ensures stability and support for the hammock.
Begin by identifying the base and feet components. The base is typically the largest piece and will have holes or slots where the feet attach. The feet are the smaller pieces that will provide stability and prevent the stand from tipping over.
Align the holes or slots in the base with the corresponding holes in the feet. Depending on your hammock stand model, you may need to insert screws or tighten bolts to securely connect the base and feet. Refer to the assembly manual for specific instructions on how to do this.
Using the appropriate tools, tighten the screws or bolts to ensure a snug fit. Be careful not to overtighten, as this can damage the components or strip the threads. It’s important to strike a balance between a secure connection and preserving the integrity of the materials.
Once the base and feet are successfully connected, double-check that they are aligned correctly. Use a level to ensure that the base is flat and even. This step is crucial for maintaining stability and preventing any wobbling or tipping when the hammock is in use.
If your hammock stand has adjustable feet, you can fine-tune their position to achieve the desired balance. This is particularly useful if you’re setting up the stand on an uneven or sloped surface. Adjust the height of each foot as needed until the base is level.
By connecting the base and feet securely and ensuring proper alignment, you are laying a solid foundation for your hammock stand. With this step complete, let’s move on to the next step: attaching the crossbars.
Read more: How To Set Up An Eno Hammock
Step 4: Attaching the Crossbars
Now that the base and feet of your hammock stand are securely connected, it’s time to move on to the next step: attaching the crossbars. The crossbars provide the structure and stability for the hammock, ensuring a safe and comfortable lounging experience.
Begin by identifying the crossbars among the components. These are typically long, tubular pieces that will connect to the upright sections of the base and provide support for the hammock.
Align the holes or slots in the crossbars with the corresponding holes or connections on the base. Depending on your hammock stand model, you may need to insert screws, tighten bolts, or slide the crossbars into place.
Refer to the assembly manual for specific instructions on how to attach the crossbars. It’s important to follow these instructions carefully to ensure a secure and stable connection.
Using the appropriate tools, tighten the screws or bolts if required. If the crossbars simply slide into place, push them in firmly to ensure they are seated properly.
Once the crossbars are attached, double-check that they are securely in place. Give them a gentle tug to ensure they are not loose or wobbly.
Depending on your hammock stand model, there may be additional crossbars or support beams that need to be attached. Follow the same process for these components, aligning them with the appropriate holes or connections and securing them as instructed in the assembly manual.
By attaching the crossbars properly, you are creating a strong and stable structure for your hammock. With this step complete, let’s move on to the next step: adjusting the height and width of the stand.
When setting up a hammock stand, make sure to choose a level and stable location. Use a tape measure to ensure the correct distance between the stand’s base and the hammock attachment points. Follow the manufacturer’s instructions for assembly to ensure safety and stability.
Step 5: Adjusting the Height and Width of the Stand
Now that the base, feet, and crossbars of your hammock stand are securely attached, it’s time to adjust the height and width of the stand to ensure a comfortable and properly fitted hammock setup.
Start by referring to the assembly manual to determine the height adjustment mechanism for your particular hammock stand model. Some stands have adjustable hooks or telescoping legs that allow for easy height adjustment.
If your stand has adjustable hooks, simply move them up or down along the upright sections of the base to achieve the desired height. Make sure to adjust both ends of the stand evenly to maintain balance.
If your stand has telescoping legs, unlock the mechanisms and extend or retract the legs to the desired height. Once you have achieved the desired height, lock the mechanisms in place to secure the legs.
Take into consideration the overall length of your hammock when adjusting the height of the stand. You want the hammock to hang comfortably without touching the ground when you’re lying in it.
Next, consider the width of your hammock to adjust the distance between the base or upright sections of the stand. Most hammock stands have adjustable width settings that allow you to match the width of your hammock for a snug fit.
Refer to the assembly manual to determine how to adjust the width of your particular hammock stand. This may involve moving specific parts or adjusting locking mechanisms to achieve the desired width.
Measure the width of your hammock and adjust the distance between the base or upright sections of the stand accordingly. Ensure that the width is evenly adjusted on both ends to maintain balance and stability.
By adjusting the height and width of your hammock stand, you can customize the setup to fit your preferred hammock hanging style. With this step complete, let’s move on to the next step: securing the hammock hooks.
Step 6: Securing the Hammock Hooks
Now that you have adjusted the height and width of your hammock stand, it’s time to secure the hammock hooks. The hooks are what will hold your hammock in place, so it’s essential to ensure they are properly installed and secure.
Start by locating the hammock hooks among the components. These are typically S-shaped hooks or carabiners that will attach to the loops or rings on the ends of your hammock.
Once you have identified the hooks, attach them to the designated points on the crossbars or upright sections of the stand. The specific attachment points will depend on the design of your hammock stand. Refer to the assembly manual for guidance on where to connect the hooks.
Ensure that the hooks are securely fastened and that there is no wobbling or movement. Give them a gentle tug to test their stability.
Next, locate the loops or rings on the ends of your hammock. These are the attachment points where the hooks will secure the hammock.
Attach each hook to the corresponding loop or ring on the hammock. Make sure the hooks are fully engaged and that the weight of the hammock is evenly distributed between the hooks.
If your hammock has a spreader bar, ensure that it is properly aligned and positioned on the crossbars of the stand. The spreader bar helps to maintain the shape and balance of the hammock.
Double-check the tension of the hammock and adjust if necessary. You want it to be taut but not overly tight. The ideal tension will provide a comfortable and supportive surface for relaxing.
By securely attaching the hammock hooks, you are ensuring the stability and safety of your hammock setup. With this step complete, let’s move on to the next step: checking stability and balance.
Step 7: Checking Stability and Balance
After securing the hammock hooks, it’s important to check the stability and balance of your hammock stand. Ensuring that the stand is properly set up will provide a safe and comfortable experience when using your hammock.
Start by checking the overall stability of the stand. Give it a gentle shake to see if it wobbles or feels unstable. If you notice any instability, double-check that all the components are securely tightened and properly aligned.
Use a level to assess the balance of the stand. Place the level on the base or crossbars, ensuring that it is parallel to the ground. Adjust the height or position of the legs or feet as needed to achieve a level position.
Pay attention to any unevenness or tilting of the stand. If you find that the stand is not level, try adjusting the position of the feet or using shims or pads beneath the legs to achieve balance.
As an additional precaution, it’s a good idea to test the stability and balance of the stand by gradually applying weight to the hammock. Slowly lower yourself into the hammock and observe any movements or instability in the stand. Make sure you feel secure and comfortable before fully reclining in the hammock.
If you find that the stand is still unstable or imbalanced, consider double-checking the assembly steps or consulting the assembly manual for any troubleshooting tips. It’s important to address any stability or balance issues before using the hammock.
By checking the stability and balance of your hammock stand, you are ensuring a safe and enjoyable experience when using your hammock. With this step complete, we’re almost ready to fully enjoy your hammock. Let’s move on to the final step: testing the hammock stand.
Read more: How To Put Up A Hammock Without Trees
Step 8: Testing the Hammock Stand
You’ve reached the final step of setting up your hammock stand: testing it to ensure everything is in working order and ready for use. Testing the stand will give you peace of mind and ensure that you can relax comfortably in your hammock.
Before fully testing the stand, do a visual inspection to ensure that all components are securely fastened and there are no signs of damage or wear. Check the connections, hooks, and crossbars to make sure everything is in place.
Carefully lower yourself into the hammock and take note of how it feels. Pay attention to any unusual movements or instability in the stand. If you experience any discomfort or the stand feels unstable, stop and inspect the setup for any possible issues.
Once you are in the hammock, gently sway back and forth to test the stability and balance of the stand. Take note of any excessive shaking or wobbling. If you notice any instability, reinforce the connections or adjust the position of the stand, and retest until you feel secure.
Try different positions in the hammock, such as sitting up or lying down, to ensure that it can comfortably accommodate your preferred lounging positions. Make sure the hammock is positioned centrally on the stand and the weight is evenly distributed.
Pay attention to the overall comfort of the hammock and the support it provides. Take note of any pressure points or areas where the hammock feels too tight or loose. Adjust the tension or position of the hammock as needed to achieve optimal comfort.
While testing the hammock, take the opportunity to enjoy the experience and appreciate the relaxation it offers. This is a great time to unwind and recharge in the comfort of your outdoor oasis.
If you are satisfied with the stability, balance, and comfort of the hammock stand, then congratulations! You have successfully set up your hammock stand and are ready to enjoy many relaxing moments ahead.
Remember to periodically check the condition and tightness of the connections, hooks, and crossbars to ensure ongoing safety and stability. With proper maintenance, your hammock stand will provide you with countless hours of outdoor enjoyment.
Now, grab a book, a refreshing beverage, or simply close your eyes, and fully immerse yourself in the delightful experience of your newly set-up hammock stand.
Conclusion
Congratulations! You have successfully set up your hammock stand and are now ready to enjoy the ultimate relaxation experience in the great outdoors. By following the step-by-step guide provided, you have ensured the stability, comfort, and safety of your hammock setup.
Choosing the right hammock stand, gathering the necessary tools and materials, and carefully assembling the components are all essential steps in creating a secure and enjoyable hammock setup. Adjusting the height and width of the stand, securing the hammock hooks, and checking the stability and balance ensure that everything is in proper working order.
Remember to periodically inspect and maintain your hammock stand to ensure its longevity and continued performance. Check for any signs of wear, tighten connections if necessary, and make any adjustments needed to maintain stability and comfort.
Now, it’s time to decompress, unwind, and revel in the blissful experience of gently swaying in your hammock. Whether you choose to enjoy sunny afternoons with a good book, spend time with loved ones, or simply close your eyes and soak in the tranquility of nature, your hammock stand will be your go-to outdoor haven.
Embrace the freedom of outdoor relaxation, and let the stress and worries of everyday life fade away as you indulge in moments of peace and serenity. With your hammock stand set up and ready for use, a world of outdoor comfort and tranquility awaits you.
So, go ahead, swing gently in the breeze, feel the warmth of the sun on your face, and let the soothing sounds of nature transport you to a place of pure relaxation. Your hammock stand is your gateway to a revitalizing outdoor haven.
Enjoy every moment, and may your hammock stand be a cherished companion on many blissful adventures to come!
Frequently Asked Questions about How To Set Up A Hammock Stand
Was this page helpful?
At Storables.com, we guarantee accurate and reliable information. Our content, validated by Expert Board Contributors, is crafted following stringent Editorial Policies. We're committed to providing you with well-researched, expert-backed insights for all your informational needs.


0 thoughts on “How To Set Up A Hammock Stand”