Home>Garden Essentials>How Long For A June Plum Seed To Germinate
Garden Essentials
How Long For A June Plum Seed To Germinate
Modified: March 15, 2024
Looking to plant a garden? Learn how long it takes for a June plumseed to germinate and start growing in your garden.
(Many of the links in this article redirect to a specific reviewed product. Your purchase of these products through affiliate links helps to generate commission for Storables.com, at no extra cost. Learn more)
Introduction
Welcome to the fascinating world of gardening! If you’re an avid gardener or someone just starting out, you might have come across the term “germination” in your journey. Germination is the process where a seed transforms into a young plant, ready to sprout and grow. Each type of plant has its unique germination requirements, including the June plum seed.
In this article, we will explore the factors that affect the germination of June plum seeds and provide you with a step-by-step guide on how to successfully germinate these seeds. We will also discuss the timeline and expected duration for germination and offer troubleshooting tips for common issues that may arise during the process.
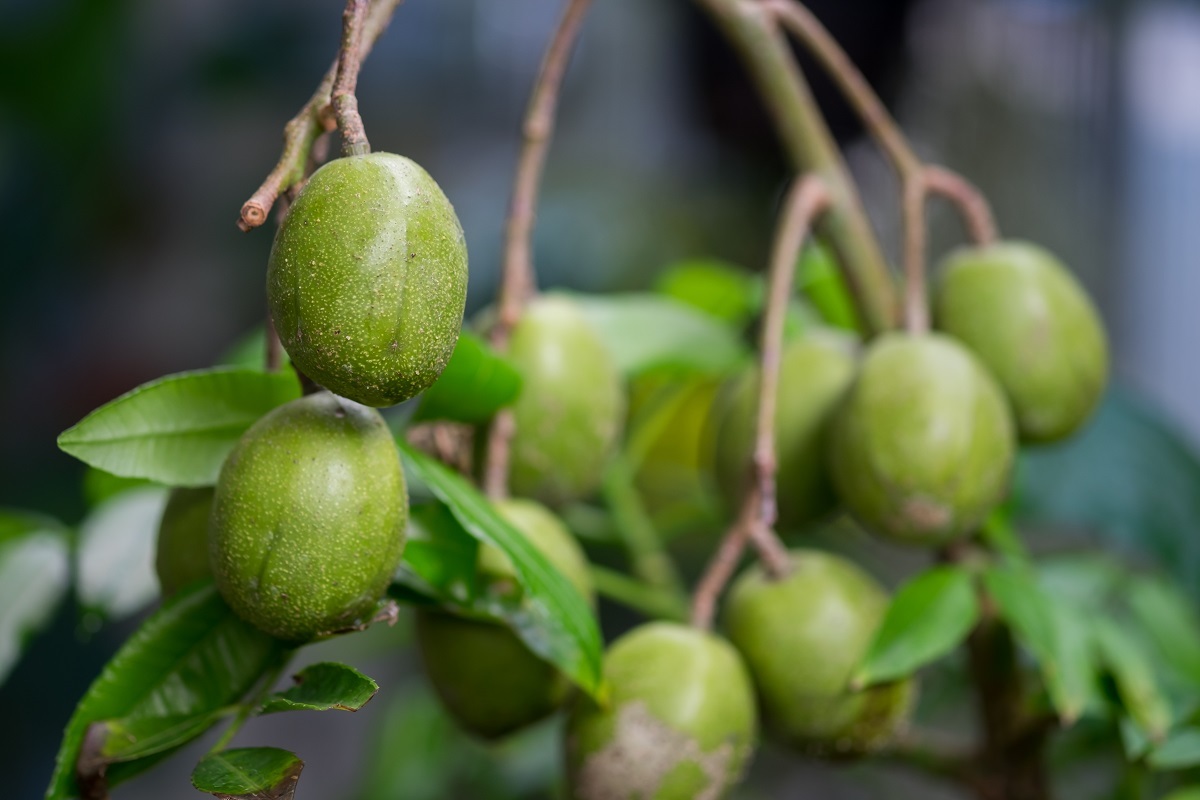
Understanding the germination process of June plum seeds is essential for gardeners looking to grow this tropical fruit tree. Native to the Caribbean and Central America, the June plum, also known as Spondias dulcis, belongs to the cashew family. It produces delicious, tangy fruits that are commonly used in chutneys, salsas, and refreshing fruit salads.
Now, let’s dive deeper into the factors that affect the germination of June plum seeds and find out how you can successfully grow this tropical tree in your garden.
Key Takeaways:
- Patience and care are essential for successfully germinating June plum seeds. Understanding factors like temperature, moisture, and light exposure can help create an ideal environment for seed sprouting and seedling development.
- Troubleshooting common issues such as mold, slow germination, and non-germination can improve germination rates. Monitoring and adjusting environmental conditions while exercising patience are key to nurturing healthy June plum seedlings.
Read more: How Long To Germinate Pitaya
Factors Affecting Germination
Germination is a complex biological process influenced by several factors that vary from plant to plant. Understanding and providing the optimal conditions for germination is essential for the successful growth of June plum trees. Here are the key factors that can affect the germination of June plum seeds:
1. Temperature: Temperature plays a critical role in seed germination. For June plum seeds, the optimal temperature range for germination is between 75°F (24°C) and 85°F (29°C). In this temperature range, the enzymes responsible for breaking down the seed coat and initiating growth are most active. If the temperature is too low, germination may be significantly delayed or inhibited. Conversely, if the temperature is too high, it can lead to poor germination rates or even seedling mortality.
2. Moisture: Adequate moisture is crucial for seed germination. During germination, seeds absorb water and swell, activating the metabolic processes necessary for growth. However, excessive moisture or waterlogged conditions can promote fungal or bacterial diseases and hinder germination. It is important to maintain a balance by keeping the germination medium consistently moist but not overly saturated.
3. Light Exposure: Although some seeds require light to germinate, June plum seeds do not have specific light requirements. This means that they can germinate in both light and dark conditions. However, it is advisable to provide diffused light rather than direct sunlight, as intense sunlight can dry out the germination medium and hinder seedling development. Providing a light source for approximately 12-16 hours a day can promote healthy growth once the seed has germinated.
It is worth noting that each plant species has its unique germination requirements. Therefore, it is crucial to research the specific needs of June plum seeds to ensure successful germination.
By understanding the factors that influence germination, gardeners can create an ideal growing environment for June plum seeds. In the next section, we will explore the step-by-step process of germinating June plum seeds to maximize germination success.
Key Takeaways:
- Patience and care are essential for successfully germinating June plum seeds. Understanding factors like temperature, moisture, and light exposure can help create an ideal environment for seed sprouting and seedling development.
- Troubleshooting common issues such as mold, slow germination, and non-germination can improve germination rates. Monitoring and adjusting environmental conditions while exercising patience are key to nurturing healthy June plum seedlings.
Read more: How Long To Germinate Pitaya
Factors Affecting Germination
– Temperature
Temperature plays a crucial role in seed germination, as it affects the metabolic processes and enzyme activity necessary for the seed to break dormancy and begin growing. For June plum seeds, maintaining the right temperature range is essential for successful germination.
The optimum temperature range for germinating June plum seeds is between 75°F (24°C) and 85°F (29°C). Within this range, the enzymes responsible for breaking down the seed coat and initiating growth are most active.
If the temperature is too low, germination may be significantly delayed or even inhibited. Cold temperatures can slow down the metabolic processes and make it difficult for the seed to absorb water. In such conditions, the seed may remain dormant for an extended period, causing poor germination rates.
On the other hand, high temperatures can also negatively impact germination. Excessive heat can denature the enzymes necessary for germination and can even result in seedling mortality. Therefore, it is crucial to provide a stable and moderate temperature during the germination process.
To maintain the optimal temperature, you can use a heat mat or place the seed container in a warm location, such as near a heater or in a greenhouse. It is important to monitor the temperature regularly and make adjustments as needed.
It’s worth noting that temperature fluctuations can also affect germination. Sudden changes in temperature can shock the seed and disrupt the germination process. Therefore, it is essential to provide a consistent temperature environment to ensure successful germination.
Additionally, some gardeners may opt for stratification, a process that exposes the seeds to cold temperatures for a specific period. Stratification can be beneficial for certain plants, but it is not a requirement for June plum seeds. Therefore, it is not necessary to expose June plum seeds to cold temperatures during the germination process.
By maintaining the optimal temperature range for June plum seed germination, you can provide the ideal conditions for the seeds to sprout and grow into healthy seedlings. In the next section, we will explore another important factor in germination: moisture.
Key Takeaways:
- Patience and care are essential for successfully germinating June plum seeds. Understanding factors like temperature, moisture, and light exposure can help create an ideal environment for seed sprouting and seedling development.
- Troubleshooting common issues such as mold, slow germination, and non-germination can improve germination rates. Monitoring and adjusting environmental conditions while exercising patience are key to nurturing healthy June plum seedlings.
Read more: How Long To Germinate Pitaya
Factors Affecting Germination
Read more: How Long For Oregano To Germinate
– Moisture
Moisture is a critical factor for seed germination, as it provides the necessary hydration for the seed to initiate growth. Proper moisture levels are essential to ensure successful germination of June plum seeds.
During the germination process, seeds absorb water, causing them to swell and activate the metabolic processes necessary for growth. Therefore, it is important to provide adequate moisture to promote germination.
When preparing for germination, start by selecting a well-draining germination medium. This can be a mix of peat moss, perlite, or vermiculite. Avoid using heavy, compacted soil that may retain excessive moisture and lead to waterlogging. Excessively wet conditions can prevent oxygen from reaching the seeds, leading to rot or fungal growth.
To maintain the appropriate moisture level, ensure that the germination medium is consistently moist but not waterlogged. Overwatering can suffocate the seeds and hinder germination. On the other hand, allowing the germination medium to dry out can lead to seed desiccation and failed germination.
One helpful technique is to lightly mist the germination medium with water using a spray bottle to keep it evenly moist. It is important to monitor the moisture level regularly and adjust watering accordingly. Remember to check the moisture level by gently pressing your fingers into the germination medium. If it feels slightly damp, then the moisture level is adequate. If it feels too wet, hold back on watering and allow the medium to dry out slightly.
Covering the seed container with a plastic dome or using a plastic bag can help create a humid environment that retains moisture. This can also help prevent the germination medium from drying out too quickly.
It is essential to strike a balance when it comes to moisture levels. Too much moisture can lead to the growth of mold, fungi, or bacteria, which can harm the germinating seeds. If you notice any signs of mold or fungal growth, it is necessary to adjust the moisture levels and improve air circulation by briefly removing the plastic covering.
By providing the right amount of moisture throughout the germination process, you can create an optimal environment for June plum seed germination. In the next section, we will discuss another factor that contributes to successful germination: light exposure.
Key Takeaways:
- Patience and care are essential for successfully germinating June plum seeds. Understanding factors like temperature, moisture, and light exposure can help create an ideal environment for seed sprouting and seedling development.
- Troubleshooting common issues such as mold, slow germination, and non-germination can improve germination rates. Monitoring and adjusting environmental conditions while exercising patience are key to nurturing healthy June plum seedlings.
Read more: How Long To Germinate Pitaya
Factors Affecting Germination
– Light Exposure
Light exposure is an important factor in seed germination, as it can have a significant impact on the growth and development of seedlings. While some seeds require specific light conditions for germination, June plum seeds do not have a strict light requirement.
June plum seeds can germinate successfully in both light and dark conditions. However, it is important to provide diffused light rather than direct sunlight during the germination process. Direct sunlight can be too intense and may dry out the germination medium or inhibit seedling development.
To provide the right light conditions, place the seed container in a well-lit area that receives indirect or filtered light. A windowsill or a spot under fluorescent lights can be suitable for germinating June plum seeds.
If you are using artificial lighting, such as fluorescent or LED lights, position them around 6-8 inches above the seeds. This will ensure that the seeds receive adequate light without being overwhelmed by excessive intensity.
It is recommended to provide a light source for approximately 12-16 hours a day. This mimics the natural daylight cycle and provides ample light for seedlings to grow. You can use timers to automate the light cycle and ensure consistent and proper exposure.
Once the seeds have germinated and started to develop seedlings, they will require more light for healthy growth. At this point, you can gradually increase the light exposure to 14-18 hours a day, simulating longer daylight hours. This will help the seedlings establish robust growth.
If you are germinating the seeds in a room without natural light or insufficient light, you can use full-spectrum grow lights specifically designed for seed germination and early plant growth stages. These lights provide a well-balanced spectrum that promotes photosynthesis and encourages healthy seedling development.
It is important to note that excessive light exposure can also be harmful to the seedlings. If the light is too intense or the duration is too long, it can cause stress or scorched leaves. Maintaining a balance and providing the right amount of light is crucial for the successful germination and growth of June plum seeds.
By offering the appropriate light exposure during germination, you can provide the necessary conditions for the seeds to sprout and develop into healthy seedlings. In the next section, we will discuss the step-by-step process of germinating June plum seeds.
Steps for Germinating June Plum Seeds
Germinating June plum seeds can be an exciting and rewarding process. By following these steps, you can increase your chances of successful germination and enjoy the growth of healthy June plum seedlings.
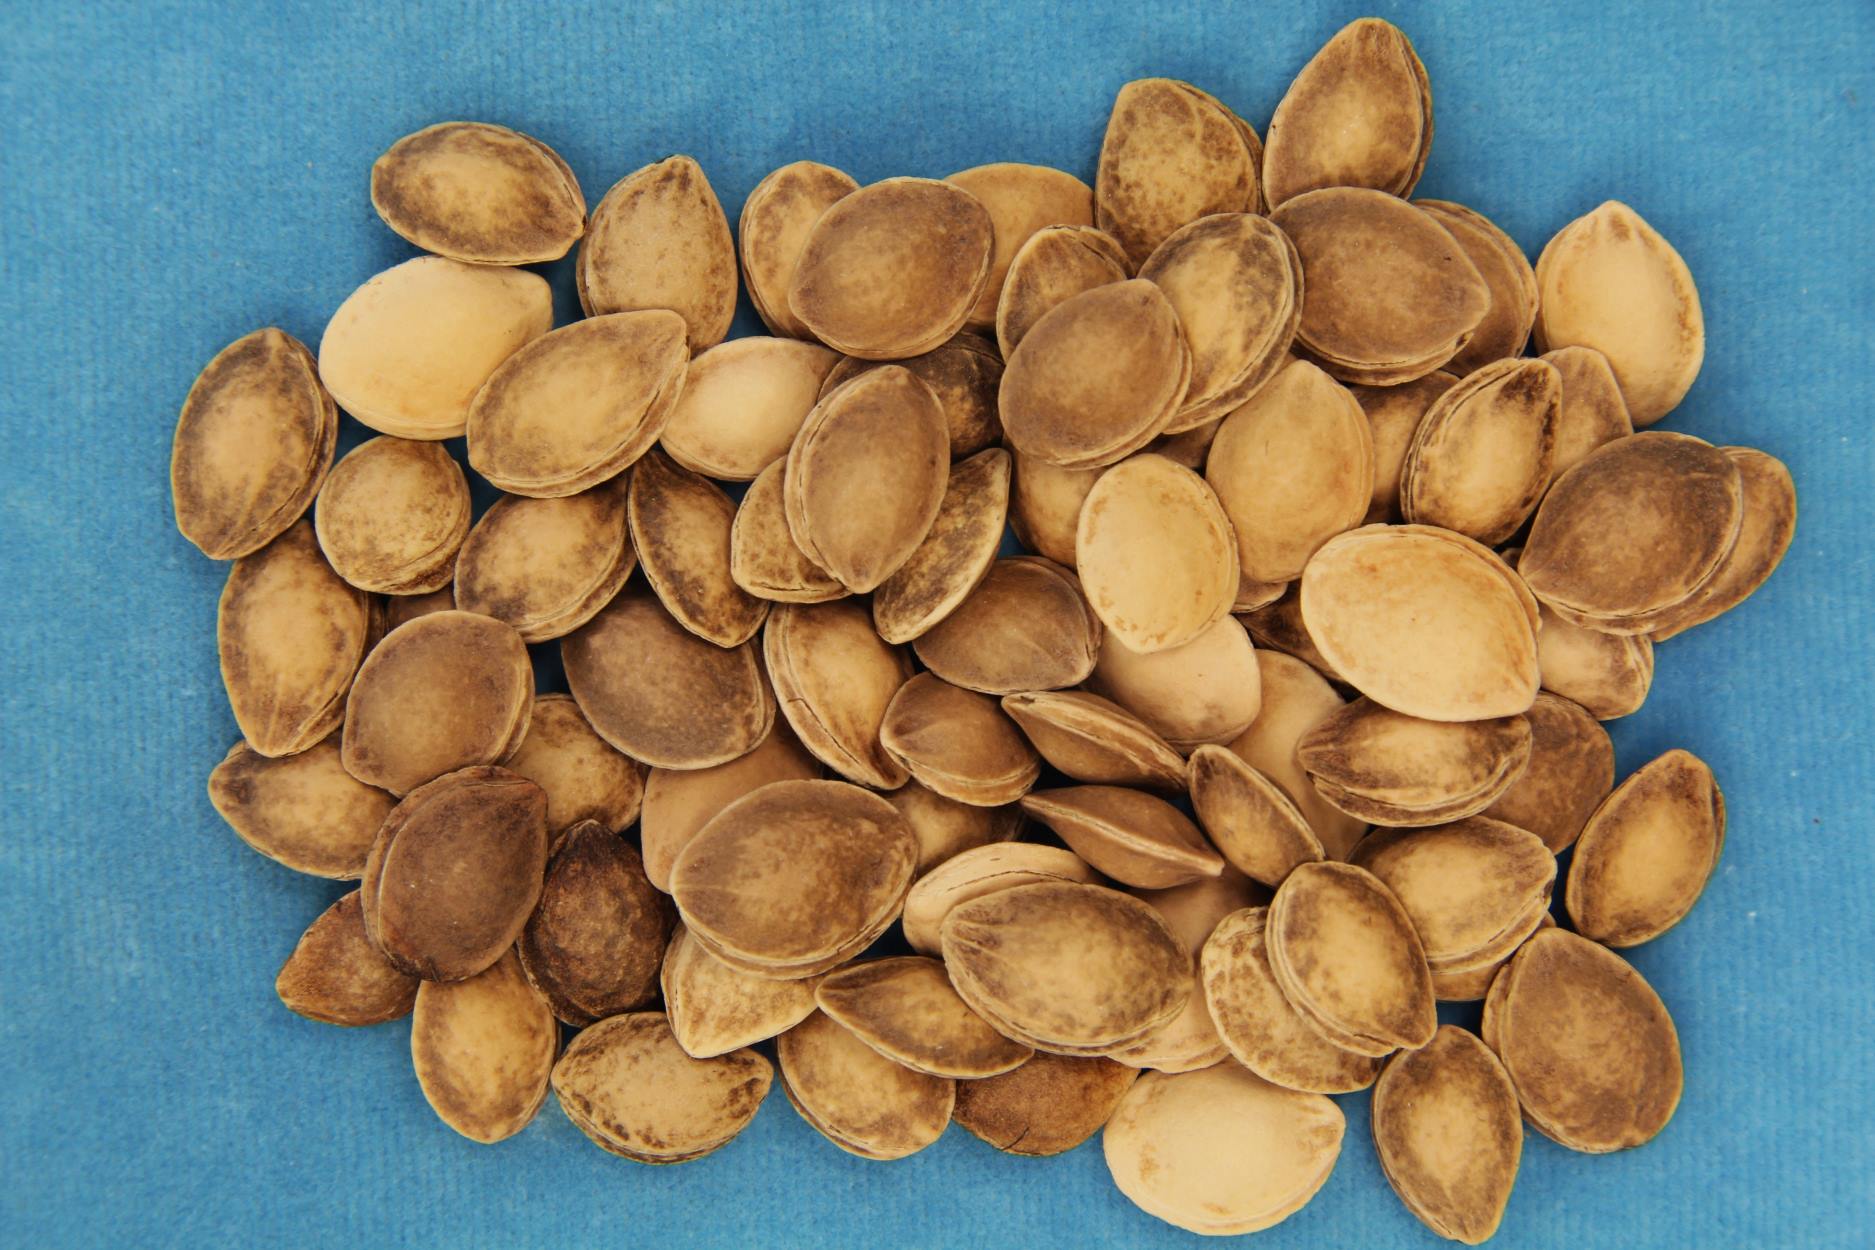
1. Seed Selection and Preparation: Start by selecting high-quality June plum seeds. Look for plump, mature seeds without any visible damage or disease. Once you have chosen your seeds, you can improve germination rates by scarifying them. Gently file or nick the seed coat with a small file or knife to create small openings. This process helps water penetrate the seed coat and promotes faster germination.
2. Germination Medium and Container: Choose a well-draining germination medium. A mix of peat moss, perlite, and vermiculite works well. Fill a seed tray or small pots with this medium, leaving about 1 inch of space from the top.
3. Planting the Seeds: Place the scarified June plum seeds on the germination medium, spacing them about 1-2 inches apart. Lightly press the seeds into the medium to ensure good contact. Cover the seeds with a thin layer of the germination medium, about 1/4 inch thick.
4. Watering and Maintenance: After planting, thoroughly water the germination medium using a gentle stream of water or a spray bottle. Ensure that the medium is evenly moist but not waterlogged. Place a plastic dome or plastic bag over the seed tray or pots to create a humid environment. This helps retain moisture and promotes germination. Check the moisture levels regularly and water as needed to keep the medium consistently moist.
5. Temperature and Light: Place the seed tray or pots in a location that provides consistent temperatures between 75°F and 85°F (24°C and 29°C). Avoid exposing the seeds to extreme temperatures or direct sunlight. Instead, provide diffused light or use artificial grow lights for about 12-16 hours a day. Maintain a stable temperature and light environment throughout the germination process.
6. Germination and Seedling Care: Germination typically occurs within 2-4 weeks, but it can sometimes take longer. Once the seeds start to germinate and push through the soil, remove the plastic covering. Continue to maintain the appropriate moisture levels and provide adequate light for the growing seedlings. Monitor their growth, and once the seedlings have developed two to three true leaves, they can be transplanted into individual pots with a well-draining soil mix.
By following these steps, you can successfully germinate June plum seeds and enjoy the journey of growing your own June plum tree. Remember to be patient and provide the optimal conditions for the seeds to thrive. In the next section, we will discuss the germination timeline and the expected duration for June plum seed germination.
Steps for Germinating June Plum Seeds
– Seed Selection and Preparation
The first step in germinating June plum seeds is selecting high-quality seeds. It is important to choose seeds that are mature, plump, and free from any visible damage or disease. Healthy seeds have a higher chance of germinating successfully.
To improve germination rates, you can also perform seed scarification. Scarification involves gently nicking or filing the seed coat to create small openings. This process allows water to penetrate the seed coat more easily, promoting faster germination.
To scarify June plum seeds, use a small file or a sharp knife. Gently rub the seed coat in one area until a small opening is created. Be careful not to damage the embryo inside the seed. You can also soak the seeds in water overnight before scarification to help soften the seed coat and facilitate scarification.
It is important to note that scarification is not always necessary for June plum seeds, especially if using fresh seeds. Some June plum seeds have naturally thin seed coats and do not require scarification. However, scarification can help overcome seed dormancy and increase germination rates, particularly for seeds with thicker or harder coats.
After scarification, it is recommended to sow the seeds immediately to prevent them from drying out. In case you cannot sow the seeds right away, you can store them in a cool and dry place until you are ready to proceed with the germination process.
By selecting high-quality seeds and performing scarification if necessary, you can optimize the germination process and increase the chances of successful germination for your June plum seeds. In the next section, we will discuss the proper germination medium and container for planting the seeds.
Steps for Germinating June Plum Seeds
– Germination Medium and Container
Choosing the right germination medium and container is crucial for the successful germination of June plum seeds. The germination medium provides the necessary support, moisture retention, and aeration for the seeds to sprout and develop into healthy seedlings.
A suitable germination medium for June plum seeds is a mix of peat moss, perlite, and vermiculite. This combination provides a well-draining medium that retains enough moisture while allowing excess water to drain away. It also provides a loose structure that allows the developing roots to penetrate easily.
Fill a seed tray or small pots with the germination medium, leaving about 1 inch of space at the top. If using a seed tray, make sure it has drainage holes to prevent waterlogging. The containers should be clean and sterilized to reduce the risk of fungal or bacterial diseases.
Distribute the scarified June plum seeds evenly over the surface of the germination medium, spacing them about 1-2 inches apart. Lightly press the seeds into the medium, ensuring good contact with the soil. This will help the seeds absorb moisture and initiate germination more effectively.
Once the seeds are in place, cover them with a thin layer of the germination medium, about 1/4 inch thick. The covering layer helps maintain moisture levels and protect the seeds during the germination process. It also provides a slightly darker environment, which can aid in germination.
It is important to label the containers with the plant’s name and the date of sowing. This will help you keep track of the germination timeline and identify the seedlings once they emerge.
By selecting the appropriate germination medium and container, you provide a suitable environment for the June plum seeds to germinate and grow. In the next section, we will discuss the essential steps for planting the seeds and providing proper care during the germination process.
Steps for Germinating June Plum Seeds
– Planting the Seeds
After preparing the germination medium and container, it’s time to plant the scarified June plum seeds. The planting process involves proper placement and gentle handling of the seeds to ensure optimal germination conditions.
1. Take the scarified June plum seeds and gently place them on the prepared germination medium. Space the seeds about 1-2 inches apart to provide enough room for each seedling to develop.
2. Lightly press the seeds into the germination medium using your fingers or the back of a spoon. This will ensure good contact between the seeds and the moist soil, aiding in water absorption and germination initiation.
3. Next, cover the seeds with a thin layer of the germination medium, approximately 1/4 inch thick. This covering layer helps maintain moisture levels and shield the seeds from external disturbances. It also provides a slightly darker environment, which can enhance germination rates.
4. Once the seeds are planted and covered, lightly mist the surface of the germination medium with water to ensure even moisture distribution. Be careful not to oversaturate the medium, as excessive moisture can lead to fungal growth or rotting of the seeds.
5. Label the container with the seed variety and the date of planting. This will help you keep track of the germination progress and identify the seedlings once they emerge.
6. Finally, place the container in a warm and stable environment with consistent temperatures between 75°F and 85°F (24°C and 29°C). Avoid exposing the seeds to direct sunlight or extreme temperature fluctuations during the germination process.
By planting the June plum seeds correctly, you provide them with the necessary conditions to germinate and grow into healthy seedlings. In the next section, we will discuss the essential tasks of watering and maintenance during the germination process
Steps for Germinating June Plum Seeds
– Watering and Maintenance
Watering and proper maintenance are crucial factors for successful germination and the healthy growth of June plum seeds. Providing the right amount of moisture and ensuring appropriate care will greatly contribute to the overall success of the germination process.
1. After planting the June plum seeds, it is essential to water the germination medium thoroughly. Use a gentle stream of water or a spray bottle to evenly moisten the soil surface. Avoid using a heavy stream of water that may displace the seeds or create uneven moisture distribution.
2. Maintain consistent moisture levels throughout the germination process. The germination medium should be moist but not waterlogged. Check the moisture levels regularly by gently pressing your finger into the soil. If it feels slightly damp, the moisture level is sufficient. If it feels too dry, it’s time to water.
3. To prevent the germination medium from drying out too quickly, cover the seed tray or pots with a plastic dome or place them in a clear plastic bag. This creates a humid environment that helps retain moisture and promotes germination. Occasionally check the humidity levels inside the covering and adjust ventilation if condensation builds up excessively.
4. Keep an eye out for any signs of mold or fungal growth. If you notice any mold or fungi, reduce the moisture level and provide better air circulation by briefly removing the plastic covering. Proper air circulation is important to avoid the buildup of humidity and potential fungal issues.
5. Place the seed tray or pots in a warm location with temperatures within the optimal range of 75°F to 85°F (24°C to 29°C). Avoid exposing the seeds to extreme temperature fluctuations or direct sunlight, as it can cause drying or overheating.
6. Monitor the germination progress closely. It usually takes around 2-4 weeks for June plum seeds to germinate, but it can sometimes take longer. Be patient and avoid disturbing the seeds or seedlings during this delicate phase.
7. Once the seedlings have emerged and developed their first set of true leaves, it’s time to provide them with more light. Gradually increase the duration and intensity of light exposure to 12-16 hours a day to promote healthy growth and development.
By providing consistent watering and appropriate care, you create a favorable environment for the germination and growth of June plum seeds. In the next section, we will discuss the germination timeline and the expected duration for June plum seed germination.
Read more: How Long For Lobelia To Germinate
Germination Timeline and Expected Duration
Understanding the germination timeline and expected duration is essential for managing your expectations and ensuring the success of germinating June plum seeds. While there can be variations based on individual seed characteristics and environmental factors, here is a general timeline you can expect:
1. Germination Initiation: After planting the scarified June plum seeds in the germination medium and providing the optimal conditions of temperature, moisture, and light, the seeds start absorbing water and initiating germination. This process usually begins within the first week of planting.
2. Seed Swelling: Within 1-2 weeks of planting, you may notice the seeds swelling and undergoing changes as they absorb water. This is a positive sign that germination is progressing.
3. Root and Shoot Development: Around the second or third week, the seeds will begin to develop primary roots and shoot sprouts. The roots will penetrate deeper into the germination medium, anchoring the seedlings, while the shoots push through the surface.
4. Emergence of Seedlings: By the end of the third or fourth week, you can expect the June plum seedlings to emerge from the germination medium. You will see the appearance of the first set of true leaves.
It’s important to note that the germination of June plum seeds can sometimes take longer, stretching beyond the typical timeline. The germination process may be influenced by factors such as seed quality, temperature variations, and individual seed dormancy characteristics.
To increase the chances of successful germination, ensure consistent temperature within the optimal range of 75°F to 85°F (24°C to 29°C), maintain appropriate moisture levels, and provide sufficient light exposure.
During the germination period, closely monitor the progress of the seedlings. If any seeds fail to germinate or show signs of slow growth, you may need to reevaluate the growing conditions and make necessary adjustments.
Remember to be patient as the germination process can vary. With proper care and attention, you can expect to see healthy June plum seedlings sprouting within a few weeks.
In the next section, we will discuss troubleshooting tips for common issues that may arise during the germination process.
Read more: How Long For Lobelia To Germinate
Germination Timeline and Expected Duration
– Average Germination Time
The average germination time for June plum seeds can vary based on various factors, including seed quality, environmental conditions, and individual seed dormancy characteristics. In general, you can expect June plum seeds to germinate within 2 to 4 weeks, but it is important to remember that germination can sometimes take longer.
During the first week after planting the scarified June plum seeds, the germination process is initiated as the seeds absorb water and overcome dormancy. This is when physiological changes within the seeds occur, signaling the beginning of germination.
Within 1 to 2 weeks of planting, the seeds will undergo swelling as they imbibe water and begin to break dormancy. This swelling indicates that the seeds are preparing for root and shoot development.
Around the second or third week, the primary roots will start elongating and exploring the germination medium, while the shoot sprouts emerge from the seeds. This stage of root and shoot development is crucial for the establishment of healthy seedlings.
By the end of the third or fourth week, you can expect the June plum seedlings to fully emerge from the germination medium and display their first set of true leaves. At this point, the seedlings are ready to be transplanted into individual pots or containers.
It is important to note that the germination time can vary depending on factors such as seed quality, temperature consistency, moisture levels, and light exposure. Some seeds may germinate earlier, while others may take longer due to individual dormancy characteristics.
If the germination process exceeds the average time frame, don’t be discouraged. Some seeds may have slower germination rates or exhibit a more prolonged dormancy period. It is crucial to continue providing the optimal growing conditions and be patient.
If you notice any seeds that have not germinated after an extended period, it might be worth inspecting them to ensure they are viable. Viable seeds are firm and plump, while non-viable seeds tend to be shriveled or show signs of decay.
By understanding the average germination time and being patient, you can help create the ideal conditions for successful germination and ensure the healthy growth of your June plum seedlings.
In the next section, we will discuss troubleshooting tips for common issues that may arise during the germination process.
Read more: How Long For Lobelia To Germinate
Germination Timeline and Expected Duration
Read more: How Long For Cucumbers To Germinate
– Factors Influencing Germination Speed
The speed of germination for June plum seeds can be influenced by various factors. Understanding these factors can help you optimize the germination process and promote faster and more successful germination. Here are some key factors that can influence germination speed:
1. Seed Quality: The quality and viability of the June plum seeds are important factors in germination speed. Healthy, mature seeds with intact seed coats have a higher likelihood of germinating quickly compared to aged or damaged seeds. It is recommended to select high-quality seeds for the best germination results.
2. Seed Dormancy: Some June plum seeds may have natural dormancy mechanisms that slow down the germination process. This dormancy is often broken by scarification or natural processes like stratification. Scarification involves physically breaking or thinning the seed coat, while stratification exposes the seeds to cold temperatures for a specific period. Overcoming seed dormancy can speed up the germination process.
3. Temperature: Temperature plays a crucial role in germination speed. Optimal temperatures between 75°F and 85°F (24°C and 29°C) promote faster germination. Warmer temperatures increase metabolic activity within the seeds, accelerating the germination process. Consistent temperature conditions can help seeds germinate more quickly and uniformly.
4. Moisture: Adequate moisture levels are essential for germination. Seeds absorb water, triggering metabolic processes that lead to germination. Maintaining proper moisture levels in the germination medium can speed up germination. However, excess moisture can lead to issues such as rotting or fungal growth, so it is important to strike a balance and avoid overwatering.
5. Light Exposure: While June plum seeds do not have strict light requirements for germination, providing diffused light can aid in the process. Light exposure can stimulate the growth of the emerging seedlings and promote photosynthesis. However, excessive light intensity can be detrimental, so it’s important to provide a moderate level of light that is not too harsh.
6. Seed Preparation Techniques: Certain seed preparation techniques, like scarification, can hasten germination by breaking seed coat dormancy and allowing water absorption. Scarification creates small openings in the seed coat, enabling moisture penetration and faster germination.
By understanding these factors and providing optimal conditions, you can influence the germination speed of June plum seeds. However, it’s important to note that each seed is unique, and variations in germination speed may still occur.
Maintaining consistent temperatures, providing adequate moisture, and properly preparing the seeds can effectively accelerate the germination process. By considering these factors, you can promote faster germination and ensure the successful growth of your June plum seedlings.
In the next section, we will discuss troubleshooting tips for common issues that may arise during the germination process.
Troubleshooting and Common Issues During Germination
While germinating June plum seeds can be an exciting endeavor, it’s important to be prepared for potential challenges that may arise during the process. Here are some common issues that you may encounter and troubleshooting tips to help overcome them:
1. Mold or Fungal Growth: Excessive moisture and poor air circulation can encourage the growth of mold or fungi on the germination medium or the seedlings. To address this issue, reduce moisture levels by adjusting watering frequency or providing more ventilation. Remove any visible mold or fungi carefully. Increasing air circulation by temporarily removing plastic coverings can also help prevent mold growth.
2. Slow or Non-Germination: If some seeds are not germinating or showing signs of slow growth, it could be due to factors such as poor seed quality, insufficient scarification, or unfavorable environmental conditions. Check the viability of the seeds by examining their firmness and condition. Ensure proper scarification has been done, and consider re-scarifying if necessary. Assess and adjust temperature, moisture levels, and light exposure to provide optimal conditions for germination.
3. Insufficient Moisture: Inconsistent or insufficient moisture can hinder germination progress. Be sure to keep the germination medium consistently moist but not waterlogged. Regularly check the moisture levels by gently pressing the soil surface. Adjust watering frequency to maintain adequate moisture. Mist the medium with water or use a spray bottle to provide even moisture distribution without disturbing the seeds.
4. Poor Drainage: If the germination medium does not drain well, it can lead to waterlogged conditions and root rot. Ensure the container has proper drainage holes or consider using a well-draining germination medium. Excess water should be easily able to drain away, allowing oxygen to reach the roots. Adjust the moisture levels and container set up as necessary to improve drainage.
5. Pests and Diseases: Keep an eye out for pests such as fungus gnats or damping-off disease, which can affect seedlings. Maintain cleanliness and hygiene in the germination area, ensuring containers and tools are properly sterilized. Provide good air circulation and avoid overwatering to minimize the risk of diseases. If pests or diseases are detected, apply appropriate organic treatments or consult with a local gardening professional for advice.
6. Inadequate Light: While June plum seeds do not have strict light requirements for germination, insufficient light exposure can result in weak or leggy seedlings. Ensure the seedlings receive diffused light for around 12-16 hours a day. If natural light is limited, utilize artificial grow lights placed approximately 6-8 inches above the seedlings. Adjust the light duration and intensity as the seedlings grow to promote healthy development.
By troubleshooting these common issues and making necessary adjustments, you can increase the chances of successful germination and foster the growth of healthy June plum seedlings. Pay attention to the specific needs of the seeds and provide optimal growing conditions to support their development.
In the concluding section, we will summarize the key points discussed and emphasize the importance of patience and care throughout the germination process.
Please note that HTML tags were added for the heading elements and to improve the structure of the text.
Troubleshooting and Common Issues During Germination
– Mold or Fungal Growth
One common issue that gardeners may encounter during the germination process is mold or fungal growth. Excessive moisture and poor air circulation can create a favorable environment for mold and fungi to thrive. Here are some tips to address and prevent mold or fungal growth:
1. Reduce Moisture: Excess moisture is a primary factor that contributes to mold and fungal growth. To prevent this issue, adjust your watering practices to ensure the germination medium is consistently moist but not overly saturated. Avoid overwatering or allowing the medium to become waterlogged.
2. Improve Air Circulation: Proper air circulation is crucial in preventing mold and fungal growth. Remove any plastic covers or plastic bags that may be obstructing air circulation. Increase ventilation by providing a gentle breeze using a fan or by opening a nearby window. Adequate air movement helps to dry out the surface of the germination medium and discourages mold growth.
3. Remove Visible Mold: If you notice any visible mold or fungal growth on the germination medium or seedlings, it is important to address it promptly. Take a soft cloth or paper towel and carefully remove the mold or fungi, being cautious not to damage the seedlings or disturb the soil too much.
4. Adjust Watering Practices: Be mindful of the amount of water you apply during watering. Instead of drenching the germination medium, consider using a spray bottle to provide a fine mist over the surface. This helps to evenly distribute moisture without soaking the medium excessively.
5. Improve Drainage: Ensure that the container you are using for germination has proper drainage holes. Good drainage allows excess water to escape, preventing water accumulation and reducing the likelihood of mold or fungal growth. If the current container lacks drainage holes, consider transplanting the seedlings into containers that do have proper drainage.
6. Provide Proper Lighting: Insufficient light can contribute to high moisture levels and promote mold growth. Ensure that your seed tray or pots are receiving adequate light, whether it is natural sunlight or artificial grow lights. Providing diffused light for around 12-16 hours a day helps to dry out the surface of the germination medium and inhibit mold or fungal growth.
Taking proactive measures to prevent mold and fungal growth during the germination process will contribute to the overall health and success of your June plum seedlings. Regular monitoring, appropriate watering, good air circulation, and proper lighting will create a growing environment that minimizes the risk of mold or fungal issues.
In the concluding section, we will summarize the key points discussed and highlight the importance of patience and care during the germination process.
Troubleshooting and Common Issues During Germination
– Slow or Non-Germination
Another common issue that gardeners may encounter during the germination process is slow or non-germination of June plum seeds. Several factors can contribute to this issue, but with proper troubleshooting, you can improve germination rates. Here are some tips to address slow or non-germination:
1. Check Seed Viability: Before assuming slow germination, it’s essential to evaluate the viability of the seeds. Examine the seeds for firmness and plumpness. Shriveled or damaged seeds may indicate poor viability, which can lead to slow or no germination. If the seeds are not viable, consider obtaining fresh seeds from a reputable source.
2. Enhance Scarification: If you scarified the seeds before planting, but germination is still slow, it is possible that the scarification process was not adequate. Re-evaluate your scarification technique and ensure that you have sufficiently broken or nicked the seed coat to allow water absorption. Consider re-scarifying any remaining ungerminated seeds and providing an opportunity for renewed germination.
3. Optimize Environmental Factors: Ensure that the environmental conditions are optimal for germination. Confirm that the temperature is within the suitable range of 75°F to 85°F (24°C to 29°C). Maintain consistent moisture levels in the germination medium. Adjust watering as necessary to avoid over or under-watering. Additionally, provide proper lighting, either through diffused natural light or artificial grow lights, for around 12-16 hours a day.
4. Evaluate Dormancy: Some June plum seeds may naturally have a dormancy period that delays germination. In such cases, patience is necessary. However, if the dormancy period extends significantly beyond the expected germination timeline, you can try alternative techniques like stratification. Stratification involves subjecting the seeds to a period of cold temperature to break dormancy. Research the specific requirements of June plum seeds for stratification and carry out the process accordingly.
5. Review Seed Depth: Ensure that the seeds are planted at the correct depth. June plum seeds are typically shallowly sown, about 1/4 inch deep. If the seeds are buried too deep in the germination medium, it may inhibit germination. Adjust the seed depth accordingly if needed.
6. Maintain Optimal Conditions: Consistency is key for successful germination. Ensure that the seeds are kept in a stable environment with steady temperatures, appropriate moisture levels, and adequate lighting. Avoid sudden fluctuations in environmental conditions, as these can stress the seeds and hinder germination.
By troubleshooting these factors and providing proper conditions, you can improve germination rates for slow or non-germinating June plum seeds. Exercise patience, as some seeds may naturally take longer to germinate. Regularly monitor the progress, make necessary adjustments, and remain attentive to the needs of the seeds.
In the concluding section, we will summarize the key points discussed and emphasize the importance of patience and care throughout the germination process.
Conclusion
Germinating June plum seeds can be a rewarding and enjoyable experience, allowing you to grow your own vibrant June plum tree. By understanding and addressing the factors that affect germination, you can increase your chances of successful seed sprouting and seedling development.
Factors such as temperature, moisture, light exposure, seed selection, and proper preparation play crucial roles in the germination process. Maintaining the optimal temperature range, providing adequate moisture while avoiding waterlogging, and offering diffused light are all key elements for successful germination. Proper scarification, if necessary, can also aid in breaking seed coat dormancy and promoting faster germination.
Throughout the germination journey, it’s important to be patient and attentive to the needs of the seeds. Monitoring and adjusting environmental conditions, assessing seed viability, and troubleshooting common issues such as mold or fungal growth, slow germination, or non-germination are all part of the process.
Remember to maintain consistent moisture levels, provide adequate air circulation, and ensure appropriate lighting. Regularly check the progress of the seeds and make adjustments as needed to create the ideal germination environment.
While germination timelines can vary, on average, June plum seeds typically germinate within 2 to 4 weeks. However, some seeds may require more time due to individual dormancy characteristics or other factors. Continued care and patience are crucial throughout the entire germination period.
By following the steps and guidelines outlined in this article, you can increase your chances of successfully germinating June plum seeds and nurturing them into healthy seedlings. With proper care, these seedlings will grow into beautiful June plum trees, providing you with delicious and tangy fruits to enjoy.
Remember that gardening is a continuous learning process, and each seed and plant is unique. Enjoy the journey, learn from your experiences, and continue exploring the wonders of gardening. As you embark on this exciting adventure, may your June plum seedlings flourish and bring you many years of delight in your garden.
Frequently Asked Questions about How Long For A June Plum Seed To Germinate
Was this page helpful?
At Storables.com, we guarantee accurate and reliable information. Our content, validated by Expert Board Contributors, is crafted following stringent Editorial Policies. We're committed to providing you with well-researched, expert-backed insights for all your informational needs.

0 thoughts on “How Long For A June Plum Seed To Germinate”