Home>Garden Essentials>How To Collect Seeds From Flowers
Garden Essentials
How To Collect Seeds From Flowers
Modified: March 15, 2024
Learn how to collect seeds from flowers in your garden and save them for future planting. Step-by-step guide to harvesting and storing flower seeds.
(Many of the links in this article redirect to a specific reviewed product. Your purchase of these products through affiliate links helps to generate commission for Storables.com, at no extra cost. Learn more)
Introduction
Welcome to the fascinating world of collecting seeds from flowers! If you’re a passionate gardener or someone looking to start their own garden, understanding how to collect flower seeds is a valuable skill to possess. Not only does it save you money on buying new seeds every season, but it also allows you to preserve and share your favorite flower varieties.
Collecting flower seeds is a rewarding process that allows you to play a role in the natural cycle of plant reproduction. By carefully selecting and harvesting seeds, you can preserve the genetic diversity of different flower species and even develop your own unique varieties.
In this guide, we’ll take you through the step-by-step process of collecting flower seeds, from selecting the right flowers to storing them for future use. You’ll discover the essential tools and materials you’ll need, as well as gain valuable insights on timing and preparation.
So, roll up your sleeves and get ready to embark on a journey that will deepen your connection with nature and give you a sense of pride in cultivating your own garden. Let’s dive into the world of seed collection and discover the hidden secrets waiting within each beautiful flower.
Key Takeaways:
- Collecting flower seeds is a fun and rewarding way to preserve the beauty of your favorite flowers, save money, and connect with nature. It’s like creating a treasure trove of nature’s wonders in your own garden!
- By carefully selecting, harvesting, and storing flower seeds, you can watch them grow into vibrant blossoms, creating a garden filled with diverse and unique flowers. It’s like nurturing a magical world of colors and fragrances right in your backyard!
Read more: How To Collect Seeds From Zinnias
Importance of Collecting Flower Seeds
Collecting flower seeds offers a multitude of benefits for both gardeners and the environment. Let’s explore some of the key reasons why it’s important to engage in this practice:
- Preserving biodiversity: Collecting seeds from flowers helps preserve the genetic diversity of different plant species. As human activities and climate change threaten biodiversity, collecting and saving seeds ensures the continued existence of various flower varieties.
- Cost-effective gardening: Buying flower seeds can be expensive, especially if you have a large garden or want to experiment with different varieties. By collecting your own seeds, you can save money and invest it in other aspects of your garden.
- Sharing with others: When you have an abundant supply of collected seeds, you have the opportunity to share them with fellow gardeners, friends, and family. This act of sharing not only promotes a sense of community but also increases the diversity of flower varieties in different gardens.
- Preserving heirloom varieties: Many flower varieties are considered “heirloom,” passed down through generations. By collecting and saving seeds from these heirloom flowers, you help preserve their unique characteristics and history for future generations.
- Adapting to local conditions: By collecting seeds from flowers that thrive in your specific climate and soil conditions, you can develop plants that are well-adapted to your local environment. This promotes resilience and reduces the need for excessive plant care and maintenance.
- Exploring your creativity: Collecting flower seeds opens the door to endless possibilities for creating new floral combinations and varieties. By cross-pollinating different flowers, you can develop unique hybrids that reflect your creativity and personal style.
- Connecting with nature: Collecting seeds from flowers allows you to connect more deeply with the natural world. The process of observing plant growth, understanding pollination, and preserving the life cycle of flowers can be a meditative and educational experience.
Now that we understand the importance of collecting flower seeds, let’s move on to the tools and materials you’ll need to get started!
Tools and Materials Needed
Collecting flower seeds requires a few essential tools and materials to ensure a successful process. Here’s what you’ll need:
- Gloves: Protect your hands from any prickly or thorny plants by wearing gardening gloves.
- Pruning Shears or Scissors: Use sharp pruning shears or scissors to cut flower stalks and remove seed heads. This will help you collect seeds without damaging the plant.
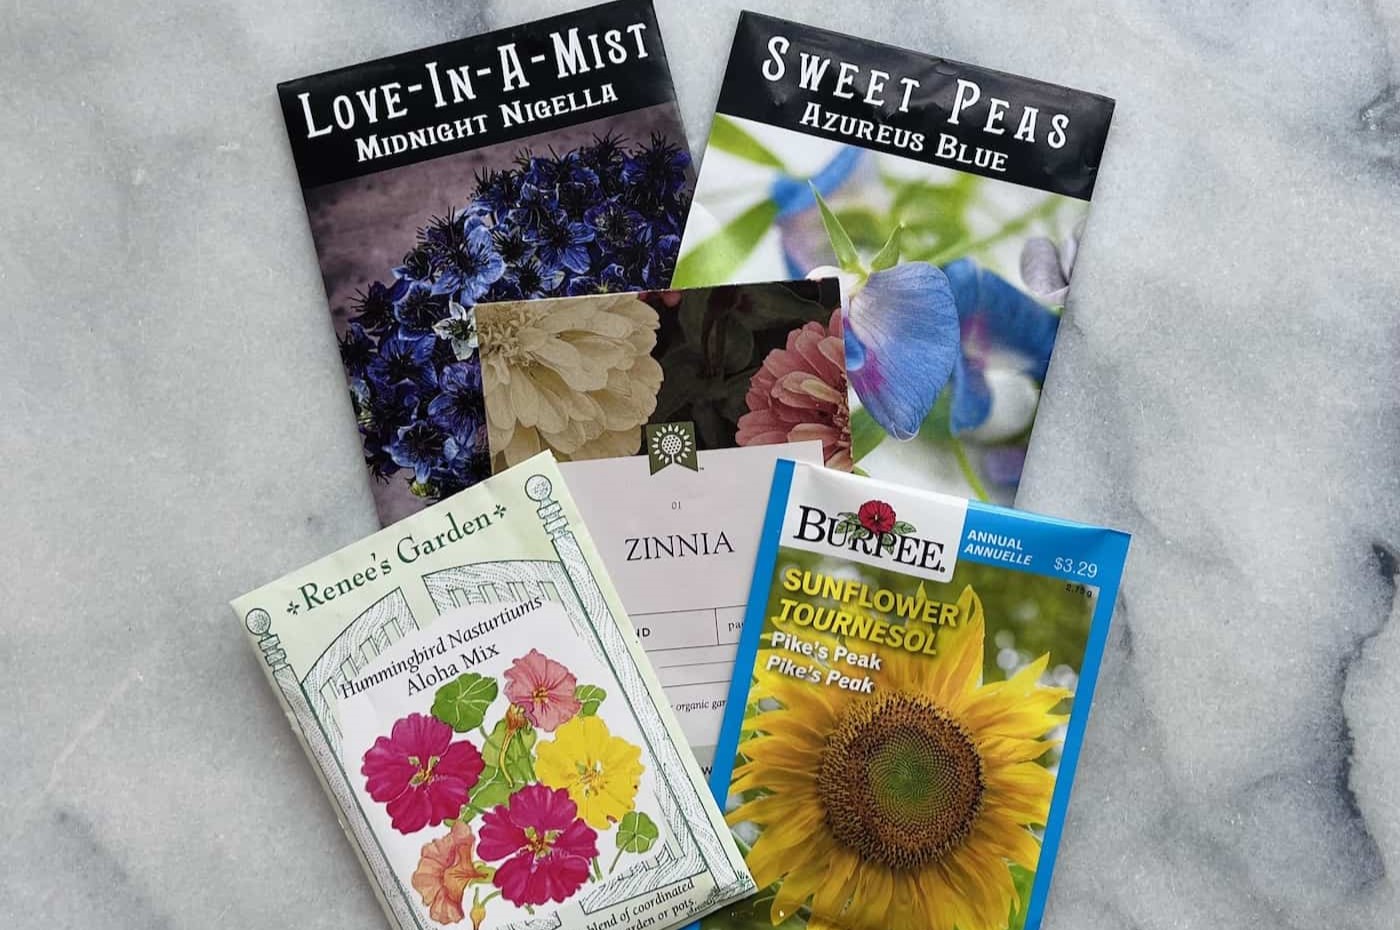
- Seed Envelopes or Envelopes: Prepare small envelopes or seed envelopes to store the collected seeds. Make sure they are dry and labeled with the flower’s name and the date of collection.
- Markers or Tags: Use waterproof markers or weatherproof plant tags to label the plants you collect seeds from. This will help you identify the varieties later on.
- Paper Bags: For plants with large seed heads, paper bags can be used to catch the seeds as they naturally disperse.
- Seed Trays or Containers: If you plan to dry your seeds indoors, seed trays or containers with good air circulation can be used to spread them out.
- Drying Rack or Screens: For optimal seed drying, a drying rack or screens can be set up in a well-ventilated area, away from direct sunlight.
- Storage Containers: Finally, you’ll need airtight containers such as glass jars or plastic containers to store the dried seeds. Ensure that the containers are clean and moisture-free.
These tools and materials are essential for collecting, storing, and preserving flower seeds. With everything ready, let’s move on to the step-by-step process of collecting seeds from flowers!
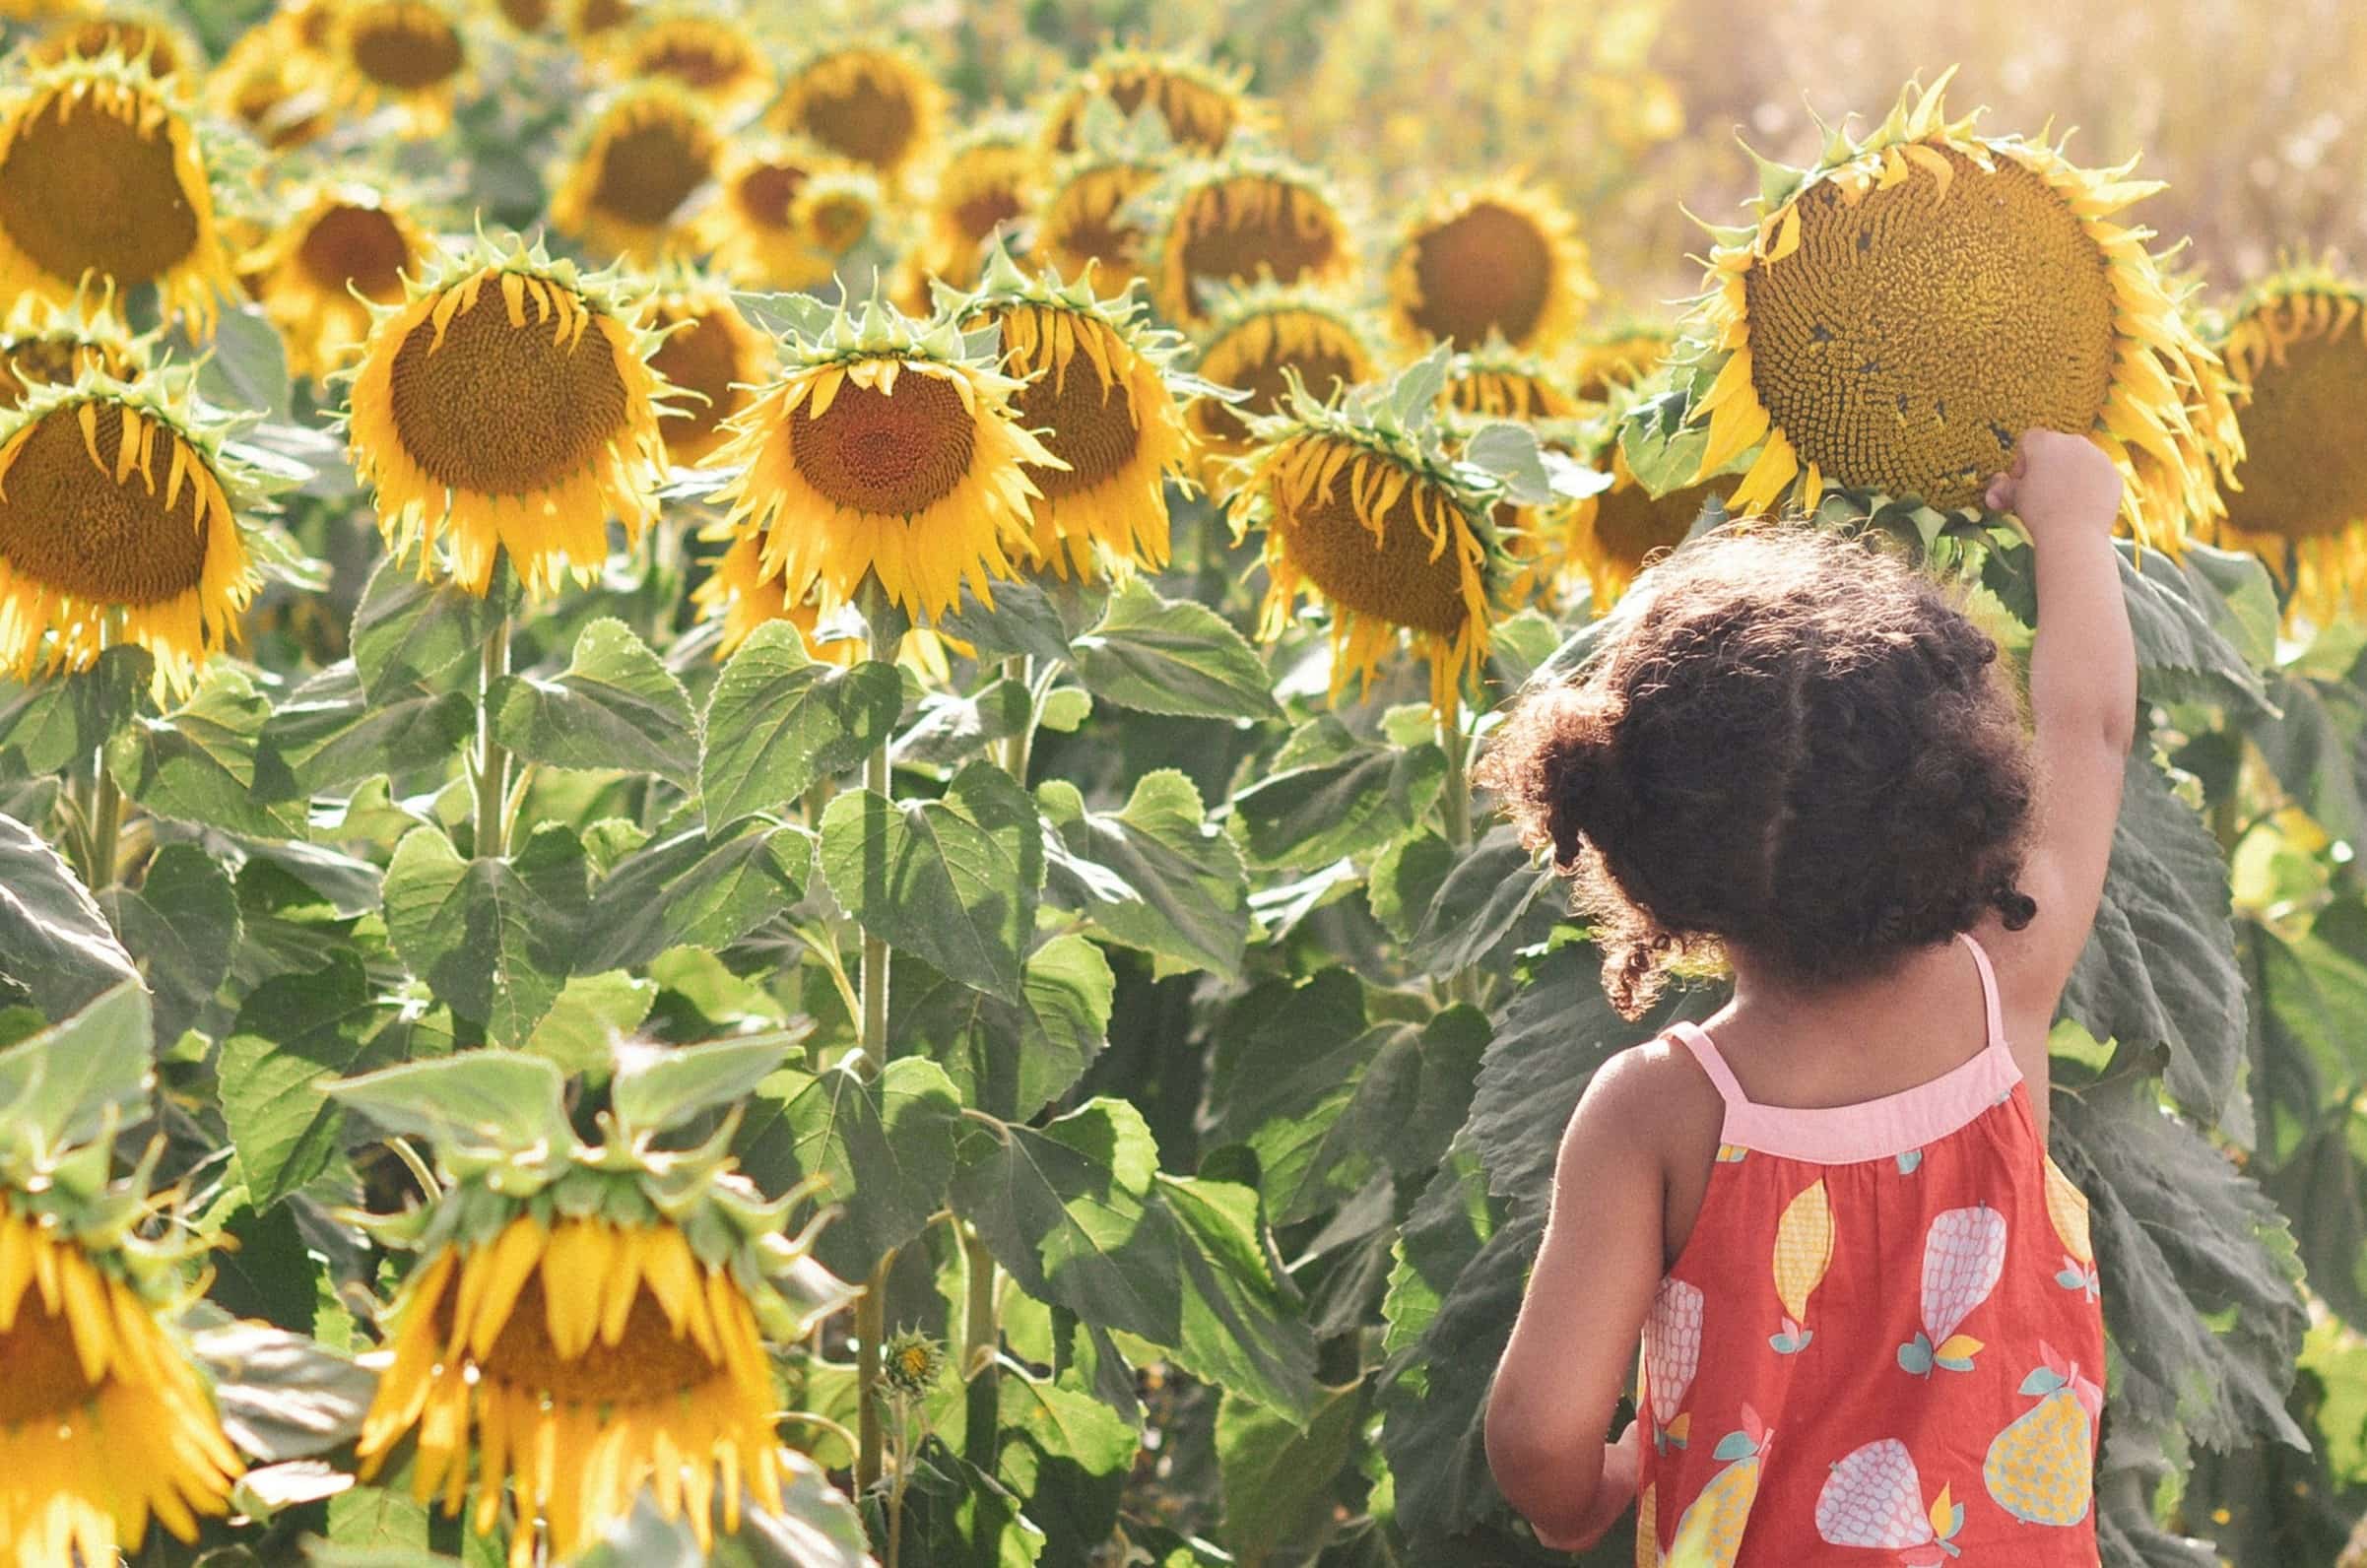
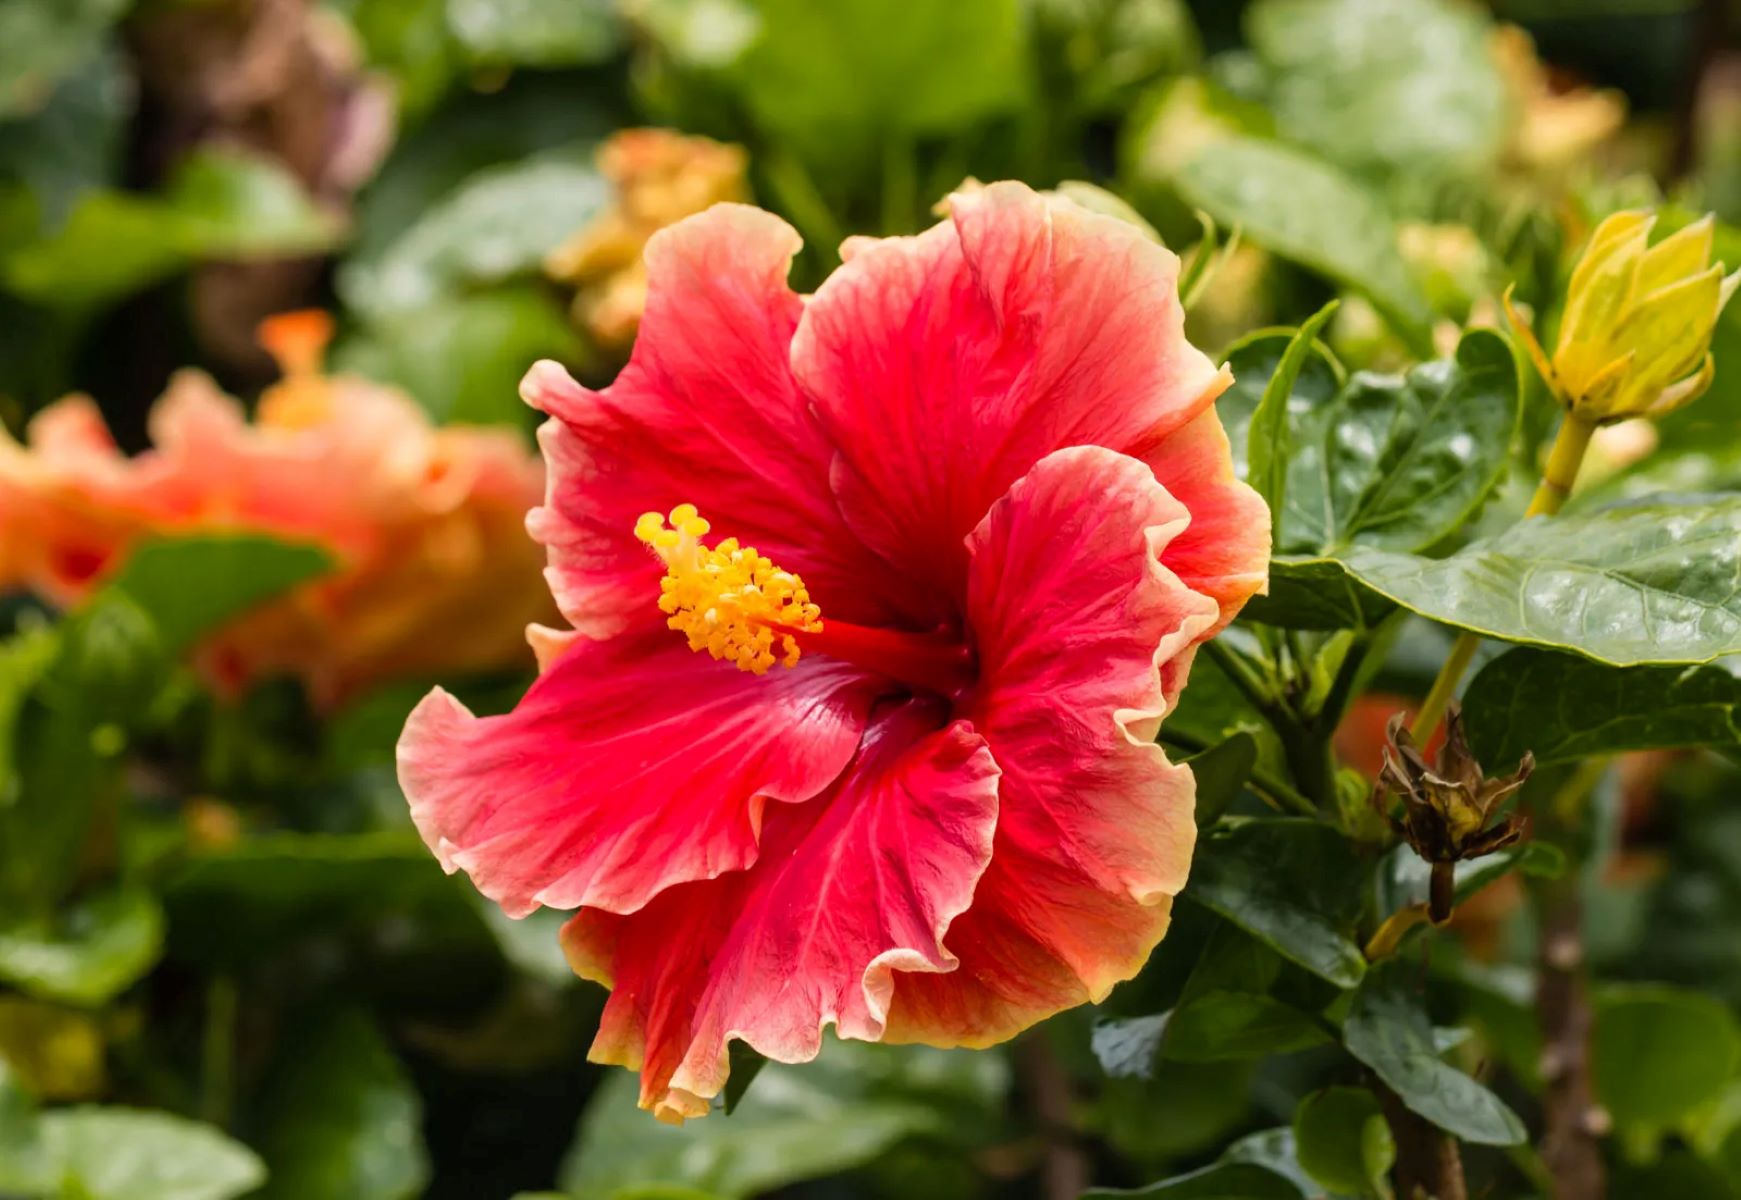
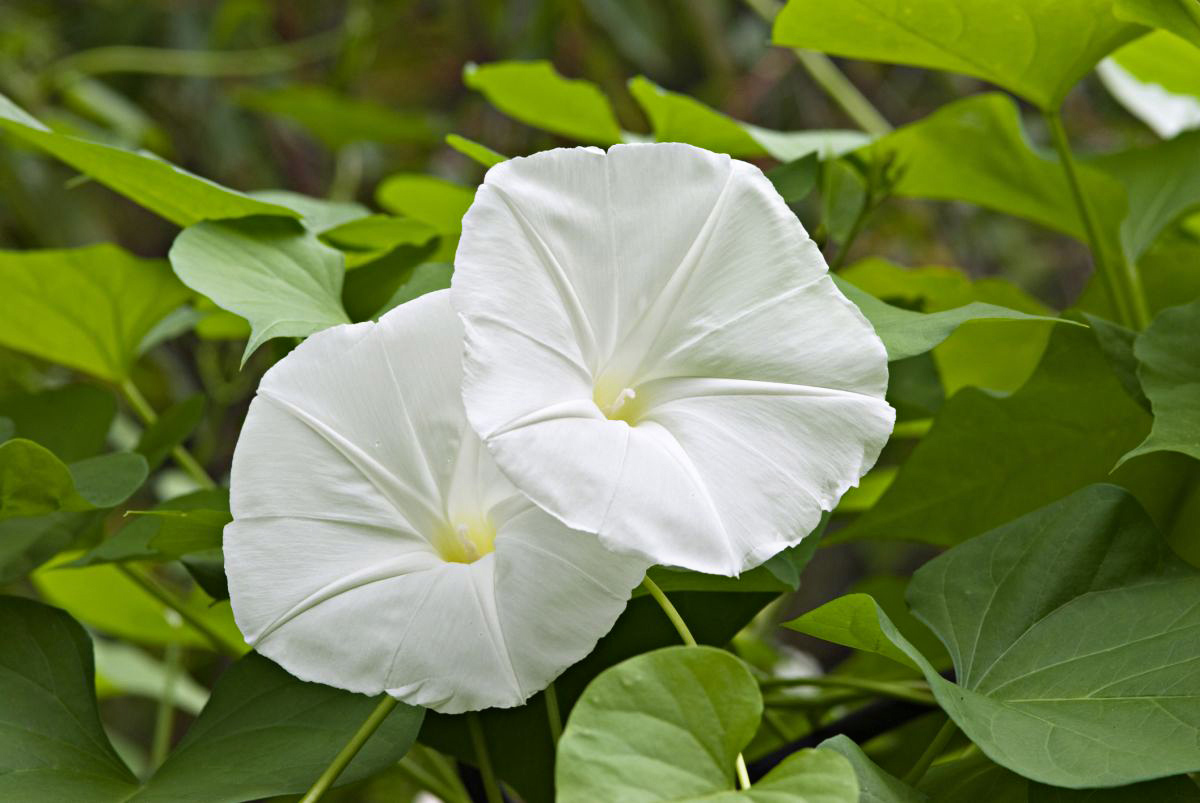
Step 1: Selecting the Flowers
The first step in collecting flower seeds is to carefully choose the flowers from which you want to gather seeds. Here are some important factors to consider during the selection process:
- Healthy Plants: Select plants that are healthy, free from diseases, and have good overall vitality. Healthy plants are more likely to produce viable and robust seeds.
- Mature Plants: It’s crucial to choose plants that have reached maturity and have started to form seed heads or pods. Plants that are too young may not have developed viable seeds yet.
- Open-Pollinated Varieties: If you are interested in preserving specific flower varieties, choose open-pollinated plants rather than hybrids. Open-pollinated flowers will produce seeds that are true to the parent plant.
- Favorite Flowers: Select flowers that you love or find particularly interesting. This will make the process of collecting and growing the seeds more enjoyable and rewarding.
- Diverse Species: To promote biodiversity, consider selecting a variety of flower species to collect seeds from. This will contribute to the preservation of different plant genetic traits.
- Seasonal Availability: Keep in mind that not all flowers produce seeds at the same time. Research the flowering and seed production season of each plant to ensure you collect seeds at the right time.
- Local Adaptation: Look for flowers that are known to thrive in your local climate and soil conditions. These plants will have a higher chance of producing successful seeds when grown in your garden.
Remember to be patient and observant during the selection process. Pay attention to the characteristics of the flowers and choose those that best align with your preferences and goals. Once you have selected the flowers, it’s time to move on to the next step: timing the seed collection.
Step 2: Timing is Key
Timing plays a crucial role when it comes to collecting flower seeds. You want to make sure you collect the seeds at the right time to ensure their viability and success. Here are some general guidelines to help you determine the optimal timing for seed collection:
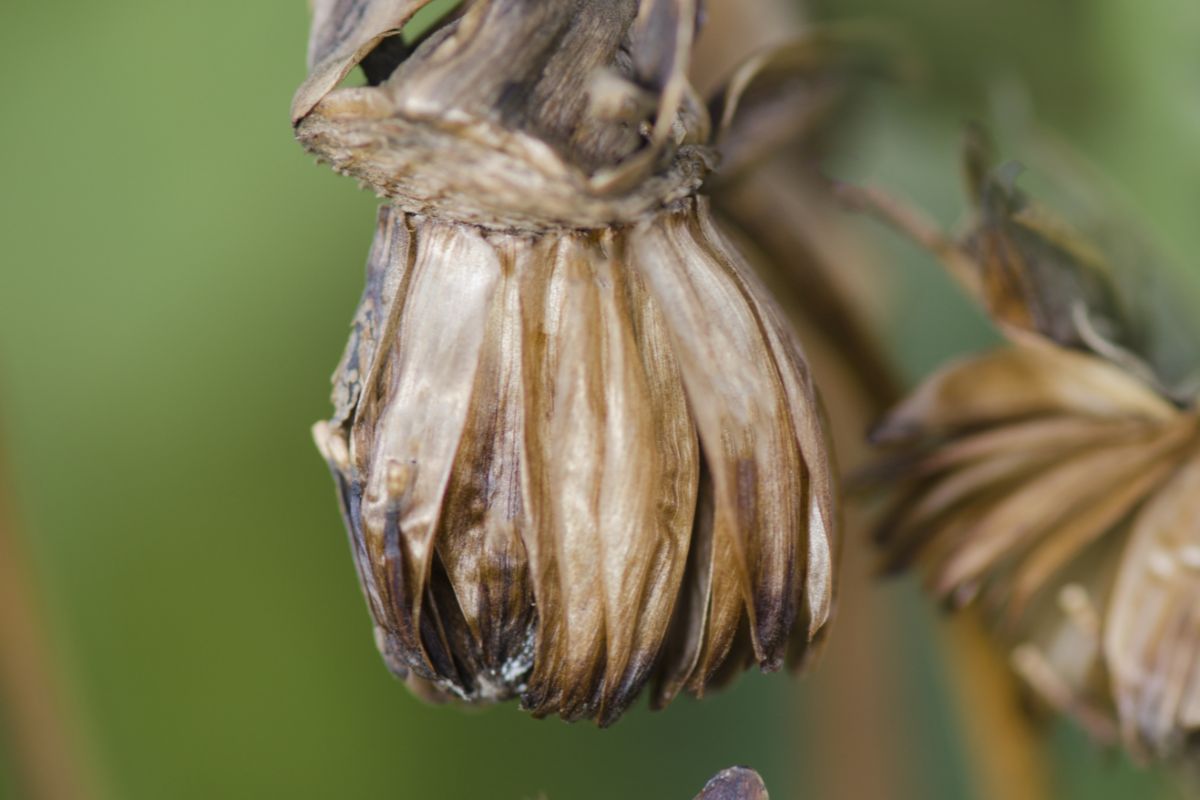
- Flower Stage: Wait until the flowers reach the end of their blooming period and start to fade or wither. This indicates that the seeds are beginning to develop inside the flower head or pod.
- Seed Maturity: Check the seed heads or pods for visual signs of maturity. Seeds are typically ready for harvest when they turn brown or dark and feel firm to the touch. Avoid collecting seeds too early when they are still green and immature.
- Natural Dispersal: Some flowers have unique ways of dispersing their seeds naturally. Observe the seed heads and pods to see if they are starting to split open or if the seeds are starting to be released. This is a good indication that it’s time to collect the seeds before they scatter away.
- Weather Conditions: Ideally, choose a dry and sunny day to collect flower seeds. Moisture and rain can cause the seeds to spoil or germinate prematurely, reducing their chances of successful germination when planted.
- Best Time of Day: Harvest seeds in the morning when the dew has dried but before the heat of the day sets in. This ensures that the plant has had enough time to recover from the cooler night temperatures and is well-hydrated for optimal seed production.
- Repeat Blooming Flowers: For plants that have the ability to rebloom or produce multiple seed heads throughout the growing season, consider collecting seeds in stages. This allows you to gather seeds from different stages of maturity.
Remember that the ideal timing for seed collection may vary depending on the specific flower species. It’s always a good idea to research the individual requirements of the plants you are collecting seeds from.
Now that you have mastered the art of timing, let’s move on to preparing for seed collection in the next step!
Read more: How To Harvest Seeds From Flowers
Step 3: Preparing for Seed Collection
Before you start collecting flower seeds, it’s important to make a few preparations to ensure a smooth and successful process. Here are the key steps to follow:
- Gather your tools: Make sure you have all the necessary tools and materials you’ll need for seed collection, as mentioned earlier. This includes gloves, pruning shears or scissors, seed envelopes, markers or tags, paper bags, seed trays or containers, drying racks or screens, and storage containers.
- Choose a quiet time: Select a time of day when the weather is calm and there are fewer insects around. This will make the process more enjoyable and reduce the risk of disturbing pollinators while you collect the seeds.
- Bring a reference guide: If you are collecting seeds from a wide variety of flowers or are unsure about their identification, it can be helpful to have a reference guide or resource on hand. This will assist you in accurately labeling and documenting the collected seeds.
- Prepare the seed envelopes: Label the seed envelopes or envelopes with the name of the flower species and the date of collection. This will help keep your collected seeds organized and prevent any mix-ups later on.
- Sanitize your tools: Before you begin collecting seeds, take a moment to clean and sanitize your pruning shears or scissors. This will help prevent the spread of any potential diseases or pests.
- Inspect the plants: Examine the plants you have selected for seed collection. Remove any damaged or diseased plant material to ensure you are collecting high-quality seeds.
- Prepare a workspace: Set up a comfortable workspace where you can sort and process the collected seeds. Ensure that you have enough space to spread out the plant material and easily access your tools.
By taking the time to prepare for seed collection, you’ll make the process more efficient and enjoyable. Now that you’re ready, let’s move on to the exciting part: harvesting the seeds!
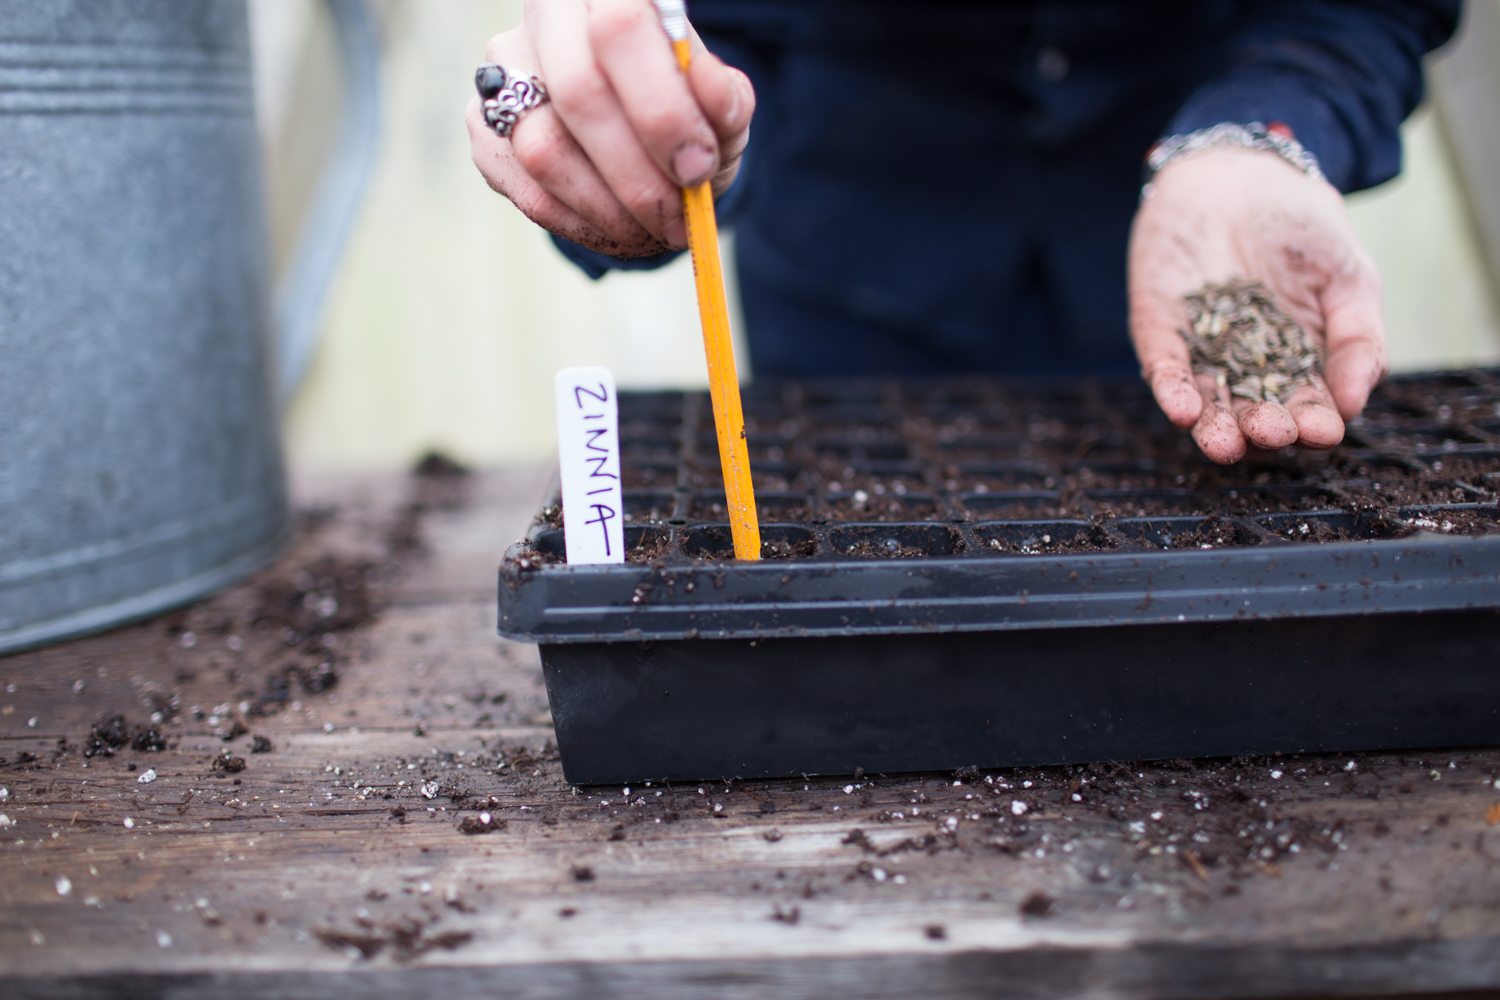
After a flower has bloomed and the petals have fallen off, wait for the seed pod to dry out. Once it’s dry, gently shake or tap the pod to release the seeds into a container. Store the seeds in a cool, dry place until you’re ready to plant them.
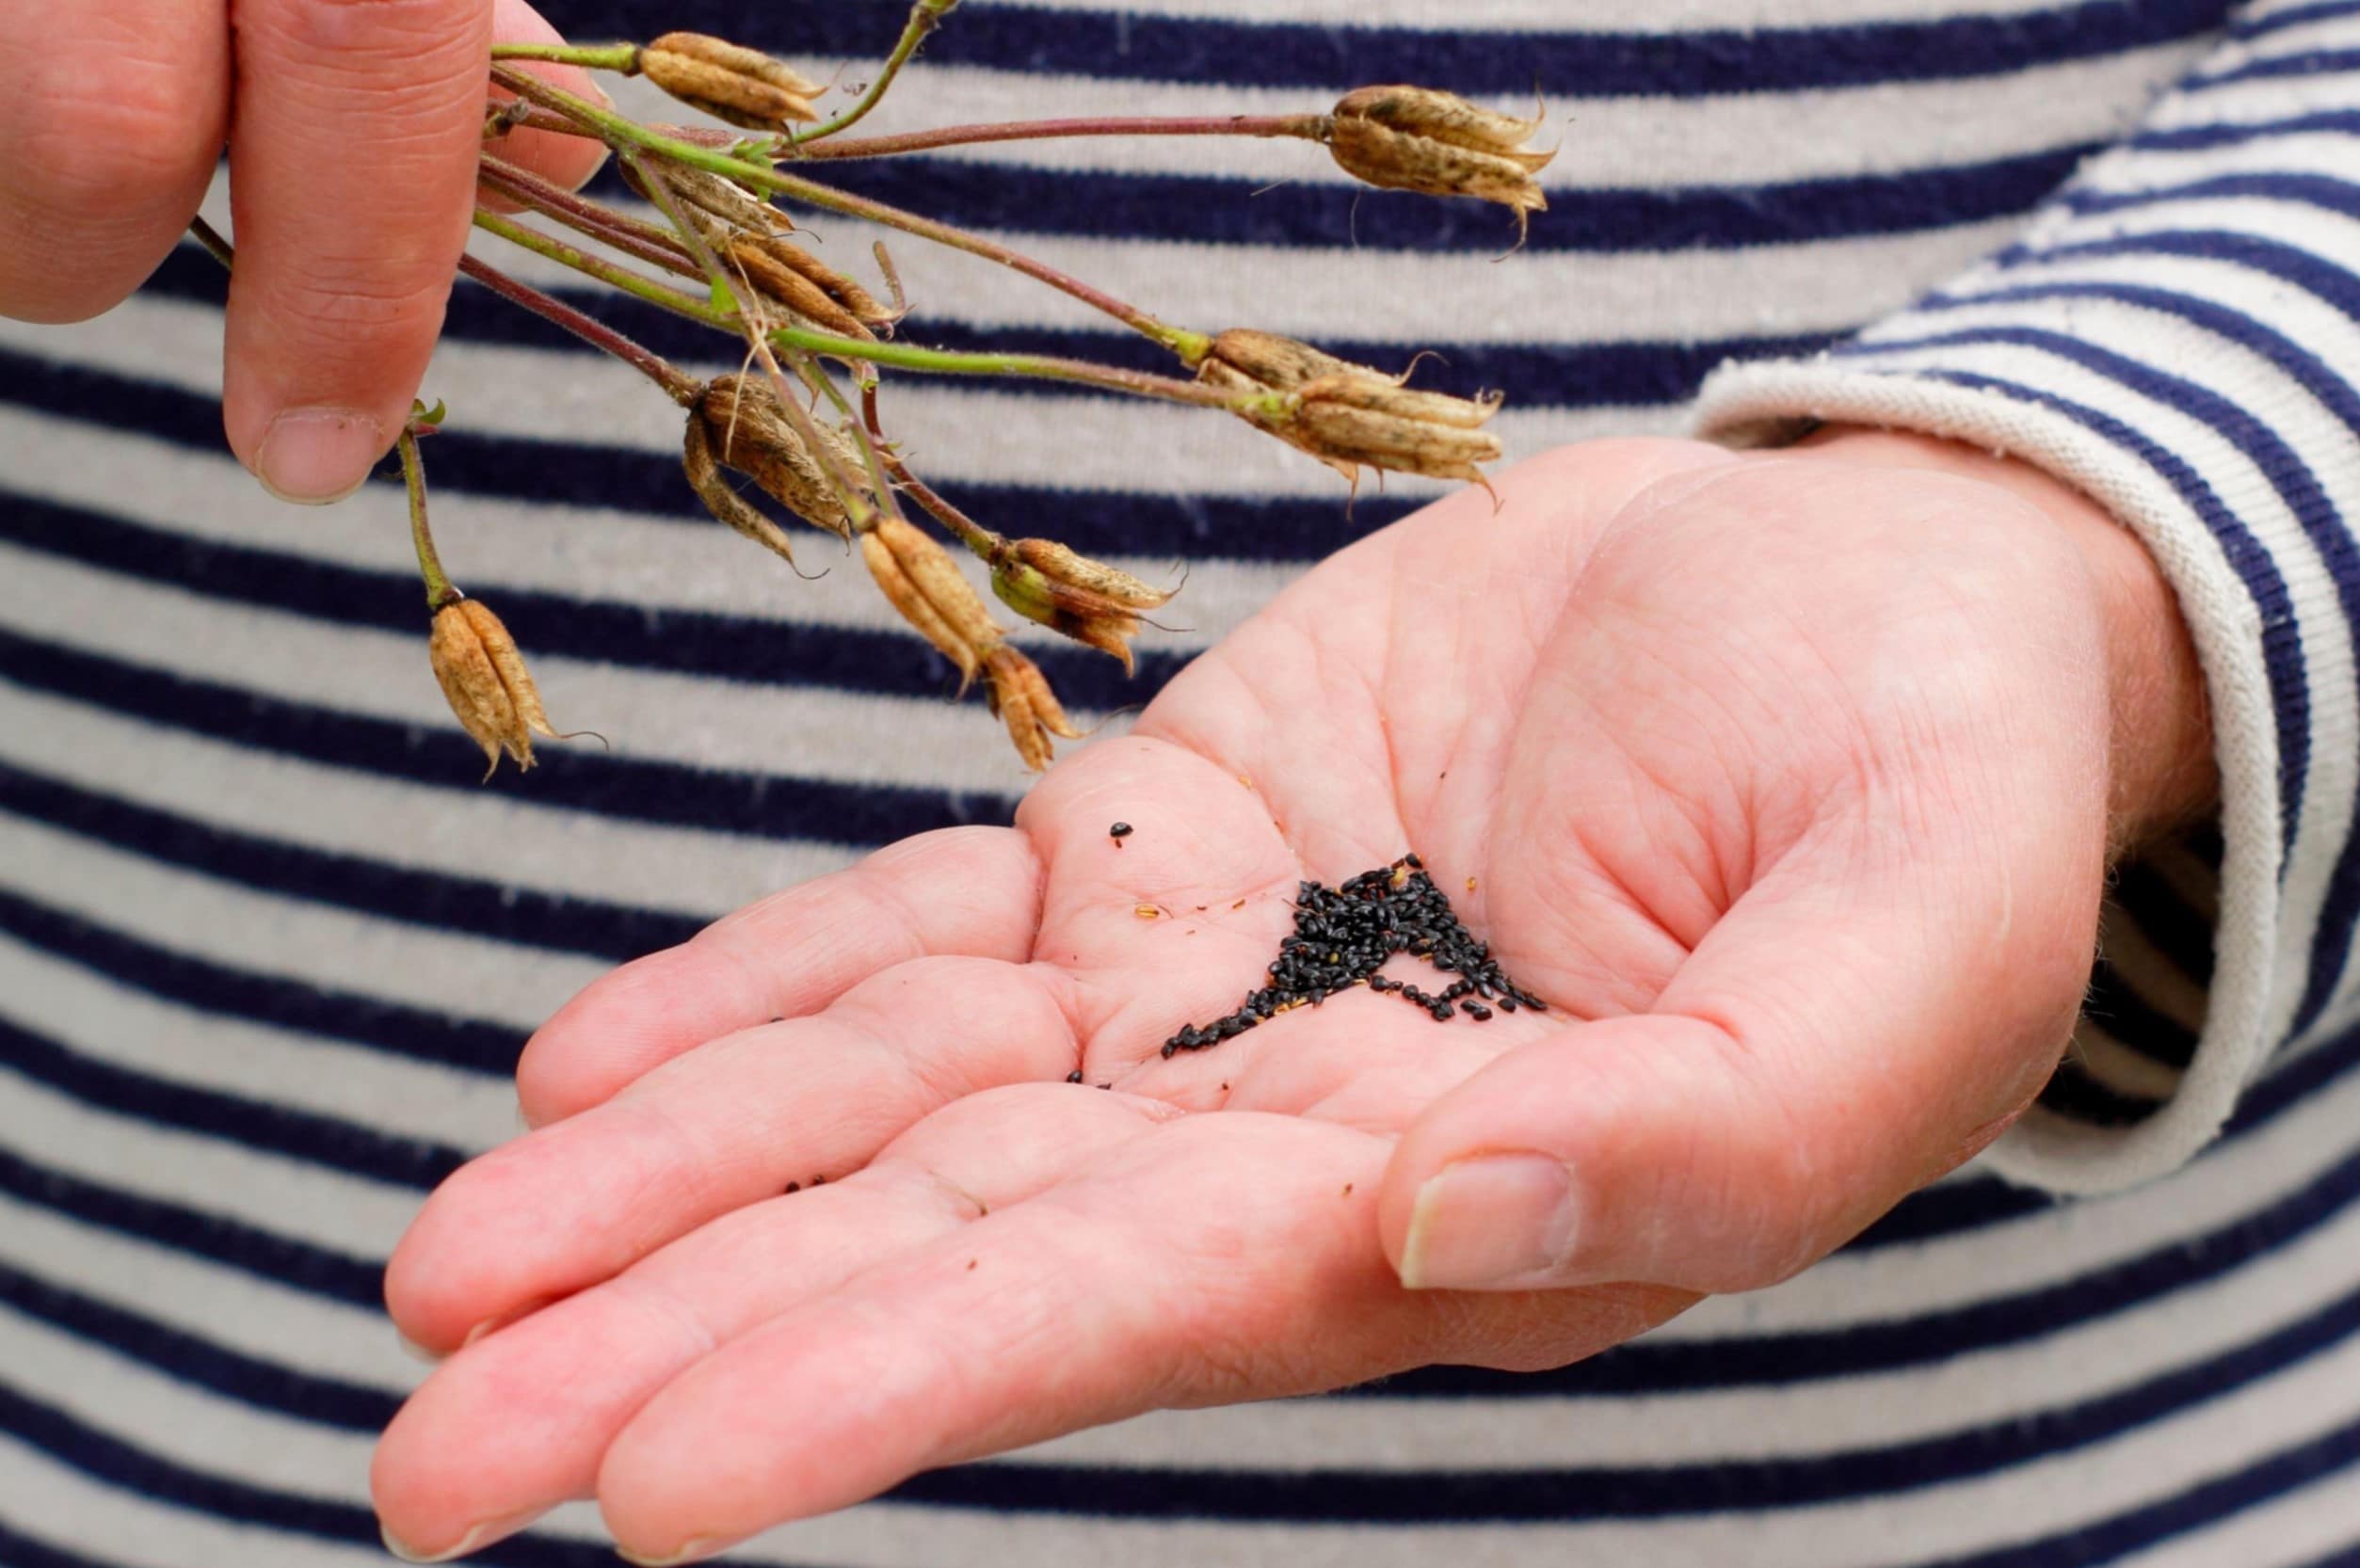
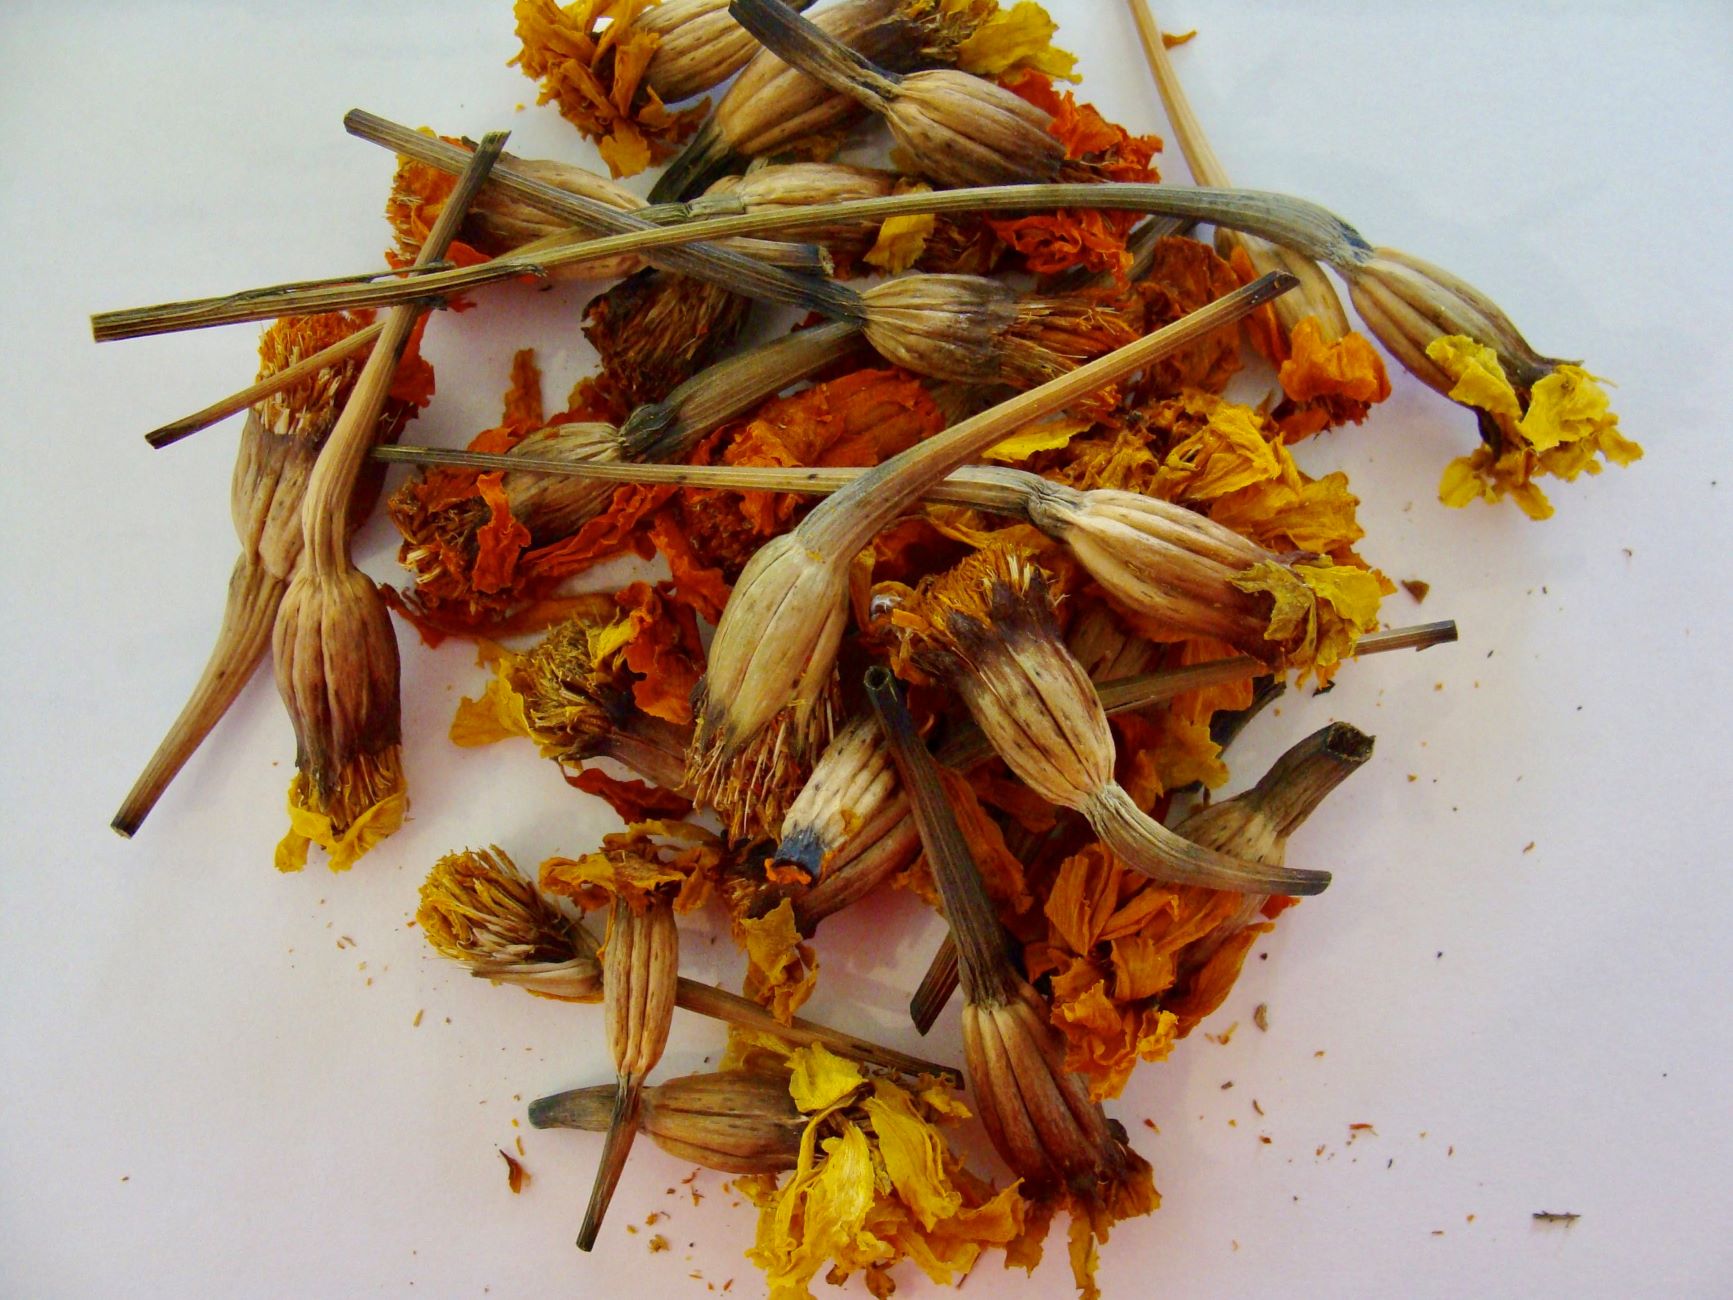
Step 4: Harvesting the Seeds
Now it’s time to harvest the flower seeds that you’ve patiently been waiting for. The process of seed harvesting involves careful extraction of the seeds from the flower heads or pods. Let’s dive into the steps to harvest seeds from flowers:
- Select the ripe seed heads: Identify the seed heads or pods that have reached maturity by checking their color and firmness. Choose ones that have turned brown or dark and feel firm to the touch.
- Hold the seed head or pod: Gently hold the seed head or pod with one hand to prevent any accidental scattering of the seeds as you harvest them.
- Remove the seeds: Use either your fingers or sharp pruning shears/scissors to carefully remove the seeds from the seed head or pod. Be gentle to avoid damaging the seeds or the plant.
- Collect the seeds in a container or paper bag: As you remove the seeds, collect them in a container or paper bag to prevent any loss. This will also make it easier to transfer the seeds to the designated envelopes later on.
- Separate additional debris: Some flower seeds may be surrounded by additional plant material, such as chaff or husks. Separate these debris from the seeds by gently rubbing or blowing on them.
- Check for maturity: Before moving on to the next seed head or pod, examine the seeds you’ve collected to ensure they are mature and fully formed. Discard any undeveloped or damaged seeds.
- Dispose of plant material: Once you’ve harvested the seeds from a particular seed head or pod, discard the remaining plant material. This ensures that you are only storing the pure seeds and not any unnecessary debris.
- Repeat the process: Continue harvesting seeds from the remaining mature seed heads or pods until you have collected an adequate amount for your needs.
Take your time during the seed harvesting process to ensure the highest quality and quantity of seeds. Once you’ve finished harvesting, it’s time to move on to the next step: cleaning and drying the seeds.
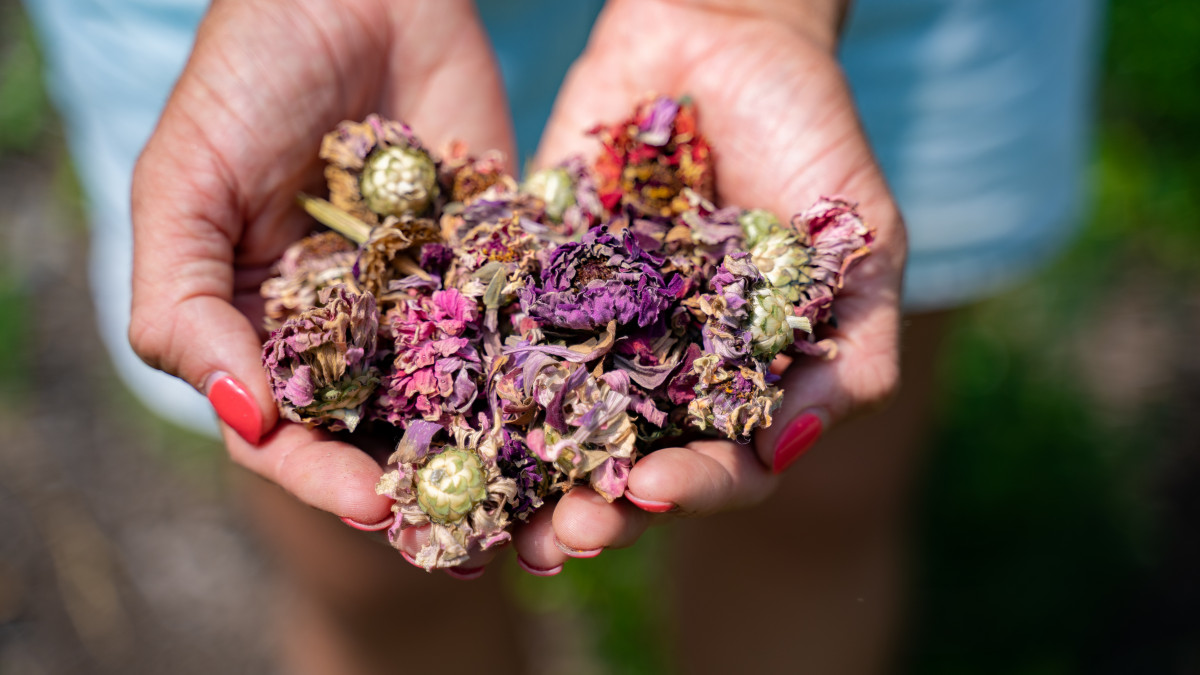
Step 5: Cleaning and Drying the Seeds
After harvesting the flower seeds, it’s important to clean and dry them properly to ensure their long-term viability. Cleaning removes any remaining debris or moisture, while drying prevents mold and rot. Let’s delve into the steps to clean and dry your collected seeds:
- Remove remaining debris: Begin by gently removing any remaining debris, such as chaff or husks, from the seeds. This can be done by rubbing the seeds between your fingers or using a fine sieve to separate the debris from the seeds.
- Rinse the seeds (if necessary): For seeds with sticky residues or pulp, you may need to rinse them to remove any residue. Use a fine sieve or a colander and gently rinse the seeds under running water, being careful not to damage or lose any seeds.
- Spread the seeds out to air dry: Place the cleaned seeds in a single layer on a drying rack or screens. Ensure that the seeds are well-spaced to allow for adequate air circulation. Avoid using paper towels or tissue, as they can retain moisture and promote mold growth.
- Choose a well-ventilated and dry area: Find a well-ventilated space away from direct sunlight, humidity, and any potential moisture sources. An ideal location could be a room with good air circulation or a covered outdoor area.
- Dry the seeds thoroughly: Allow the seeds to air dry undisturbed for several days to a few weeks, depending on their size and moisture content. Stir or gently shuffle the seeds occasionally to facilitate even and thorough drying.
- Perform a moisture test: To ensure the seeds are properly dried, perform a moisture test. Squeeze a few seeds between your fingers – they should feel dry and not leave any moisture or residue behind.
- Label and store: Once the seeds are completely dry, place them in the previously prepared seed envelopes or containers. Label each envelope with the flower’s name and the date of collection.
- Store in a cool, dry place: Store the envelopes or containers in a cool, dry place, away from direct sunlight, extreme temperatures, and moisture. A climate-controlled room or a refrigerator can be suitable for long-term seed storage.
- Monitor for mold or pests: Regularly check the stored seeds for any signs of mold or pests. If any issues are detected, promptly remove the affected seeds to prevent further contamination.
By following these steps to clean and dry your collected seeds, you can increase their chances of successful germination and long-term storage. Now that your seeds are ready, let’s move on to the next step: storing them for future use.
Step 6: Storing the Seeds
Proper storage is essential to maintain the viability of your collected flower seeds. By providing the right conditions, you can preserve the seeds for future use. Follow these steps to effectively store your seeds:
- Ensure seeds are completely dry: Before storing the seeds, ensure they are thoroughly dried, as any remaining moisture can lead to mold or seed damage. Perform a moisture test by squeezing a few seeds – they should feel dry and not leave any moisture or residue behind.
- Label the storage containers: Use small, airtight containers such as glass jars or plastic seed storage containers. Label each container with the flower’s name, the date of collection, and any additional information you find important, such as the flower color or specific variety.
- Place desiccant packets (optional): To prevent moisture buildup, you can add desiccant packets to the storage containers. Silica gel packets or powdered milk can help absorb any residual moisture and maintain the dryness of the seeds.
- Store in a cool, dark, and dry place: Find a suitable location with a stable temperature, preferably between 40-50°F (4-10°C). Avoid storing seeds in areas prone to temperature fluctuations, high humidity, or exposure to direct sunlight, as these conditions can reduce seed viability.
- Avoid freezing temperatures: While cooler temperatures are favorable for seed storage, freezing temperatures can damage or kill many flower seeds. Ensure the storage location remains above freezing to safeguard the seeds.
- Check for pests and mold regularly: Regularly inspect your stored seeds for any signs of pests or mold. If any issues are detected, promptly remove the affected seeds to prevent further contamination.
- Monitor temperature and humidity: Periodically monitor the storage conditions, checking for any significant temperature or humidity changes. Adjust the storage environment as needed to maintain optimal conditions for seed longevity.
- Keep detailed records: Maintain a record of the stored seeds with relevant information such as the date of storage, the expected seed longevity, and any specific treatments or stratification requirements for future planting.
- Periodically test germination: To ensure the viability of your stored seeds, conduct periodic germination tests. This will help you determine the percentage of seeds that successfully sprout, allowing you to gauge their remaining viability.
By following these storage guidelines and maintaining optimal conditions, you can maximize the longevity and success rate of your collected flower seeds. Now, let’s move on to the final step: planting the seeds and watching them grow!
Read more: How To Plant Flowers From Seeds
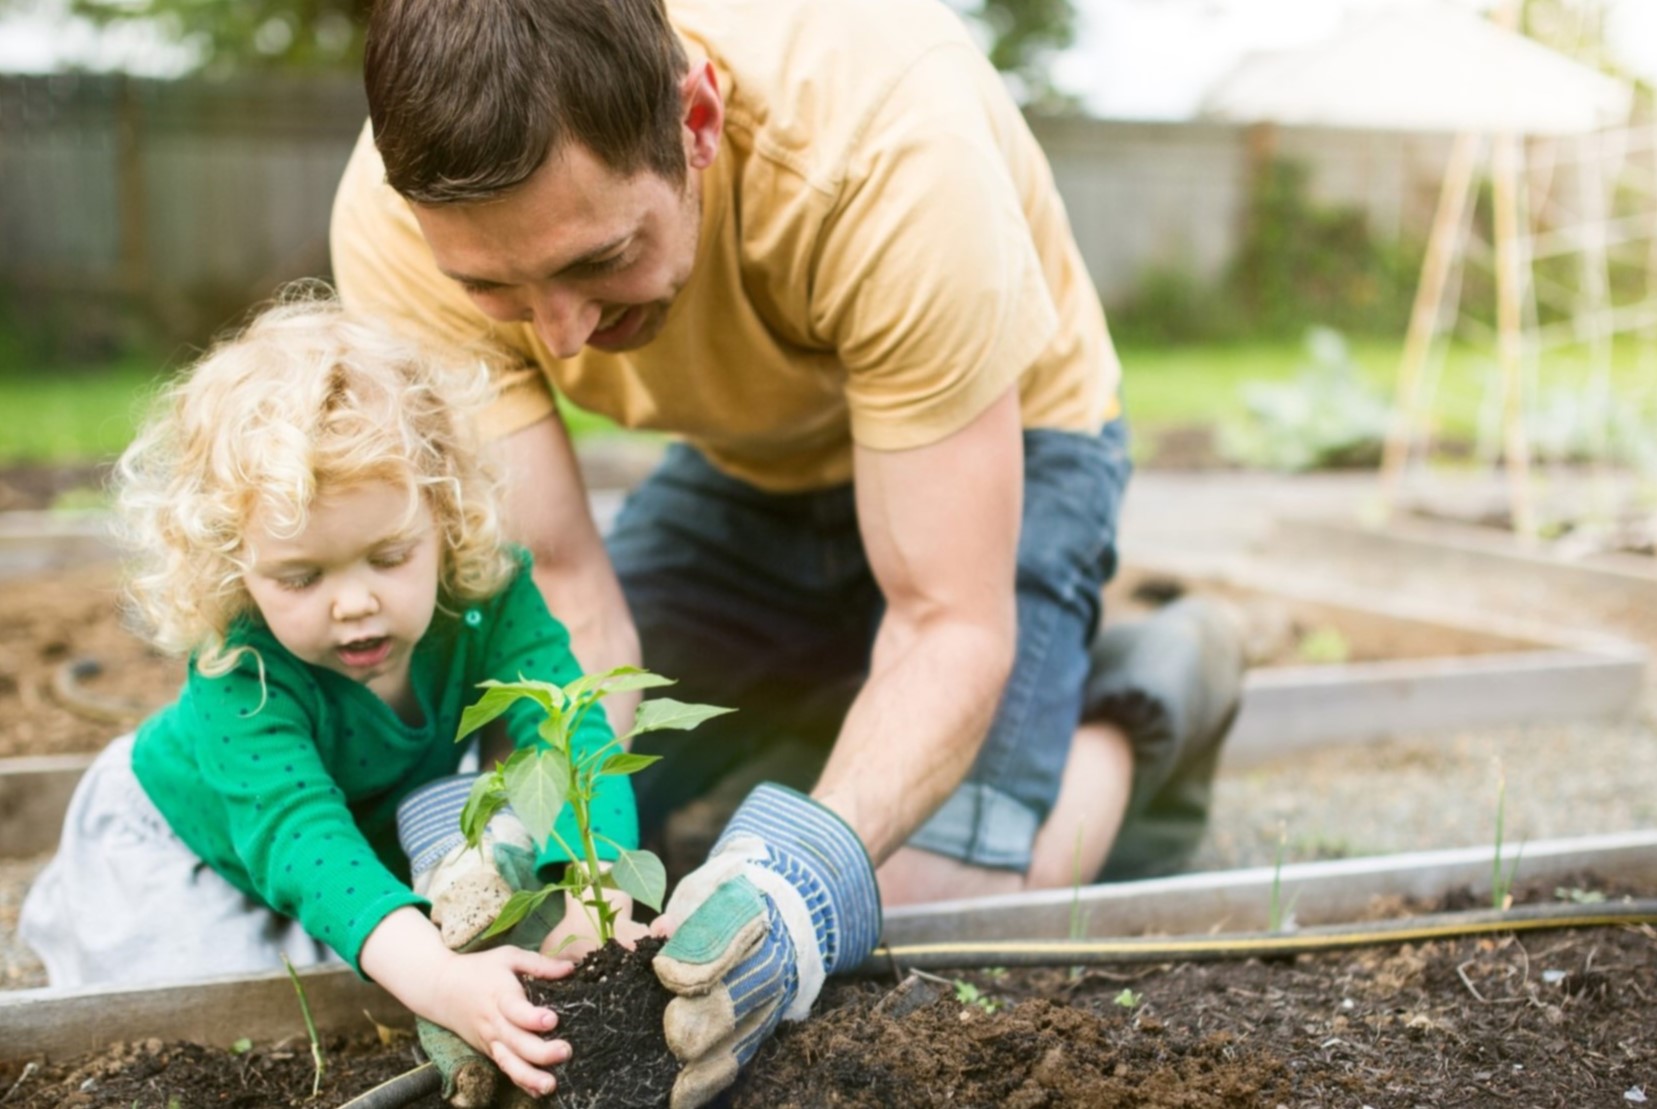
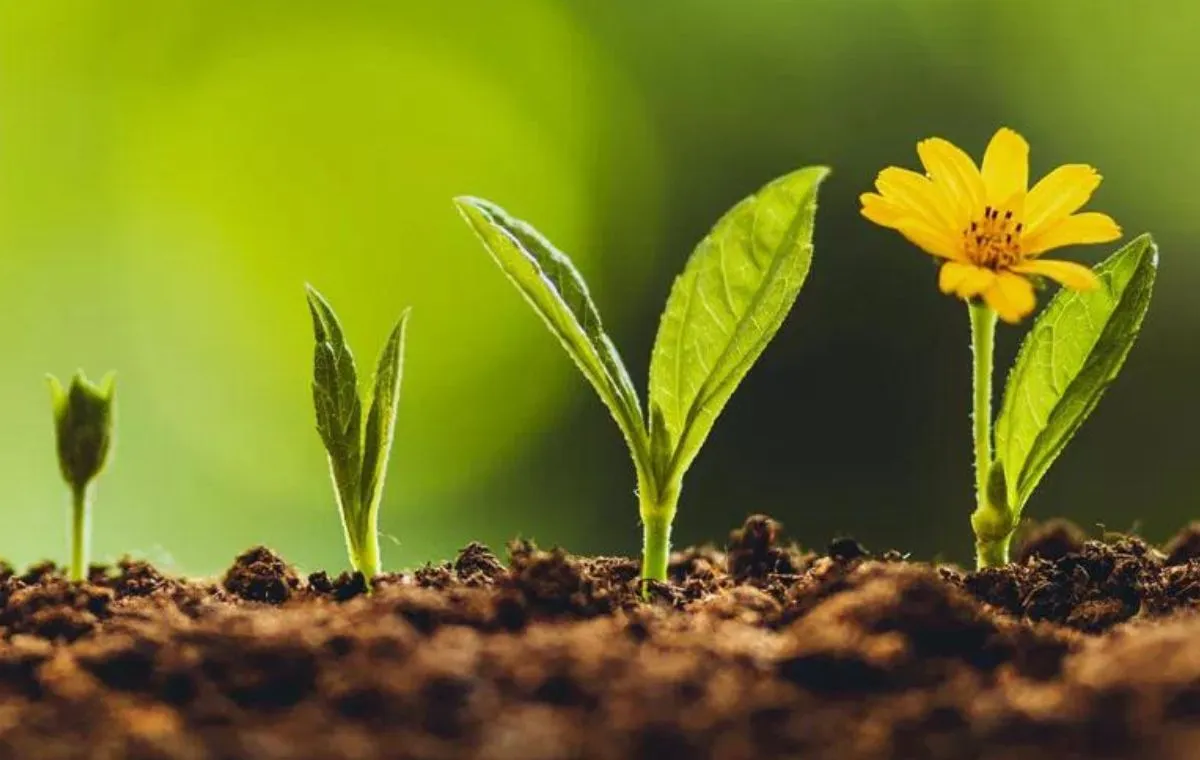
Step 7: Planting the Collected Seeds
The final and most exciting step in the process of collecting flower seeds is planting them and witnessing their growth and beauty. Here’s a guide to planting the collected seeds:
- Choose the right time to plant: Research the optimal planting time for the specific flower species you collected seeds from. Some seeds may require stratification (a period of cold treatment) or specific conditions to germinate successfully.
- Prepare the planting area: Select a suitable spot in your garden or prepare containers for indoor planting. Ensure the soil is well-draining and amend it with compost or organic matter if necessary.
- Sow the seeds: Follow the recommended planting depth and spacing for each flower species. Gently press the seeds into the soil, cover them with a thin layer of soil, and water them lightly to ensure good seed-to-soil contact.
- Provide proper care: Regularly water the newly planted seeds, keeping the soil consistently moist but not waterlogged. Protect the emerging seedlings from extreme weather conditions and ensure they receive adequate sunlight or artificial light if grown indoors.
- Thin out seedlings if necessary: Once the seedlings have sprouted and grown a few sets of leaves, thin them out to provide enough space for each plant to thrive. Follow the recommended spacing requirements for the specific flowers you are growing.
- Monitor growth and health: Keep an eye on the progress of your plants, observing their growth, health, and any signs of pests or diseases. Take appropriate measures if necessary, such as providing support for taller plants or applying organic pest control methods.
- Enjoy the blossoms: As your plants mature, enjoy the beauty of the flowers they produce. Take the time to savor the fruits of your labor, knowing that you were part of the entire process from collecting seeds to witnessing the vibrant blooms.
- Consider seed saving: As your flowers bloom and eventually produce new seeds, you can continue the cycle by collecting and saving seeds from the next generation. This allows you to perpetuate and expand your collection of flower varieties.
By following these steps and providing proper care, you can cultivate a garden filled with diverse and unique flowers from the seeds you collected. It’s a wonderful journey of nurturing life and experiencing the wonders of nature.
Congratulations on completing all the steps of collecting and planting flower seeds! Your dedication and love for gardening have allowed you to become a true steward of nature. Enjoy the beauty of your blooming garden, and don’t forget to share your knowledge and joy with others!
Conclusion
Congratulations! You now have the knowledge and skills to embark on the wonderful journey of collecting flower seeds. By following the step-by-step process outlined in this guide, you can preserve the beauty and diversity of your favorite flowers while saving money and connecting with nature in a deeper way.
Throughout this guide, we’ve explored the importance of collecting flower seeds for preserving biodiversity, saving costs, and fostering a sense of community through sharing. We’ve also learned about the essential tools and materials needed, the importance of timing, and the process of seed harvesting, cleaning, drying, and storing.
By carefully selecting healthy plants, understanding the optimal timing for seed collection, and properly preparing, cleaning, drying, and storing the seeds, you can maximize their viability and increase your chances of successful germination.
Remember, the joy doesn’t end with collecting and storing the seeds. The final step of planting the collected seeds allows you to witness the magical transformation of seeds into beautiful blossoms. As your garden flourishes and blooms, you can continue the cycle by collecting seeds from the next generation.
So go ahead, immerse yourself in the world of collecting flower seeds, and let your creativity and love for gardening flourish. Explore diverse species, develop unique varieties, and share the beauty of your garden with others. Let the seed collection process be a source of fulfillment, joy, and connection with the natural world.
Happy seed collecting, planting, and gardening!
Frequently Asked Questions about How To Collect Seeds From Flowers
Was this page helpful?
At Storables.com, we guarantee accurate and reliable information. Our content, validated by Expert Board Contributors, is crafted following stringent Editorial Policies. We're committed to providing you with well-researched, expert-backed insights for all your informational needs.
0 thoughts on “How To Collect Seeds From Flowers”