Home>Garden Essentials>How To Dry Seeds For Planting
Garden Essentials
How To Dry Seeds For Planting
Modified: October 20, 2024
Learn how to dry and store seeds for planting in your garden, ensuring healthy growth and a bountiful harvest.
(Many of the links in this article redirect to a specific reviewed product. Your purchase of these products through affiliate links helps to generate commission for Storables.com, at no extra cost. Learn more)
Introduction
Welcome to the fascinating world of growing plants from seeds! Whether you are an avid gardener or just starting out, understanding the process of drying seeds for planting is an essential skill to have. This method allows you to collect and store seeds from your favorite plants, ensuring a continuous supply for future seasons.
When it comes to gardening, the possibilities are endless. From vibrant flowers to delicious vegetables and flavorful herbs, each plant holds the potential for new growth and beauty. By learning how to dry seeds, you can unlock the hidden potential of your plants, ensuring their continued success and the opportunity to share your favorite varieties with others.
So why should you dry seeds instead of purchasing them each year? One of the main benefits is the cost savings. Commercially bought seeds can quickly add up, especially if you have a large garden or enjoy experimenting with different varieties. By harvesting and drying seeds from your own plants, you can save money and have a diverse selection of seeds on hand.
Another advantage is the preservation of heirloom varieties. Many traditional and rare plant varieties are not easily found in stores, making seed-saving crucial for their preservation. By drying and storing seeds from these unique plants, you can help maintain their genetic diversity and ensure their availability for future generations.
Choosing the right seeds to dry is an important consideration. Look for mature plants that are healthy and have produced quality fruits or flowers. Avoid using seeds from hybrid plants, as these may not produce consistent results. Instead, focus on open-pollinated or heirloom varieties, as these will reliably reproduce the same characteristics as their parent plants.
In the next sections, we will explore the process of harvesting, cleaning, and drying seeds. We will also discuss various drying methods, such as air drying, oven drying, and using a dehydrator. Additionally, we will provide tips on how to check for seed dryness and the best practices for storing dried seeds.
By the end of this guide, you will have a solid understanding of how to dry seeds for planting, allowing you to embark on a rewarding journey of growing plants from your very own collected seeds. Let’s dive in and discover the wonders of seed drying!
Key Takeaways:
- Save money and preserve plant diversity by drying seeds for planting. Choose healthy, open-pollinated varieties, and use air drying or a dehydrator for best results.
- Ensure seed viability and longevity by storing dried seeds in airtight containers in a cool, dark, and moisture-free location. Regularly test germination rate and refresh seed stock for continued success.
Read more: How To Dry Out Seeds For Planting
Why Dry Seeds?
Drying seeds is a crucial step in the seed-saving process, offering numerous benefits for both experienced gardeners and beginners. Let’s explore why drying seeds is an essential practice:
1. Cost savings: Purchasing seeds can be expensive, especially if you have a large garden or want to grow a wide variety of plants. By drying and saving seeds from your own plants, you can significantly reduce your gardening expenses. It’s a budget-friendly way to have an abundance of seeds for future plantings.
2. Preservation of heirloom varieties: Many traditional and heirloom plant varieties are not readily available in stores or seed catalogs. By drying seeds from these unique plants, you play a vital role in their preservation. As you grow and save seeds from heirloom plants, you help maintain their genetic diversity and keep them available for future generations.
3. Ensuring a continuous supply of favorite plants: If you have specific plants that you love and want to grow year after year, drying their seeds is the best way to guarantee a continuous supply. By saving and storing the seeds, you can grow your favorite plants without relying on purchasing new seeds every season.
4. Adapting plants to your garden: Saving seeds from your own plants allows you to select and save seeds from specimens that have performed exceptionally well in your garden. Over time, this practice can help you develop plants that are better adapted to your specific garden conditions, such as soil type, climate, and pests.
5. Experimentation and innovation: Drying seeds gives you the opportunity to experiment and create new plant varieties. You can cross-pollinate plants, save the seeds, and observe the offspring’s characteristics. With time, you may be able to develop unique and exciting plant varieties that are well-suited to your own gardening goals and preferences.
6. Sharing with friends and community: Dried seeds make wonderful gifts for fellow gardeners, friends, and community members. Sharing your saved seeds allows others to experience the joy of growing their own plants from seeds and promotes a culture of seed exchange and preservation.
By drying seeds, you take an active role in preserving plant diversity, saving money, and fostering a deeper connection to nature. It’s an empowering practice that allows you to become self-sufficient in your gardening endeavors and contribute to the larger gardening community. Now that we understand the importance of drying seeds, let’s delve into the process of choosing the right seeds for drying.
Choosing the Right Seeds
When it comes to drying seeds, selecting the right plant varieties is essential for successful preservation and future growth. Here are some factors to consider when choosing seeds to dry:
1. Plant health: Look for plants that are healthy, disease-free, and have produced robust fruits or flowers. Avoid using seeds from poorly performing or weak plants, as they may not produce viable seeds or offspring with desirable traits.
2. Open-pollinated or heirloom varieties: Focus on selecting open-pollinated or heirloom seeds for drying. These varieties have been passed down through generations and are stable, meaning the seeds will produce plants that closely resemble the parent plant. Open-pollinated plants are pollinated by natural means (wind, insects, etc.) and produce seeds that can be reliably saved and replanted.
3. Non-hybrid plants: Avoid using seeds from hybrid plants for drying. Hybrid plants are the result of cross-pollination between two different varieties to produce specific traits. The seeds from hybrid plants may not produce offspring with consistent characteristics, making them unreliable for seed-saving purposes.
4. Adaptability: Consider the adaptability of the plant to your specific garden conditions. Look for plants that have thrived in your garden, showing resilience against pests, diseases, and weather conditions. By saving seeds from these well-adapted plants, you increase the chances of success in future plantings.
5. Taste and preference: If you are growing edible crops, prioritize plants with flavors that you enjoy. Taste and preference are important factors to consider when selecting seeds, as they contribute to the overall satisfaction and enjoyment of your gardening experience.
6. Diversity: Embrace diversity in your garden by selecting a variety of seeds to dry. By saving seeds from different plant species and varieties, you create a rich tapestry of flavors, colors, and textures in your garden. This diverse collection of seeds also contributes to the overall resilience and sustainability of your garden ecosystem.
7. Obtain seeds ethically: When acquiring seeds, ensure that they have been obtained in an ethical and legal manner. Avoid acquiring seeds from rare or endangered plants, as this can contribute to their depletion in the wild. Instead, focus on reputable seed banks, local nurseries, or trusted seed exchanges that promote responsible seed sourcing.
By considering these factors when choosing seeds for drying, you can ensure a successful and rewarding seed-saving experience. Once you have selected the right seeds, it’s time to move on to the process of harvesting and cleaning them. Let’s explore these steps in the next section.
Harvesting Seeds
Harvesting seeds is a crucial step in the seed-saving process, as it determines the quality and viability of the seeds you will be drying. Here are some important considerations when harvesting seeds:
1. Timing: Timing is key when harvesting seeds. Wait until the plants have fully matured and the seeds have reached their ripeness. Look for signs such as the drying of seed pods, the darkening of seed heads, or the browning of fruits. Each plant has its own specific indicators of seed maturity, so it’s important to research and understand the particular requirements of the plant you are harvesting from.
2. Selecting the best specimens: When harvesting seeds, choose the best specimens from your plants. Look for healthy, vibrant, and disease-free plants. Select fruits or seed heads that are fully developed and show no signs of rot or insect damage. By choosing the healthiest plants, you increase the chances of obtaining high-quality seeds.
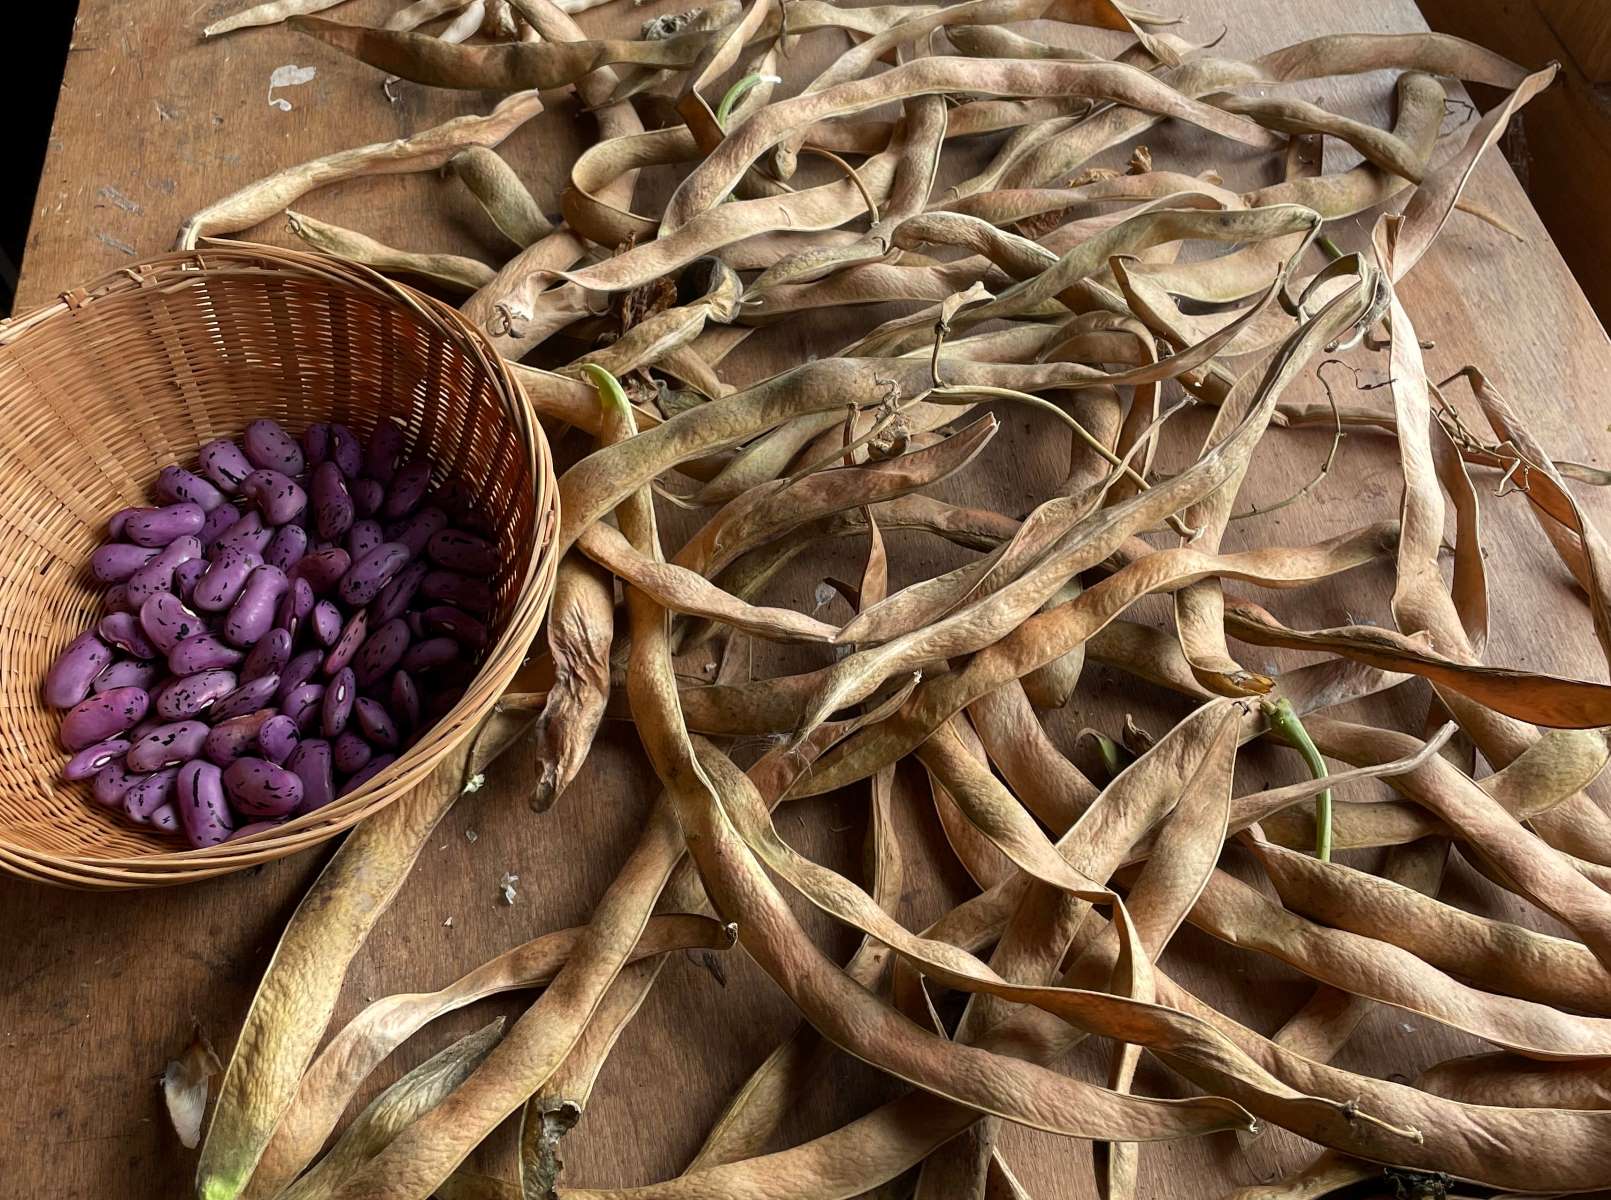
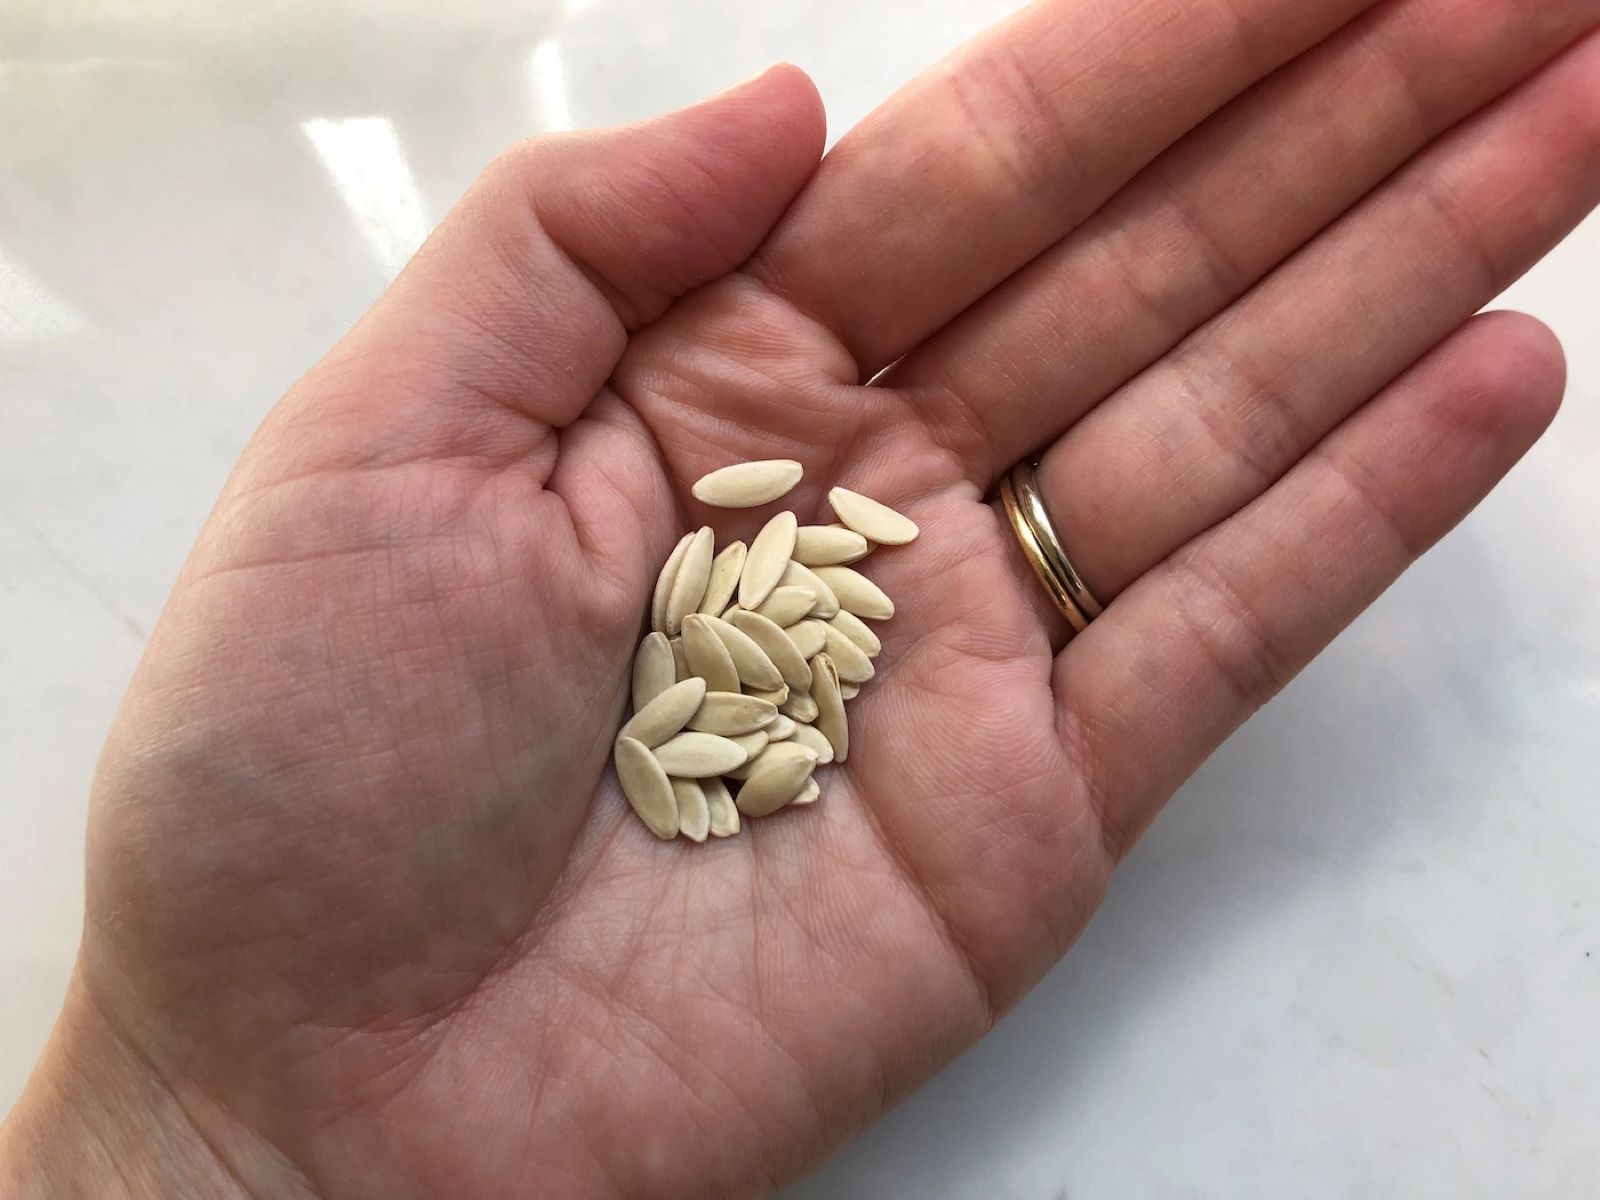
3. Collection methods: The collection method depends on the type of plant and the structure of its seeds. For plants with large seeds, such as beans or sunflower, you can simply pluck or cut the seed heads and allow them to dry indoors. For plants with smaller seeds, such as lettuce or tomatoes, you may need to gently squeeze or scrape the seeds from the plant into a container.
4. Proper handling: When collecting seeds, handle them carefully to avoid damage. Avoid dropping or crushing the seeds, as this can affect their viability. Place the seeds in a clean and dry container, such as a paper bag or envelope, labeling them with the plant species and collection date to ensure proper identification later.
5. Isolation for cross-pollinating plants: If you are harvesting seeds from cross-pollinating plants, such as cucumbers or squash, it’s important to prevent cross-pollination between different varieties. To ensure seed purity, isolate different varieties of the same species by placing physical barriers, such as mesh bags or cages, around individual plants.
6. Wildflower and native plant considerations: When harvesting seeds from wildflowers or native plants, be mindful of the impact on local ecosystems. Avoid harvesting seeds from rare or endangered plants. Instead, focus on collecting seeds from common and abundant species, ensuring that you leave a sufficient amount for natural regeneration and the sustenance of local wildlife.
By following these guidelines for harvesting seeds, you will be well on your way to obtaining high-quality seeds for drying. Once you have collected the seeds, the next step is to clean and prepare them for the drying process. This will be the focus of the next section.
Cleaning Seeds
After harvesting seeds, it’s important to clean them to remove any debris, plant material, or pathogens that may affect their viability. Cleaning seeds not only helps ensure their quality but also prevents the spread of diseases in your garden. Here are some tips for effectively cleaning seeds:
1. Manual cleaning: Start by manually removing any large debris or plant material from the seeds. You can do this by gently rubbing the seeds between your fingers or using a fine sieve or strainer to separate them from unwanted particles. This process helps remove bulky materials like stems, leaves, or fruit pulp.
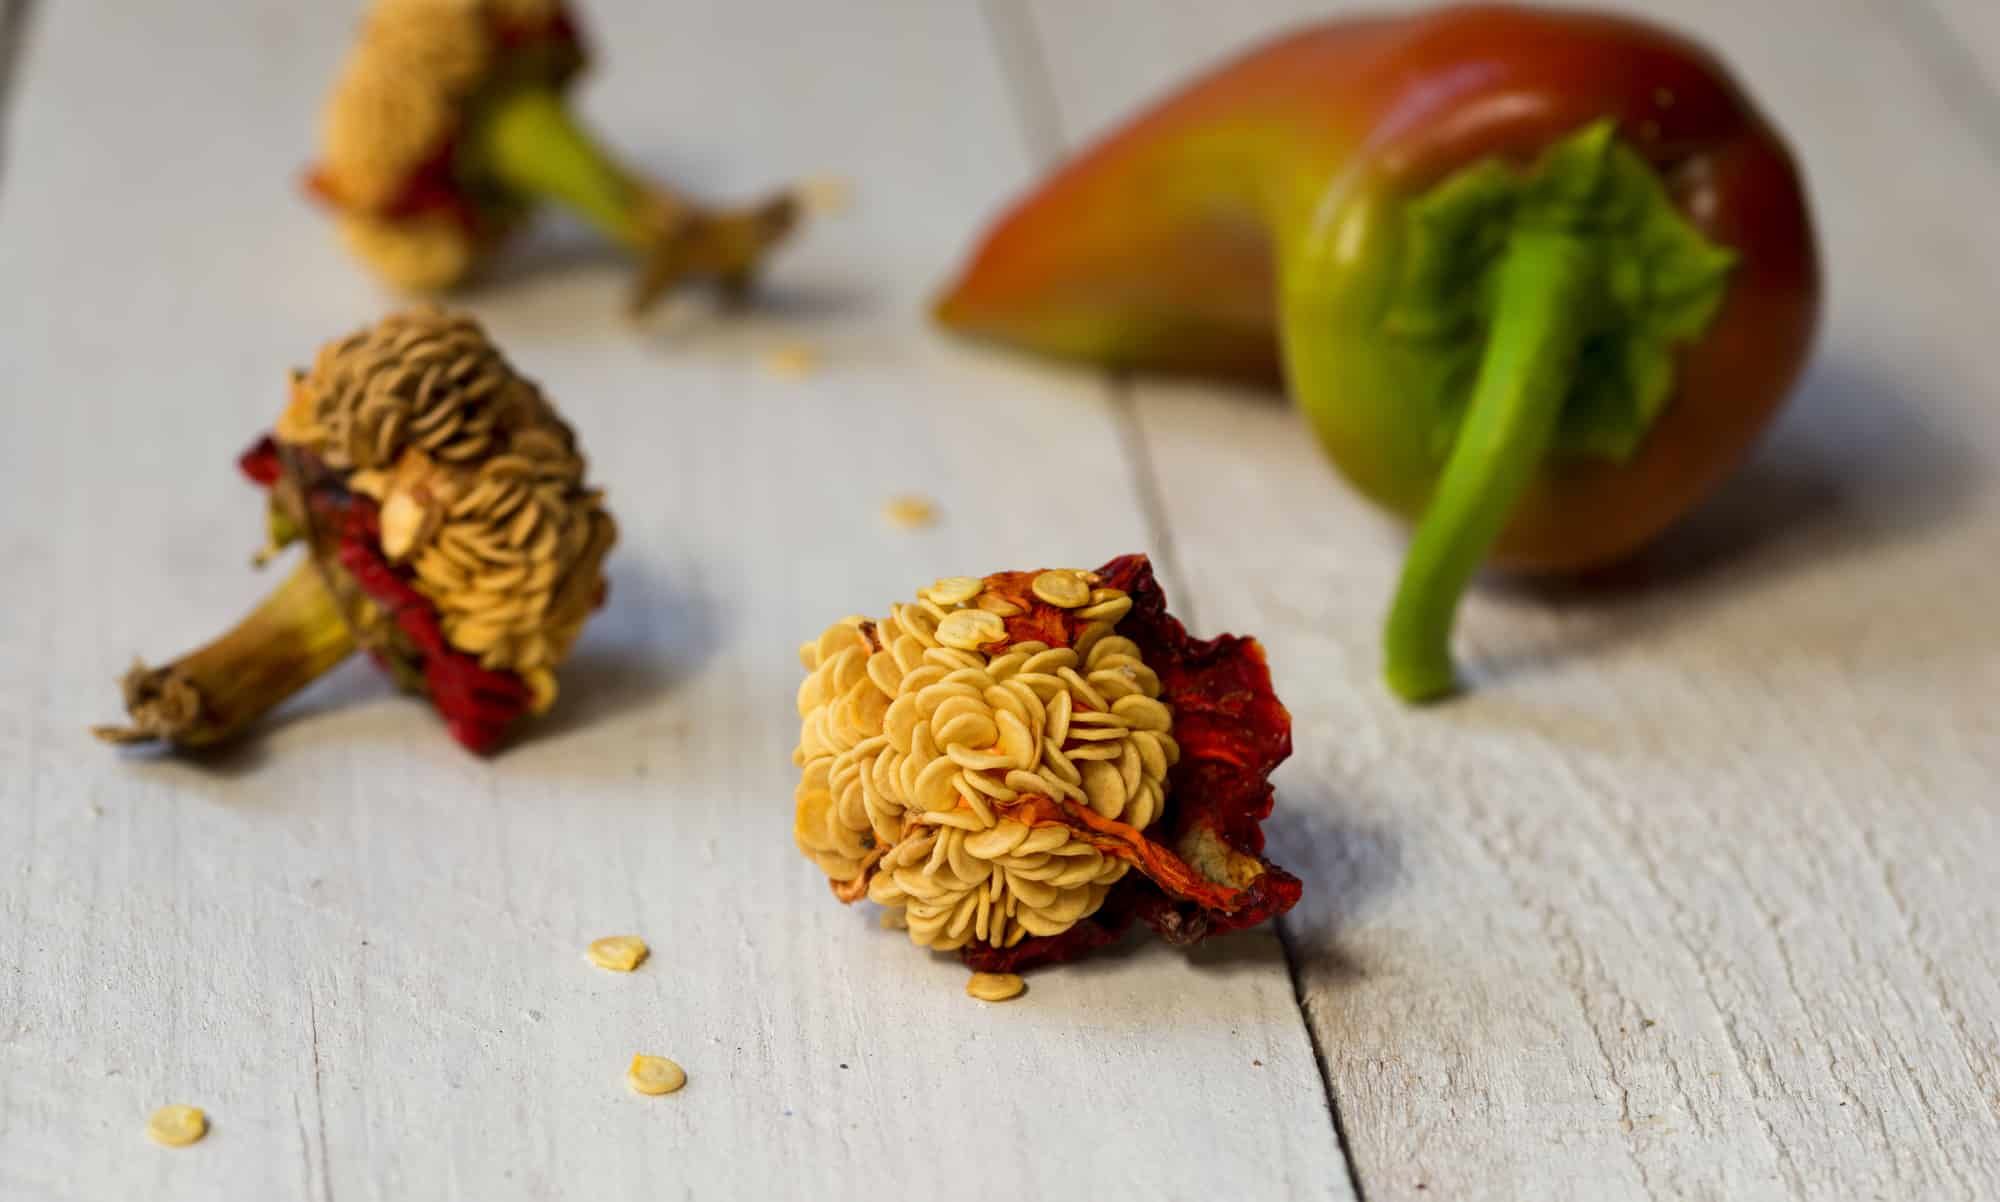
2. Water separation: For smaller seeds, you can use a water separation method to separate the seeds from lighter plant materials. Place the seeds in a container filled with water and stir gently. The viable seeds will sink to the bottom, while any floating debris or unripe seeds can be carefully poured off.
3. Fermentation process: Some seeds, especially those from fruits like tomatoes or squash, benefit from a fermentation process to remove the gel-like coating that surrounds them. Scoop the seeds into a container with some water and allow them to sit undisturbed for a few days. During this time, the seeds will ferment and the coating will break down. Rinse the seeds well after fermentation to remove any remaining pulp.
4. Drying after cleaning: Once the seeds have been cleaned, it’s important to dry them thoroughly before storage. Spread the seeds out on a clean surface, such as a paper towel or a screen, in a well-ventilated and dry area. Allow the seeds to air dry completely, stirring or flipping them occasionally to ensure even drying. Avoid using heat sources or direct sunlight, as high temperatures can damage the seeds.
5. Seed purity: When cleaning seeds, it’s important to ensure seed purity by removing any seeds that look unhealthy or different from the rest. This includes seeds that are discolored, shriveled, or malformed. Removing these undesirable seeds helps maintain the quality and vigor of the seed stock.
6. Labeling: Properly label your cleaned seeds with the plant species, variety (if applicable), and the date of collection. This ensures correct identification and allows you to track the freshness and viability of the seeds over time.
By taking the time to clean your seeds after harvesting, you ensure that they are free from contaminants and ready for the drying process. Next, we will explore different methods of drying seeds to preserve their viability and prepare them for future plantings.
Read more: How To Dry Peas For Seed
Drying Methods for Seeds
Properly drying seeds is crucial for their long-term viability and successful storage. There are several methods you can use to dry seeds effectively. Let’s explore some common drying methods:
1. Air Drying: Air drying is the simplest and most widely used method for drying seeds. Start by spreading the cleaned seeds in a single layer on a clean, dry surface. This can be a paper towel, a mesh screen, or a baking sheet lined with parchment paper. Place the seeds in a well-ventilated area away from direct sunlight, and allow them to air dry naturally. Stir or flip the seeds regularly to ensure even drying. Depending on the size and moisture content of the seeds, air drying can take anywhere from a few days to a couple of weeks.
2. Oven Drying: Oven drying is a quicker alternative to air drying, but it requires caution to avoid overheating the seeds. Preheat your oven to the lowest possible temperature (ideally below 100°F/38°C), or use the oven’s “warm” setting. Spread the cleaned seeds in a single layer on a baking sheet lined with parchment paper and place it in the oven. Keep the oven door slightly ajar to allow moisture to escape. Stir or flip the seeds occasionally to ensure even drying. Monitor the seeds closely to prevent overheating, as high temperatures can damage their viability. Once the seeds are completely dry, remove them from the oven and let them cool before storing.
3. Using a Dehydrator: If you have a food dehydrator, you can use it to dry seeds efficiently. Spread the cleaned seeds in a single layer on the dehydrator trays, ensuring proper spacing for adequate airflow. Set the dehydrator to a low temperature, preferably around 95°F/35°C. Allow the seeds to dry according to the manufacturer’s instructions, periodically checking for dryness. Dehydrators provide consistent temperature and airflow, making them suitable for drying seeds more quickly than air drying. However, it’s essential to monitor the seeds closely and avoid excessive heat.
4. Silica Gel: Silica gel packets can be used to dry seeds in a sealed container. Place the cleaned seeds in a breathable container, such as a paper bag or an envelope. Add a few packets of silica gel, which absorb moisture, to the container. Seal the container and store it in a cool, dry place for a few days to a week. Check the seeds for dryness, and once they are completely dry, remove them from the container and transfer them to a storage container.
5. Desiccants: Similar to silica gel, other desiccant materials like rice, powdered milk, or powdered borax can be used to dry seeds. Place the cleaned seeds in a breathable container and bury them within the desiccant material. Seal the container and store it in a cool, dry place for a designated period. Check the seeds for dryness, and once they are completely dry, remove them from the container and transfer them to a storage container.
6. Seed Drying Chambers: Seed drying chambers are specialized devices designed to provide controlled environments for drying seeds. These chambers allow for precise temperature and humidity regulation, ensuring optimal drying conditions for different types of seeds. Seed drying chambers are commonly used in large-scale seed-saving operations or botanical gardens, but they are not typically necessary for home gardeners unless dealing with a large quantity of seeds.
When using any drying method, it’s important to periodically check the seeds for dryness. Seeds should feel hard and brittle, and there should be no signs of moisture or softness. If the seeds are not completely dry, continue the drying process until they reach the proper moisture content for storage.
Now that you know various methods for drying seeds, it’s crucial to determine their dryness. In the next section, we will explore how to check for seed dryness and ensure the seeds are ready for storage.
Air Drying
Air drying is one of the most common and effective methods for drying seeds. It is a simple, natural process that allows seeds to gradually release moisture and reach the optimal moisture content for storage. Here is a step-by-step guide on air drying seeds:
1. Prepare the seeds: Start by cleaning the seeds, removing any debris or unwanted materials. Place the cleaned seeds in a single layer on a clean, dry surface. Use a paper towel, a mesh screen, or a baking sheet lined with parchment paper, ensuring there is enough space between the seeds for proper airflow.
2. Choose a suitable location: Find a well-ventilated area with low humidity to air dry the seeds. Avoid direct sunlight, as it can degrade the seed quality. Ideal locations include a shaded outdoor area, a well-ventilated room, or an indoor space with good air circulation.
3. Arrange for proper airflow: Proper airflow is crucial for effective air drying. Make sure there is sufficient space between the seeds to allow air to circulate. This prevents the seeds from becoming moldy or developing moisture pockets.
4. Stir or flip the seeds: Regularly stir or flip the seeds during the drying process to ensure even airflow and prevent seeds from sticking together. This helps promote uniform drying and prevents any potential mold or rot formation.
5. Monitor the drying process: Check the seeds regularly to monitor their progress. Over time, you will notice that the seeds become hard and dry. This can take anywhere from a few days to a couple of weeks, depending on the moisture content of the seeds and the ambient humidity.
6. Test for dryness: To determine if the seeds are completely dry, perform a simple “snap” test. Take a seed and try to break it with your fingers. If it snaps easily and does not bend or feel soft, it is likely dry and ready for storage. If the seed bends or feels soft, it needs more time to dry. Continue the drying process until all seeds have reached the desired dryness.
7. Store the dried seeds: Once the seeds are thoroughly dry, remove them from the drying area and transfer them to airtight containers or seed envelopes. Label the containers with the plant species, variety (if applicable), and the date of collection. Store the seeds in a cool, dark place, away from moisture and extreme temperature fluctuations.
Air drying is a simple and reliable method for drying seeds, giving you the confidence that your seeds are properly prepared for storage. By following these steps, you can ensure the long-term viability of your seeds and have a bountiful supply for future plantings.
In the next section, we will explore an alternative drying method: oven drying.
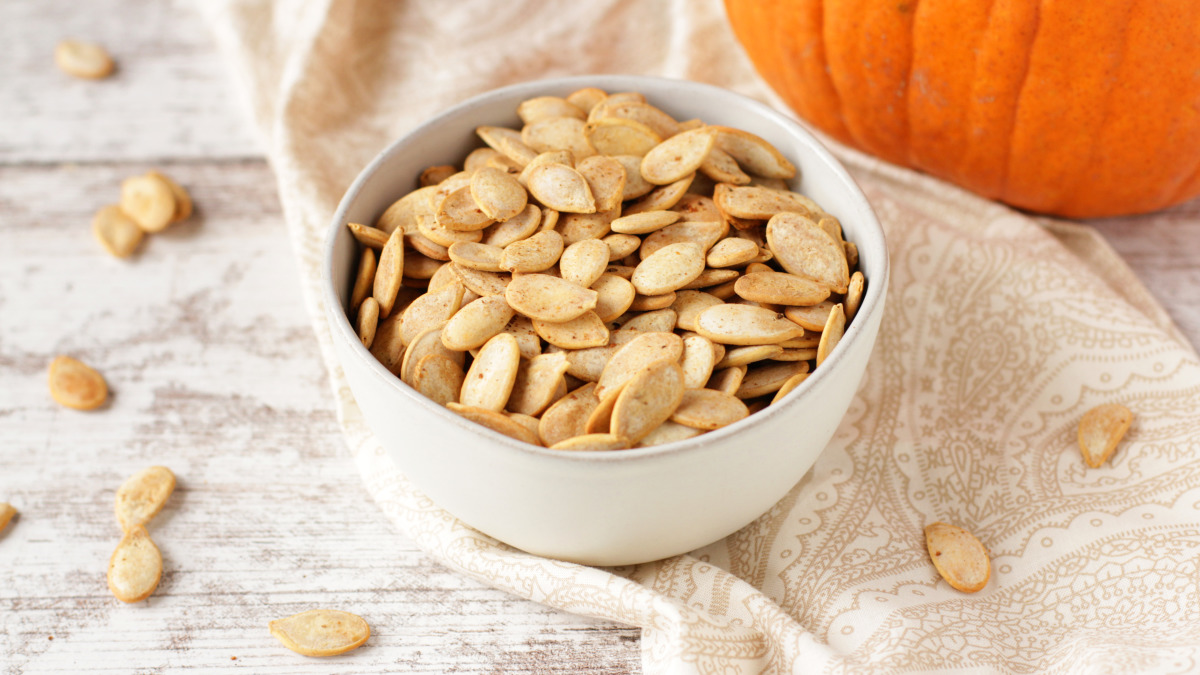
After harvesting seeds, spread them out in a single layer on a paper towel or screen. Place them in a warm, dry area with good air circulation for 1-2 weeks until completely dry. Store in a cool, dry place until ready for planting.
Oven Drying
Oven drying is a quicker alternative to air drying and can be a convenient method for drying seeds, especially when time is limited or ambient humidity is high. However, it is important to exercise caution and closely monitor the seeds to prevent overheating or damage. Follow these steps for oven drying seeds:
1. Prepare the seeds: Begin by cleaning the seeds and removing any debris or unwanted materials. Spread the cleaned seeds in a single layer on a baking sheet lined with parchment paper. Ensure that the seeds are evenly distributed and not crowded to allow for effective drying.
2. Preheat the oven: Preheat your oven to the lowest possible temperature, ideally below 100°F (38°C). If your oven does not have a temperature setting below this, use the “warm” setting if available. The goal is to create a gentle and low heat environment for drying the seeds.
3. Place the seeds in the oven: Once the oven has reached the desired temperature, place the baking sheet with the seeds inside. Keep the oven door slightly ajar to allow moisture to escape and prevent the build-up of heat.
4. Stir or flip the seeds: Periodically check the seeds and gently stir or flip them to ensure even drying. This helps prevent seeds from clumping or sticking together, ensuring that all seeds are exposed to the warm air circulating in the oven.
5. Monitor the seeds: It is crucial to closely monitor the seeds during the drying process to prevent overheating, which can damage their viability. Check the seeds frequently and observe their dryness. Remove any seeds that appear to be dry to avoid overexposure to heat.
6. Test for dryness: To determine if the seeds are completely dry, perform a “snap” test. Take a seed and try to break it with your fingers. If it snaps easily and does not bend or feel soft, it is likely dry and ready for storage. If the seed bends or feels soft, it needs more time to dry. Continue the drying process, regularly checking for dryness until all seeds have reached the desired state.
7. Cool the seeds and store them: Once the seeds are completely dry, remove them from the oven and allow them to cool before storing. Transfer the dried seeds to airtight containers or seed envelopes, labeling them with the necessary identification information. Store the seeds in a cool, dark place, away from moisture and extreme temperature fluctuations.
Remember, oven drying can be faster than air drying, but it requires careful attention to prevent overheating. Regularly monitor the seeds to ensure they do not get too hot or become damaged. By following these steps, you can effectively dry seeds using your oven.
In the next section, we will explore another option for drying seeds: using a dehydrator.
Using a Dehydrator
When it comes to drying seeds, using a dehydrator can provide a convenient and efficient method. Dehydrators offer precise temperature control and consistent airflow, which helps to speed up the drying process while preserving the viability of the seeds. Follow these steps to effectively dry seeds using a dehydrator:
1. Prepare the seeds: Begin by cleaning the seeds and removing any debris or unwanted materials. Ensure that the seeds are dry and free from excess moisture before placing them in the dehydrator.
2. Arrange the seeds in the dehydrator: Spread the cleaned seeds out in a single layer on the dehydrator trays. Take care not to overcrowd the seeds, as this can impede proper airflow and hinder the drying process. Make sure there is sufficient spacing between the seeds to allow them to dry evenly.
3. Set the dehydrator temperature: Set the dehydrator to a low temperature, ideally around 95°F (35°C). This temperature provides a gentle and consistent heat that aids in the drying process without causing any damage to the seeds. Refer to the manufacturer’s instructions for your specific dehydrator model.
4. Drying time: The drying time will vary depending on the type of seed and its moisture content. Check the dehydrator instructions or refer to seed-specific drying guidelines for an estimate on the drying time. Periodically check the seeds to monitor their dryness and continue the drying process until they reach the desired moisture level. Be sure to rotate the trays within the dehydrator to ensure even drying.
5. Test for dryness: To determine if the seeds are adequately dry, perform a “snap” test. Take a seed and try to break it with your fingers. If it snaps easily and does not bend or feel soft, it is likely dry and ready for storage. If the seed bends or feels soft, it needs more time to dry. Continue the drying process, regularly checking for dryness until all seeds have reached the desired state.
6. Cool the seeds and store them: Once the seeds are completely dry, remove them from the dehydrator and allow them to cool before storing. Transfer the dried seeds to airtight containers or seed envelopes, labeling them with the necessary identification information. Store the seeds in a cool, dark place, away from moisture and extreme temperature fluctuations.
Using a dehydrator streamlines the seed drying process by providing precise temperature control and consistent airflow. It ensures efficient drying while maintaining the viability of the seeds. By following these steps, you can effectively dry seeds using a dehydrator.
Next, we will discuss how to check for seed dryness and provide tips for successfully storing dried seeds.
Read more: How To Germinate Dried Lentils
Checking for Seed Dryness
Ensuring that seeds are properly dried is essential for their long-term viability and successful storage. While various drying methods are effective, it’s crucial to check for seed dryness before storing them. Here are some methods to determine if your seeds are adequately dried:
1. Visual inspection: One of the simplest ways to check for seed dryness is through visual inspection. Examine the seeds closely and look for any signs of moisture or softness. Fully dried seeds will appear hard and brittle, with no visible moisture content.
2. “Snap” test: Perform a “snap” test by attempting to break a seed with your fingers. If the seed snaps easily and does not bend or feel soft, it is likely dry and ready for storage. On the other hand, if the seed bends or feels soft, it indicates that it still contains moisture and requires further drying.
3. Weight comparison: Weigh a small sample of seeds from the same variety before drying. After the drying process, weigh the same sample again. If the weight remains the same, it suggests that the seeds are dry and have reached a stable moisture level. However, if the weight decreases, it indicates that the seeds may still contain excess moisture and need additional drying time.
4. Seed moisture tester: For those who have access to a seed moisture tester, this device can provide accurate readings of the moisture content within the seeds. A moisture tester measures the electrical conductivity of the seeds, which correlates with their moisture levels. Consult the specific instructions for the moisture tester you are using to determine the appropriate moisture level for seed storage.
It’s important to note that different types of seeds have varying moisture content requirements for storage. Most seeds should be dried to a moisture content level of around 5-10%. However, some seeds, such as those from tropical plants, may require slightly higher moisture content to remain viable.
If you detect any signs of excess moisture during the checking process, continue drying the seeds using your chosen method until they reach the desired dryness. Remember to avoid overheating or rapid drying, as these can negatively impact seed viability.
Now that you have confirmed the dryness of your seeds, it’s time to move on to the crucial step of storing them properly.
Storing Dried Seeds
Proper storage is vital for maintaining the viability and longevity of your dried seeds. By following these guidelines, you can ensure that your seeds remain in optimal condition for future plantings:
1. Select suitable containers: Choose airtight and moisture-proof containers for storing your dried seeds. Options include glass jars with tight-fitting lids, plastic containers with sealing gaskets, or resealable seed envelopes. Ensure that the containers are clean, dry, and free of any lingering odors that could potentially affect the seeds.
2. Label and identify: Clearly label each container or seed envelope with the name of the plant species, variety (if applicable), and the date of collection. Proper identification prevents confusion and allows you to easily locate and identify your stored seeds in the future. Consider using waterproof labels or permanent markers for longevity.
3. Store in a cool and dark location: Find a suitable storage location for your seeds that is cool, dark, and dry. Avoid areas prone to temperature fluctuations, such as garages or attics, which can negatively affect seed viability. A cool basement, a pantry cupboard, or a dedicated seed storage box in a cool room are ideal choices.
4. Maintain consistent temperatures: Seeds are best preserved when stored at a cool, consistent temperature. Aim for a storage temperature between 32°F (0°C) and 50°F (10°C) for most seeds. Fluctuations in temperature can cause condensation and damage the seeds, so avoid storing them in areas prone to temperature fluctuations.
5. Control humidity: Excess moisture can lead to seed deterioration and the growth of molds or fungi. Maintain a low humidity level in your seed storage area. Consider adding desiccant packets or silica gel to the containers to absorb any residual moisture and ensure a dry storage environment.
6. Regularly monitor and test for viability: Periodically check your stored seeds for signs of deterioration or loss of viability. Conduct germination tests by planting a small sample of the seeds and observing their germination rate. This allows you to assess the seed’s viability and make informed decisions for future plantings.
7. Rotate and refresh your seed stock: To maintain optimal seed viability, it is recommended to refresh your seed stock every few years by collecting and drying fresh seeds. This helps ensure a continuous supply of healthy and viable seeds for future garden endeavors.
By following these storage practices, you can protect the integrity and viability of your dried seeds, allowing you to enjoy successful germination and abundant plant growth in the seasons to come.
Now that you have learned the importance of proper storage, let’s conclude our journey of seed drying with some helpful tips for successful seed drying.
Tips for Successful Seed Drying
Proper seed drying is crucial for maintaining seed quality and viability. Here are some valuable tips to ensure successful seed drying:
1. Start with quality seeds: Begin with healthy, mature seeds from plants that have thrived in your garden. Select open-pollinated or heirloom varieties for the best results.
2. Clean seeds thoroughly: Remove any debris or plant material from the seeds before drying. Cleaning the seeds ensures that you are working with pure and viable stock.
3. Avoid over-harvesting: Allow the seeds to fully mature on the plant before harvesting. Prematurely harvested seeds may not develop fully or have lower viability.
4. Use proper drying methods: Choose the drying method that is most appropriate for the type and moisture content of your seeds. Air drying, oven drying, or using a dehydrator are popular choices.
5. Monitor the drying process: Regularly check and monitor the seeds as they dry. Take care to avoid over-drying, as excessively dry seeds can become brittle and lose viability.
6. Keep seeds separate: If you are drying seeds from different plant varieties, be sure to keep them separated to avoid cross-contamination. Label and store each variety separately once dried.
7. Optimize air circulation: Proper airflow is essential for effective drying. Ensure that seeds are spread out in a single layer, allowing air to circulate freely around each seed. This prevents mold or rot and ensures even drying.
8. Check the moisture content: Use the “snap” test or moisture tester to determine if the seeds are sufficiently dry. Seeds should be hard and brittle, without any sign of moisture or flexibility.
9. Label and store properly: Clearly label each container with the seed’s name, variety, and the date of collection. Store the containers in a cool, dark, and moisture-free area to maintain seed viability.
10. Conduct germination tests: Occasionally test the germination rate of stored seeds to ensure their viability. This helps you determine if the seeds are still suitable for planting.
11. Rotate your seed stock: Refresh your seed collection by collecting and drying fresh seeds every few years. This ensures a continuous supply of vigorous and viable seeds.
12. Share and exchange seeds: Participate in seed exchanges or share with fellow gardeners to promote diversity and preserve heirloom varieties while expanding your collection.
By following these valuable seed drying tips, you can confidently preserve the quality and viability of your seeds while enjoying successful future plantings. Happy gardening!
Now that you have a comprehensive understanding of seed drying, you are ready to embark on your seed-saving journey and witness the wonders of growing plants from your own collected seeds. Best of luck in all your gardening endeavors!
Conclusion
Congratulations! You have reached the end of our comprehensive guide on drying seeds for planting. From understanding the benefits of seed drying to learning the various methods and techniques involved, you now have the knowledge and tools to successfully preserve and store your own seeds.
By drying seeds, you not only save money but also contribute to the preservation of heirloom varieties and create a diverse and sustainable garden. Harvesting, cleaning, and properly drying seeds are essential steps in this process, ensuring that your seeds are viable and ready for future plantings.
Remember to carefully choose the seeds, opting for healthy and open-pollinated varieties that suit your specific garden conditions. Harvest and clean the seeds with care, removing any debris or unwanted materials. Then, explore the different drying methods available, such as air drying, oven drying, or using a dehydrator, depending on your preferences and resources.
Checking for seed dryness is crucial before storing them, ensuring that they have reached the proper moisture level for long-term viability. And when it comes to storage, select suitable airtight containers, label them appropriately, and keep them in a cool, dark, and moisture-free location.
To ensure the continued success of your seed-saving efforts, regularly test the germination rate of your stored seeds and refresh your seed stock by collecting and drying fresh seeds over time. Participating in seed exchanges or sharing seeds with fellow gardeners is a great way to expand your collection and contribute to the preservation of plant diversity.
Now armed with the knowledge and understanding of seed drying, you are ready to embark on an exciting journey of growing plants from your own collected seeds. Enjoy the sense of accomplishment as you witness the growth and development of your garden, knowing that you have played an active role in preserving the natural heritage of plants.
Remember, gardening is both a science and an art, and seed drying is an essential part of the process. Embrace the joy and satisfaction that comes with nurturing plants from seed to harvest. Happy gardening and may your future plantings be filled with beauty, abundance, and successful growth!
Frequently Asked Questions about How To Dry Seeds For Planting
Was this page helpful?
At Storables.com, we guarantee accurate and reliable information. Our content, validated by Expert Board Contributors, is crafted following stringent Editorial Policies. We're committed to providing you with well-researched, expert-backed insights for all your informational needs.


0 thoughts on “How To Dry Seeds For Planting”