Home>Garden Essentials>How To Install Rock Ground Cover
Garden Essentials
How To Install Rock Ground Cover
Modified: October 21, 2024
Learn how to install rock ground cover in your garden with our step-by-step guide. Enhance the beauty of your outdoor space with this durable and low-maintenance option.
(Many of the links in this article redirect to a specific reviewed product. Your purchase of these products through affiliate links helps to generate commission for Storables.com, at no extra cost. Learn more)
Introduction
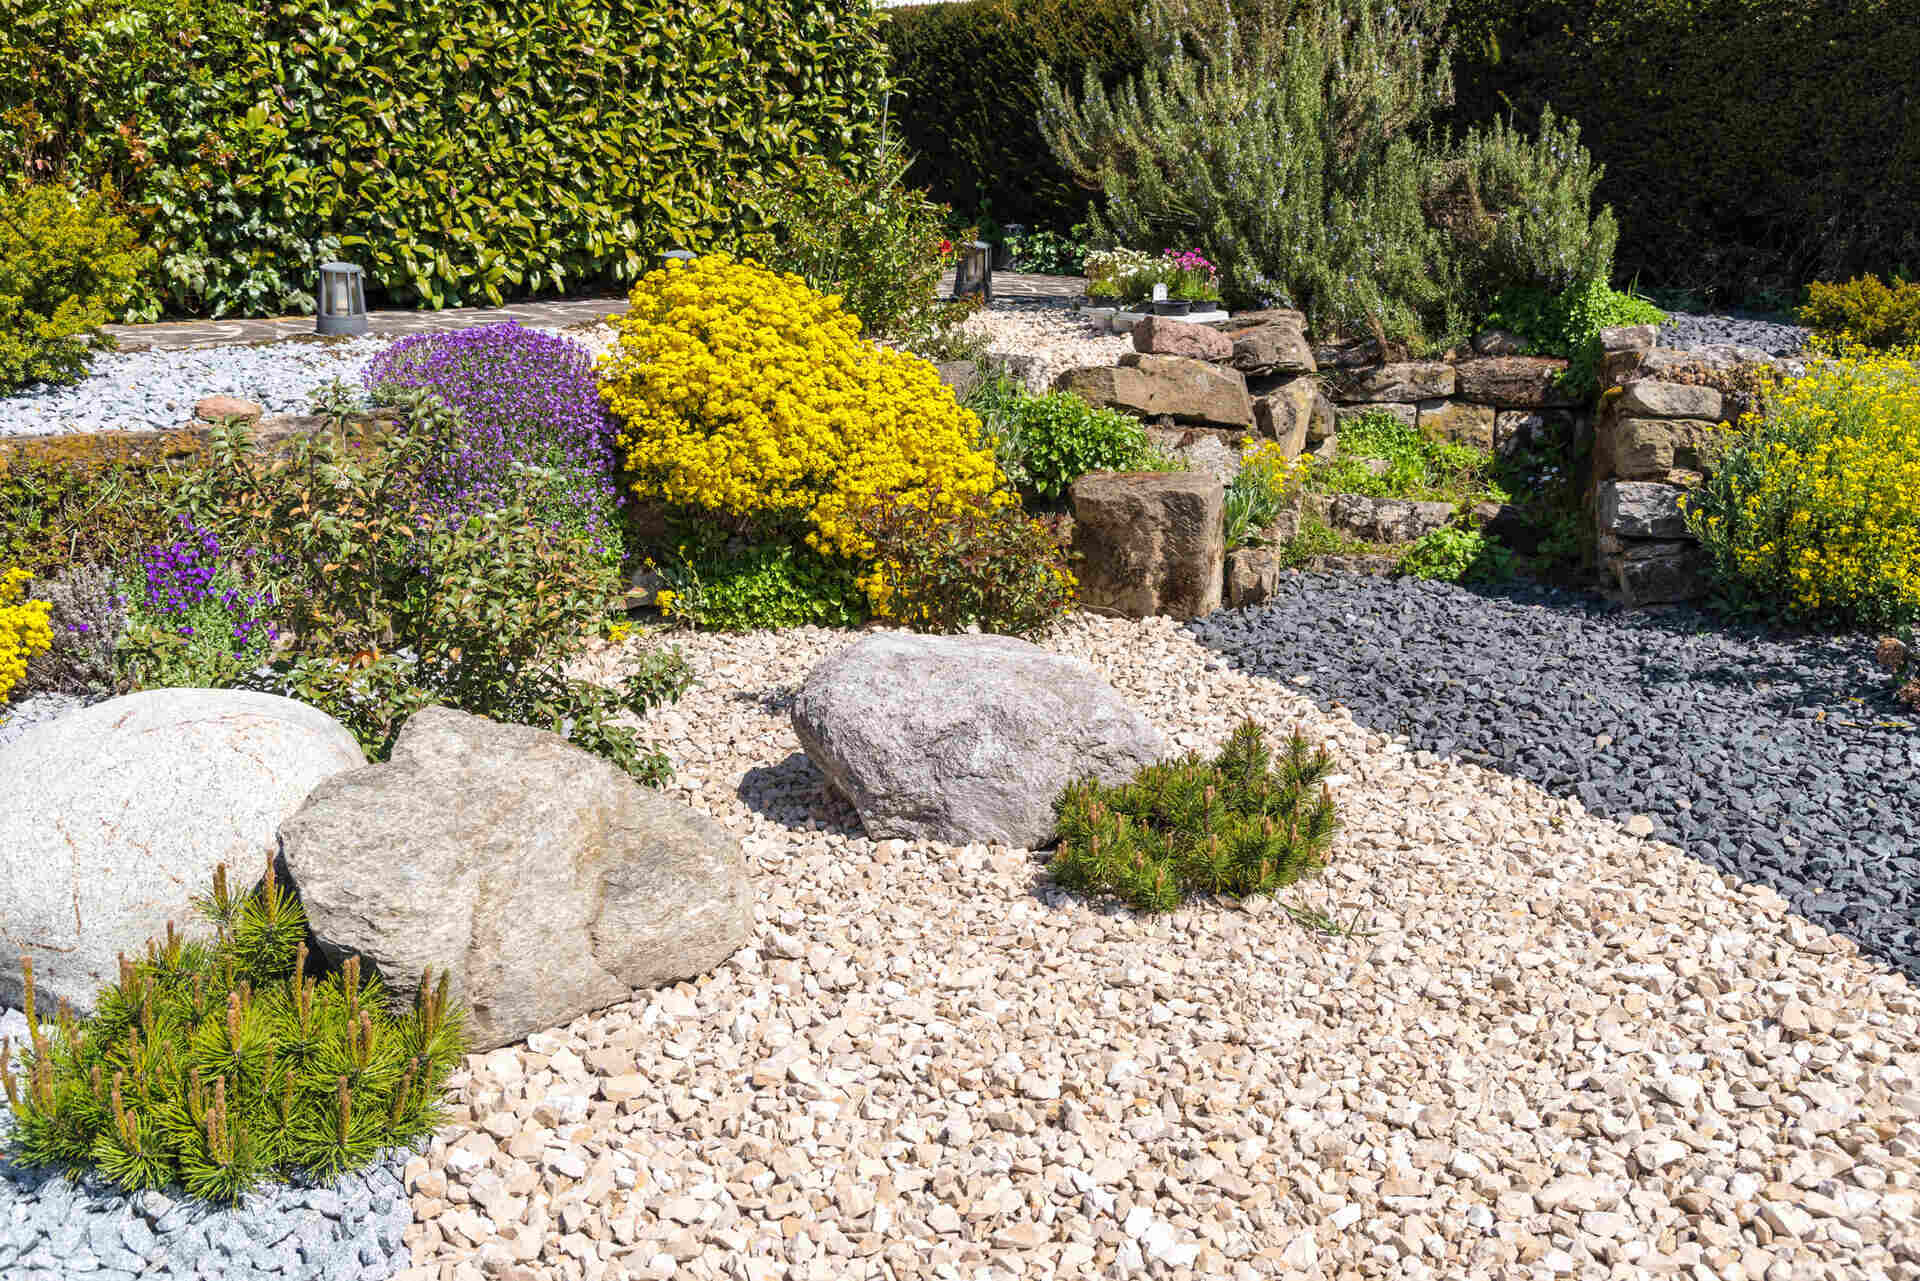
Welcome to this comprehensive guide on how to install rock ground cover. Adding rock ground cover to your garden not only enhances its visual appeal but also provides numerous practical benefits. Whether you want to reduce maintenance, control weeds, or improve drainage, rock ground cover is a versatile and attractive landscaping option.
In this article, we will walk you through the step-by-step process of installing rock ground cover in your garden. From selecting the right type of rock to properly preparing the area and ensuring proper maintenance, we will cover all the essential elements to help you achieve a successful installation. So, let’s get started!
Before you begin the installation, it’s important to note that rock ground cover is a long-term landscaping solution. It requires careful planning and preparation to achieve optimal results. By following these steps, you’ll be able to create a beautiful and low-maintenance garden space that will last for years to come.
So, without further ado, let’s dive into the details of installing rock ground cover and transform your garden into a stunning oasis.
Key Takeaways:
- Rock ground cover adds beauty and reduces maintenance in your garden. Careful planning, proper preparation, and regular maintenance are essential for a successful and long-lasting installation.
- Choosing the right type of rock, accurately measuring the required amount, and properly maintaining the area are crucial steps in installing rock ground cover. These ensure a visually appealing and low-maintenance garden space.
Step 1: Determine the Area for Rock Ground Cover
The first step in installing rock ground cover is to determine the area where you want to install it. Take some time to assess your garden and identify the specific areas that would benefit from rock ground cover. Consider areas where you want to minimize maintenance, control weed growth, or create a decorative focal point.
Once you have identified the area, measure the length and width of the space to determine the total square footage. This will help you calculate the amount of rock ground cover you will need later on.
It’s important to note that not every area in your garden may be suitable for rock ground cover. Consider factors such as the amount of sunlight, soil type, and drainage conditions. Certain plants may not thrive under rock ground cover, so be mindful of any existing vegetation that may need to be removed or relocated.
Additionally, consider the overall style and aesthetic of your garden. Rock ground cover comes in a variety of sizes, colors, and textures, so choose a style that complements your existing landscape design.
Taking the time to carefully determine the area for rock ground cover will ensure that you make the most of your installation and achieve the desired results. So, grab a notebook and head out to your garden to start envisioning where you want your rock ground cover to go.
Step 2: Prepare the Area for Installation
Once you have determined the area for your rock ground cover, it’s time to prepare the space for installation. Proper preparation is crucial for achieving a successful and long-lasting installation.
Begin by removing any existing vegetation, such as grass or weeds, from the area. You can do this by manually pulling them out or using a shovel or garden tool to dig them up. Make sure to remove all the roots to prevent regrowth.
Next, clear the area of any debris, such as rocks, sticks, or leaves. These items can disrupt the leveling of the rock ground cover and create an uneven surface.
Once the area is clear, it’s recommended to grade the soil. This involves raking and leveling the soil to ensure a smooth and even surface for the installation. You can use a garden rake or a leveling tool for this purpose.
If your soil has poor drainage, it’s advisable to amend it with compost or sand to improve its drainage capabilities. This will prevent water from pooling and causing issues with the rock ground cover.
Lastly, establish borders or edging around the installation area. This helps define the boundaries of the rock ground cover and prevents it from spreading into other areas. You can choose from a variety of materials for edging, such as plastic, metal, or natural stone.
By adequately preparing the area for installation, you create a solid foundation for the rock ground cover and ensure its longevity. So, take the time to clear, grade, and edge the area before moving on to the next step.
Step 3: Select the Type of Rock Ground Cover
Now that the area is prepared, it’s time to choose the type of rock ground cover that best suits your needs and preferences. There is a wide variety of rocks available, each with its own unique characteristics and benefits.
Consider the following factors when selecting the type of rock ground cover:
- Type of Rock: Rocks come in various sizes and shapes, such as pea gravel, crushed stone, or river rock. Consider the desired aesthetic and how the rock will blend with the rest of your landscape.
- Color: Rocks are available in a range of colors, from earthy tones like brown and tan to vibrant shades like red and blue. Choose a color that complements your garden and overall design scheme.
- Texture: The texture of the rock can add visual interest and dimension to your garden. Smooth rocks provide a polished look, while rougher rocks can create a more natural and rustic appeal.
- Durability: Some rocks are more durable and long-lasting than others. Consider the weather conditions in your area and choose rocks that can withstand the elements and retain their appearance over time.
It’s also important to consider the functional benefits of the rock ground cover. Different types of rocks can help with weed control, reduce erosion, and improve drainage. Take these factors into account when making your selection.
Visit local garden centers or stone suppliers to see the rocks in person and get a better sense of their appearance and texture. Don’t hesitate to ask for recommendations or guidance from professionals who can provide expert advice based on your specific needs.
By taking the time to select the right type of rock ground cover, you ensure that your installation not only looks visually appealing but also serves its intended purpose.
Step 4: Measure and Calculate the Required Amount of Rock
After selecting the type of rock ground cover, it’s essential to accurately measure and calculate the amount of rock needed for your installation. Having the correct quantity ensures that you have enough material to cover the desired area without running out or having excess.
To measure the area, multiply the length and width of the installation space. For irregular-shaped areas, break it down into smaller sections and measure each section separately. Add up the measurements to get the total square footage of the area.
Once you have the total square footage, you need to determine the depth of the rock ground cover. The depth typically ranges from 2 to 4 inches, depending on the desired coverage and the size of the rocks you have selected.
To calculate the amount of rock needed, multiply the total square footage by the desired depth in feet. For example, if your area is 100 square feet and you want a depth of 3 inches, you would multiply 100 by 0.25 (which is 3 inches converted to feet). The result, in this case, would be 25 cubic feet.
It’s important to note that rocks are typically sold by weight in pounds or tons. To convert the cubic feet measurement to the appropriate weight measurement, you need to know the specific weight of the rock you have chosen. The supplier or retailer can provide this information.
Alternatively, you can use online calculators or consult with a professional landscaper to help you determine the amount of rock ground cover needed based on your specific measurements and requirements.
By accurately measuring and calculating the required amount of rock, you can ensure that you purchase the right quantity for your installation, helping you avoid any shortages or excess materials.
Read more: How To Install Bark As Ground Cover Mulch
Step 5: Purchase the Rock Ground Cover
Now that you have measured and calculated the required amount of rock ground cover, it’s time to purchase the materials. There are several options for obtaining the rocks needed for your installation.
1. Local Garden Centers: Visit your local garden centers or landscaping suppliers. They often have a variety of rocks available, allowing you to see and select the rocks in person. You can discuss your project with knowledgeable staff members who can guide you towards the right type and quantity of rocks for your installation.
2. Online Suppliers: Many online suppliers offer a wide range of rocks and ground cover materials. This option provides convenience and the ability to compare prices and options from the comfort of your own home. Make sure to read reviews and check the supplier’s credibility before making a purchase.
3. Rock Quarries: Depending on your location, you may have access to local rock quarries where you can directly purchase the materials. This can be a cost-effective option, especially if you need a large quantity of rock ground cover. Contact local quarries to inquire about their availability and pricing.
When purchasing the rocks, keep in mind the required quantity calculated in Step 4. It’s always a good idea to buy a bit more than you initially calculated to account for any unexpected needs or errors during the installation process.
Consider the logistics of transporting the rocks to your home. If you don’t have a suitable vehicle for transportation, inquire whether the supplier offers delivery services. They can often deliver the rocks to your doorstep, saving you time and effort.
Take advantage of any discounts, promotions, or seasonal sales that may be available. It’s worth comparing prices and checking if there are any bundle deals or package discounts that can help you save money on your purchase.
By purchasing the rock ground cover from a reliable source and considering convenience, quality, and cost-effectiveness, you can ensure a smooth and successful acquisition of the materials for your installation.
Before installing rock ground cover, make sure to clear the area of any weeds or debris. Then, lay down a weed barrier fabric to prevent future weed growth and finally, evenly spread the rock over the fabric for a clean and low-maintenance ground cover.
Step 6: Clear the Area of Debris and Plants
Before you start laying down the rock ground cover, it is crucial to clear the area of any debris and plants. This step ensures that the installation area is clean and provides a solid foundation for the rock ground cover.
Start by removing any large rocks, branches, or other debris that may be present on the surface. This can be done by hand or using a rake or garden tool to collect and remove the debris. Clearing the area of debris will prevent any unevenness or discomfort underfoot once the rock ground cover is installed.
Next, assess the area for any existing plants or vegetation that need to be removed. Clear out any unwanted plants, including grass, weeds, or shrubs, using a shovel or a gardening tool. Make sure to dig out the roots to prevent regrowth and ensure a clean and clear area for the rock ground cover.
If you wish to preserve certain plants or trees in the area, carefully dig them up and transplant them to a different location in your garden. Take care not to damage the roots and provide them with adequate water and nutrients for the best chance of survival.
During this step, also consider any underground utilities, such as irrigation pipes or cables, that may be present in the area. Take precautions to avoid damaging them during the clearing process. If you are uncertain about the location of underground utilities, it is advisable to consult with a professional or contact the utility company for assistance.
By thoroughly clearing the area of debris and unwanted vegetation, you create a clean slate for the installation of the rock ground cover. This ensures a visually appealing and well-prepared base for the next steps of the installation process.
Step 7: Lay a Weed Barrier
One important step in installing rock ground cover is laying a weed barrier. A weed barrier is a material that helps prevent weed growth and ensures a low-maintenance garden space.
Start by measuring the area and cut the weed barrier fabric to fit the dimensions. Lay the fabric over the cleared area, ensuring that it covers the entire surface. Trim any excess fabric if necessary.
The weed barrier fabric acts as a barrier, preventing weed seeds from germinating and growing through the rock ground cover. It also helps to retain moisture in the soil and prevent erosion.
Secure the weed barrier fabric in place using landscape pins or staples. Place them along the edges and sporadically throughout the area to keep the fabric from shifting or moving.
While the weed barrier helps to control weed growth, it is important to note that some weeds may still manage to grow through the fabric over time. Regular maintenance, such as inspecting and removing any weeds that emerge, will help keep your rock ground cover area weed-free.
Additionally, ensure that the weed barrier fabric is breathable and allows for water penetration. This is essential for maintaining healthy soil conditions and preventing water pooling or runoff.
By laying a weed barrier, you create a barrier against unwanted weeds, reducing the overall maintenance needed for your rock ground cover area and ensuring its long-term beauty and functionality.
Step 8: Spread and Level the Rock Ground Cover
With the weed barrier in place, it’s time to start spreading and leveling the rock ground cover. This step ensures an even distribution of the rocks and creates a visually appealing surface.
Begin by pouring or scooping small amounts of rock onto the weed barrier fabric. Use a garden rake or a shovel to spread the rocks evenly across the installation area. Work in small sections, gradually spreading the rocks as you move forward.
As you spread the rocks, use the rake or shovel to level the surface. This helps to create a consistent depth and prevents any unevenness. Aim for a uniform layer of rock ground cover, ensuring that the surface is smooth and free of any noticeable gaps or mounds.
Pay attention to areas around landscape features, such as trees or flower beds, and ensure that the rocks are evenly distributed up to the edges. The goal is to create a seamless transition between the rock ground cover and the surrounding elements.
Take your time during this step to achieve the desired aesthetic and coverage. Step back periodically to assess the overall appearance and make adjustments as needed.
Keep in mind that certain types of rocks may require additional steps to ensure proper installation. For example, larger rocks may need to be individually placed and arranged, while smaller rocks can simply be spread and leveled. Follow any specific instructions provided by the rock supplier for best results.
By spreading and leveling the rock ground cover, you create a visually pleasing and consistent surface that enhances the overall look and functionality of your garden space.
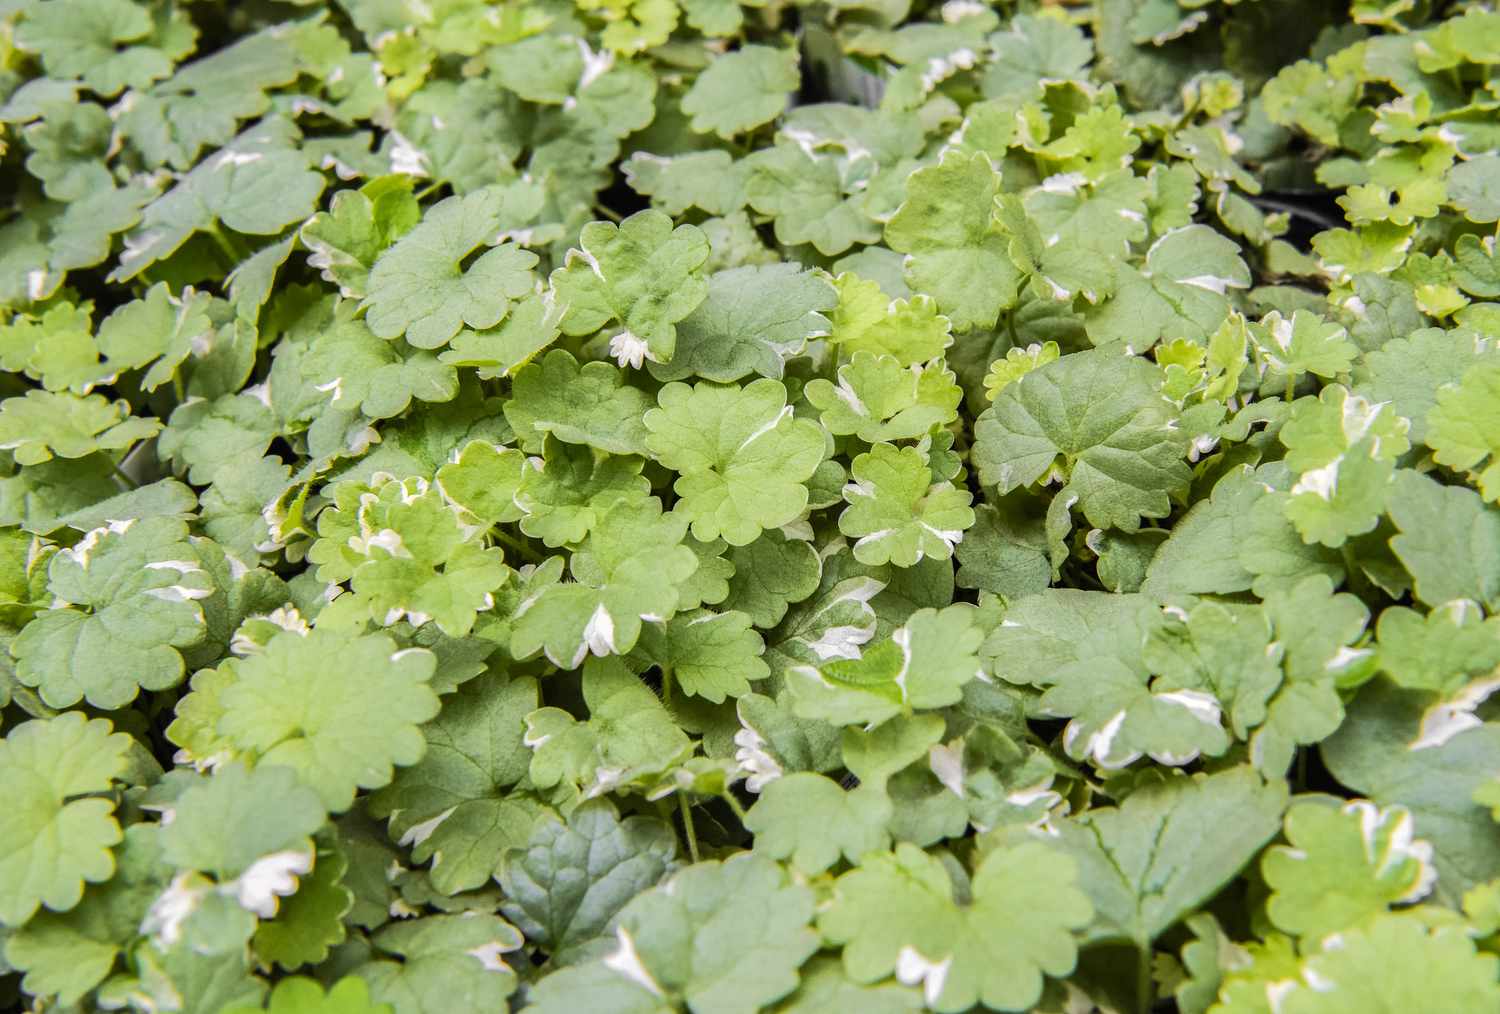
Read more: How To Care For Dichondra Ground Cover
Step 9: Compact the Rock Ground Cover
Once you have spread and leveled the rock ground cover, it’s important to compact it. This step helps to settle the rocks in place and creates a more stable and long-lasting installation.
There are several methods you can use to compact the rock ground cover:
- Walk or Roll: Simply walk or roll over the surface of the rock ground cover. This can help to press the rocks down and create a more compact layer. Make sure to distribute your weight evenly as you move across the area.
- Tamp: Use a hand or mechanical tamper to compact the rocks. A tamper is a tool with a flat bottom that is used to exert pressure and compact the materials beneath it. Start at one edge and work your way across the entire installation area, applying firm and even pressure.
- Water: Lightly mist the rock ground cover with water. This can help to settle the rocks and create a more compact surface. Be cautious not to overwater, as excessive moisture can cause erosion or pooling.
Regardless of the method you choose, take care not to apply too much pressure or compact the rocks too tightly, as this may result in an unnatural and uncomfortable surface.
Compacting the rock ground cover helps to create a more stable and visually appealing installation. It minimizes shifting and movement of the rocks, reducing the need for frequent maintenance and touch-ups.
Remember to periodically inspect the compacted rock ground cover and make adjustments as needed. Over time, natural settling may occur, so it’s important to monitor the area and make any necessary adjustments or additions to maintain a consistent and attractive appearance.
Step 10: Maintain and Refresh the Rock Ground Cover
Proper maintenance is essential to keep your rock ground cover looking its best and ensuring its longevity. By following a regular maintenance routine and periodically refreshing the area, you can maintain an attractive and functional rock ground cover.
Here are some maintenance tips to consider:
- Weed Control: Despite the weed barrier, some weeds may still find a way to grow through the rock ground cover. Regularly inspect the area and remove any weeds that emerge. This can be done by hand or using a garden tool.
- Clear Debris: Periodically remove any debris, such as fallen leaves or branches, from the surface of the rock ground cover. This helps to maintain its clean and polished appearance.
- Refresh the Rocks: Over time, the rocks may shift or settle, exposing areas of the weed barrier or creating uneven areas. To maintain a consistent look, periodically add more rocks to fill in these areas and ensure uniform coverage.
- Inspect for Damage: Regularly inspect the rock ground cover for any signs of damage, such as erosion or displacement. Address any issues promptly to prevent further damage and maintain the integrity of the installation.
- Control Moisture: While rock ground cover is known for its excellent drainage properties, it’s important to monitor moisture levels in the area. Overwatering or excessive moisture can lead to issues such as mold or mildew growth. Ensure proper drainage and avoid excessive irrigation near the rock ground cover.
In addition to regular maintenance, consider refreshing the rock ground cover every few years. Over time, the rocks may become faded or worn due to exposure to the elements. Adding a fresh layer of rocks can rejuvenate the appearance and enhance the overall look of your garden.
By implementing a consistent maintenance routine and refreshing the rock ground cover periodically, you can enjoy a beautiful and well-maintained garden space for years to come.
Conclusion
Congratulations! You have successfully completed the installation of rock ground cover in your garden. With its low maintenance requirements, weed control benefits, and aesthetic appeal, rock ground cover is a fantastic landscaping option for achieving a beautiful and functional outdoor space.
Throughout this guide, we walked you through each step of the installation process, from determining the area and preparing it for installation to selecting the right type of rock and properly maintaining the rock ground cover. By following these steps, you have transformed your garden into a stunning oasis.
Remember, proper planning and preparation are key to a successful installation. Take the time to assess your garden, choose the right type of rock, measure accurately, and clear the area of debris and vegetation. This sets the foundation for a visually appealing and long-lasting rock ground cover.
Maintenance is also crucial for the upkeep of your rock ground cover area. Regularly inspect and maintain the area, control weeds, clear debris, and periodically refresh the rocks to ensure its continued beauty.
With your newly installed rock ground cover, take time to enjoy and appreciate the beauty it brings to your garden. Relax, entertain, and create lasting memories in your outdoor space.
We hope this comprehensive guide has provided you with valuable insight and information on how to install rock ground cover. May your garden thrive and bring you joy for years to come!
Ready to give your garden a bit more privacy and style? After mastering rock ground cover installation, why not check out creative ways to border your blossoming spaces? Our guide on stylish garden fence ideas offers inspiration that aligns beautifully with your landscaping ambitions. These designs not only secure private spaces but also add a charming aesthetic touch, perfect for any outdoor area looking to stand out.
Frequently Asked Questions about How To Install Rock Ground Cover
Was this page helpful?
At Storables.com, we guarantee accurate and reliable information. Our content, validated by Expert Board Contributors, is crafted following stringent Editorial Policies. We're committed to providing you with well-researched, expert-backed insights for all your informational needs.


0 thoughts on “How To Install Rock Ground Cover”