Home>Garden Essentials>How To Make An Indoor Hydroponic Vertical Garden
Garden Essentials
How To Make An Indoor Hydroponic Vertical Garden
Modified: March 16, 2024
Learn how to create your own indoor hydroponic vertical garden and enjoy gardening all year round. Enhance your space with a beautiful and efficient garden setup.
(Many of the links in this article redirect to a specific reviewed product. Your purchase of these products through affiliate links helps to generate commission for Storables.com, at no extra cost. Learn more)
Introduction
Welcome to the world of indoor hydroponic vertical gardening! In this article, we will explore the incredible benefits of creating your own indoor hydroponic vertical garden, and guide you through the step-by-step process of setting one up.
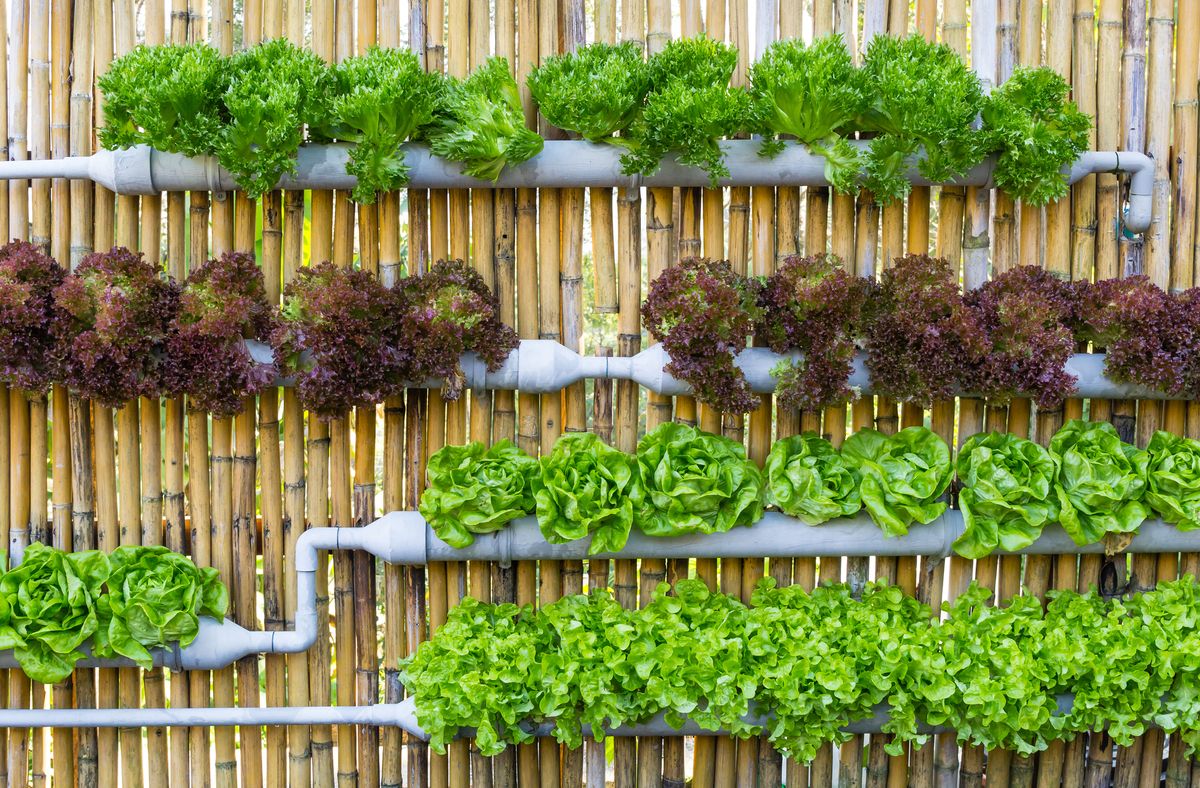
Gardening has long been a popular hobby for many people, but limited space and challenging climates can make it difficult to cultivate a thriving garden. That’s where indoor hydroponic vertical gardening comes in. This innovative gardening method allows you to grow a variety of plants in a vertical space, making use of unused vertical surfaces such as walls or racks.
The benefits of an indoor hydroponic vertical garden are vast. First and foremost, it allows you to maximize your gardening space. Whether you live in a small apartment or a spacious home, vertical gardening utilizes the upward space that often goes unused. This means you can grow more plants and enjoy a bountiful harvest, even with limited floor space.
Another advantage of indoor hydroponic vertical gardening is its ability to provide an optimal growing environment for your plants. With hydroponics, you can control factors such as temperature, humidity, and nutrient levels, ensuring that your plants thrive and produce high-quality crops all year round. No more worrying about unpredictable weather conditions or seasonality constraints.
Furthermore, indoor hydroponic vertical gardening offers excellent water and resource efficiency. As the plants are grown in a soil-less medium and receive their nutrients through a carefully balanced nutrient solution, water usage is significantly reduced compared to traditional gardening methods. Additionally, there is minimal to no soil runoff, which means fewer chemicals leaching into the environment.
Not only is indoor hydroponic vertical gardening sustainable, but it also allows you to grow a wide variety of plants. From leafy greens and herbs to fruits and flowers, the possibilities are endless. You can create a diverse and beautiful garden that caters to your taste and culinary preferences.
Now that you understand the benefits, it’s time to dive into the step-by-step process of creating your own indoor hydroponic vertical garden. Don’t worry if you’re new to gardening or hydroponics – we’ll walk you through each stage, providing guidance and tips along the way.
So get ready to unleash your inner gardener and enjoy the wonders of growing your own fresh, healthy, and delicious produce right at home. Let’s embark on this exciting journey of indoor hydroponic vertical gardening together!
Key Takeaways:
- Embrace the benefits of indoor hydroponic vertical gardening, maximizing space and enjoying year-round harvests while promoting sustainability and enhancing well-being.
- From setting up the garden to harvesting fresh produce, enjoy the rewarding journey of indoor hydroponic vertical gardening, creating an oasis of greenery and abundance.
Read also: 9 Best Hydroponic Indoor Garden For 2025
Benefits of an Indoor Hydroponic Vertical Garden
An indoor hydroponic vertical garden offers numerous advantages beyond its space-saving capabilities. Let’s explore some of the key benefits of this gardening method.
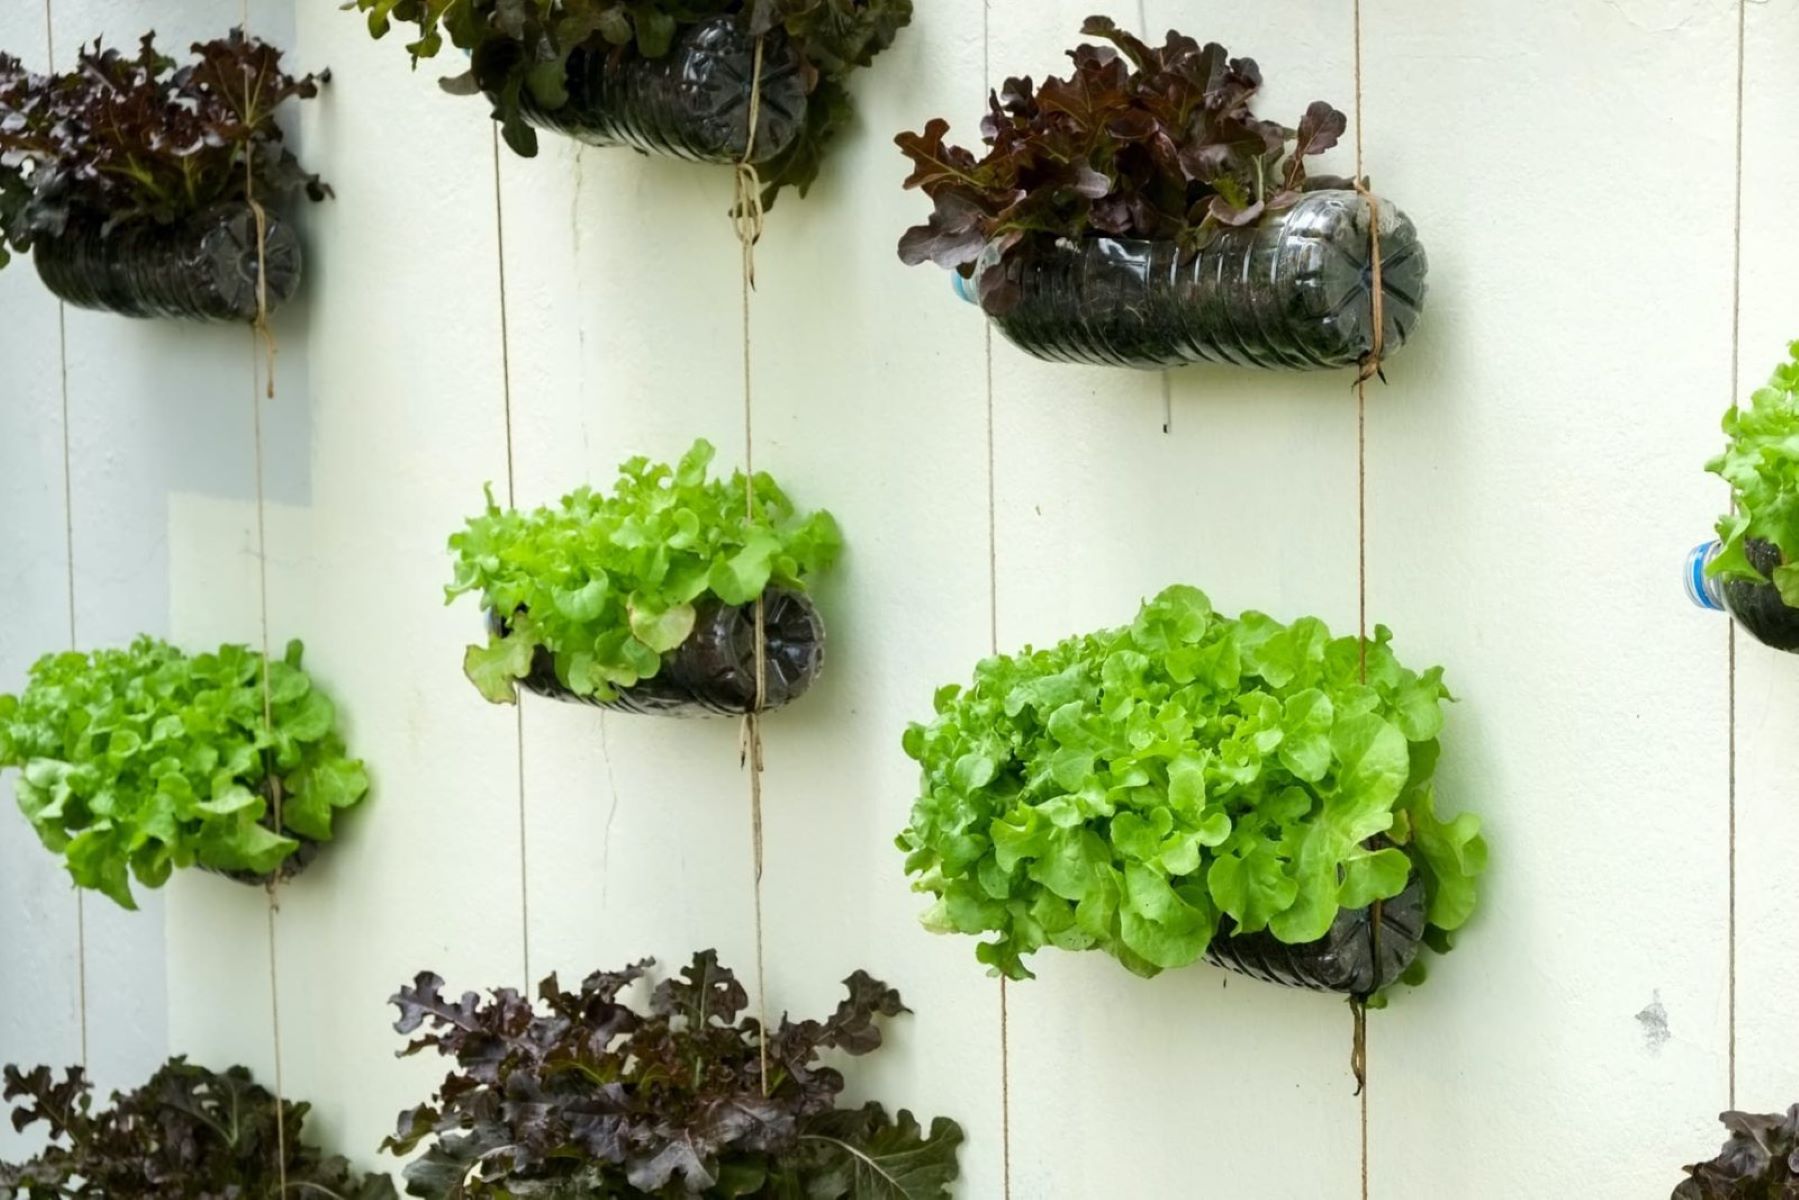
- Maximized Space: One of the biggest advantages of an indoor hydroponic vertical garden is its ability to make the most of limited space. By utilizing vertical surfaces such as walls or racks, you can grow a significant amount of plants in a small footprint. This is especially beneficial for urban dwellers or those with limited outdoor space.
- Year-Round Gardening: With an indoor hydroponic vertical garden, you can escape the limitations of seasons and climate. By controlling the environment, you can provide optimal conditions for your plants to thrive throughout the year. This means you can enjoy a continuous supply of fresh herbs, vegetables, and even flowers, regardless of the weather outside.
- Water Efficiency: Hydroponic systems are remarkably water-efficient. Unlike traditional soil-based gardening, where water can be lost through evaporation or improper drainage, hydroponic systems recirculate and conserve water. In fact, studies have shown that hydroponic gardens use up to 90% less water compared to conventional gardening methods.
- No Soil Required: Another benefit of indoor hydroponic vertical gardens is that they eliminate the need for soil. Instead, plants are grown in an inert growing medium, such as perlite or coconut coir, which provides support and retains moisture. This not only reduces the risk of soil-borne pests and diseases but also allows for easier plant maintenance and cleaner harvesting.
- Higher Yields: Due to the controlled environment and optimized growing conditions, indoor hydroponic vertical gardens can produce higher yields compared to traditional gardening methods. With proper monitoring of nutrient levels, light exposure, and temperature, plants can grow faster and more efficiently, resulting in bigger and healthier harvests.
- Pesticide-Free Gardening: By eliminating the need for soil, indoor hydroponic gardens significantly reduce the risk of pests and diseases. Without soil-borne pathogens, there is less reliance on pesticides and herbicides. This means you can enjoy chemical-free, organic produce right from your own garden.
- Aesthetic Appeal: An indoor hydroponic vertical garden can be a stunning addition to any space. The lush greenery and vibrant colors of your plants can enhance the beauty of your home or office. Additionally, vertical gardens act as natural air purifiers, helping to improve indoor air quality and create a more pleasant and refreshing atmosphere.
- Educational and Therapeutic: Gardening has numerous therapeutic benefits, and an indoor hydroponic vertical garden allows you to indulge in this activity all year round. It can provide a calming and satisfying experience, reducing stress and promoting mental well-being. Moreover, it offers a unique educational opportunity for children and adults alike to learn about plant growth, nutrition, and sustainability.
Embrace the advantages of an indoor hydroponic vertical garden and experience the joy of cultivating your own flourishing and sustainable green oasis. Let’s now move on to the practical steps of setting up your own indoor hydroponic vertical garden.
Step 1: Choosing the Right Location
Before setting up your indoor hydroponic vertical garden, it’s crucial to choose the right location. The success of your garden depends greatly on the environmental conditions it will be exposed to. Here are some key factors to consider when selecting the location for your vertical garden:
- Sunlight: Most plants require ample sunlight to grow and thrive. When choosing a location, look for an area that receives at least 6-8 hours of direct or indirect sunlight per day. South-facing windows are usually the best option for optimal light exposure. If natural sunlight is limited, you can supplement it with artificial grow lights.
- Temperature: Different plants have different temperature requirements. Ideally, the location should have a stable temperature range between 65-75°F (18-24°C). Avoid areas with extreme temperature fluctuations, such as near heating or cooling vents, as they can negatively affect plant growth.
- Humidity: Indoor environments tend to have lower humidity levels compared to outdoor gardens. However, certain plants, such as herbs or tropical varieties, thrive in higher humidity. If your chosen location has low humidity, consider using a humidifier or placing a tray of water near the plants to increase moisture in the air.
- Accessibility: Ensure that the chosen location is easily accessible for regular maintenance, such as watering, pruning, and harvesting. Consider the convenience of reaching the plants, especially if you’re planning a large vertical garden. Accessibility will also help you monitor and address any issues that may arise with your hydroponic system or plants.
- Space and Structure: Evaluate the available space and structure in the chosen location. Vertical gardens require sturdy support to hold the weight of the plants, growing medium, and water. If you plan to set up a freestanding structure, ensure that it can withstand the weight and has ample space to accommodate the desired number of plants. If using a wall-mounted system, ensure the wall is strong enough to support the weight and can be easily secured.
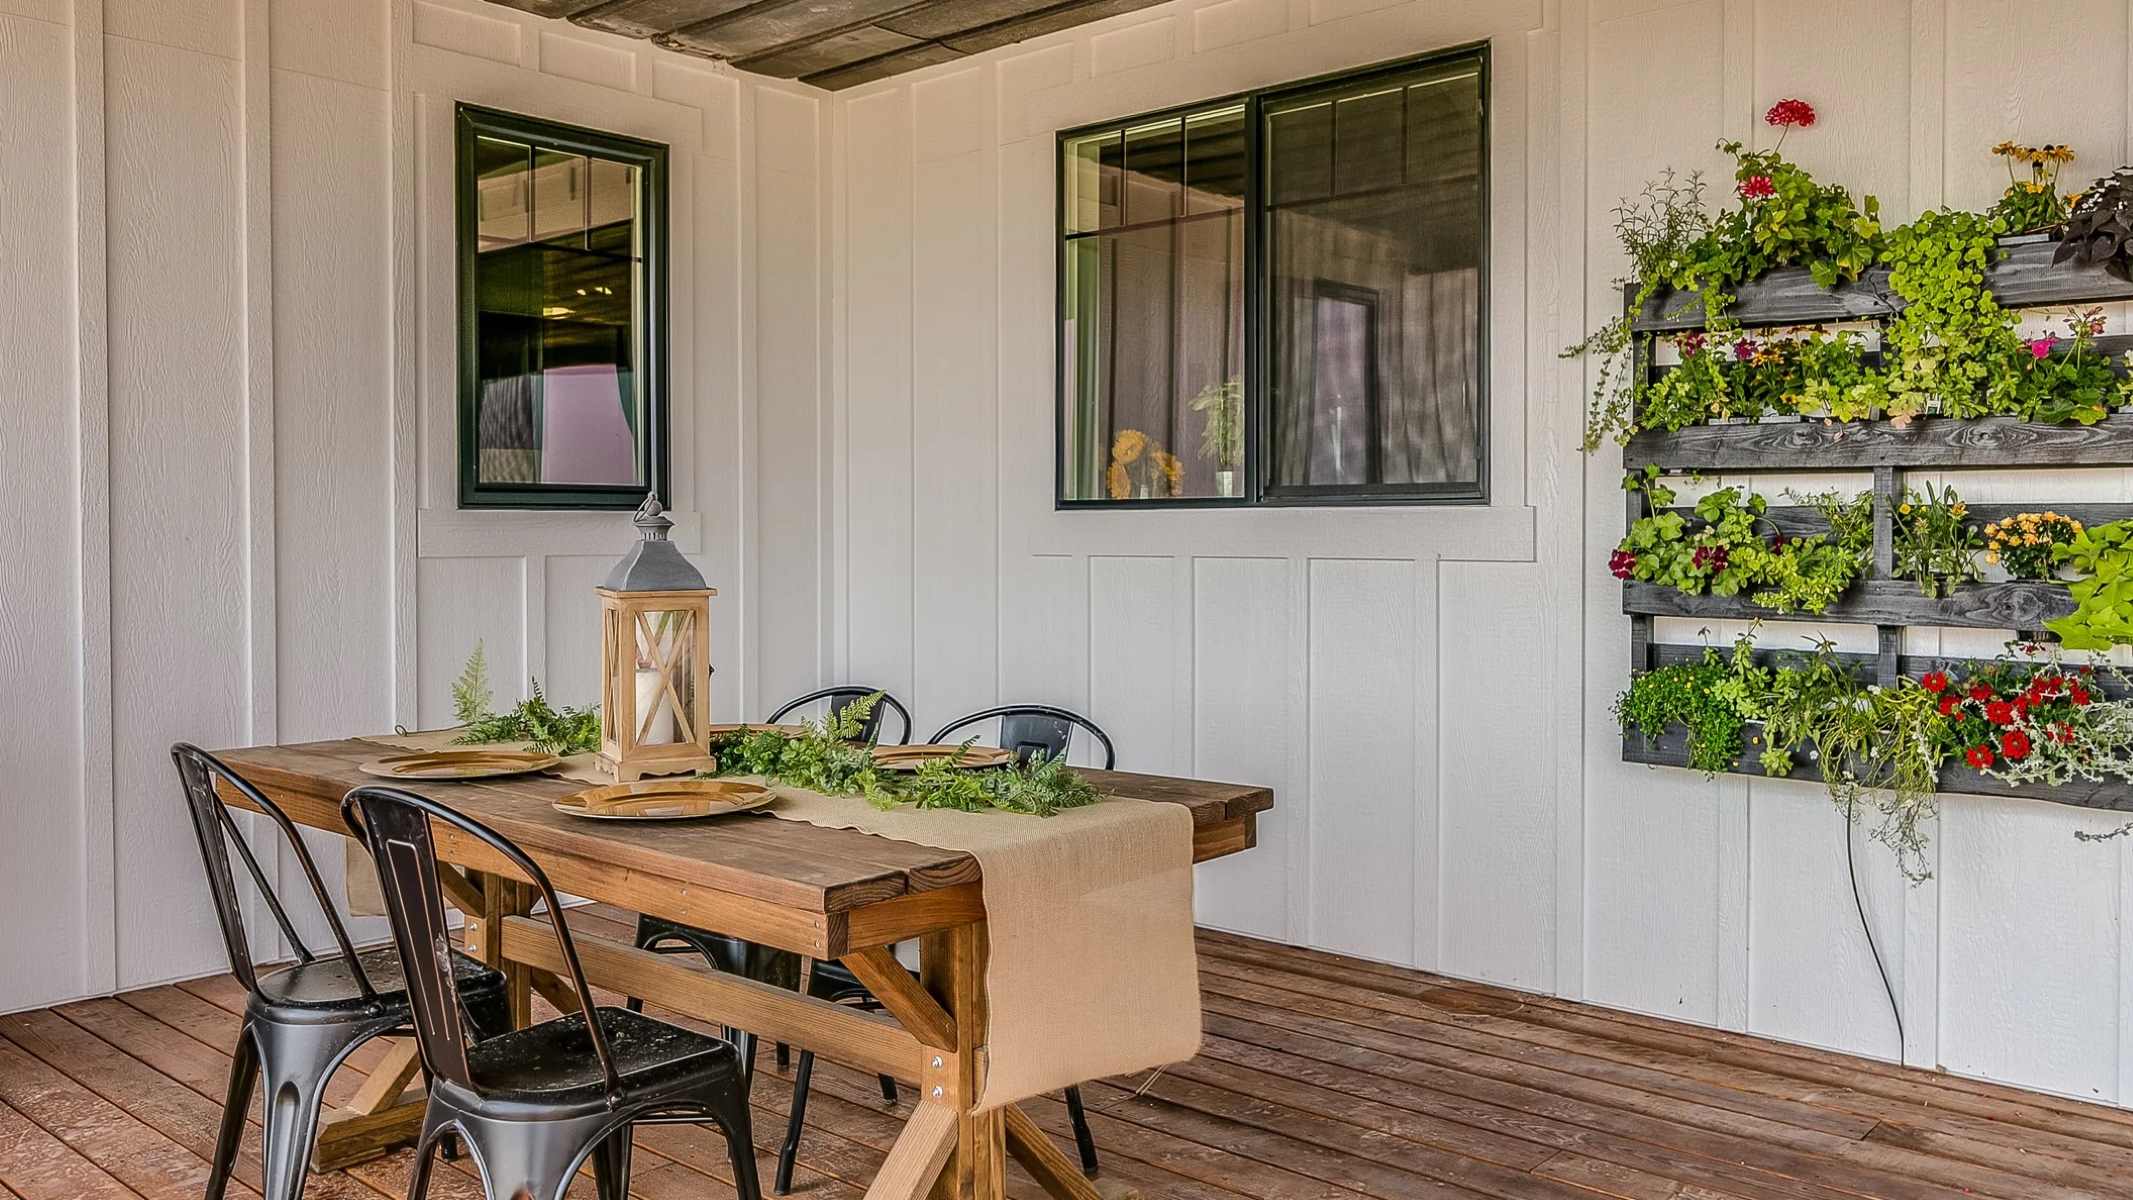
- Aesthetics: Consider the aesthetic appeal of the location, as your indoor hydroponic vertical garden will become a focal point in the space. Choose a location that complements the overall design and ambiance of the room. You can even create a beautiful and captivating living wall by strategically arranging plants with different colors and textures.
Take your time to assess various locations in your home or office, keeping in mind the factors mentioned above. Once you find the perfect spot, you can proceed to the next step of selecting the hydroponic system that matches your requirements and goals.
Step 2: Selecting the Hydroponic System
Choosing the right hydroponic system is a crucial step in setting up your indoor hydroponic vertical garden. There are several types of hydroponic systems available, each with its own advantages and considerations. Here are some popular options to explore:
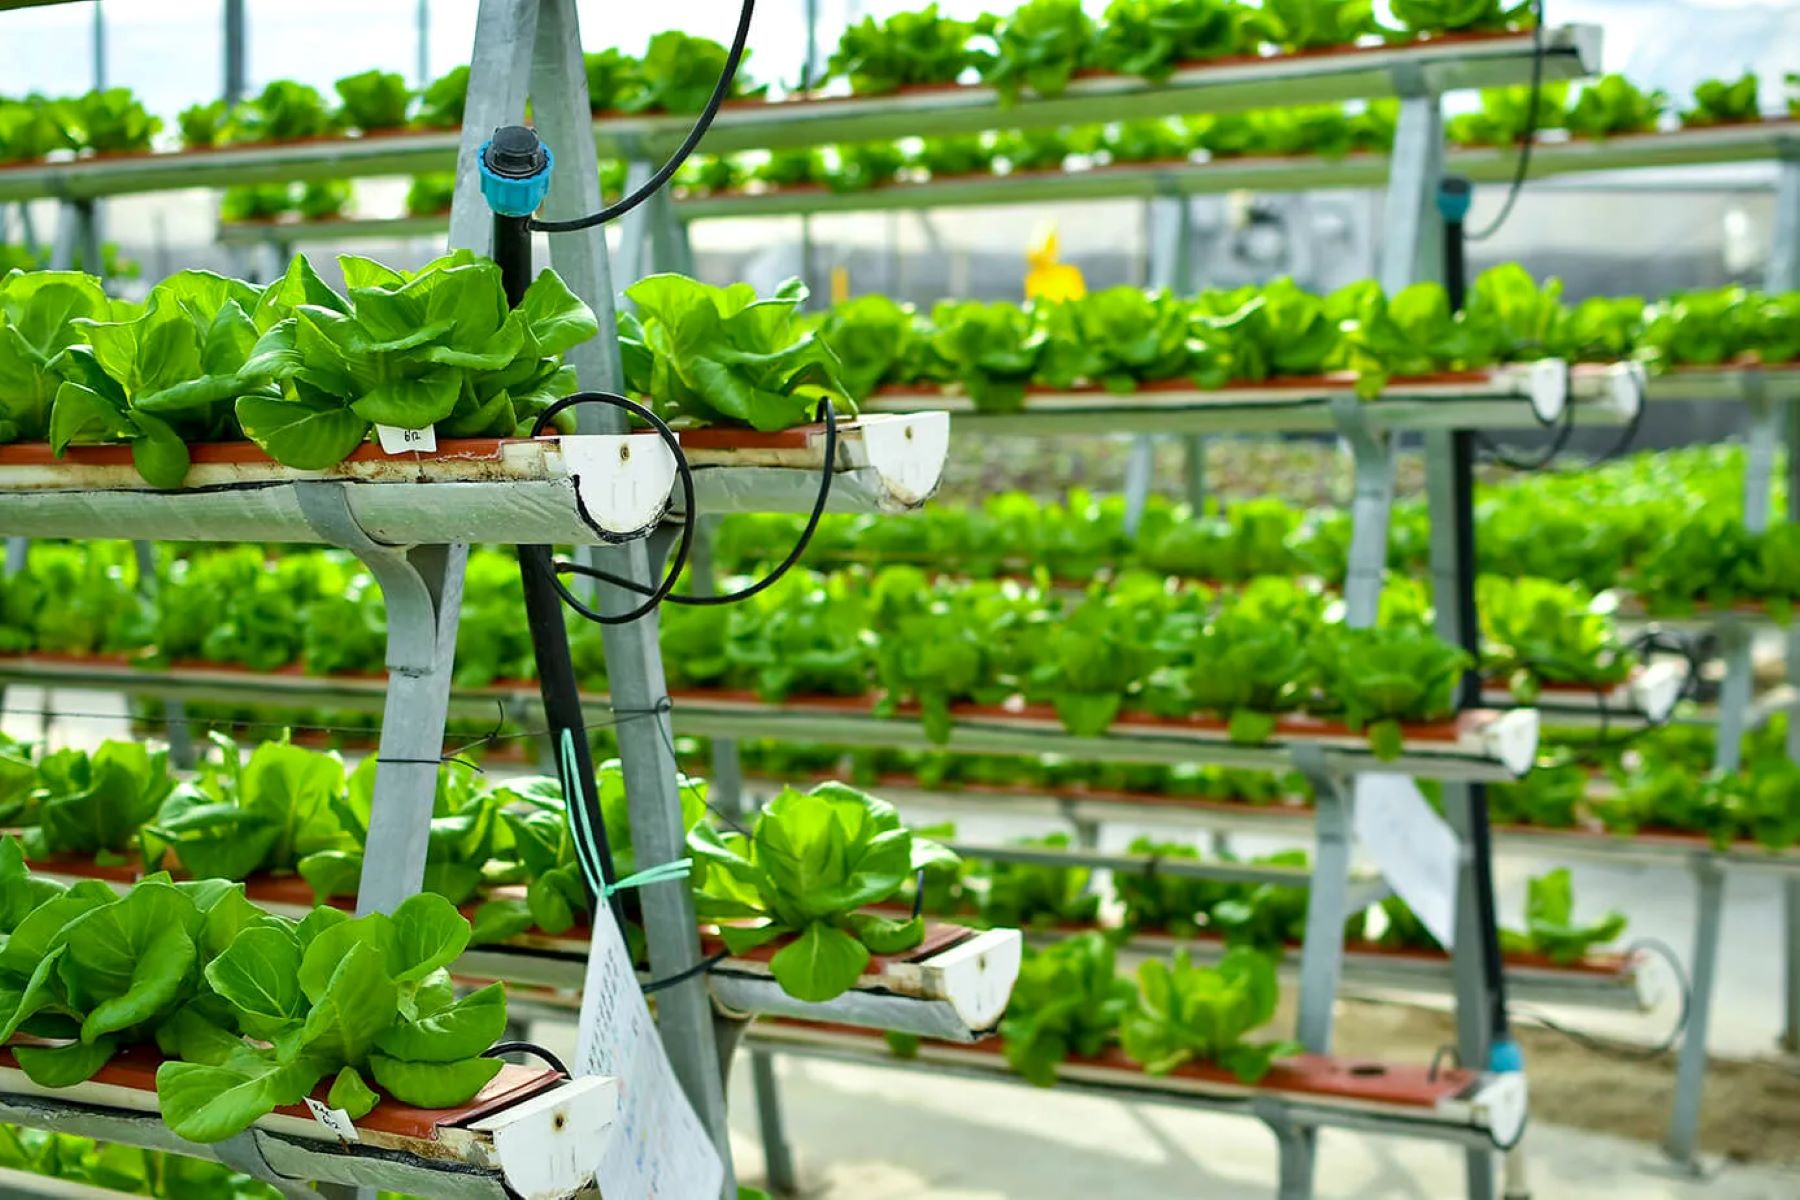
- Nutrient Film Technique (NFT): NFT systems use a thin film of nutrient solution that constantly flows over the root system of the plants, providing a continuous supply of water and nutrients. These systems are ideal for smaller plants with shallow root systems, such as lettuce or herbs. NFT systems are efficient and conserve water, making them a popular choice for indoor gardens.
- Drip System: Drip systems involve using a pump to deliver a nutrient solution to the plants through a network of tubes and emitters. The solution is dripped onto the growing medium, allowing the roots to absorb water and nutrients. Drip systems work well for a wide range of plants and are highly customizable. They are suitable for both small and large-scale vertical gardens.
- Aeroponics: Aeroponic systems suspend the plant roots in the air, with nutrient-rich mist sprayed directly onto the roots. This method promotes faster growth and higher yields, as the roots have direct access to oxygen and nutrients. Aeroponic systems are efficient in water usage and are suitable for advanced gardeners or those looking for maximum plant growth and productivity.
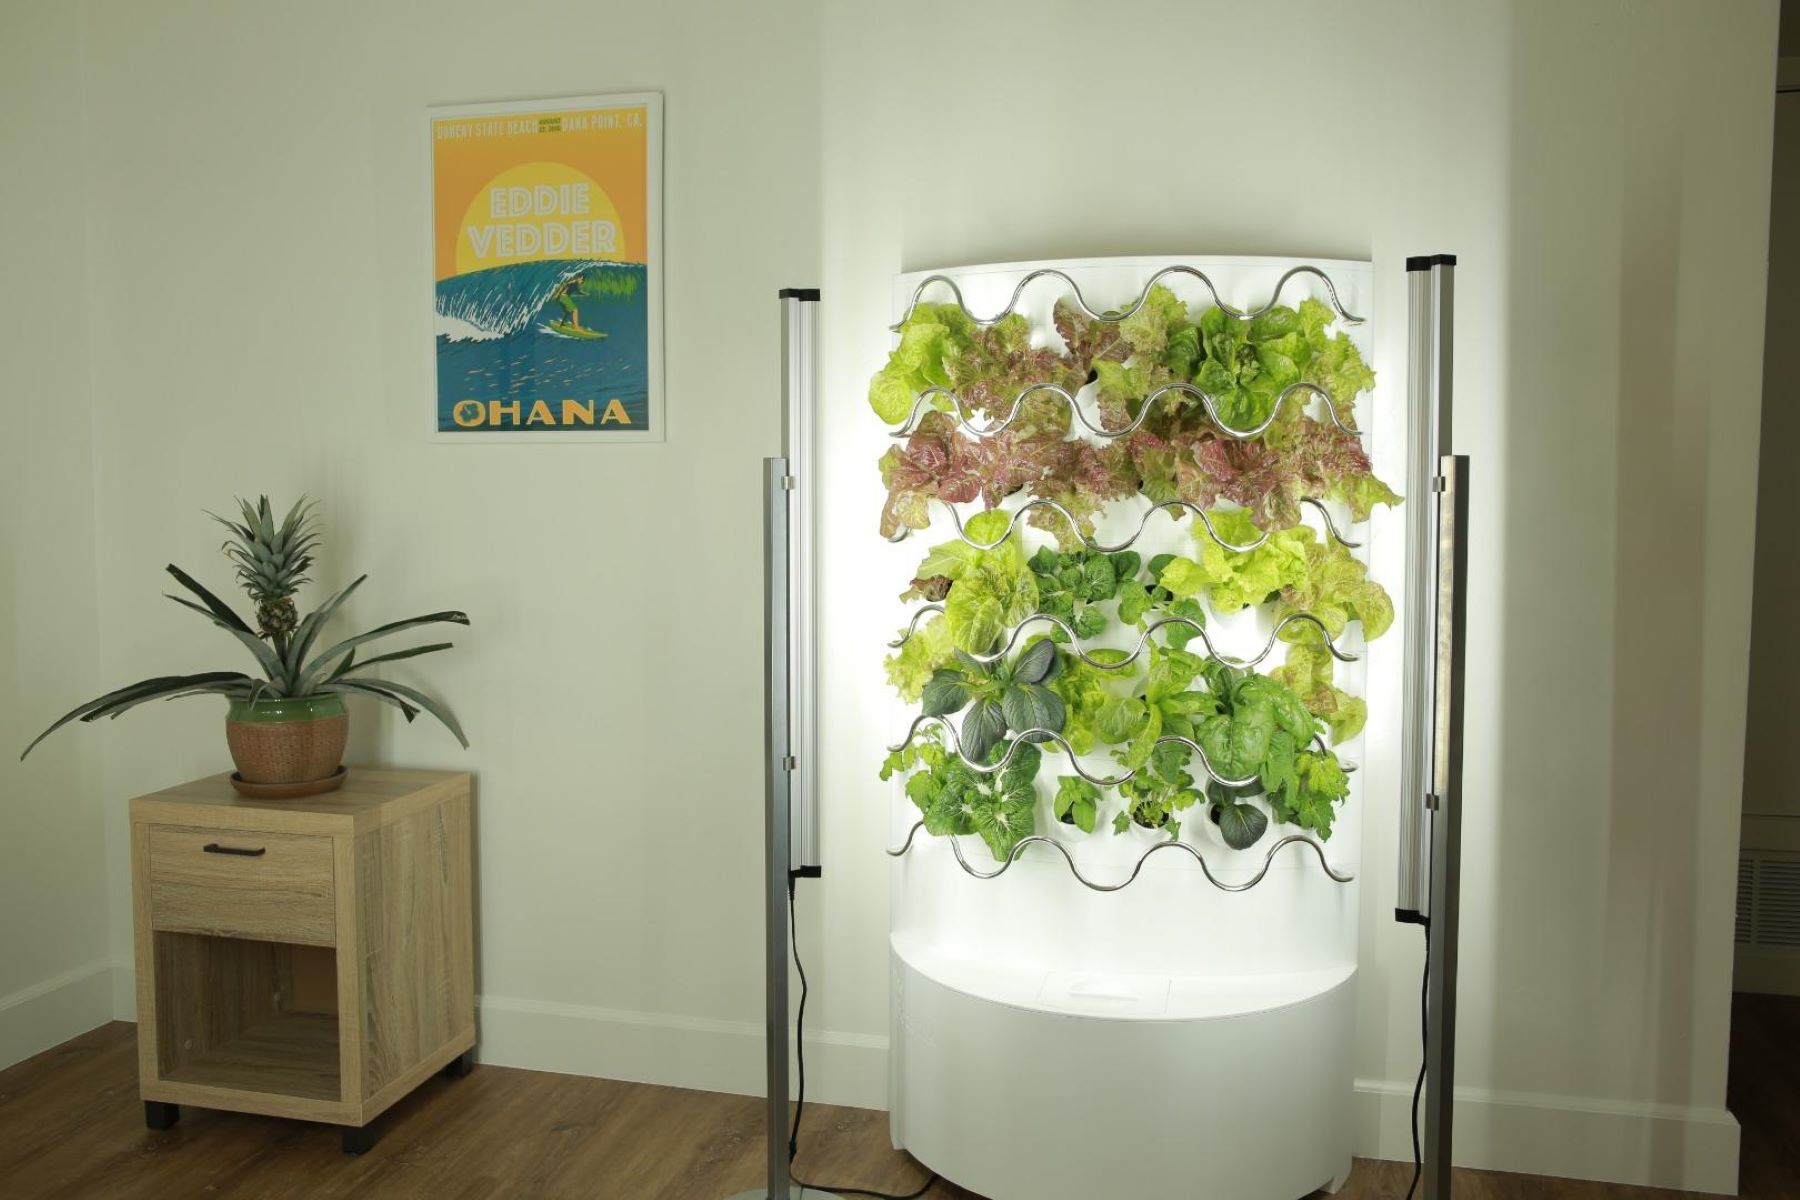
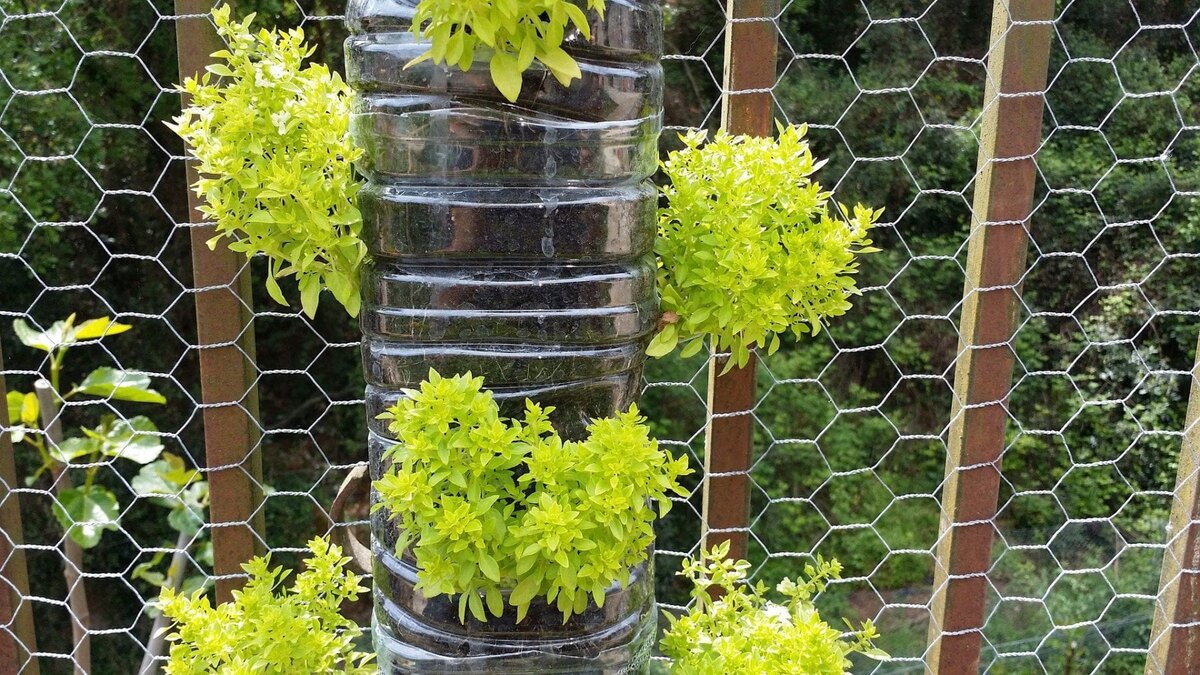
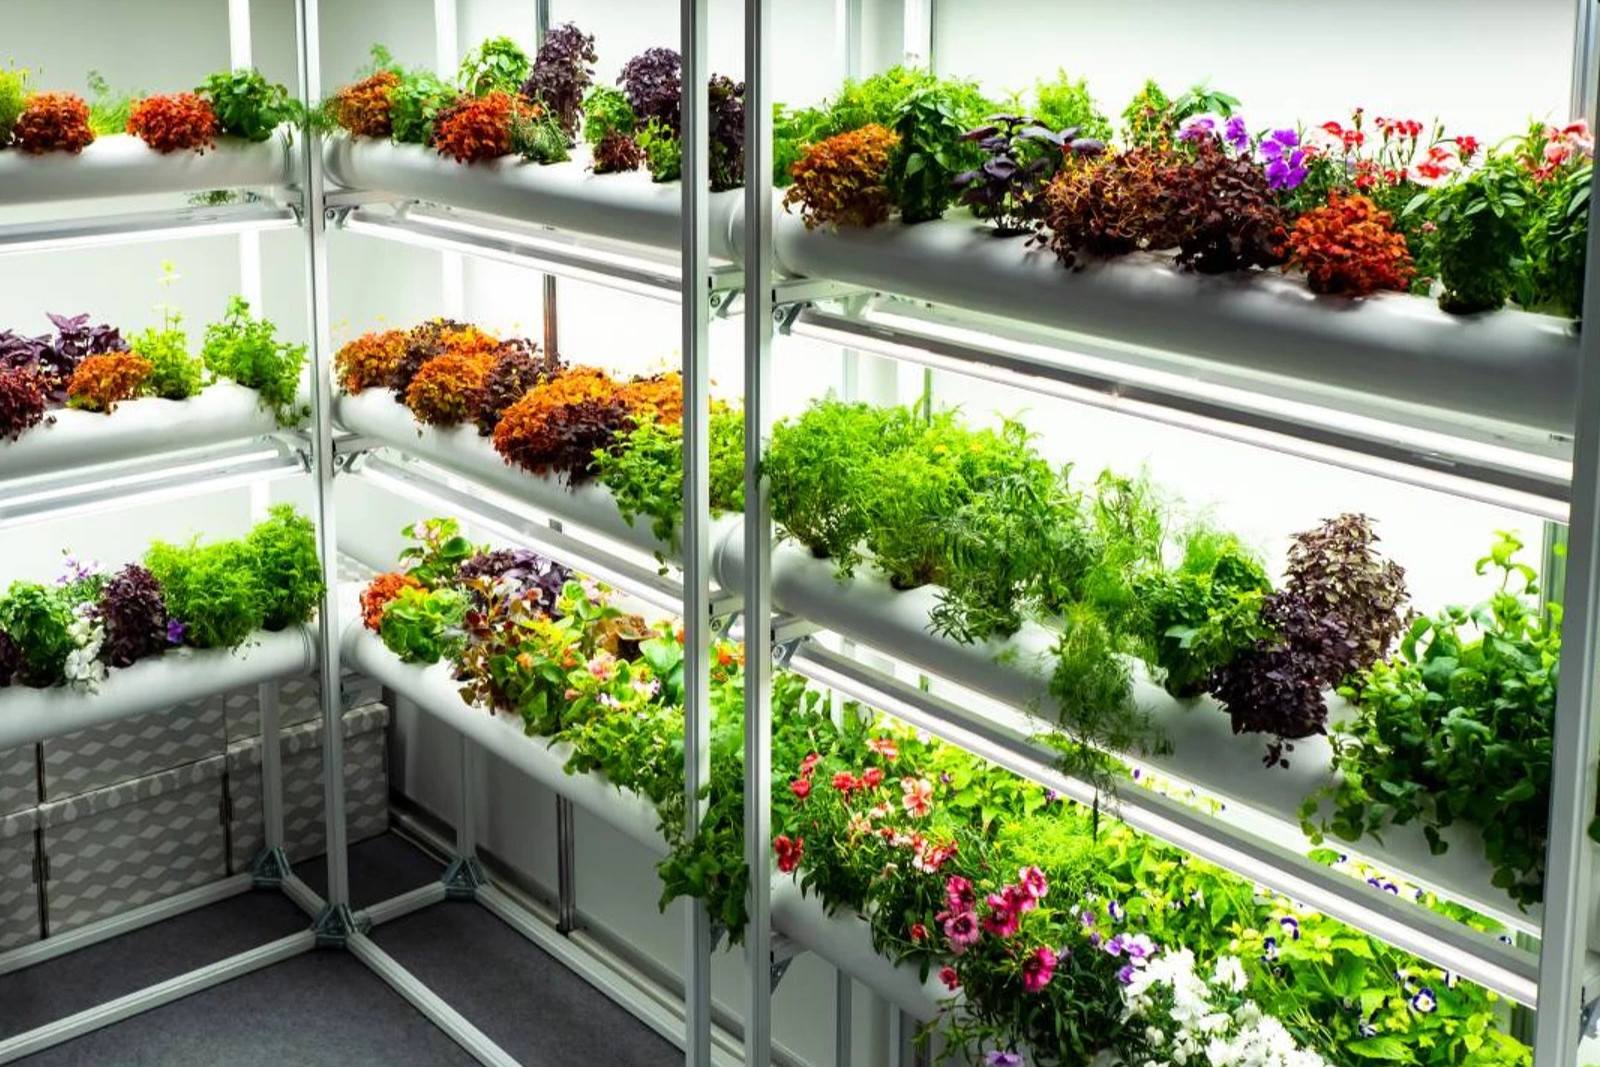
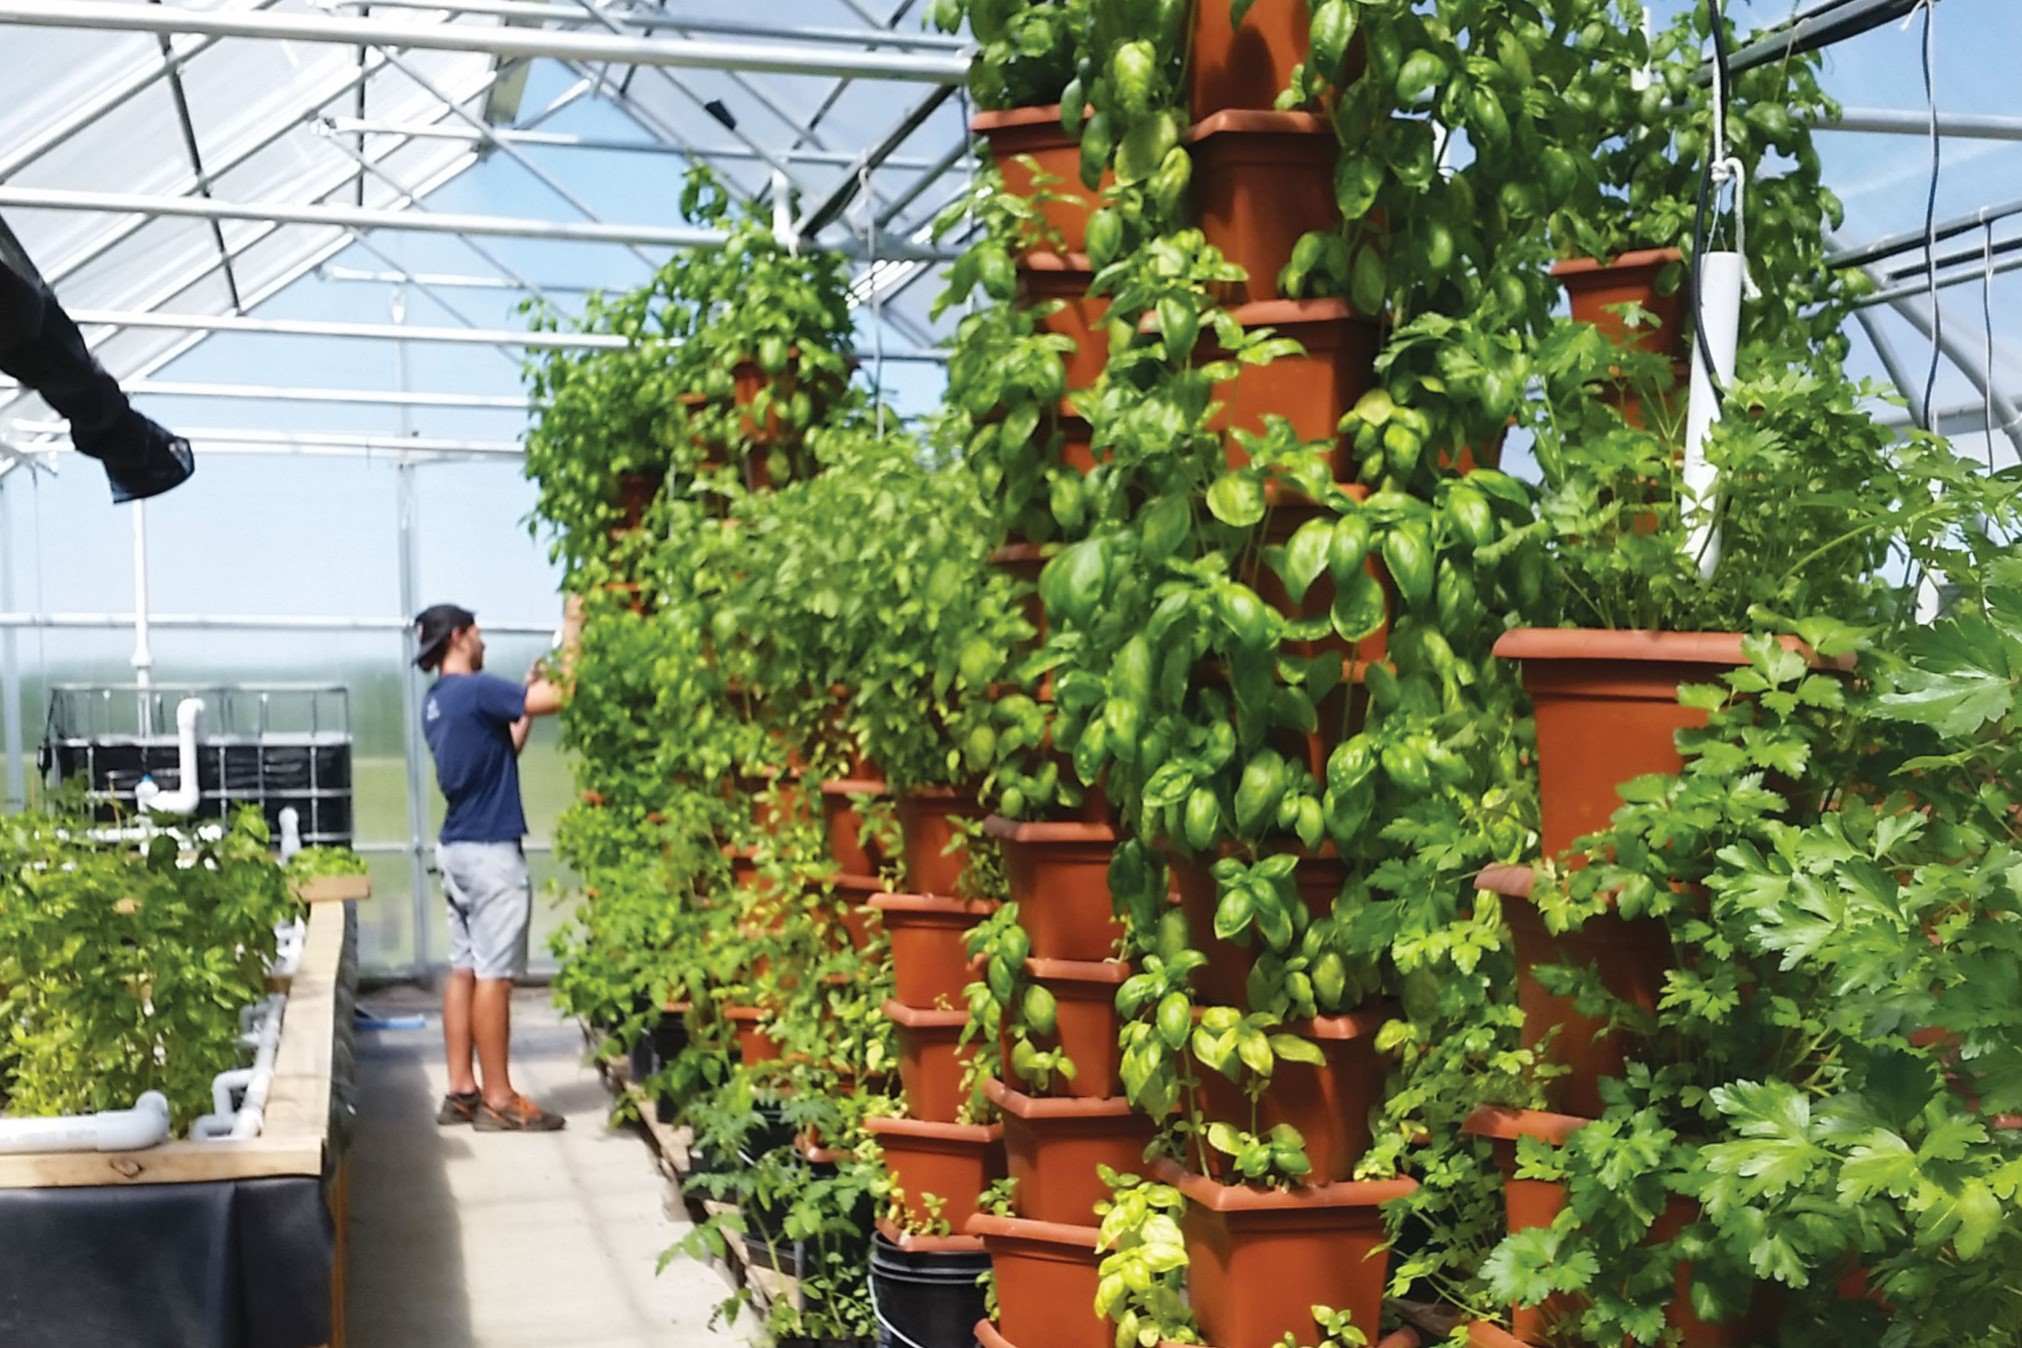
- Vertical Tower Systems: Vertical tower systems are specifically designed for vertical gardening. These systems usually consist of stacked growing trays or pockets, allowing plants to grow vertically. They are space-saving and ideal for smaller spaces. Vertical tower systems work well for a variety of crops, including leafy greens, herbs, and small fruiting plants.
- Wick System: Wick systems are simple and passive hydroponic setups that use a wicking material to deliver the nutrient solution to the plants. The wick draws the solution from a reservoir to the growing medium, allowing the roots to absorb it gradually. Wick systems are inexpensive, low-maintenance, and suitable for smaller plants or beginners experimenting with hydroponics.
When selecting a hydroponic system, consider factors such as your available space, desired plant selection, budget, and level of experience. Additionally, research and understand the specific requirements and maintenance needs of each system to ensure it aligns with your goals and capabilities.
Once you have chosen the hydroponic system that suits your needs, it’s time to gather the necessary supplies for your indoor hydroponic vertical garden. We will cover this in the next step.
Step 3: Gathering the Essential Supplies
Now that you have chosen the hydroponic system for your indoor hydroponic vertical garden, it’s time to gather the essential supplies. Having the right equipment and materials is crucial for a successful and thriving garden. Here are the key supplies you will need:
- Growing Containers: Depending on the type of hydroponic system you have chosen, you will need appropriate growing containers. These can include net pots, grow bags, or trays with individual compartments. Ensure that the containers are durable, have good drainage, and are suitable for the size of your plants.
- Growing Medium: The growing medium provides support for the plants’ roots and helps retain moisture and nutrients. Options for growing mediums include perlite, vermiculite, coconut coir, rockwool, or clay pebbles. Choose a medium that is compatible with your hydroponic system and the specific needs of your plants.
- Nutrient Solution: Nutrient solutions provide the essential macronutrients and micronutrients necessary for plant growth. You can purchase pre-formulated hydroponic nutrient solutions or mix your own using commercial nutrient concentrates. Ensure that the nutrient solution is suitable for the type of plants you will be growing and follow the recommended dosage instructions.
- pH Testing Kit: Maintaining the correct pH level is crucial for nutrient uptake and plant health. Invest in a pH testing kit to regularly monitor and adjust the pH of your nutrient solution. Most hydroponic systems require a slightly acidic pH range of 5.5-6.5 for optimal nutrient absorption.
- Water Pump and Tubing: Depending on your hydroponic system, you may need a water pump to circulate the nutrient solution through your system. Select a pump that is suitable for the size of your garden. Additionally, ensure you have sufficient tubing to connect the pump to the growing containers or delivery system.
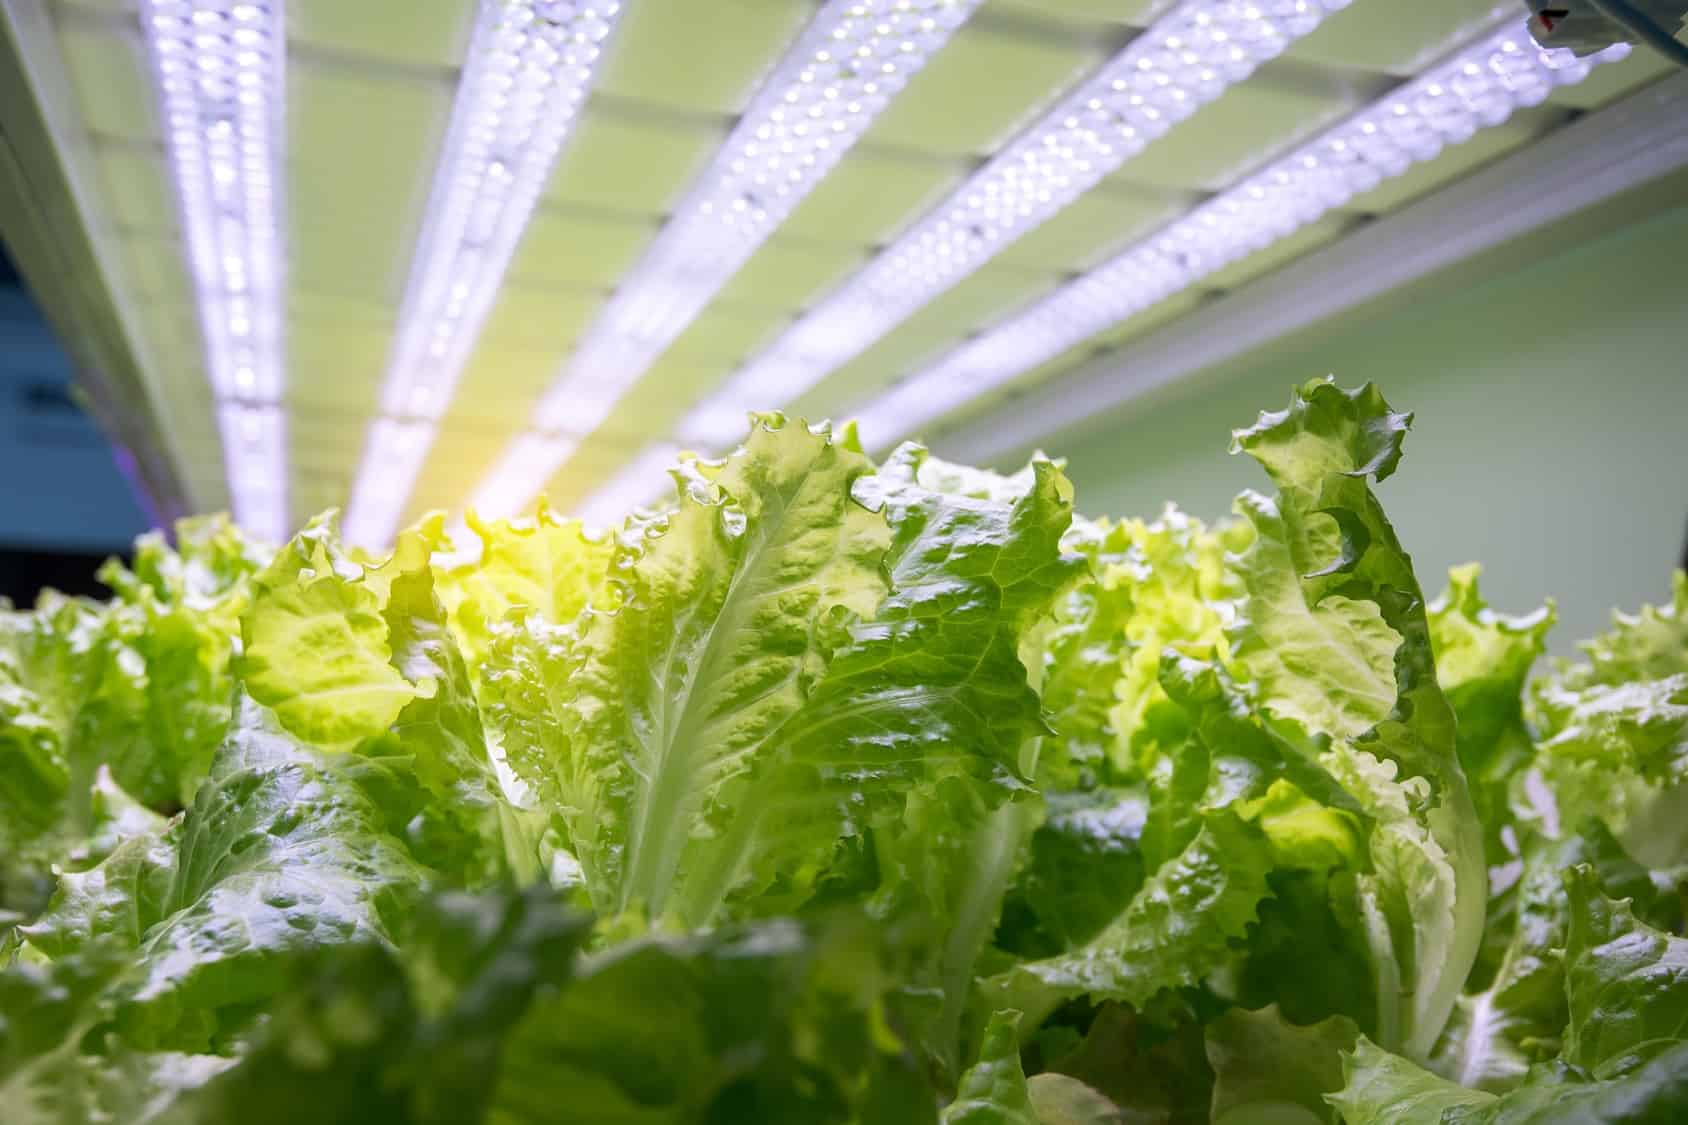
- Grow Lights: Indoor hydroponic gardens often require supplemental lighting to provide the necessary light energy for plant growth. LED or fluorescent grow lights are popular choices due to their energy efficiency and the ability to provide the full spectrum of light required by plants. Place the lights at an appropriate distance and ensure they are on for the recommended hours based on the plant’s light requirements.
- pH Adjustment Solutions: In addition to the pH testing kit, you may need pH adjustment solutions to bring the pH of your nutrient solution within the desired range. These solutions, such as pH up or pH down, can be used to raise or lower the pH as needed.
- Water Reservoir: A water reservoir is necessary for holding and maintaining the nutrient solution. The size of the reservoir will depend on the size of your garden and the water requirements of your plants. Ensure the reservoir is clean and opaque to prevent algae growth and light penetration.
- Timer: To automate the watering and lighting cycles of your hydroponic system, invest in a timer. A timer allows you to set specific intervals for the water pump and grow lights, ensuring consistent and controlled conditions for your plants.
These are the essential supplies you will need to set up your indoor hydroponic vertical garden. Make sure to gather all the necessary items before proceeding to the next step of setting up the garden structure. With the right supplies at hand, you are well-prepared to embark on the exciting journey of hydroponic gardening.
Read also: 9 Incredible Vertical Indoor Garden For 2025
Step 4: Setting Up the Vertical Garden Structure
Now that you have gathered all the essential supplies, it’s time to set up the structure for your indoor hydroponic vertical garden. The structure will provide support for the plants and help optimize space utilization. Here are the steps to set up your vertical garden:
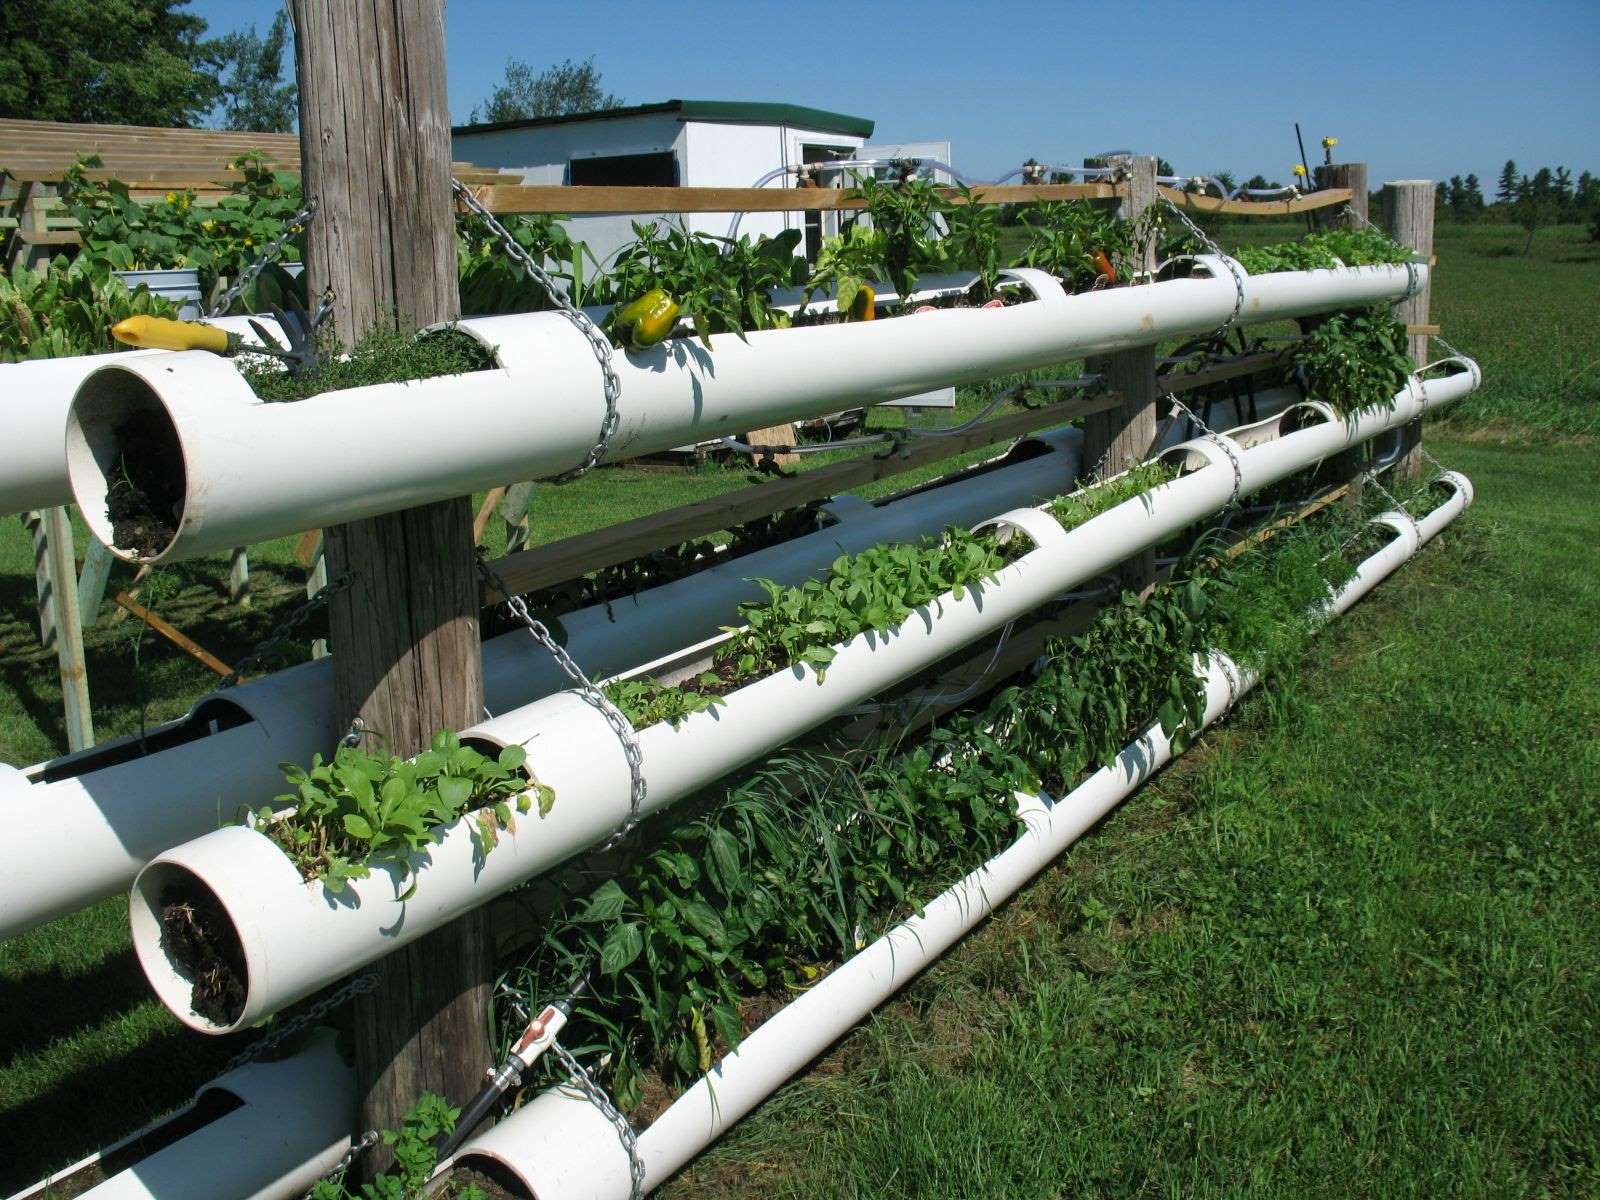
- Select the Vertical Garden System: Choose the type of vertical garden system that suits your space and needs. This could be a freestanding tower, a wall-mounted system, or even a customized structure suitable for your available space. Consider factors such as stability, ease of access, and the number of plants you want to grow.
- Secure the Structure: If you are using a freestanding tower or shelf system, ensure that it is secure and stable. Place it on a level surface and anchor it if necessary. For wall-mounted systems, use sturdy anchors and brackets to securely attach the structure to the wall. Carefully follow the manufacturer’s instructions to ensure proper installation.
- Set up the Growing Containers: Depending on the chosen system, arrange the growing containers in an organized manner. Make sure they are securely in place and well-spaced to allow for proper air circulation and growth. Ensure that the containers have proper drainage, and if necessary, add drainage holes to avoid waterlogging.
- Attach the Irrigation System: Connect the water pump and irrigation tubing to the growing containers. Be sure to follow the instructions provided with your specific hydroponic system. The irrigation system should evenly distribute the nutrient solution to each container, ensuring all plants receive sufficient water and nutrients.
- Set up the Grow Lights: Install the grow lights above or around the vertical garden structure, ensuring they are positioned at the recommended distance from the plants. Mount the lights securely and adjust their height as the plants grow. Connect the lights to a timer to automate the lighting cycle and ensure appropriate light exposure for the plants.
- Test the System: Before planting, run a test of the irrigation system and lights to ensure everything is functioning properly. Check for any leaks, blockages, or malfunctions in the system. Adjust the timer settings if necessary and make any necessary adjustments to ensure optimum water flow and lighting conditions.
- Clean and Sterilize: Clean and sterilize the growing containers, tubing, and any other equipment used in the setup process. This will help prevent the growth of harmful bacteria or pathogens that could potentially damage your plants. Effective cleaning practices include using a bleach solution or specialized cleaning agents recommended for hydroponic systems.
Once you have completed the setup of your vertical garden structure, you are ready to move on to the next steps of preparing the nutrient solution and selecting and preparing the plants. With your garden taking shape, the excitement of seeing your plants thrive and flourish is just around the corner!
When setting up an indoor hydroponic vertical garden, make sure to choose a location with access to natural light or use grow lights to provide the necessary light for plant growth.
Step 5: Preparing the Nutrient Solution
Now that your vertical garden structure is set up, it’s time to prepare the nutrient solution for your indoor hydroponic vertical garden. The nutrient solution provides essential elements for plant growth and helps fuel their development. Here’s how you can prepare the nutrient solution:
- Read and Follow Instructions: If you purchased a pre-formulated hydroponic nutrient solution, carefully read and follow the instructions provided on the packaging. The instructions will guide you on the appropriate dosage, mixing ratios, and any other specific requirements for your chosen nutrient solution.
- Measure and Mix: Start by measuring the appropriate amount of water required for your nutrient solution. Use distilled or filtered water to avoid any impurities. Add the necessary amount of nutrient solution concentrate to the water, following the recommended ratios provided by the manufacturer. Stir well to ensure the solution is thoroughly mixed.
- Adjust pH: Test the pH of the nutrient solution using a pH testing kit. The ideal pH range for most hydroponic systems is slightly acidic, around 5.5-6.5. If the pH is too high, you can lower it by adding a small amount of pH down solution. Alternatively, if the pH is too low, you can raise it by adding a small amount of pH up solution. Adjust the pH gradually and retest until it falls within the desired range.
- Maintain and Monitor: Regularly check and monitor the pH and nutrient levels of the solution throughout the growth cycle of your plants. Nutrient levels may need adjustment depending on the stage of plant growth and nutrient uptake. Follow the manufacturer’s guidelines and recommended schedule for nutrient solution changes and adjustments.
- Keep Solution Fresh: It’s essential to replace and refresh the nutrient solution periodically. Over time, the solution can become depleted of nutrients, leading to poor plant growth and health. Generally, it’s recommended to change the nutrient solution every 1-2 weeks for optimal plant performance. Dispose of the old nutrient solution properly and prepare a fresh batch.
- Monitor EC/PPM Levels: EC (Electrical Conductivity) or PPM (Parts Per Million) levels are indicators of the nutrient concentration in the solution. Using a nutrient monitor or EC/PPM meter, measure and monitor these levels periodically. Different plants have different nutrient requirements, and adjusting the levels accordingly can help ensure optimal plant growth and health.
- Adjust Nutrient Ratios: As your plants grow and develop, their nutrient requirements may vary. Adjust the nutrient ratios based on the specific needs of your plants. Pay attention to the signs of nutrient deficiencies or excess and make necessary adjustments to maintain a balanced nutrient solution.
Preparing and maintaining the nutrient solution is vital for the success of your indoor hydroponic vertical garden. By providing the necessary nutrients in the correct ratios, you will support healthy plant growth and an abundant harvest. With the nutrient solution ready, it’s time to move on to the next step of selecting and preparing the plants for your vertical garden.
Step 6: Plant Selection and Preparation
Now that your vertical garden structure is set up and the nutrient solution is ready, it’s time to select and prepare the plants for your indoor hydroponic vertical garden. Careful consideration of plant selection and proper preparation will contribute to the overall success of your garden. Here’s how you can proceed:
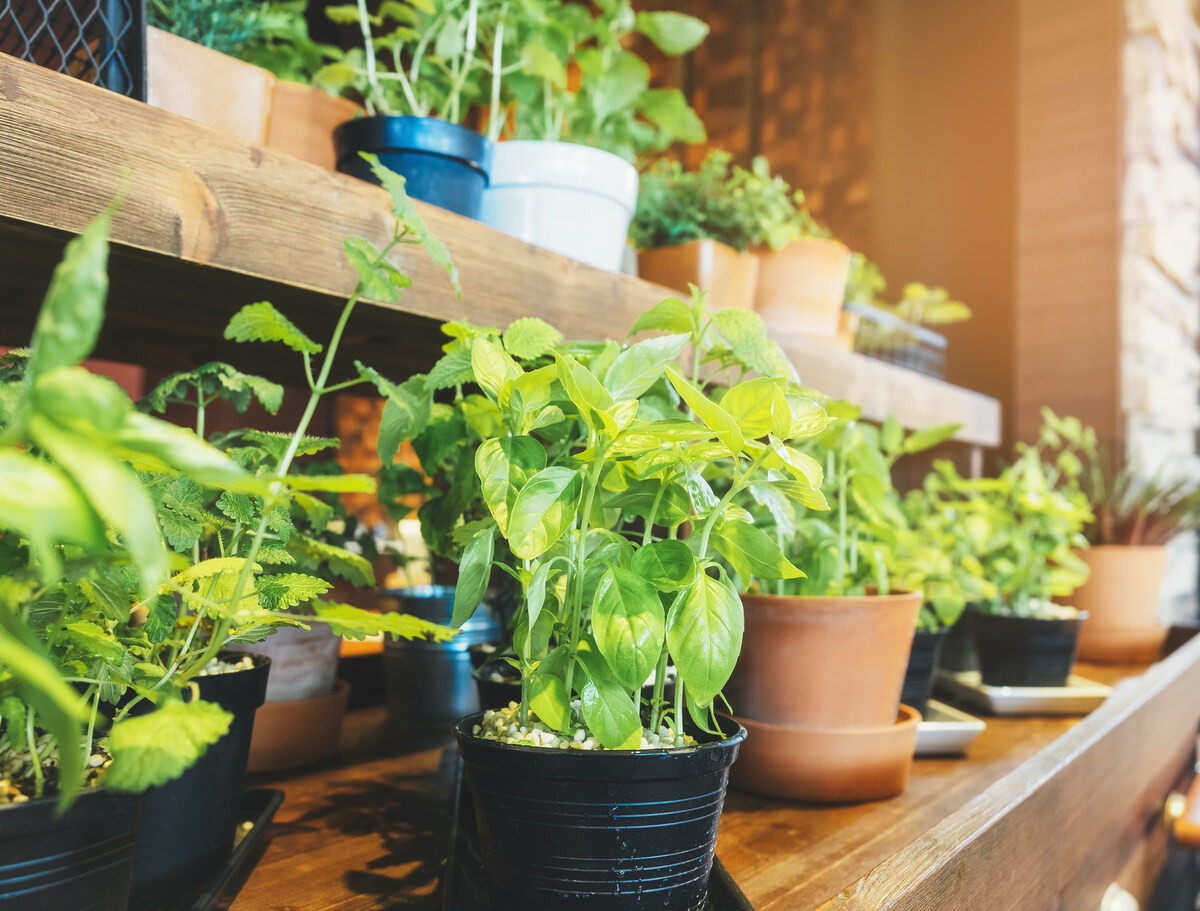
- Research Suitable Plants: Begin by researching and selecting plants that are well-suited for hydroponic systems and vertical gardening. Leafy greens like lettuce, spinach, and kale, as well as herbs like basil, mint, and cilantro, are popular choices. Additionally, consider small fruiting plants like cherry tomatoes or strawberries that can thrive in vertical setups.
- Consider Growing Conditions: Take into account the specific growing conditions required by each plant. This includes factors such as light requirements, temperature range, and humidity levels. Ensure that the selected plants are compatible with the conditions provided by your indoor environment.
- Obtain Quality Seedlings or Seeds: Acquire high-quality seedlings or seeds from reputable sources. If starting from seeds, follow the germination instructions provided on the seed packets. Use starter trays or small pots with a quality seed-starting mix to give the seeds the best chance of germination and early growth.
- Transplant Seedlings: Once the seedlings have sprouted and developed a few sets of true leaves, carefully transplant them into your growing containers filled with the chosen growing medium. Create appropriate-sized holes or pockets in the medium to accommodate the root system of each plant.
- Space the Plants Adequately: When placing the transplanted seedlings in the growing containers, provide enough space between each plant to allow for proper airflow and future growth. Crowded plants can lead to reduced air circulation and increased risk of disease or inadequate nutrient uptake.
- Water and Secure Plants: After transplanting, water the plants gently to settle the growing medium around the roots. Secure the plants in place using support structures like plant clips or trellises, if necessary. This will help keep the plants upright and prevent any potential damage.
- Prune and Train: As your plants grow, regularly prune any yellow or dead leaves to maintain plant health. For vine or climbing plants like tomatoes or cucumbers, train the stems to grow vertically along the support system, ensuring they have enough space and support.
- Monitor Plant Health: Regularly monitor the health of your plants, paying attention to signs of nutrient deficiencies, pests, or diseases. Adjust the nutrient solution or take appropriate measures to address any issues that may arise. Keep a close eye on plant growth and respond accordingly to ensure healthy and productive plants.
- Harvest and Enjoy: Once your plants reach maturity, it’s time to harvest and enjoy the fresh, homegrown produce from your indoor hydroponic vertical garden. Harvest leafy greens by picking outer leaves, allowing the inner leaves to continue growing. For fruiting plants like tomatoes, wait for fruits to fully ripen before harvesting for the best flavor.
By carefully selecting and preparing your plants, and providing attentive care throughout their growth, you’ll be rewarded with a bountiful and vibrant indoor hydroponic vertical garden. The journey from seed to harvest is an exciting and fulfilling process that allows you to savor the joy of homegrown goodness.
Step 7: Transplanting the Plants
Once your plants have reached an appropriate size and are ready to be transferred into the main growing system, it’s time to perform the transplanting process. Transplanting is a crucial step in the growth cycle of your indoor hydroponic vertical garden, as it allows the plants to establish their roots in the chosen growing medium. Here’s how you can proceed with transplanting:
- Choose the Right Time: Determine the optimal time for transplanting based on the growth stage of your plants. It’s generally recommended to transplant when the seedlings have developed a strong root system and are showing signs of healthy growth, such as multiple sets of true leaves.
- Prepare the Growing Containers: Ensure that the growing containers within your vertical garden structure are clean and ready for transplanting. Remove any debris or old plant material from the containers and clean them thoroughly with a mild disinfectant to minimize the risk of disease or contamination.
- Moisten the Growing Medium: Prior to transplanting, moisten the growing medium to provide a suitable environment for the plant’s roots. This will help promote easier and smoother transplanting. However, ensure that the medium is not saturated, as excessive moisture can lead to fungal or bacterial issues.
- Prepare the Plants: Gently remove the seedlings from their current containers, taking care not to damage the delicate roots. If the seedlings are in a seed tray or individual pots, gently loosen the root ball by tapping the bottom or squeezing the sides of the container. This will help the plants separate easily during transplanting.
- Transplant the Seedlings: Make appropriate-sized holes or pockets in the moistened growing medium of the growing containers. Place each seedling carefully into the prepared hole or pocket, ensuring that the root system is fully covered with the growing medium, up to the base of the stem. Firmly press the medium around the roots to provide stability.
- Space the Plants Adequately: Maintain proper spacing between the transplanted plants to allow for adequate air circulation and future growth. Crowded plants can lead to increased risk of disease or hinder the development of the root system. Follow the recommended spacing guidelines for each plant variety.
- Water and Nurture the Transplants: After transplanting, water the newly transplanted plants gently to settle the growing medium around the roots. Ensure that the medium is moist but not waterlogged. Place the transplants in an appropriate location within your indoor hydroponic vertical garden, providing them with the necessary light and environmental conditions for their specific needs.
- Monitor and Support the Plants: Regularly monitor the transplanted plants for any signs of stress or nutrient deficiencies. Provide support structures, such as trellises or plant clips, if needed, to help the plants grow vertically and stay upright. Adjust the nutrient solution and lighting as necessary, ensuring that the plants are receiving optimal care and attention.
By following these steps and taking proper care during the transplanting process, you’ll give your plants the best chance to thrive in your indoor hydroponic vertical garden. It’s an essential step towards their continued growth, and with proper nurturing, your plants will soon flourish and reward you with a plentiful and vibrant harvest.
Read more: How To Make Succulent Vertical Garden
Step 8: Monitoring and Maintaining the Garden
Monitoring and maintaining your indoor hydroponic vertical garden are crucial to ensure the health and productivity of your plants. Regular observation and proper care will help you identify and address any issues that may arise. Here’s how you can effectively monitor and maintain your garden:
- Check Water Levels: Regularly monitor the water levels in your hydroponic system to ensure that the plants are receiving an adequate water supply. Be mindful of evaporation and adjust the water levels as necessary. Maintaining proper water levels is essential for nutrient absorption and plant hydration.
- Monitor Nutrient Solution: Continuously monitor the pH and nutrient levels of your nutrient solution. Use a pH testing kit and a TDS or EC meter to measure the acidity level and nutrient concentration in the solution. Adjust the pH and nutrient levels accordingly to maintain an optimal growing environment for the plants.
- Inspect Plant Health: Regularly examine the foliage of your plants for any signs of disease, pests, or nutritional deficiencies. Look for wilting, yellowing leaves, spots, or unusual growth patterns. Early detection of issues allows for prompt treatment and minimizes the risk of damage to the entire garden.
- Pest Management: Implement an integrated pest management (IPM) strategy to prevent and manage pests effectively. Regularly inspect your plants for common indoor garden pests like aphids, mites, or whiteflies. Use organic pest control methods such as insecticidal soaps, neem oil, or introducing beneficial insects to keep pest populations in check.
- Pruning and Training: Prune your plants regularly to remove any dead, diseased, or damaged foliage. This helps to maintain plant health and promotes airflow and light penetration. Train vining or climbing plants along trellises or support structures to ensure proper growth and prevent overcrowding.
- Monitor Light Exposure: Regularly assess the lighting conditions in your indoor garden. Ensure that your plants are receiving the appropriate amount of light based on their specific needs. Adjust the height and positioning of your grow lights if necessary to optimize light exposure and minimize any shading issues.
- Maintain Proper Air Circulation: Proper air circulation is essential in preventing fungal diseases and promoting healthy plant growth. Use fans or ensure that there is natural airflow in your indoor garden. Avoid overcrowding plants and maintain an adequate distance between them to allow for good air circulation.
- Clean and Sanitize: Regularly clean and sanitize your hydroponic system components, such as growing containers, tubing, and reservoirs. Remove any debris or dead plant material that can serve as a breeding ground for pests or pathogens. Use diluted hydrogen peroxide or a mild disinfectant to sanitize your equipment.
- Stay Consistent: Consistency is key in maintaining a healthy and thriving hydroponic garden. Stick to a regular watering and nutrient solution schedule, ensuring that your plants receive a consistent supply of water and nutrients. Avoid sudden changes or fluctuations that can stress the plants.
By consistently monitoring and maintaining your indoor hydroponic vertical garden, you’ll create an optimal environment for plant growth and maximize their productivity. Regular care and attention will reward you with healthy, vibrant plants that will bring joy and abundance into your indoor space.
Step 9: Harvesting and Enjoying Fresh Produce
After putting in the effort to set up and maintain your indoor hydroponic vertical garden, it’s time to reap the rewards of your hard work by harvesting and enjoying the fresh produce. Here’s how to properly harvest and make the most of your homegrown goodies:
- Determine Harvest Time: Each plant has its own optimal harvest time. Pay attention to the specific variety and follow the guidelines for harvesting. Leafy greens are typically harvested when the leaves are young and tender, while fruiting plants are ready to harvest when the fruits have reached their desired size, color, and flavor.
- Use Proper Harvesting Techniques: Use clean, sharp scissors or pruning shears to harvest your plants. Carefully cut or pinch off the mature leaves or fruits, taking care not to damage the rest of the plant. Avoid tearing or pulling, as this can lead to unnecessary stress or damage to the plant.
- Harvest Leafy Greens: For leafy greens such as lettuce or spinach, you can use the “cut and come again” method. Harvest the outer leaves as needed, leaving the inner leaves to continue growing. This allows for a continuous harvest throughout the growing season and prolongs the productivity of your plants.
- Handle with Care: After harvesting, handle your freshly picked produce with care to maintain its quality and freshness. Avoid bruising or crushing the leaves or fruits. Place them in a clean container or bag and keep them in a cool, shaded area until you’re ready to use them.
- Enjoy Fresh and Healthy Meals: Incorporate your homegrown produce into your meals to savor the full flavor and nutritional benefits. From crisp salads to refreshing smoothies, the possibilities are endless. Explore new recipes and get creative with your homegrown produce to truly appreciate the flavors and satisfaction of your garden-to-table experience.
- Share the Bounty: If your indoor hydroponic vertical garden produces an abundance of fresh produce, consider sharing your harvest with family, friends, or neighbors. It’s a wonderful way to spread the joy of homegrown goodness and build a sense of community around your gardening endeavors.
- Continue the Cycle: After harvesting, your plants may have produced new growth or have the potential to regrow. If desired, you can trim back your plants and allow them to continue growing for another harvest. This allows you to enjoy multiple cycles of fresh produce from your indoor garden.
- Start Planning for the Next Crop: Once you have harvested your plants, take the opportunity to clean and prepare your hydroponic system for the next crop. Ensure that the growing containers, tubing, and reservoir are properly cleaned and sanitized before starting a new planting cycle. Consider rotating your crops to prevent nutrient depletion and optimize plant health.
- Celebrate Your Gardening Success: Take a moment to appreciate the rewards of your indoor hydroponic vertical garden. Celebrate your gardening achievements, whether through a simple reflection on the joy and satisfaction it brings or by sharing your success with others. Your hard work and dedication have allowed you to enjoy the delights of fresh, homegrown produce all year round.
By following these steps and embracing the joy of harvesting and enjoying your freshly grown produce, you’ll experience the ultimate satisfaction of a successful indoor hydroponic vertical garden. So gather your homegrown goodies, let your culinary creativity flow, and relish in the flavors of your garden-to-table journey!
Conclusion
Congratulations on successfully setting up your indoor hydroponic vertical garden! You have embarked on a fulfilling journey of growing fresh, healthy, and delicious produce right in the comfort of your own home. Through careful planning, thoughtful preparation, and consistent care, you have created an oasis of greenery and abundance, all within the vertical space of your choosing.
By opting for an indoor hydroponic vertical garden, you have unlocked a multitude of benefits. You have maximized your use of space, allowing you to grow an abundance of plants even in compact areas. The controlled environment of hydroponics has provided ideal growing conditions, enabling year-round gardening regardless of external climate or seasonality. You have also cultivated an eco-friendly and sustainable garden, conserving water, reducing chemical usage, and promoting efficient resource utilization.
Throughout the steps, from choosing the right location to harvesting and enjoying your fresh produce, you have become an expert in monitoring and maintaining your garden. You have mastered the art of providing optimal lighting, nutrient solutions, and care to nurture your plants and ensure their well-being. Your dedication, attention to detail, and love for gardening have resulted in thriving plants and a bountiful harvest.
Not only have you reaped the rewards of your indoor hydroponic vertical garden with an abundance of fresh produce, but you have also experienced the joy of connecting with nature, promoting sustainability, and enhancing your overall well-being. Gardening has provided therapeutic benefits, improved indoor air quality, and instilled a sense of pride and accomplishment.
Now, as you continue to care for and enjoy your homegrown bounty, remember to share your experience and knowledge with others. Inspire and educate those around you about the beauty and possibilities of indoor hydroponic vertical gardening. Encourage them to embark on a journey of self-sufficiency, sustainability, and the joy of gardening.
We hope this comprehensive guide has equipped you with the necessary insights, tips, and steps to create and maintain an exceptional indoor hydroponic vertical garden. May your garden continue to flourish, providing you with a continuous supply of fresh and flavorful produce throughout the seasons. Happy gardening!
Frequently Asked Questions about How To Make An Indoor Hydroponic Vertical Garden
Was this page helpful?
At Storables.com, we guarantee accurate and reliable information. Our content, validated by Expert Board Contributors, is crafted following stringent Editorial Policies. We're committed to providing you with well-researched, expert-backed insights for all your informational needs.

0 thoughts on “How To Make An Indoor Hydroponic Vertical Garden”