Home>Garden Essentials>How To Place Solar Lights In Landscaping
Garden Essentials
How To Place Solar Lights In Landscaping
Modified: March 7, 2024
Learn how to enhance your garden with solar lights. Our step-by-step guide will show you the best ways to strategically place solar lights in your landscaping for a beautiful and eco-friendly outdoor ambiance.
(Many of the links in this article redirect to a specific reviewed product. Your purchase of these products through affiliate links helps to generate commission for Storables.com, at no extra cost. Learn more)
Introduction
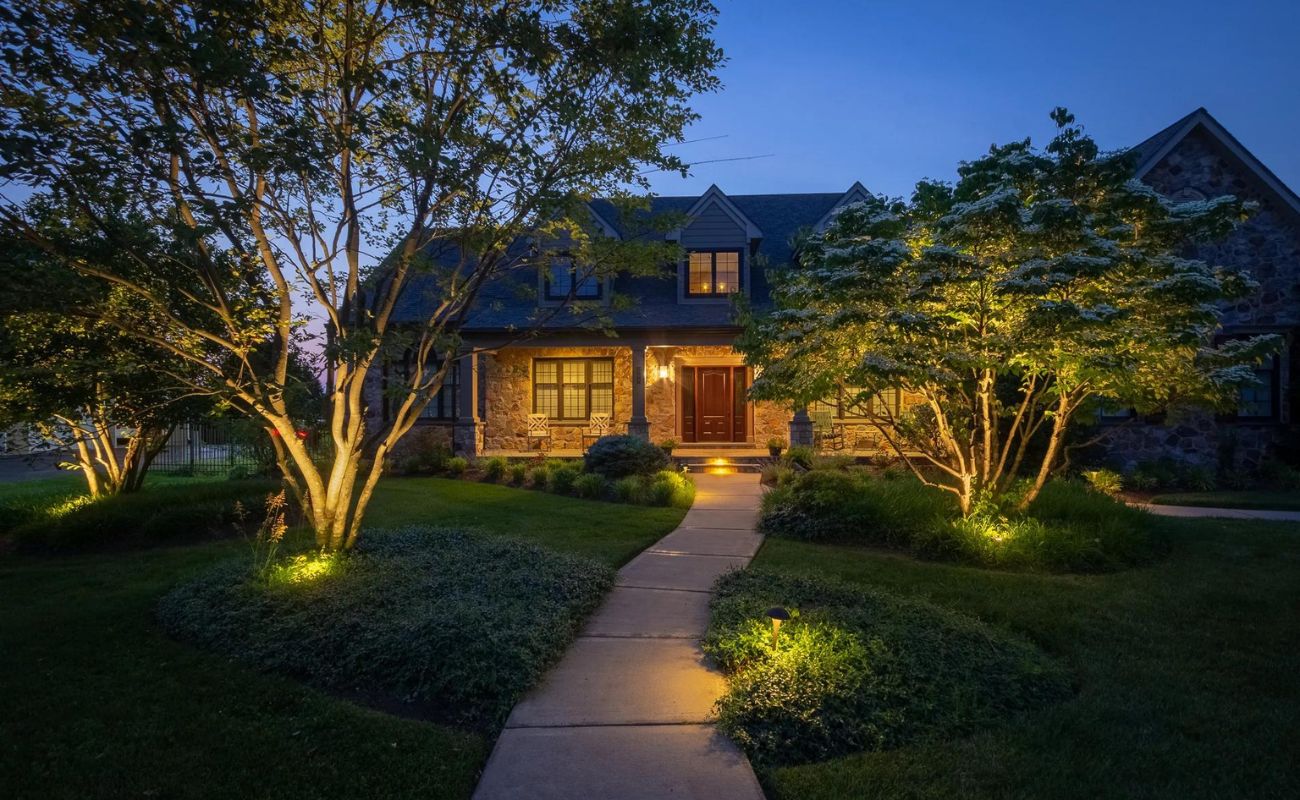
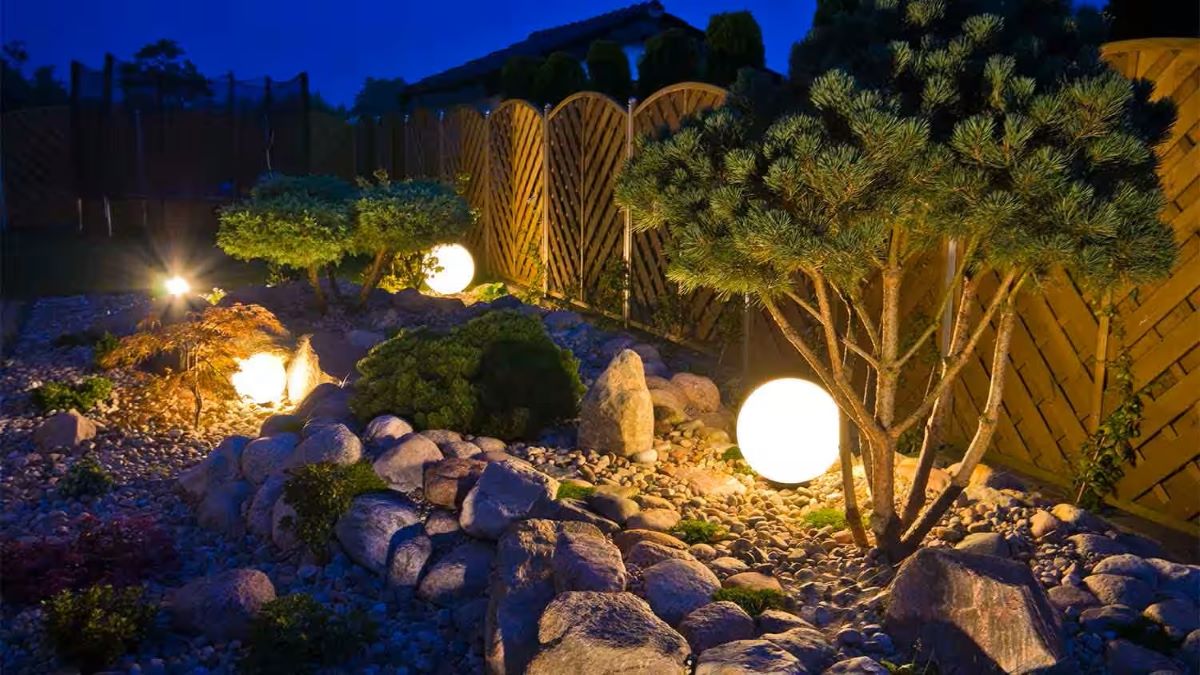
When it comes to landscaping, creating a visually stunning and inviting outdoor space is essential. Aside from the use of plants, hardscapes, and water features, lighting plays a crucial role in enhancing the beauty and functionality of your garden. One popular and eco-friendly option is to use solar lights.
Solar lights harness the power of the sun to illuminate your outdoor space after dark. They are not only an excellent choice for reducing energy consumption but also provide a convenient and hassle-free lighting solution. With a plethora of designs and styles available, you can easily find solar lights that fit your landscaping needs and personal aesthetic preferences.
In this article, we will guide you through the process of placing solar lights in your landscaping to create a striking and well-lit outdoor space. From choosing the right solar lights to determining the ideal placement and maintaining the lights, we will cover all the essential aspects to help you achieve the desired effect.
So, let’s dive in and explore the world of solar lights in landscaping, and discover how they can transform your outdoor space into an enchanting oasis.
Key Takeaways:
- Solar lights are a great eco-friendly option for lighting up your garden. By choosing the right type and placing them strategically, you can create a stunning outdoor space that’s both beautiful and energy-efficient.
- Regular maintenance, such as cleaning the solar panels and checking for obstructions, is essential to keep your solar lights working effectively. With proper care, they can illuminate your garden for years to come.
Choosing the Right Solar Lights
When it comes to choosing solar lights for your landscaping, there are a few key factors to consider. By taking these into account, you can ensure that you select the right lights that will meet your needs and withstand the outdoor elements.
Firstly, consider the function of the solar lights. Are you looking for lights to illuminate pathways and walkways, accentuate garden features, or highlight trees and shrubs? Understanding the purpose will help you determine the type and style of lights you need.
Next, assess the solar lights’ brightness and duration. Look for lights with sufficient lumen output to provide the desired level of illumination. Additionally, consider the battery capacity and charging time to ensure that the lights will last throughout the night.
Another crucial factor is the quality and durability of the solar lights. Opt for lights made from high-quality materials that can withstand harsh weather conditions. Look for features such as waterproof and corrosion-resistant designs to ensure longevity.
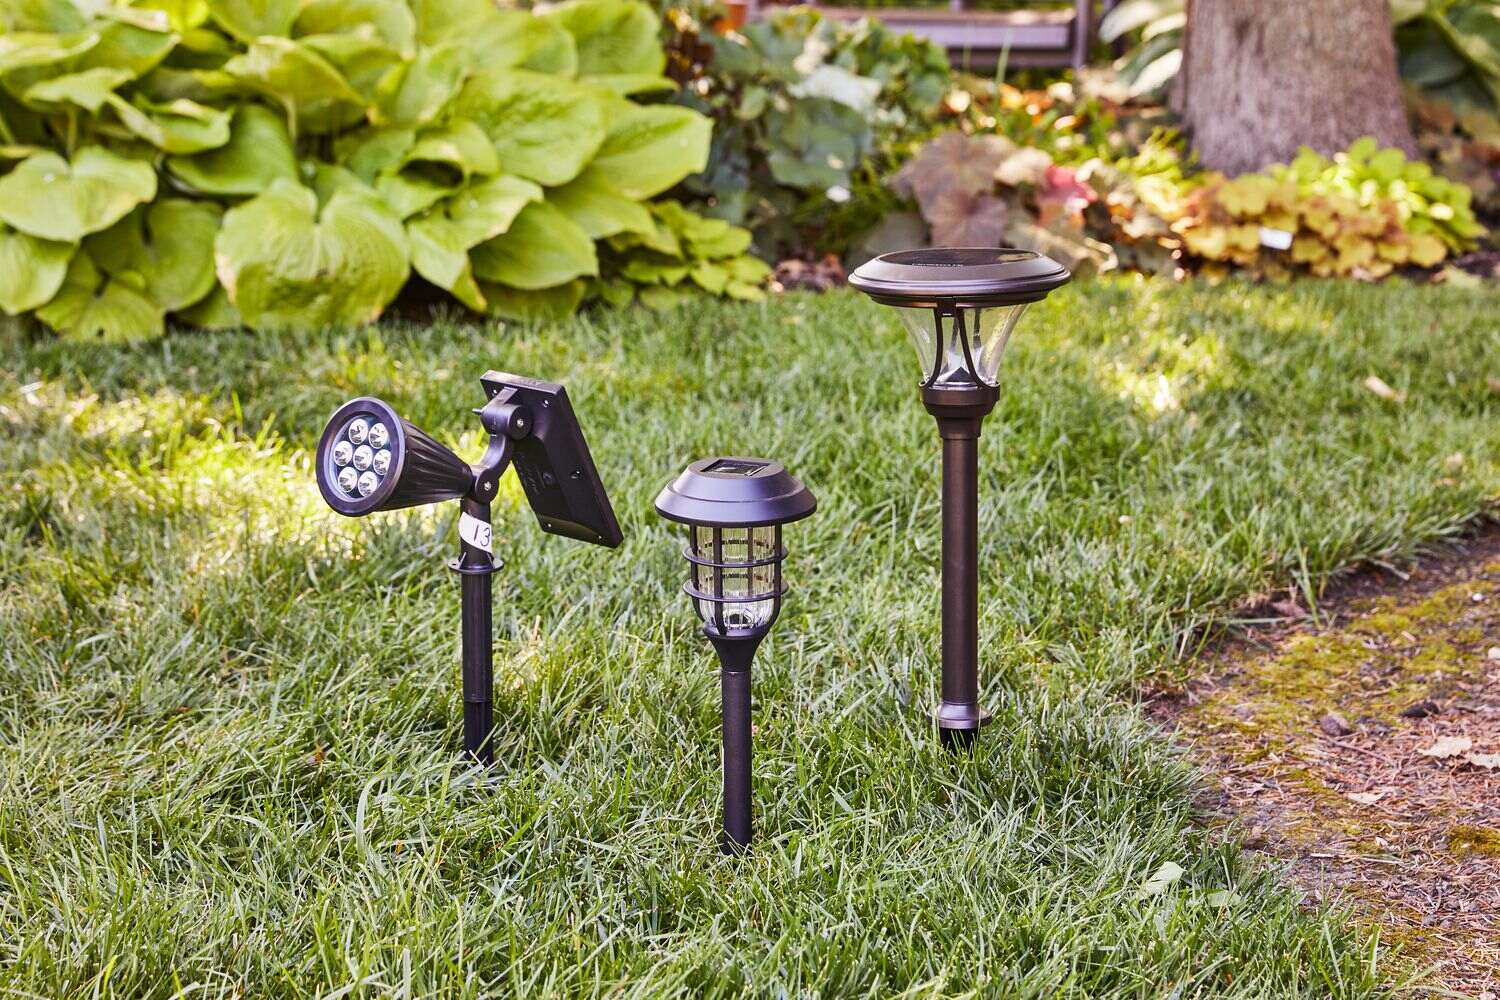
Furthermore, consider the design and aesthetics of the solar lights. They should complement your landscaping style and enhance the overall visual appeal. Choose from a wide range of designs, including lanterns, pathway lights, spotlights, and string lights, to find the perfect fit for your outdoor space.
Lastly, take into account the placement and installation options of the solar lights. Some lights come with stakes for easy ground installation, while others can be mounted on walls or structures. Ensure that the lights you choose are suitable for your specific landscaping needs and installation requirements.
By carefully considering these factors, you can select solar lights that not only meet your functional requirements but also add a touch of elegance and charm to your outdoor space. So, take the time to research and choose the right solar lights that will truly enhance your landscaping vision.
Assessing Your Landscaping Needs
Before you start placing solar lights in your landscaping, it’s important to assess your specific needs and preferences. This will help you determine the quantity, type, and placement of lights that will best enhance your outdoor space.
Begin by evaluating the size and layout of your garden. Take note of pathways, walkways, and focal points such as garden features, trees, and shrubs. Determine which areas you want to highlight and which areas require functional lighting for safety and navigation.
Consider the ambiance you want to create in your outdoor space. Do you prefer a soft, subtle glow or a brighter and more vibrant illumination? This will influence your choice of solar lights and their placement.
Take into account the specific lighting requirements of different areas in your garden. For pathways and walkways, you’ll need lights that illuminate the path and provide safe navigation. For garden features, consider using spotlights or accent lights to create focal points and highlight their beauty.
Furthermore, think about the overall aesthetic style and theme of your landscaping. Are you going for a rustic, modern, or whimsical look? Choose solar lights that align with your preferred style to create a cohesive and visually pleasing outdoor environment.
Additionally, consider the hours of direct sunlight your garden receives. Solar lights require sunlight to charge, so it’s important to place them in areas that receive enough sunlight during the day. This will ensure that the lights have sufficient power to illuminate your garden at night.
Lastly, think about any future plans or changes you may have for your landscaping. If you anticipate making adjustments or additions, leave room for flexibility in your lighting placement. This will make it easier to adapt and modify your lighting scheme as your garden evolves.
By conducting a thorough assessment of your landscaping needs, you can make informed decisions about the type and placement of solar lights. This will allow you to create a customized and well-lit outdoor space that aligns with your vision and enhances the beauty of your garden.
Determining the Ideal Placement
Once you have assessed your landscaping needs, it’s time to determine the ideal placement for your solar lights. Proper placement is crucial to maximize their effectiveness and ensure that your garden is beautifully illuminated after dark.
Start by identifying the areas in your garden that require functional lighting. These areas typically include pathways, walkways, and stairs. Place solar lights strategically along these paths to provide safe navigation and prevent any accidents or falls. For optimal visibility, position the lights evenly and at a consistent distance from each other.
In addition to functional lighting, consider installing solar lights to highlight and accentuate your garden’s features. These can include statues, water features, or focal points like trees and flower beds. Use spotlights or accent lights to create a dramatic effect and draw attention to these areas.
Illuminating trees and shrubs can add depth and create a magical ambiance in your garden. Place solar lights at the base of trees or use uplights to showcase their beauty. For shrubs or hedges, consider using string lights or low-profile pathway lights to provide a subtle and enchanting glow.
Don’t forget about outdoor structures such as patios, gazebos, or pergolas. Incorporate solar lights into these spaces to enhance their functionality and create a cozy atmosphere. Hang string lights or install wall-mounted solar lights to add a warm and inviting glow to these outdoor living areas.
When deciding on the placement of solar lights, consider the angle and direction of light projection. Place lights in a way that directs the light where it is needed most, while avoiding excessive glare or shadows.
Remember to take into account the hours of sunlight each area receives throughout the day. Choose spots that get ample sunlight exposure to ensure that the solar lights can fully charge during the day and provide optimal performance at night.
Lastly, be mindful of any potential obstructions or landscaping elements that may block or interfere with the lighting. Make sure to position solar lights away from tall plants, fences, or structures that could obstruct the sunlight or cast unwanted shadows.
By carefully considering these factors and strategically placing your solar lights, you can create a captivating and well-lit outdoor space that showcases the beauty of your garden and enhances its nighttime charm.
Preparing the Solar Lights
Before placing your solar lights in the desired locations, it’s important to properly prepare them for optimal performance and longevity. Take the following steps to ensure that your solar lights are ready to illuminate your garden:
1. Read the instructions: Start by carefully reading the manufacturer’s instructions that come with your solar lights. They will provide specific guidance on how to prepare and install the lights correctly.
2. Charge the batteries: Most solar lights come with rechargeable batteries that need to be fully charged before use. Place the lights in an area that receives direct sunlight for at least 8 to 10 hours to ensure the batteries are fully charged.
3. Clean the solar panels: Over time, dust, dirt, and debris can accumulate on the solar panels, reducing their efficiency. Gently wipe the panels with a damp cloth or sponge to remove any obstructions and ensure maximum sunlight absorption.
4. Test the lights: Turn on the solar lights and make sure they are functioning properly. Check that the LED bulbs illuminate and that any additional features, such as sensors or timers, are working as intended.
5. Install stakes or mounts: Depending on the type of solar lights you have, you may need to attach stakes to the lights for ground installation or use mounts for wall or structure mounting. Follow the manufacturer’s instructions to securely attach the stakes or mounts.
6. Position the solar lights: At this stage, you can begin placing the solar lights in their predetermined locations based on your landscaping plan. Make sure to position them where they will receive adequate sunlight during the day.
7. Adjust the angle and direction: For lights with adjustable heads, tilt them to the desired angle to achieve optimal light projection. Aim the lights in the direction that will provide the best illumination for the intended area.
8. Secure the lights: If you’re placing solar lights in loose soil or mulch, press the stakes firmly into the ground to secure them in place. For wall-mounted lights, use the appropriate hardware to ensure they are securely attached.
9. Allow time for the lights to activate: After positioning the solar lights, give them a full day to activate and adjust to their new environment. This will allow them to properly charge their batteries and start providing illumination at night.
By following these preparation steps, you can ensure that your solar lights are ready to illuminate your garden effectively and provide long-lasting outdoor lighting. Proper preparation will contribute to the overall performance and durability of your solar lights, allowing you to enjoy a beautifully lit outdoor space for years to come.
Read more: How To Place Large Rocks In Landscaping
Placing Solar Lights in Pathways and Walkways
When it comes to illuminating pathways and walkways in your garden, solar lights are a practical and visually appealing choice. They provide a safe and inviting atmosphere while adding a touch of elegance to your outdoor space. Follow these steps to properly place solar lights in pathways and walkways:
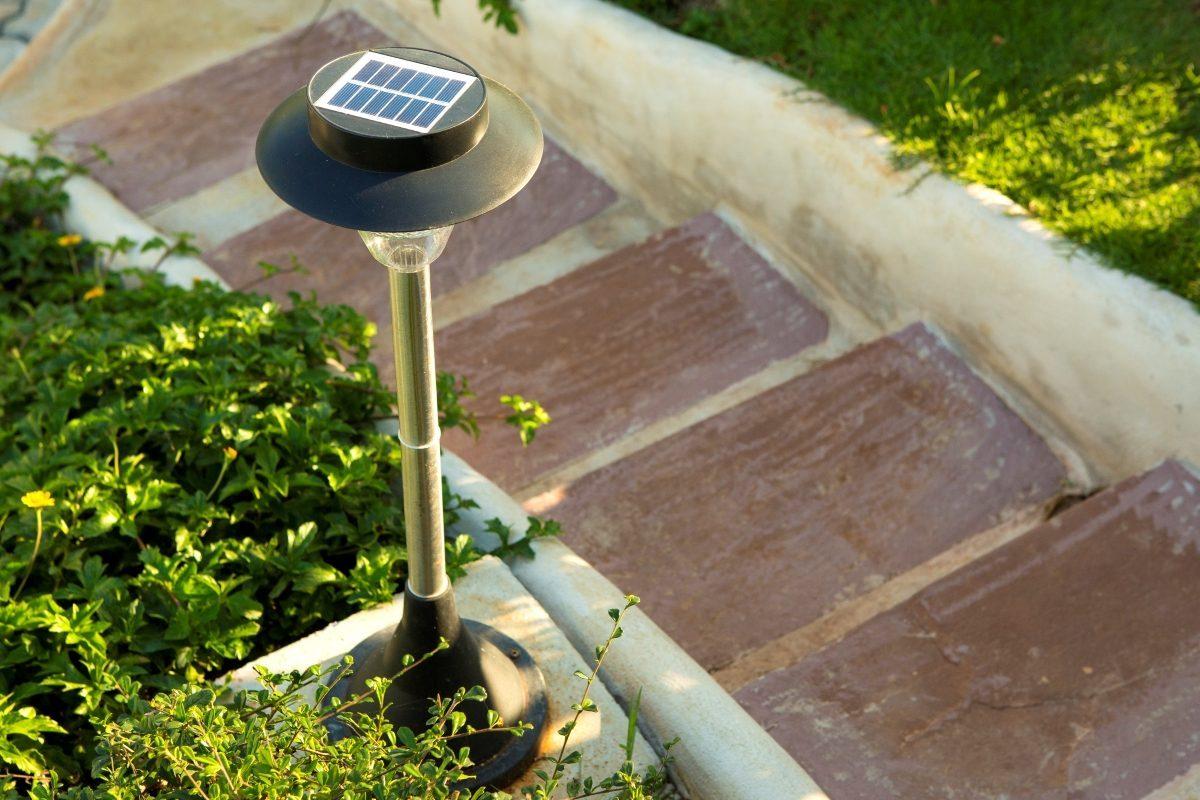
1. Determine the spacing: Start by deciding the distance between each solar light along the pathway or walkway. The spacing will depend on the length of the path and the brightness of the lights. As a general guideline, aim for approximately 3 to 4 feet between each light.
2. Mark the locations: Use garden stakes or small flags to mark the spots where you intend to place the solar lights. This will serve as a guide during the installation process and ensure an even and consistent placement.
3. Prepare the ground: If the pathway or walkway has loose soil or mulch, use a small spade or trowel to create a small hole or trench for each solar light. Make sure the hole is deep enough to secure the light and keep it stable.
4. Install the solar lights: Depending on the design of the solar lights, either stick the stake into the prepared hole, or place the light directly into the trench. Gently press down to ensure the light is secured in place.
5. Adjust the angle: If the solar lights have adjustable heads, tilt them to the desired angle. This will allow you to direct the light onto the pathway for maximum visibility and safety.
6. Test the lights: After installing the solar lights, turn them on to verify that they are functioning properly. Check that the lights illuminate and adjust any angles if necessary.
7. Allow time to charge: Before expecting the solar lights to provide optimal illumination, give them a day or two to fully charge their batteries. This will ensure that they have enough power to operate effectively at night.
8. Fine-tune the placement: Once the solar lights have charged, take a walk along the pathway or walkway at night to assess their performance. Make any necessary adjustments to the angle or placement of the lights to achieve the desired lighting effect.
9. Regular maintenance: Periodically check the solar lights for debris, such as leaves or dirt, that may obstruct the solar panels. Keep the panels clean to maximize their efficiency and ensure proper charging.
By following these steps, you can successfully place solar lights in your pathways and walkways, creating an enchanting and well-lit outdoor experience. The soft and inviting glow of the solar lights will guide you and your guests throughout your garden, all while adding a touch of charm and sophistication to your landscape design.
When placing solar lights in landscaping, make sure to position them in areas that receive direct sunlight for at least 6-8 hours a day. This will ensure that the solar panels can charge fully and provide bright illumination at night.
Accentuating Garden Features with Solar Lights
One of the most effective ways to elevate the overall beauty and ambiance of your garden is by accentuating its features with solar lights. Whether it’s a stunning statue, a bubbling water feature, or a vibrant flower bed, the strategic placement of solar lights can highlight these elements and create a captivating visual display. Here are some steps to effectively accentuate your garden features with solar lights:
1. Identify the focal points: Begin by identifying the focal points of your garden that you want to highlight. These could be statues, sculptures, architectural features, or any other elements that make your garden unique and visually appealing.
2. Plan your lighting scheme: Determine the type of lighting that will best showcase each garden feature. For statues and sculptures, consider using spotlights that can be placed at the base or positioned to shine directly onto the artwork. For water features, opt for underwater solar lights or floating solar lights to create a magical effect.
3. Install the solar lights: Once you have decided on the types of solar lights to use, carefully install them around the garden features. Securely position the lights according to your plan, ensuring they are stable and angled correctly to highlight the focal point effectively.
4. Experiment with lighting angles: Play with different angles and positions of the solar lights to find the most flattering and dramatic effect for each garden feature. Adjust the direction of the light to focus on specific details or to create captivating shadows.
5. Consider different light colors: Explore solar lights with different color options to add a unique touch to your garden. Warm white lights can create a cozy and inviting atmosphere, while colored lights can add a playful or dramatic effect to certain features.
6. Test the lighting at night: Wait until evening to see how the solar lights illuminate your garden features. Make any necessary adjustments to the position or angle of the lights to achieve the desired effect. Pay attention to any areas that may need additional lighting or areas that may require less illumination.
7. Maintain the solar lights: Regularly clean the solar panels to ensure optimal performance. Remove any debris or dirt that may accumulate on the panels, as it can interfere with their ability to charge and provide sufficient light.
8. Experiment and adapt: Don’t be afraid to experiment and adapt your lighting scheme as your garden evolves. As plants grow and change, you may need to adjust the position, angle, or type of solar lights to continue accentuating your garden features effectively.
By accentuating your garden features with solar lights, you create a visually captivating and enchanting outdoor space. The carefully placed lights will draw attention to the unique elements of your garden, allowing you to enjoy their beauty even after the sun sets.
Illuminating Trees and Shrubs with Solar Lights
Illuminating trees and shrubs with solar lights can add depth, drama, and a touch of enchantment to your garden. By strategically placing solar lights around these elements, you can create a magical nighttime atmosphere and showcase the natural beauty of your landscape. Follow these steps to effectively illuminate your trees and shrubs with solar lights:
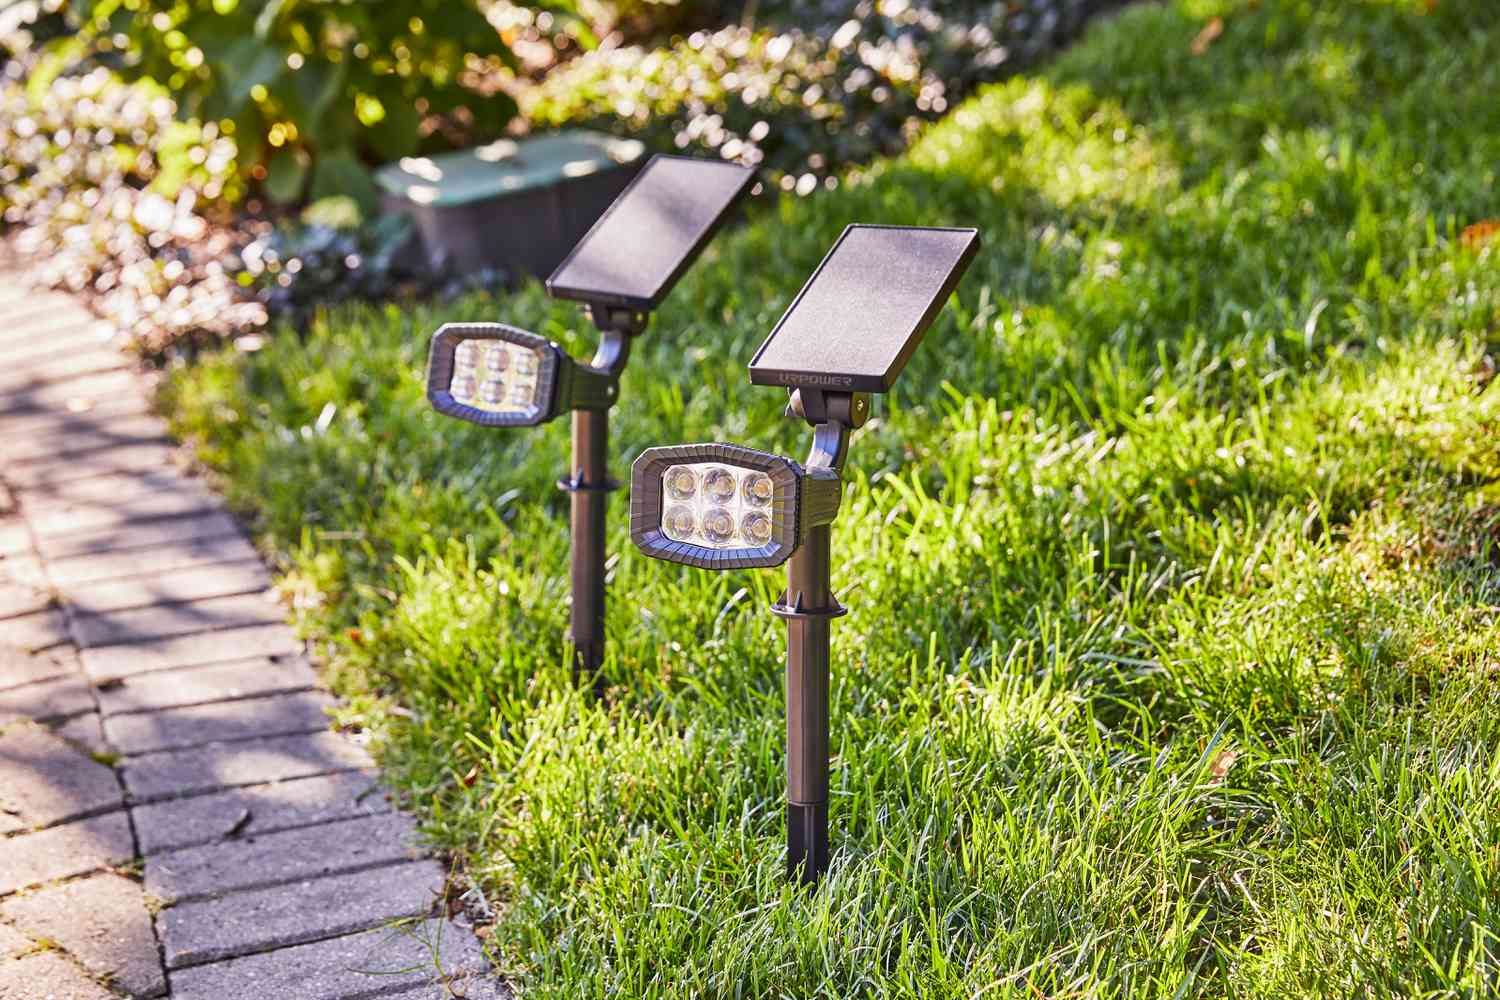
1. Select the right type of solar lights: Choose solar lights that are designed specifically for accentuating trees and shrubs. Spotlights with adjustable heads or uplights that can be placed at the base of the plants are ideal options. Look for solar lights with a warm white or cool white light color for a natural and elegant effect.
2. Identify the trees and shrubs for illumination: Determine which trees and shrubs in your garden you want to highlight. Consider the size, shape, and unique features of each plant and choose those that will create the most impact when illuminated at night.
3. Position the solar lights: Place the solar lights at the base of the trees or in the soil near the shrubs. Aim the lights upwards to create a dramatic uplighting effect that highlights the branches, leaves, and textures of the plants. For larger trees, you may need to use multiple solar lights to evenly illuminate the canopy.
4. Adjust the angle and distance: Experiment with the angle, distance, and height of the solar lights to achieve the desired effect. Aim the lights to accentuate specific parts of the trees or shrubs, such as interesting branch formations or colorful flowers. Be mindful of any potential obstructions, such as other plants or structures, that may block the light and cast unwanted shadows.
5. Test the lighting at night: Wait until it’s dark to properly assess how the solar lights illuminate the trees and shrubs. Make any necessary adjustments to the positioning and angles to ensure that the intended features are accentuated and the lighting is evenly distributed.
6. Experiment with different lighting techniques: Vary the lighting techniques to create different effects in your garden. For example, string lights wrapped around the trunk of a tree can create a whimsical and inviting atmosphere. Or try using pathway lights to cast a soft glow on shrub borders, adding depth and visual interest.
7. Maintain the solar lights: Regularly clean the solar panels to ensure optimal charging and performance. Trim any overgrown branches or foliage that may block the light. Replace batteries as needed to ensure that the solar lights will operate at their best.
8. Consider safety and energy efficiency: If you plan to illuminate trees near walkways or paths, ensure that the lighting does not obstruct visibility or create hazards. Opt for solar lights with motion sensors or timers to conserve energy and only activate when needed.
By illuminating trees and shrubs with solar lights, you can create a breathtaking and captivating display in your garden. The gentle glow accentuates the natural beauty of these plants, adding a touch of magic to your outdoor space while highlighting the unique features of your landscape.
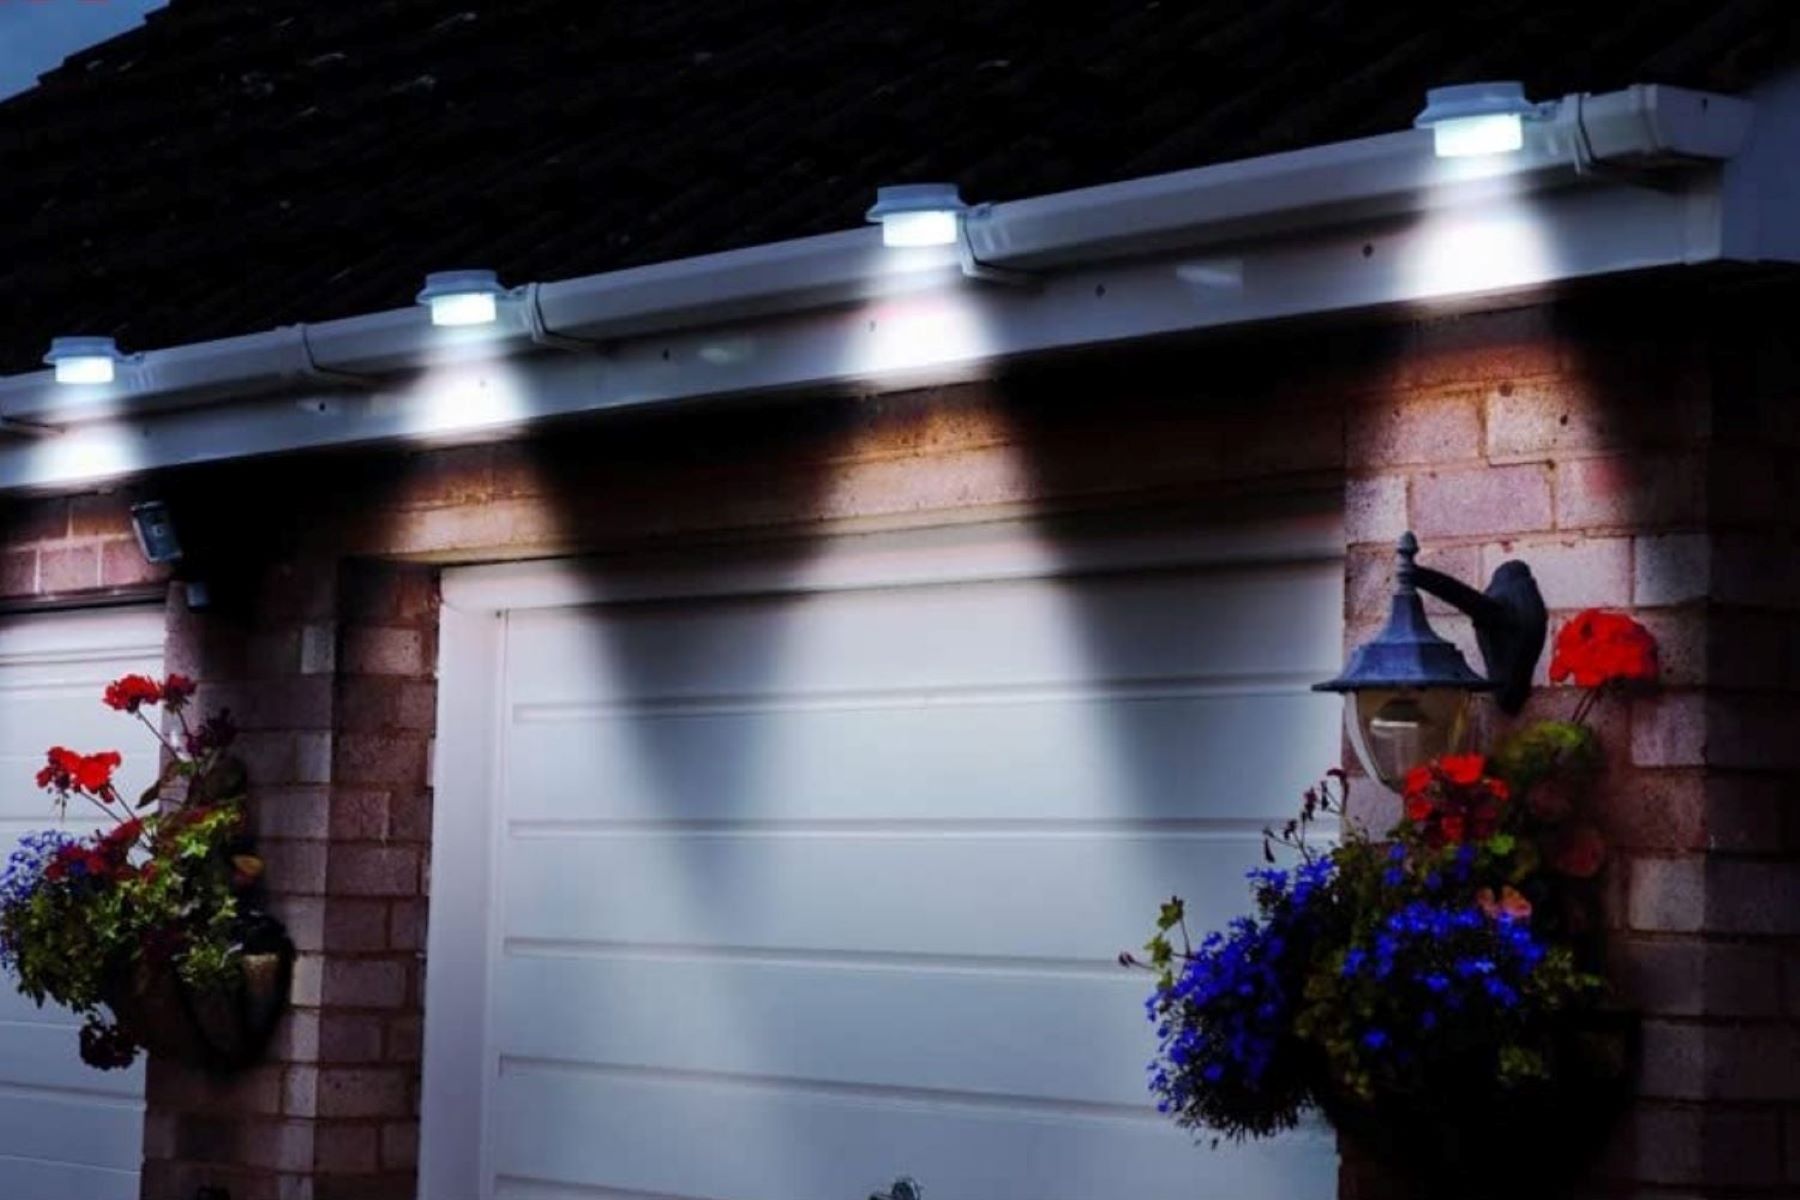
Enhancing Outdoor Structures with Solar Lights
If you have outdoor structures such as patios, gazebos, or pergolas in your garden, incorporating solar lights can transform them into cozy and inviting spaces. These lights not only enhance the functionality of these structures but also add a touch of ambiance and elegance to your outdoor living areas. Here are some steps to effectively enhance your outdoor structures with solar lights:
1. Determine the purpose: Consider the specific purpose and function of each outdoor structure. Do you want to create a relaxed and cozy seating area, or do you envision a well-lit space for entertaining guests? Understanding the purpose will help you choose the right type of solar lights and determine their placement.
2. Choose the appropriate solar lights: Select solar lights that are suitable for your outdoor structures. Options include string lights, lanterns, wall-mounted lights, or even solar-powered chandeliers. Consider the style and design of the structure to choose solar lights that complement its aesthetic.
3. Position the lights strategically: Determine where you want to place the solar lights on or around the outdoor structure. For string lights, drape them along the beams or perimeter of the structure to create a whimsical and inviting atmosphere. Wall-mounted lights can provide focused illumination on seating areas or entry points.
4. Consider the angle and direction of light: Adjust the angle and direction of the solar lights to achieve the desired lighting effect. For seating areas, position the lights to provide adequate illumination without creating glare. Aim the lights towards the center or focal point of the structure to create a warm and welcoming glow.
5. Test the lighting at night: Wait until it’s dark to verify that the solar lights are illuminating the outdoor structures effectively. Make any necessary adjustments to the placement or angles to achieve the desired ambiance. Take into account any specific areas that may require additional lighting, such as steps or walkways.
6. Add accent lighting: Consider adding accent lighting to highlight specific features of the outdoor structures. For example, use spotlights to illuminate architectural details or use solar-powered lanterns to create a cozy and intimate atmosphere.
7. Ensure proper charging: Ensure that the solar panels of the lights receive enough sunlight during the day. Trim any nearby branches or foliage that may obstruct the sunlight. Regularly clean the solar panels to maintain optimal charging and performance.
8. Utilize additional features: Some solar lights come with additional features such as motion sensors or timers. These features can enhance the functionality and energy efficiency of your outdoor lighting. Adjust the settings to fit your preferences and maximize the convenience of your outdoor space.
By enhancing your outdoor structures with solar lights, you can create a welcoming and magical environment in your garden. The soft and enchanting glow will transform your outdoor living areas into inviting spaces that can be enjoyed day and night, allowing you to make the most of your garden and outdoor structures.
Read more: How To Store Solar Lights
Maintenance and Troubleshooting Tips
Proper maintenance of your solar lights is essential to ensure their longevity and optimal performance. Additionally, knowing how to troubleshoot common issues can help you quickly resolve any problems that may arise. Here are some maintenance and troubleshooting tips for your solar lights:
1. Regularly clean the solar panels: Keep the solar panels clean and free from dust, dirt, and debris. Wipe them gently with a damp cloth or sponge to maximize sunlight absorption and maintain efficient charging.
2. Check for obstructions: Regularly inspect the lights to ensure that there are no obstructions blocking the solar panels or lights. Trim any overgrown branches or foliage that may cast shadows or interfere with the light projection.
3. Replace batteries when necessary: If your solar lights start to dim or stop working altogether, it may be an indication that the batteries need to be replaced. Follow the manufacturer’s instructions to safely replace the batteries with fresh ones of the correct type.
4. Examine the wiring connections: Inspect the wiring connections of your solar lights to ensure they are secure and free from any corrosion or damage. Loose or faulty connections can interfere with the proper functioning of the lights.
5. Check the ON/OFF switch: Some solar lights come with an ON/OFF switch. Ensure that the switch is in the correct position for the lights to turn on and off as intended.
6. Optimize sunlight exposure: If your solar lights are not charging properly, check if they are positioned in an area that receives sufficient sunlight during the day. If needed, move the lights to a sunnier spot to improve their charging efficiency.
7. Adjust the solar light settings: Solar lights with additional features such as motion sensors or timers may have adjustable settings. Consult the user manual to understand how to adjust these settings to meet your preferences and save energy.
8. Test the lights periodically: Regularly turn on the lights at night to verify that they are functioning as expected. If any lights are not working, troubleshoot the issue using the manufacturer’s instructions or contact customer support for assistance.
9. Replace faulty components: In the event of a damaged or malfunctioning component, contact the manufacturer for replacement parts or professional assistance. Avoid attempting to repair the lights yourself unless you have the appropriate knowledge and skills.
10. Store lights during harsh weather: If you experience severe weather conditions such as storms or heavy snowfall, it’s advisable to temporarily remove and store your solar lights to protect them from damage. This will help prolong their lifespan.
By following these maintenance and troubleshooting tips, you can ensure that your solar lights remain in optimal condition and continue to illuminate your garden effectively. Regular maintenance and prompt troubleshooting will help extend the lifespan of your solar lights and ensure that you enjoy their benefits for years to come.
Conclusion
Solar lights are a fantastic and eco-friendly option to illuminate your garden and enhance its beauty. By carefully choosing the right solar lights, assessing your landscaping needs, and determining their ideal placement, you can create a stunning outdoor space that can be enjoyed day and night.
Whether you are lighting pathways and walkways, accentuating garden features, illuminating trees and shrubs, or enhancing outdoor structures, solar lights offer a versatile and convenient solution. They harness the power of the sun to provide illumination without the need for electricity, reducing energy consumption and minimizing environmental impact.
Proper maintenance and troubleshooting are also crucial to ensure the longevity and optimal performance of your solar lights. Regular cleaning of the solar panels, checking for obstructions, and replacing batteries when necessary will help keep your lights functioning at their best.
Remember to continually assess and adjust your lighting scheme as your garden evolves. By experimenting with different placements, angles, and types of solar lights, you can create unique and captivating lighting effects that truly highlight the beauty of your garden.
As you embark on your journey to place solar lights in your landscaping, let your creativity guide you. Create an enchanting atmosphere, invite guests to enjoy your outdoor space, and immerse yourself in the beauty of a garden that comes alive at night.
With the right selection, placement, and maintenance of solar lights, your garden will become a breathtaking sanctuary that seamlessly blends natural beauty with sustainable lighting solutions.
Frequently Asked Questions about How To Place Solar Lights In Landscaping
Was this page helpful?
At Storables.com, we guarantee accurate and reliable information. Our content, validated by Expert Board Contributors, is crafted following stringent Editorial Policies. We're committed to providing you with well-researched, expert-backed insights for all your informational needs.


0 thoughts on “How To Place Solar Lights In Landscaping”