Home>Furniture & Design>Outdoor Furniture>How To Fix Outdoor Solar Lights
Outdoor Furniture
How To Fix Outdoor Solar Lights
Modified: August 16, 2024
Learn how to easily fix outdoor solar lights and enhance your outdoor furniture and design with our expert tips. Keep your outdoor space well-lit and stylish!
(Many of the links in this article redirect to a specific reviewed product. Your purchase of these products through affiliate links helps to generate commission for Storables.com, at no extra cost. Learn more)
Introduction
Welcome to the world of outdoor solar lights! These innovative and eco-friendly lighting solutions have transformed the way we illuminate our outdoor spaces. Whether you're looking to enhance the ambiance of your garden, patio, or walkway, outdoor solar lights offer a cost-effective and sustainable lighting option. However, like any technology, solar lights may encounter issues over time. Fear not! This comprehensive guide will walk you through the troubleshooting process, equipping you with the knowledge and skills to revive your outdoor solar lights and bask in their radiant glow once again.
From checking the solar panel and cleaning it to replacing batteries and inspecting the LED bulbs, we'll delve into the essential steps to revive your outdoor solar lights. Additionally, we'll explore the significance of proper positioning and sunlight exposure, shedding light on the factors that can influence the performance of your solar lights. By the end of this guide, you'll be well-versed in the art of troubleshooting outdoor solar lights, ensuring that your outdoor spaces remain beautifully illuminated with minimal maintenance.
So, grab your toolkit and get ready to embark on a journey to resurrect your outdoor solar lights. With a little know-how and a touch of DIY magic, you'll soon be enjoying the enchanting radiance of your solar-powered outdoor lights once more. Let's dive in and illuminate the path to outdoor lighting bliss!
Key Takeaways:
- Keep your outdoor solar lights shining bright by regularly cleaning the solar panel and ensuring it has unobstructed exposure to sunlight. This simple maintenance step can revive their radiant glow.
- Revive your outdoor solar lights by replacing the batteries and checking the LED bulbs, sensor, and switch. Optimizing their positioning for sunlight exposure ensures consistent, enchanting illumination.
Read more: How Do Outdoor Solar Lights Work?
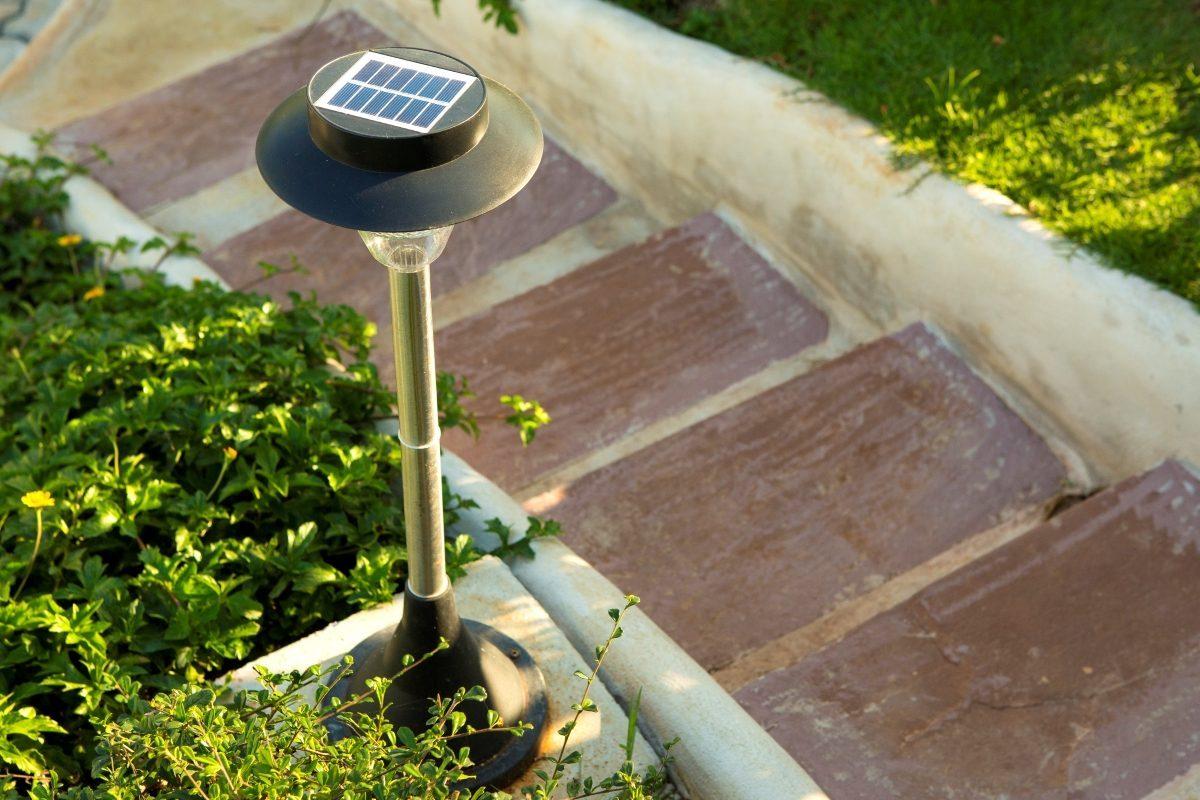
Check the Solar Panel
When your outdoor solar lights start to dim or stop working altogether, the solar panel is a crucial component to inspect. Over time, the solar panel may become obstructed by dirt, dust, or other debris, hindering its ability to harness sunlight and convert it into energy. To troubleshoot the solar panel, begin by conducting a visual inspection. Look for any signs of physical damage, such as cracks or corrosion, that may be impeding its functionality.
Next, ensure that the solar panel is positioned correctly to receive an adequate amount of sunlight. Ideally, the panel should be facing south in the northern hemisphere and north in the southern hemisphere to capture the maximum sunlight exposure throughout the day. If the panel is shaded by nearby objects, such as trees or structures, consider relocating the lights to a sunnier spot to optimize their performance.
Furthermore, check for any potential shading caused by accumulated grime or foliage. Even a thin layer of dirt can diminish the solar panel’s efficiency, so gently clean the surface using a soft cloth or a mild detergent solution. Be mindful not to use abrasive materials that could scratch the panel.
If the solar panel appears to be in good condition and free of obstructions, it’s time to move on to the next troubleshooting step. By examining the solar panel and ensuring its unobstructed exposure to sunlight, you’re taking the first essential stride toward reviving your outdoor solar lights and restoring their luminous charm.
Clean the Solar Panel
When it comes to troubleshooting outdoor solar lights, one of the most impactful and often overlooked steps is cleaning the solar panel. Over time, dust, dirt, and other environmental debris can accumulate on the surface of the solar panel, diminishing its ability to absorb sunlight and convert it into energy. This can lead to reduced performance and even complete malfunction of the lights. Fortunately, a thorough cleaning can often rejuvenate the solar panel and restore its efficiency.
To begin the cleaning process, carefully remove the solar panel from the light fixture, following the manufacturer’s instructions. Once detached, inspect the panel for any visible dirt, dust, or residue. If the buildup is minimal, a gentle wipe with a soft, clean cloth may suffice. However, if the panel is heavily soiled, a mild detergent solution and a non-abrasive sponge can be used to remove stubborn grime.
It’s important to avoid using harsh chemicals or abrasive materials, as these can damage the delicate surface of the solar panel. Opt for a mild soap or specialized solar panel cleaner if necessary. Additionally, ensure that the panel is completely dry before reattaching it to the light fixture to prevent any potential damage or electrical hazards.
Regularly incorporating solar panel cleaning into your maintenance routine can significantly prolong the lifespan of your outdoor solar lights and optimize their performance. By keeping the panel free from obstructions and debris, you’ll maximize its sunlight absorption, allowing your lights to shine brightly and consistently illuminate your outdoor spaces.
By taking the time to clean the solar panel, you’re not only addressing a common issue that affects solar light functionality but also investing in the longevity and effectiveness of your outdoor lighting system. With a sparkling clean solar panel, your outdoor solar lights will be primed to radiate their enchanting glow once more.
Replace the Batteries
When outdoor solar lights begin to exhibit dim or inconsistent illumination, the culprit may often be the rechargeable batteries. Over time, these batteries can degrade and lose their ability to hold a charge, diminishing the overall performance of the lights. Fortunately, replacing the batteries is a relatively straightforward and cost-effective solution to breathe new life into your solar lights.
Before proceeding with battery replacement, it’s essential to identify the type of batteries used in your solar lights. Most outdoor solar lights are equipped with rechargeable AA, AAA, or lithium-ion batteries. Refer to the manufacturer’s instructions or the product specifications to determine the appropriate battery type and voltage required for your lights.
Once you’ve identified the correct replacement batteries, carefully remove the existing ones from the light fixture. Take note of their orientation and the configuration of any connecting wires to ensure proper installation of the new batteries. Dispose of the old batteries according to local regulations for safe and environmentally responsible recycling.
When inserting the new batteries, pay close attention to the polarity markings to ensure they are positioned correctly. Improper battery orientation can lead to malfunction or damage to the light fixture. After securely installing the new batteries, reassemble the light fixture and place it in a location where it can receive ample sunlight to initiate the charging process.
By replacing the batteries with fresh, fully charged ones, you’re poised to reignite the brilliance of your outdoor solar lights. This simple yet impactful maintenance task can extend the lifespan of your lights and ensure consistent, reliable performance, allowing you to continue enjoying the captivating illumination they provide.
By addressing the battery component of your solar lights, you’re not only resolving potential issues with dim or erratic operation but also fortifying the foundation of their sustainable energy system. With new batteries in place, your outdoor solar lights are primed to shine brightly and infuse your outdoor spaces with their enchanting radiance once more.
To fix outdoor solar lights, first check the batteries and replace if needed. Clean the solar panel and ensure it’s getting enough sunlight. If the light still doesn’t work, consider replacing the LED bulb.
Check the LED Bulbs
When troubleshooting outdoor solar lights, it’s essential to inspect the LED bulbs, as they are integral to the illumination process. Dim or non-functioning lights may indicate issues with the LED bulbs, ranging from loose connections to component failure. By examining the bulbs, you can identify and address potential issues that may be affecting the overall performance of your solar lights.
Begin by carefully removing the cover or casing that houses the LED bulbs, following the manufacturer’s instructions. Once exposed, visually inspect the bulbs for any signs of physical damage, such as cracks, discoloration, or corrosion. Additionally, check for loose or frayed wiring that may be impeding the electrical connection to the bulbs.
If the bulbs appear to be in good condition and the wiring is secure, it’s time to test their functionality. This can be done using a multimeter or by temporarily swapping the bulbs with known-working ones from another fixture. Testing the bulbs in this manner can help determine whether they are the source of the lighting issue or if the problem lies elsewhere in the solar light system.
In the event that the LED bulbs are found to be faulty, it’s advisable to replace them with compatible, high-quality replacements. Refer to the product specifications or seek guidance from the manufacturer to ensure that the replacement bulbs are suitable for your specific solar light model. When installing the new bulbs, exercise caution to avoid damaging the delicate components and ensure a secure, proper connection.
By thoroughly examining and, if necessary, replacing the LED bulbs, you’re taking proactive steps to maintain the optimal functionality of your outdoor solar lights. Addressing any issues related to the bulbs can result in consistent, vibrant illumination that enhances the ambiance of your outdoor spaces, allowing you to fully appreciate the beauty and practicality of solar-powered lighting.
By focusing on the LED bulbs, you’re not only troubleshooting potential lighting issues but also contributing to the longevity and reliability of your outdoor solar lights. With a keen eye and a proactive approach, your solar lights will soon be aglow, casting a warm and inviting radiance over your outdoor environment.
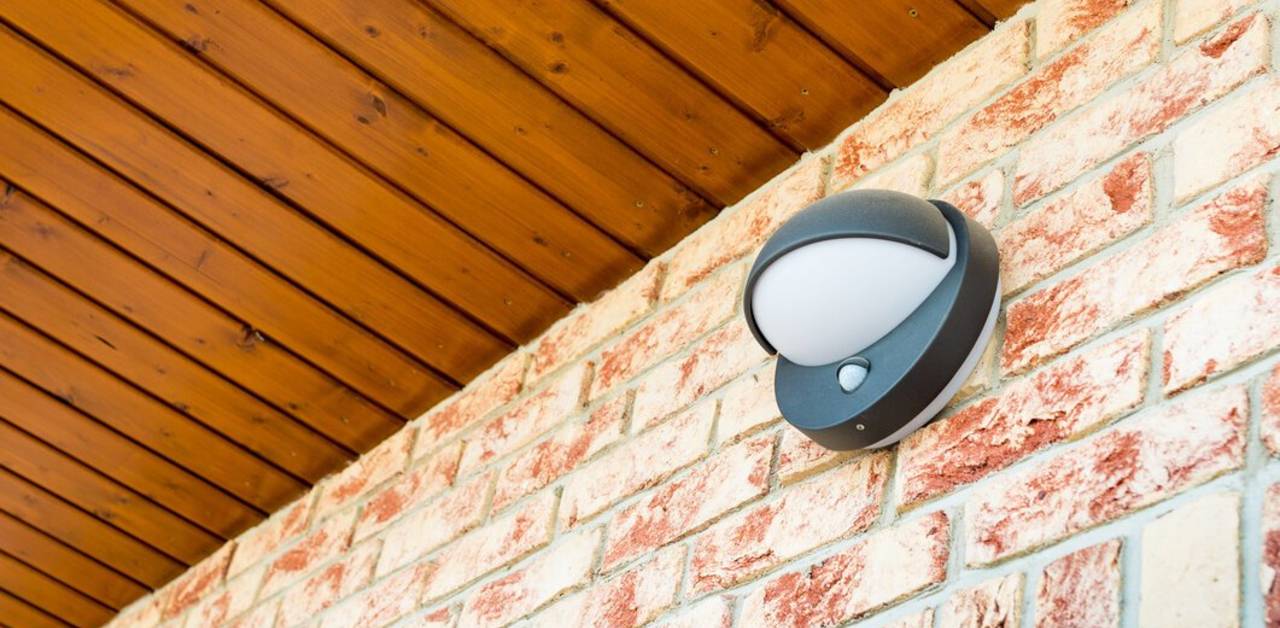
Check the Sensor and Switch
As you troubleshoot your outdoor solar lights, it’s important to pay attention to the sensor and switch, which play pivotal roles in controlling the light’s operation. Issues related to the sensor or switch can lead to erratic behavior, such as the lights not turning on at night or remaining illuminated during the day. By examining these components, you can identify and address potential issues that may be affecting the overall functionality of your solar lights.
Start by locating the sensor and switch on the light fixture. The sensor is typically a small, circular component that detects ambient light levels, while the switch allows for manual control or adjustment of the light’s settings. Inspect these components for any visible damage, such as corrosion, loose connections, or signs of wear and tear. Additionally, ensure that the sensor is free from obstructions that may be interfering with its ability to detect light changes.
If your solar lights have a manual switch, ensure that it is in the correct position for automatic operation, typically labeled as “Auto” or “On.” If the switch is in the correct position and the lights still fail to function as expected, it may indicate a fault in the sensor’s functionality.
To test the sensor, cover it with a dark, opaque material, such as tape or a cloth, to simulate nighttime conditions. If the lights activate when the sensor is covered, it indicates that the sensor is likely functioning properly. Conversely, if the lights remain unresponsive, the sensor may require further inspection or potential replacement.
If your solar lights feature adjustable settings, such as sensitivity or duration controls, take the opportunity to fine-tune these parameters to optimize the lights’ performance according to your preferences and environmental conditions.
By thoroughly examining the sensor and switch, you’re actively engaging in the troubleshooting process and addressing potential issues that may be affecting the functionality of your outdoor solar lights. By ensuring that these components are in optimal working condition, you can enjoy consistent and reliable illumination that enhances the beauty and functionality of your outdoor spaces.
By focusing on the sensor and switch, you’re not only troubleshooting potential issues but also contributing to the longevity and reliability of your outdoor solar lights. With a keen eye and a proactive approach, your solar lights will soon be aglow, casting a warm and inviting radiance over your outdoor environment.
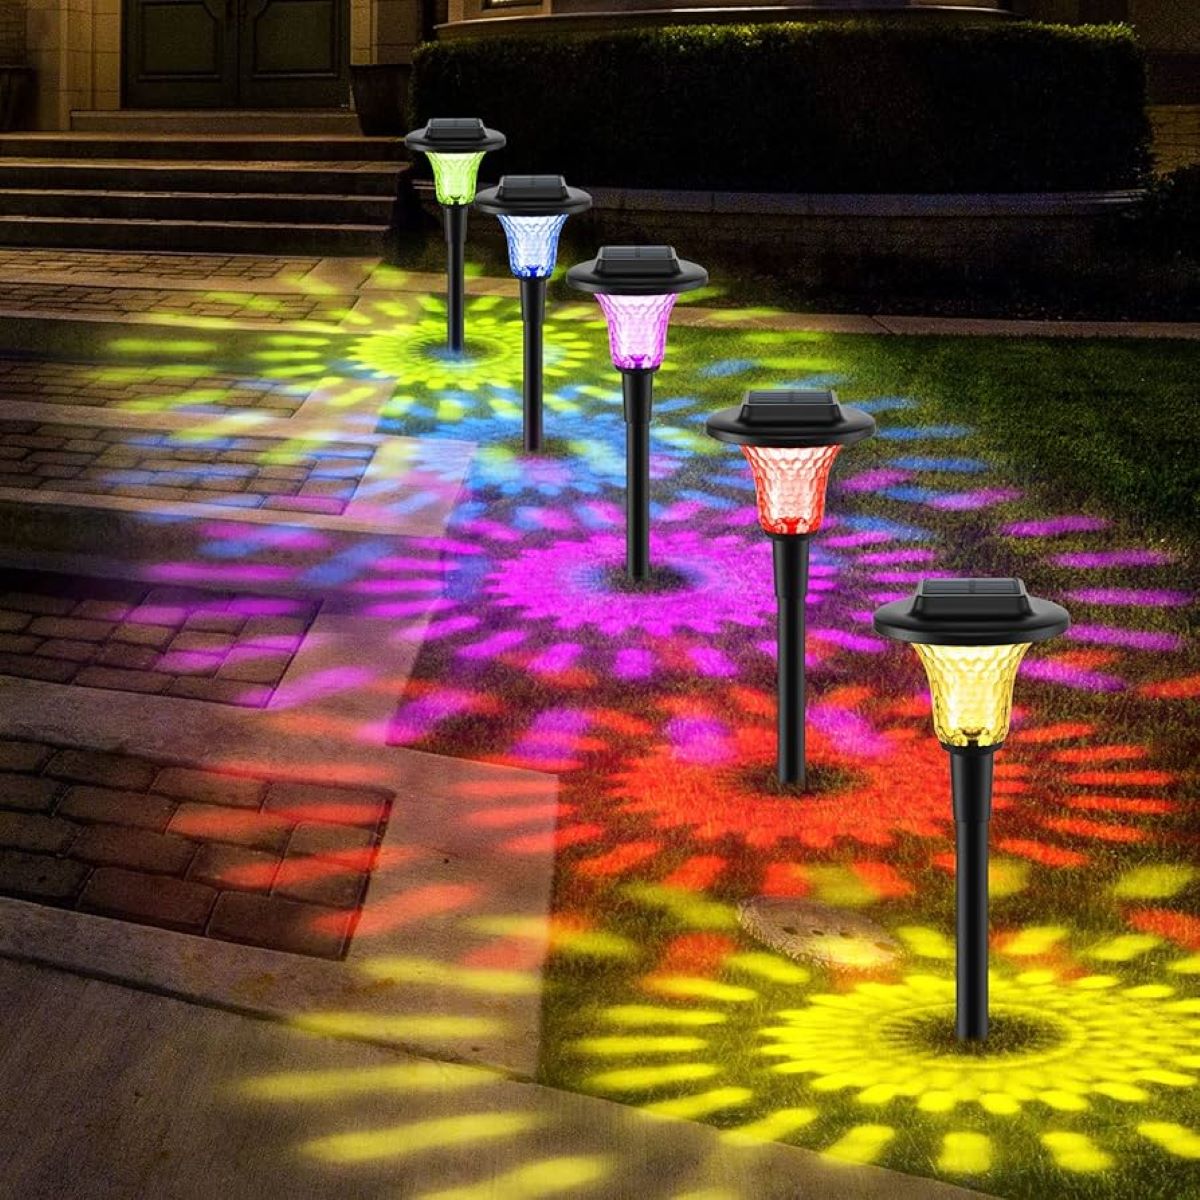
Positioning and Sunlight
Proper positioning and adequate sunlight exposure are pivotal factors in ensuring the optimal performance of your outdoor solar lights. The positioning of the lights and the unobstructed access to sunlight are essential for harnessing solar energy and maintaining consistent illumination throughout the night. By paying attention to these elements, you can maximize the efficiency and effectiveness of your solar lighting system.
Start by evaluating the placement of your solar lights. Ensure that they are positioned in areas that receive ample sunlight during the day, free from obstructions such as overhanging branches, structures, or other objects that may cast shadows and limit solar exposure. Ideally, the solar panels should face south in the northern hemisphere and north in the southern hemisphere to capture the maximum sunlight throughout the day.
If your outdoor space experiences seasonal changes in sunlight patterns, consider adjusting the positioning of the lights to accommodate these variations. By periodically assessing and optimizing the placement of the lights, you can adapt to the shifting angles of sunlight and maintain consistent performance throughout the year.
In addition to positioning, it’s important to keep the solar panels clean and free from debris, as discussed earlier. Regularly inspect the panels and remove any accumulated dirt or grime to ensure unhindered sunlight absorption, allowing the lights to charge efficiently and operate at their full potential.
Furthermore, consider the impact of ambient lighting sources, such as streetlights or neighboring properties, on the performance of your solar lights. Excessive ambient light at night can interfere with the activation of the lights’ sensors, potentially affecting their functionality. Adjust the positioning or sensitivity settings of the lights to minimize the influence of external light sources and optimize their performance in varying nighttime conditions.
By prioritizing the positioning and sunlight exposure of your outdoor solar lights, you’re actively contributing to their consistent and reliable operation. By optimizing these factors, you can ensure that your outdoor spaces are illuminated with enchanting radiance, enhancing their beauty and ambiance while maximizing the benefits of solar-powered lighting.
By focusing on the positioning and sunlight exposure of your solar lights, you’re not only optimizing their performance but also embracing the sustainable and eco-friendly advantages of solar-powered illumination. With careful attention to these elements, your outdoor solar lights will continue to shine brightly, enriching your outdoor environment with their captivating glow.
Conclusion
Congratulations on embarking on the journey to troubleshoot and revive your outdoor solar lights! By delving into the essential steps outlined in this guide, you’ve equipped yourself with the knowledge and skills to address common issues and maintain the optimal functionality of your solar lighting system. From inspecting the solar panel and cleaning it to replacing batteries, checking the LED bulbs, examining the sensor and switch, and optimizing the positioning for sunlight exposure, you’ve embraced the art of troubleshooting with confidence and resourcefulness.
As you’ve discovered, the solar panel serves as the lifeblood of your outdoor solar lights, capturing sunlight and converting it into energy to power the illumination. By ensuring its unobstructed exposure to sunlight and keeping it clean, you’ve taken a crucial step toward revitalizing your lights and allowing them to shine brightly once more.
Additionally, the maintenance and replacement of batteries play a pivotal role in sustaining the energy storage capacity of your solar lights. By addressing the battery component, you’ve fortified the foundation of your lighting system and ensured consistent, reliable performance that will continue to enhance your outdoor spaces.
Inspecting the LED bulbs, sensor, and switch has empowered you to identify and resolve potential issues that may affect the functionality of your solar lights. By paying attention to these integral components, you’ve demonstrated a proactive approach to troubleshooting and maintenance, safeguarding the longevity and effectiveness of your solar lighting system.
Furthermore, by optimizing the positioning of your solar lights and prioritizing sunlight exposure, you’ve embraced the dynamic relationship between solar energy and efficient illumination. Your commitment to positioning the lights for maximum sunlight exposure ensures that they continue to radiate their enchanting glow, enhancing the beauty and functionality of your outdoor environment.
By successfully navigating the troubleshooting process and implementing the necessary maintenance steps, you’ve not only revived your outdoor solar lights but also deepened your appreciation for the sustainable and eco-friendly benefits of solar-powered illumination. Your dedication to maintaining and optimizing your solar lighting system reflects a commitment to sustainable living and a harmonious relationship with the environment.
As you bask in the renewed radiance of your outdoor solar lights, may their luminous charm illuminate your outdoor spaces with enchanting brilliance, creating a warm and inviting ambiance for you and your guests to enjoy. With your newfound expertise in troubleshooting and maintenance, you’re well-prepared to ensure that your solar lights continue to shine brightly, enriching your outdoor environment for years to come.
Frequently Asked Questions about How To Fix Outdoor Solar Lights
Was this page helpful?
At Storables.com, we guarantee accurate and reliable information. Our content, validated by Expert Board Contributors, is crafted following stringent Editorial Policies. We're committed to providing you with well-researched, expert-backed insights for all your informational needs.


0 thoughts on “How To Fix Outdoor Solar Lights”