
Articles
How To Install Outdoor Landscape Lighting
Modified: October 19, 2024
Learn how to install outdoor landscape lighting with our comprehensive articles. Illuminate your outdoor space and enhance its beauty.
(Many of the links in this article redirect to a specific reviewed product. Your purchase of these products through affiliate links helps to generate commission for Storables.com, at no extra cost. Learn more)
Introduction
Welcome to the world of outdoor landscape lighting! Adding lighting to your outdoor space not only enhances its beauty but also provides safety and security. Whether you want to illuminate your garden, patio, walkway, or any other outdoor area, this comprehensive guide will walk you through the process of installing outdoor landscape lighting.
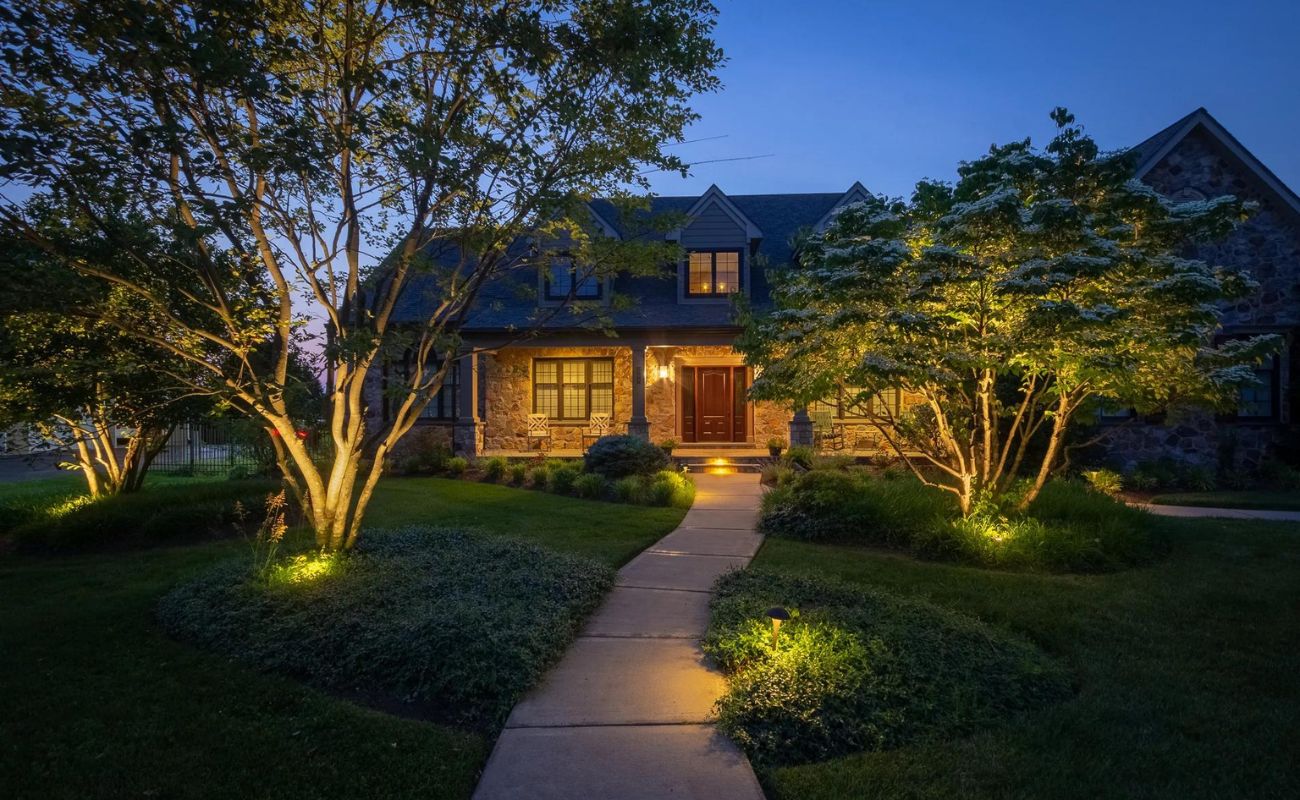
Outdoor lighting not only enhances the aesthetics of your home but also adds functionality by enabling you to enjoy your outdoor space during the evening hours. By strategically placing lights around your landscape, you can create a warm and inviting ambiance that extends the usability of your outdoor area.
Before diving into the installation process, it’s essential to plan your outdoor landscape lighting project. Consider the specific areas you want to illuminate and the overall effect you want to achieve. This will help determine the type and placement of lighting fixtures you need.
In this article, we will guide you through each step of the process, from planning and gathering materials to installing the fixtures, wiring, and connecting the lighting to a power source. We’ll also cover testing and troubleshooting, as well as essential maintenance tips to ensure your outdoor landscape lighting stays in optimal condition.
Throughout the article, we will provide useful insights to help you optimize your outdoor lighting installation for search engines. By incorporating specific keywords and following SEO best practices, your article will not only engage readers but also increase its visibility in search engine results.
So, without further ado, let’s dive into the wonderful world of outdoor landscape lighting and learn how to transform your outdoor space into a breathtaking oasis.
Key Takeaways:
- Proper planning, gathering materials, and preparing the lighting layout are crucial steps in installing outdoor landscape lighting. Careful consideration of lighting goals and fixture placement ensures a balanced and visually appealing illumination.
- Regular maintenance, including cleaning fixtures, inspecting for damage, and testing the system, is essential for preserving the longevity and performance of outdoor landscape lighting. Prioritizing safety and seeking professional assistance when needed ensures a safe and reliable installation.
Step 1: Planning your outdoor landscape lighting
Planning is a crucial first step in any outdoor landscape lighting project. It allows you to envision the desired outcome and ensures that you choose the right lighting fixtures and placement for your specific needs. Here are some steps to follow when planning your outdoor landscape lighting:
- Assess your outdoor space: Take a thorough look at your outdoor space during both daytime and nighttime. Observe the areas that you want to highlight and the ones that require additional lighting for safety and security. This will help you identify the key focal points and determine the types of lighting fixtures you need.
- Determine your lighting goals: Consider the purpose of your outdoor lighting. Do you want to create a warm and inviting atmosphere? Are you looking to highlight specific architectural features or landscape elements? Understanding your lighting goals will guide your choices in terms of fixture types, placement, and intensity.
- Create a lighting plan: Sketch out a layout of your outdoor space and mark the areas where you want to install lighting fixtures. Consider factors such as pathways, plants, trees, and focal points. This plan will serve as a roadmap for the installation process.
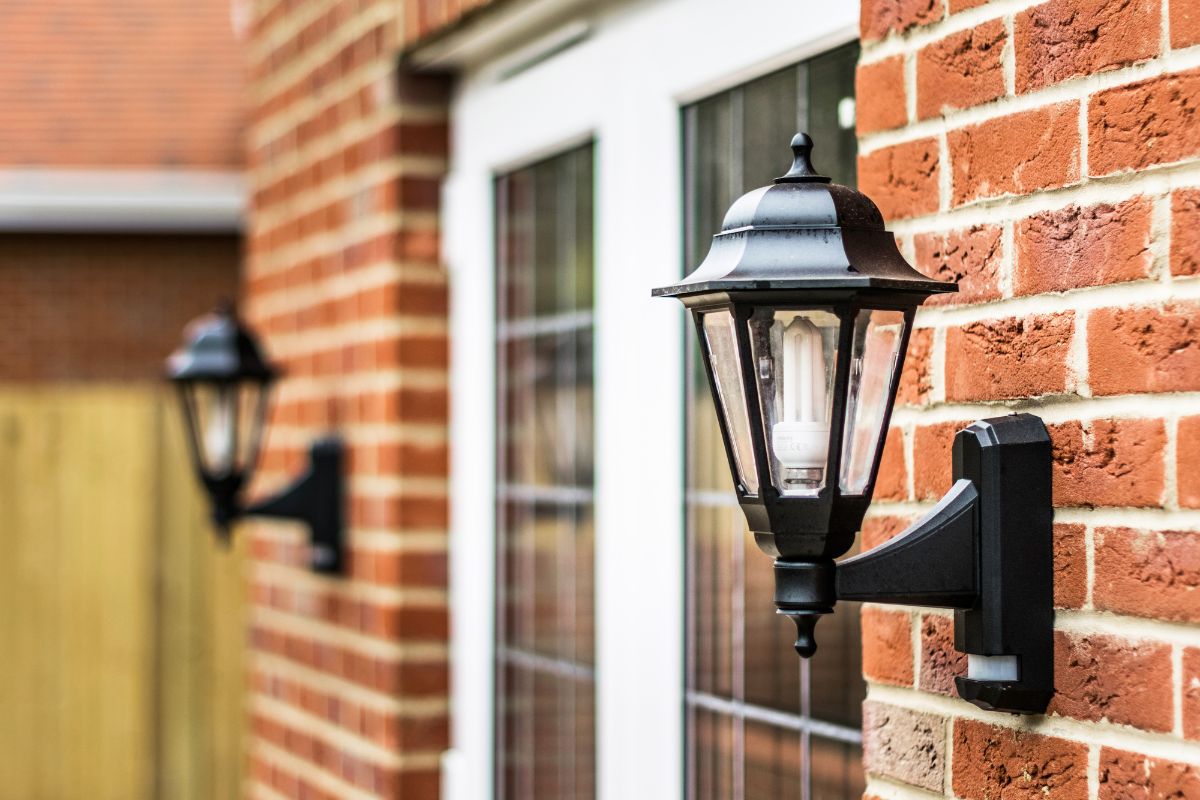
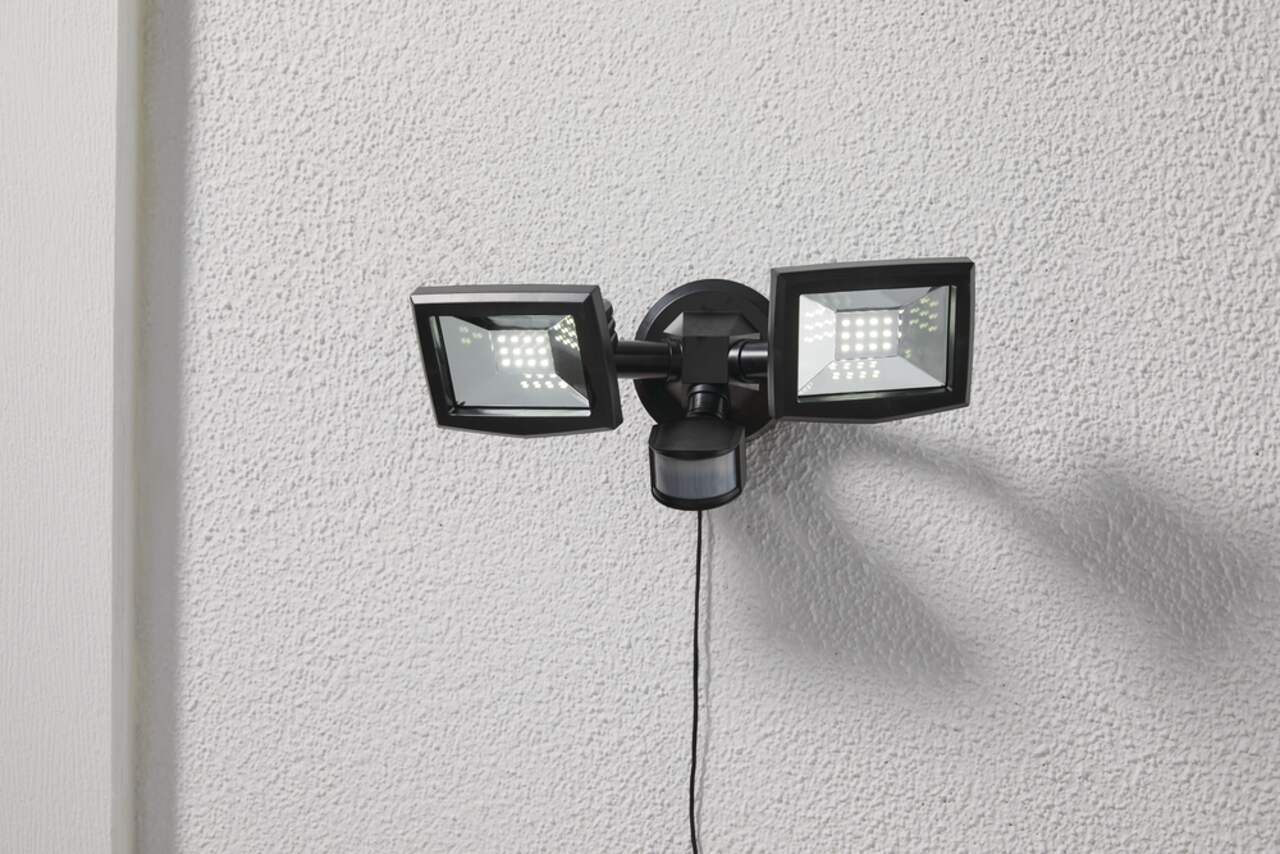
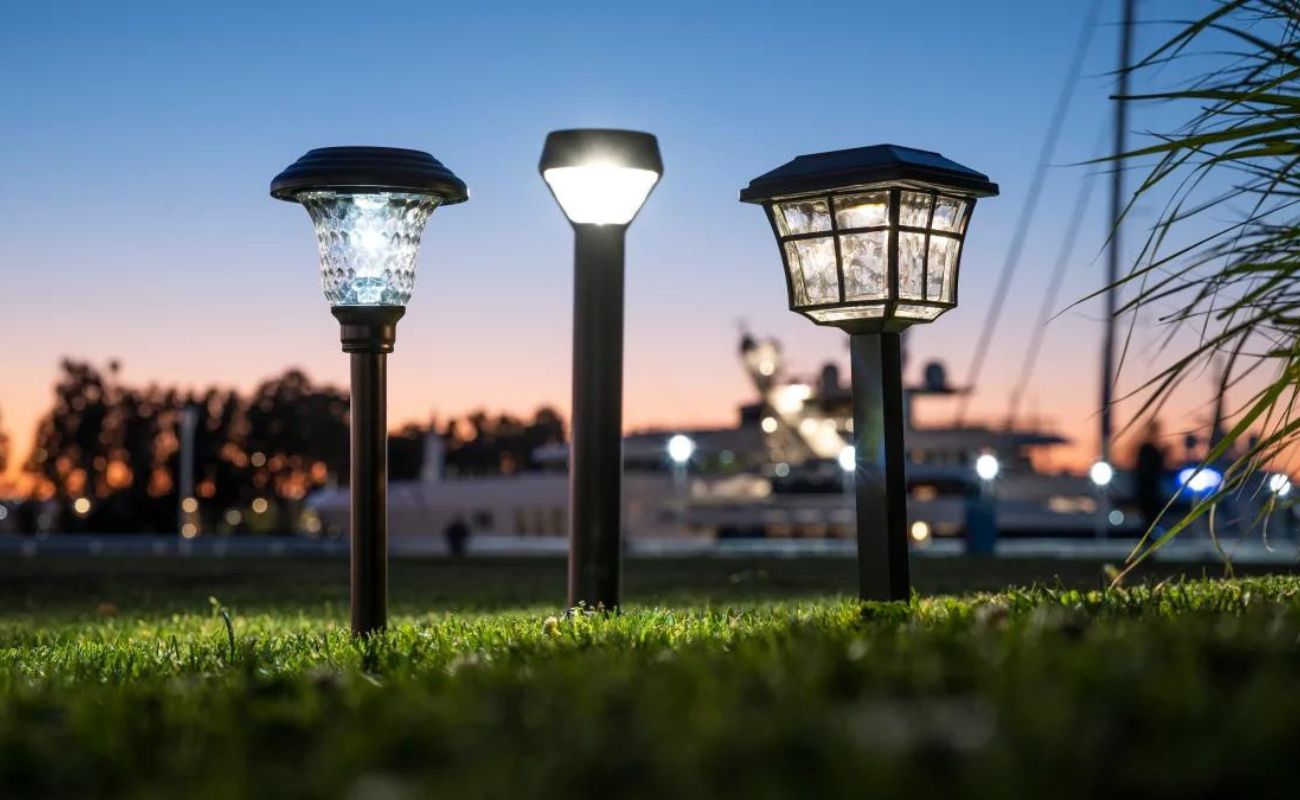
- Choose the right lighting fixtures: Select lighting fixtures that not only complement your outdoor aesthetics but also meet your specific lighting goals. There are various options to choose from, including path lights, spotlights, floodlights, and string lights, among others. Ensure that the fixtures are suitable for outdoor use and can withstand the elements.
- Consider lighting techniques: Think about the different lighting techniques you can utilize to achieve your desired effects. For example, uplighting can accentuate trees and architectural features, while downlighting can provide overall illumination. Silhouetting, grazing, and moonlighting are other techniques to explore.
- Manage light pollution: Be mindful of light pollution and its impact on the environment and neighboring properties. Use shielded fixtures that direct the light downward and minimize unnecessary light spillage. This will enhance the overall performance and efficiency of your outdoor landscape lighting.
- Calculate power requirements: Determine the power requirements for your lighting setup to ensure that your electrical system can handle the load. Consult with an electrician if needed to avoid overloading circuits and potential electrical hazards.
- Consider energy-efficient options: Opt for energy-efficient lighting fixtures, such as LED lights, to reduce energy consumption and minimize maintenance costs. LED lights are not only long-lasting but also offer a variety of color temperatures to create the desired ambiance.
Remember, careful planning is key to achieving a successful outdoor landscape lighting installation. It helps you make informed decisions, maximize the visual impact, and create a harmonious balance between functionality and aesthetics.
Step 2: Gathering materials and tools
Once you have a clear plan in place for your outdoor landscape lighting project, the next step is to gather all the necessary materials and tools. Having everything at hand will ensure a smooth installation process. Here’s what you’ll need:
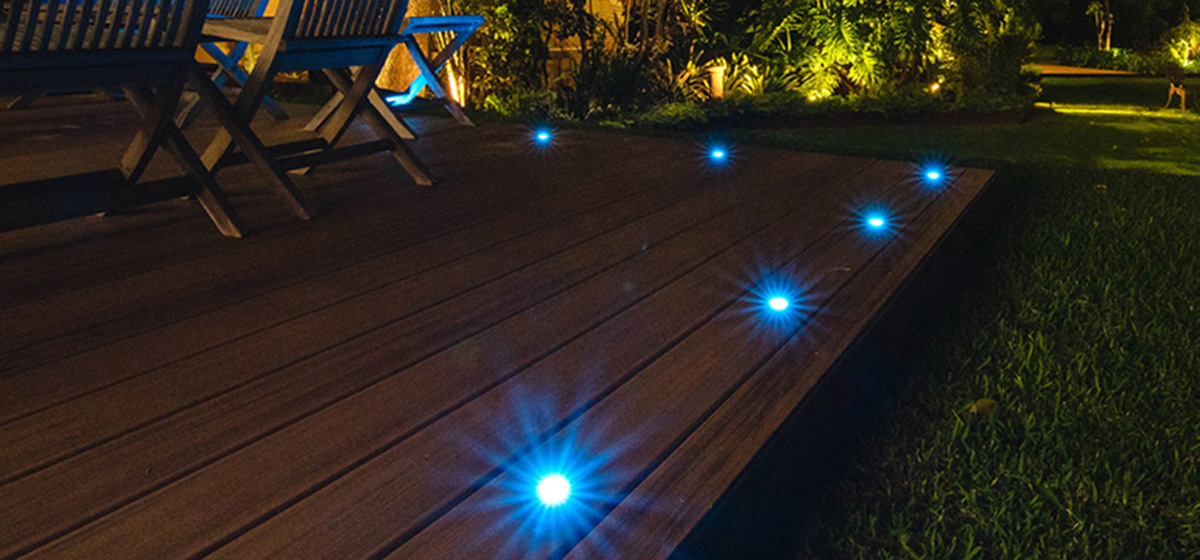
- Outdoor lighting fixtures: Purchase the lighting fixtures that align with your lighting goals and complement your outdoor aesthetics. This may include path lights, spotlights, floodlights, step lights, or any other type of fixture you require.
- Electrical cables and connectors: Depending on the layout of your outdoor space, you’ll need electrical cables of different lengths. These cables will connect your lighting fixtures to the power source. Additionally, gather the necessary connectors like wire nuts and waterproof connectors to ensure secure connections.
- Transformers: Transformers are essential components that convert high-voltage electrical current to low voltage, typically 12 or 24 volts. They are necessary when using low-voltage outdoor lighting systems, ensuring safe and efficient operation.
- Landscape wire: Landscape wire is used to connect the lighting fixtures to the transformer. It is specially designed for outdoor use, usually UV-resistant and able to withstand the elements.
- Stakes or mountings: Depending on the type of fixture and installation method, you may need stakes or mountings to secure the lighting fixtures into the ground or onto surfaces. Ensure they are sturdy and suitable for outdoor use.
- Wire strippers and cutters: These tools will come in handy when working with electrical cables. They allow you to strip the insulation from the wires and cut them to the desired length.
- Shovel or trenching tool: If you need to bury cables in the ground, a shovel or trenching tool will be necessary for digging trenches to lay the cables. Make sure to check for underground utilities and take necessary safety precautions.
- Voltage tester: A voltage tester is a crucial tool for checking the presence of electrical current and ensuring safe connections. Use it to test the power supply and verify that everything is properly connected.
- Optional accessories: Depending on your specific lighting design, you may need additional accessories such as timers, motion sensors, or remote controls to enhance functionality and convenience.
Before starting the installation process, make sure you have all the necessary materials and tools readily available. This will allow you to work efficiently and minimize any potential delays. Additionally, ensure that all the materials are of good quality and suitable for outdoor use, as they will be exposed to various weather conditions.
By gathering all the required materials and tools in advance, you’ll be ready to move seamlessly onto the next step: preparing the lighting layout.
Step 3: Preparing the lighting layout
Preparing the lighting layout is a crucial step before installing the outdoor landscape lighting fixtures. It involves mapping out the exact placement of the fixtures according to your lighting plan. By doing so, you’ll ensure a balanced and visually appealing illumination throughout your outdoor space. Here’s how to prepare the lighting layout:
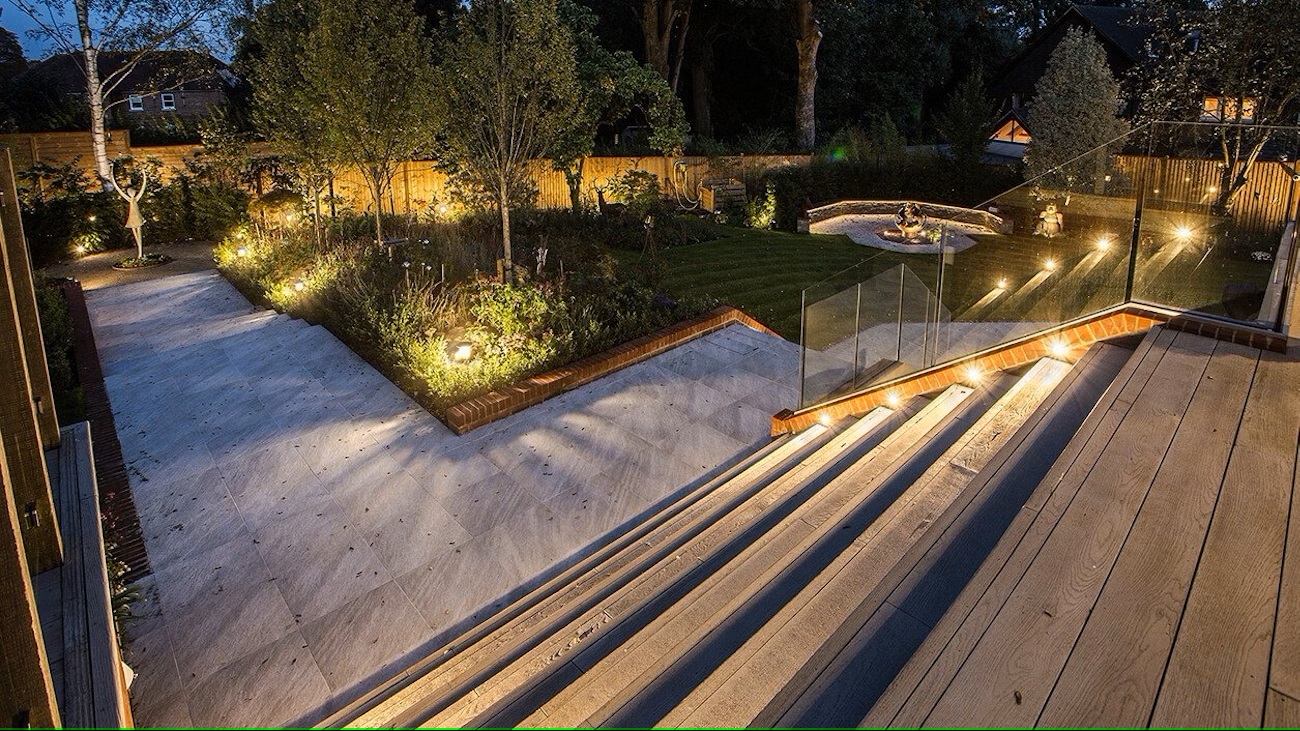
Using your lighting plan as a guide, mark the exact locations where you want to install the lighting fixtures. This can be done by placing temporary stakes or markers in the ground, or using colored tape or spray paint. Pay attention to the spacing between fixtures to achieve a balanced look. For path lights, a general rule of thumb is to space them around 6-8 feet apart. However, you can adjust this based on your preferences and the brightness of the fixtures. Aim for a symmetrical arrangement if your landscape design allows for it. Identify the focal points of your outdoor space, such as trees, sculptures, or architectural features. Place spotlights or floodlights strategically to highlight these elements and create a dramatic effect. Experiment with different angles and intensities to find the desired outcome. Consider the overall distribution of light across your outdoor space. Avoid creating areas that are either too bright or too dim. Ensure that the light is spread evenly by adjusting the fixture placement and intensity as needed. Create depth and dimension by incorporating multiple layers of light. This can be done by combining different types of fixtures, such as path lights, spotlights, and up/downlights. Layering light adds visual interest and allows you to highlight different elements of your landscape. Keep in mind that your landscape may change over time due to growth or renovation. Anticipate these changes by leaving some flexibility in your lighting layout. Use adjustable fixtures or install additional wiring and connectors to accommodate future adjustments. While planning your lighting layout, prioritize areas that require added safety and security, such as pathways, stairs, or entranceways. Ensure that these areas are well-lit to prevent accidents and deter intruders.
Take your time to refine and adjust the lighting layout until you are satisfied with the overall arrangement. Walk around your outdoor space at different times of the day to visualize how the lighting will look from different angles. This will help you fine-tune your choices and deliver an exceptional lighting experience.
Once the lighting layout is prepared, you’re ready to move on to the next step: installing the outdoor lighting fixtures.
Step 4: Installing the outdoor lighting fixtures
Now that you have your lighting plan in place and the layout is prepared, it’s time to start installing the outdoor lighting fixtures. This step involves physically placing the fixtures at their designated locations and securing them properly. Here’s a step-by-step guide on how to install the outdoor lighting fixtures:
Before you begin the installation, gather the tools and materials required, such as a shovel, screwdriver, stakes, or mountings. Having everything ready will make the installation process smoother. If your lighting design includes path lights, start by installing them. Dig a small hole at each marked location and position the stakes or mountings securely in the ground. Place the path lights on top of the stakes or mountings and make sure they are level. For spotlights and floodlights, determine the best position to accentuate the focal points in your outdoor space. Install the mountings or stakes and attach the fixtures securely. Adjust the angle and direction of the light to achieve the desired effect. Depending on your lighting plan, install any other types of lighting fixtures such as step lights, wall washers, or up/downlights. Follow the manufacturer’s instructions for proper installation and ensure that all fixtures are securely fastened. As you install each fixture, make sure to route the wiring correctly. Conceal the landscape wire by burying it in a shallow trench or utilizing existing pathways and garden borders. Secure the wire with staples or clips to keep it in place and prevent any accidental damage. Pay attention to the heights and angles of the fixtures to achieve the desired lighting effect. Experiment with different positions to find the perfect balance between functionality and aesthetics. Before moving to the next step, double-check that all the fixtures are properly connected. Ensure that the wiring is securely connected to the fixtures and that there are no loose connections or exposed wires that may pose a safety hazard. Once all the fixtures are installed, turn on the power to test the lighting. Check if all the fixtures are functioning properly and adjust any angles or positions if necessary.
During the installation process, always refer to the manufacturer’s instructions for specific guidelines and precautions. If you’re unsure about any aspect of the installation, it’s recommended to consult with a professional electrician to ensure a safe and reliable setup.
With the outdoor lighting fixtures successfully installed, you’re now ready to move on to the next step: wiring the outdoor landscape lighting.
When installing outdoor landscape lighting, make sure to plan the layout and design before starting. Consider the placement of fixtures, power source, and the overall aesthetic you want to achieve. This will help ensure a successful and visually appealing installation.
Read more: How To Install Outdoor Flood Lights
Step 5: Wiring the outdoor landscape lighting
Wiring is a critical step in the installation process of outdoor landscape lighting. It involves connecting the lighting fixtures to the power source, ensuring a safe and reliable electrical connection. Here’s a step-by-step guide on how to wire the outdoor landscape lighting:
Plan the route for the landscape wire, taking into consideration the location of the lighting fixtures and the power source. Choose the most direct and efficient path, avoiding obstacles and potential hazards. Dig a shallow trench along the determined route to bury the landscape wire. The depth of the trench should be sufficient to protect the wire from accidental damage and the elements. Use a shovel or trenching tool to create the trench. Place the landscape wire into the trench, making sure to leave some slack at each fixture location for ease of installation. Be gentle when handling the wire to avoid kinks or damage. If necessary, use wire connectors to extend the length of the wire to reach all fixtures. At each fixture location, strip the ends of the landscape wire using wire strippers. Connect the wires of the fixtures to the corresponding wires of the landscape wire, matching the positive (+) and negative (-) connections. Secure the connections with wire nuts or waterproof connectors, ensuring a tight and reliable connection. Once all the fixtures are connected, carefully cover the landscape wire with soil, ensuring it is properly buried and hidden. Avoid placing heavy objects or vehicles over the buried wire to prevent potential damage. After burying the landscape wire, inspect all the connections to ensure they are secure and properly insulated. Be thorough in checking for any exposed wires, loose connections, or potential safety hazards. Make any necessary adjustments or repairs as needed. Before proceeding to the next step, test the wiring to ensure that all the fixtures are receiving power. Turn on the power source and check that all the fixtures are illuminated. If any fixtures are not functioning, double-check the connections or consult with a professional to troubleshoot the issue.
During the wiring process, it’s essential to prioritize safety. Ensure that the power source is turned off while making connections, and take precautions to avoid electrocution or injury. If you are unsure about any aspect of the wiring process, it is recommended to seek the assistance of a qualified electrician.
With the outdoor landscape lighting properly wired, you’re ready to move on to the next step: connecting the lighting to a power source.
Step 6: Connecting the lighting to a power source
Once the outdoor landscape lighting fixtures are installed and properly wired, the next step is to connect the lighting to a power source. This involves establishing a reliable connection between the lighting system and the electrical supply. Here’s a step-by-step guide on how to connect the lighting to a power source:
Identify the nearest electrical outlet or power source that you will use to supply electricity to the outdoor landscape lighting system. Consider the proximity to the lighting fixtures and accessibility for the wiring. Determine the power requirements of your lighting system, including the voltage and amperage. Ensure that the power source can accommodate the load and that it matches the specifications of the lighting fixtures and transformer. If you are using low-voltage outdoor lighting, you will need to install a transformer to convert the high-voltage power supply to the appropriate low voltage (usually 12 or 24 volts). Follow the manufacturer’s instructions to properly install and connect the transformer. Connect the transformer to the power source by using an appropriate weatherproof cable. Make sure to turn off the power supply before making any connections. Follow the electrical codes and guidelines to ensure a safe and secure connection. Using the landscape wire from the fixtures, connect each lighting fixture’s wiring to the appropriate terminal on the transformer. Consult the manufacturer’s instructions for the specific wiring connections and ensure that the wiring is secure and insulated. Once all the connections are made, turn on the power source and test the connection between the lighting system and the power supply. Check that all the fixtures are receiving power and that they are functioning properly. If any issues arise, double-check the connections and troubleshooting guides or seek professional assistance. After confirming that the connection is successful, conceal the wiring by burying it or using conduit to protect it from the elements and potential hazards. Ensure that the wiring is secure and inaccessible to children or pets, and follow local electrical codes and regulations.
As you connect the lighting to a power source, it’s crucial to prioritize safety and adhere to electrical codes and guidelines. If you are uncertain about any aspect of the process or dealing with electrical connections, it is recommended to consult with a qualified electrician to ensure a safe and reliable installation.
With the outdoor landscape lighting connected to a power source, the next step is to test and troubleshoot the installation to ensure optimal performance.
Step 7: Testing and troubleshooting the installation
After completing the installation and connecting the outdoor landscape lighting to a power source, it’s crucial to test the system and troubleshoot any issues that may arise. This step ensures that your lighting installation is functioning correctly and addresses any potential problems. Here’s a step-by-step guide on how to test and troubleshoot your outdoor landscape lighting:
- Turn on the lighting system: Switch on the power to activate the outdoor landscape lighting system. Ensure that the power source is providing electricity to the lighting fixtures.
- Check each lighting fixture: Inspect each lighting fixture to verify that it is receiving power and emitting light properly. Pay attention to brightness levels, color consistency, and the overall illumination of the intended areas.
- Identify any malfunctioning fixtures: If any fixtures are not working as expected, troubleshoot the issue by checking the wiring connections. Ensure that all connections are secure and properly insulated. Replace any faulty bulbs or fixtures as needed.
- Investigate potential wiring problems: If multiple fixtures are not functioning correctly, there might be an issue with the wiring connections. Check for loose or damaged wires, ensure proper insulation, and confirm that all connections are securely and correctly made.
- Test the power supply: If none of the fixtures are receiving power, verify that the power supply is functioning correctly. Test the outlet or power source with another electrical device to ensure a reliable connection. Check for any tripped circuit breakers or blown fuses that may be causing a power outage.
- Address voltage drop: If you notice a significant decrease in brightness or dimming of the lighting fixtures farther away from the power source, it may be due to voltage drop. Consider using a larger transformer or adding additional transformers to mitigate this issue.
- Reposition or adjust fixtures if needed: During the testing phase, assess the placement and angles of the lighting fixtures. If certain areas are under-illuminated or over-illuminated, readjust the fixtures or reposition them to improve the lighting effect and achieve the desired illumination.
- Document and address any ongoing issues: Keep a record of any persistent problems or recurring issues you encounter during the testing process. Take note of the specific fixtures or areas that require further attention. If necessary, consult with a professional electrician for expert advice and assistance with troubleshooting.
Testing and troubleshooting the installation is essential to ensure that your outdoor landscape lighting system is functioning optimally. Regular maintenance and inspections should be performed to address any potential issues promptly and maintain the longevity of your lighting system.
With the testing and troubleshooting complete, you’re almost done. The final step is to learn how to maintain your outdoor landscape lighting to ensure its longevity and performance.
Step 8: Maintaining your outdoor landscape lighting
Proper maintenance is key to ensuring the longevity and optimal performance of your outdoor landscape lighting. Regular care and upkeep will help keep the fixtures clean, prevent damage, and maintain the visual appeal of your outdoor space. Here’s a step-by-step guide on how to maintain your outdoor landscape lighting:
- Clean the fixtures: Regularly clean the lighting fixtures to remove dirt, debris, and any build-up that may obstruct the light output. Gently wipe down the fixtures using a soft cloth and a mild solution of water and soap. Avoid using harsh chemicals or abrasive materials that may damage the finish.
- Inspect for damage: Periodically inspect the fixtures for any signs of damage, such as cracks, dents, or corrosion. Replace any damaged components to maintain the integrity and functionality of the lighting system.
- Trim vegetation: Trim any overgrown vegetation that may obstruct the lighting fixtures or interfere with their performance. Ensure that plants, shrubs, or trees are not blocking the light or casting unwanted shadows. Regularly prune and maintain the surrounding landscape to optimize the lighting effect.
- Check and adjust angles: Assess the positioning and angles of the lighting fixtures to ensure they are still aimed correctly. Over time, fixtures may shift or become misaligned due to weather conditions or other factors. Make any necessary adjustments to maintain the desired lighting effect.
- Replace bulbs as needed: Monitor the performance of the light bulbs and replace any burnt-out bulbs promptly. Follow the manufacturer’s guidelines for bulb replacement and ensure that the new bulbs are of the correct type and wattage specified for the fixtures.
- Test the system periodically: Regularly test the outdoor landscape lighting system to ensure that all fixtures are functioning correctly. Switch on the power source and check that each fixture is illuminating as intended. Address any issues promptly to prevent further damage or malfunctions.
- Check for wiring issues: Inspect the wiring connections periodically to ensure they are secure and free from damage. Look for any signs of frayed wires or loose connections. If any issues are detected, address them immediately by repairing or replacing the affected wiring.
- Protect from extreme weather: Take precautions to protect the outdoor landscape lighting fixtures from extreme weather conditions. If severe weather is expected, consider removing lightweight fixtures or using covers to shield them from excessive wind, rain, or snow.
- Consult with professionals if needed: If you encounter any complex issues or are unsure about proper maintenance procedures, consult with a professional electrician or outdoor lighting specialist. They can provide expert guidance and assistance to ensure the ongoing performance and safety of your outdoor landscape lighting.
By following these maintenance steps, you can extend the lifespan of your outdoor landscape lighting and preserve its aesthetic appeal. Regular care and attention will ensure that your outdoor space remains beautifully illuminated for years to come.
Congratulations! You have successfully completed all the steps required to install, wire, connect, and maintain your outdoor landscape lighting. Enjoy the enhanced beauty, safety, and functionality it brings to your outdoor space.
Read more: How To Install Outdoor Step Lights
Conclusion
Congratulations on completing the installation and maintenance of your outdoor landscape lighting! By following the steps outlined in this comprehensive guide, you have transformed your outdoor space into a stunning and inviting environment. Let’s recap the key points:
- Proper planning is essential. Assess your space, determine your lighting goals, create a lighting plan, choose the right fixtures, and consider lighting techniques.
- Gather all the necessary materials and tools before starting the installation process to ensure smooth progress.
- Prepare the lighting layout by marking fixture locations, considering spacing and symmetry, highlighting focal points, and ensuring balanced light distribution.
- Install the fixtures securely, making sure to adjust heights and angles for optimal lighting effects.
- Wire the lighting system by burying landscape wire, connecting fixtures to the transformer, and ensuring proper insulation and connections.
- Connect the lighting to a power source by locating the power source, installing a transformer if necessary, and making secure connections.
- Test and troubleshoot the installation to ensure all fixtures are functioning correctly, addressing any issues that arise.
- Maintain your outdoor landscape lighting by regularly cleaning the fixtures, inspecting for damage, trimming vegetation, checking angles, replacing bulbs, and testing the system periodically.
Remember to prioritize safety throughout the entire process. If you have any doubts or concerns about electrical work, consult with a professional electrician for assistance.
By illuminating your outdoor space, you have created an inviting atmosphere that enhances the beauty of your home while providing safety and security. Whether you’re enjoying a quiet evening in your garden, hosting outdoor gatherings, or simply taking a nighttime stroll, your newly installed outdoor landscape lighting will enhance the experience.
Now it’s time to sit back, relax, and enjoy the delightful ambiance your outdoor landscape lighting brings. With proper maintenance and care, your lighting installation will continue to brighten your outdoor space for years to come.
Frequently Asked Questions about How To Install Outdoor Landscape Lighting
Was this page helpful?
At Storables.com, we guarantee accurate and reliable information. Our content, validated by Expert Board Contributors, is crafted following stringent Editorial Policies. We're committed to providing you with well-researched, expert-backed insights for all your informational needs.


0 thoughts on “How To Install Outdoor Landscape Lighting”