Home>Garden Essentials>How To Plant A Pomegranate Tree From Seeds
Garden Essentials
How To Plant A Pomegranate Tree From Seeds
Modified: October 20, 2024
Learn how to plant a pomegranate tree from seeds in your garden. Follow our step-by-step guide for successful pomegranate cultivation.
(Many of the links in this article redirect to a specific reviewed product. Your purchase of these products through affiliate links helps to generate commission for Storables.com, at no extra cost. Learn more)
Introduction
Welcome to the wonderful world of pomegranate trees! If you have a green thumb and a desire to grow your own fruit, planting a pomegranate tree from seeds can be an exciting and rewarding endeavor. Not only will you have the satisfaction of nurturing a plant from its humble beginnings, but you will eventually be rewarded with delicious, juicy pomegranates.
Pomegranate trees are known for their beautiful, vibrant flowers and their tart, antioxidant-rich fruits. They are native to regions with hot, arid climates, making them the perfect addition to any sunny garden or backyard. These trees can also be grown in containers, making them a suitable option for those with limited outdoor space.
In this guide, we will take you through the step-by-step process of planting a pomegranate tree from seeds. Whether you are a seasoned gardener looking to expand your plant collection or a beginner itching to try your hand at gardening, this article will provide you with all the information you need to successfully grow your own pomegranate tree.
From gathering materials to harvesting the fruits, each step in the process will be covered in detail. Along the way, we will also provide helpful tips and insights to ensure that your pomegranate tree thrives and produces an abundance of sweet, juicy pomegranates.
So, roll up your sleeves, grab your gardening tools, and let’s dive into the fascinating world of pomegranate trees!
Key Takeaways:
- Planting a pomegranate tree from seeds is a fun and rewarding adventure that involves gathering materials, choosing the right seeds, and preparing them for planting to grow your very own delicious pomegranates.
- Once your pomegranate tree grows, proper care including watering, fertilization, and pruning will help it thrive. Harvesting the ripe pomegranates is a delightful reward for your efforts in growing the tree.
Read more: How To Plant A Cherry Tree From Seed
Step 1: Gathering Materials
Before you begin the process of planting a pomegranate tree from seeds, it’s important to gather all the necessary materials. Having everything ready beforehand will ensure a smooth and seamless planting experience. Here are the items you will need:
- Pomegranate Seeds: The first and most crucial item on your list is the pomegranate seeds themselves. You can either extract the seeds from a ripe pomegranate or purchase seeds from a reputable source. Make sure to choose seeds from a variety that is suitable for your climate zone.
- Potting Mix: Pomegranate trees thrive in well-draining soil, so it’s important to have a good quality potting mix on hand. Look for a mix that is specifically formulated for fruit trees or one that has a blend of organic matter and perlite to ensure adequate drainage.
- Pots or Containers: Depending on your preference and available space, you can choose to plant your pomegranate seeds in pots, containers, or even dedicated raised beds. Make sure the chosen containers have drainage holes to prevent waterlogging.
- Watering Can or Spray Bottle: To properly water your pomegranate seeds and seedlings, you will need a watering can or a spray bottle. This will allow you to moisten the soil without causing any damage to the delicate roots.
- Plant Labels: It’s always a good idea to label your pomegranate seeds or seedlings to keep track of their varieties and planting dates. This will help you remember important information as your tree grows and ensure you can identify any specific needs or characteristics.
- Gardening Gloves: Protect your hands while working in the soil by wearing a pair of gardening gloves. This will prevent any injuries and keep your hands clean throughout the planting process.
- Garden Tools: Some basic gardening tools will come in handy when planting your pomegranate seeds. A small trowel, a rake, and a pair of pruning shears or scissors will be sufficient to assist you in preparing the soil, planting the seeds, and caring for your seedlings.
- Sunscreen and Hat: Since pomegranate trees require plenty of sun, it’s important to protect yourself from harmful UV rays while working outdoors. Apply sunscreen and wear a hat to shield yourself from the sun’s intense heat.
By gathering these materials beforehand, you’ll be well-prepared to begin the exciting process of planting your pomegranate tree from seeds. So, let’s move on to the next step and learn how to choose the right seeds for planting.
Step 2: Choosing the Right Seeds
When it comes to planting a pomegranate tree from seeds, selecting the right seeds is crucial for the success of your endeavor. Here are some important factors to consider when choosing the seeds:
- Variety: Pomegranate trees come in various varieties, each with its own unique characteristics. Some varieties are more suited for specific climates or growing conditions, so it’s important to choose seeds that are well-adapted to your region. Consider factors such as your local climate, available space, and desired fruit characteristics when selecting the variety of pomegranate seeds.
- Freshness: Fresh seeds have a higher germination rate compared to older seeds, so it’s important to choose seeds that are relatively fresh. If you’re extracting the seeds from a ripe pomegranate, make sure it is fully matured and of good quality. For purchased seeds, check the packaging for the harvest date or expiration date to ensure freshness.
- Source: It’s crucial to obtain your pomegranate seeds from a reputable source. Look for reputable nurseries, garden centers, or online seed suppliers that specialize in fruit trees. This will ensure that you are getting high-quality seeds that are true to their variety.
- Health: Inspect the seeds for any signs of damage, mold, or disease. Healthy seeds are plump, firm, and free from blemishes. Avoid seeds that appear shriveled, discolored, or have visible signs of damage as they are less likely to germinate successfully.
- Quantity: Depending on your space and desired outcome, determine how many pomegranate seeds you’ll need. It’s a good idea to have a few extra seeds on hand in case some don’t germinate or if you want to experiment with different planting methods.
By carefully considering these factors and choosing the right pomegranate seeds, you’ll set yourself up for success when it comes to growing your own pomegranate tree. Now that you’ve chosen your seeds, let’s move on to the next step and learn how to prepare them for planting.
Step 3: Preparing the Seeds for Planting
Once you have selected the right pomegranate seeds, the next step is to prepare them for planting. This involves a few key steps to increase their chances of germination and ensure healthy seedlings. Here’s what you need to do:
- Cleaning: Start by cleaning the pomegranate seeds. Rinse them gently under cool running water to remove any remaining pulp or debris. Avoid using hot water or scrubbing too vigorously, as this can damage the seeds.
- Stratification: Pomegranate seeds require a process called stratification, which simulates the natural conditions that trigger germination. To stratify the seeds, you can place them in a damp paper towel or a ziplock bag with some moistened vermiculite, perlite, or peat moss. Seal the bag or wrap it in the paper towel and refrigerate it for 4 to 6 weeks. This cold period mimics the winter conditions and prepares the seeds for germination.
- Checking for Viability: Before planting the seeds, it’s a good idea to check their viability. Take a few seeds from the stratification process and perform a viability test. Place the seeds on a damp paper towel or cotton pad and seal it in a plastic bag. Keep the bag in a warm area, ideally around 70-75°F (21-24°C). Check the seeds regularly over the following weeks to see if they sprout. This will give you an idea of how many seeds are likely to germinate and help you adjust your planting plans if needed.
- Soaking (Optional): If you want to further enhance germination, you can soak the stratified seeds in water for about 24 hours before planting. This can help soften the seed coat and improve the success rate of germination.
- Handling: When handling the pomegranate seeds, try to avoid touching them directly with your hands. Instead, use clean and sterilized tweezers or a spoon to handle the seeds. This helps prevent the transfer of any harmful bacteria or oils from your skin that could potentially harm the seeds.
- Labeling: As you prepare the seeds, it’s important to label them to keep track of their variety and planting date. Use plant labels or write directly on ziplock bags or containers to avoid any confusion later on.
By following these steps to prepare your pomegranate seeds, you’ll increase the likelihood of successful germination and healthy seedlings. Now that the seeds are ready, it’s time to move on to the next step: choosing the planting location for your pomegranate tree.
Step 4: Choosing the Planting Location
The success and growth of your pomegranate tree largely depend on choosing the right planting location. Pomegranate trees thrive in sunny, warm, and well-ventilated areas. Here are a few considerations to keep in mind when selecting the perfect spot:
- Sunlight: Pomegranate trees require full sun exposure for at least six to eight hours a day. Choose a location that receives ample sunlight and is not shaded by buildings, tall trees, or other structures. The more sun the tree gets, the better it will grow and produce fruits.
- Climate: Pomegranate trees are native to hot and arid climates. They prefer Mediterranean-like conditions with dry summers and mild winters. If you’re in a region with colder winters, look for cold-hardy varieties or consider growing your pomegranate tree in a container so you can bring it indoors during the colder months.
- Soil Drainage: Pomegranate trees do not like standing water and are susceptible to root rot. Choose a planting location with well-draining soil to prevent waterlogging and ensure healthy root development. If you have heavy clay or compacted soil, consider amending it with organic matter or creating raised beds to improve drainage.
- Space: Pomegranate trees can grow up to 20 feet in height and spread, so ensure that you have enough space for the tree to grow and expand. Avoid planting near structures, power lines, or other plants that could obstruct its growth. If space is limited, consider growing your pomegranate tree in a container or choose a dwarf or compact variety.
- Protection from Wind: While pomegranate trees can tolerate some wind, strong gusts can damage the branches and affect fruit production. Consider planting your tree in a location that provides some protection from strong winds, such as near a wall or a windbreak.
- Pollination: Pomegranate trees are self-pollinating, meaning they can bear fruit with just one tree. However, to increase fruit yield and quality, it’s beneficial to have more than one tree for cross-pollination. If you have enough space, consider planting multiple pomegranate trees to enhance pollination and maximize fruit production.
By considering these factors and choosing an ideal planting location for your pomegranate tree, you’ll create an environment where it can thrive and flourish. Now that you’ve selected the perfect spot, it’s time to move on to the next step: preparing the soil for planting.
Read more: How To Plant Plum Tree From Seed
Step 5: Preparing the Soil
Creating the right soil environment is crucial for the healthy growth of your pomegranate tree. Pomegranate trees prefer well-draining soil that is rich in organic matter and nutrients. Here’s how you can prepare the soil for planting:
- Clear the Area: Start by clearing the planting area of any weeds, rocks, or debris. Remove any existing grass or vegetation to provide a clean slate for your pomegranate tree.
- Soil Test: Consider getting a soil test done to determine the pH and nutrient levels of your soil. Pomegranate trees prefer slightly acidic to neutral soil with a pH range of 5.5 to 7.5. Based on the soil test results, you can adjust the pH and nutrient levels with appropriate amendments if needed.
- Amendments: If your soil is heavy clay or lacks organic matter, amend it with compost, well-rotted manure, or other organic materials. Incorporate the amendments into the soil to improve its structure, drainage, and nutrient content. Aim for a loose and crumbly texture that allows for proper root development.
- Loosening the Soil: Use a garden fork or a tiller to loosen the soil in the planting area. This will help break up compacted soil and improve aeration and drainage. Avoid excessive tilling, as this can disturb beneficial soil organisms and ecosystem balance.
- Remove Rocks and Debris: While loosening the soil, remove any rocks, roots, or debris that may hinder root growth or cause obstructions.
- Level the Ground: Use a rake or garden tool to level the ground and ensure that the planting area is even. This will help provide stability for the young pomegranate tree and prevent water pooling.
- Organic Mulch: Consider adding a layer of organic mulch, such as wood chips or straw, around the planting area. Mulch helps suppress weeds, retain moisture, and regulate soil temperature. Apply a 2-3 inch layer of mulch, leaving a gap around the base of the tree to prevent excessive moisture buildup around the trunk.
By preparing the soil properly, you’ll create an optimal growing environment for your pomegranate tree. The well-draining, nutrient-rich soil will support healthy root development and improve overall tree health. Now that the soil is ready, it’s time to move on to the exciting step of planting the pomegranate seeds.
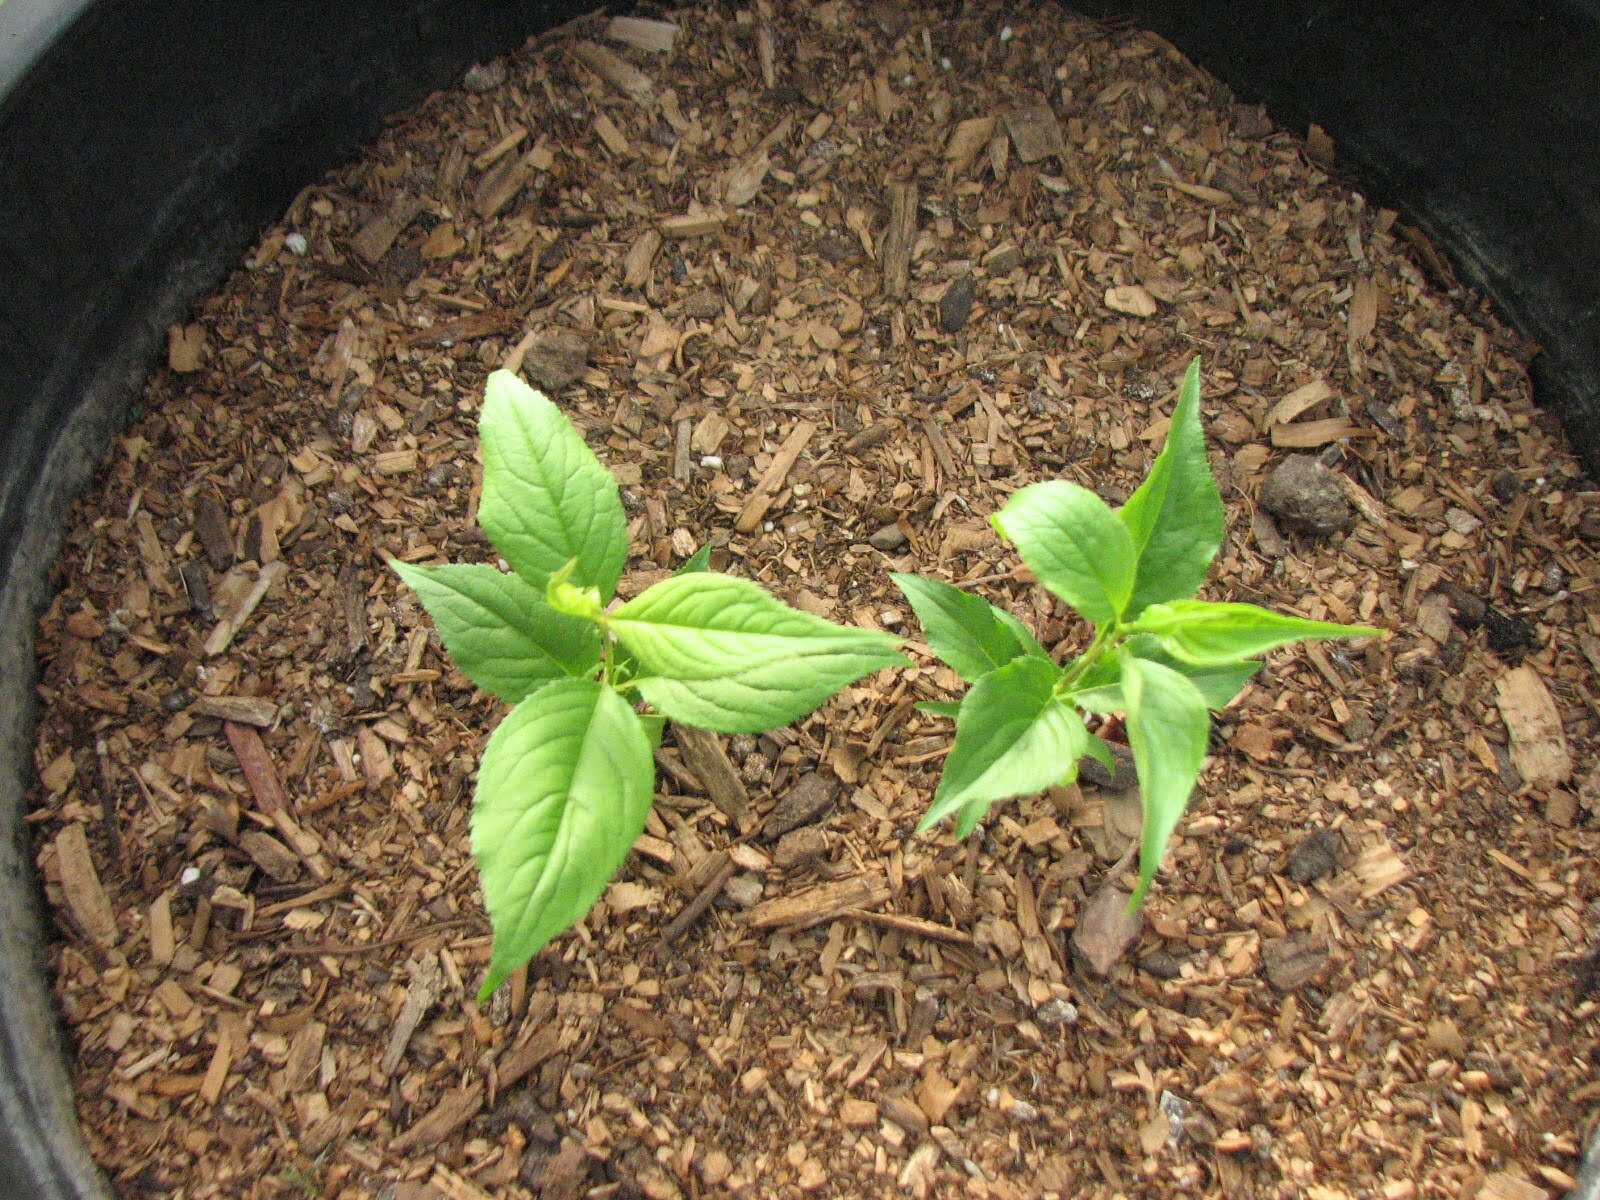
After removing the seeds from the pomegranate, soak them in water for a few days to soften the outer coating. Then plant them in well-draining soil, keep them moist, and place in a sunny spot to grow.
Step 6: Planting the Seeds
Now that you have prepared the soil, it’s time to plant the pomegranate seeds. Follow these steps to ensure successful planting and germination:
- Digging the Hole: Use a small garden trowel or a shovel to dig a hole in the prepared soil. The hole should be deep enough to accommodate the seeds and provide adequate space for root development.
- Spacing: If you are planting multiple seeds, space them at least 6 to 10 feet apart to allow sufficient room for each tree to grow and spread. Follow any specific spacing recommendations for the variety you’re planting.
- Planting Depth: Plant the pomegranate seeds at a depth of about 1 inch. Make sure to place them horizontally with the flat side facing up. This orientation will increase the chances of germination and proper root development.
- Backfilling: Gently backfill the hole with soil, covering the seeds completely. Lightly firm the soil around the seeds to ensure good seed-to-soil contact. Avoid compacting the soil too much, as this can hinder root growth.
- Watering: After planting the seeds, give them a thorough watering to settle the soil and provide moisture for germination. Use a watering can or a gentle spray to avoid disturbing the seeds. Ensure that the soil is evenly moist but not soaked.
- Labeling: It’s important to label the planted seeds to keep track of their variety and planting date. Use plant labels or other labeling methods to avoid confusion as the seeds start to germinate.
- Protection: Consider placing a protective cover, such as a mesh or a plastic dome, over the planted seeds to create a mini greenhouse effect. This will help retain moisture, provide warmth, and protect the seeds from extreme weather conditions or pests.
- Care: Keep the soil consistently moist but not overly saturated as the seeds germinate and seedlings emerge. Monitor the soil moisture and adjust watering accordingly to prevent drying out or waterlogging. Be patient, as germination can take anywhere from a few weeks to a few months.
By following these steps to plant the pomegranate seeds, you’ll give them the best chance of successful germination and healthy growth. Now, it’s time to move on to the next step: watering and caring for the seedlings as they start to sprout.
Step 7: Watering and Caring for the Seedlings
As your pomegranate seedlings start to sprout, proper watering and care are essential for their healthy growth. Follow these steps to ensure that your seedlings thrive:
- Watering: Water the seedlings regularly, keeping the soil consistently moist but not waterlogged. Aim for deep, thorough waterings rather than frequent shallow waterings. Check the moisture level of the soil regularly and adjust watering based on the plant’s needs and the weather conditions. Be mindful not to overwater, as this can lead to root rot and other issues.
- Fertilization: Once the seedlings have developed a few sets of true leaves, you can start fertilizing them. Use a balanced, slow-release fertilizer or a diluted liquid fertilizer specifically formulated for fruit trees. Follow the manufacturer’s instructions for application rates and frequency. Fertilize every four to six weeks during the growing season to provide the necessary nutrients for healthy growth.
- Weeding: Regularly check the planting area for weeds and remove them promptly. Weeds compete with your pomegranate seedlings for nutrients and moisture, so keeping the area weed-free will help the seedlings establish themselves without competition.
- Protecting from Pests: Keep a lookout for any pests that may affect your pomegranate seedlings, such as aphids or snails. Monitor the plants regularly and take appropriate measures to prevent or control any pest infestations. Consider using organic pest control methods or consult with a local gardening expert for guidance.
- Supporting the Seedlings: As the seedlings grow taller, they may need support to prevent them from bending or breaking under their own weight. Use bamboo stakes or other supports to gently tie the seedlings to keep them upright. Be careful not to tie them too tightly, as this can damage the stems.
- Pruning: Once the seedlings have grown a few inches tall, you can begin pruning to shape the tree and encourage strong branching. Remove any weak or crossing branches, and trim back excessive growth to promote a well-balanced canopy. Avoid heavy pruning during the first year, as this can delay growth.
- Monitoring: Keep a close eye on the seedlings for any signs of stress, disease, or nutrient deficiencies. Look for yellowing leaves, wilting, or other abnormal symptoms. Address any issues promptly by adjusting watering, fertilization, or taking appropriate measures to rectify the problem.
By providing proper watering, care, and attention to your pomegranate seedlings, you’ll help them establish a strong foundation for future growth and fruit production. Now, it’s time to move on to the next step: transplanting the seedlings (optional) as they outgrow their containers or current location.
Step 8: Transplanting the Seedlings (Optional)
Transplanting the pomegranate seedlings is an optional step that you can take if they outgrow their containers or current planting location. Transplanting allows the seedlings to have more space for root development and access to nutrients in a larger area. Here’s how you can transplant your pomegranate seedlings:
- Timing: Choose the right time to transplant the seedlings. This is typically done in early spring or late fall when the weather is mild and the seedlings are dormant or experiencing slower growth.
- Preparation: Before transplanting, moisten the soil in both the current container or planting location and the new planting hole. This will help minimize stress and ease the transition for the seedlings.
- Digging the New Planting Hole: Dig a hole in the new planting location that is spacious enough to accommodate the root ball of the seedling. The hole should be slightly wider and deeper than the current container or root system of the seedling.
- Careful Removal: Gently remove the seedling from its container or current planting location, taking care not to damage the roots. You can use a small trowel or your hands to carefully loosen the soil around the root ball and slide it out.
- Placing the Seedling: Place the seedling into the new planting hole, ensuring that it sits at the same level as it was previously planted. Spread out the roots in the hole and backfill with soil, gently firming it around the root ball.
- Watering: Water the transplanted seedling immediately after planting to help settle the soil and eliminate any air pockets. Provide thorough watering, ensuring that the soil is evenly moist around the roots.
- Aftercare: Keep a close eye on the transplanted seedlings and continue to provide proper care and maintenance. Water the seedlings regularly, monitor for any signs of stress or nutrient deficiencies, and adjust their care as needed.
- Staking (if necessary): If the transplanted seedlings seem a bit unstable or prone to bending, you can provide support by staking them. Use bamboo stakes or other supports to gently tie the seedlings and provide stability until they become firmly rooted.
Transplanting pomegranate seedlings is an optional step, but it can help them establish in a larger space and improve their overall growth. However, if the seedlings are already in their permanent location with ample space, there may be no need for transplantation. Now, let’s proceed to the next step: pruning and training the pomegranate tree.
Read more: How To Plant Persimmon Tree From Seed
Step 9: Pruning and Training the Tree
Pruning and training your pomegranate tree is an important step in maintaining its health, shape, and productivity. Proper pruning ensures that the tree develops a strong structure, promotes optimal fruit production, and allows for better air circulation. Here’s how you can prune and train your pomegranate tree:
- Timing: Prune your pomegranate tree in late winter or early spring, before new growth begins. This dormant period allows for better visibility and minimizes stress on the tree.
- Remove Suckers: Look for any suckers or unwanted shoots that emerge from the base of the tree or the rootstock. These can sap energy from the tree and should be promptly removed by cutting them off near the base.
- Trimming Dead or Damaged Branches: Inspect the tree for any dead, diseased, or damaged branches. Prune them back to healthy wood, making clean cuts just above a bud or branch junction. This helps prevent the spread of diseases and allows for better nutrient flow to the remaining branches.
- Thinning Interior Branches: Pomegranate trees tend to have a dense growth habit, which can hinder air circulation and sunlight penetration. Thinning the interior branches allows for better light penetration and airflow, reducing the risk of fungal diseases. Remove any overcrowded or crossing branches to open up the canopy.
- Shaping the Canopy: Prune the branches to shape the canopy of the tree. A well-pruned pomegranate tree should have an open and balanced structure. Aim for a vase-shaped or multi-trunk form, with the main leaders or branches spreading evenly to allow sunlight to reach all parts of the tree.
- Training the Tree: If you desire a specific training form, such as an espalier or a single-trunk tree, start training the tree early on with selective pruning. Use stakes, wires, or other training structures to guide the growth in the desired direction. Regularly prune and train the young branches to maintain the desired form.
- Sanitizing: Between each pruning cut, sanitize your pruning tools with rubbing alcohol or a disinfectant spray. This helps prevent the spread of diseases or pathogens from one branch to another.
- Observation: After pruning, monitor the tree for any signs of stress or potential issues. Ensure that the branches are healing properly and adjust the tree’s care and maintenance as needed.
By properly pruning and training your pomegranate tree, you’ll improve its structure, promote overall health, and maximize fruit production. Always remember to use clean and sharp pruning tools to make clean cuts. Now, let’s move on to the final step: harvesting the delicious pomegranates!
Step 10: Harvesting the Pomegranates
After months of care and patience, the time has finally come to harvest the bountiful pomegranates from your tree. Harvesting at the right time ensures that the fruits are at their peak flavor and sweetness. Follow these steps to harvest your pomegranates:
- Timing: Pomegranates are typically ready for harvesting in late summer or early fall, depending on the variety and your local climate. The fruits should have reached their full maturity, with a deep color and firm texture.
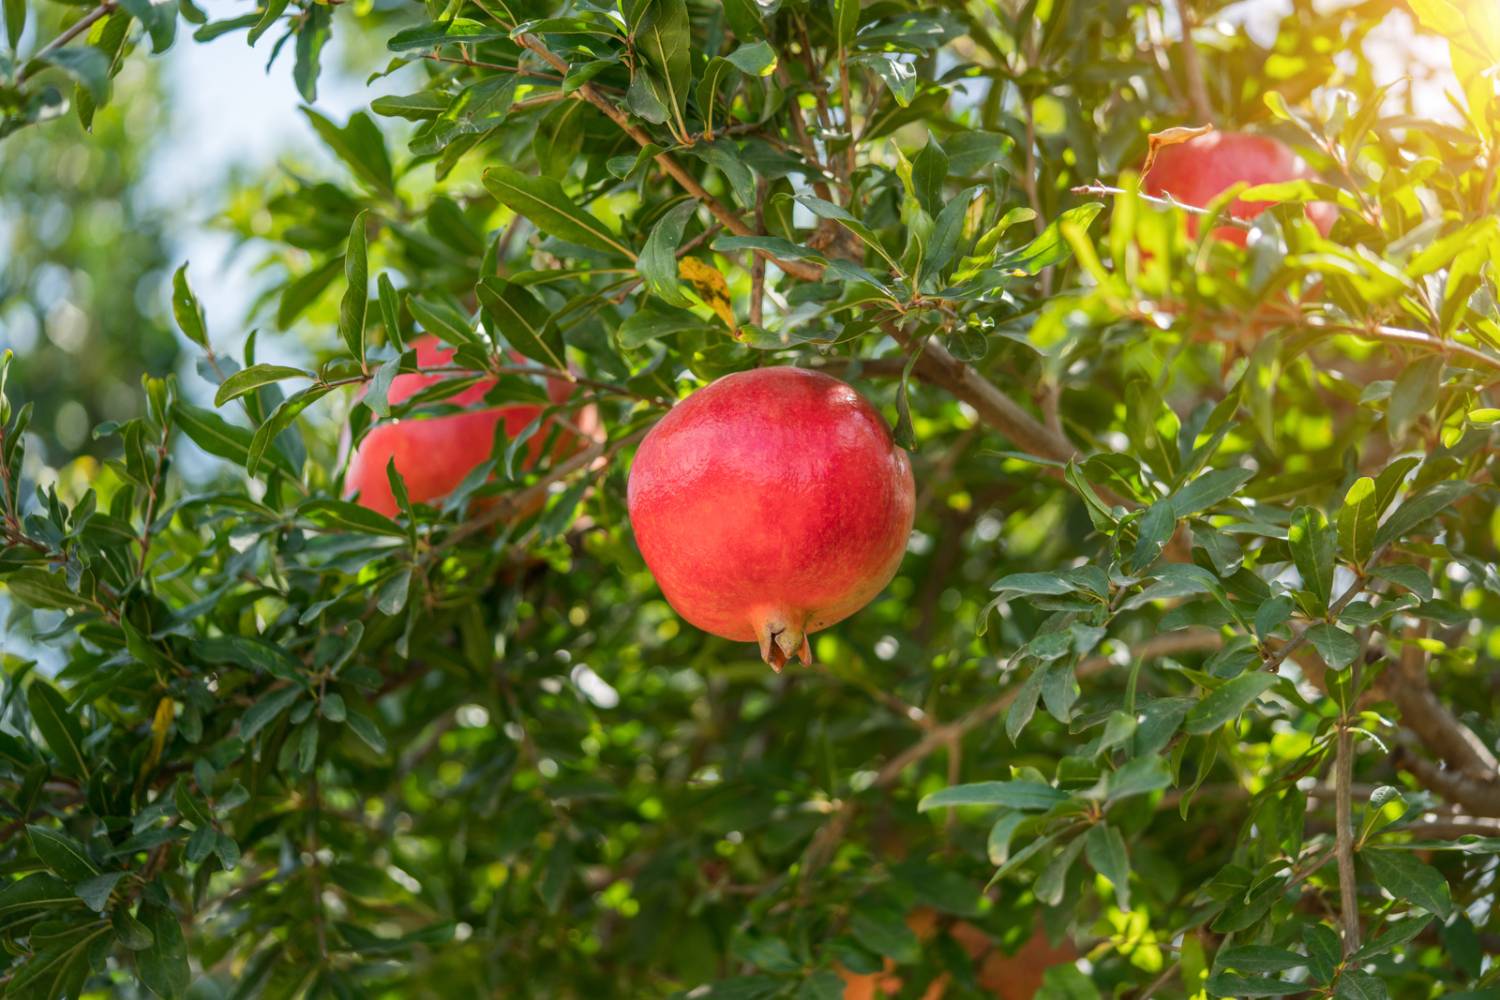
- Appearance: Look for pomegranates with a rich, deep color. Depending on the variety, they may be vibrant red, yellow, or even pink. The skin should be smooth, glossy, and free from blemishes or cracks.
- Feel: Gently hold the pomegranate and feel its weight. The fruit should feel heavy for its size, indicating a good juice content. Avoid harvesting pomegranates that feel light or appear shriveled, as they may not be fully matured.
- Color Test: To ensure the pomegranates are fully ripe, you can perform a color test. Cut a small slit on the fruit’s skin. If the seeds inside are a deep, vibrant color, the pomegranate is ready for harvesting. If the seeds are pale or white, the fruit needs more time to ripen.
- Harvesting Technique: Use a pair of pruning shears or sharp scissors to cut the pomegranates from the tree. Cut the fruits from the branch, leaving a short stem attached. Avoid pulling or twisting the fruits, as this can damage the tree or break the skin of the pomegranates.
- Storage: Once harvested, pomegranates can be stored at room temperature for up to a week. If you want to prolong their shelf life, place them in a cool and well-ventilated area, such as a refrigerator, where they can last for several weeks.
- Enjoying the Fruits: When you’re ready to enjoy the pomegranates, cut them open by scoring the skin and gently breaking apart the sections. Hold each section over a bowl and tap the back with a spoon to release the juicy arils (seeds). You can eat them as is, add them to salads, smoothies, desserts, or use them in various culinary creations.
- Seeding: If you want to save the seeds for future planting, carefully separate the arils from the pith and allow them to dry completely. Store the seeds in a cool and dry place until you’re ready to sow them.
Harvesting and savoring the delicious pomegranates from your tree is a rewarding experience. Enjoy the fruits of your labor and share the flavors of nature with family and friends. Congratulations on successfully growing your own pomegranate tree!
With this final step, you have completed the journey of planting and caring for a pomegranate tree from seeds. By following these steps and providing proper care, your pomegranate tree will reward you with beautiful foliage, stunning flowers, and luscious fruits for years to come.
Happy gardening and happy harvesting!
Conclusion
Growing a pomegranate tree from seeds is a fulfilling and rewarding experience that allows you to witness the miracle of nature firsthand. From the careful selection of seeds to the joy of harvesting the delicious fruits, each step along the way contributes to the success and growth of your pomegranate tree.
Throughout this guide, we have covered the essential steps involved in planting a pomegranate tree from seeds. We started by gathering the necessary materials, choosing the right seeds, and preparing them for planting. Then, we explored the importance of selecting an appropriate planting location, preparing the soil, and sowing the seeds with care.
Once the seeds germinated and grew into seedlings, we discussed the importance of proper watering, fertilization, and care. We learned about the optional step of transplanting the seedlings and the significance of pruning and training the tree to shape its growth. Finally, we explored the exciting moment of harvesting the ripe and juicy pomegranates, savoring the fruits of your labor.
Remember, gardening is both an art and a science. While following these steps will increase your chances of success, each pomegranate tree is unique, and variations may arise depending on your specific environment and conditions. Always observe your tree closely, adapt your care accordingly, and seek advice from local experts or gardening communities.
As you embark on this journey, let the process be a source of joy, wonder, and connection to nature. Embrace the challenges that come your way, and celebrate the triumphs of nurturing a plant from a tiny seed to a thriving tree. Your efforts will not only yield delicious pomegranates but also foster a deeper connection with the natural world.
So, if you’re ready, gather your materials, choose your pomegranate seeds, and let the journey begin. With patience, care, and a touch of green thumb, you’ll have the pleasure of witnessing the growth and harvest of your very own pomegranate tree.
Happy planting and may your pomegranate tree flourish with abundance!
Frequently Asked Questions about How To Plant A Pomegranate Tree From Seeds
Was this page helpful?
At Storables.com, we guarantee accurate and reliable information. Our content, validated by Expert Board Contributors, is crafted following stringent Editorial Policies. We're committed to providing you with well-researched, expert-backed insights for all your informational needs.


0 thoughts on “How To Plant A Pomegranate Tree From Seeds”