Home>Garden Essentials>How To Use A Seed Starter Tray
Garden Essentials
How To Use A Seed Starter Tray
Modified: August 28, 2024
Learn how to effectively use a seed starter tray in your garden for successful germination and healthy plant growth.
(Many of the links in this article redirect to a specific reviewed product. Your purchase of these products through affiliate links helps to generate commission for Storables.com, at no extra cost. Learn more)
Introduction
Gardening can be a rewarding and fulfilling hobby. Whether you have a spacious backyard or a small balcony, growing your own plants brings a sense of joy and satisfaction. One of the key components to successful gardening is starting with healthy, vigorous plants from the very beginning. This is where a seed starter tray comes in.
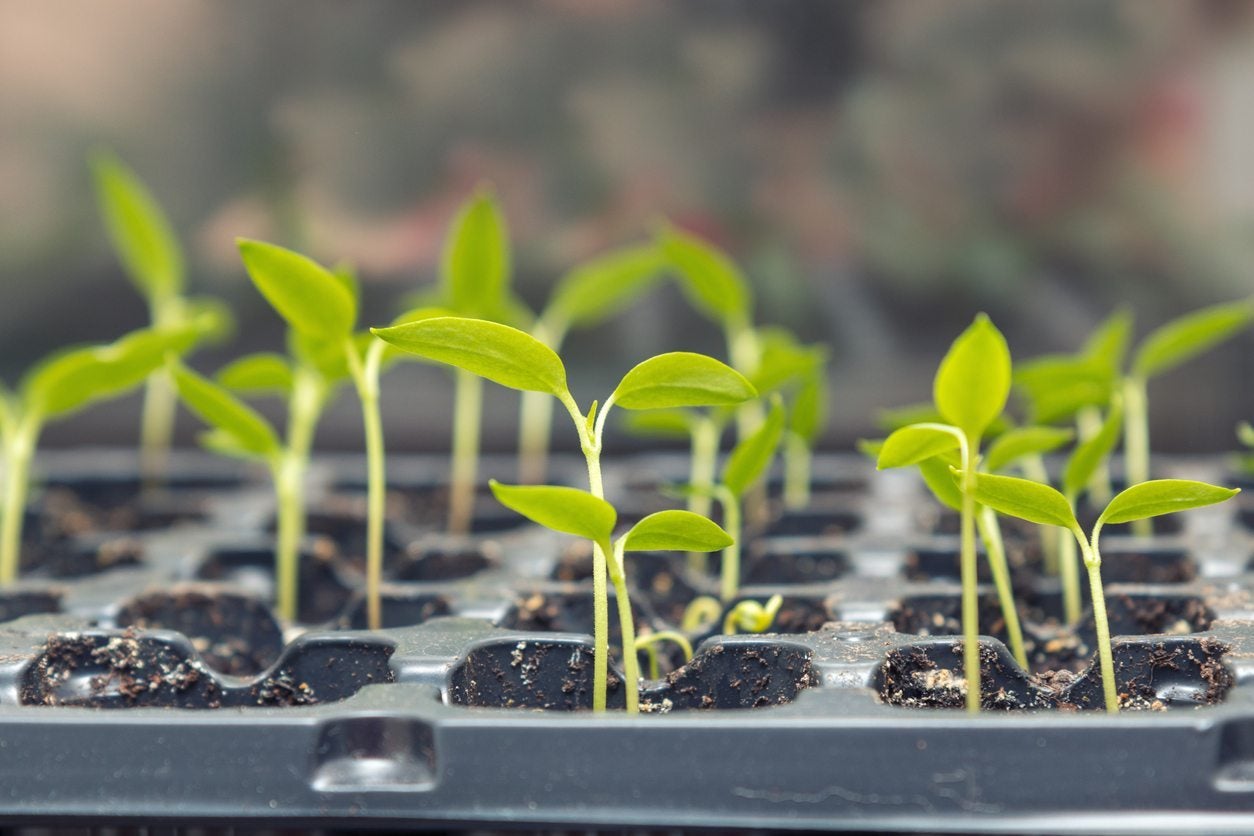
A seed starter tray is a shallow, multi-cell container designed to provide optimal conditions for seed germination and early seedling growth. It allows you to start your plants indoors, giving them a head start before they are transplanted to the garden. Using a seed starter tray offers numerous benefits and can greatly increase your chances of success in the garden.
Throughout this article, we will explore the various benefits of using a seed starter tray, as well as provide a step-by-step guide on how to effectively utilize one. By the end, you will have the knowledge and confidence to start your own seeds and nurture them into healthy, robust plants.
Key Takeaways:
- Using a seed starter tray helps you grow healthy plants by providing a controlled environment, extending the growing season, and protecting seeds from pests and diseases. It’s a cost-effective and space-efficient way to start your garden.
- When using a seed starter tray, choose the right size and material, prepare the tray properly, select suitable seeds, and provide optimal conditions for germination and seedling growth. Care for your seedlings and enjoy the journey of gardening!
Read more: How To Use Chimney Charcoal Starter
Benefits of Using a Seed Starter Tray
Using a seed starter tray offers several advantages over direct sowing seeds in the garden soil. Let’s take a closer look at some of these benefits:
1. Controlled Environment:
A seed starter tray provides a controlled environment for seeds to germinate. By controlling factors such as temperature, humidity, and moisture levels, you can create optimal conditions that promote higher germination rates and faster seedling growth.
2. Extended Growing Season:
Starting your plants indoors using a seed starter tray allows you to extend the growing season. By starting seeds earlier, you can gain several weeks or even months of extra growth before transplanting them outside. This is especially beneficial for regions with shorter growing seasons.
3. Protection from Pests and Diseases:
Seeds and young seedlings are particularly vulnerable to pests and diseases. By starting them in a seed starter tray, you can minimize their exposure to potential threats. The controlled environment helps to reduce the risk of pests and diseases, giving your plants a better chance to thrive.
Read more: How To Use Weber Chimney Starter
4. Easy Monitoring:
With a seed starter tray, it is easy to monitor the progress of your seeds and seedlings. The transparent or translucent nature of the tray allows you to keep a close eye on their development, ensuring they receive the right amount of water, light, and nutrients.
5. Space Efficiency:
Seed starter trays are compact and take up little space. They can be easily placed on a windowsill, a countertop, or a small table. This makes them ideal for gardeners with limited space, such as apartment dwellers or those who want to start seeds indoors.
6. Cost-effective:
Using a seed starter tray can be a cost-effective option compared to purchasing established plants from a nursery. By starting your plants from seeds, you can save money and have a wider variety of plant options to choose from.
7. Sense of Achievement:
There is a unique sense of achievement that comes with starting seeds and nurturing them into healthy, thriving plants. Using a seed starter tray allows you to be involved in every step of the process, from seed to harvest, further enhancing the joy and satisfaction of gardening.
Overall, using a seed starter tray provides a range of benefits that can greatly improve your success in growing your own plants. The controlled environment, extended growing season, protection from pests and diseases, easy monitoring, space efficiency, cost-effectiveness, and the sense of achievement are all compelling reasons to incorporate a seed starter tray into your gardening routine.
Read more: How To Use Drip Tray With Drain In Kegerator
Step 1: Choosing the Right Seed Starter Tray
Choosing the right seed starter tray is important for the successful germination and growth of your seeds. Here are some factors to consider when selecting a seed starter tray:
1. Size and Number of Cells:
Seed starter trays come in various sizes and cell configurations. The number of cells in a tray can range from a few to several hundred. Consider the number of seeds you plan to sow and the available space you have for growing seedlings. If you have limited space, a smaller tray with fewer cells may be more suitable.
2. Material:
Seed starter trays are typically made of plastic, bio-degradable materials, or recycled materials. Plastic trays are durable, reusable, and often come with clear lids for retaining moisture. Bio-degradable trays are made from materials like compostable peat or coconut coir, which can be planted directly into the soil along with the seedling. Choose a material that aligns with your environmental values and gardening preferences.
3. Drainage Holes:
Proper drainage is crucial for preventing waterlogging and root rot. Look for seed starter trays that have drainage holes at the bottom. These holes allow excess water to drain away and ensure that the soil remains moist but not overly saturated.
Read more: How To Use A Crystal Glass Tray On A Table
4. Cover or Dome:
Some seed starter trays come with a transparent cover or dome. This helps retain moisture, creating a mini greenhouse effect and promoting faster germination. The cover also helps to maintain consistent humidity levels and protect the seeds from external disturbances.
5. Easy to Clean:
Choose a seed starter tray that is easy to clean and sterilize between uses. This minimizes the risk of disease transmission and ensures a healthy growing environment for your seedlings.
6. Compatibility with Heat Mats:
If you plan to use a heat mat to provide bottom heat for seed germination, ensure that the seed starter tray is compatible with heat mats. Some trays have built-in heat mat compartments or are designed to fit perfectly on top of standard-sized heat mats.
7. Stackability:
If you have limited space, look for seed starter trays that are stackable. This allows you to maximize vertical space and efficiently utilize your growing area.
Consider these factors when choosing a seed starter tray to ensure that it meets your specific needs and provides an ideal environment for your seeds to germinate and thrive. Remember, a well-chosen seed starter tray sets the foundation for successful gardening.
Read more: What Greenery Is Used With Fruit Trays
Step 2: Preparing the Seed Starter Tray
Before you start sowing your seeds, it’s important to properly prepare the seed starter tray to create an optimal growing environment. Here are the steps to follow in preparing the seed starter tray:
1. Clean the Tray:
Start by cleaning the seed starter tray to remove any dirt, debris, or potential contaminants. Wash the tray using warm water and mild soap or a dilute bleach solution to ensure cleanliness. Rinse thoroughly and allow it to dry completely before proceeding.
2. Fill with Seed Starting Mix:
Choose a high-quality seed starting mix or a sterile seedling mix. Avoid using garden soil, as it may contain pathogens or weed seeds that can hinder seedling growth. Fill the cells of the tray with the seed starting mix, gently patting it down to create a firm yet airy surface.
3. Moisten the Soil:
Before sowing the seeds, it’s important to ensure that the soil is evenly moist. Use a spray bottle or a gentle stream of water to lightly moisten the seed starting mix. Be careful not to oversaturate the soil, as it may lead to waterlogged conditions that can impede germination.
Read more: How To Store A Sourdough Starter
4. Create Labels:
Labeling your seed starter tray is crucial to keep track of the types of plants you are growing. Use plant tags, popsicle sticks, or any other labeling system to mark each cell with the name of the seed variety or plant type. This will help you identify the seedlings once they start to grow.
5. Set Up the Tray:
Place the prepared seed starter tray on a waterproof tray or a saucer to catch any excess water that drains out. This will help maintain cleanliness and prevent water damage to surfaces. If your tray has a transparent cover or dome, place it on top to create a mini greenhouse effect and promote moisture retention.
6. Heat the Soil (optional):
If you are using heat mats to provide bottom heat for faster germination, place the seed starter tray on top of the heat mat. This additional warmth can stimulate seed germination and promote root development.
7. Provide Adequate Lighting:
Place the seed starter tray in a location that receives bright, indirect sunlight or use artificial grow lights. Adequate lighting is essential for healthy seedling growth. If using grow lights, position them a few inches above the tray and adjust the height as the seedlings grow.
By following these steps, you will ensure that your seed starter tray is properly prepared, providing an ideal environment for seed germination and seedling development. Now you’re ready to move on to selecting and planting your seeds, which we will cover in the next step.
Step 3: Selecting the Seeds
When it comes to selecting seeds for your seed starter tray, there are a few key factors to consider. Choosing the right seeds will set the foundation for successful seedling growth and ultimately, a bountiful garden. Here are some steps to follow when selecting your seeds:
1. Determine Your Garden Goals:
Before choosing seeds, consider your gardening goals. Are you looking to grow vegetables, herbs, flowers, or a combination of them? Do you have specific varieties in mind, or are you open to trying new ones? Assess your gardening preferences and decide what you want to cultivate in your garden.
2. Consider Your Growing Conditions:
Evaluate the conditions in your garden, such as the amount of sunlight, temperature range, and soil type. Different plant varieties have specific requirements, so choose seeds that are suitable for your growing conditions. For example, if you have limited sunlight, opt for shade-tolerant plants. If you have a short growing season, select quick-maturing varieties.
3. Research the Seed Suppliers:
There are numerous seed suppliers available, both online and locally. Do some research to find reputable suppliers that offer high-quality, non-GMO seeds. Read reviews, check their seed catalog, and consider factors like seed viability and germination rate.
Read more: How To Store Starter In Fridge
4. Look for Certified Organic Seeds:
If you prefer organic gardening, look for certified organic seeds. These seeds are grown without synthetic fertilizers, pesticides, or genetically modified organisms. Using organic seeds aligns with eco-friendly practices and ensures a healthier start for your plants.
5. Check Seed Viability:
Seeds have a shelf life, and their viability can decrease over time. Check the expiration or “packed for” date on seed packets to ensure that the seeds are still viable. Fresh seeds have a higher germination rate and better chances of successful growth.
6. Consider Seedling Transplantability:
Some plants, like root vegetables or delicate flowering plants, may have difficulty with transplanting due to their sensitive root systems. Consider whether the seeds you choose are best sown directly in the garden or can be easily transplanted from the seed starter tray to the garden later.
7. Diversity and Experimentation:
Don’t be afraid to explore new varieties and experiment with different plants. Adding diversity to your garden can bring excitement and surprise. Try growing heirloom varieties, unusual herbs, or unique flower colors to broaden your gardening experience.
By following these steps, you can confidently select the seeds that align with your gardening goals and growing conditions. Take the time to research, evaluate, and experiment to create a diverse and thriving garden.
Read more: What Is A Starter Fertilizer
Step 4: Planting the Seeds in the Tray
Now that you have selected your seeds, it’s time to plant them in the prepared seed starter tray. Properly sowing the seeds will ensure good germination rates and set your seedlings up for healthy growth. Follow these steps to plant your seeds:
1. Read the Seed Packet:
Before planting, read the instructions on the seed packet. The packet will provide specific information about seed depth, spacing, and any other requirements for successful germination.
2. Mark the Cells:
If you are planting different types of seeds in the same tray, use your previously prepared labels to mark each cell. This will help you identify the seedlings as they grow.
3. Sow the Seeds:
Gently tap the seed packet to distribute the seeds evenly. Using your fingers or a small spoon, carefully place the seeds into the designated cells of the seed starter tray. Follow the recommended seed depth mentioned on the packet, as it may vary depending on the plant variety.
4. Cover the Seeds:
After sowing the seeds, lightly cover them with a thin layer of the seed-starting mix. This will provide a protective layer, help retain moisture, and facilitate germination. Refer to the seed packet for specific instructions on covering the seeds, as some may require exposure to light for optimal germination.
5. Water the Seeds:
Using a spray bottle or a watering can with a fine spout, gently water the seeds. Be careful not to dislodge the seeds or oversaturate the soil. Aim for a consistent level of moisture, ensuring that the seed-starting mix is evenly damp but not waterlogged.
6. Label the Tray:
Using a plant tag or a labeling system, mark the tray with the name of the seeds you just planted. This will help you keep track of what’s growing and where.
7. Place the Tray in Optimal Conditions:
After planting, place the seed starter tray in a location that provides the right conditions for germination. This typically includes a warm and well-lit area, but make sure to refer to the specific requirements of the seeds you have planted. If needed, add a clear dome or cover to create a mini greenhouse effect and maintain humidity.
Read more: How To Use Amaranth Seeds
8. Maintain Moisture and Check for Germination:
Regularly monitor the moisture levels in the seed starter tray and water as needed to keep the soil consistently moist. Check the seeds for germination daily or as indicated on the seed packet. Once the seedlings start to emerge, remove the cover and continue to provide optimal growing conditions.
By following these steps, you will ensure that your seeds are properly planted in the seed starter tray, creating an environment conducive to germination and healthy seedling growth. Move on to the next step to learn how to provide the right conditions for germination.
Step 5: Providing the Right Conditions for Germination
Germination is a crucial stage in the life cycle of a seed, and providing the right conditions will greatly increase the chances of successful germination. By creating an environment that meets the specific needs of your seeds, you can optimize their germination and ensure healthy seedling development. Here are some important factors to consider:
1. Temperature:
Seeds have specific temperature requirements for germination. Most seeds germinate best at temperatures between 65°F and 85°F (18°C and 29°C). Use a thermometer to monitor the temperature in the area where the seed starter tray is placed, and adjust it as needed by using a heating mat or by moving it to a warmer or cooler location.
2. Light:
While light requirements vary among different plant species, most seeds do not require light during the germination process. In fact, some seeds prefer darkness. However, once the seedlings begin to emerge, they will need ample light to grow strong and healthy. Provide sufficient light by placing the tray in a bright area or by using artificial grow lights.
Read more: How To Use Anise Seed
3. Moisture:
Consistent moisture is crucial for successful seed germination. The seed-starting mix should be kept evenly moist, but avoid overwatering, as this can lead to fungal diseases or rot. Use a spray bottle or a gentle watering can to mist the soil surface, ensuring it remains moist but not soggy. Check the moisture level regularly and adjust watering as needed.
4. Humidity:
Some seeds benefit from higher humidity levels during germination. You can create a humid environment by covering the tray with a clear plastic dome or by placing it inside a plastic bag. This helps retain moisture and creates a mini greenhouse effect. Monitor the humidity inside the tray, and if condensation forms on the cover, prop it slightly open to allow for air circulation.
5. Ventilation:
Adequate airflow is important for preventing fungal diseases and promoting healthy seedling growth. Once the seedlings have emerged, remove the cover or create small gaps for ventilation. This allows fresh air to circulate and reduces the risk of damping off, a fungal disease that can kill young seedlings.
6. Timing:
Each plant variety has its own optimal germination time. This information can usually be found on the seed packet. Monitor the seed tray closely, and once most of the seeds have germinated and the seedlings are well-established, it’s time to remove the cover and provide normal growing conditions.
By providing the right conditions for germination, you are setting the stage for successful growth and development of your seedlings. Understanding the specific needs of your seeds will help ensure that they have the best possible start in life.
Read more: How To Use Black Seed
Step 6: Caring for the Seedlings
Now that your seeds have germinated and are growing into seedlings, it’s important to provide proper care to ensure their continued health and development. With the right care, your seedlings will grow strong and ready for transplantation into the garden. Follow these steps to care for your seedlings:
1. Watering:
Water your seedlings regularly, keeping the soil consistently moist but not waterlogged. Avoid overwatering, as it can lead to root rot. Water directly at the base of the seedlings to avoid wetting the foliage.
2. Light:
Provide adequate light for your seedlings to promote healthy growth. Place them in a bright location where they will receive at least 6-8 hours of indirect sunlight each day. If growing indoors, use artificial grow lights positioned a few inches above the seedlings.
3. Fertilizing:
Once the seedlings have developed their first set of true leaves, start fertilizing them with a diluted, balanced, water-soluble fertilizer. Follow the instructions on the fertilizer package for the correct dilution ratio and frequency of application. Be careful not to over-fertilize, as this can damage the delicate seedlings.
Read more: How To Use Cardamom Seeds
4. Thin Out Seedlings (if necessary):
If you have multiple seedlings growing closely together in one cell or compartment, you may need to thin them out to allow for better air circulation and adequate space for each plant to grow. Gently remove the weaker seedlings, leaving only the strongest and healthiest ones.
5. Transplanting to Larger Containers (if necessary):
If your seedlings outgrow the space in the seed starter tray before they are ready to be transplanted into the garden, you may need to transfer them to larger individual pots. Choose containers that provide sufficient room for root growth and use a well-draining potting mix.
6. Hardening Off:
Before transplanting your seedlings into the garden, they need to be gradually acclimated to the outdoor conditions. This process, known as hardening off, involves gradually exposing the seedlings to outdoor temperatures, sunlight, and wind. Start by placing them outdoors in a sheltered area for a few hours each day, gradually increasing the time and exposure over a period of 7-10 days.
7. Pest and Disease Control:
Monitor your seedlings regularly for any signs of pests or diseases. Inspect the leaves, stems, and soil for pests like aphids, fungus gnats, or damping off. Early detection and intervention can prevent further damage. Use organic pest control methods whenever possible to protect the health of your seedlings.
By providing proper care to your seedlings, you are ensuring their well-being and setting the stage for successful transplanting and future growth in the garden. Your attentiveness and care will be reflected in healthy and vibrant plants that will continue to thrive.
Read more: How To Use Coriander Seeds
Step 7: Transplanting the Seedlings
Transplanting seedlings from the seed starter tray to their final destination in the garden is an exciting phase in the growing process. This step allows your seedlings to establish themselves in their new home and continue their growth towards maturity. Follow these steps to ensure successful transplanting:
1. Choose the Right Timing:
Timing is crucial when it comes to transplanting seedlings. Wait until the weather has warmed up, and there is no longer a risk of frost. Consult the seed packet or gardening resources for specific guidance on when to transplant each type of seedling.
2. Prepare the Garden Bed:
Before transplanting, prepare the garden bed by removing any weeds and loosening the soil. Incorporate organic matter, such as compost or well-rotted manure, to improve soil fertility and drainage.
3. Water the Seedlings:
Prior to transplanting, water the seedlings thoroughly in their seed starter tray. This hydrates the plants and makes it easier to remove them without causing damage to the roots.
Read more: How To Use Tamarind Seeds
4. Dig the Planting Hole:
Dig a hole in the garden bed that is slightly larger than the root ball of the seedling. Gently press the soil around the hole to ensure good contact with the seedling’s roots once planted.
5. Transplant Carefully:
To remove a seedling from the seed starter tray, gently loosen the soil around the base of the plant with a small trowel or your fingers. Carefully lift the seedling by holding onto the leaves, avoiding excessive handling of the delicate stem. Place the seedling in the prepared hole, ensuring that it is at the same depth it was in the seed starter tray.
6. Backfill and Firm the Soil:
Gently backfill the hole with soil, taking care not to damage the delicate roots. Firm the soil around the seedling to eliminate any air pockets. This provides stability and ensures good root-to-soil contact.
7. Water the Transplanted Seedlings:
After transplanting, water the seedlings thoroughly to provide moisture to the roots and help them establish in their new location. Use a gentle stream of water to avoid disturbing the soil around the seedlings.
Read more: How To Use Tamarind Seeds
8. Provide Aftercare:
Continue to monitor and care for your transplanted seedlings as they adjust to their new environment. Protect them from extreme weather conditions, provide regular watering, and apply organic fertilizers as needed to promote healthy growth.
Transplanting seedlings requires careful handling and attention to ensure their successful transition into the garden. By following these steps, you can confidently transplant your seedlings and watch them thrive as they continue their journey to maturity.
Conclusion
Congratulations! You have successfully ventured into the world of seed starting using a seed starter tray. By following the steps outlined in this guide, you have learned how to choose the right tray, prepare it, select the seeds, plant them, and provide the optimal conditions for germination and seedling growth. Finally, you have learned how to transplant your seedlings into the garden, where they will continue their journey towards maturity.
Using a seed starter tray offers numerous benefits, including providing a controlled environment, extending the growing season, protecting from pests and diseases, easy monitoring, space efficiency, cost-effectiveness, and a sense of achievement. By starting your plants from seeds, you have gained a deeper connection to your garden, witnessing the entire growth process from the very beginning.
Remember, caring for your seedlings is a crucial part of their success. Regularly water them, provide adequate light, fertilize appropriately, and protect them from pests and diseases. As they grow, be sure to gradually acclimate them to outdoor conditions through the hardening off process before transplanting them into the garden.
As your plants mature, continue to observe their progress, provide proper care, and enjoy the fruits of your labor. Gardening is a journey of learning and discovery, and with each season, you will gain valuable experience that will help you become an even better gardener.
So, grab your seed starter tray, choose your favorite seeds, and get growing! With passion, patience, and knowledge, your garden will flourish, bringing beauty, nourishment, and joy to your life!
Frequently Asked Questions about How To Use A Seed Starter Tray
Was this page helpful?
At Storables.com, we guarantee accurate and reliable information. Our content, validated by Expert Board Contributors, is crafted following stringent Editorial Policies. We're committed to providing you with well-researched, expert-backed insights for all your informational needs.
0 thoughts on “How To Use A Seed Starter Tray”