Home>Renovation & DIY>Tools & Equipment>How To Test A Starter Solenoid With A Screwdriver
Tools & Equipment
How To Test A Starter Solenoid With A Screwdriver
Published: December 19, 2023
Learn how to test a starter solenoid using a screwdriver and other tools and equipment. Follow these simple steps to troubleshoot your starter solenoid. Discover the best techniques for testing your starter solenoid.
(Many of the links in this article redirect to a specific reviewed product. Your purchase of these products through affiliate links helps to generate commission for Storables.com, at no extra cost. Learn more)
Introduction
Welcome to the world of automotive DIY! If you’re experiencing issues with your vehicle starting, the starter solenoid might be the culprit. Fortunately, testing a starter solenoid can be done with a simple and commonly available tool: a screwdriver. This guide will walk you through the process, making it easy for even the most novice car enthusiasts to diagnose and potentially solve their starting problems.
Understanding the role of the starter solenoid and how to test it can save you time and money by avoiding unnecessary trips to the mechanic. So, let’s roll up our sleeves, grab a screwdriver, and dive into the fascinating world of automotive troubleshooting!
Key Takeaways:
- Testing a starter solenoid with a screwdriver is an easy way to diagnose starting issues in your car. It’s like using a secret tool to uncover the mystery of why your car won’t start!
- By bridging the solenoid terminals with a screwdriver, you can hear if the starter motor engages, helping you determine if the solenoid is the culprit. It’s like playing detective with your car’s starting system!
Read more: How To Use An Electrical Test Screwdriver
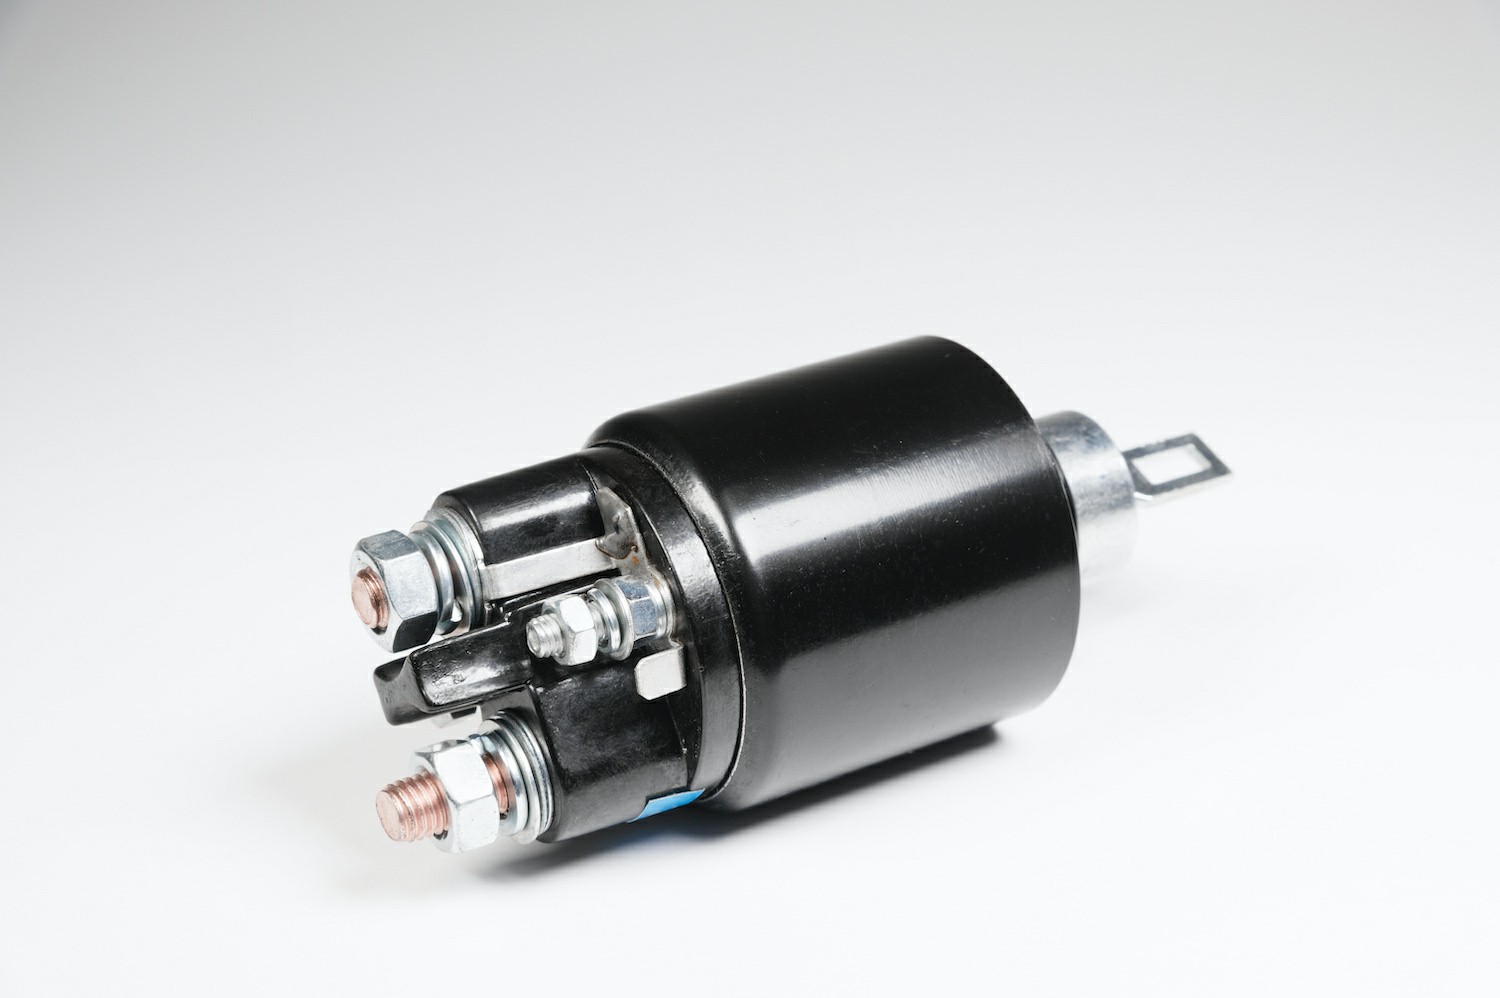
What is a Starter Solenoid?
A starter solenoid is a crucial component of a vehicle’s starting system. It serves as a bridge between the vehicle’s battery and the starter motor. When you turn the ignition key, an electrical signal is sent to the starter solenoid, which then engages the starter motor, allowing it to crank the engine and initiate the combustion process.
Essentially, the starter solenoid acts as a high-power switch, directing a large electric current to the starter motor. It consists of a coil of wire wrapped around an iron core. When the electrical signal from the ignition switch is received, the coil becomes magnetized, pulling a plunger that completes the circuit, allowing the electric current to flow to the starter motor.
One of the key functions of the starter solenoid is to transmit a high electric current from the battery to the starter motor with minimal power loss. This is achieved through the use of large contacts within the solenoid, which can handle the high current without overheating or sustaining damage.
Over time, the starter solenoid can experience wear and tear, leading to malfunctions that result in starting issues. By understanding how to test the starter solenoid, you can determine whether it is the root cause of your vehicle’s starting problems and take appropriate action to resolve the issue.
Tools and Materials Needed
Before diving into the process of testing a starter solenoid with a screwdriver, it’s essential to gather the necessary tools and materials. Here’s what you’ll need:
- Screwdriver: A standard flathead screwdriver will be used to bridge the electrical connections and trigger the starter solenoid.
- Safety Gear: It’s crucial to prioritize safety, so wearing protective gear such as gloves and safety glasses is highly recommended.
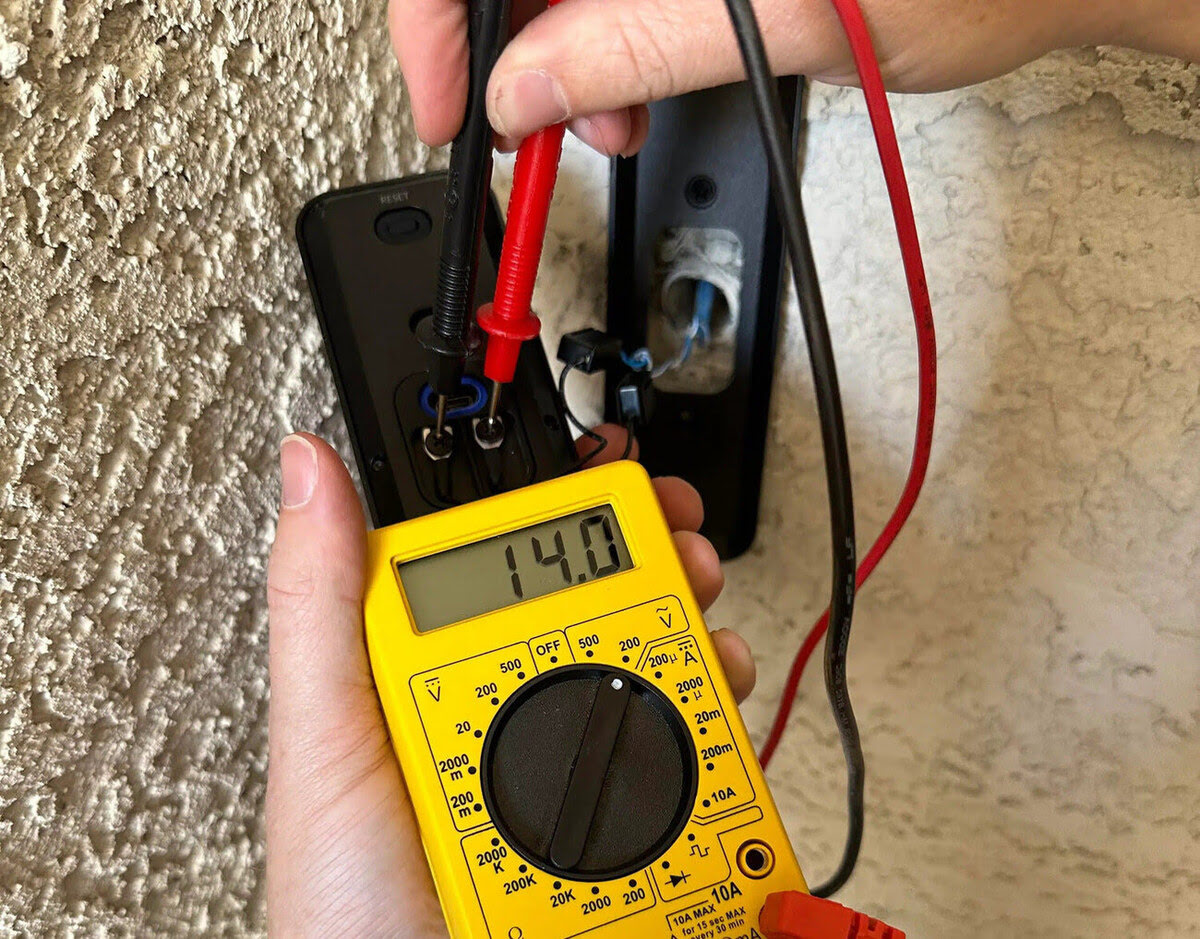
- Multimeter (Optional): While not mandatory, having a multimeter on hand can provide additional confirmation of the solenoid’s functionality by measuring the voltage and continuity of the circuit.
- Assistant (Optional): Having a helper to turn the ignition key while you perform the test can make the process smoother and safer.
By ensuring you have these tools and materials ready, you’ll be well-prepared to carry out the starter solenoid test effectively and safely.
When testing a starter solenoid with a screwdriver, make sure the vehicle is in park or neutral and the ignition is off. Use the screwdriver to bridge the two large terminals on the solenoid. If the starter engages, the solenoid is working.
Steps to Test a Starter Solenoid with a Screwdriver
Testing a starter solenoid with a screwdriver is a straightforward process that can provide valuable insights into the solenoid’s functionality. Follow these steps carefully to conduct the test:
- Prepare the Vehicle: Park the vehicle on a flat, stable surface and engage the parking brake. Ensure the transmission is in “Park” or “Neutral” and turn off the ignition.
- Locate the Starter Solenoid: The starter solenoid is typically mounted on the vehicle’s firewall or fender, near the battery. It is connected to the battery via a large cable and to the starter motor with a smaller wire.
- Ensure Safety: Put on your safety gear, including gloves and safety glasses, to protect yourself from any potential electrical hazards.
- Identify the Solenoid Terminals: The solenoid will have two main terminals. One is the large terminal connected to the battery, and the other is the smaller terminal connected to the ignition switch.
- Bypass the Solenoid: With the ignition key turned off, use the screwdriver to bridge the gap between the large terminal (connected to the battery) and the smaller terminal (connected to the ignition switch). This effectively bypasses the solenoid and sends a direct current from the battery to the starter motor.
- Observe the Results: As you bridge the terminals with the screwdriver, listen for the sound of the starter motor engaging. If the motor cranks the engine, it indicates that the solenoid is functioning properly, and the issue may lie elsewhere in the starting system.
- Use a Multimeter (Optional): If you have a multimeter, you can further verify the solenoid’s operation by measuring the voltage at the terminals and checking for continuity in the circuit. This can provide additional confirmation of the solenoid’s functionality.
By following these steps, you can effectively test the starter solenoid using a screwdriver and gain valuable insights into its condition and performance. Remember to exercise caution and prioritize safety throughout the testing process.
Conclusion
Congratulations on successfully learning how to test a starter solenoid with a screwdriver! By understanding the crucial role of the starter solenoid and mastering the testing process, you’ve empowered yourself to diagnose starting issues and potentially resolve them without the need for professional assistance.
Remember, the ability to troubleshoot and test automotive components not only saves time and money but also fosters a deeper connection with your vehicle. As you continue your journey in the world of automotive maintenance and repair, the knowledge and skills you’ve gained will serve you well in keeping your vehicle in top condition.
Whether you’re a seasoned DIY enthusiast or just beginning to explore the realm of automotive repairs, the process of testing a starter solenoid with a screwdriver exemplifies the practical and empowering nature of DIY automotive maintenance. Armed with a few simple tools and the willingness to learn, you can tackle a wide range of automotive challenges with confidence.
So, the next time your vehicle exhibits starting issues, grab your trusty screwdriver and apply the techniques you’ve learned to pinpoint the root cause. By doing so, you’ll not only keep your vehicle running smoothly but also deepen your understanding of its intricate systems.
With your newfound knowledge and hands-on experience, you’re well-equipped to take on the fascinating world of automotive troubleshooting and maintenance. Happy wrenching!
Frequently Asked Questions about How To Test A Starter Solenoid With A Screwdriver
Was this page helpful?
At Storables.com, we guarantee accurate and reliable information. Our content, validated by Expert Board Contributors, is crafted following stringent Editorial Policies. We're committed to providing you with well-researched, expert-backed insights for all your informational needs.


0 thoughts on “How To Test A Starter Solenoid With A Screwdriver”