Home>Gardening & Outdoor>Outdoor Entertaining>How To Build A Brick Fire Pit
Outdoor Entertaining
How To Build A Brick Fire Pit
Modified: October 19, 2024
Learn how to create a stunning brick fire pit for your outdoor entertaining space with our step-by-step guide. Enjoy cozy gatherings and memorable moments around the fire.
(Many of the links in this article redirect to a specific reviewed product. Your purchase of these products through affiliate links helps to generate commission for Storables.com, at no extra cost. Learn more)
Introduction
So, you"ve decided to take your outdoor entertaining to the next level by building a brick fire pit. There"s something undeniably magical about gathering around a crackling fire with friends and family, sharing stories and creating unforgettable memories. Whether it"s for roasting marshmallows, enjoying cozy evenings, or simply adding a touch of rustic charm to your backyard, a brick fire pit is the perfect addition to your outdoor space.
In this comprehensive guide, we"ll walk you through the step-by-step process of building your own brick fire pit. From gathering the necessary materials and tools to adding the finishing touches, we"ll cover everything you need to know to create a stunning and functional fire pit that will be the centerpiece of your outdoor gatherings. So, roll up your sleeves, unleash your creativity, and get ready to embark on an exciting DIY project that will elevate your outdoor living experience. Let"s dive in!
Key Takeaways:
- Building a brick fire pit requires gathering materials, choosing a safe location, preparing the site, building the base, laying the bricks, and adding finishing touches to create a cozy and inviting outdoor space.
- A brick fire pit not only adds rustic charm to your backyard but also creates a focal point for memorable gatherings. Prioritize safety, maintain the fire pit, and enjoy countless moments of connection and relaxation around the warm glow of the fire.
Read more: How To Build An Outdoor Fire Pit
Step 1: Gather Materials and Tools
Before you start building your brick fire pit, it"s essential to gather all the necessary materials and tools. Here"s what you"ll need:
Materials:
- Bricks: Choose heat-resistant bricks that can withstand high temperatures. Common options include fire bricks or concrete pavers.
- Concrete mix: Used for creating a stable base for your fire pit.
- Gravel: Provides drainage and stability for the base of the fire pit.
- Steel ring or fire pit insert: Helps contain the fire and ensures safety.
- Marking paint or chalk: For outlining the fire pit location.
- Optional: Capstones for a decorative finish.
Tools:
- Shovel: For digging and moving gravel and concrete.
- Rake: To level the ground and spread materials evenly.
- Tape measure: Essential for accurate measurements and layout.
- Masonry trowel: For applying and shaping the concrete mix.
- Level: Ensures the fire pit is built evenly and straight.
- Rubber mallet: Helps adjust the position of bricks during construction.
- Protective gear: Gloves and safety goggles for handling materials.
Once you have all the materials and tools assembled, you"re ready to move on to the next step in creating your brick fire pit.
Step 2: Choose a Location
Choosing the right location for your brick fire pit is crucial for both safety and ambiance. Here are some key considerations to keep in mind when selecting the perfect spot:
Read more: How To Build A Good Fire In A Fire Pit
Safety First:
Ensure that the location you choose is a safe distance away from any flammable structures, such as overhanging trees, bushes, or buildings. It"s also important to check local regulations and obtain any necessary permits for building a fire pit in your area.
Accessibility:
Select a location that is easily accessible and provides enough space for seating and movement around the fire pit. This will ensure that your guests can comfortably gather around the fire and enjoy the warmth and ambiance it provides.
Wind Considerations:
Take note of the prevailing wind direction in your outdoor space. You"ll want to position the fire pit so that the smoke is directed away from seating areas, ensuring a more pleasant experience for everyone gathered around the fire.
Aesthetic Appeal:
Consider the overall aesthetics of your outdoor space. The fire pit should complement the existing landscape and add to the visual appeal of your backyard. Additionally, choosing a location with a picturesque view can enhance the overall ambiance of the area.
Once you"ve carefully considered these factors, mark the chosen location using marking paint or chalk. This will provide a clear outline for the construction process and ensure that the fire pit is positioned exactly where you envision it.
With the location selected and marked, you"re ready to move on to the next step of preparing the site for construction.
Read more: How To Make A Brick Fire Pit
Step 3: Prepare the Site
Now that you have chosen the perfect location for your brick fire pit, it"s time to prepare the site for construction. Follow these essential steps to ensure a solid foundation and a successful build:
Clear the Area:
Begin by clearing the selected area of any debris, rocks, or vegetation. This will provide a clean and level surface for building the fire pit.
Excavation:
Use a shovel to excavate the marked area to a depth of approximately 6-8 inches. This will allow space for the base materials and create a stable foundation for the fire pit.
Add Gravel:
Once the area is excavated, add a layer of gravel to the bottom of the pit. This will aid in drainage and provide additional stability for the base of the fire pit.
Read more: How To Make A Fire Pit With Bricks
Compact the Base:
Use a hand tamper or a piece of lumber to compact the gravel firmly. This step is crucial for creating a solid and level base that will support the weight of the fire pit.
Check for Level:
Use a carpenter"s level to ensure that the base is perfectly level. This will prevent any potential issues during the construction of the fire pit and contribute to its overall stability.
Verify the Dimensions:
Double-check the dimensions of the excavated area to ensure that it matches the intended size of your fire pit. Accuracy at this stage will contribute to a seamless construction process.
With the site properly prepared, you"re now ready to move on to the exciting phase of building the base for your brick fire pit.
Step 4: Build the Base
Building a solid base is essential for the stability and longevity of your brick fire pit. Follow these steps to construct a sturdy foundation that will support the structure and withstand the heat of the fire:
Read more: How To Build A Fire Pit With Stone
Create the Concrete Mix:
Follow the manufacturer"s instructions to prepare the concrete mix. Typically, this involves mixing the concrete with water in a wheelbarrow or mixing tub until it reaches a thick, workable consistency.
Fill the Excavated Area:
Pour the prepared concrete mix into the excavated area, ensuring an even distribution and filling it to the top. Use a trowel to level the surface and create a smooth finish.
Add the Fire Ring or Insert:
Place the steel fire ring or fire pit insert on top of the freshly poured concrete. This will define the inner edge of the fire pit and provide a safe and contained area for the fire.
Check for Alignment:
Use a tape measure to verify that the fire ring or insert is centered and aligned with the intended dimensions of the fire pit. This step is crucial for ensuring a symmetrical and visually appealing final result.
Read more: How To Build A Fire Pit In The Ground
Allow for Curing:
Let the concrete cure according to the manufacturer"s recommendations. This typically involves keeping the concrete moist and protected from extreme temperatures as it sets and hardens.
With the base constructed and the concrete cured, you"re now ready to move on to the exciting phase of laying the bricks and bringing your fire pit to life.
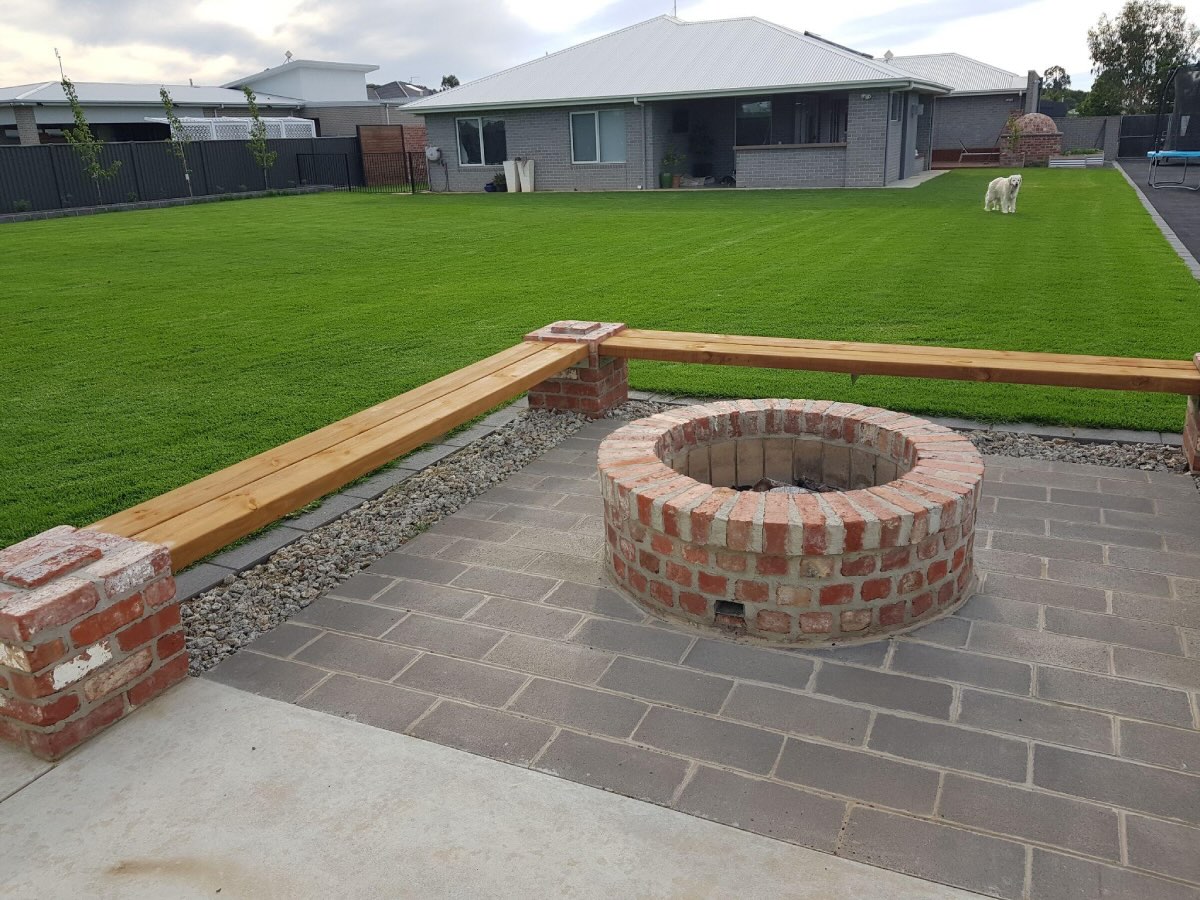
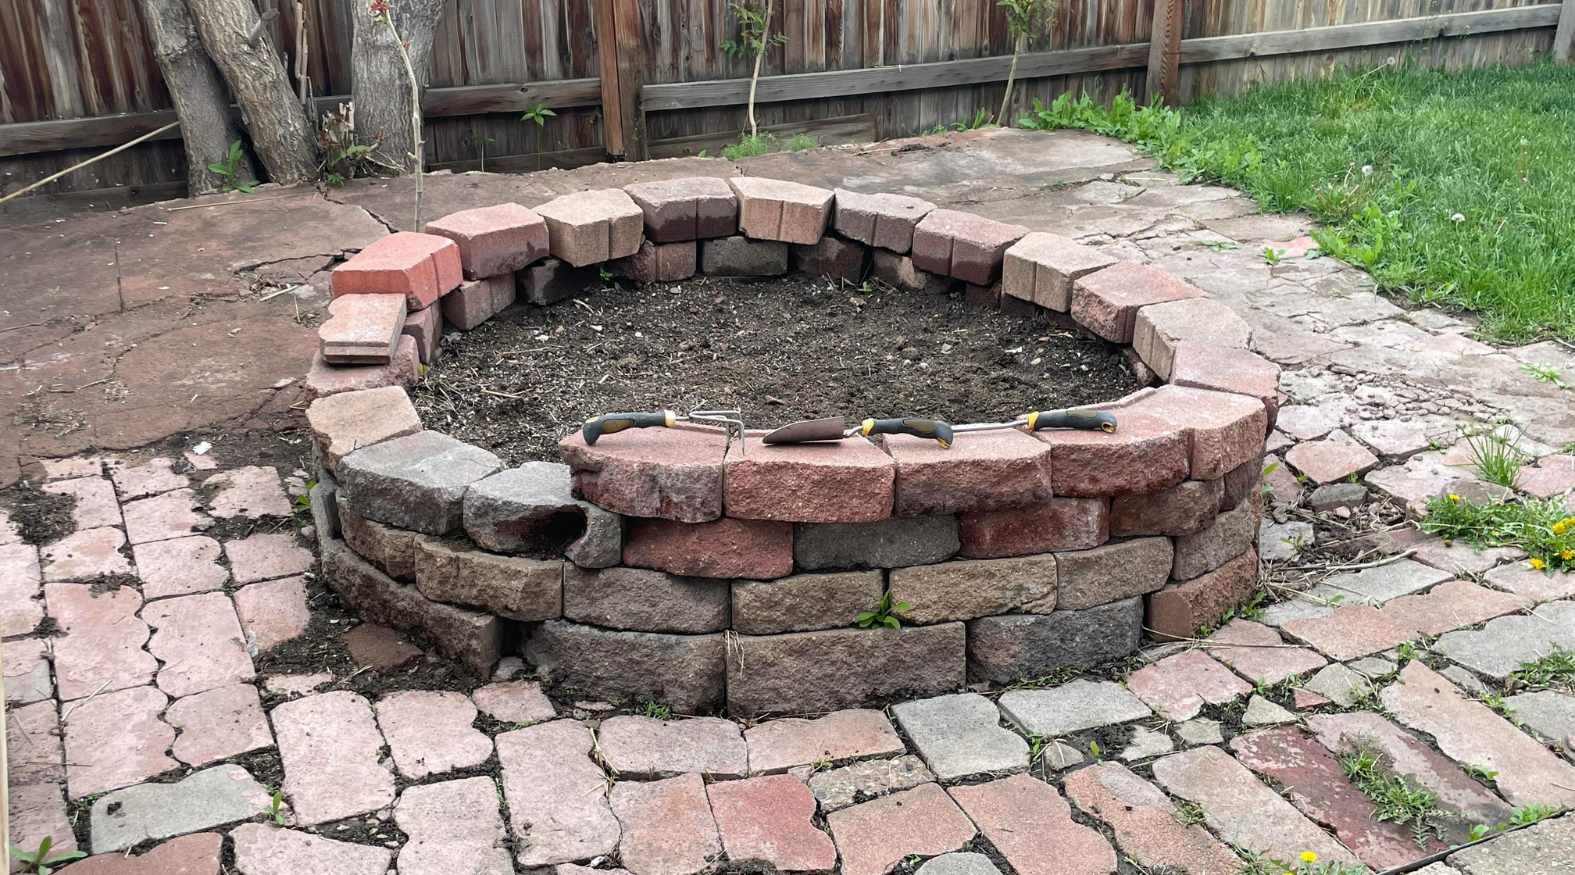
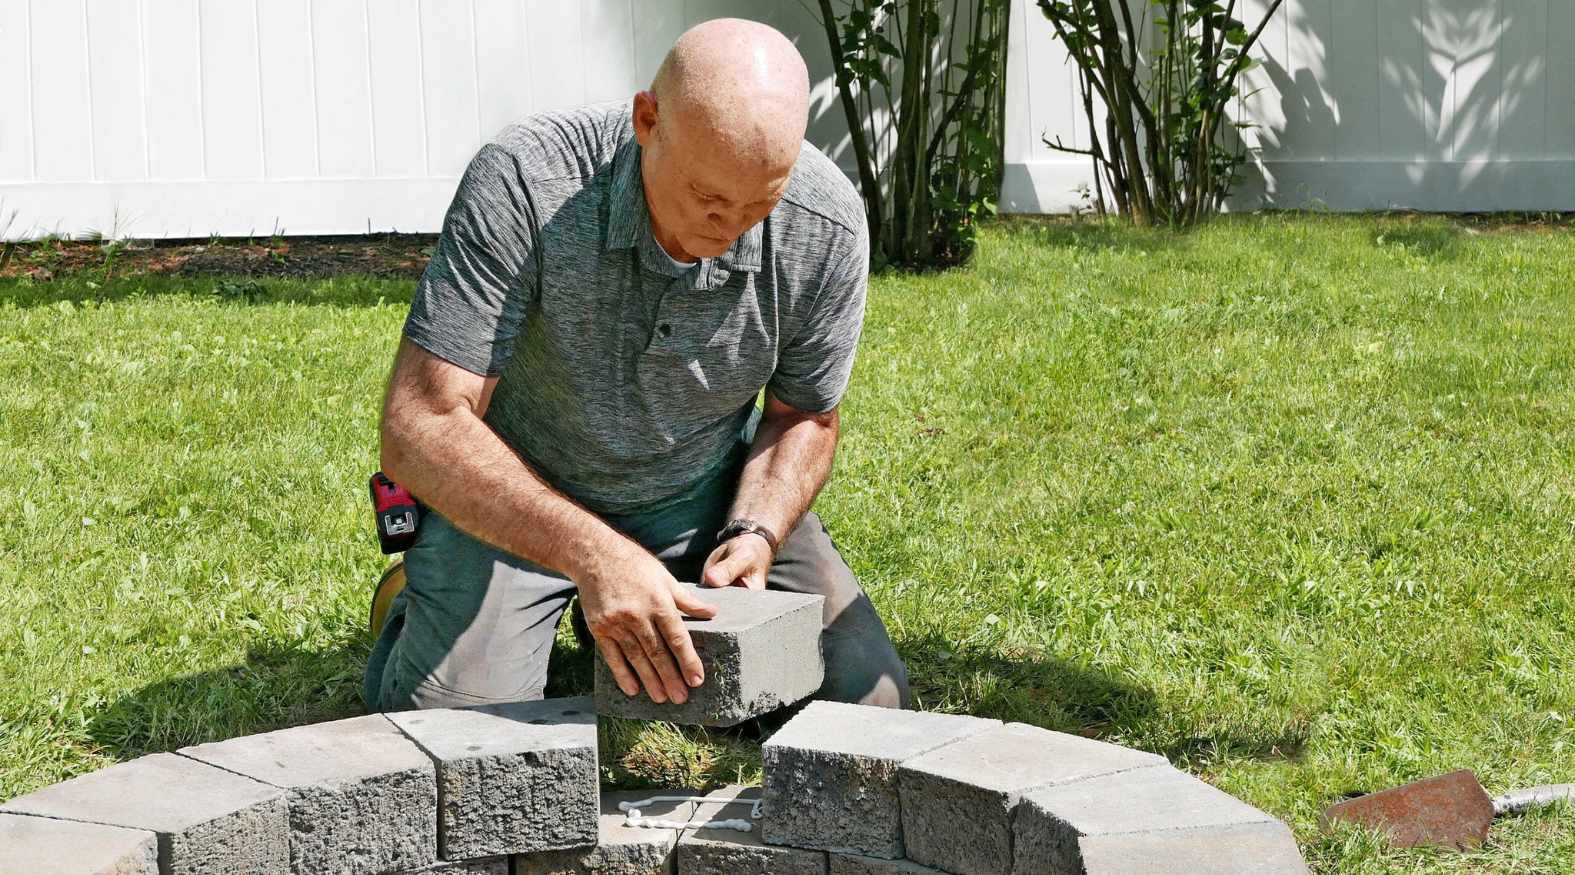
Step 5: Lay the Bricks
Now comes the creative and visually rewarding part of building your brick fire pit – laying the bricks to form the walls of the fire pit. Follow these steps to bring your vision to life:
Prepare the Work Area:
Set up a clean and organized work area near the fire pit base. Arrange the bricks within easy reach, along with the necessary tools, to streamline the construction process.
Apply Mortar:
Using a trowel, apply a layer of mortar to the top of the cured concrete base. This will serve as the adhesive for the first layer of bricks.
Read more: How To Build A Fire Pit For Burning Leaves
Begin the First Course:
Place the first layer of bricks on top of the mortar, ensuring a snug fit and even alignment. Use a level to check that the bricks are positioned uniformly and adjust as needed.
Build Upward:
Continue adding layers of bricks, applying mortar between each course to bond the bricks together securely. Stagger the joints between bricks in each layer to enhance the stability and visual appeal of the fire pit walls.
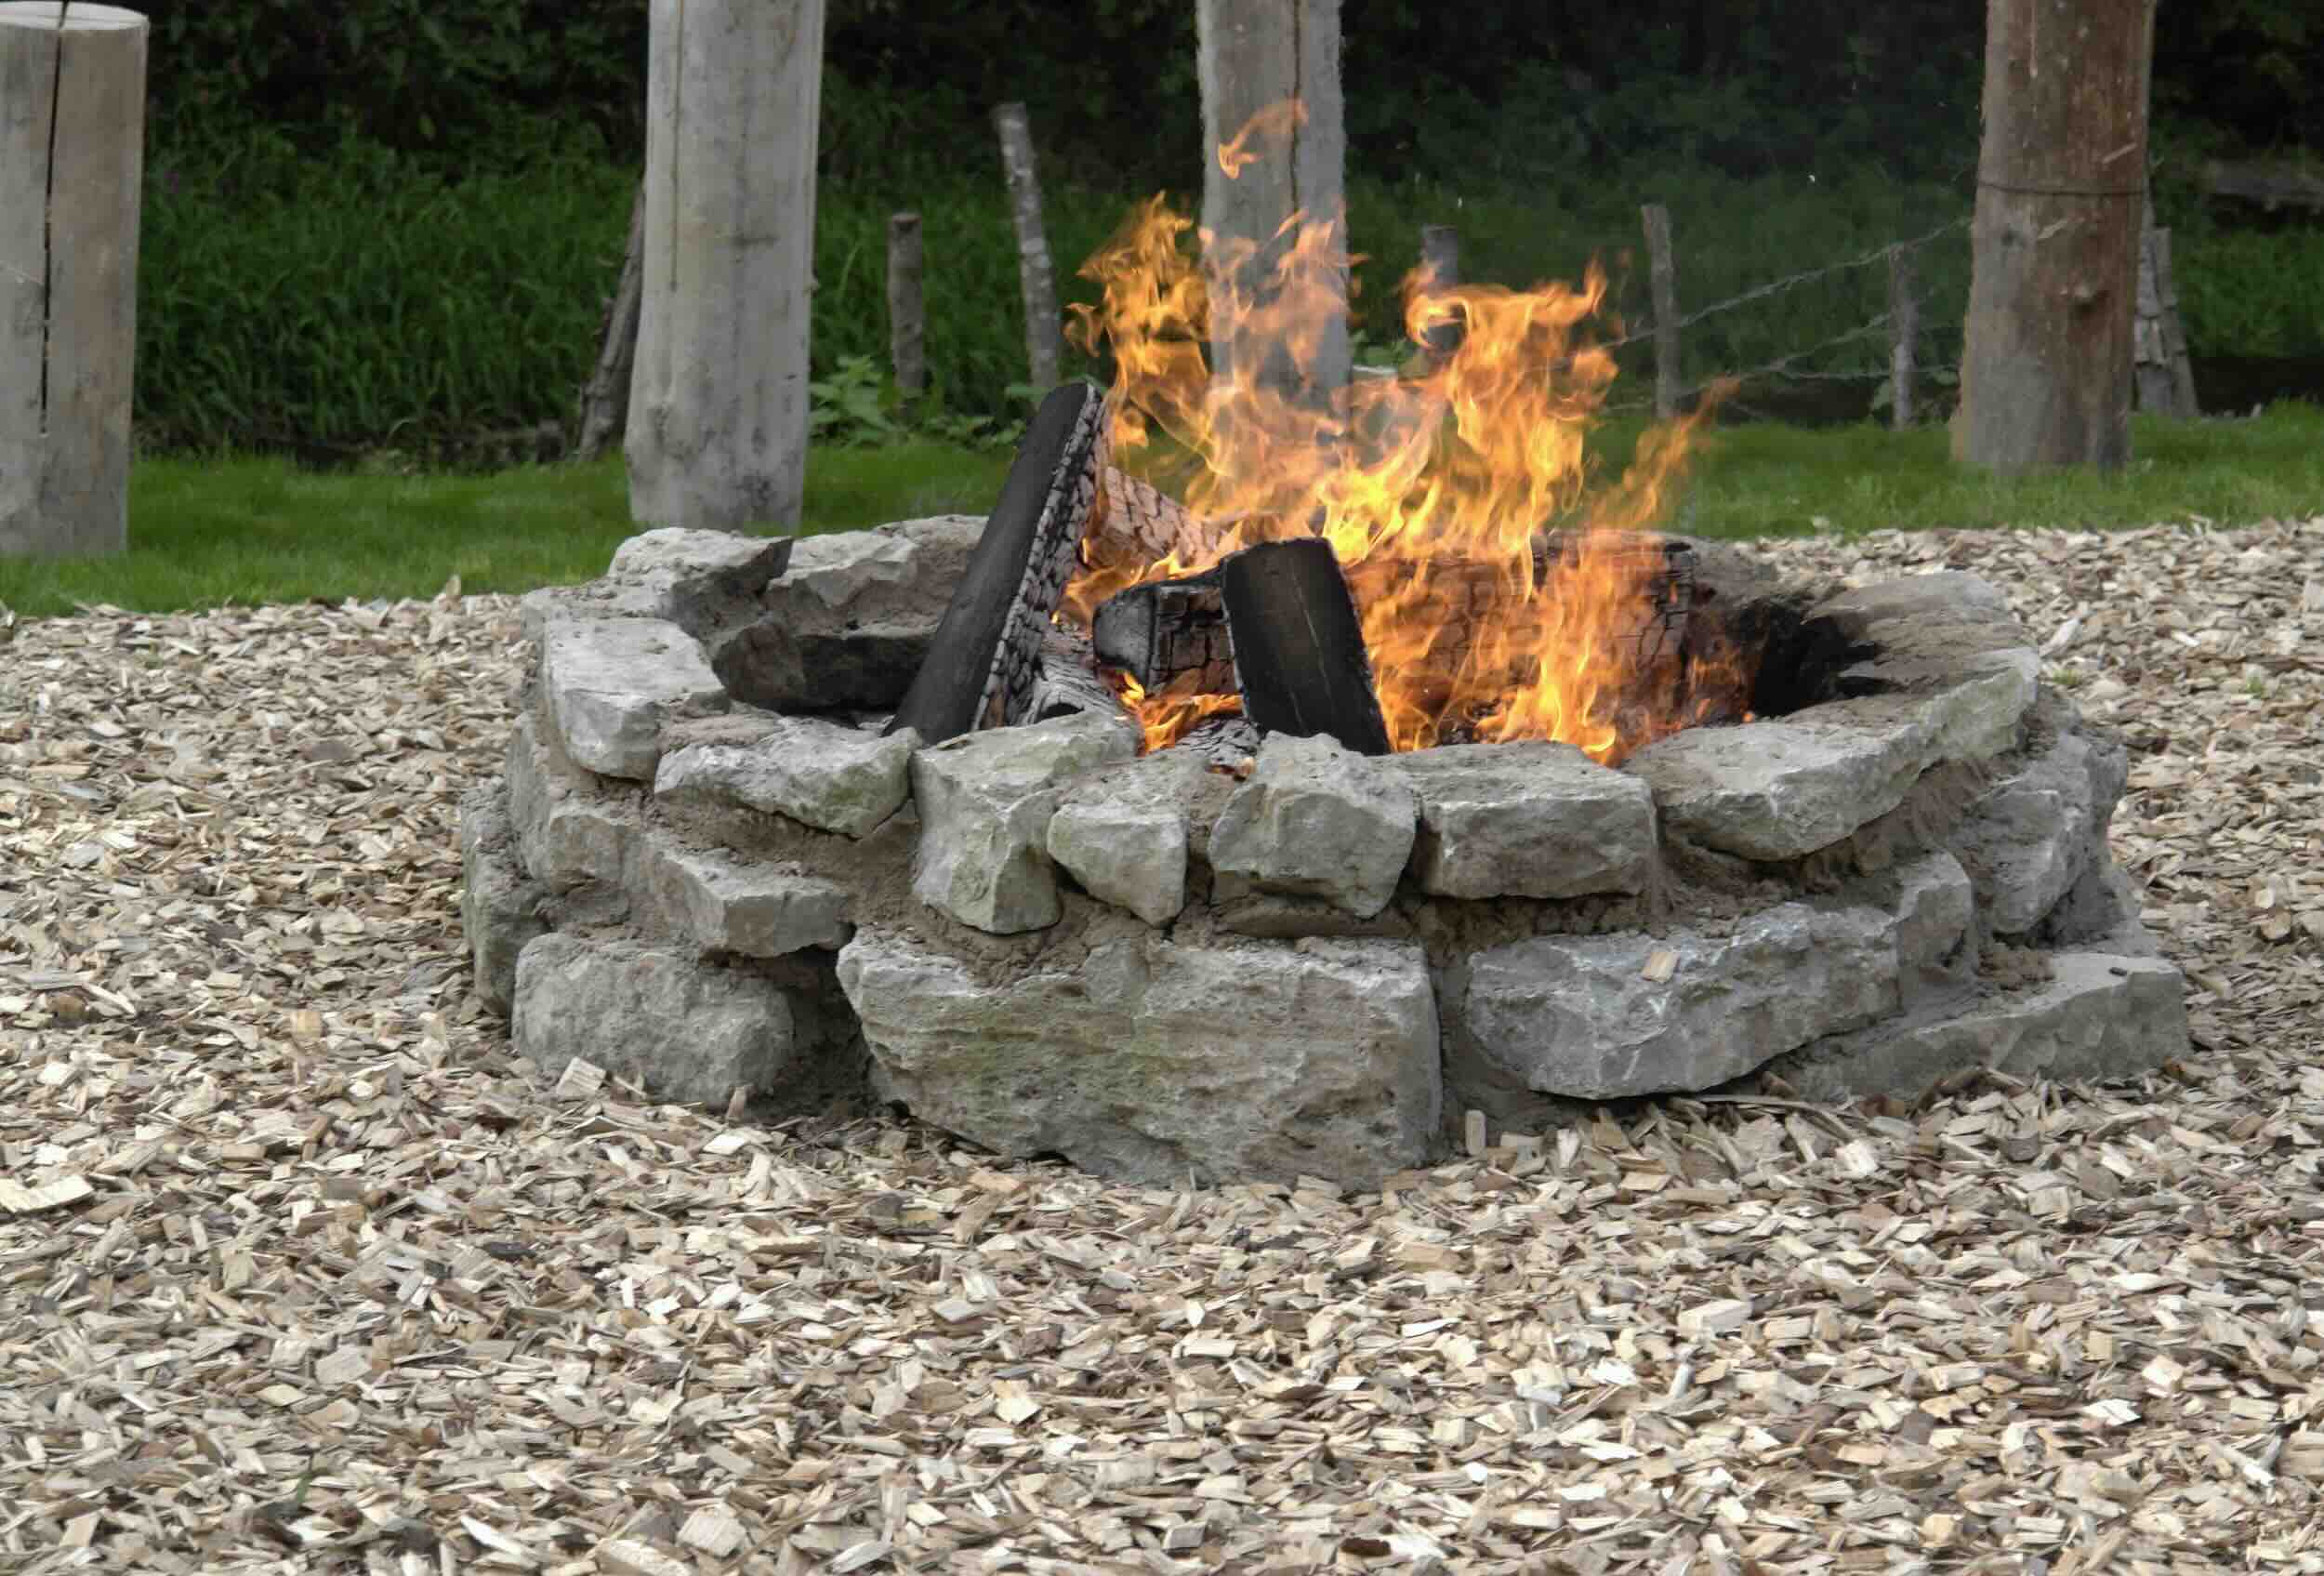
Create Openings:
If desired, leave openings in the brick wall to serve as air vents for the fire pit. These openings will facilitate airflow and contribute to the efficient burning of the fire.
Add Capstones (Optional):
For a polished and decorative finish, consider adding capstones to the top course of bricks. These flat stones can add a refined touch to the fire pit and provide a comfortable surface for seating.
With the bricks laid and the structure taking shape, you"re one step closer to enjoying the warmth and allure of your custom-built brick fire pit.
Read more: How To Build A Fire Pit On A Concrete Patio
Step 6: Add Finishing Touches
As you near the completion of your brick fire pit, it"s time to add the finishing touches that will enhance both its functionality and visual appeal. Follow these steps to elevate the overall look and performance of your fire pit:
Apply a Protective Coating:
Consider applying a heat-resistant sealant or coating to the exterior of the brick fire pit. This protective layer can help prolong the life of the bricks and maintain the fire pit"s appearance over time.
Add a Grate or Spark Screen:
For added safety and convenience, consider placing a metal grate over the fire pit to contain the burning wood. Additionally, a spark screen can help prevent embers from escaping and enhance the overall safety of the fire pit.
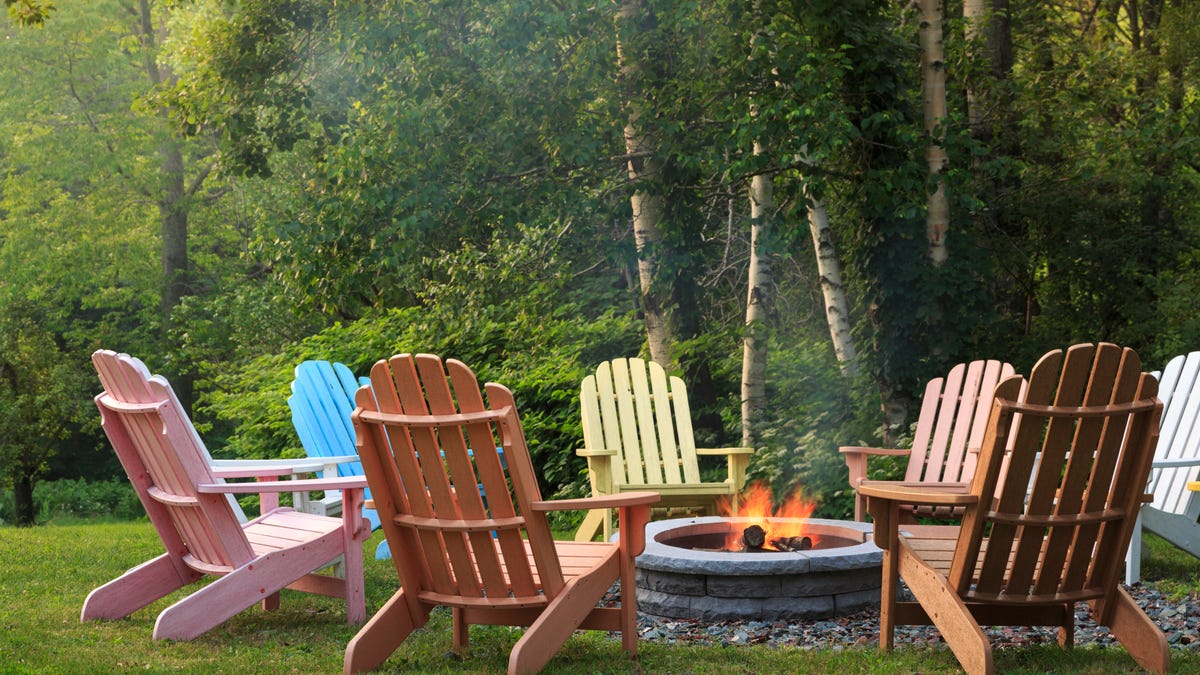
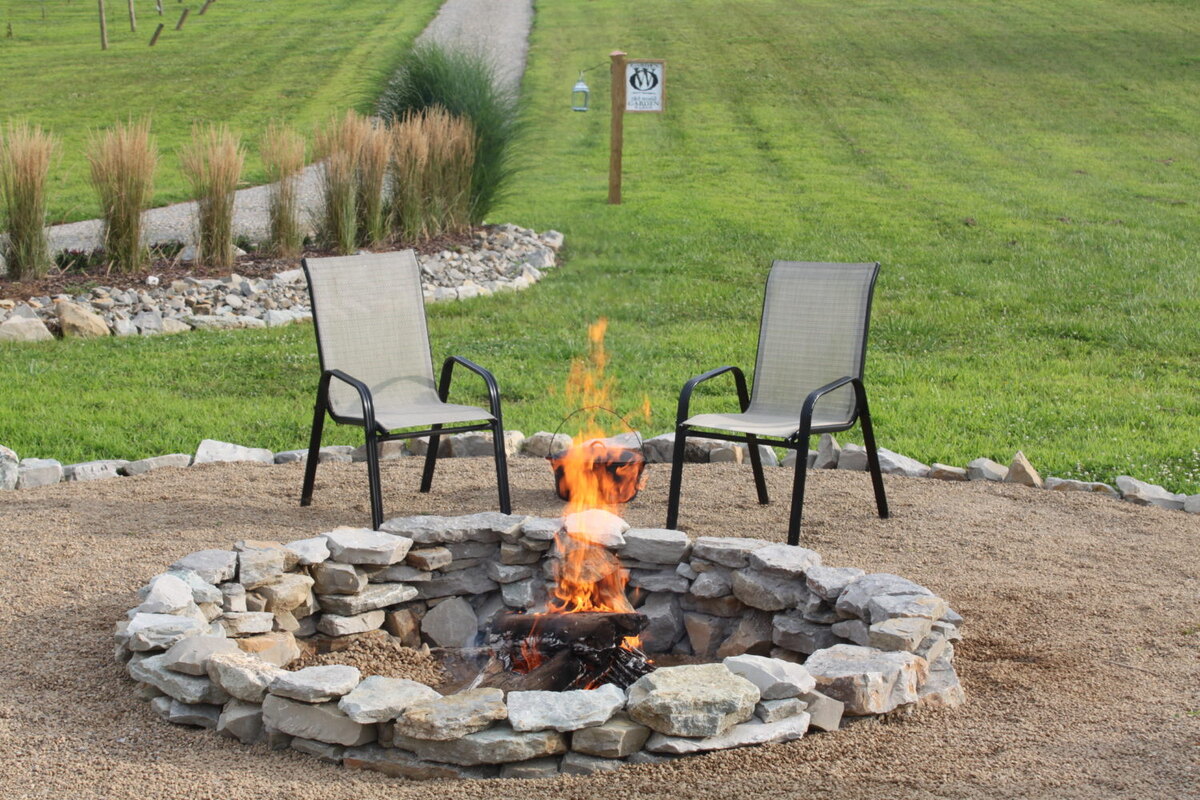
Create a Seating Area:
Arrange outdoor seating around the fire pit to create a cozy and inviting space for gatherings. Whether it"s rustic log benches, Adirondack chairs, or comfortable outdoor sofas, the seating area will complement the fire pit and provide a comfortable space for relaxation and conversation.
Read more: How To Build A Square Fire Pit
Accessorize with Fire Pit Tools:
Equip your outdoor space with essential fire pit tools, such as a poker, tongs, and a shovel. These tools will allow you to tend to the fire, adjust burning logs, and maintain a safe and enjoyable fire pit experience.
Personalize with Décor:
Add personal touches to the surrounding area with outdoor lighting, decorative lanterns, or potted plants. These elements can enhance the ambiance of the space and create a welcoming atmosphere for outdoor entertaining.
Enjoy and Maintain:
With the finishing touches in place, it"s time to enjoy the warmth and allure of your custom-built brick fire pit. Regularly inspect and maintain the fire pit to ensure its safety and performance, and revel in the countless memorable moments it will facilitate in your outdoor living space.
With the completion of these finishing touches, your brick fire pit is ready to become the heart of your outdoor entertaining and a beloved focal point of your backyard.
Conclusion
Congratulations on successfully completing the construction of your brick fire pit! By following the step-by-step guide outlined in this article, you”ve not only created a stunning outdoor feature but also set the stage for countless memorable gatherings and cozy evenings around the fire.
Building a brick fire pit is a rewarding DIY project that adds both functionality and charm to your outdoor space. From the initial selection of materials and tools to the final touches that personalize the fire pit, every step contributes to the creation of a welcoming and inviting focal point for your backyard.
As you sit back and admire your handiwork, take pride in knowing that you”ve not only built a fire pit but also crafted a space for connection, relaxation, and shared experiences. The warm glow of the fire, the crackling sound of burning wood, and the laughter of friends and family will all find a home around your custom-built fire pit.
Remember to prioritize safety by following local regulations, maintaining the fire pit regularly, and exercising caution when enjoying the fire. With proper care and attention, your brick fire pit will continue to kindle warmth and create cherished memories for years to come.
So, gather your loved ones, prepare your favorite fire pit treats, and bask in the inviting ambiance of your outdoor oasis. Your brick fire pit is more than a construction project – it”s a symbol of togetherness and a source of endless enjoyment in the great outdoors.
Here”s to the countless stories, s”mores, and moments of connection that await around your newly built brick fire pit. Cheers to the magic of outdoor living and the enduring allure of a crackling fire!
Frequently Asked Questions about How To Build A Brick Fire Pit
Was this page helpful?
At Storables.com, we guarantee accurate and reliable information. Our content, validated by Expert Board Contributors, is crafted following stringent Editorial Policies. We're committed to providing you with well-researched, expert-backed insights for all your informational needs.

0 thoughts on “How To Build A Brick Fire Pit”