Home>Gardening & Outdoor>Outdoor Recreation & Activities>How To Attach Basketball Hoop To Trampoline

Outdoor Recreation & Activities
How To Attach Basketball Hoop To Trampoline
Modified: October 21, 2024
Learn how to safely attach a basketball hoop to your trampoline for endless outdoor recreation and activities. Get step-by-step instructions and have fun playing basketball while bouncing!
(Many of the links in this article redirect to a specific reviewed product. Your purchase of these products through affiliate links helps to generate commission for Storables.com, at no extra cost. Learn more)
Introduction
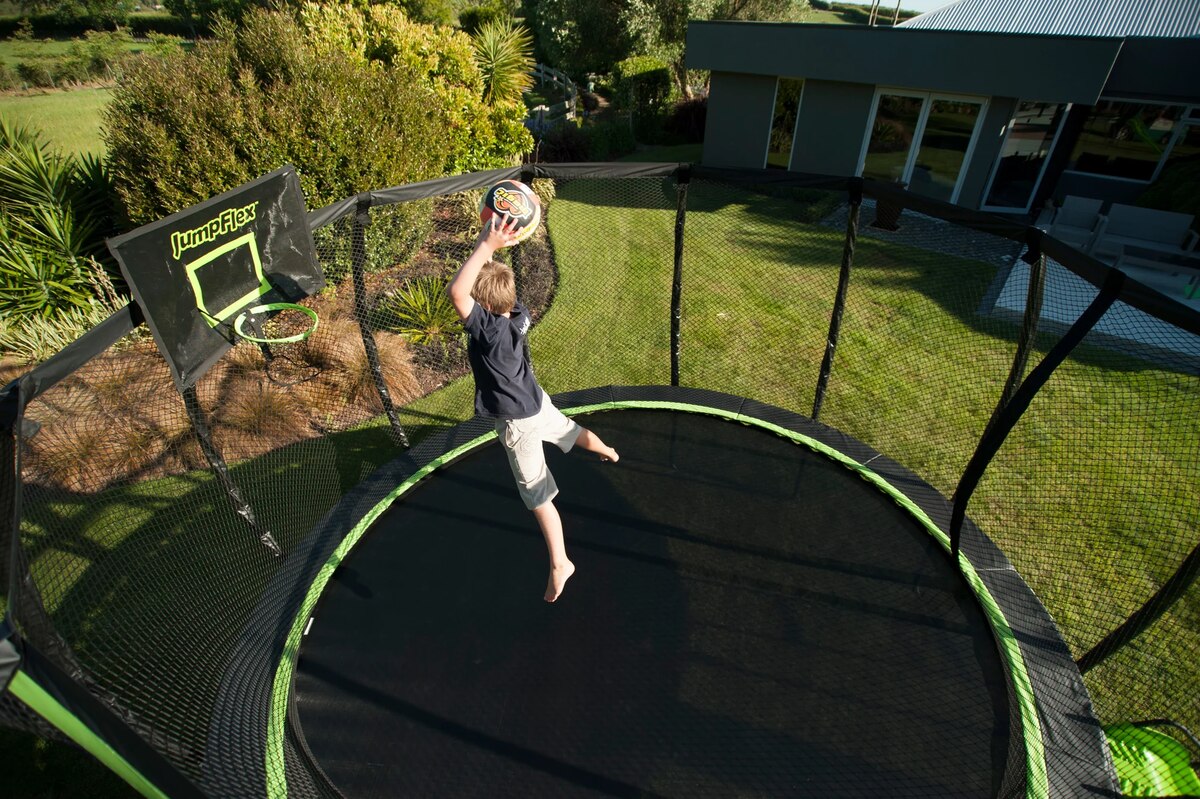
Welcome to the world of trampoline basketball, where the exhilarating bounce of a trampoline meets the high-flying excitement of basketball. By attaching a basketball hoop to your trampoline, you can take your backyard fun to new heights, quite literally! Whether you’re a seasoned basketball player or just looking for a unique way to enjoy some physical activity, trampoline basketball offers a thrilling and dynamic experience for all ages.
In this guide, we’ll walk you through the process of attaching a basketball hoop to your trampoline, providing you with step-by-step instructions and valuable tips to ensure a safe and enjoyable setup. From gathering the necessary materials to testing the hoop, we’ve got you covered. So, grab your basketball and get ready to elevate your game with this exciting trampoline modification!
Key Takeaways:
- Transform your trampoline into a basketball court with a specialized hoop kit and essential tools. Prepare the trampoline and test the hoop for a safe and thrilling trampoline basketball experience.
- Enjoy the fusion of trampolining and basketball with a securely attached hoop. Prioritize safety, responsible play, and adherence to guidelines for endless hours of bouncing, shooting, and scoring fun.
Read also: 14 Best Trampoline Basketball Hoop For 2025
Step 1: Gather Necessary Materials
Before you begin the process of attaching a basketball hoop to your trampoline, it’s essential to gather all the required materials. Having the right tools and components at your disposal will streamline the installation process and ensure that everything is securely in place. Here’s a comprehensive list of the materials you’ll need:
- Trampoline Basketball Hoop Kit: Look for a specialized trampoline basketball hoop kit, which typically includes a hoop, backboard, and mounting hardware specifically designed for trampoline use. These kits are engineered to withstand the bouncing and movement of the trampoline, providing a safe and durable basketball setup.
- Measuring Tape: A measuring tape will be essential for determining the precise location for mounting the basketball hoop on the trampoline enclosure or frame. Accurate measurements are crucial for ensuring proper alignment and clearance.
- Wrench or Socket Set: Depending on the type of mounting hardware included in your basketball hoop kit, you’ll need a wrench or socket set to securely fasten the hoop to the trampoline.
- Step Ladder: A step ladder will facilitate safe and convenient access to the top of the trampoline enclosure or frame, allowing you to work at a comfortable height during the installation process.
- Marker or Chalk: Marking the mounting locations on the trampoline will require a marker or chalk to ensure accuracy and precision when positioning the basketball hoop.
- Protective Eyewear and Gloves: As a safety precaution, consider wearing protective eyewear and gloves while handling the mounting hardware and tools during the installation process.
By gathering these essential materials, you’ll be well-prepared to proceed with confidence as you embark on the exciting journey of transforming your trampoline into a basketball court. With everything in hand, you’re one step closer to enjoying the thrilling fusion of trampolining and basketball!
Step 2: Prepare the Trampoline
Before attaching the basketball hoop to your trampoline, it’s crucial to prepare the trampoline and its surrounding area to ensure a safe and stable setup. Taking the time to properly assess and address these preparatory steps will contribute to the overall functionality and longevity of your trampoline basketball system. Here’s how to prepare the trampoline for the installation:
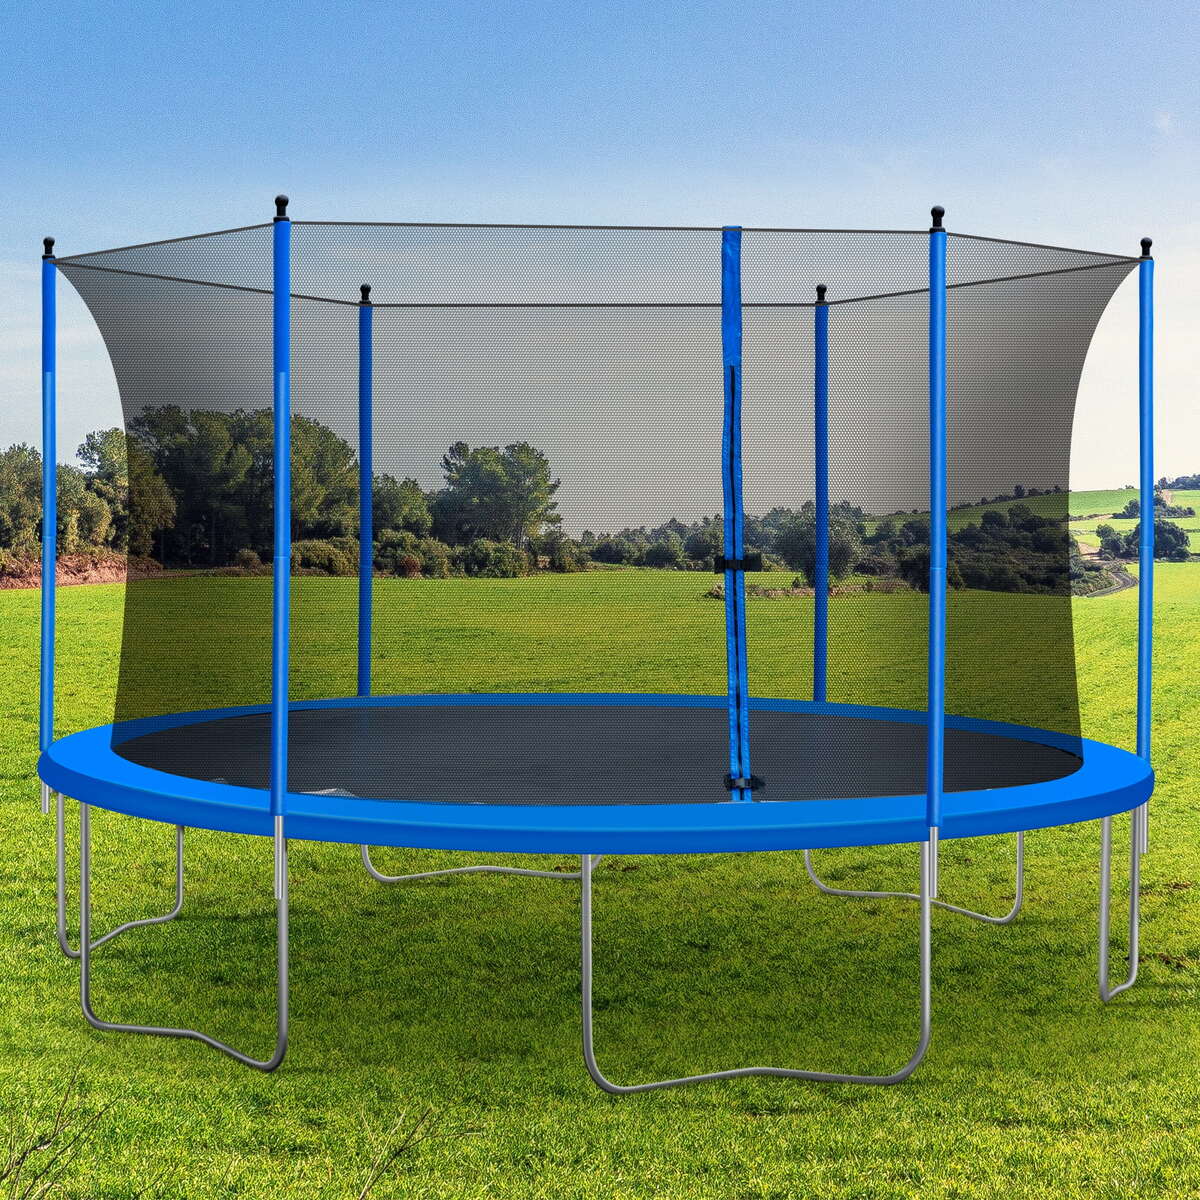
- Inspect the Trampoline: Begin by thoroughly inspecting the trampoline for any signs of wear, tear, or damage. Check the frame, springs, jumping mat, and safety enclosure (if applicable) for any issues that may compromise the trampoline’s structural integrity. Ensure that all components are in good condition and free from defects.
- Clean the Trampoline Surface: Clear the trampoline surface of any debris, such as leaves, twigs, or dirt. Use a soft brush or broom to gently sweep the jumping mat and surrounding areas, promoting a clean and safe environment for trampoline activities.
- Secure the Trampoline: Verify that the trampoline is placed on a level surface and securely anchored to the ground, following the manufacturer’s recommendations for stability and safety. If your trampoline features anchoring systems or stakes, ensure that they are properly installed and tightened to prevent movement during use.
- Position the Trampoline Hoop: Determine the ideal location for attaching the basketball hoop to the trampoline. Consider factors such as the clearance above the trampoline, the proximity to the safety enclosure (if applicable), and the orientation that provides an optimal shooting experience. Mark the intended mounting area with a marker or chalk for reference.
- Review Safety Guidelines: Familiarize yourself and any potential users with the safety guidelines and usage instructions specific to trampoline basketball activities. Emphasize the importance of proper bouncing techniques, safe play, and adult supervision for younger participants to minimize the risk of accidents.
By carefully preparing the trampoline and its surroundings, you’ll create a solid foundation for the subsequent installation of the basketball hoop. This proactive approach not only enhances the safety of the trampoline basketball setup but also promotes a more enjoyable and worry-free experience for all participants.
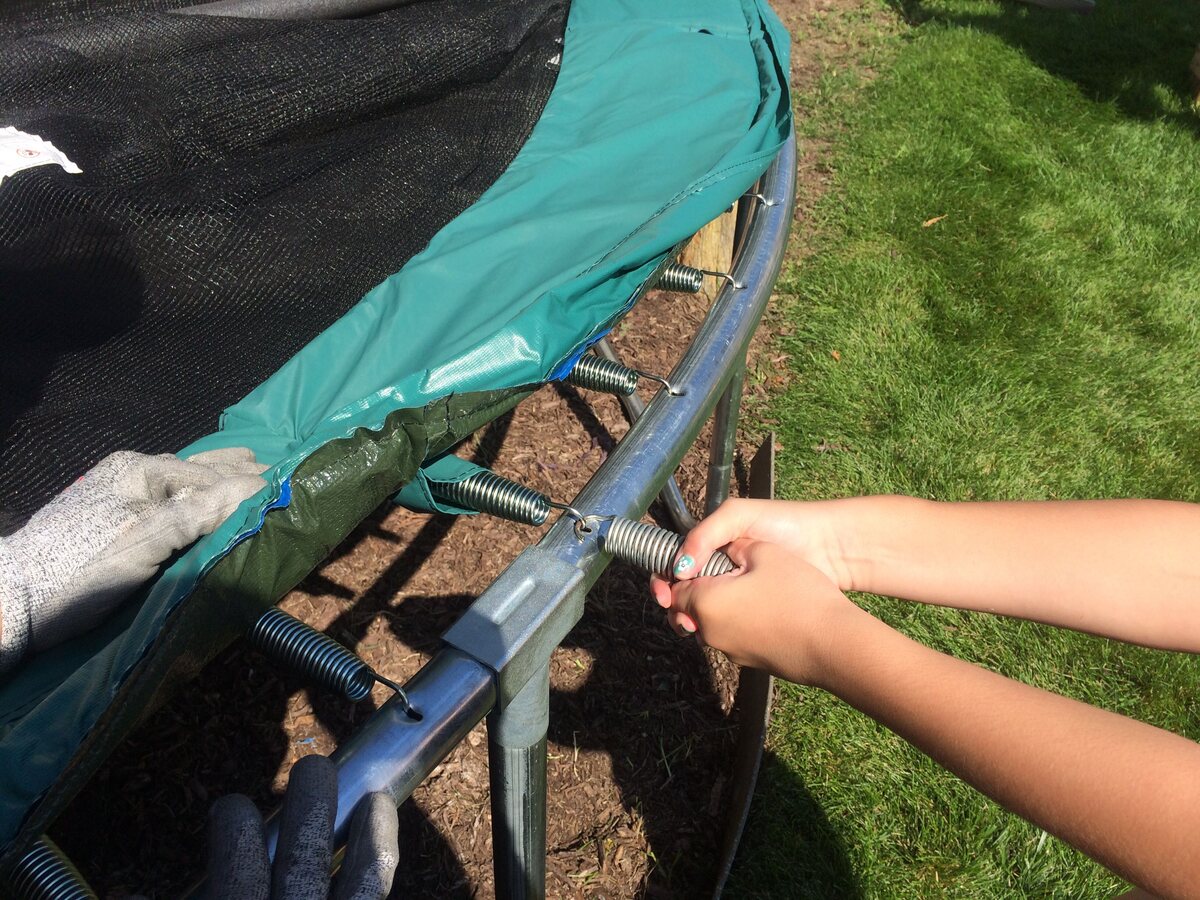
Use U-bolts to attach the basketball hoop to the trampoline frame. Make sure the hoop is securely fastened to prevent any accidents during play.
Step 3: Attach the Hoop to the Trampoline
With the trampoline prepared and the necessary materials at hand, it’s time to proceed with attaching the basketball hoop to the trampoline. This step involves securing the hoop and backboard to the trampoline enclosure or frame, ensuring a stable and reliable connection that can withstand the dynamic movements of trampoline basketball. Follow these detailed instructions to effectively attach the hoop to the trampoline:
- Refer to the Manufacturer’s Instructions: Before beginning the installation, carefully review the manufacturer’s instructions provided with the trampoline basketball hoop kit. Familiarize yourself with the specific mounting requirements, hardware, and recommended techniques for attaching the hoop to the trampoline.
- Position the Hoop Mounting Hardware: Identify the designated mounting points on the trampoline enclosure or frame for attaching the basketball hoop. Align the mounting brackets or hardware with the pre-marked location on the trampoline, ensuring that the hoop is positioned at the desired height and distance from the jumping surface.
- Secure the Mounting Hardware: Utilize the appropriate tools, such as a wrench or socket set, to securely fasten the mounting hardware to the trampoline. Follow the manufacturer’s guidelines for tightening the bolts or screws, taking care not to over-tighten or strip the hardware during the installation process.
- Attach the Hoop and Backboard: With the mounting hardware in place, proceed to attach the basketball hoop and backboard to the secured brackets or mounting arms. Ensure that the hoop is level and properly aligned, and that the backboard is securely connected to provide a stable surface for bank shots and rebounds.
- Double-Check Stability and Alignment: Once the hoop and backboard are attached, carefully inspect the entire assembly to confirm that it is stable, level, and securely mounted to the trampoline. Make any necessary adjustments to the hardware or positioning to achieve optimal stability and alignment.
By meticulously following these steps and adhering to the manufacturer’s instructions, you can effectively attach the basketball hoop to your trampoline, setting the stage for countless hours of airborne basketball excitement. With the hoop securely in place, you’re one step closer to experiencing the unique fusion of trampolining and basketball in your own backyard!
Step 4: Test the Hoop
Once the basketball hoop is securely attached to the trampoline, it’s time to put it to the test and ensure that it delivers a safe and enjoyable experience for players of all skill levels. Testing the hoop involves assessing its stability, functionality, and overall performance to verify that it meets the necessary standards for trampoline basketball activities. Follow these steps to effectively test the hoop and prepare for some high-flying basketball action:
- Check Stability and Security: Begin by gently shaking the hoop and backboard to assess their stability and the integrity of the mounting connection. Verify that the hardware remains securely fastened and that there is no excessive movement or wobbling when pressure is applied to the hoop and backboard.
- Inspect the Rim and Net: Examine the basketball rim and net to ensure that they are securely attached and free from any sharp edges or protruding components that could pose a safety hazard during play. The rim should be firmly affixed to the backboard, and the net should be intact and properly secured.
- Test Bounce and Rebound: With a basketball in hand, carefully bounce it off the trampoline surface and attempt to make shots into the hoop. Evaluate the bounce and rebound characteristics to familiarize yourself with the unique dynamics of shooting and scoring on a trampoline. This step allows you to adjust your shooting technique and become accustomed to the trampoline’s influence on the basketball’s trajectory.
- Ensure Adequate Clearance: As you test the hoop, pay attention to the clearance above the trampoline to avoid any interference with the surrounding environment, such as trees, structures, or overhead obstructions. Confirm that there is ample space for shooting, jumping, and maneuvering without encountering obstacles that could impede the gameplay.
- Engage in Safe Play: Encourage safe and responsible play by emphasizing the importance of proper trampoline usage and basketball maneuvers. Remind participants to avoid hanging on the rim, perform controlled jumps and landings, and respect the boundaries of the trampoline while engaging in trampoline basketball activities.
By conducting a thorough assessment and testing process, you can ensure that the basketball hoop is ready for action, providing a secure and entertaining outlet for trampoline basketball enthusiasts. With the hoop successfully tested and approved, it’s time to gather your friends and family for an exhilarating game of trampoline basketball, where the thrill of jumping meets the excitement of scoring baskets in mid-air!
Conclusion
Congratulations on successfully attaching a basketball hoop to your trampoline, unlocking a world of airborne athleticism and endless entertainment right in your backyard. By following the step-by-step process outlined in this guide, you’ve transformed your trampoline into a dynamic basketball court, creating opportunities for high-flying dunks, gravity-defying rebounds, and thrilling slam dunks.
With the hoop securely mounted and tested for stability and performance, you’re now poised to enjoy the unique fusion of trampolining and basketball, offering an exhilarating experience for players of all ages. Whether you’re perfecting your jump shot, engaging in friendly competitions, or simply enjoying the physical activity and excitement of trampoline basketball, your backyard has become a hub for active, gravity-defying fun.
As you embark on this trampoline basketball adventure, remember to prioritize safety, responsible play, and adherence to the manufacturer’s guidelines for trampoline and basketball equipment usage. By promoting a safe and enjoyable environment, you can maximize the benefits of trampoline basketball while minimizing the risk of accidents or injuries.
So, gather your basketball, invite your friends and family, and get ready to elevate your game with the thrilling combination of trampoline and basketball. With the hoop securely attached and tested, the stage is set for endless hours of bouncing, shooting, and scoring, creating lasting memories and fostering a love for active outdoor recreation.
Embrace the excitement, soar to new heights, and experience the joy of trampoline basketball – where every jump is a chance to reach for the stars and score unforgettable moments of fun and camaraderie.
Frequently Asked Questions about How To Attach Basketball Hoop To Trampoline
Was this page helpful?
At Storables.com, we guarantee accurate and reliable information. Our content, validated by Expert Board Contributors, is crafted following stringent Editorial Policies. We're committed to providing you with well-researched, expert-backed insights for all your informational needs.







0 thoughts on “How To Attach Basketball Hoop To Trampoline”