Furniture
How To Make A Hula Hoop Chandelier
Modified: December 7, 2023
Learn how to make a stunning hula hoop chandelier that adds a unique touch to your home decor. Get creative with this DIY furniture project!
(Many of the links in this article redirect to a specific reviewed product. Your purchase of these products through affiliate links helps to generate commission for Storables.com, at no extra cost. Learn more)
Introduction
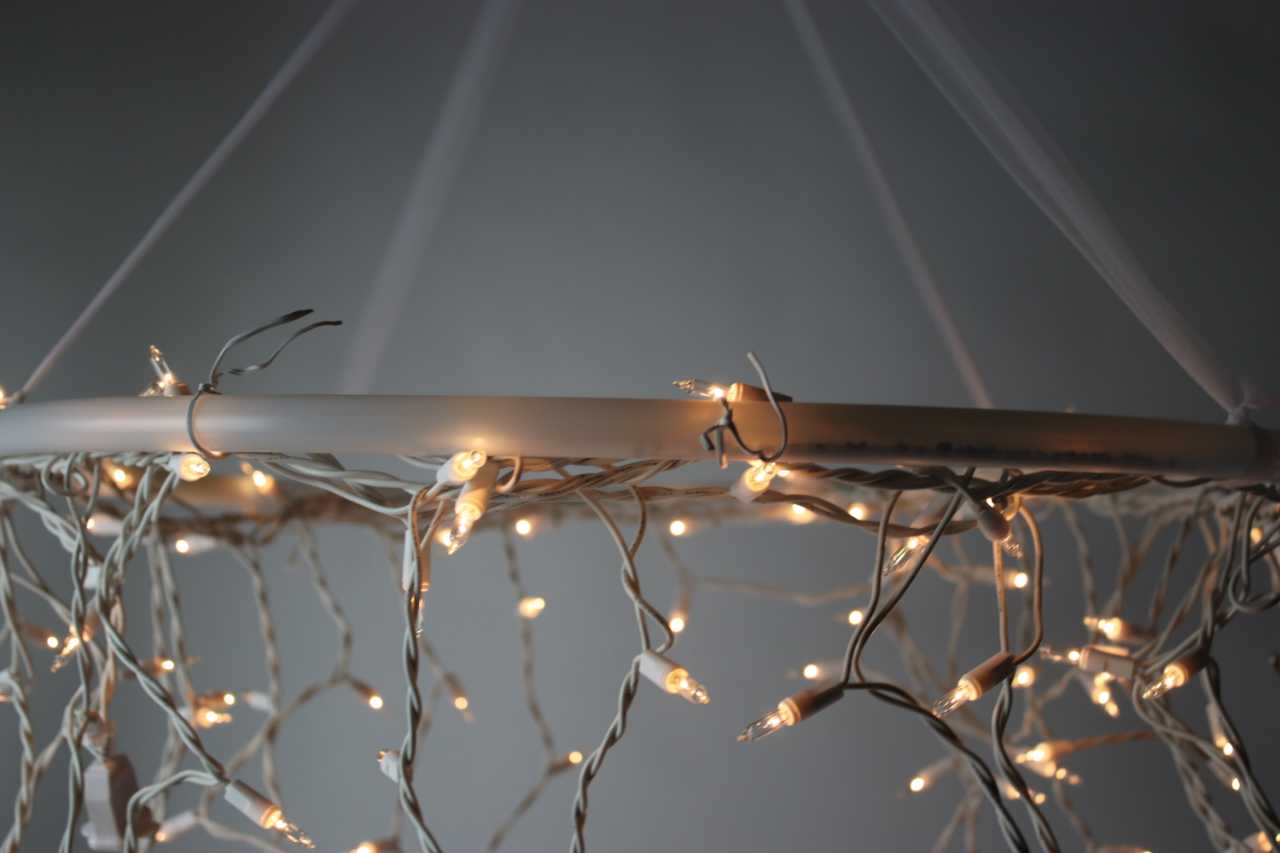
Are you looking for a creative and unique lighting fixture to add a touch of whimsy to your space? Look no further than a hula hoop chandelier! This DIY project is not only a great way to repurpose old hula hoops but also a fun and affordable way to create a statement piece for your home or event.
Whether you’re planning to hang it in your bedroom, living room, or even at a wedding reception, a hula hoop chandelier is sure to be a conversation starter. The best part is, you don’t need to be a crafting expert to make one. With a few simple materials and a bit of creativity, you can create a stunning chandelier that reflects your personal style.
In this article, we’ll guide you through the step-by-step process of making a hula hoop chandelier. From preparing the hula hoops to decorating and hanging the chandelier, we’ve got you covered. So, grab your crafting supplies and let’s get started!
Key Takeaways:
- Transform old hula hoops into a stunning chandelier with fabric, ribbon, and decorative elements. Showcase your creativity and personalize your space with this whimsical DIY project.
- Create a captivating lighting fixture for your home or event using lightweight hula hoops and a few simple materials. Unleash your artistic flair and make a statement with a unique hula hoop chandelier.
Read more: How To Make A Seashell Chandelier
Materials Needed
Before you begin crafting your hula hoop chandelier, gather the following materials:
- Hula hoops: You will need at least two hula hoops of different sizes. Choose hoops that are lightweight and easy to manipulate.
- String or twine: Use a strong string or twine to attach the hoops and hang the chandelier.
- Fabric or ribbon: Select fabric or ribbon in colors and patterns that match your decor theme.
- Decorative elements: This could include artificial flowers, feathers, beads, tassels, or any other embellishments you desire.
- Scissors: You will need a good pair of scissors to cut the fabric, ribbon, and string.
- Hot glue gun: A hot glue gun will be handy for attaching the decorative elements to the hoops and securing the fabric or ribbon.
- Lighting kit: If you want to transform your chandelier into a functional light fixture, you will need a lighting kit that suits your preference.
- Hanging hooks or brackets: Depending on where you plan to hang your chandelier, gather the appropriate hooks or brackets for installation.
These materials can easily be found at craft stores or online retailers. Feel free to customize your supplies based on your personal style and the overall aesthetic you want to achieve.
Step 1: Prepare the Hula Hoops
The first step in creating your hula hoop chandelier is to prepare the hula hoops. Follow these simple instructions:
- Choose your hula hoops: Select two hula hoops of different sizes. This will add visual interest and dimension to your chandelier.
- Clean the hula hoops: Remove any dust or dirt from the hula hoops by wiping them down with a clean cloth. This will ensure that the surface is smooth for decorating.
- Paint or decorate the hula hoops (optional): If desired, you can paint the hula hoops with acrylic paint or wrap them with decorative tape to customize their appearance. This step is completely optional and depends on your personal preference.
- Secure any loose parts: Check the hula hoops for any loose or protruding parts. If necessary, use a strong adhesive or tape to secure them in place. This will ensure that the hoops are sturdy and won’t come apart during the assembly process.
After completing these steps, you will have two prepared hula hoops ready to be assembled into your chandelier. Take your time and ensure that the hula hoops are clean, secure, and visually appealing.
Step 2: Attach the Hoops Together
Now that you have prepared the hula hoops, it’s time to attach them together to create the base structure of your chandelier. Follow these steps:
- Position the hula hoops: Decide on the desired placement of the hula hoops. The larger hoop should rest on top, while the smaller hoop will be positioned below.
- Secure with string or twine: Using a strong string or twine, wrap it around the intersection point of the hula hoops. Make sure it is tightly secured to hold the hoops together. Tie a knot to secure the string or twine in place.
- Stabilize the connection: To ensure stability, tie additional strings or twine from the intersecting points of the hula hoops to the edges of each hoop. This will create a secure connection and prevent the hoops from moving or tilting.
Take your time during this step to ensure that the hula hoops are securely fastened together. You can adjust the tension of the string or twine as needed to create a stable structure. Once you are satisfied with the attachment, move on to the next step of decorating your chandelier.
When making a hula hoop chandelier, consider using LED string lights for a more energy-efficient and long-lasting lighting option. This will also help to reduce the risk of overheating.
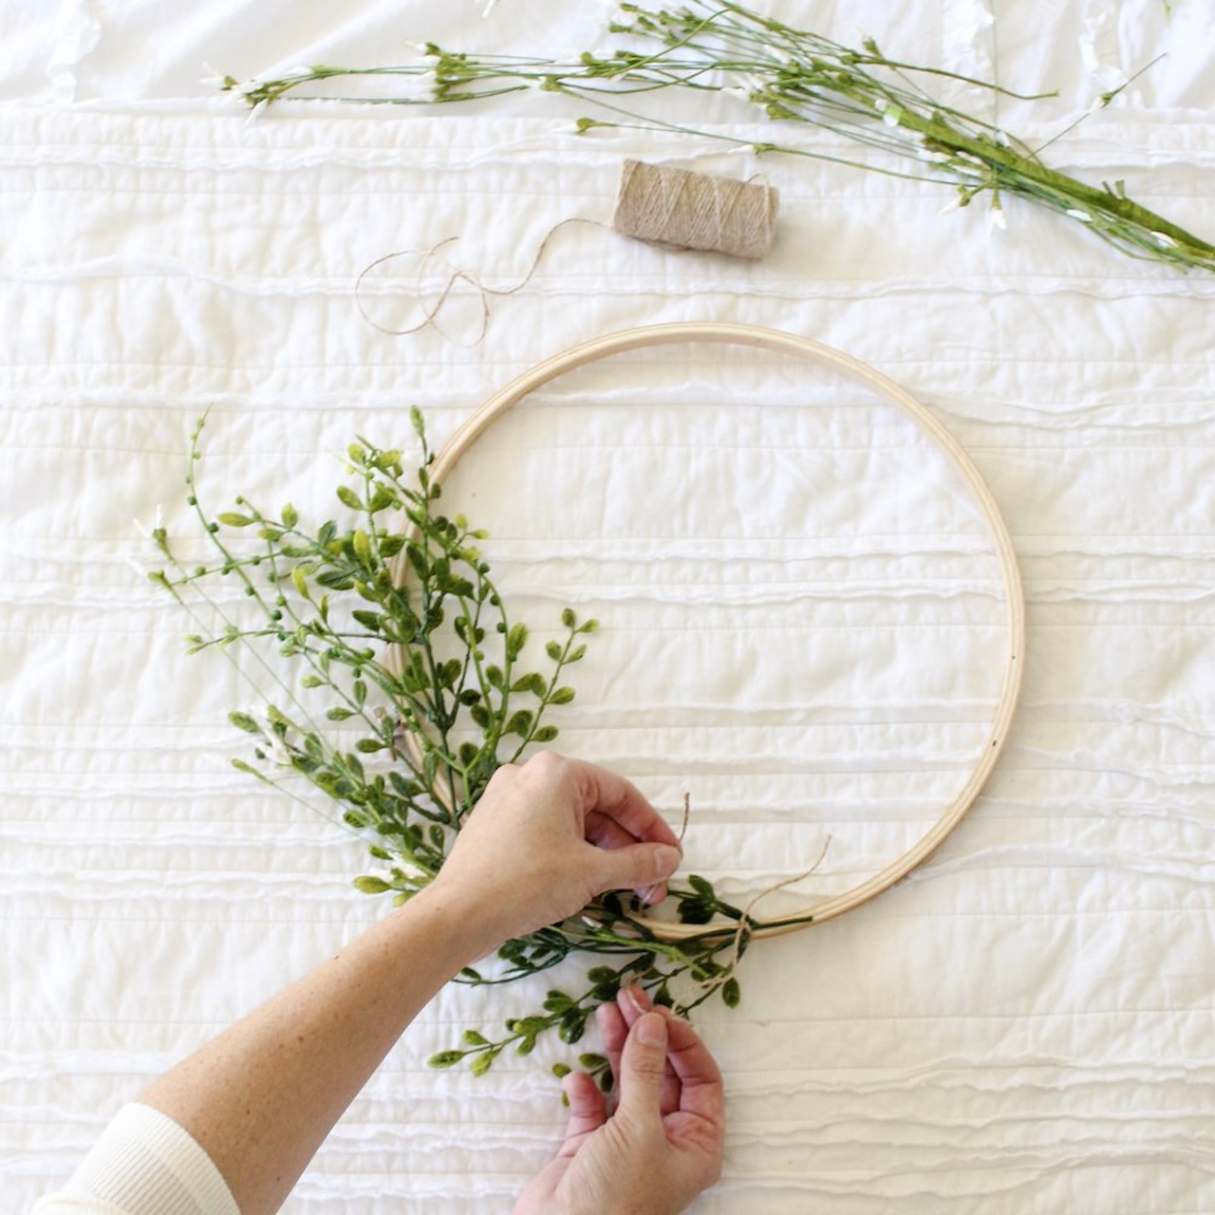
Step 3: Decorate the Chandelier
Now comes the fun part – decorating your hula hoop chandelier! Get creative and let your imagination run wild. Follow these steps to give your chandelier a personal touch:
- Choose your fabric or ribbon: Select fabric or ribbon that matches your desired color scheme or theme. You can opt for solid colors, patterns, or a combination of both. Cut the fabric or ribbon into long strips that are 1 to 2 inches wide.
- Attach the fabric or ribbon: Starting from the top hula hoop, tie the fabric or ribbon strips around the hoop using knots or bows. Allow the strips to hang freely, or trim them to your desired length for a neat and tidy look.
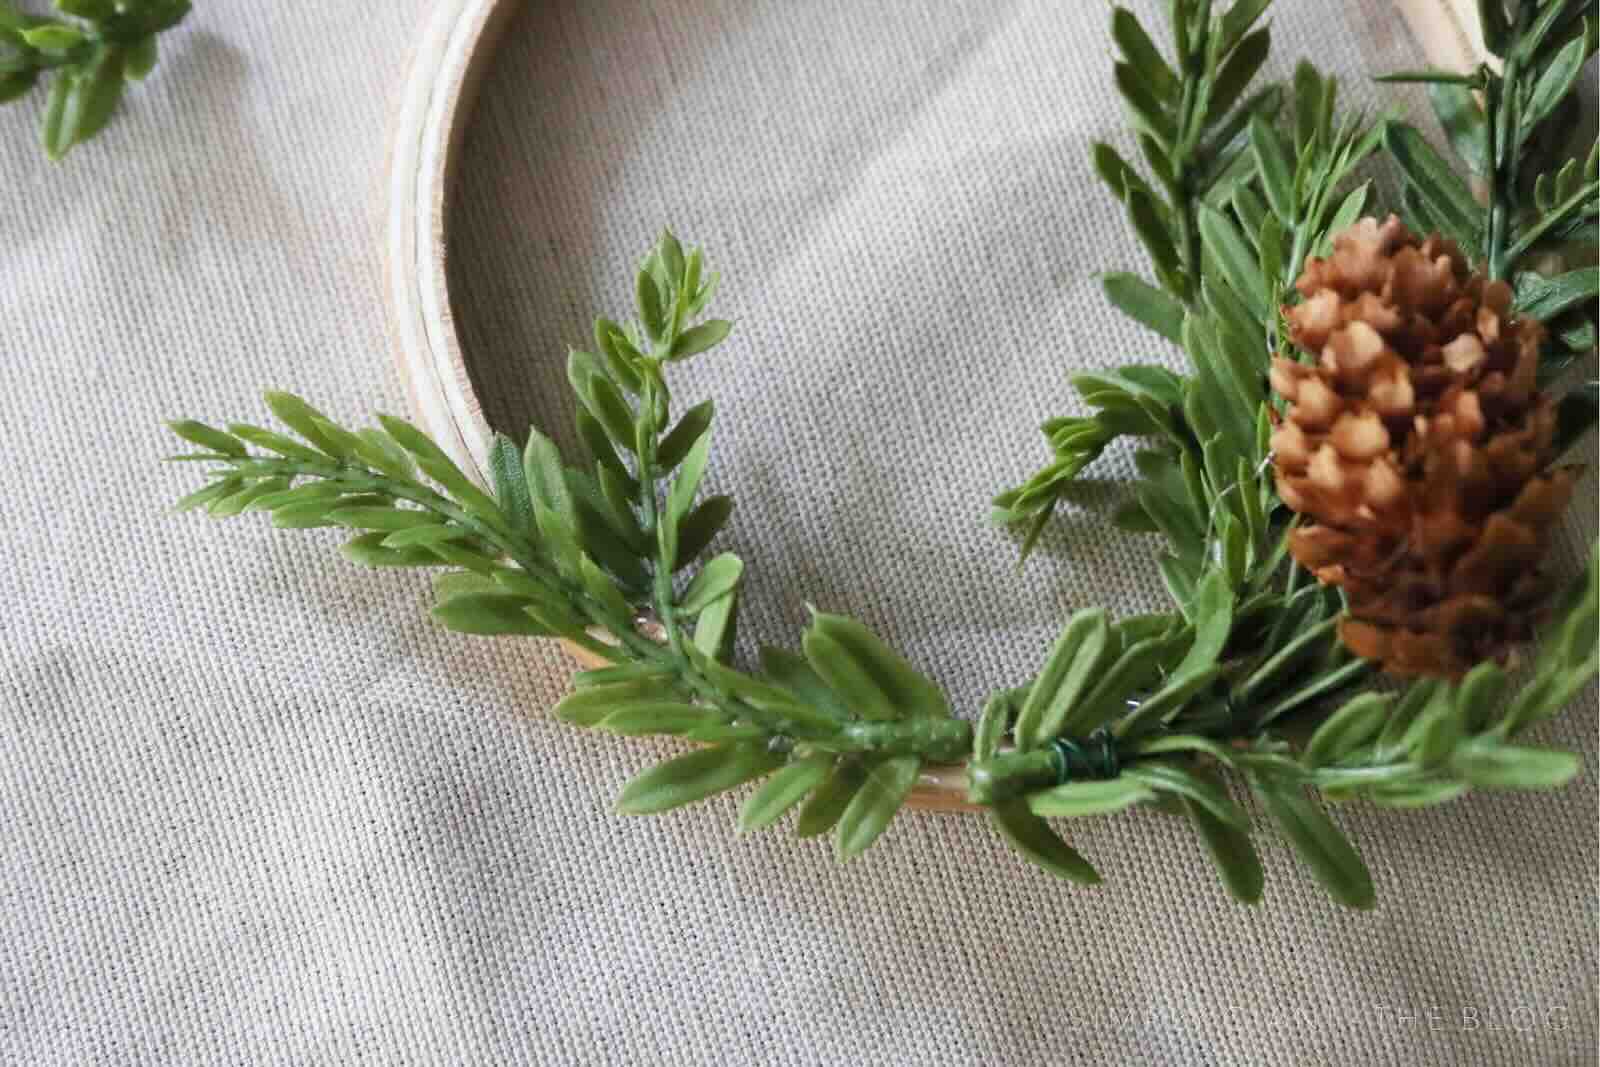
- Add decorative elements: Use a hot glue gun to attach artificial flowers, feathers, beads, tassels, or any other embellishments you have chosen. Be creative and experiment with different placements and combinations of decorations. Consider layering them for added texture and visual interest.
- Ensure even distribution: As you decorate, step back from time to time to ensure that the fabric, ribbon, and decorative elements are evenly distributed around the chandelier. Adjust as necessary to achieve a balanced and cohesive look.
Remember to have fun with the decorating process – it’s an opportunity to showcase your personal style and creativity. Take your time, and don’t be afraid to try out different ideas until you achieve a look that you love.
Read more: How To Make Chandelier Shade
Step 4: Hang the Chandelier
After you have finished decorating your hula hoop chandelier, it’s time to hang it in its designated location. Follow these steps to ensure a secure and eye-catching installation:
- Choose the hanging location: Select a suitable location for your chandelier. It could be in a room, outdoor space, or at a special event venue. Consider factors such as ceiling height, lighting, and visibility to find the perfect spot.
- Install hanging hooks or brackets: Depending on the type and weight of your chandelier, install appropriate hanging hooks or brackets on the ceiling or desired surface. Use screws or adhesive based on the material of the surface.
- Hang the chandelier: Carefully lift the chandelier and hook it onto the installed hanging hooks or brackets. Ensure that it is secured properly and does not wobble or swing excessively.
- Adjust and level: Step back and assess the chandelier’s position. Use a level or your eyes to ensure that it hangs level and does not appear crooked. Make any necessary adjustments by adding or removing string or twine from the hula hoops.
- Test the lighting (if applicable): If you have added a lighting kit to your chandelier, connect it to a power source and test the lights to ensure they are functioning properly. Adjust the placement of the lights if necessary to achieve your desired illumination.
Take your time during this step to ensure that the chandelier is securely hung and properly positioned. Once you are satisfied, step back and admire your beautiful hula hoop chandelier, now a stunning centerpiece in your space.
Conclusion
Congratulations, you have successfully created a hula hoop chandelier! By repurposing hula hoops and letting your creativity shine, you’ve added a unique and captivating lighting fixture to your space. Whether it’s for your home, a special event, or even as a gift, your hula hoop chandelier is sure to impress.
Throughout this DIY project, you learned how to prepare the hula hoops, attach them together to form the base structure, and decorate the chandelier with fabric, ribbon, and decorative elements. The process allowed you to unleash your creativity and personalize the chandelier to suit your personal style and desired aesthetic.
When hanging the chandelier, you took care to select the perfect location and ensure it was securely installed. If you added a lighting kit, you were able to create a functional and beautiful light source that will illuminate your space with a warm and inviting glow.
Remember, every step of the process was an opportunity for self-expression and artistic flair. Feel free to experiment with different materials, colors, and decorations to create a hula hoop chandelier that truly reflects your individuality.
Now that you’ve mastered the art of making a hula hoop chandelier, you can continue exploring other DIY projects to further enhance your space. Enjoy the ambiance and charm that your chandelier brings, and be proud of your crafting skills!
So go ahead, gather your materials, grab your hula hoops, and let your imagination run wild. It’s time to create a one-of-a-kind hula hoop chandelier that will become the centerpiece of your space and an object of admiration for all who see it.
Frequently Asked Questions about How To Make A Hula Hoop Chandelier
Was this page helpful?
At Storables.com, we guarantee accurate and reliable information. Our content, validated by Expert Board Contributors, is crafted following stringent Editorial Policies. We're committed to providing you with well-researched, expert-backed insights for all your informational needs.


0 thoughts on “How To Make A Hula Hoop Chandelier”