Home>Home Appliances>Cleaning Appliances>How To Replace The Bristle Brush On A Dual Cleaner Shark Vacuum Cleaner
Cleaning Appliances
How To Replace The Bristle Brush On A Dual Cleaner Shark Vacuum Cleaner
Modified: February 26, 2024
Learn how to easily replace the bristle brush on your Dual Cleaner Shark Vacuum Cleaner with our step-by-step guide. Keep your cleaning appliances in top condition!
(Many of the links in this article redirect to a specific reviewed product. Your purchase of these products through affiliate links helps to generate commission for Storables.com, at no extra cost. Learn more)
Introduction
Welcome to the guide on how to replace the bristle brush on a Dual Cleaner Shark vacuum cleaner. Over time, the bristle brush of a vacuum cleaner can wear out, affecting its cleaning performance. Fortunately, replacing the bristle brush is a straightforward process that can help restore your vacuum cleaner's efficiency and suction power.
In this comprehensive tutorial, we will walk you through each step of replacing the bristle brush on your Dual Cleaner Shark vacuum cleaner. Whether you are a seasoned DIY enthusiast or a novice looking to maintain your appliance, this guide will equip you with the necessary knowledge and confidence to carry out the task successfully.
By following these instructions, you can ensure that your Dual Cleaner Shark vacuum cleaner continues to deliver optimal cleaning results, prolonging its lifespan and saving you the cost of a professional repair or a new appliance. So, let's dive in and learn how to rejuvenate your vacuum cleaner by replacing the bristle brush!
Key Takeaways:
- Keep your Dual Cleaner Shark vacuum cleaner in top shape by replacing the bristle brush with the right tools and a step-by-step process. Enjoy a cleaner home and longer appliance lifespan!
- Replacing the bristle brush on your Dual Cleaner Shark vacuum cleaner is easy and can save you money on professional repairs or a new appliance. Follow the guide for optimal cleaning performance!
Read more: How To Clean A Shark Vacuum Cleaner
Step 1: Gather the Necessary Tools
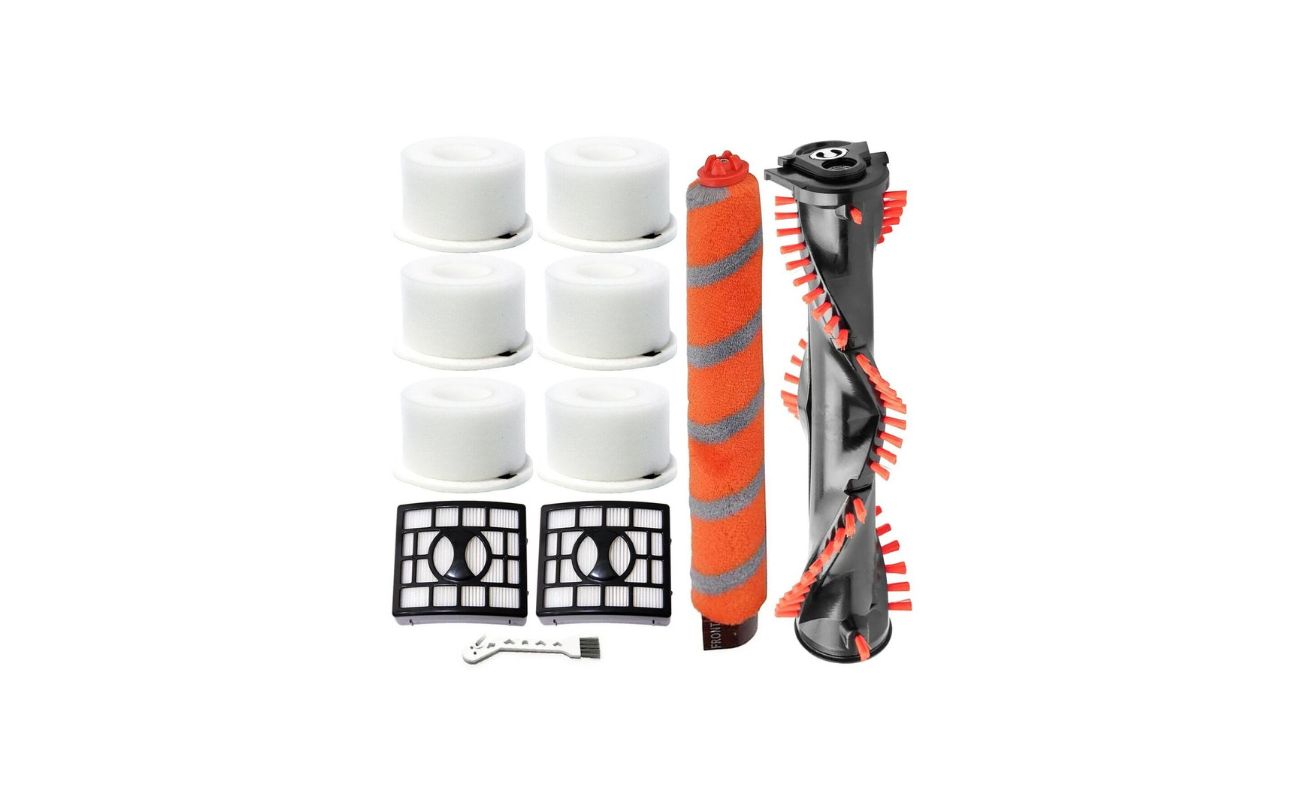
Before you begin the process of replacing the bristle brush on your Dual Cleaner Shark vacuum cleaner, it’s essential to gather the required tools and materials. Having the right equipment at hand will streamline the task and ensure a smooth transition from the old bristle brush to the new one. Here’s a list of the tools and materials you will need:
- New Bristle Brush: Ensure that you have the correct replacement bristle brush specifically designed for your Dual Cleaner Shark vacuum cleaner model. You can typically purchase this from authorized dealers or online retailers.
- Screwdriver: Depending on your vacuum cleaner model, you may need a Phillips or flathead screwdriver to remove the necessary components. Be sure to have the appropriate screwdriver on hand to avoid any delays during the process.
- Clean Cloth: Keeping a clean cloth nearby can be helpful for wiping any dust or debris that may be present during the bristle brush replacement.
- Work Surface: Find a suitable work surface with ample lighting and space to comfortably maneuver the vacuum cleaner and its components. A clear, well-lit area will facilitate a hassle-free bristle brush replacement.
- User Manual: It’s always beneficial to have the user manual for your vacuum cleaner within reach. The manual can provide specific instructions and diagrams related to the bristle brush replacement, ensuring that you follow the manufacturer’s guidelines accurately.
By gathering these tools and materials, you’ll be well-prepared to proceed with the bristle brush replacement process. With everything in place, you can move on to the next step with confidence, knowing that you have the necessary resources to complete the task effectively.
Step 2: Remove the Old Bristle Brush
Now that you have assembled the required tools and materials, it’s time to begin the process of removing the old bristle brush from your Dual Cleaner Shark vacuum cleaner. Follow these steps carefully to ensure a successful removal:
- Prepare the Vacuum Cleaner: Before starting, make sure the vacuum cleaner is unplugged from the power source to prevent any electrical mishaps. Place the vacuum cleaner on a stable surface with ample space to maneuver around it.
- Access the Bristle Brush Compartment: Depending on your vacuum cleaner model, locate the compartment that houses the bristle brush. This may involve removing a cover or accessing the underside of the vacuum cleaner.
- Remove the Retaining Screws or Clips: Using the appropriate screwdriver, carefully remove any retaining screws or clips that secure the bristle brush in place. Keep the screws or clips in a safe place to prevent misplacement.
- Extract the Old Bristle Brush: Once the retaining mechanism is detached, gently pull out the old bristle brush from its housing. Take note of how the brush is positioned and oriented for reference when installing the new bristle brush.
- Clean the Compartment: With the old bristle brush removed, take a moment to clean the compartment using a clean cloth. Removing any accumulated dust or debris will ensure a clean and optimal environment for the new bristle brush.
By following these steps, you can effectively remove the old bristle brush from your Dual Cleaner Shark vacuum cleaner, paving the way for the installation of the new bristle brush. Proceed to the next section to learn how to install the new bristle brush with precision and ease.
Step 3: Install the New Bristle Brush
With the old bristle brush successfully removed, it’s time to proceed with the installation of the new bristle brush in your Dual Cleaner Shark vacuum cleaner. Follow these steps to ensure a seamless and accurate installation:
- Position the New Bristle Brush: Take the new bristle brush and position it correctly in the designated compartment, aligning it according to the orientation of the old bristle brush. Ensure that the brush is securely fitted and sits flush within the housing.
- Secure the Retaining Screws or Clips: If your vacuum cleaner utilizes retaining screws or clips, reattach them to secure the new bristle brush in place. Use the appropriate screwdriver to fasten the screws or clips, ensuring a firm and stable hold for the brush.
- Refer to the User Manual: Consult the user manual for your Dual Cleaner Shark vacuum cleaner to verify that the new bristle brush is installed according to the manufacturer’s specifications. The manual may provide specific guidelines or diagrams related to the bristle brush installation process.
- Test the Brush Rotation: Before reassembling the vacuum cleaner, perform a quick test to ensure that the new bristle brush rotates smoothly and without any obstructions. This step will help identify any potential issues before fully reassembling the appliance.
By following these steps, you can effectively install the new bristle brush in your Dual Cleaner Shark vacuum cleaner, setting the stage for the final phase of reassembling the appliance. Proceed to the next section to learn how to reassemble the vacuum cleaner with the new bristle brush in place.
To replace the bristle brush on a Dual Cleaner Shark Vacuum Cleaner, first, unplug the vacuum. Then, locate the brush cover and remove it. Next, take out the old brush and replace it with a new one. Finally, secure the brush cover back in place.
Step 4: Reassemble the Vacuum Cleaner
After successfully installing the new bristle brush in your Dual Cleaner Shark vacuum cleaner, it’s time to reassemble the appliance to its fully operational state. Follow these steps to ensure a smooth and complete reassembly:
- Replace the Bristle Brush Compartment Cover: If the removal of the old bristle brush involved taking off a cover or accessing a compartment, secure the cover back in place. Ensure that it is properly aligned and fastened to prevent any loose components.
- Inspect Other Components: Take a moment to inspect the surrounding components and areas that were accessed during the bristle brush replacement process. Ensure that all parts are in their correct positions and that no tools or materials are left inside the vacuum cleaner.
- Reattach Any Detached Parts: If any additional parts or accessories were removed to access the bristle brush, such as panels or attachments, reattach them securely. Confirm that each part fits snugly and functions as intended.
- Secure the Power Cord: If the power cord was unplugged for safety during the process, securely plug it back into the power source. Ensure that the cord is free from any obstructions and does not pose a tripping hazard.
By following these steps, you can effectively reassemble your Dual Cleaner Shark vacuum cleaner, ensuring that all components are securely in place and ready for operation. Proceed to the final section to learn how to test the vacuum cleaner with the newly installed bristle brush.
Read more: Who Makes Shark Vacuum Cleaner
Step 5: Test the Vacuum Cleaner
With the bristle brush successfully replaced and the vacuum cleaner reassembled, it’s essential to perform a test to ensure that the appliance functions as intended. Follow these steps to conduct a thorough test of your Dual Cleaner Shark vacuum cleaner:
- Power On the Vacuum Cleaner: Plug the vacuum cleaner into a power source and switch it on. Listen for any unusual sounds or vibrations that may indicate an issue with the bristle brush or other components.
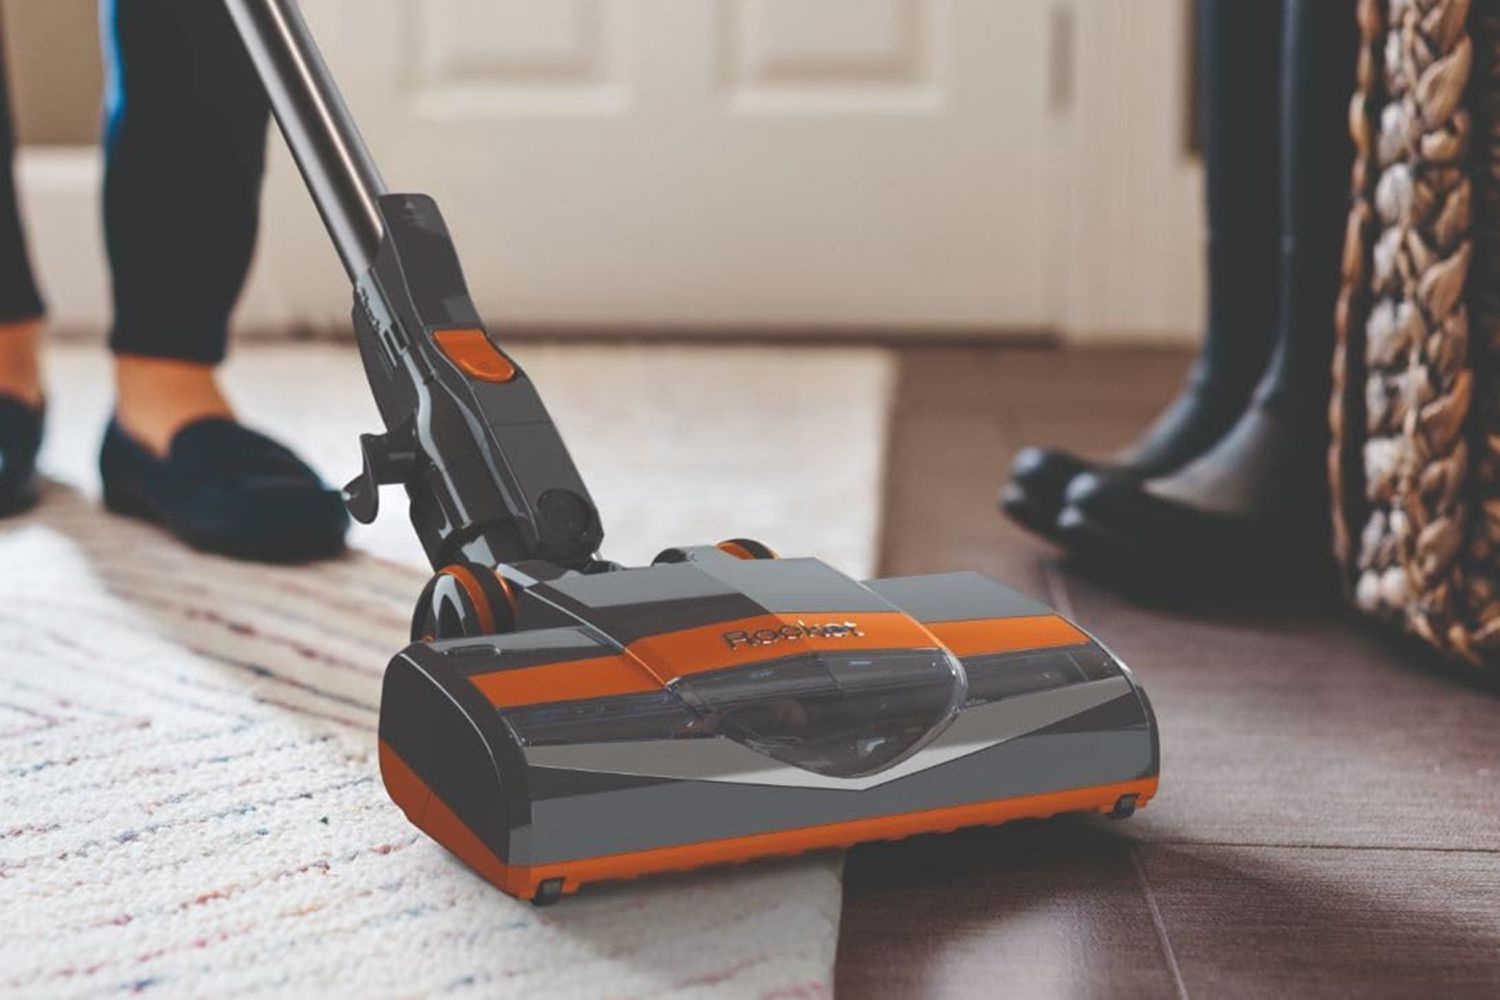
- Engage the Suction and Brush Action: Activate the suction and brush action of the vacuum cleaner to observe the performance of the new bristle brush. Ensure that the brush rotates smoothly and effectively agitates the carpet or floor surface for optimal cleaning.
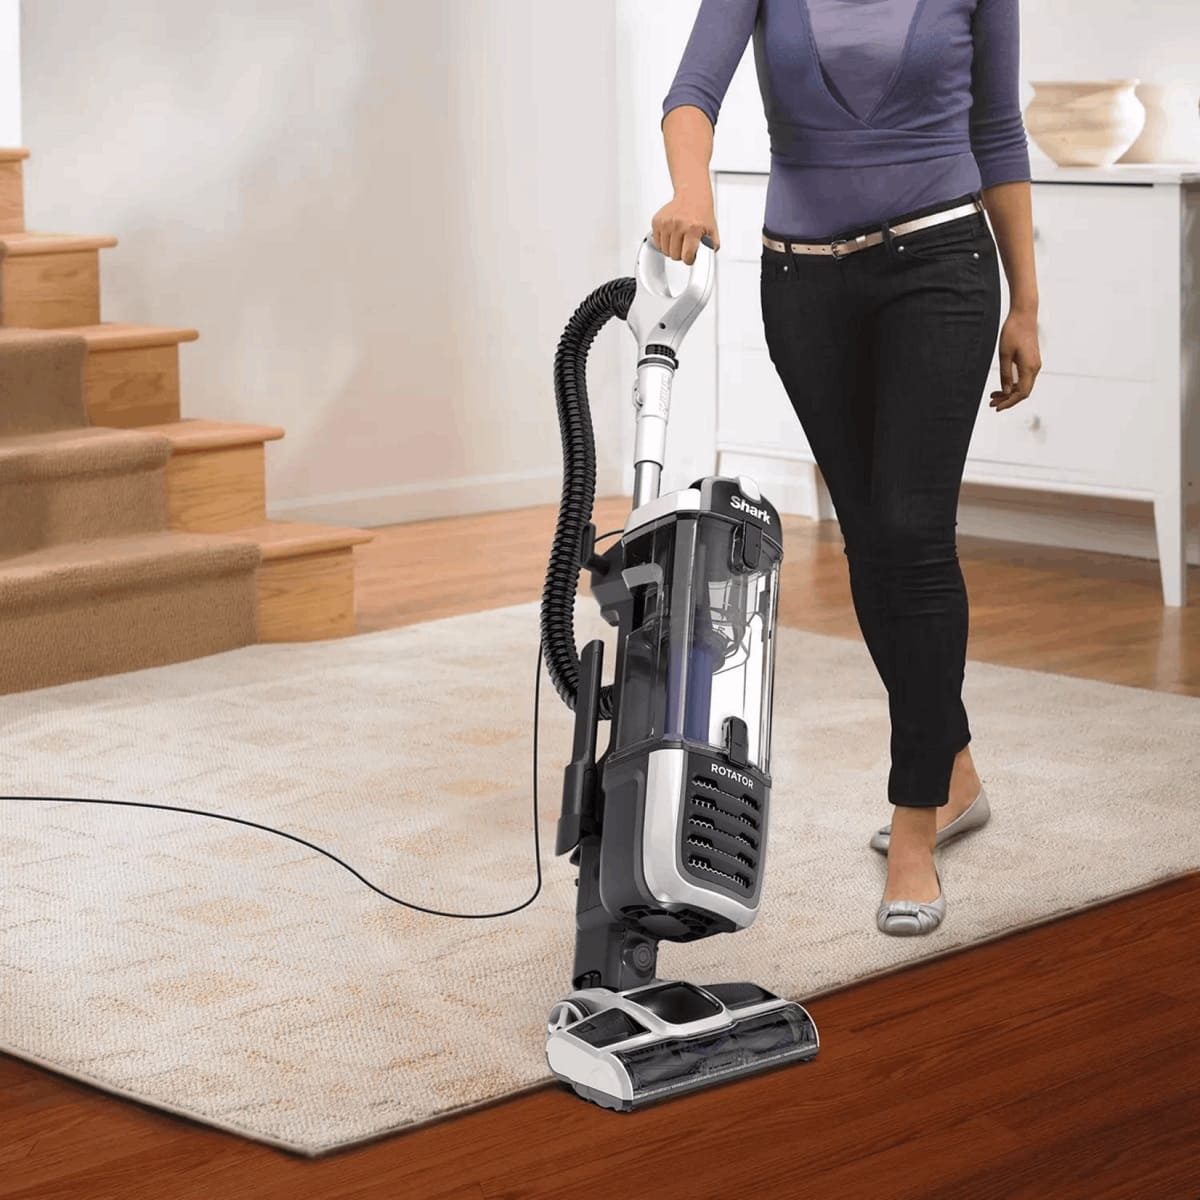
- Test Different Floor Surfaces: Move the vacuum cleaner across various floor surfaces, such as carpet, hardwood, or tile, to assess the performance of the bristle brush in different cleaning scenarios. Pay attention to the suction power and the brush’s ability to lift dirt and debris.
- Inspect the Cleaning Results: After testing the vacuum cleaner, inspect the cleaning results to ensure that the appliance effectively removes dirt and debris from the surfaces. Verify that the bristle brush contributes to a thorough and efficient cleaning process.
By following these steps, you can evaluate the functionality of your Dual Cleaner Shark vacuum cleaner with the newly installed bristle brush. A successful test ensures that the appliance delivers optimal cleaning performance and that the bristle brush replacement has rejuvenated its functionality.
If the test reveals any issues or concerns, revisit the previous steps to verify the installation and reassembly of the bristle brush. With a successful test, you can confidently rely on your vacuum cleaner to maintain a clean and healthy living environment.
Conclusion
Congratulations on successfully replacing the bristle brush on your Dual Cleaner Shark vacuum cleaner! By following the comprehensive steps outlined in this guide, you have rejuvenated your appliance and ensured its continued effectiveness in maintaining a clean living space. The process of replacing the bristle brush not only restores the vacuum cleaner’s performance but also prolongs its lifespan, saving you the cost of professional repairs or a new appliance.
Remember that regular maintenance, such as replacing worn-out components, is essential for preserving the efficiency and longevity of your vacuum cleaner. By staying proactive in maintaining your appliance, you can enjoy consistent cleaning performance and a healthier indoor environment.
Should you encounter any challenges or uncertainties during the bristle brush replacement process, don’t hesitate to consult the user manual for your Dual Cleaner Shark vacuum cleaner or seek assistance from authorized service providers. Your appliance’s user manual can provide valuable insights and specific guidelines tailored to your model.
With the new bristle brush in place, your Dual Cleaner Shark vacuum cleaner is ready to tackle cleaning tasks with renewed vigor. Enjoy the enhanced performance and reliability of your appliance, and revel in the satisfaction of a freshly maintained vacuum cleaner, contributing to a cleaner and more comfortable home environment.
Thank you for entrusting us with the guidance on replacing the bristle brush on your Dual Cleaner Shark vacuum cleaner. We hope this tutorial has empowered you to efficiently maintain and optimize the performance of your appliance, ensuring a cleaner and healthier home for you and your family.
Frequently Asked Questions about How To Replace The Bristle Brush On A Dual Cleaner Shark Vacuum Cleaner
Was this page helpful?
At Storables.com, we guarantee accurate and reliable information. Our content, validated by Expert Board Contributors, is crafted following stringent Editorial Policies. We're committed to providing you with well-researched, expert-backed insights for all your informational needs.


0 thoughts on “How To Replace The Bristle Brush On A Dual Cleaner Shark Vacuum Cleaner”