Home>Home Appliances>Heating & Cooling>How To Connect A Nest Thermostat To A Forced Air Heating System
Heating & Cooling
How To Connect A Nest Thermostat To A Forced Air Heating System
Modified: August 17, 2024
Learn how to connect a Nest thermostat to your forced air heating system for efficient heating and cooling. Follow our step-by-step guide.
(Many of the links in this article redirect to a specific reviewed product. Your purchase of these products through affiliate links helps to generate commission for Storables.com, at no extra cost. Learn more)
Introduction
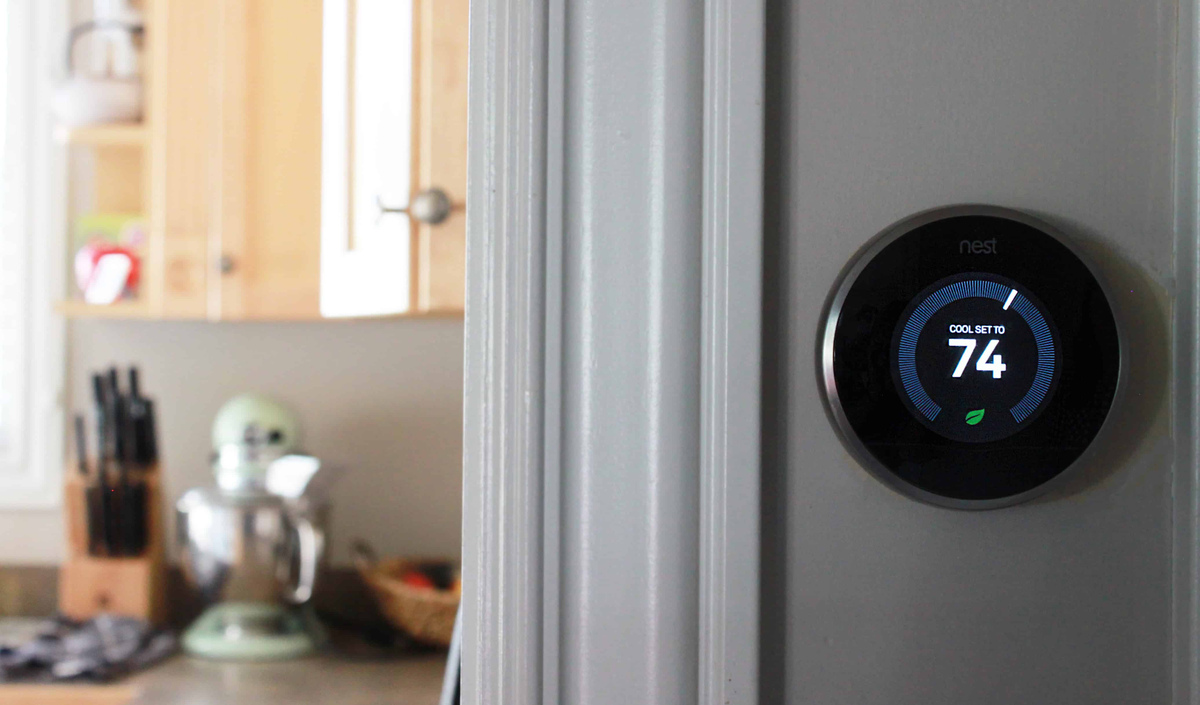
Installing a Nest thermostat in your home can revolutionize the way you manage your heating and cooling systems. The Nest thermostat is renowned for its cutting-edge technology, intuitive interface, and energy-saving capabilities. By seamlessly integrating with various heating and cooling systems, including forced air systems, the Nest thermostat offers unparalleled convenience and efficiency.
In this comprehensive guide, we will delve into the process of connecting a Nest thermostat to a forced air heating system. Whether you are a seasoned DIY enthusiast or a first-time homeowner, understanding the compatibility requirements and installation steps is crucial for a successful integration.
By following the steps outlined in this guide, you will gain the confidence to embark on this transformative journey. From preparing your forced air heating system for the installation to troubleshooting potential issues, we will walk you through each stage with clarity and precision.
Let's embark on this enlightening journey to unlock the full potential of your forced air heating system with the seamless integration of a Nest thermostat.
Key Takeaways:
- Get ready to revolutionize your home’s climate control! Connecting a Nest thermostat to your forced air heating system is a transformative journey that maximizes energy efficiency and personalized comfort.
- Prepare, connect, and enjoy the benefits! By understanding compatibility, preparing your system, and testing the connection, you’ll unlock the full potential of the Nest thermostat for a smarter, more sustainable approach to climate control.
Read more: How To Design A Forced Air Heating System
Understanding Nest Thermostat Compatibility
Before diving into the installation process, it's essential to grasp the concept of Nest thermostat compatibility with forced air heating systems. The Nest thermostat is designed to work with a wide range of heating and cooling systems, including forced air systems, which are prevalent in many homes. Understanding the compatibility requirements ensures a smooth and successful integration.
The Nest thermostat is compatible with most forced air heating systems, including gas, oil, electric, and propane systems. It is essential to verify the compatibility of your specific forced air system with the Nest thermostat to avoid any potential issues during installation. The compatibility of the Nest thermostat with forced air systems is attributed to its versatile design and adaptive technology, which enables it to effectively control and optimize the heating process.
When assessing compatibility, it's crucial to consider the wiring configuration of your forced air heating system. The Nest thermostat typically requires a common wire (C-wire) for seamless operation. The C-wire provides a constant power supply to the thermostat, ensuring consistent performance and enabling advanced features such as remote access and intelligent scheduling. While some forced air systems may not have a C-wire initially, there are alternative solutions, such as using a power extender kit, to accommodate the Nest thermostat's requirements.
Furthermore, the Nest thermostat is engineered to work with multi-stage heating systems commonly found in forced air setups. Whether your system operates with single-stage, multi-stage, or variable speed heating, the Nest thermostat is equipped to optimize the heating process based on your specific system configuration. This adaptability ensures that the Nest thermostat can effectively regulate the temperature and maximize energy efficiency, regardless of the complexity of your forced air heating system.
In addition to heating compatibility, the Nest thermostat seamlessly integrates with air conditioning systems, heat pumps, and other HVAC components, offering a comprehensive solution for climate control in residential settings. This holistic compatibility underscores the versatility and adaptability of the Nest thermostat, making it a suitable choice for homeowners seeking a unified and intelligent approach to managing their heating and cooling systems.
By understanding the compatibility requirements of the Nest thermostat with forced air heating systems, you can proceed with confidence, knowing that the integration is tailored to meet the specific needs of your home's heating infrastructure. This foundational knowledge sets the stage for a seamless and efficient installation process, laying the groundwork for a transformative upgrade to your home's climate control capabilities.
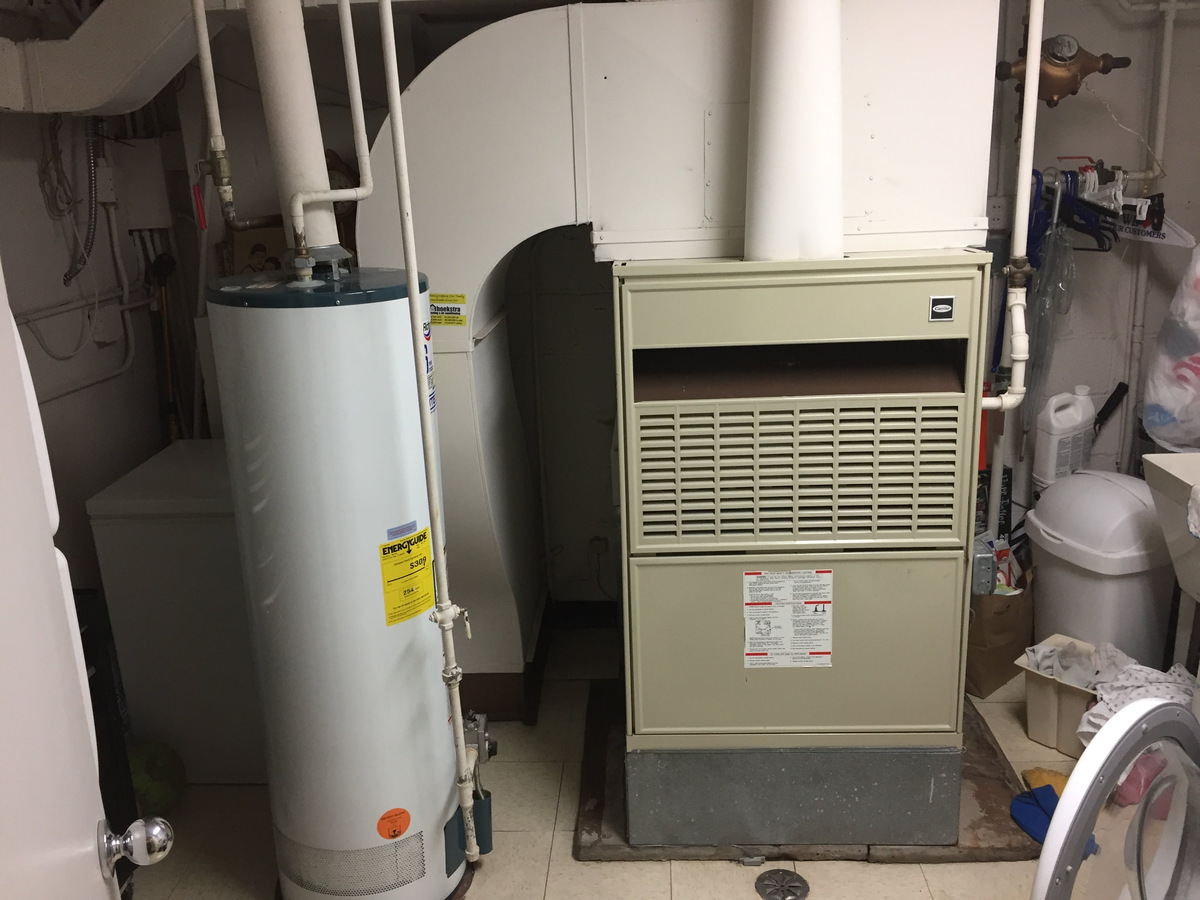
Preparing Your Forced Air Heating System for Nest Thermostat Installation
Before embarking on the installation of a Nest thermostat, it is crucial to prepare your forced air heating system to ensure a seamless integration. This preparatory phase involves assessing the existing wiring, power supply, and compatibility of the system with the Nest thermostat's requirements.
1. Assessing Wiring Compatibility
Begin by examining the wiring configuration of your forced air heating system. The Nest thermostat typically requires a common wire (C-wire) to ensure consistent power supply for optimal performance. If your current wiring setup lacks a C-wire, you may need to explore alternative solutions, such as using a power extender kit, to accommodate the Nest thermostat's requirements. Ensuring the presence of a compatible wiring setup is fundamental to the successful integration of the Nest thermostat with your forced air heating system.
2. Verifying Power Supply
Check the power supply to your heating system to confirm that it meets the Nest thermostat's power requirements. Adequate power supply is essential for the thermostat to function reliably and support advanced features such as remote access and intelligent scheduling. If the existing power supply is insufficient, it may be necessary to make adjustments or enhancements to meet the Nest thermostat's power needs.
Read more: How To Improve A Forced Air Heating System ?
3. Compatibility Confirmation
Verify the compatibility of your forced air heating system with the Nest thermostat by referring to the manufacturer's guidelines and compatibility resources. This step involves understanding the specific heating system type, whether it operates as a single-stage, multi-stage, or variable speed system. By aligning the system's capabilities with the Nest thermostat's compatibility parameters, you can ensure a harmonious integration that optimizes the heating process and energy efficiency.
4. System Readiness
Assess the overall readiness of your forced air heating system for the Nest thermostat installation. This involves checking for any existing issues or malfunctions that may impact the integration process. Addressing any pre-existing issues ensures a smooth transition to the new thermostat and minimizes the likelihood of compatibility challenges or operational disruptions.
By meticulously preparing your forced air heating system for the Nest thermostat installation, you lay a solid foundation for a successful integration. This proactive approach not only streamlines the installation process but also sets the stage for maximizing the benefits of the Nest thermostat's advanced features and intelligent climate control capabilities within your home.
Connecting the Nest Thermostat to Your Forced Air Heating System
Once you have meticulously prepared your forced air heating system for the integration of a Nest thermostat, the next crucial step is to connect the thermostat to the existing infrastructure. This process involves precise wiring, configuration, and synchronization to ensure a seamless transition to the advanced climate control capabilities offered by the Nest thermostat.
1. Wiring Configuration
Begin by carefully reviewing the wiring diagram provided by Nest for your specific heating system. Identify the designated terminals for the wiring connections, including the common wire (C-wire), heating wire, cooling wire (if applicable), and other relevant components. Ensure that the power to the heating system is turned off before proceeding with any wiring adjustments to guarantee safety and prevent electrical hazards.
2. Wiring Connections
Follow the wiring diagram and instructions provided by Nest to make the necessary connections between the thermostat and your forced air heating system. Securely attach the wires to their respective terminals, ensuring proper alignment and insulation. The C-wire, in particular, plays a pivotal role in providing continuous power to the thermostat, enabling its advanced functionality and remote accessibility.
3. Thermostat Installation
Mount the Nest thermostat on the designated wall location, ensuring that it is level and securely affixed. Carefully insert the wiring into the corresponding terminals on the thermostat, following the prescribed configuration based on your heating system type and additional components such as air conditioning or heat pumps.
4. Power Activation
Once the wiring connections are in place, restore power to your forced air heating system and the Nest thermostat. Verify that the thermostat powers up and initializes correctly, displaying the necessary prompts for the initial setup. This step confirms the successful connection between the thermostat and your heating system, laying the groundwork for personalized climate control and energy-efficient operation.
5. Configuration and Testing
Proceed to configure the Nest thermostat settings according to your preferences, including temperature thresholds, scheduling, and integration with additional HVAC components. Test the heating system to ensure that the thermostat effectively regulates the temperature and responds to adjustments made through its intuitive interface. This comprehensive testing phase validates the seamless connection between the Nest thermostat and your forced air heating system, affirming its operational reliability and adaptability.
By meticulously following the prescribed wiring and installation procedures, you establish a robust connection between the Nest thermostat and your forced air heating system. This pivotal integration marks the beginning of a transformative journey towards intelligent climate control, energy efficiency, and enhanced comfort within your home.
Testing and Troubleshooting the Connection
After completing the physical connection of the Nest thermostat to your forced air heating system, it is essential to conduct thorough testing to ensure seamless functionality and address any potential issues that may arise during the integration process.
1. Functional Testing
Initiate the testing phase by activating the heating system and observing the Nest thermostat's response. Verify that the thermostat accurately detects the system's operation and displays the corresponding heating status. This initial assessment provides valuable insights into the thermostat's ability to interface with the heating system and regulate the temperature effectively.
2. Temperature Regulation
Adjust the temperature settings on the Nest thermostat to trigger the heating system and monitor its performance. Observe the system's response to temperature adjustments, ensuring that the thermostat effectively communicates with the heating system to maintain the desired temperature levels. This comprehensive evaluation validates the thermostat's ability to regulate the heating process in alignment with your preferences.
3. Remote Access and Control
Leverage the remote access capabilities of the Nest thermostat to test its responsiveness to temperature adjustments and scheduling commands from a mobile device or computer. This remote testing phase demonstrates the thermostat's seamless connectivity and reinforces its role as a versatile and user-friendly climate control interface.
Read more: When Did Forced Air Heating Start?
4. Troubleshooting Potential Issues
In the event of any irregularities or malfunctions during the testing phase, refer to the troubleshooting resources provided by Nest. These resources may include online guides, support documentation, and customer service channels that offer insights into addressing common integration issues. By systematically troubleshooting potential challenges, you can swiftly resolve any impediments to the thermostat's optimal performance.
5. System Calibration
Calibrate the Nest thermostat to align with the specific characteristics of your forced air heating system. This calibration process may involve fine-tuning temperature settings, optimizing scheduling parameters, and adjusting the thermostat's adaptive features to harmonize with the nuances of your heating system. By customizing the thermostat's configuration, you enhance its compatibility and performance within your home environment.
6. Continuous Monitoring
Following the initial testing and troubleshooting phase, maintain a vigilant approach to monitoring the Nest thermostat's operation in conjunction with your forced air heating system. Regularly assess its performance, responsiveness, and energy-saving capabilities to ensure sustained functionality and efficiency. This ongoing monitoring reinforces the seamless integration of the thermostat with your heating system, fostering a reliable and intelligent climate control experience.
By diligently conducting comprehensive testing and troubleshooting procedures, you fortify the connection between the Nest thermostat and your forced air heating system, laying the groundwork for a harmonious and efficient partnership. This meticulous approach not only validates the successful integration but also empowers you to harness the full potential of the Nest thermostat's advanced features and transformative impact on your home's climate control dynamics.
Conclusion
In conclusion, the integration of a Nest thermostat with a forced air heating system represents a transformative leap towards intelligent climate control, energy efficiency, and enhanced comfort within your home. By embarking on this enlightening journey, you have gained valuable insights into the compatibility requirements, preparatory measures, installation procedures, and testing protocols essential for a successful integration.
The Nest thermostat's adaptability and advanced features, coupled with its seamless compatibility with forced air heating systems, position it as a pivotal asset in optimizing your home's climate control dynamics. From its intuitive interface and remote accessibility to its adaptive temperature regulation and energy-saving capabilities, the Nest thermostat embodies a holistic approach to managing your heating and cooling systems.
As you navigate the intricacies of preparing and connecting the Nest thermostat to your forced air heating system, you have laid a solid foundation for a harmonious partnership that transcends traditional thermostat functionality. The meticulous attention to wiring configuration, power supply verification, and compatibility confirmation underscores your commitment to a seamless integration that maximizes the thermostat's potential.
Furthermore, the comprehensive testing and troubleshooting phase have empowered you to validate the thermostat's seamless functionality, address potential issues, and fine-tune its configuration to align with your specific heating system characteristics. This proactive approach ensures sustained performance and reliability, cementing the Nest thermostat's role as a cornerstone of intelligent climate control within your home.
As you embrace the transformative impact of the Nest thermostat on your home's climate control dynamics, you are poised to experience the tangible benefits of energy efficiency, personalized comfort, and intuitive control. The seamless integration of the Nest thermostat with your forced air heating system heralds a new era of intelligent climate management, empowering you to optimize energy usage, reduce utility costs, and create a comfortable living environment tailored to your preferences.
In essence, the journey to connect a Nest thermostat to a forced air heating system transcends mere installation; it represents a conscious decision to embrace innovation, efficiency, and personalized comfort within your home. By harnessing the full potential of the Nest thermostat, you have embarked on a transformative path towards a smarter, more sustainable approach to climate control, enriching your daily living experience and contributing to a greener, more efficient future.
Frequently Asked Questions about How To Connect A Nest Thermostat To A Forced Air Heating System
Was this page helpful?
At Storables.com, we guarantee accurate and reliable information. Our content, validated by Expert Board Contributors, is crafted following stringent Editorial Policies. We're committed to providing you with well-researched, expert-backed insights for all your informational needs.


0 thoughts on “How To Connect A Nest Thermostat To A Forced Air Heating System”