Home>Home Appliances>Kitchen Appliances>How To Make Potato Chips With A Dehydrator
Kitchen Appliances
How To Make Potato Chips With A Dehydrator
Modified: March 19, 2024
Learn how to make delicious and healthy potato chips using a dehydrator in your kitchen. Explore a simple and convenient way to enjoy homemade snacks.
(Many of the links in this article redirect to a specific reviewed product. Your purchase of these products through affiliate links helps to generate commission for Storables.com, at no extra cost. Learn more)
Introduction
Welcome to the wonderful world of homemade potato chips! If you're a fan of this crispy, savory snack, you'll be delighted to know that you can easily make your own potato chips using a dehydrator. Not only does this allow you to control the ingredients and seasonings, but it also provides a healthier alternative to store-bought chips, as you can skip the unhealthy additives and excessive oil.
In this comprehensive guide, we'll walk you through the step-by-step process of creating delicious potato chips with a dehydrator. From selecting the perfect potatoes to mastering the art of seasoning, dehydrating, and storing your homemade chips, you'll gain all the insights you need to become a potato chip aficionado.
So, roll up your sleeves, gather your ingredients, and get ready to embark on a culinary adventure that will elevate your snacking experience to a whole new level. Let's dive into the delightful world of crafting your own delectable potato chips!
Key Takeaways:
- Homemade potato chips made with a dehydrator offer a healthier, customizable, and delicious alternative to store-bought chips, allowing you to control the ingredients and seasonings for a satisfying snacking experience.
- Choosing the right potatoes, mastering the art of slicing, seasoning, dehydrating, and storing are key steps in creating perfectly crispy, flavorful homemade potato chips with a dehydrator.
Read more: How To Make Carrot Chips In A Dehydrator
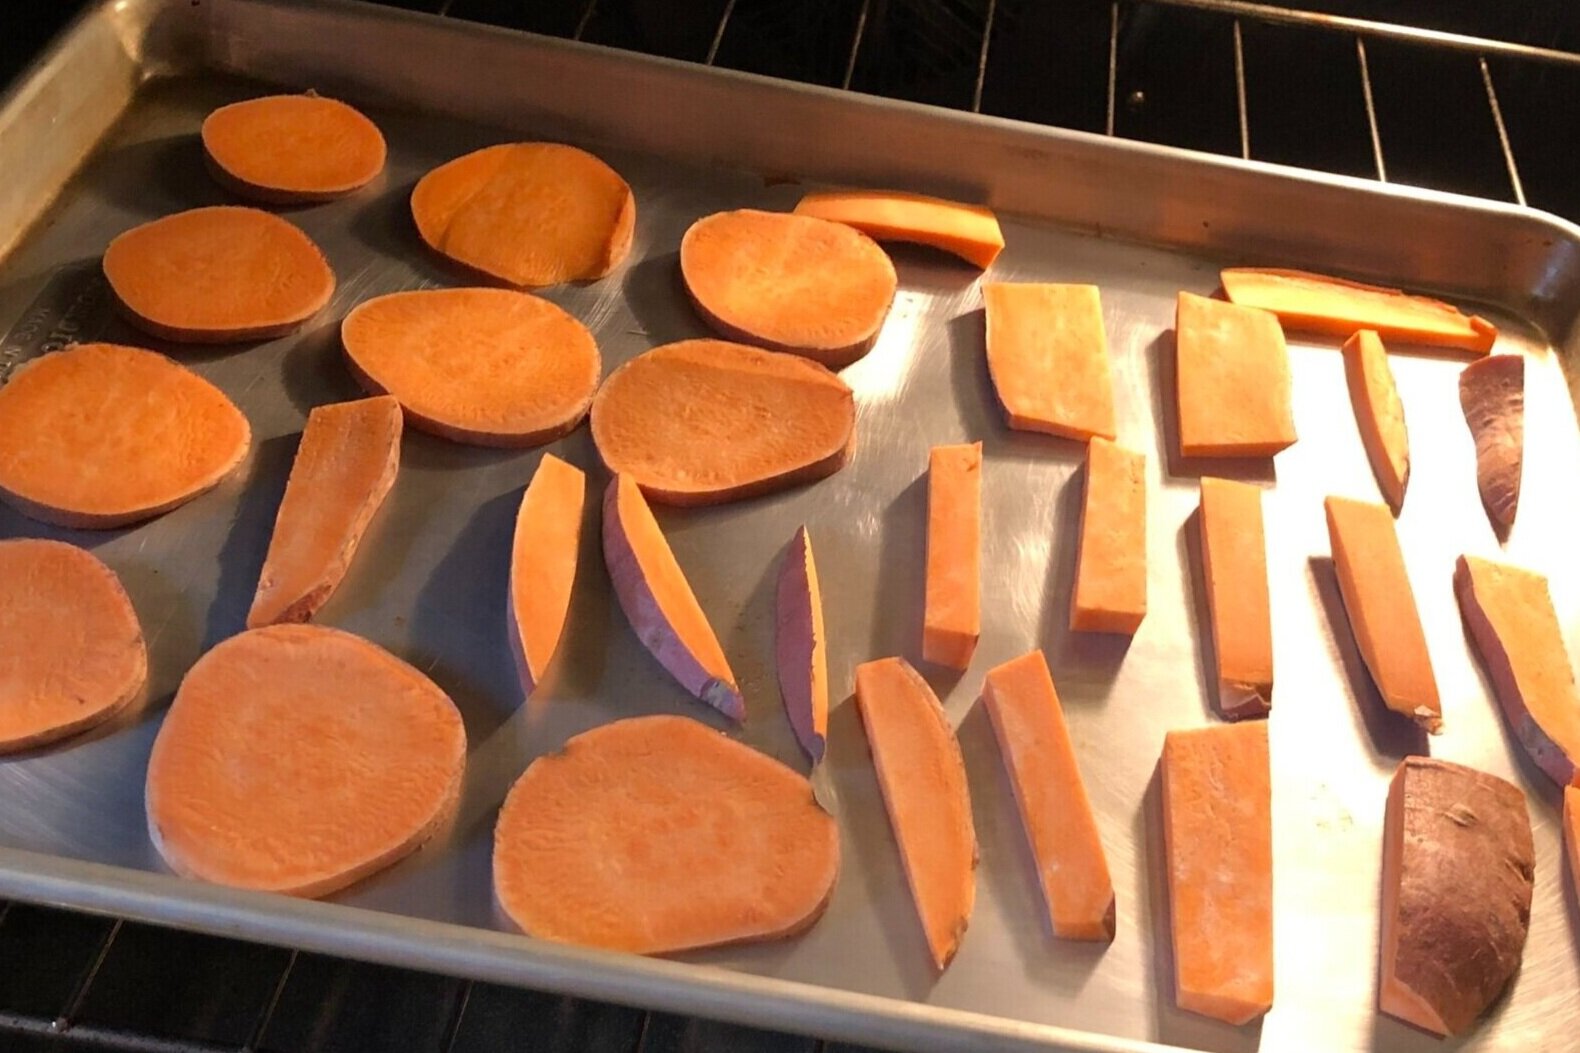
Choosing the Right Potatoes
When it comes to making potato chips, selecting the right type of potatoes is crucial. Not all potatoes are created equal, and choosing the best variety will significantly impact the flavor, texture, and overall quality of your homemade chips.
First and foremost, opt for starchy potatoes such as Russet or Idaho potatoes. These varieties are ideal for making chips due to their low moisture content and high starch levels, which contribute to a satisfyingly crisp texture once dehydrated. Additionally, their mild, earthy flavor serves as an excellent canvas for a wide range of seasonings, allowing you to customize your chips to suit your taste preferences.
Before slicing the potatoes, it’s essential to wash and thoroughly dry them. Removing any dirt or debris from the skins will result in cleaner, more appetizing chips. Once cleaned, use a sharp knife or a mandoline slicer to cut the potatoes into uniformly thin slices. Consistent thickness is key to ensuring that the chips dehydrate evenly, preventing some from becoming overly crisp while others remain underdone.
By carefully selecting and preparing the right potatoes, you set the stage for creating perfectly crispy, flavorful chips that will rival any commercial brand. With this crucial first step accomplished, you’re now ready to move on to the next stage of the potato chip-making process.
Slicing the Potatoes
Now that you’ve chosen the perfect potatoes for your homemade chips, it’s time to master the art of slicing them. Achieving thin, uniform slices is essential for ensuring that your potato chips dehydrate evenly and result in a satisfying crunch with every bite. While it’s possible to achieve this with a sharp knife, using a mandoline slicer can streamline the process and provide consistently thin slices.
When using a mandoline slicer, adjust the blade to your desired thickness, typically around 1/16 inch. Take caution when handling the mandoline, as the blades are extremely sharp. To safeguard your fingers, consider using a protective glove or a specialized hand guard to guide the potatoes across the blade. This will help you achieve the desired thinness without risking injury.
If you prefer to use a knife, aim for slices of similar thickness, approximately 1/16 inch. This can be a more time-consuming process, but with a steady hand and a sharp knife, you can achieve the desired results. Take your time to ensure that the slices are as uniform as possible, as any discrepancies may lead to inconsistent dehydration and varying levels of crispness in the finished chips.
Regardless of the slicing method you choose, it’s crucial to work efficiently to prevent the exposed surfaces of the potatoes from browning. If you’re slicing a large batch of potatoes, consider placing the slices in a bowl of cold water to prevent oxidation and maintain their fresh appearance until they’re ready for seasoning and dehydration.
With your potatoes expertly sliced and prepared, you’re now one step closer to transforming them into delectable, homemade potato chips. The next phase of the process involves infusing your slices with tantalizing seasonings to elevate their flavor profile. Let’s dive into the exciting world of seasoning your potato chips to perfection!
To make crispy potato chips with a dehydrator, slice the potatoes thinly and evenly, then soak them in cold water for 30 minutes to remove excess starch. Pat them dry and season with your favorite spices before dehydrating for 6-8 hours at 125°F. Enjoy!
Seasoning the Potato Chips
Seasoning is where the magic truly happens in the realm of homemade potato chips. It’s the stage where you can unleash your creativity and tailor the flavor profile to your liking. Whether you prefer classic salted chips, zesty barbecue seasoning, or bold and spicy flavors, the seasoning process allows you to customize your chips to perfection.
Before applying the seasonings, ensure that the sliced potatoes are thoroughly dried to remove excess moisture. This step is crucial for allowing the seasonings to adhere to the chips and for achieving optimal crispiness during dehydration. Once dried, transfer the slices to a large bowl and lightly coat them with a high-quality cooking oil, such as olive oil or avocado oil. This will not only aid in the adherence of the seasonings but also contribute to the chips’ satisfying texture and flavor.
Now comes the fun part – seasoning your potato chips! For classic salted chips, sprinkle the slices with a fine, even layer of salt, ensuring that each chip is lightly coated. If you’re feeling adventurous, consider experimenting with a variety of seasonings, such as paprika, garlic powder, onion powder, or even a touch of cayenne for a hint of heat. Gently toss the seasoned slices to distribute the flavors evenly, taking care not to break or damage the delicate slices.
For those who crave a more robust flavor experience, you can explore the world of homemade seasoning blends. Create a tantalizing barbecue seasoning by combining smoky paprika, garlic powder, brown sugar, and a dash of cayenne for a hint of heat. Alternatively, craft a savory herb and garlic seasoning using dried herbs, garlic powder, and a touch of parmesan cheese for a gourmet twist on traditional potato chips.
Once the chips are impeccably seasoned, arrange them in a single layer on the trays of your dehydrator, ensuring that they do not overlap. This will allow for optimal airflow and even dehydration, resulting in uniformly crispy chips. With the seasoning process complete, it’s time to set your dehydrator to the appropriate temperature and patiently await the transformation of your seasoned potato slices into delectable, crunchy chips.
As the chips undergo the dehydration process, the seasonings will infuse the slices, creating a symphony of flavors that will tantalize your taste buds. Soon, you’ll be savoring the fruits of your labor – perfectly seasoned, homemade potato chips that surpass any store-bought counterpart. With the chips undergoing dehydration, let’s explore the next crucial step – the process of dehydrating the seasoned potato slices to achieve the desired crispness and flavor intensity.
Dehydrating the Potato Chips
With the seasoned potato slices meticulously prepared, it’s time to embark on the transformative process of dehydration. This stage is where the magic unfolds, as the slices gradually evolve into crispy, flavorful potato chips, ready to delight your senses with each satisfying crunch.
Before loading the seasoned potato slices into the dehydrator, it’s essential to arrange them in a single layer on the dehydrator trays, ensuring that they do not overlap. This allows for optimal airflow around each slice, facilitating even dehydration and preventing the chips from sticking together. Additionally, it’s crucial to set the dehydrator to the appropriate temperature for potato chips, typically around 125°F to 135°F (approximately 52°C to 57°C).
As the dehydrator hums to life, the gentle warmth begins to coax out the moisture from the seasoned potato slices, gradually transforming them into crispy, delectable chips. The duration of the dehydration process may vary depending on factors such as the thickness of the slices, the moisture content of the potatoes, and the specific model of the dehydrator. On average, the dehydration process can take anywhere from 6 to 12 hours, during which patience becomes a virtue as you eagerly anticipate the flavorful rewards that await.
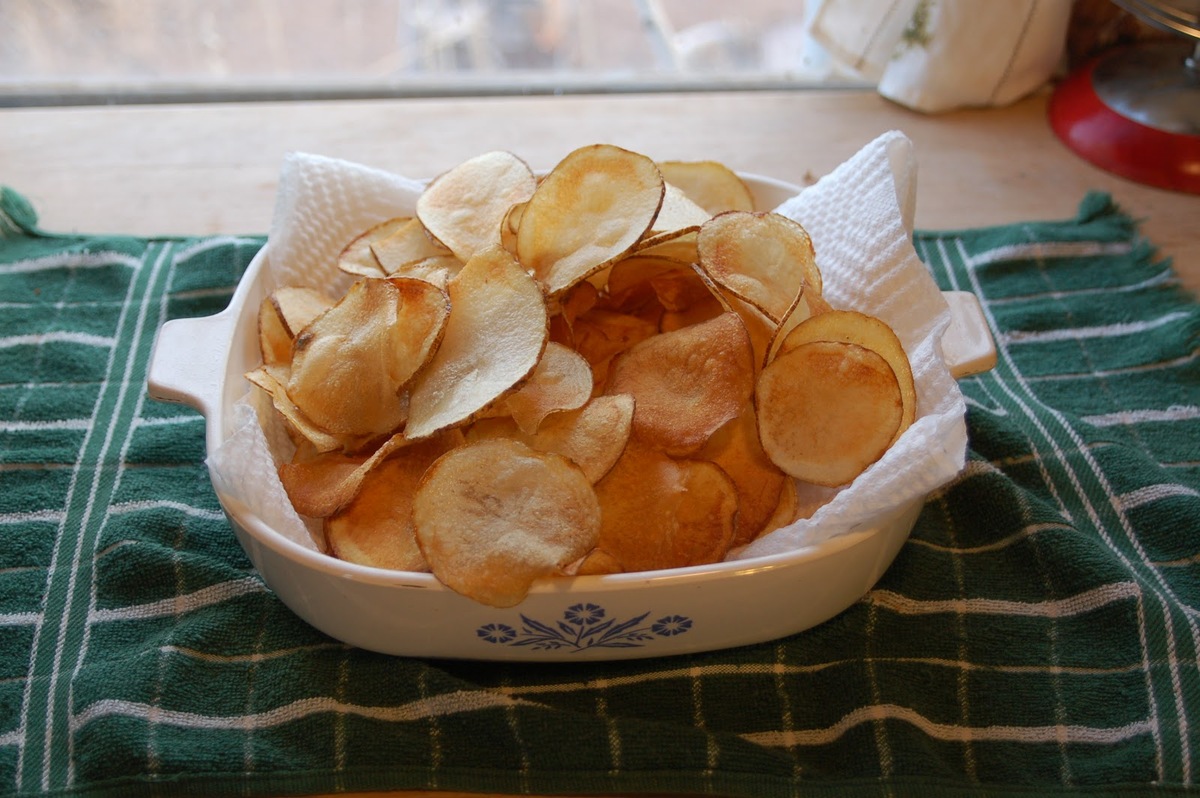
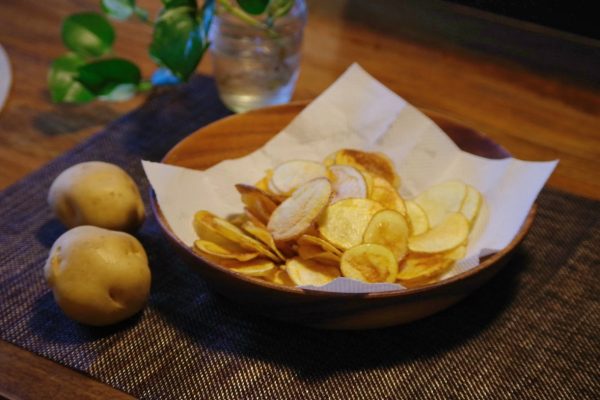
Periodically check the progress of the chips, rotating the trays if necessary to ensure uniform dehydration. As the slices gradually transform, you’ll notice the once pliable slices becoming increasingly firm and crisp. To assess their readiness, carefully remove a chip from the dehydrator, allowing it to cool before sampling. The ideal potato chip should offer a satisfying crunch with a light, airy texture, indicating that it has achieved the perfect level of dehydration.
Once the chips have reached the desired level of crispness, carefully transfer them to a wire rack to cool completely. This allows any residual moisture to evaporate, ensuring that the chips remain delightfully crisp during storage. As the chips cool, their flavors intensify, resulting in a tantalizing symphony of seasonings that will captivate your taste buds with each delightful bite.
With the dehydration process complete, you’re now the proud creator of a batch of homemade potato chips that boast exceptional flavor, satisfying crunch, and wholesome goodness. As you revel in the fruits of your culinary endeavor, it’s essential to consider the final phase of the potato chip-making journey – the art of storing your delectable creations to preserve their freshness and flavor for future enjoyment.
Read more: How To Make Apple Chips In A Dehydrator
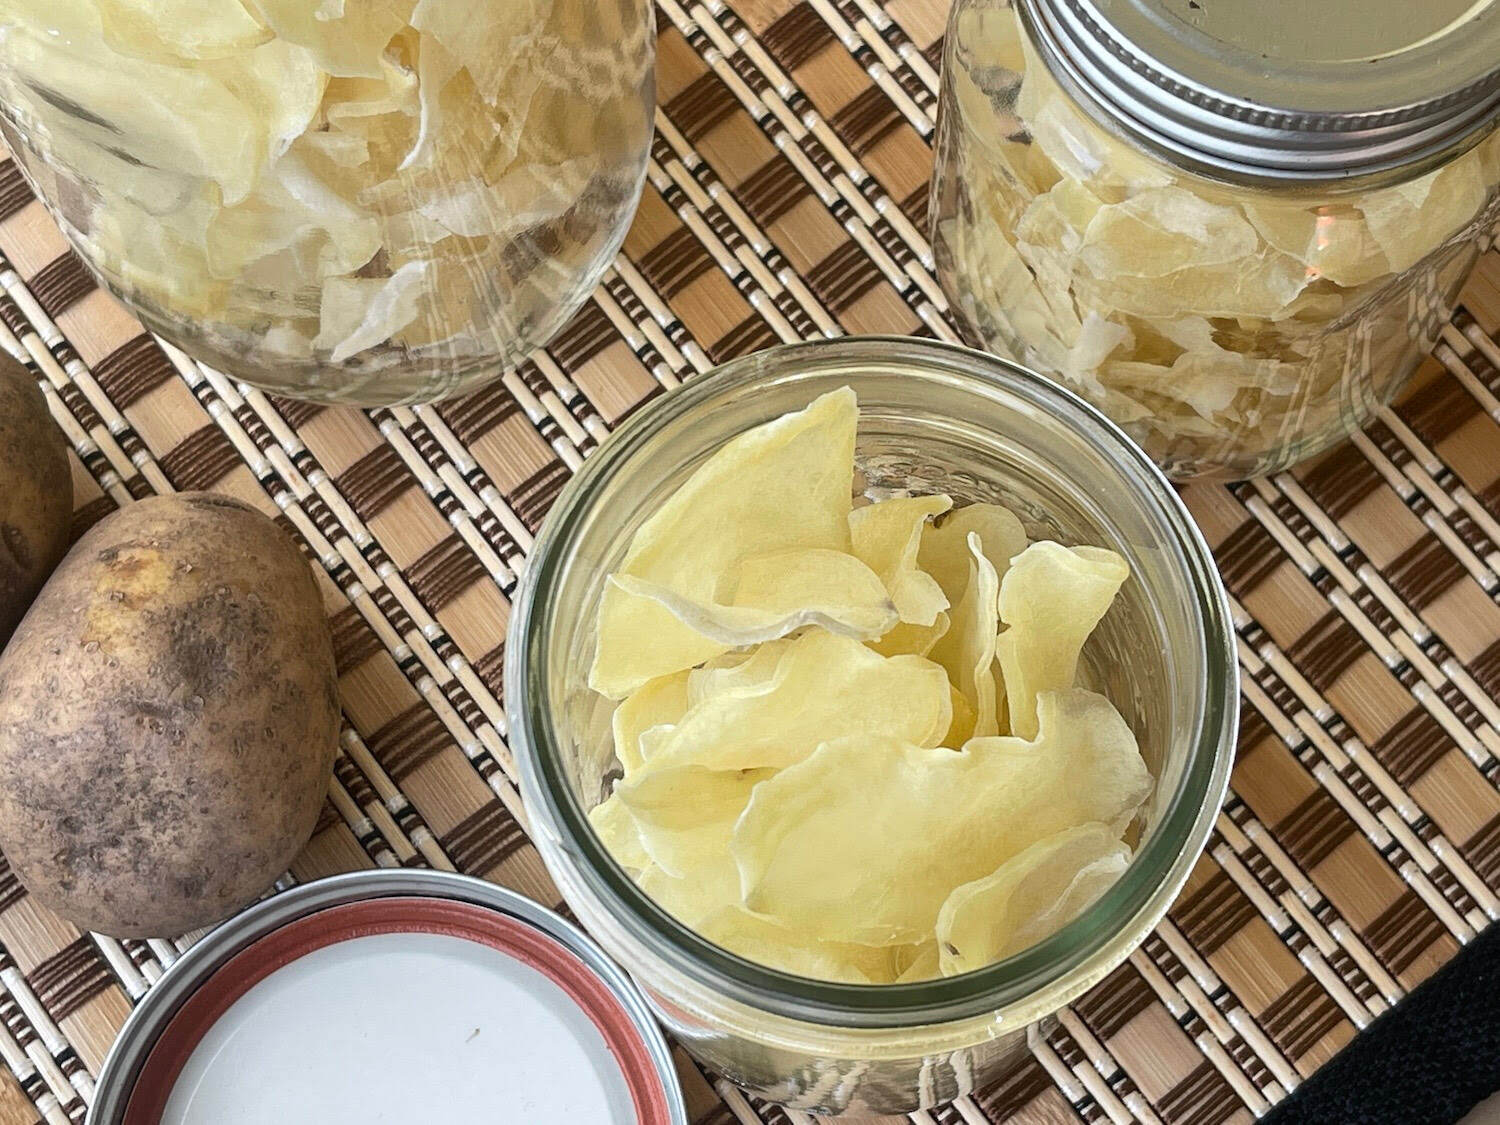
Storing the Potato Chips
As you bask in the satisfaction of creating a batch of delectable homemade potato chips, it’s crucial to ensure that they are properly stored to maintain their crispness and flavor. Whether you’ve crafted a small indulgence for immediate enjoyment or a generous supply to savor over time, the right storage approach will preserve the quality of your chips, allowing you to relish their delightful crunch whenever the craving strikes.
Once your potato chips have cooled to room temperature, it’s time to transfer them to airtight containers for storage. Opt for containers that provide a snug seal, effectively safeguarding the chips from exposure to air and moisture, which can compromise their crisp texture. Alternatively, you can use resealable plastic bags, ensuring that they are tightly sealed to prevent air from infiltrating and compromising the chips’ freshness.
When filling the storage containers or bags, handle the chips with care to prevent breakage. While homemade potato chips offer a more robust texture compared to their commercial counterparts, they still benefit from gentle handling to preserve their satisfying crunch. If you’ve seasoned your chips with delicate herbs or spices, take care to avoid excessive agitation to maintain the integrity of the seasonings.
Store the airtight containers or bags of potato chips in a cool, dark pantry or cupboard, away from direct sunlight and heat sources. Exposure to light and warmth can hasten the degradation of the chips, leading to loss of crispness and flavor. By storing them in a cool, dark environment, you can prolong the shelf life of your homemade chips and ensure that they retain their exceptional quality.
While it’s tempting to indulge in your freshly made potato chips immediately, allowing them to rest in their storage containers for 24 hours can enhance their texture and flavor. This brief period of rest allows any residual moisture to distribute evenly, contributing to a more consistent crunch and intensifying the infusion of seasonings throughout the chips.
When properly stored, homemade potato chips can maintain their peak quality for up to two weeks, offering a delightful snack to enjoy at your leisure. However, their irresistible flavor and satisfying crunch often lead to swift consumption, making extended storage a rarity. With each crispy bite, you’ll savor the fruits of your labor, reveling in the knowledge that you’ve mastered the art of creating wholesome, flavorful potato chips from scratch.
As you embark on your culinary journey to create homemade potato chips with a dehydrator, remember that the process is not just about crafting a delightful snack – it’s an expression of creativity, a celebration of wholesome ingredients, and a testament to the joy of culinary exploration. With each batch of chips you create, you infuse them with your unique touch, elevating the simple potato into a gourmet delight that captivates the senses and brings joy to those who savor its delicious essence.
Frequently Asked Questions about How To Make Potato Chips With A Dehydrator
Was this page helpful?
At Storables.com, we guarantee accurate and reliable information. Our content, validated by Expert Board Contributors, is crafted following stringent Editorial Policies. We're committed to providing you with well-researched, expert-backed insights for all your informational needs.


0 thoughts on “How To Make Potato Chips With A Dehydrator”