Home>Home Appliances>Kitchen Appliances>How To Make Kale Chips In A Dehydrator
Kitchen Appliances
How To Make Kale Chips In A Dehydrator
Published: January 5, 2024
Learn how to make delicious and healthy kale chips using a dehydrator in your kitchen. Enjoy a nutritious snack with this simple kitchen-appliances recipe.
(Many of the links in this article redirect to a specific reviewed product. Your purchase of these products through affiliate links helps to generate commission for Storables.com, at no extra cost. Learn more)
Introduction
Welcome to the world of homemade kale chips! If you're looking for a nutritious and delicious snack that's easy to make, then you're in the right place. In this guide, we'll walk you through the step-by-step process of creating crispy and flavorful kale chips using a dehydrator. Whether you're a health-conscious individual, a culinary enthusiast, or simply someone who loves snacking, learning how to make kale chips in a dehydrator is a fantastic skill to add to your repertoire.
Kale chips have gained popularity in recent years due to their fantastic crunch, vibrant green color, and versatility in flavoring. By dehydrating fresh kale leaves, you can transform them into a guilt-free snack that's packed with nutrients. Unlike store-bought chips that are often laden with unhealthy additives, homemade kale chips offer a wholesome alternative that doesn't compromise on taste.
Not only are kale chips a great way to satisfy your cravings for something crunchy, but they also provide a wealth of health benefits. Kale is a nutritional powerhouse, rich in vitamins, minerals, and antioxidants. When dehydrated at low temperatures, kale retains most of its nutrients, making it an excellent choice for a wholesome snack.
In this guide, we'll cover everything you need to know about making kale chips in a dehydrator, from selecting the right kale to seasoning the chips with delicious flavors. Whether you're a beginner in the kitchen or an experienced cook looking to expand your culinary repertoire, this guide is designed to help you master the art of creating delectable kale chips that will impress your taste buds and nourish your body.
So, grab your apron and let's embark on a culinary adventure as we delve into the wonderful world of homemade kale chips. Get ready to elevate your snacking game and discover the joy of creating a wholesome, flavorful treat that's perfect for any occasion. Let's dive in and learn how to make kale chips in a dehydrator!
Key Takeaways:
- Homemade kale chips are a guilt-free, nutrient-packed snack bursting with vibrant flavors. Making them allows for creativity and nourishes both body and soul.
- By mastering the art of creating homemade kale chips, you preserve essential nutrients and inspire others to embark on their own wholesome snacking adventures.
Read more: How To Make Kale Chips Air Fryer
What You’ll Need
Before you embark on your kale chip-making journey, it’s essential to gather the necessary tools and ingredients. Here’s a rundown of what you’ll need to create your own batch of crispy, nutritious kale chips:
Ingredients:
- Fresh kale: Opt for organic kale if possible, as it tends to have a more robust flavor and is free from pesticides.
- Olive oil: Choose high-quality extra virgin olive oil for its rich flavor and health benefits.
- Seasonings: You can get creative with your choice of seasonings, such as sea salt, garlic powder, onion powder, paprika, cayenne pepper, or nutritional yeast.
Tools and Equipment:
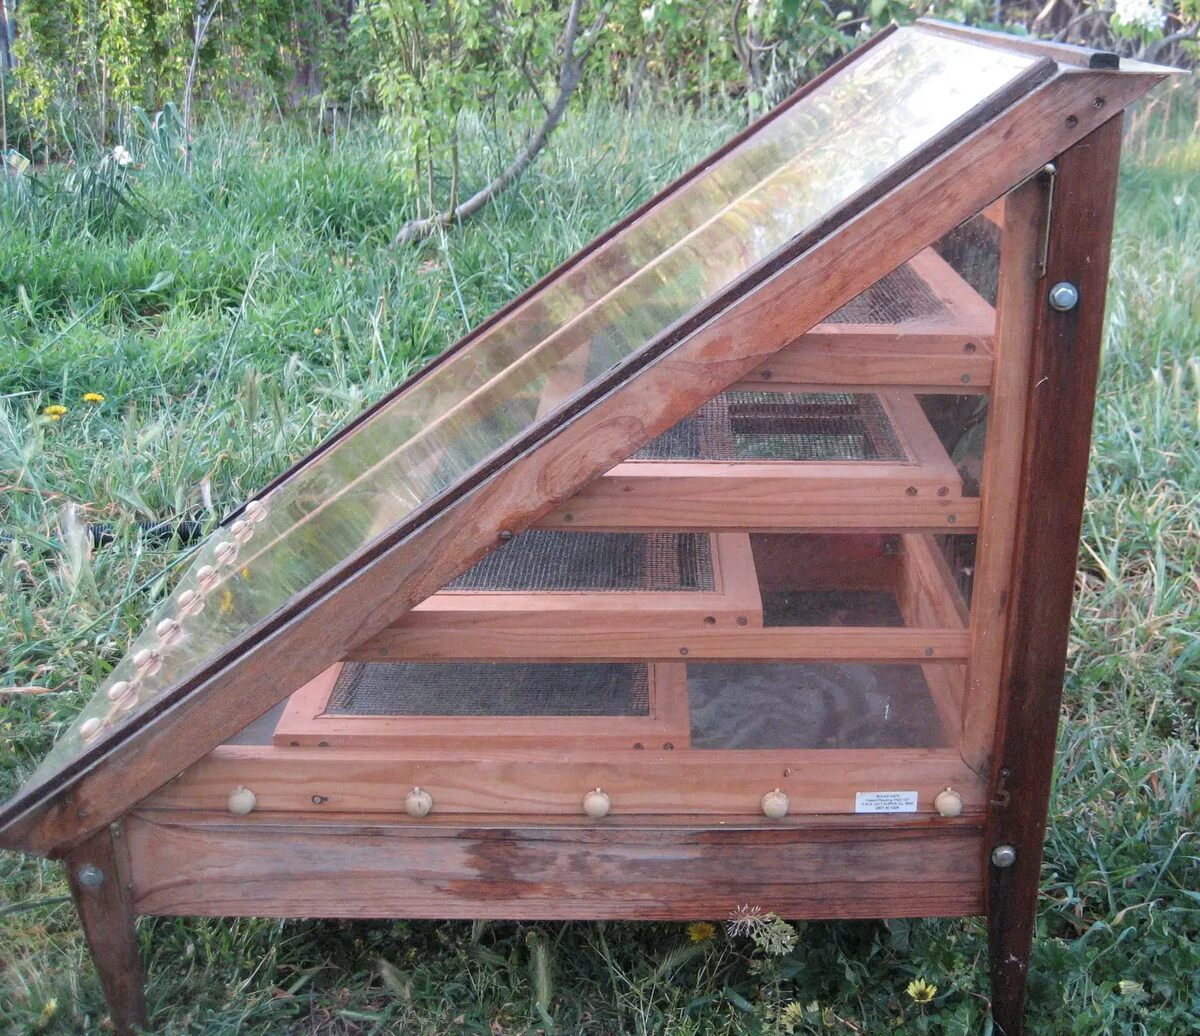
- Dehydrator: A food dehydrator is the key tool for transforming kale leaves into crispy chips. If you don't have a dehydrator, you can use your oven set to the lowest temperature, but a dehydrator is the optimal choice for achieving the perfect texture and preserving nutrients.
- Bowl: You'll need a large bowl for washing and drying the kale leaves, as well as for tossing them with oil and seasonings.
- Baking sheets or dehydrator trays: If you're using an oven, baking sheets are essential. For a dehydrator, you'll need the trays that came with the appliance.
- Parchment paper or silicone baking mats: These will help prevent the kale chips from sticking to the baking sheets or dehydrator trays.
- Sharp knife or kitchen shears: You'll use these to remove the kale leaves from the stems and to cut them into chip-sized pieces.
- Measuring spoons: These are handy for accurately portioning out the oil and seasonings.
- Storage container: Once your kale chips are dehydrated, you'll need an airtight container to store them and keep them fresh.
Now that you have a clear understanding of the ingredients and equipment required, it’s time to gather everything you need to embark on your kale chip-making adventure. With your kitchen stocked and your enthusiasm ignited, you’re well on your way to creating a delightful, nutritious snack that’s sure to impress!
Preparing the Kale
Preparing the kale is the crucial first step in crafting delectable kale chips. Follow these simple yet essential guidelines to ensure that your kale chips turn out crispy and full of flavor:
Read more: How To Make Carrot Chips In A Dehydrator
1. Selecting and Washing the Kale:
Begin by choosing fresh, vibrant kale leaves. Look for leaves that are firm and free from wilting or yellowing. If possible, opt for organic kale to minimize exposure to pesticides. Once you have your kale, give the leaves a thorough rinse under cold water to remove any dirt or debris. Gently pat the leaves dry with a clean kitchen towel or use a salad spinner to ensure they are completely dry before proceeding.
2. Removing the Stems:
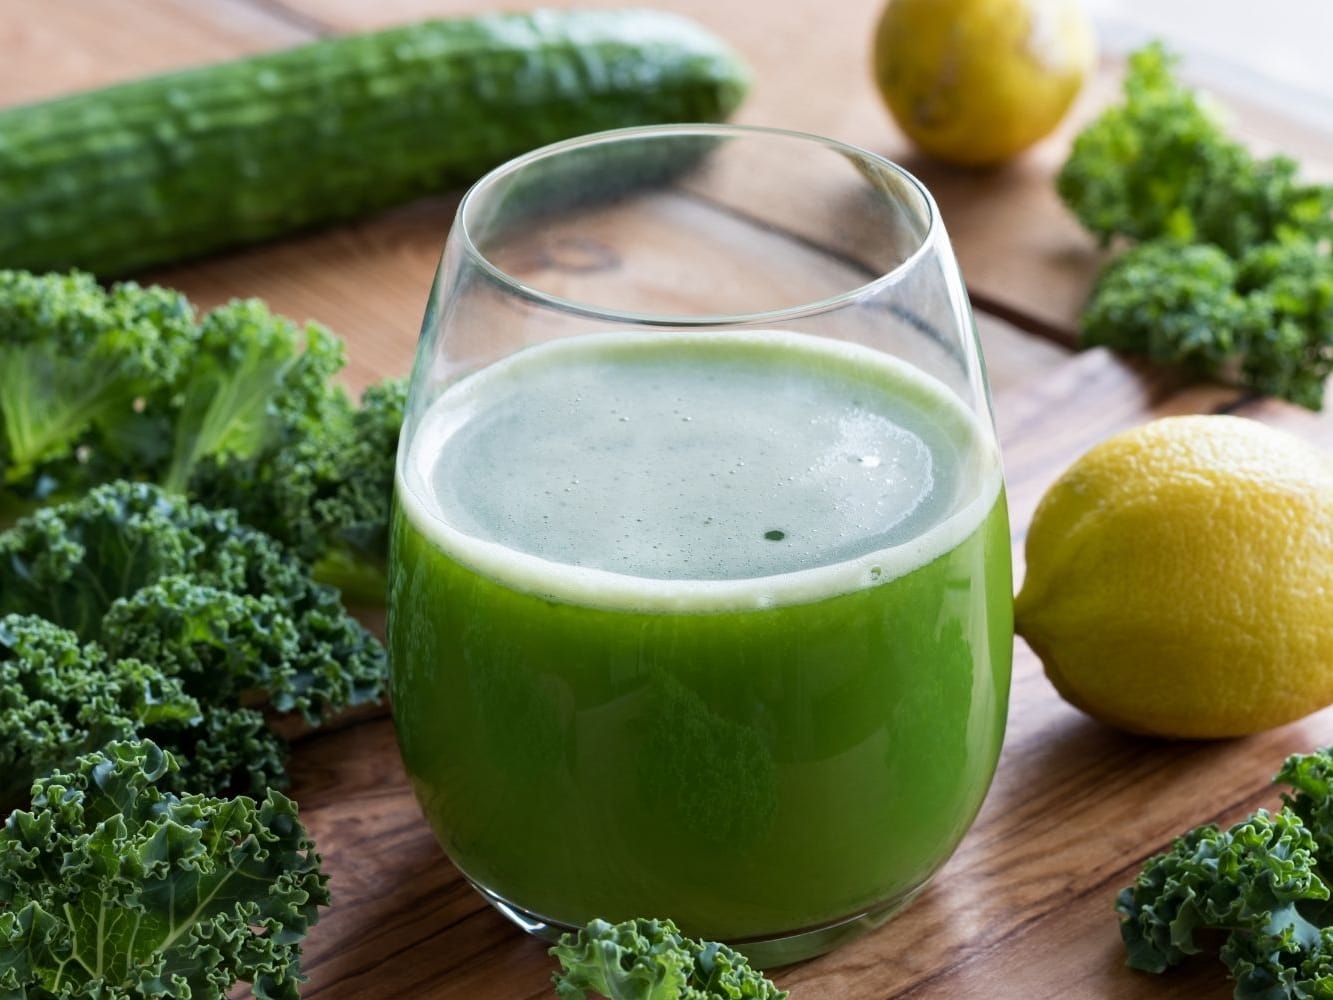
The stems of kale can be tough and fibrous, so it’s best to remove them before making kale chips. To do this, simply grasp the stem end with one hand and run your other hand along the sides of the stem, stripping the leaves away. Alternatively, you can use a sharp knife or kitchen shears to carefully trim the leaves away from the stems. Discard the stems or save them for use in soups or smoothies.
3. Tearing or Cutting the Leaves:
Once the stems are removed, tear the kale leaves into bite-sized pieces or cut them using a sharp knife or kitchen shears. Aim for pieces that are roughly 2-3 inches in size, as they will shrink slightly during the dehydration process. Evenly sized pieces will ensure that the kale chips dehydrate uniformly, resulting in a consistent texture and flavor.
By following these steps, you’ll set the stage for creating perfectly crispy kale chips. The key is to start with fresh, well-prepared kale leaves, setting the foundation for a delightful snacking experience. With your kale prepped and ready, it’s time to infuse these nutrient-packed leaves with mouthwatering flavors and seasonings!
Seasoning the Kale Chips
Once you have prepared the kale leaves, it’s time to elevate their flavor by adding delicious seasonings. This step allows you to customize the taste of your kale chips, creating a snack that perfectly suits your palate. Here’s how to season your kale chips to perfection:
Read more: How To Make Potato Chips With A Dehydrator
1. Drizzling with Olive Oil:
In a large bowl, place the prepared kale leaves and drizzle them with a modest amount of high-quality extra virgin olive oil. Use clean hands to gently massage the oil into the leaves, ensuring that each piece is lightly coated. The oil not only adds a rich flavor but also helps the seasonings adhere to the kale during the dehydration process.
2. Adding Seasonings:
Get creative with your choice of seasonings to impart irresistible flavor to your kale chips. Common options include sea salt, garlic powder, onion powder, paprika, cayenne pepper, or nutritional yeast for a cheesy, umami flavor. Sprinkle the desired seasonings over the oiled kale leaves, using your hands to toss and coat the leaves thoroughly. Be mindful not to oversaturate the leaves with seasonings, as a light and even coating will yield the best results.
3. Balancing Flavors:
As you season the kale chips, consider the balance of flavors. Aim to achieve a harmonious blend of savory, salty, and, if desired, a hint of spiciness. Tasting a few seasoned leaves at this stage can help you adjust the seasoning to your preference before the dehydration process begins.
4. Allowing the Flavors to Meld:
Once the kale leaves are coated with oil and seasonings, allow them to rest for a few minutes. This brief period enables the flavors to meld, ensuring that each bite of the finished kale chips is infused with a delightful combination of seasonings.
By taking the time to season your kale chips thoughtfully, you can create a snack that’s bursting with flavor and perfectly tailored to your taste. The next step is to dehydrate the seasoned kale leaves, transforming them into crispy, irresistible chips that are ready to be enjoyed as a wholesome and satisfying snack!
Read more: How To Make Apple Chips In A Dehydrator
Dehydrating the Kale Chips
Dehydrating the seasoned kale chips is the transformative stage that turns simple kale leaves into crispy, flavorful chips. Whether you’re using a dedicated dehydrator or your oven set to the lowest temperature, the dehydration process is essential for achieving the perfect texture. Here’s how to dehydrate your seasoned kale chips to perfection:
1. Preparing the Dehydrator:
If you’re using a dehydrator, assemble the trays and line them with parchment paper or silicone baking mats to prevent the kale chips from sticking. Preheat the dehydrator to approximately 125°F (52°C) for optimal results. The low temperature ensures that the kale chips dehydrate slowly, preserving their nutrients and yielding a crisp texture.
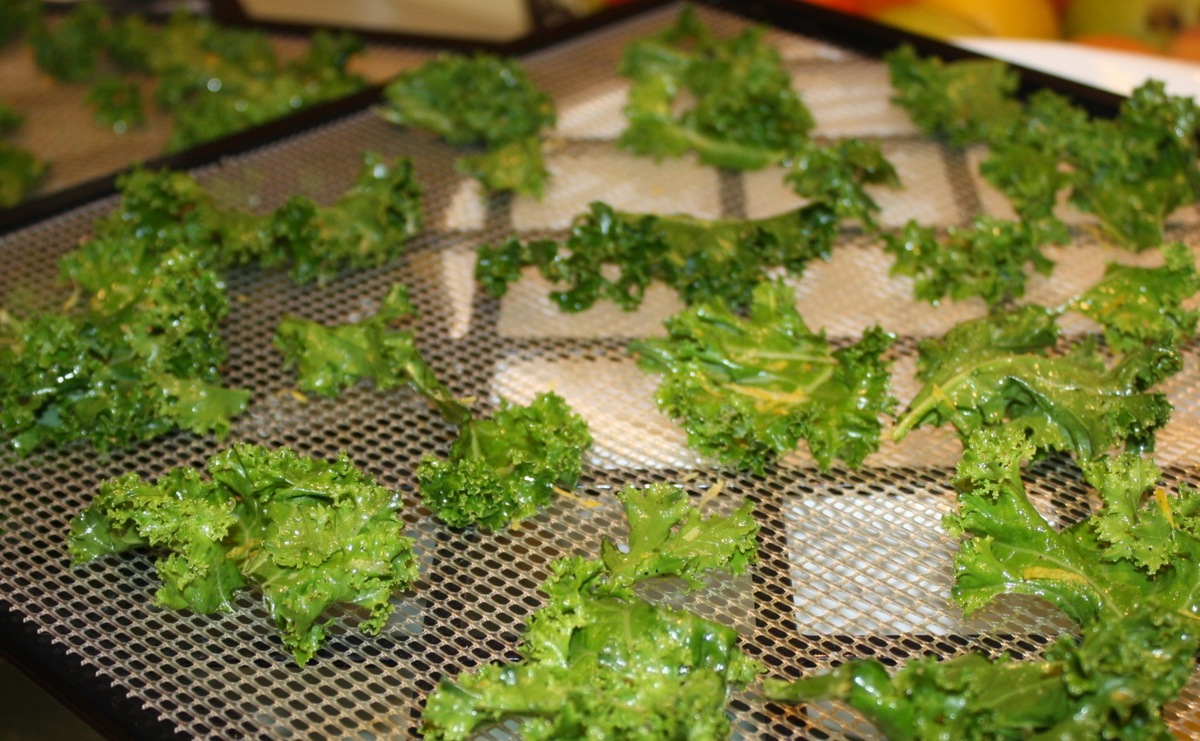
2. Arranging the Kale Chips:
Spread the seasoned kale chips in a single layer on the prepared dehydrator trays. Avoid overcrowding the trays to allow for proper air circulation, which is crucial for even dehydration. If using an oven, place the kale chips on parchment-lined baking sheets and set the oven to its lowest temperature, typically around 200°F (93°C).
3. Dehydrating Time:
The dehydration time can vary depending on the moisture content of the kale, the humidity in your environment, and the efficiency of your dehydrator or oven. In general, kale chips take approximately 4 to 6 hours to dehydrate fully at 125°F (52°C) in a dehydrator. If using an oven, the dehydration time may be slightly shorter, so keep a close eye on the chips to prevent over-drying.
Read more: How To Make Zucchini Chips In A Dehydrator
4. Checking for Doneness:
Throughout the dehydration process, periodically check the kale chips for doneness. They are ready when they are dry and crisp to the touch, with a texture similar to that of a traditional chip. Keep in mind that the chips will continue to crisp up slightly as they cool, so it’s better to slightly under-dry them than to over-dry, which can result in a bitter taste.
5. Cooling and Testing:
Once the kale chips are dehydrated to perfection, remove them from the dehydrator or oven and allow them to cool completely. As they cool, their texture will continue to firm up. Sample a few chips to ensure they have reached the desired level of crispness, and make any adjustments to your seasoning preferences for future batches.
By following these steps, you can master the art of dehydrating kale chips, resulting in a batch of irresistible, nutrient-packed snacks that are ready to be enjoyed. With the dehydration process complete, it’s time to savor the satisfying crunch and delectable flavors of your homemade kale chips!
Storing the Kale Chips
Once you’ve successfully dehydrated your kale chips to crispy perfection, it’s essential to store them properly to maintain their delightful texture and flavor. Proper storage ensures that your homemade kale chips remain fresh and delicious for an extended period. Here’s how to store your kale chips to retain their quality:
1. Cool Completely:
Before storing your kale chips, allow them to cool completely at room temperature. This step is crucial, as it allows any residual moisture to evaporate, ensuring that the chips remain crisp and free from sogginess.
Read more: How To Make Banana Chips With A Dehydrator
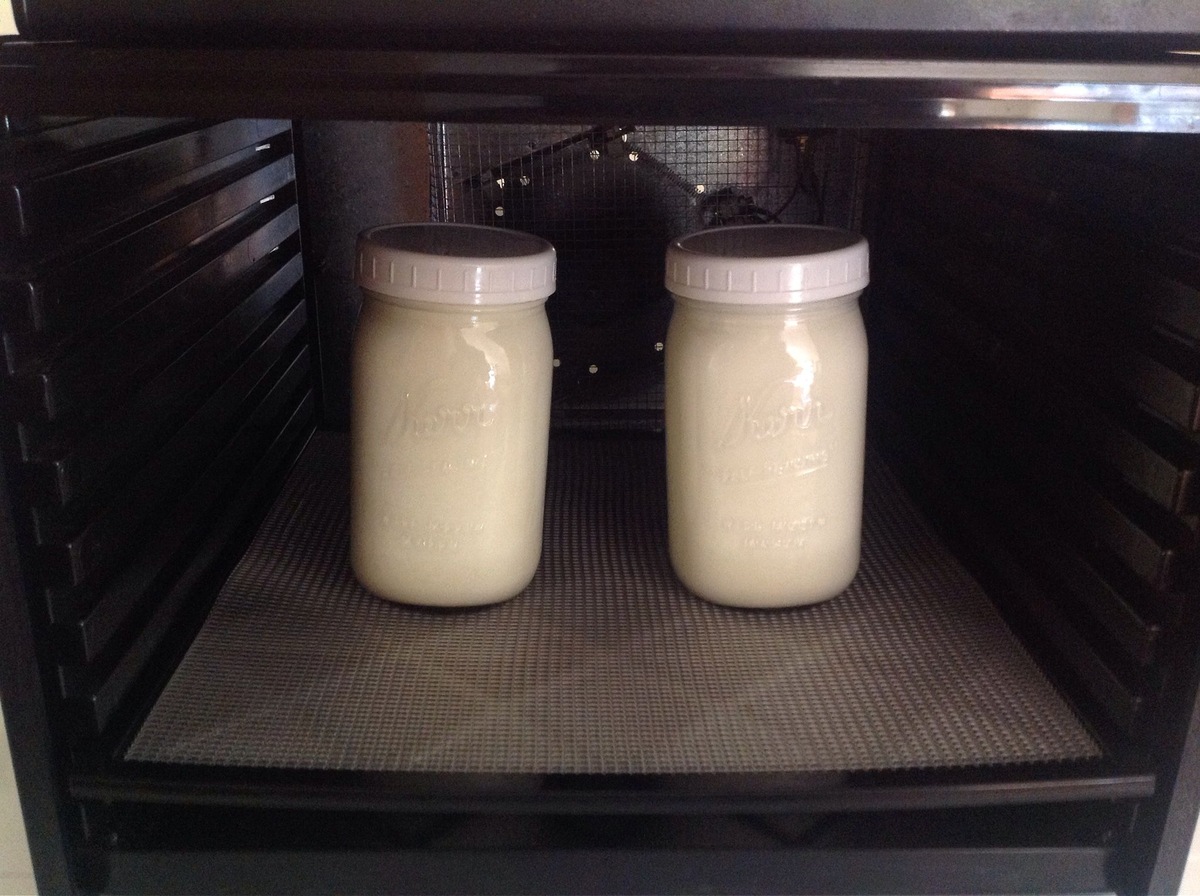
2. Airtight Containers:
Transfer the cooled kale chips to airtight containers, such as glass jars or resealable plastic bags. Airtight containers help protect the chips from exposure to moisture and air, which can compromise their crispness. If using plastic bags, gently press out excess air before sealing them tightly.
3. Adding Desiccants:
For prolonged storage, consider adding food-safe desiccants, such as silica gel packets, to the containers. These desiccants help absorb any remaining moisture, further safeguarding the kale chips against becoming limp or stale over time.
4. Storage Conditions:
Store the airtight containers of kale chips in a cool, dry pantry or cupboard. Avoid placing them in areas of high humidity or direct sunlight, as these conditions can compromise the crispness and flavor of the chips.
5. Monitoring Freshness:
Periodically check the stored kale chips for any signs of moisture or staleness. If you notice any deterioration in texture or flavor, consider refreshing the chips by briefly re-dehydrating them before returning them to airtight containers.
Read more: How To Store Baked Kale Chips
6. Enjoying and Sharing:
With proper storage, your homemade kale chips can remain fresh for several weeks, providing you with a wholesome, convenient snack whenever the craving strikes. Share the joy of homemade kale chips with family and friends, and savor the satisfaction of offering a nutritious and delicious snack that you’ve crafted with care.
By following these storage guidelines, you can ensure that your homemade kale chips maintain their exceptional quality, allowing you to enjoy the delightful crunch and flavor of these nutrient-packed snacks whenever you desire. With your kale chips safely stored, you’re ready to indulge in a guilt-free, wholesome snacking experience that’s as satisfying as it is nutritious!
Conclusion
Congratulations on mastering the art of making kale chips in a dehydrator! By embarking on this culinary journey, you’ve not only created a delightful and nutritious snack but also gained valuable skills in preparing wholesome, homemade treats. As you reflect on your kale chip-making experience, consider the following key takeaways:
Wholesome Snacking:
Homemade kale chips offer a guilt-free snacking option that’s rich in nutrients and free from artificial additives. By harnessing the power of fresh kale and natural seasonings, you’ve crafted a wholesome snack that nourishes both body and soul.
Culinary Creativity:
The process of making kale chips allows for creativity and experimentation. From selecting seasonings to perfecting the dehydration process, you’ve honed your culinary skills and discovered the joy of customizing flavors to suit your preferences.
Read more: How To Store Homemade Kale Chips
Nutrient-Rich Enjoyment:
Through the gentle dehydration of kale leaves, you’ve preserved their essential vitamins, minerals, and antioxidants, creating a snack that not only tantalizes the taste buds but also contributes to your overall well-being.
Sharing the Experience:
As you savor the delightful crunch and flavors of your homemade kale chips, consider sharing this experience with others. Whether it’s introducing friends and family to the joys of wholesome snacking or inspiring fellow food enthusiasts to embark on their own kale chip-making adventures, your newfound expertise can be a source of joy and inspiration for those around you.
As you continue your culinary endeavors, remember that the journey of creating homemade kale chips is as rewarding as the end result. Embrace the creativity, nourish your body with wholesome ingredients, and savor the satisfaction of crafting a snack that reflects your care and dedication. Whether enjoyed as a solo indulgence or shared with loved ones, your homemade kale chips are a testament to your culinary prowess and commitment to wholesome living.
With the knowledge and skills you’ve acquired, you’re well-equipped to continue exploring the world of nutritious, homemade snacks, infusing each creation with your unique flair and passion for wholesome living. So, here’s to the delightful crunch, vibrant flavors, and nourishing goodness of homemade kale chips. Cheers to your culinary success, and may your future kitchen endeavors be filled with creativity, joy, and wholesome delights!
Frequently Asked Questions about How To Make Kale Chips In A Dehydrator
Was this page helpful?
At Storables.com, we guarantee accurate and reliable information. Our content, validated by Expert Board Contributors, is crafted following stringent Editorial Policies. We're committed to providing you with well-researched, expert-backed insights for all your informational needs.


0 thoughts on “How To Make Kale Chips In A Dehydrator”