Home>Home Maintenance>How To Care For Aloe Plant In Pot Without Drainage
Home Maintenance
How To Care For Aloe Plant In Pot Without Drainage
Modified: October 18, 2024
Learn how to care for an aloe plant in a pot without drainage to keep your home-maintenance routine hassle-free.
(Many of the links in this article redirect to a specific reviewed product. Your purchase of these products through affiliate links helps to generate commission for Storables.com, at no extra cost. Learn more)
Introduction
Welcome to the world of home maintenance! Whether you are a seasoned green thumb or a beginner looking to add some greenery to your space, caring for houseplants is an excellent way to beautify your home and improve your indoor air quality. One popular plant that many people choose to have indoors is the aloe plant.
Aloe plants are not only aesthetically pleasing with their vibrant green leaves and unique rosette shape, but they also offer numerous health benefits. From soothing skin irritations to improving digestion, aloe vera has been used for centuries for its medicinal properties.
Growing aloe plants in pots is a convenient and practical way to bring these benefits into your home. However, one common challenge that arises when growing aloe plants in pots is the lack of drainage. Many decorative pots and containers do not have drainage holes, making it difficult to maintain the proper moisture levels for the plant.
But fear not! In this article, we will explore various techniques and tips on how to care for your aloe plant in a pot without drainage. From choosing the right pot to watering techniques, we will cover everything you need to know to keep your aloe plant thriving and healthy.
So, if you’re ready to embark on a journey of plant care and discover the joys of having an aloe plant in your home, let’s dive in!
Key Takeaways:
- Aloe plants in pots without drainage require sparing watering, well-draining soil, and careful monitoring to prevent overwatering and promote healthy growth.
- Propagating aloe plants through offshoot division and leaf cuttings is an exciting way to expand your plant collection and share the joy of growing aloes with others.
Read more: What To Plant In A Pot Without Drainage
Benefits of Growing Aloe Plants in Pots
Growing aloe plants in pots offers several advantages for both seasoned gardeners and beginners alike. Here are some of the key benefits:
- Portability: One of the primary benefits of growing aloe plants in pots is the ability to move them around. Unlike plants planted directly in the ground, potted aloe plants can be easily relocated to different areas of your home to accommodate changing sunlight or temperature needs.
- Indoor Versatility: Aloe plants are well-suited for indoor environments. They can thrive in various lighting conditions, making them a perfect addition to any room in your home. Whether you have a sunny window sill or a low-light corner, you can find a spot for your potted aloe plant.
- Visual Appeal: Aloe plants make stunning decorative elements with their succulent leaves. The vibrant green color and unique rosette shape instantly add a touch of natural elegance to any space. Potted aloe plants can serve as a focal point in your living room, bedroom, or office, enhancing the overall aesthetics of your home.
- Medicinal Uses: Aloe vera has a long history of medicinal use, and having a potted aloe plant at home provides convenient access to its healing properties. The gel present in the leaves of the aloe plant is rich in antioxidants, vitamins, and minerals, making it highly beneficial for soothing skin irritations, treating burns, and promoting overall skin health.
- Purifies Indoor Air: Like other houseplants, aloe plants play a crucial role in improving indoor air quality. Through the process of photosynthesis, they absorb harmful toxins such as formaldehyde, benzene, and carbon dioxide, releasing oxygen and freshening the air in your home.
- Low Maintenance: Aloe plants are known for their resilience and low maintenance requirements. They are drought-tolerant plants that do not require frequent watering. Potted aloe plants can thrive with minimal care and attention, making them an ideal choice for busy individuals or those new to plant care.
With all these incredible benefits, it’s no wonder that growing aloe plants in pots has become increasingly popular. Not only do they beautify your home, but they also provide health benefits and offer a sense of satisfaction and accomplishment as you watch them grow and flourish.
Now that we have explored the benefits, let’s move on to the next step – choosing the right pot for your aloe plant.
Choosing the Right Pot for Your Aloe Plant
When it comes to selecting a pot for your aloe plant, there are a few key factors to consider. These include size, material, and drainage capabilities. Let’s delve into each of these considerations:
Size Matters:
Choosing the correct size of pot is crucial for the health and growth of your aloe plant. The pot should be proportionate to the size of the plant and allow room for the roots to expand. A general guideline is to select a pot that is 1-2 inches larger in diameter than the current root ball of the aloe plant. This will provide enough space for the roots to grow while preventing excessive moisture retention.
Material Selection:
When it comes to the material of the pot, there are several options available, such as terracotta, ceramic, plastic, and fiberglass. Each material has its own advantages and considerations:
- Terracotta: Terracotta pots are a popular choice for aloe plants due to their breathability. They allow excess moisture to evaporate, minimizing the risk of root rot. However, terracotta pots can also dry out quickly, requiring more frequent watering.
- Ceramic: Ceramic pots are aesthetically pleasing and come in various styles and colors. They provide good insulation, preventing rapid temperature fluctuations. However, most ceramic pots do not have drainage holes, so extra care must be taken to avoid overwatering.
- Plastic: Plastic pots are lightweight, inexpensive, and readily available. They often come with drainage holes and retain moisture well. However, they can deteriorate with time and may not provide as much breathability as terracotta or ceramic pots.
- Fiberglass: Fiberglass pots are durable, lightweight, and offer good insulation. They come in a range of designs and sizes. Fiberglass pots are often equipped with drainage holes and can be a suitable choice for aloe plants.
Consider the characteristics of each pot material and choose the one that best suits your needs and preferences. Remember to ensure that the pot you select has sufficient drainage capabilities or can be modified to allow for proper water flow.
Drainage Considerations:
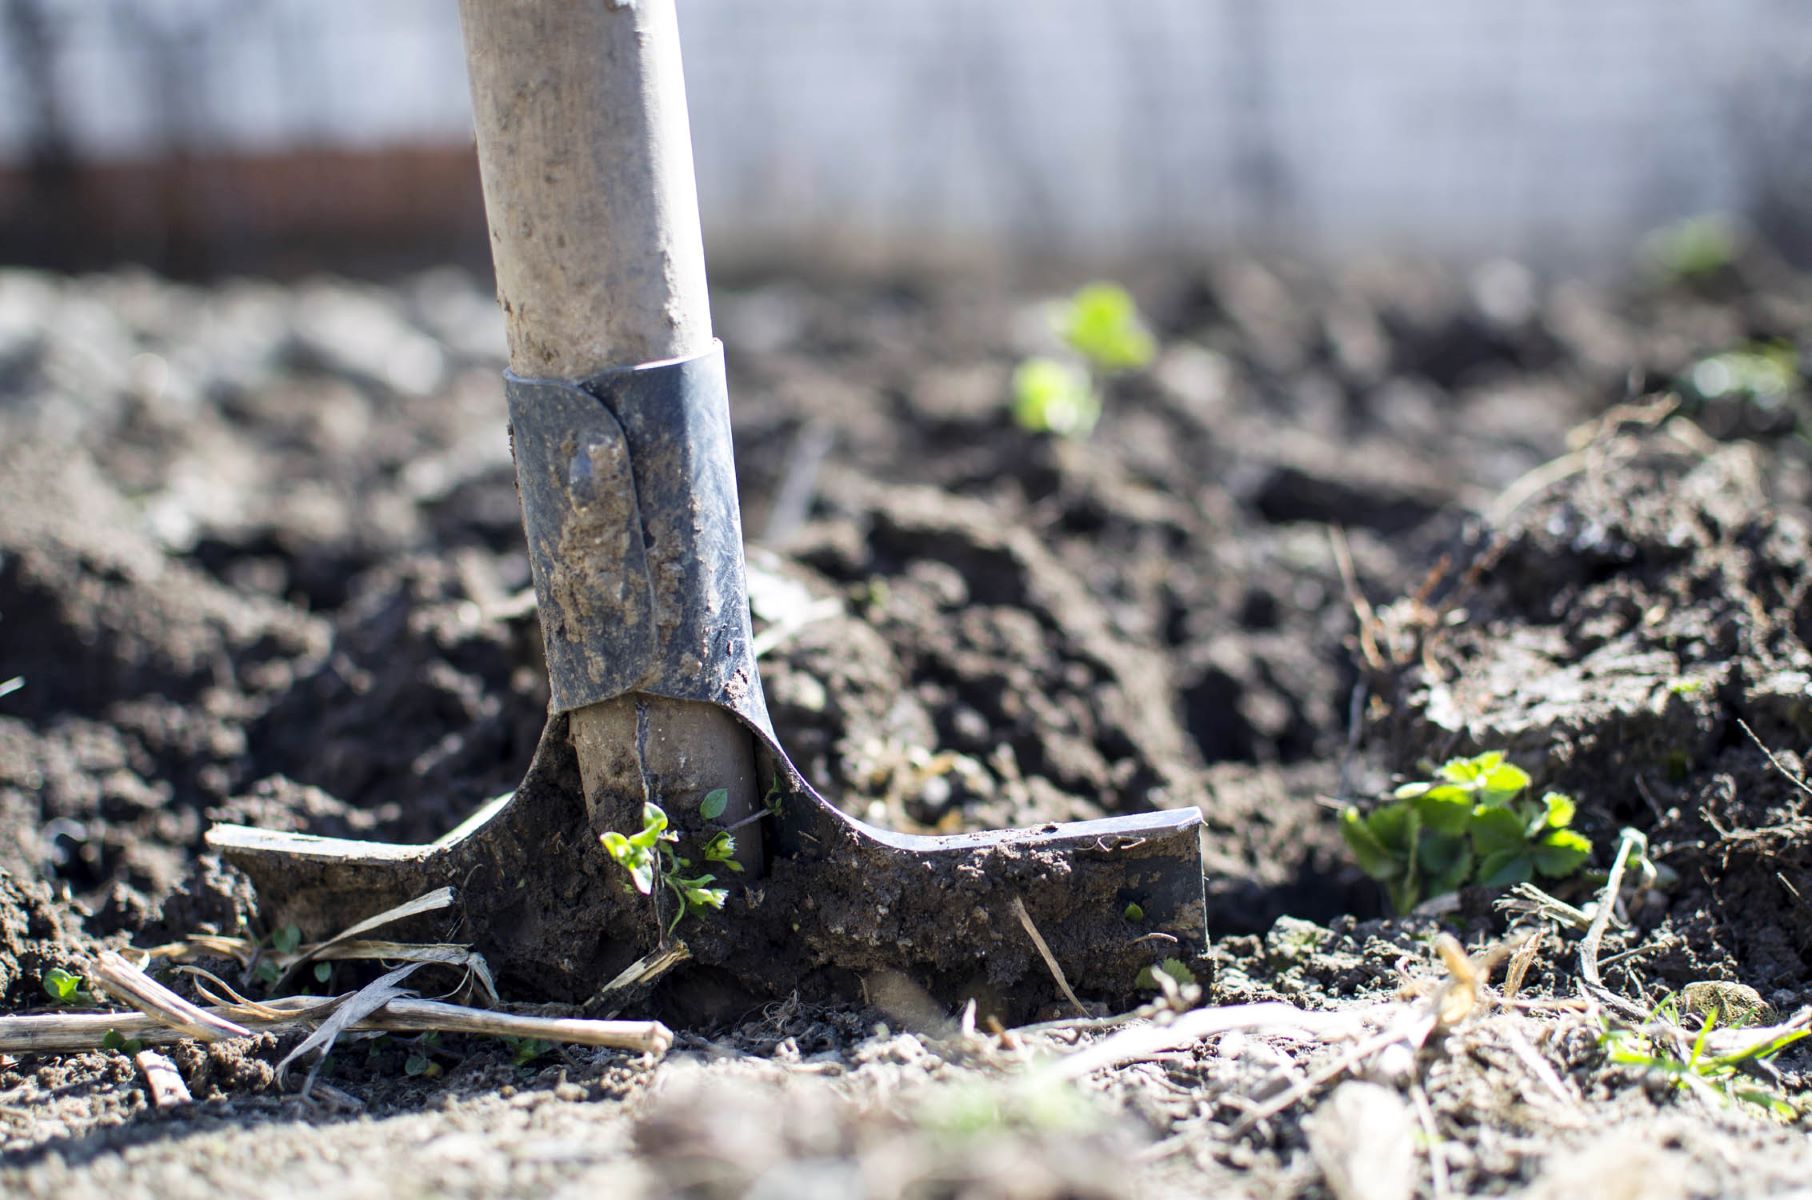
Since we are focusing on caring for aloe plants in pots without drainage, it’s important to address this issue. When selecting a pot without drainage holes, you’ll need to create a drainage system yourself. This can be achieved by lining the bottom of the pot with a layer of coarse gravel or pebbles, which will create space for excess water to accumulate without saturating the roots.
Another alternative is to use a secondary pot with drainage holes and place the decorative pot without drainage inside it. This allows for proper water drainage while still providing the aesthetic appeal of the decorative pot.
By carefully considering the size, material, and drainage capabilities of the pot, you can provide your aloe plant with a suitable and healthy home. Next, let’s explore the ideal potting mix to ensure optimal growth and nourishment for your aloe plant.
Selecting the Ideal Potting Mix
The right potting mix is essential for the health and well-being of your aloe plant. It should provide adequate drainage, proper aeration, and sufficient nutrients. Here are some considerations when selecting the ideal potting mix:
Well-Draining Soil:
Aloe plants prefer well-draining soil to prevent water accumulation around the roots, which can lead to root rot. Avoid using regular garden soil as it tends to retain too much moisture. Instead, opt for a cactus or succulent potting mix readily available at garden centers. These mixes are specifically formulated to provide excellent drainage and promote proper root health for aloe plants.
Additional Amendments:
While a good-quality cactus or succulent mix is usually sufficient, you can enhance it further by adding perlite or coarse sand. These additions increase soil porosity, allowing excess water to drain effectively. Aim for a potting mix that consists of about 50% cactus mix and 50% perlite or coarse sand to create the ideal balance of moisture retention and drainage.
Nutrient Requirements:
Aloe plants are not heavy feeders but still require some nutrients to thrive. Choose a potting mix that contains a slow-release fertilizer specific to succulents or cacti. Additionally, you can supplement the soil with organic matter such as well-rotted compost or aged manure to provide extra nutrients. These organic amendments improve soil structure and fertility, promoting overall plant health.
pH Level:
The ideal pH level for aloe plants is slightly acidic to neutral, ranging from 6.0 to 7.0. Most commercial cactus and succulent potting mixes are formulated within this pH range. However, it’s a good practice to check the pH level of the potting mix using a soil pH testing kit, which can be found at gardening supply stores. This ensures that the soil pH is suitable for your aloe plant’s optimal growth and nutrient absorption.
Remember to thoroughly mix and moisten the potting mix before filling it in the pot. This will help avoid any air pockets and provide an even distribution of moisture throughout the soil.
Now that you’ve selected the perfect potting mix for your aloe plant, it’s time to explore watering techniques for managing moisture levels in pots without drainage.
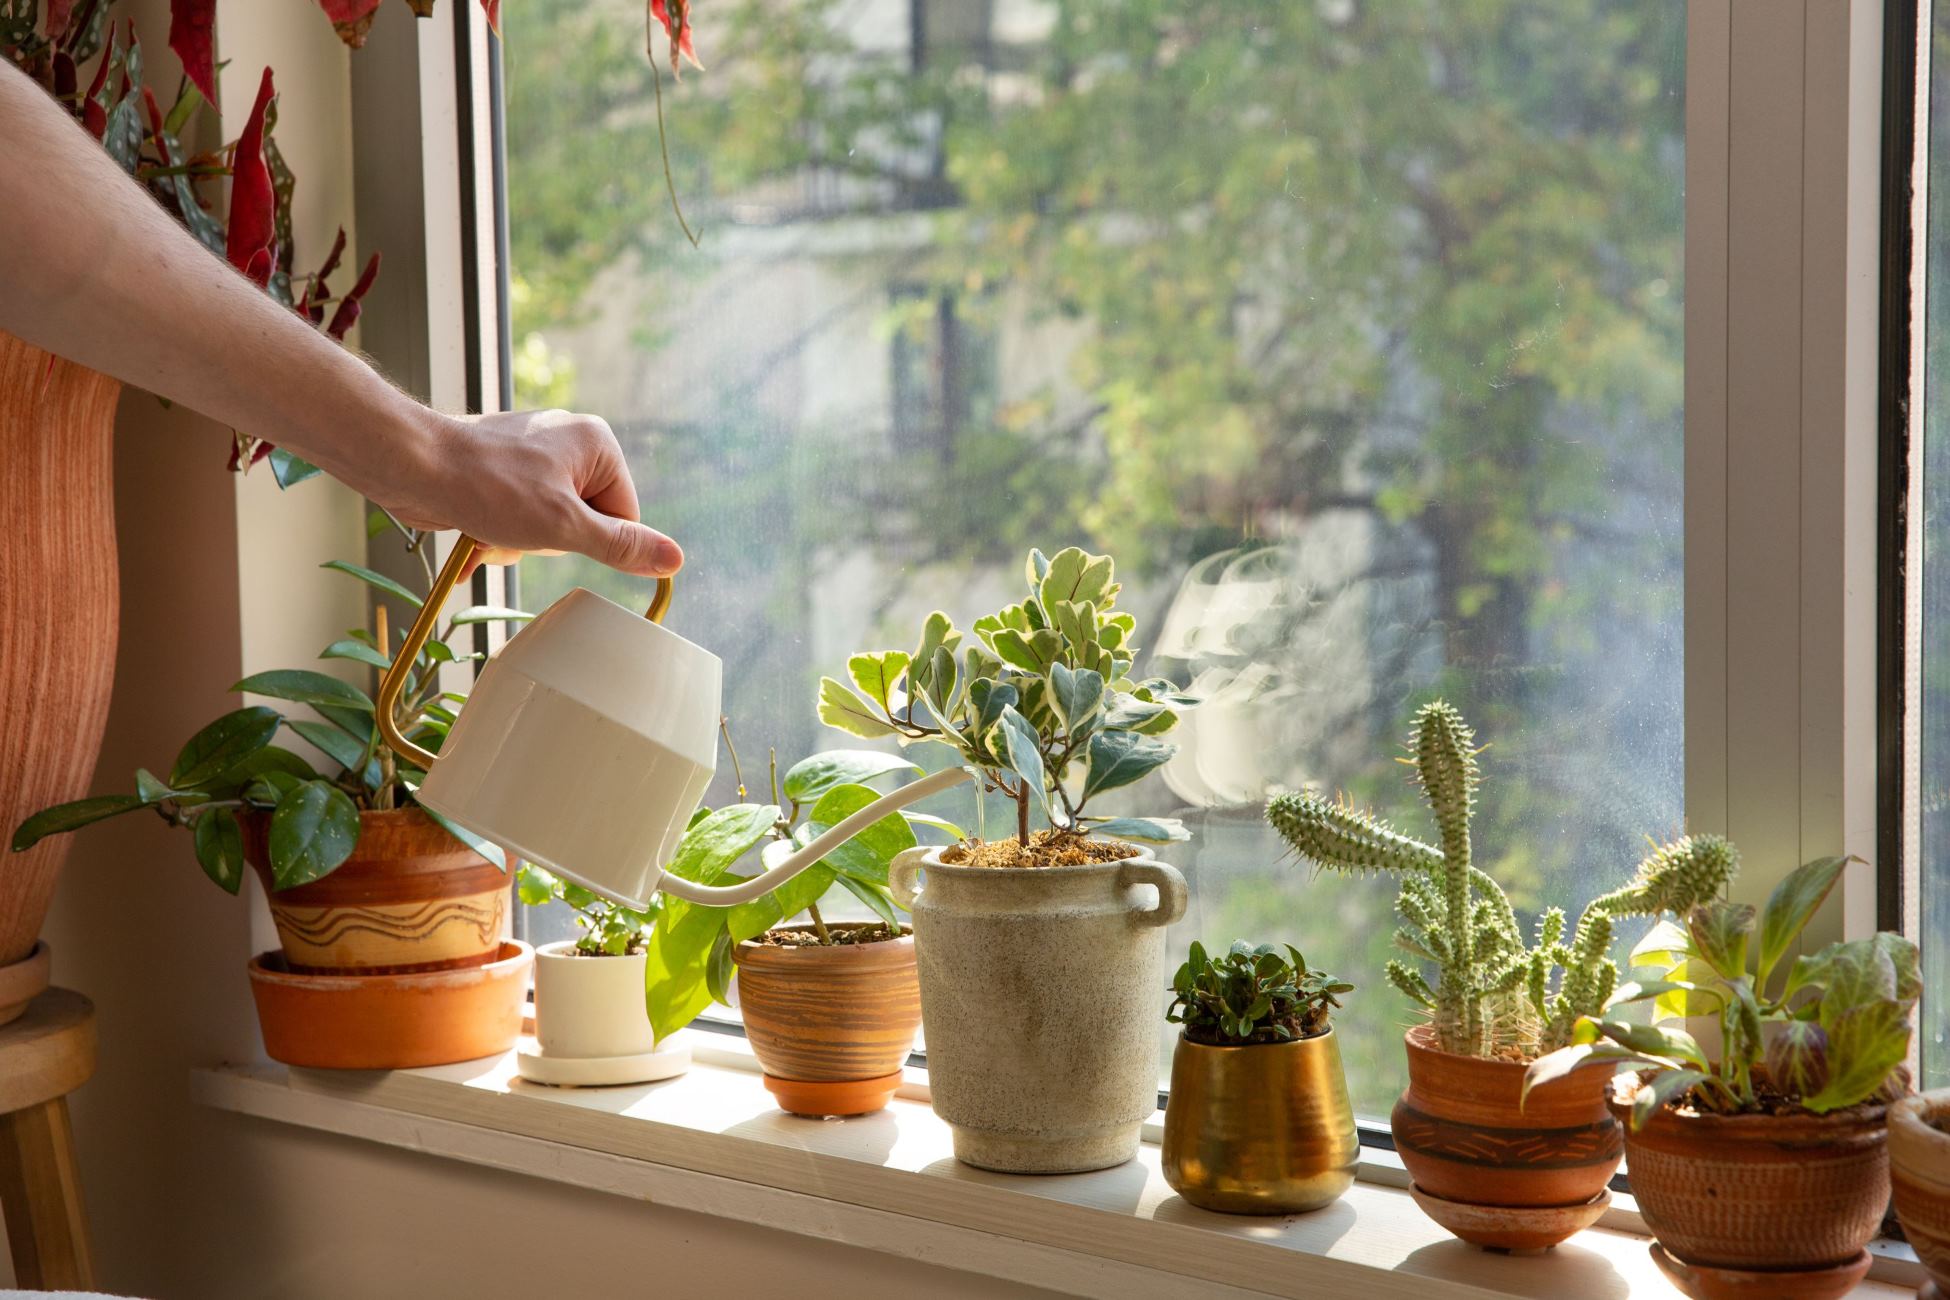
Watering Techniques for Aloe Plants without Drainage
Watering aloe plants in pots without drainage requires a different approach compared to plants in pots with drainage holes. Proper watering techniques are essential to prevent overwatering, which can lead to root rot and other issues. Here are some techniques to effectively water your aloe plant without drainage:
Water sparingly:
Aloe plants are succulents, adapted to survive in arid conditions with minimal water. Therefore, it’s important to water them sparingly. Before watering, check the moisture level of the soil by inserting your finger about an inch deep into the soil. If it feels dry, it’s time to water. If it still feels moist, hold off on watering for a few more days.
Read more: How To Make A Good Drainage Pot For A Plant
Soak and dry method:
When watering your aloe plant, use the “soak and dry” method. This means thoroughly saturating the soil with water until it comes out of the drainage holes of the inner pot (if using a secondary pot with drainage). Allow the excess water to drain completely before placing the inner pot back into the decorative pot. It’s important not to let the plant sit in standing water to prevent root rot.
Avoid frequent watering:
A common mistake is overwatering aloe plants, which can lead to root rot and the plant’s ultimate demise. Aloe plants store water in their fleshy leaves, allowing them to withstand periods of drought. Therefore, avoid watering too frequently. Aim for watering every 2-3 weeks, or even less during the cooler seasons when the growth rate slows down.
Adjust watering based on seasons:
During the active growing season, which is typically spring and summer, aloe plants may require more frequent watering due to increased evaporation and growth. In contrast, during the dormant season, such as fall and winter, decrease the watering frequency as the plant’s water requirements decrease. Adapt your watering schedule based on the specific needs of your aloe plant and the environment it’s in.
Observe the plant’s response:
The best way to determine whether your aloe plant needs water is by observing its leaves. If the leaves begin to appear flat, thin, or wrinkled, it’s a sign that the plant is dehydrated and requires watering. On the other hand, if the leaves become soft or yellow, it’s a sign of overwatering, and you should adjust your watering schedule accordingly.
By adopting these watering techniques and paying attention to your aloe plant’s needs, you can prevent water-related issues and keep your plant healthy. Next, let’s explore how to monitor moisture levels in the pot and ensure optimal conditions for your aloe plant.
Monitoring Moisture Levels in the Pot
Monitoring moisture levels is crucial when caring for aloe plants in pots without drainage. It helps maintain the right balance of moisture in the soil and prevents waterlogging, which can be detrimental to the plant’s health. Here are some tips for monitoring and managing moisture levels in the pot:
Use a moisture meter:
A moisture meter is a helpful tool for accurately measuring the moisture content of the soil. It consists of a probe that is inserted into the soil, providing instant readings of the moisture level. This allows you to determine when it’s time to water your aloe plant or if the soil is still too moist. Moisture meters are widely available at garden centers and online stores.
Observe the soil color and texture:
Another way to assess moisture levels is by observing the color and texture of the soil. Dry soil appears lighter in color and feels dry to the touch, while moist soil tends to be darker and may feel slightly damp. Avoid watering if the soil still feels moist, as overwatering can lead to root rot. Developing a sense of the soil’s moisture content through observation will help you gauge when your aloe plant needs watering.
Check the weight of the pot:
The weight of the pot can also provide a clue about moisture levels. After watering, the pot will be heavier, and as the soil dries out, the pot will become lighter. Lift the pot occasionally to get a sense of its weight and compare it to when the soil is freshly watered. This method can help you determine if it’s time to water or if the soil is still adequately moist.
Consider the environmental conditions:
Environmental factors such as temperature, humidity, and airflow can affect how quickly the soil dries out. During hot and dry periods, the soil may dry out more rapidly, leading to more frequent watering. In contrast, during cooler and more humid conditions, the soil dries out slower, necessitating less frequent watering. Take these factors into account when monitoring moisture levels and adjusting your watering schedule.
Err on the side of underwatering:
When in doubt, it’s better to underwater than to overwater your aloe plant. Aloe plants are resilient and can tolerate slight moisture deficiency better than excessive moisture. Over time, you will become familiar with your plant’s specific moisture needs and can fine-tune your watering routine accordingly.
By regularly monitoring the moisture levels in the pot, you can ensure optimal conditions for your aloe plant. This, in turn, promotes healthy growth and prevents issues related to improper watering. Now, let’s discuss some common mistakes to avoid in aloe plant care.
Avoiding Common Mistakes in Aloe Plant Care
While caring for aloe plants in pots without drainage, it’s essential to avoid common mistakes that can harm the health and growth of your plant. By being aware of these pitfalls, you can ensure the best possible care for your aloe plant. Let’s explore some of the most common mistakes and how to avoid them:
Overwatering:
Overwatering is perhaps the biggest mistake when it comes to aloe plant care. Aloe plants are drought-tolerant succulents that have adapted to dry conditions. They prefer soil that is slightly dry between watering sessions. Overwatering can lead to root rot and other issues. Always check the moisture level of the soil before watering and only water when the soil is completely dry.
Using the Wrong Potting Mix:
Avoid using regular garden soil or heavy potting mixes that retain too much moisture. Aloe plants require well-draining soil to prevent waterlogging. Use a cactus or succulent potting mix that provides excellent drainage. Adding perlite or coarse sand to the mix can further improve drainage.
Insufficient Light Exposure:
Aloe plants thrive in bright, indirect light. Insufficient light exposure can cause the plant to become leggy or pale in color. Place your aloe plant near a window with filtered sunlight or consider using artificial grow lights to supplement natural light if needed.
Overcrowding:
Aloe plants require sufficient space for their roots to grow and develop. Avoid overcrowding by selecting an appropriately sized pot that allows room for root expansion. If you notice your aloe plant outgrowing its current pot, it’s time to repot into a larger container.
Neglecting Pest and Disease Control:
Pests such as mealybugs and scale insects can infest aloe plants. Regularly inspect your plant for signs of infestation, such as sticky residue, small pests, or yellowing leaves. If pests are present, use appropriate organic insecticidal sprays or wipes to remove them. Additionally, keep an eye out for signs of disease, such as fungal infections, and promptly address any issues that arise.
Ignoring Seasonal Changes:
Aloe plants undergo seasonal growth patterns, and their water and light requirements may vary. During the active growing season in spring and summer, the plant may need more frequent watering and additional sunlight. Adjust your care routine accordingly to allow for these natural seasonal changes.
Neglecting Regular Maintenance:
Regular maintenance is necessary to keep your aloe plant healthy and thriving. This includes removing dead or yellowing leaves, repotting when necessary, and occasionally fertilizing with a succulent-specific slow-release fertilizer. Stay observant and address any issues promptly to prevent them from escalating.
By avoiding these common mistakes and providing the proper care, you can ensure the long-term health and beauty of your aloe plant. Now, let’s explore some propagation tips for expanding your aloe plant collection.
Propagation Tips for Aloe Plants in Pots
Propagating aloe plants is an exciting way to expand your plant collection or share the joy of growing aloes with others. Luckily, aloe plants are relatively easy to propagate. Here are some tips to help you successfully propagate your aloe plant:
Offshoot Division:
One of the easiest methods of aloe plant propagation is through offshoot division. Aloe plants produce small baby plants, known as “pups,” that grow from the base of the mother plant. Wait until the pups are of a reasonable size, with their own set of roots and several leaves, before separating them from the mother plant. Gently remove the pup from the soil and use a clean, sharp knife to carefully cut it away from the main plant. Plant the pup in a separate pot with well-draining soil, and treat it the same way you would care for a mature aloe plant.
Leaf Cuttings:
An alternative way to propagate aloe plants is through leaf cuttings. Using a sharp, sterilized knife, carefully cut off a healthy, mature leaf from the parent plant. Allow the leaf to dry and form a callus for a day or two, which helps prevent rotting. Place the calloused end of the leaf into well-draining soil, burying it about an inch into the soil. Water sparingly, ensuring the soil remains slightly moist. Over time, new roots will develop from the cut end of the leaf, and a new plant will grow.
Rooting Hormone:
If you want to give your aloe plant propagation a boost, you can use a rooting hormone. Dip the cut end of the leaf or offshoot in rooting hormone powder or gel before placing it in the potting mix. This will encourage faster root development and increase the chances of successful propagation. Follow the instructions on the rooting hormone product for the best results.
Patience and Care:
Propagation can be a slow process, so patience is key. Be sure to provide the propagated plant with the right conditions, including bright, indirect light and well-draining soil. Avoid overwatering to prevent rotting. It may take a few weeks or even months for new growth to emerge, so be patient and continue to care for the propagated plant with regular watering and light as needed.
Experiment with Different Methods:
Don’t be afraid to experiment with different propagation methods to see what works best for you. Some people have success with other methods, such as using stem cuttings or leaf sections with intact veins. With time and practice, you’ll find the approach that yields the best results for you and your aloe plants.
Propagation is a rewarding way to multiply your aloe plant collection and share the joy of growing these beautiful succulents. With these tips in mind, you’re ready to embark on your propagation journey. Now let’s explore how to deal with common pests and diseases that can affect aloe plants in pots.
Read more: How To Plant Aloe Vera Seeds
Dealing with Pests and Diseases
While aloe plants are generally hardy and resistant to most pests and diseases, they can still be susceptible to certain issues. Here are some common pests and diseases that can affect aloe plants in pots and how to deal with them:
Mealybugs:
Mealybugs are small, white, cottony insects that often infest aloe plants. They can be found on the leaves, stems, and in leaf axils. To treat an infestation, start by isolating the affected plant to prevent the pests from spreading to other plants. Use a cotton swab dipped in rubbing alcohol to remove the mealybugs from the plant, focusing on the affected areas. For severe infestations, a diluted insecticidal soap spray can be used. Repeat the treatment as required until the pests are eliminated.
Scale Insects:
Scale insects are small, oval-shaped pests that attach themselves to the leaves and stems of aloe plants. They often appear as waxy or shell-like bumps. Similar to the treatment for mealybugs, isolate the affected plant and manually remove the scales using a cotton swab dipped in rubbing alcohol. For larger infestations, use an insecticidal soap spray, applying it thoroughly to all areas of the plant. Regular monitoring and repeated treatments may be necessary to fully eradicate the scale insects.
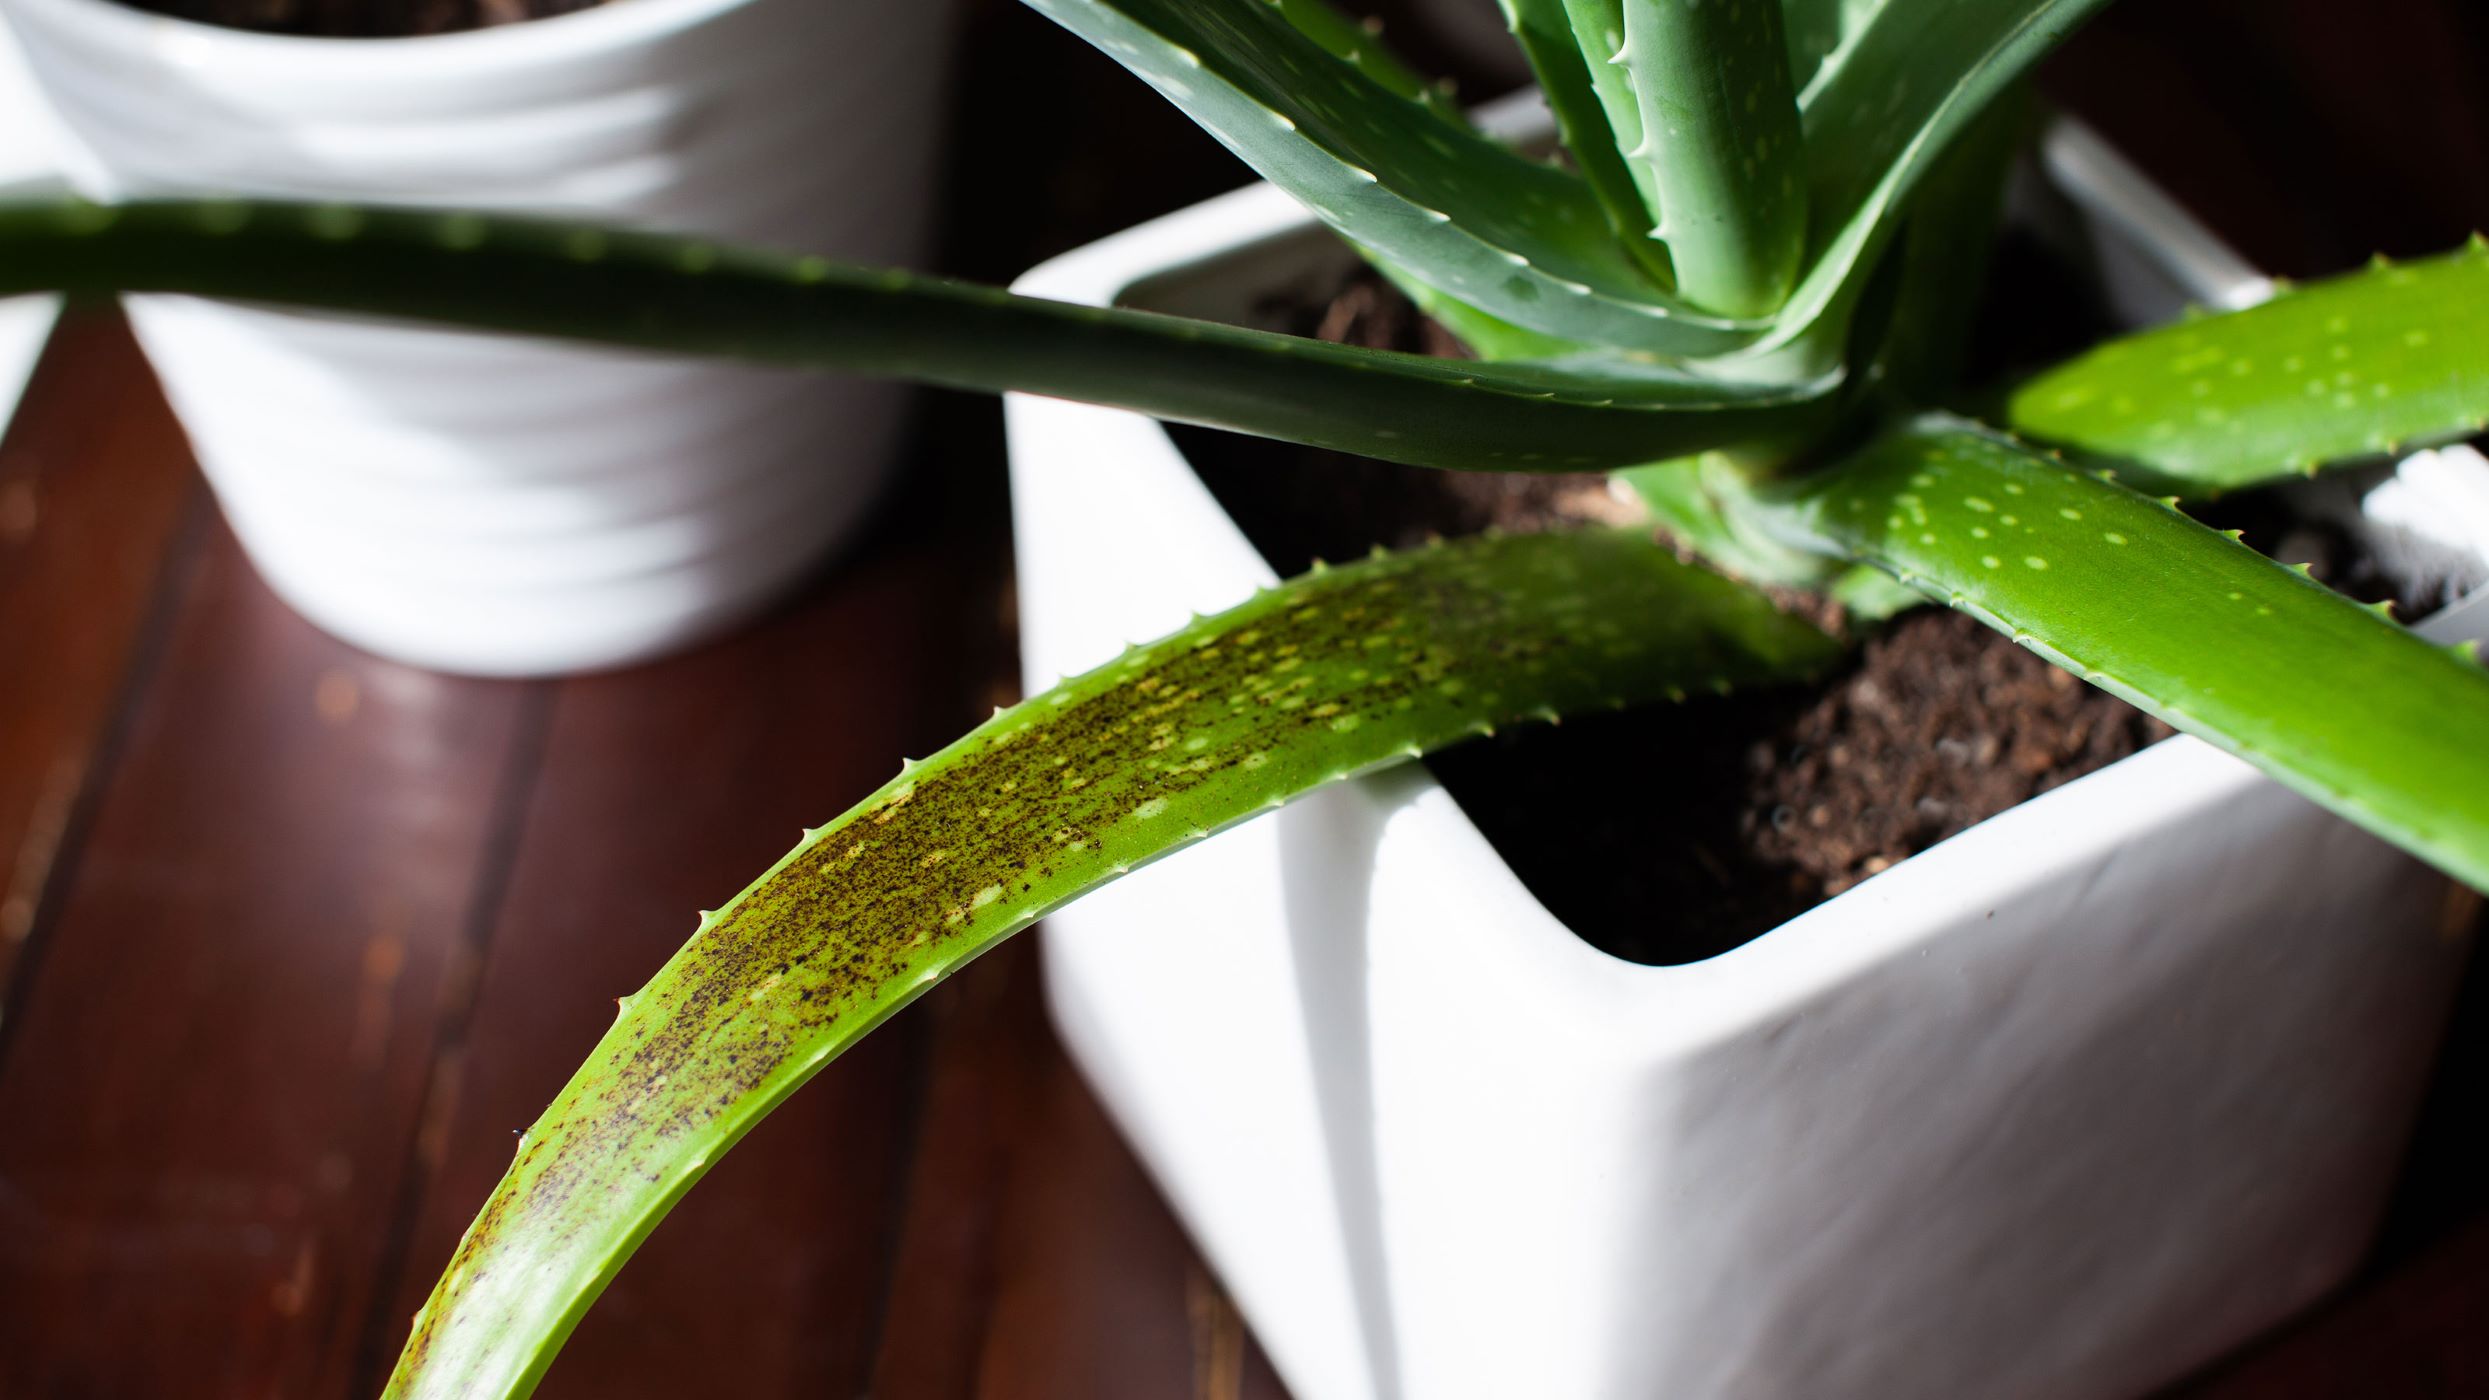
Rot and Fungal Infections:
One of the most common issues with aloe plants is root rot, caused by overwatering or poor drainage. To prevent rot, ensure that the potting mix and container have good drainage. If you notice signs of rot, such as wilting leaves, collapsed stem, or a foul odor, take immediate action. Remove the affected plant from the pot, trim away any rotting or blackened roots, and repot the plant in fresh, well-draining soil. Allow the plant to dry out slightly before resuming regular watering. Avoid overwatering in the future to prevent future rot issues.
Read more: How To Store Aloe Vera Plant Gel
Leaf Spot:
Leaf spot is a common fungal infection characterized by small, circular brown or black spots on the leaves of the aloe plant. It is usually caused by overwatering or high humidity. To treat leaf spot, remove any infected leaves and improve airflow around the plant to reduce humidity. Adjust your watering routine to avoid excessive moisture on the leaves. If the infection persists, you can use a fungicidal spray specifically formulated for leaf spot treatment. Follow the instructions on the product label for application and frequency.
Preventative Measures:
Preventing pests and diseases is key to maintaining the health of your aloe plant. Regularly inspect your plant for any signs of pests or infections. Keep the leaves clean by gently wiping them with a damp cloth or sponge to remove dust and debris. Ensure proper airflow around the plant and avoid overcrowding. Additionally, always use clean, sterilized tools when working with your aloe plant to prevent the spread of any potential diseases.
By staying vigilant and taking appropriate measures to address pests and diseases promptly, you can keep your aloe plant healthy and thriving. Now that we have covered dealing with common issues, let’s move on to some frequently asked questions about aloe plant care.
Frequently Asked Questions (FAQs)
Q: How often should I water my aloe plant in a pot without drainage?
A: Aloe plants in pots without drainage should be watered sparingly. Check the moisture level of the soil before watering, and only water when the soil is completely dry, which is usually every 2-3 weeks. Adjust the watering frequency based on the season and environmental conditions.
Read more: What Kind Of Plants To Plant For Drainage
Q: Can I use regular garden soil for my aloe plant?
A: Regular garden soil is not recommended for aloe plants as it tends to retain too much moisture. Instead, use a well-draining cactus or succulent potting mix. These mixes are specifically formulated to provide the optimal conditions for aloe plants.
Q: How much sunlight does my aloe plant need?
A: Aloe plants thrive in bright, indirect light. Place your aloe plant near a window with filtered sunlight or provide it with artificial grow lights if natural light is limited. Avoid placing the plant in direct sunlight, as it can cause sunburn on the leaves.
Q: How do I know if my aloe plant is getting too much water?
A: Overwatering can lead to issues like root rot. Signs of overwatering include yellowing or wilting leaves, a soft and mushy stem, or a foul odor coming from the soil. Adjust your watering routine and ensure that the soil is well-draining to prevent excessive moisture retention.
Q: Can I propagate my aloe plant from leaf cuttings?
A: Yes, aloe plants can be propagated from leaf cuttings. Allow the cut end of the leaf to callus for a day or two, then plant it in well-draining soil. Over time, new roots will develop from the cut end, and a new plant will grow.
Read more: How To Plant Outdoor Plants In Pots
Q: How often should I fertilize my aloe plant?
A: Aloe plants are relatively low-maintenance and do not require frequent fertilization. Apply a balanced, liquid fertilizer specifically formulated for succulents or cacti once or twice a year during the growing season. Follow the instructions provided on the fertilizer packaging for application instructions.
Q: Can I keep my aloe plant outside during the summer months?
A: Aloe plants are typically indoor plants but can be moved outdoors during the summer months, as long as they are acclimated gradually to the increased sunlight and temperature. Place them in a shaded or partially shaded area at first and gradually expose them to more sunlight over time.
Q: How do I prevent my aloe plant from becoming leggy?
A: Legginess in aloe plants is often caused by insufficient light. Make sure your aloe plant receives bright, indirect light to encourage compact growth. Rotate the plant periodically to ensure even exposure to light and avoid one-sided growth.
By addressing these frequently asked questions, you have gained valuable insights into common concerns related to aloe plant care. With this knowledge, you can confidently care for your aloe plant in a pot without drainage. Now, let’s conclude our discussion.
Conclusion
Caring for aloe plants in pots without drainage may seem challenging at first, but with the right techniques and knowledge, you can successfully maintain the health and beauty of your aloe plant. From choosing the right pot and potting mix to implementing proper watering and monitoring techniques, you have learned the key factors in providing optimal care for your aloe plant.
We explored the benefits of growing aloe plants in pots, including their portability, indoor versatility, and visual appeal. We discussed the importance of selecting the right pot that promotes proper drainage and allows room for root expansion. Additionally, we highlighted the significance of using a well-draining potting mix and monitoring moisture levels to prevent common issues like overwatering and root rot.
You also gained insights into propagation techniques, including offshoot division and leaf cuttings, to expand your aloe plant collection. We addressed common pests and diseases that can affect aloe plants, such as mealybugs, scale insects, and fungal infections, providing tips on how to identify and treat these issues.
By understanding these fundamental principles and avoiding common pitfalls, you are well-equipped to care for your aloe plant and ensure its long-term health and vitality.
Remember, each aloe plant is unique, and it may take some time and experimentation to find the perfect balance of care that works for your specific plant. Be patient, observe your plant’s response, and make adjustments as necessary.
Having an aloe plant in your home not only adds natural beauty to your decor but also offers numerous health benefits and the joy of nurturing a living organism. So, embrace the journey of caring for your aloe plant, and enjoy the rewards it brings.
With proper care, your aloe plant will continue to thrive and provide you with its soothing gel, purify the air, and add a touch of greenery to your space for years to come.
Frequently Asked Questions about How To Care For Aloe Plant In Pot Without Drainage
Was this page helpful?
At Storables.com, we guarantee accurate and reliable information. Our content, validated by Expert Board Contributors, is crafted following stringent Editorial Policies. We're committed to providing you with well-researched, expert-backed insights for all your informational needs.
0 thoughts on “How To Care For Aloe Plant In Pot Without Drainage”