Home>Home Maintenance>How To Do Home Repair

Home Maintenance
How To Do Home Repair
Modified: October 20, 2024
Learn how to do home repair with our comprehensive guide. Discover essential tips and techniques for home maintenance to keep your property in top condition.
(Many of the links in this article redirect to a specific reviewed product. Your purchase of these products through affiliate links helps to generate commission for Storables.com, at no extra cost. Learn more)
Introduction
When it comes to maintaining your home, occasional repairs are unavoidable. Whether it’s a leaky faucet, a loose doorknob, or a cracked tile, knowing how to handle these issues can save you both time and money. However, many homeowners find themselves overwhelmed by the thought of tackling home repairs on their own.
That’s where this comprehensive guide comes in. In this article, I will walk you through the process of handling various home repairs, providing you with the knowledge and confidence to tackle common maintenance tasks. From assessing the damage to troubleshooting issues, we will cover everything you need to know to become a home repair expert.
Before we dive into the nitty-gritty of home repair, it’s important to note that safety should always be your number one priority. If a repair task seems too complex or dangerous, it’s best to consult a professional. However, for minor repairs and general maintenance, you can rely on the tips and techniques covered in this guide.
By learning how to assess the damage, gather the necessary tools and materials, and follow basic repair techniques, you’ll be well-equipped to address a wide range of home maintenance issues. We will cover plumbing repairs, electrical repairs, carpentry fixes, painting and patching, roof and gutter repairs, flooring repairs, and more.
Additionally, we will explore common home repair troubleshooting techniques, helping you identify and resolve issues efficiently. Whether you’re dealing with a leaky pipe, a faulty electrical outlet, or a squeaky floorboard, you’ll find step-by-step instructions to assist you in resolving the problem.
Throughout this guide, I will incorporate SEO optimization techniques to ensure that it’s not just informative, but also easily discoverable by those searching for home repair tips online. By naturally including relevant keywords, this article will rank higher in search engine results, making it more accessible to readers like you.
Remember, though, that while SEO optimization is important, the primary focus is to provide you with valuable information in a reader-friendly format. With that in mind, let’s begin our journey into the world of home repair and maintenance!
Key Takeaways:
- Regularly inspect your home for damage and address issues promptly to prevent costly repairs. Prioritize safety, gather the right tools, and seek professional help when needed for complex tasks.
- By being proactive, staying informed, and practicing patience, you can confidently handle a variety of home repairs. Celebrate your successes and enjoy the process of maintaining your home.
Read more: How Do Digital Calipers Work
Assessing the Damage
Before you can dive into any home repair project, it’s essential to assess the extent of the damage. This step will help you determine the necessary repairs, gather the right tools and materials, and set realistic expectations for the project.
Start by thoroughly inspecting the damaged area. Look for any visible signs of damage, such as cracks, leaks, or wear and tear. It’s important to take note of these issues and evaluate their severity.
Next, consider the potential causes of the damage. For example, if you notice a water stain on the ceiling, investigate possible sources of the leak, such as a dripping pipe or roof damage. Understanding the root cause will help you address the underlying problem and prevent further damage down the line.
Once you have assessed the damage, determine whether you can handle the repair yourself or if you need to seek professional assistance. Some repairs, such as minor plumbing or electrical tasks, can often be DIY projects. However, complex issues or those requiring specialized knowledge should be left to professionals.
Finally, consider the time and budget available for the repair. Assess if you have sufficient resources to take on the task at hand. If the repair requires costly materials or if you have limited time, it may be best to postpone the project until you can adequately allocate the necessary resources.
By thoroughly assessing the damage, understanding the cause, and evaluating your capabilities and resources, you will set yourself up for success in any home repair endeavor. Remember, it’s better to be realistic and seek professional help when needed, rather than attempting repairs beyond your skill level.
Now that you have a solid understanding of the damage, it’s time to move on to the next step: gathering the tools and materials necessary for the repair.
Gathering Tools and Materials
Once you’ve assessed the damage and determined that the repair is within your capabilities, it’s time to gather the necessary tools and materials. Having the right equipment on hand will make the repair process smoother and more efficient.
Start by making a list of the tools you’ll need. This will vary depending on the type of repair you’re undertaking, but some common tools you may require include:
- Hammer
- Screwdriver set
- Adjustable wrench
- Plunger
- Tape measure
- Utility knife
- Level
- Pliers
These are just a few examples, and the specific tools you’ll need will depend on the nature of the repair. If you don’t already own the necessary tools, consider borrowing or renting them to avoid unnecessary expenses.
In addition to tools, you’ll also need to gather the materials required for the repair. This may include items such as:
- Replacement parts
- Adhesives
- Paint
- Drywall compound
- Caulk
- Nails/screws
- Plumbing fittings
Research the specific materials needed for your repair and make a list. Visit your local home improvement store or check online for availability and pricing. It’s important to ensure you have all the necessary materials on hand before starting the repair to avoid any delays or interruptions.
Before you make your final purchase, consider buying a little extra of each material. This will come in handy in case of mistakes or if any additional repairs arise. It’s always better to have a surplus than to run out mid-project.
Once you have your tools and materials ready, organize them in a designated work area. This will make it easier to access everything you need during the repair process and keep things organized.
Now that you’re equipped with the necessary tools and materials, you’re ready to proceed to the next step: taking precautions to ensure your safety during the repair process.
Safety Precautions
When it comes to home repairs, safety should always be a top priority. By taking the necessary precautions, you can minimize the risk of accidents or injuries during the repair process. Here are some essential safety measures to keep in mind:
- Turn off the power and water: Before starting any electrical or plumbing repairs, make sure to turn off the power supply or shut off the water source. This will prevent electrocution or water-related accidents.
- Wear protective gear: Depending on the nature of the repair, it’s important to wear appropriate protective gear. This may include safety goggles, gloves, a dust mask, or ear protection. Protecting your eyes, hands, and lungs will minimize the risk of injury.
- Use proper lifting techniques: When working with heavy objects or equipment, remember to lift with your legs, not your back. Improper lifting can result in back strains or other injuries.
- Keep work area well-lit and ventilated: Ensure that your work area is properly lit, either with natural light or artificial lighting. Additionally, make sure there is proper ventilation to prevent the buildup of harmful fumes or dust.
- Follow instructions and guidelines: When using tools or equipment, always read and follow the manufacturer’s instructions and safety guidelines. Improper use can lead to accidents or damage to the tools themselves.
- Secure ladders and work surfaces: If you’re working at heights or on unstable surfaces, make sure to secure ladders and work platforms to prevent falls. Use appropriate safety precautions, such as securing the ladder base and using a spotter if necessary.
- Be cautious around electricity: If you’re tackling electrical repairs, take extra precautions by turning off the power supply and using insulated tools. If you’re unsure or uncomfortable working with electricity, it’s best to consult a professional.
- Have a first aid kit on hand: Accidents can happen even with the most careful preparation. Make sure to have a well-stocked first aid kit easily accessible in case of minor injuries.
These are just a few general safety precautions to keep in mind. It’s important to assess the specific risks associated with each repair task and take appropriate safety measures accordingly. If you’re unsure about any safety aspect, it’s always best to consult a professional or seek guidance from knowledgeable sources.
By prioritizing safety and following proper precautions, you can ensure a smooth and secure repair process. Now that we’ve covered safety measures, let’s move on to the fundamental techniques you’ll need for basic home repair tasks.
Basic Home Repair Techniques
Having a solid understanding of basic home repair techniques is essential for tackling a wide range of maintenance tasks. In this section, we will explore some fundamental techniques that can help you in various repair scenarios.
- Fixing a leak: Leaks can occur in various parts of your home, from faucets to pipes. To fix a leaky faucet, start by turning off the water supply and disassembling the faucet. Replace any worn-out washers or seals and reassemble the faucet. For leaking pipes, identify the source of the leak and tighten or replace the affected section.
- Replacing a broken tile: To replace a broken tile, start by removing the grout around the damaged tile using a grout saw or oscillating tool. Once the grout is removed, carefully break the tile using a chisel and hammer. Clean the area and apply tile adhesive to the back of the new tile before pressing it into place. Finally, reapply grout and clean any excess.
- Repairing a hole in drywall: Start by cleaning the damaged area and removing any loose debris. Apply a patch over the hole, securing it with joint compound. Allow it to dry and sand the surface until it’s smooth. Finish by applying multiple coats of joint compound and sanding between each coat for a seamless finish.
- Replacing a door knob: To replace a loose or broken door knob, start by removing the screws and separating the knob from the latch mechanism. Install the new knob by aligning it with the latch and securing it with screws. Test the knob to ensure it turns and latches properly.
- Fixing a stuck window: If a window is difficult to open or close, start by removing any debris or dirt from the window tracks. Apply lubricant to the tracks and hinges to help loosen them. If the window still doesn’t move smoothly, adjust the alignment of the tracks and make sure the window is properly balanced.
- Patching a small hole in a wall: For small holes in walls, such as those caused by nails or screws, start by cleaning the hole and removing any loose debris. Apply spackle or a patching compound to the hole using a putty knife. Once dry, sand the area until it’s smooth and repaint if necessary.
These are just a few examples of basic repair techniques that can come in handy for common home maintenance tasks. It’s important to note that the specific steps may vary depending on the materials and conditions you’re working with. Always refer to manufacturer instructions and seek guidance when needed.
Now that you have a foundation in basic home repair techniques, let’s move on to more specialized repairs, starting with plumbing fixes.
Read more: Why Do Calipers Stick
Plumbing Repairs
Dealing with plumbing issues can be intimidating, but with the right knowledge and techniques, you can handle many common problems yourself. Here are a few plumbing repairs you may encounter:
- Fixing a leaky faucet: Start by turning off the water supply to the faucet. Remove the handle and replace the washer or cartridge inside. Reassemble the faucet and test for any remaining leaks.
- Unclogging a drain: Using a plunger, create a seal over the drain and vigorously plunge up and down. For tougher clogs, try using a drain snake or auger. Remember to wear gloves and avoid using harsh chemical drain cleaners.
- Replacing a showerhead: Use an adjustable wrench to loosen and remove the old showerhead. Wrap the shower arm threads with Teflon tape and screw the new showerhead onto the arm, tightening it by hand. Use the wrench to snugly tighten it without overtightening.
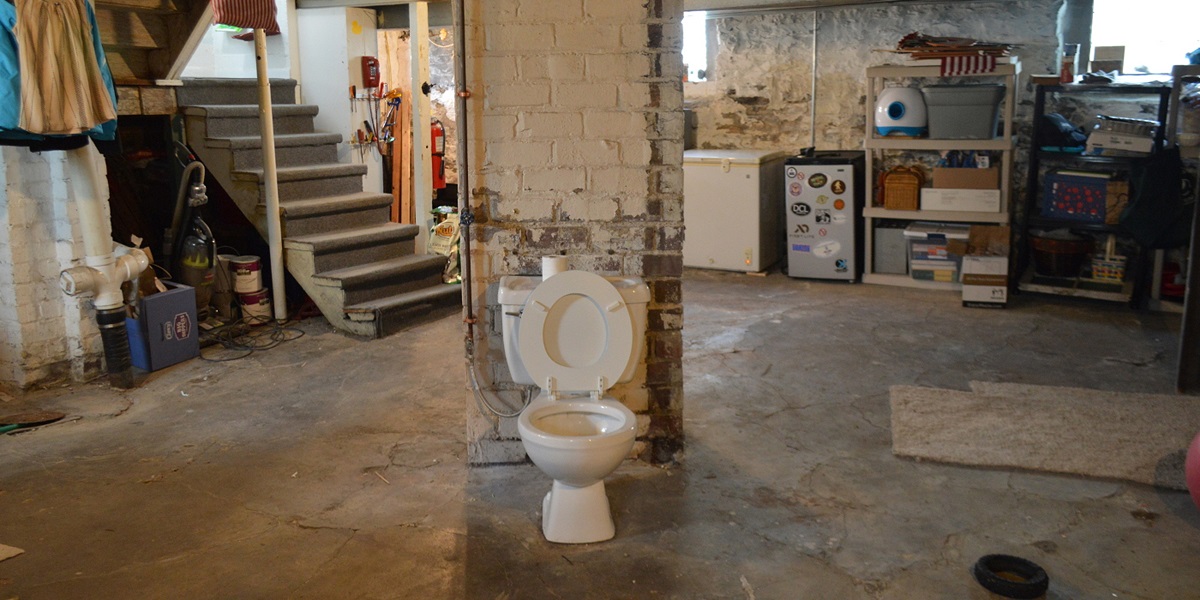
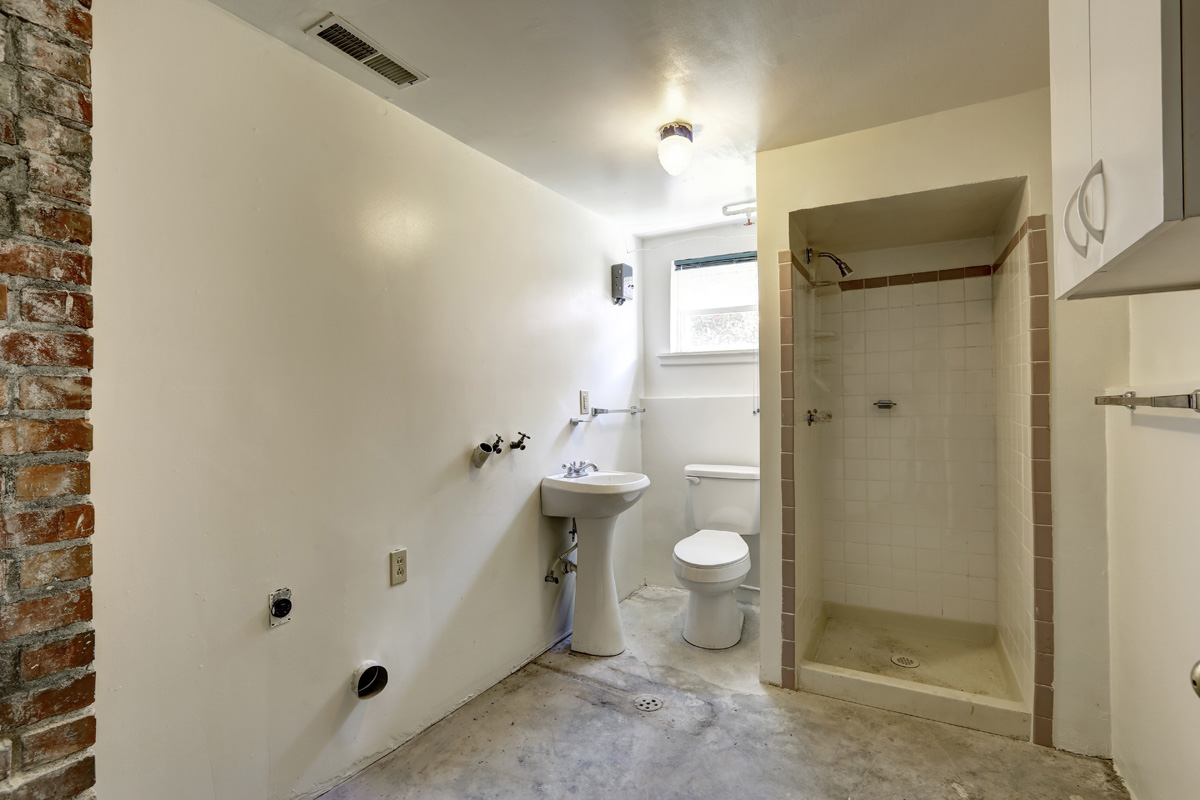
- Repairing a running toilet: Start by removing the tank lid and inspecting the components inside. Adjust the water level by adjusting the float or fill valve. If the flapper isn’t sealing properly, replace it. Lastly, check the flush handle and chain, ensuring they are properly connected and functioning.
- Fixing a slow-dripping shower: Unscrew the showerhead and clean any debris or mineral buildup. If the problem persists, soak the showerhead in vinegar overnight to dissolve any stubborn deposits. Rinse the showerhead and reattach it, ensuring a tight seal.
- Repairing a leaking pipe: Start by turning off the water supply to the affected area. Clean the pipe and surrounding area, then apply plumber’s tape or pipe dope to the threads of the new fitting. Tighten the fitting onto the pipe using a pipe wrench, being careful not to overtighten.
Keep in mind that plumbing repairs can vary depending on the specific issue and the type of plumbing system in your home. If a problem seems too complex or beyond your capabilities, don’t hesitate to contact a professional plumber for assistance.
Now that we’ve covered plumbing repairs, let’s move on to electrical repairs, which require extra caution and care.
Electrical Repairs
Working with electricity can be hazardous, so it’s important to approach electrical repairs with caution. If you’re not confident in your abilities or if the repair is complex, it’s best to hire a professional electrician. However, there are some minor electrical repairs you can tackle yourself. Here are a few:
- Replacing a light fixture: Start by turning off the power to the light fixture at the circuit breaker. Remove the existing fixture by unscrewing the mounting screws and disconnecting the wires. Connect the wires of the new fixture to the corresponding wires in the electrical box, following the manufacturer’s instructions. Secure the new fixture in place and test it before restoring power.
- Installing a new electrical outlet: Begin by turning off the power to the outlet at the circuit breaker. Remove the cover plate and the screws holding the old outlet in place. Disconnect the wires from the old outlet and connect them to the corresponding screws on the new outlet. Secure the new outlet in place and replace the cover plate. Finally, restore power and test the outlet.
- Replacing a circuit breaker: Before attempting this repair, consult with a professional electrician, as it involves working inside the electrical panel. If a circuit breaker is faulty, turn off the power to the panel. Remove the cover of the electrical panel and carefully disconnect the wires connected to the faulty breaker. Install the new breaker by connecting the wires and securely seating it in the panel. Replace the panel cover and restore power.
- Fixing a light switch: Start by turning off the power to the switch at the circuit breaker. Remove the cover plate and unscrew the mounting screws holding the switch in place. Disconnect the wires from the old switch and connect them to the corresponding terminals on the new switch. Secure the new switch in place, replace the cover plate, and restore power to test the switch.
- Installing a ceiling fan: If you’re comfortable with electrical work, you can install a ceiling fan yourself. Start by turning off the power to the existing ceiling box. Remove the old light fixture and disconnect the wires. Install the fan mounting bracket, connect the wires from the fan to the corresponding wires in the ceiling box, and securely mount the fan. Attach the fan blades and test the fan before restoring power.
Remember, electrical repairs can be dangerous, so always exercise caution. If you’re uncertain about the repair or feel uncomfortable working with electricity, it’s best to consult a professional electrician.
Now that we’ve covered electrical repairs, let’s move on to carpentry fixes, which are common in many home maintenance projects.
When doing home repair, always start with the basics. Make sure to turn off the power or water supply before attempting any repairs to avoid accidents or damage.
Carpentry Repairs
Carpentry repairs are a common aspect of home maintenance. Whether you’re dealing with a wobbly table or a squeaky floorboard, having some carpentry skills can save you from hiring a professional. Here are a few carpentry repairs you may encounter:
- Fixing a loose cabinet door: If a cabinet door is loose, start by inspecting the hinges. Tighten the screws holding the hinges in place. If the screw holes are stripped, remove the hinge, fill the holes with wooden toothpicks or dowels, and reattach the hinge, ensuring a snug fit.
- Repairing a squeaky floorboard: Locate the squeaky area by walking on the floor and listening for the noise. Drive a small finishing nail through the floorboard into the subfloor below. Use a nail set to sink the nail head slightly below the surface of the floorboard. Repeat for any additional squeaky areas.
- Replacing a broken drawer slide: Remove the drawer from its housing and inspect the sliding mechanism. Purchase a replacement slide that matches the dimensions and style of the original. Install the new slide by attaching it to the drawer box and the cabinet housing, following the manufacturer’s instructions.
- Repairing a damaged wooden door: Start by assessing the extent of the damage. If it’s a minor scratch or gouge, you can use wood filler to fill in the imperfections. For deeper damage or cracks, use wood glue to carefully rejoin the separated pieces. Allow the glue to dry completely, then sand and refinish the door as needed.
- Fixing a sticky door: Identify the areas where the door is sticking. This may be due to misaligned hinges or swollen wood. Tighten or adjust the hinges to align the door properly. If the door is rubbing against the frame, use a plane or sandpaper to gently remove excess material, allowing the door to open and close smoothly.
- Repairing a loose handrail: Begin by tightening the screws or bolts holding the handrail in place. If the problem persists, remove the handrail and inspect the mounting brackets. Replace any damaged or worn brackets and re-secure the handrail, ensuring it is securely attached to the wall.
These are just a few examples of carpentry repairs you may encounter. Remember to use the appropriate tools and techniques for each particular repair. If you’re unsure or the damage is extensive, it’s always best to consult a professional carpenter.
Now that we’ve covered carpentry repairs, let’s move on to painting and patching, which can help refresh the look of your home.
Painting and Patching
Painting and patching are essential skills for maintaining the appearance and integrity of your home. Whether you’re looking to refresh a room with a new coat of paint or repair damaged walls, these techniques can help you achieve a polished finish. Here are some painting and patching tips:
- Preparing the surface: Before painting or patching, ensure that the surface is clean and free of dust and debris. Use a mild detergent and water to wash walls, and sand any rough areas or peeling paint to create a smooth surface for painting or patching.
- Patching small holes: Fill small holes or cracks with spackle or a patching compound using a putty knife. Smooth out the surface and let it dry completely. Once dry, sand the patch until it’s flush with the surrounding wall. Prime the patch if necessary before painting.
- Repairing larger holes: For larger holes, use a self-adhesive mesh patch to reinforce the area. Apply a patching compound over the mesh, ensuring it is smooth and level with the wall. Let it dry completely before sanding and priming.
- Choosing the right paint: Select a paint finish and color that suits your desired look and the specific room. Consider factors such as lighting, purpose of the room, and personal preference. Consult with paint professionals at your local home improvement store to ensure you choose the right type of paint for the surface.
- Applying painters tape: Use painters tape to protect areas you don’t want to paint, such as trim, baseboards, or windows. Apply the tape carefully, ensuring it’s straight and adheres firmly. This will help create clean, crisp lines and prevent paint bleed onto unwanted surfaces.
- Painting techniques: Use a high-quality brush or roller to apply the paint evenly. Start by cutting in the edges with a brush, then use a roller for larger areas. Apply multiple thin coats of paint for a smoother finish, allowing each coat to dry completely before applying the next.
- Clean up and maintenance: Properly clean your paintbrushes and rollers after each use. For water-based paints, use soap and water, and for oil-based paints, use mineral spirits. Store brushes and rollers in their original packaging or in airtight plastic bags to prevent them from drying out between uses.
Remember to take your time and work carefully to achieve professional-looking results. If you have large or complex painting projects or need assistance with patching extensive damage, it’s best to consult a professional painter.
Now that we’ve covered painting and patching, let’s move on to roof and gutter repairs, which are crucial for maintaining the structural integrity of your home.
Read more: How Do You Know When Calipers Are Bad
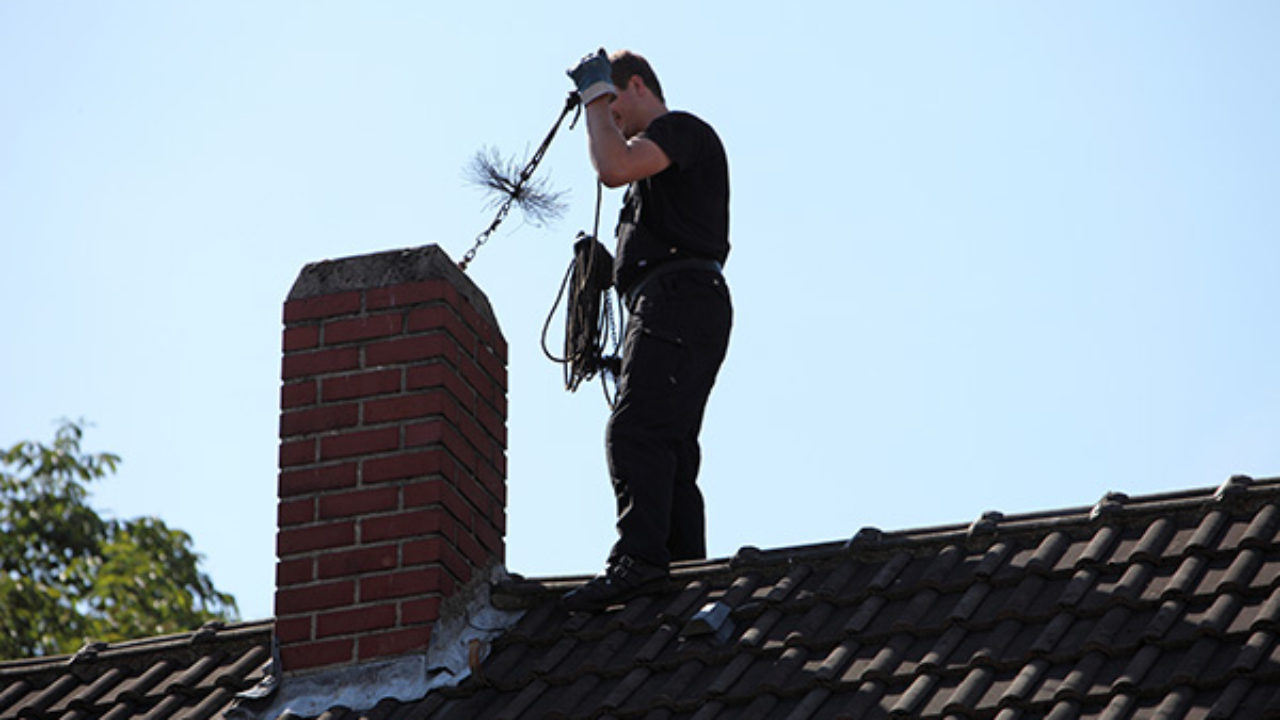
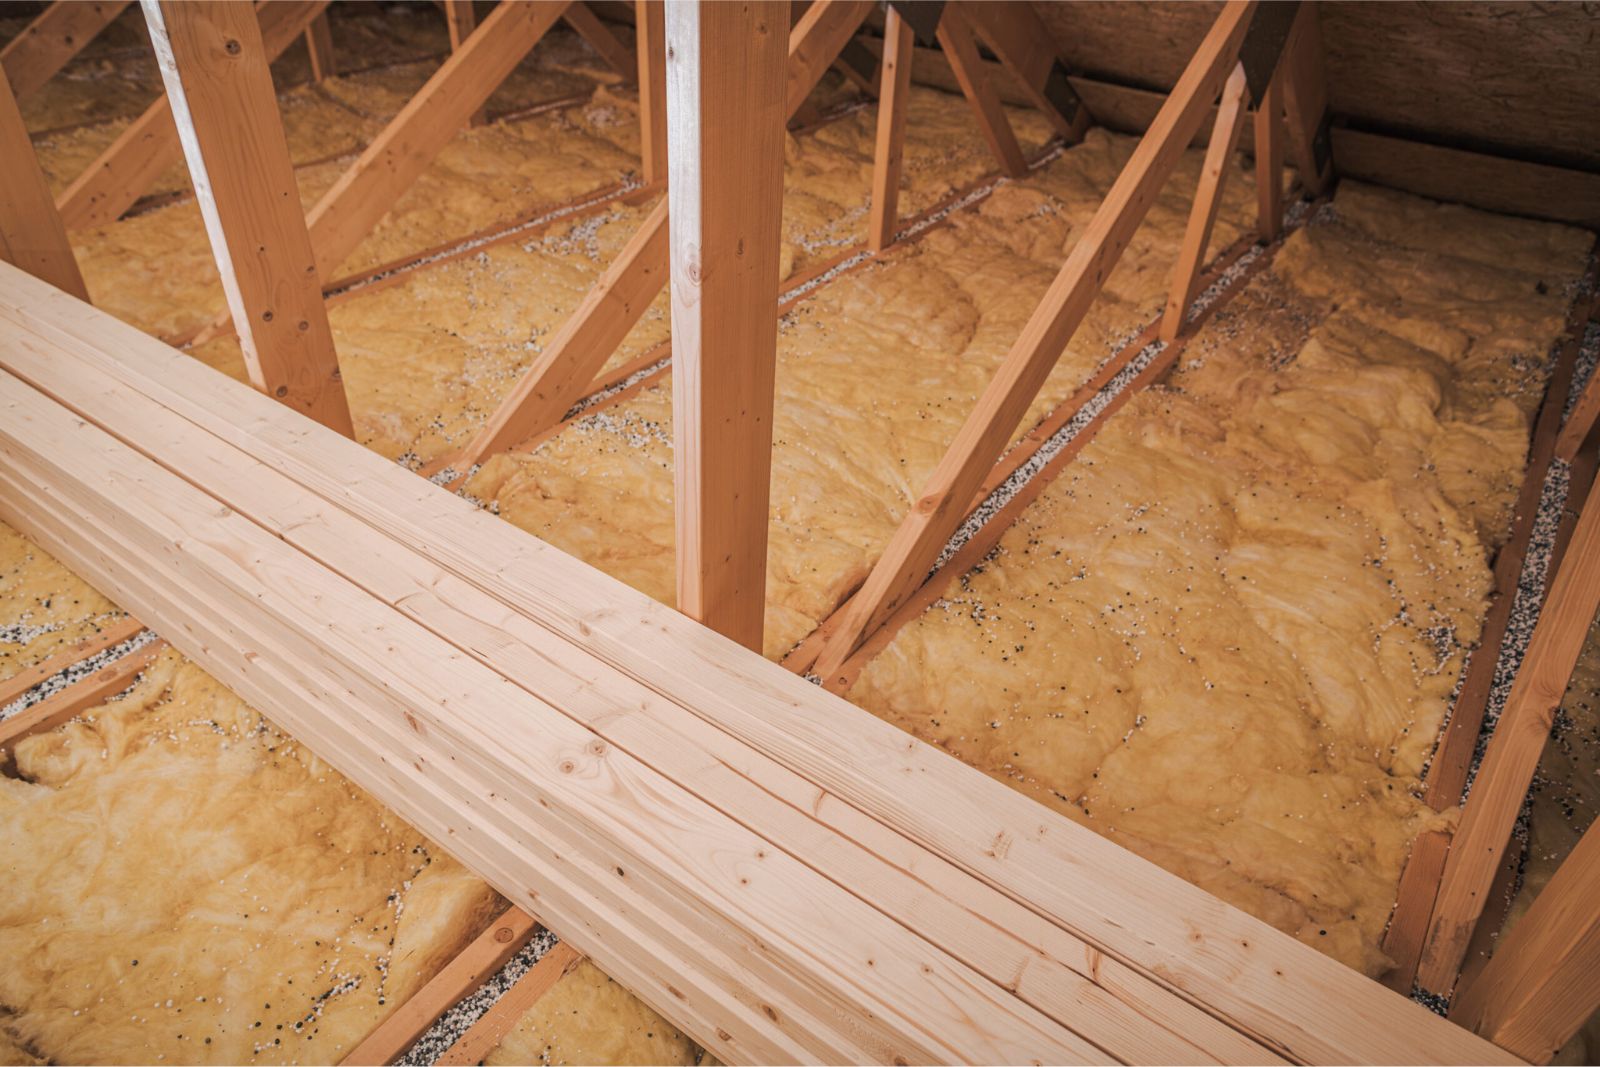
Roof and Gutter Repairs
Roof and gutter repairs are essential for keeping your home structurally sound and protecting it from water damage. While major roof repairs should be handled by professionals, there are some minor repairs you can tackle yourself. Here are a few roof and gutter repair tips:
- Inspecting the roof: Regularly inspect your roof for any signs of damage, such as missing or damaged shingles, cracks, or curled edges. Look for any areas where water may be pooling or signs of leaks in the attic. It’s important to catch potential issues early to prevent further damage.
- Replacing damaged shingles: If you notice any damaged or missing shingles, carefully remove the damaged pieces and replace them with new ones. Follow the manufacturer’s instructions for proper installation. Ensure that the new shingles are securely fastened to prevent future issues.
- Fixing gutter issues: Inspect your gutters for any clogs or damage. Use a ladder to safely access the gutters and remove any debris or leaves. If there are any leaks or loose sections, tighten the gutter brackets or use silicone caulk to seal the joints. Consider installing gutter guards to prevent future clogs.
- Sealing roof leaks: If you notice any signs of a roof leak, such as water stains on the ceiling or walls, it’s crucial to address it promptly. Identify the source of the leak and seal it using roofing cement or a silicone-based sealant. For larger or persistent leaks, it’s best to consult a professional roofer.
- Trimming tree branches: Overhanging tree branches can cause damage to your roof and gutters, especially during storms. Trim back any branches that are too close to your roof to prevent them from scraping against the surface or causing debris buildup in the gutters.
- Cleaning and maintaining gutters: Regularly clean your gutters to ensure they are free of debris and functioning properly. Use a scoop or garden trowel to remove leaves and other debris. Flush the gutters with a hose to ensure water flows freely. Consider installing gutter guards to minimize the need for frequent cleanings.
- Checking roof flashings: Inspect the flashings around chimneys, vents, and skylights for any signs of damage or deterioration. Replace any damaged flashings and ensure they are properly sealed to prevent water penetration.
While minor roof and gutter repairs can be done by homeowners, it’s important to prioritize safety and consult professional roofers for major repairs or if you’re unsure about the extent of the damage.
Now that we’ve covered roof and gutter repairs, let’s move on to flooring repairs, which can help restore the beauty and functionality of your home’s floors.
Flooring Repairs
Over time, wear and tear can take a toll on your home’s flooring. From hardwood to tile to carpet, flooring repairs are a common part of home maintenance. Here are some tips for addressing common flooring issues:
- Repairing scratches on hardwood floors: For minor scratches, use a hardwood floor cleaner and a soft cloth to gently rub the affected area. For deeper scratches, use a wood filler or touch-up marker that matches the color of your floor. Apply the filler or marker to the scratch and wipe away any excess, then seal and protect the area with a wood floor finish.
- Fixing loose or squeaky floorboards: To fix a loose floorboard, locate the nails or screws that secure it to the subfloor. Use a hammer or screwdriver to tighten the fasteners or add new ones if necessary. For squeaky floorboards, use wood screws to secure the boards to the subfloor, taking care not to overtighten and cause damage.
- Replacing a damaged tile: Begin by removing the grout around the damaged tile using a grout saw or oscillating tool. Carefully break the tile using a chisel and hammer and remove the pieces. Clean the area and apply tile adhesive to the back of the new tile, pressing it firmly into place. Reapply grout and clean any excess for a seamless finish.
- Fixing loose or wrinkled carpet: For a loose carpet, use a knee kicker or carpet stretcher to reattach it to the tack strips along the perimeter of the room. Gently stretch the carpet and use a carpet trimmer to trim any excess material. If you have wrinkles or buckling in your carpet, consider hiring a professional carpet installer to re-stretch and secure the carpet.
- Repairing vinyl or laminate flooring: For minor damage, such as scratches or small chips, use a vinyl or laminate floor repair kit, following the manufacturer’s instructions. Fill in the damaged area with the appropriate compound or putty and smooth it out. For larger damage, consult a professional to assess the extent of the repairs needed.
- Dealing with water-damaged flooring: If your flooring has been exposed to water and shows signs of damage, such as warping or discoloration, it’s important to address it promptly. Start by drying the area thoroughly to prevent further damage and mold growth. Depending on the extent of the damage, you may need to replace sections of the flooring or consult a professional for repair options.
Remember, different types of flooring require specific repair techniques and materials. It’s important to research and follow the manufacturer’s guidelines for each specific flooring material. If you’re unsure about any repairs or if the damage is extensive, it’s best to consult a flooring professional.
Now that we’ve covered flooring repairs, let’s move on to troubleshooting common home repair issues that may arise in various areas of your home.
Troubleshooting Common Home Repair Issues
As a homeowner, you’re bound to encounter various home repair issues from time to time. Troubleshooting these issues can help you identify the underlying problems and determine the best course of action. Here are some common home repair issues and tips for troubleshooting them:
- Water leaks: If you notice water stains on the ceiling or walls, it’s crucial to identify the source of the leak. Trace the water stains to their origin point. Check likely sources, such as windows, plumbing fixtures, or roofs. Once you pinpoint the source, take appropriate action, such as repairing a pipe, sealing a window, or fixing a leaky roof.
- Electrical malfunctions: If you’re experiencing electrical issues, start by checking the circuit breaker panel to see if any breakers have tripped. Reset the breakers if necessary. If the problem persists, inspect the affected outlets or switches for loose connections or damaged wiring. If you’re uncertain or the issue is more complex, consult a professional electrician.
- Heating or cooling system problems: If your HVAC system is not functioning properly, check the thermostat settings to ensure they are correct. Inspect the air filters and clean or replace them if needed. If the problem persists, check the circuit breaker for the HVAC system and contact an HVAC technician if necessary.
- Plumbing drainage issues: Slow drainage in sinks, tubs, or toilets can be caused by clogs in the drainage system. Start by using a plunger or drain snake to clear the clog. If that doesn’t resolve the issue, there may be a larger blockage in the pipes that requires professional assistance.
- Malfunctioning appliances: If an appliance is not working as expected, check the power supply and ensure that it’s properly connected. Review the user manual for troubleshooting steps specific to the appliance. If the problem persists, contact the manufacturer’s customer service or a professional appliance repair technician.
- Cracks in walls or ceilings: Small cracks can be common due to natural settling of the house. However, larger or recurring cracks may indicate foundation issues. If you notice such cracks, monitor their progression and consult a foundation specialist if necessary. For minor cracks, use spackle or joint compound to fill and smooth them, then paint over the repaired area.
While troubleshooting common home repair issues can help you identify the problem, it’s important to exercise caution and know your limitations. If you’re unsure or the issue is beyond your expertise, it’s best to consult a professional for proper assessment and repair.
Now that we’ve covered troubleshooting, let’s conclude with some final tips and recommendations for successful home repairs.
Final Tips and Recommendations
As we wrap up our comprehensive guide to home repairs, here are some final tips and recommendations to help you successfully navigate the world of home maintenance:
- Be proactive: Regularly inspect your home for any signs of damage or maintenance needs. Addressing issues early can save you from costly repairs down the road.
- Research and educate yourself: Take the time to learn about different home repair tasks and techniques. Familiarize yourself with the tools and materials required for each task to ensure you’re prepared.
- Safety first: Always prioritize safety when handling home repairs. Follow proper safety precautions, use protective gear, and consult professionals when needed.
- Take it step by step: Break down complex repairs into manageable steps. Focus on one task at a time and don’t rush through the process. This will help ensure accuracy and quality results.
- Keep a well-stocked toolbox: Invest in a basic set of tools and keep them organized and easily accessible. Having the right tools on hand will make repairs more efficient and enjoyable.
- Don’t be afraid to ask for help: While some repairs can be DIY projects, don’t hesitate to seek professional assistance for more complex tasks or if you’re unsure of your abilities.
- Maintain a record: Keep a log or journal of your home repairs, including dates, materials used, and any relevant information. This will help with future maintenance and keep track of any warranties or guarantees.
- Learn from experience: As you gain more experience with home repairs, reflect on each project. Consider what worked well and what could be improved for future repairs.
- Practice patience: Home repairs can be challenging at times, but with patience and perseverance, you can overcome obstacles and achieve rewarding results.
- Celebrate your successes: Completing home repairs on your own is a great accomplishment. Take pride in your work and celebrate your successes along the way.
Remember, home repairs are an ongoing process, and no home is exempt from occasional maintenance tasks. By being proactive, staying informed, and taking the necessary precautions, you’ll be well-equipped to handle a variety of repairs and maintenance in your home.
Now go forth with confidence, and may your home be a safe and well-maintained haven for you and your loved ones!
Read more: Why Do Calipers Lock Up
Conclusion
In conclusion, home repairs are an inevitable part of homeownership. By equipping yourself with knowledge, skills, and the right tools, you can confidently tackle a wide range of maintenance tasks. Throughout this comprehensive guide, we’ve covered the assessment of damage, gathering tools and materials, safety precautions, basic repair techniques, and specific repairs in plumbing, electrical, carpentry, painting, roofing, gutter, and flooring areas. Additionally, we discussed troubleshooting common home repair issues and provided final tips and recommendations to ensure successful home repairs.
It’s important to remember that while DIY repairs can save you money and provide a sense of accomplishment, safety should always be the top priority. If a repair exceeds your abilities or presents a potential danger, don’t hesitate to seek professional help.
By being proactive in maintaining your home, regularly inspecting for damages, and addressing issues promptly, you can prevent further damage and costly repairs in the future. Researching and educating yourself about various repair techniques will empower you to handle a wide range of home maintenance tasks confidently.
Remember to follow safety precautions, use the appropriate tools and materials for each repair, and take it step by step. Don’t be afraid to ask for help when needed and keep a well-stocked toolbox to ensure you’re prepared for any situation that may arise.
Finally, celebrate your achievements along the way. Completing home repairs on your own is a great accomplishment and can save you time and money. By continuously learning from each project and growing your skills, you’ll become a capable and confident home repair expert.
So, embrace the challenge of home repairs, stay curious, and enjoy the process of maintaining and improving your home. With the knowledge and guidance provided in this guide, you’re well-equipped to handle common home repairs and create a comfortable and safe living environment for you and your loved ones.
Happy repairing!
Frequently Asked Questions about How To Do Home Repair
Was this page helpful?
At Storables.com, we guarantee accurate and reliable information. Our content, validated by Expert Board Contributors, is crafted following stringent Editorial Policies. We're committed to providing you with well-researched, expert-backed insights for all your informational needs.