Articles
How To Fix A Sticky Door
Modified: January 9, 2024
Learn effective methods to fix a sticky door with these informative articles. Discover easy solutions and tips to eliminate door friction and improve functionality.
(Many of the links in this article redirect to a specific reviewed product. Your purchase of these products through affiliate links helps to generate commission for Storables.com, at no extra cost. Learn more)
Introduction
A sticky door can be a frustrating and inconvenient problem to deal with. It can make it difficult to open and close doors smoothly, creating annoyance and potentially leading to damage to the door or frame over time. However, fixing a sticky door doesn’t have to be a complicated or expensive endeavor. With a few simple tools and a little bit of know-how, you can have your door functioning properly again in no time.
In this article, we will guide you through the step-by-step process of fixing a sticky door. From identifying the cause of the stickiness to tightening loose hinges, lubricating the door hardware, and adjusting the strike plate, we’ve got you covered. Whether you’re dealing with a sticky exterior door, a sticky interior door, or even a stubborn cabinet door, the techniques we’ll cover can be applied to various types of doors.
So, if you’re tired of wrestling with your sticky door every time you try to open or close it, read on to discover the solutions and tips that will help you get your doors gliding smoothly once again.
Key Takeaways:
- Say goodbye to frustrating door stickiness by following simple steps to fix a sticky door, from tightening loose hinges to lubricating door hardware and adjusting the strike plate.
- Identifying the cause of stickiness and addressing it with the right tools and techniques can restore smooth functionality to your doors, enhancing the aesthetics and convenience of your living space.
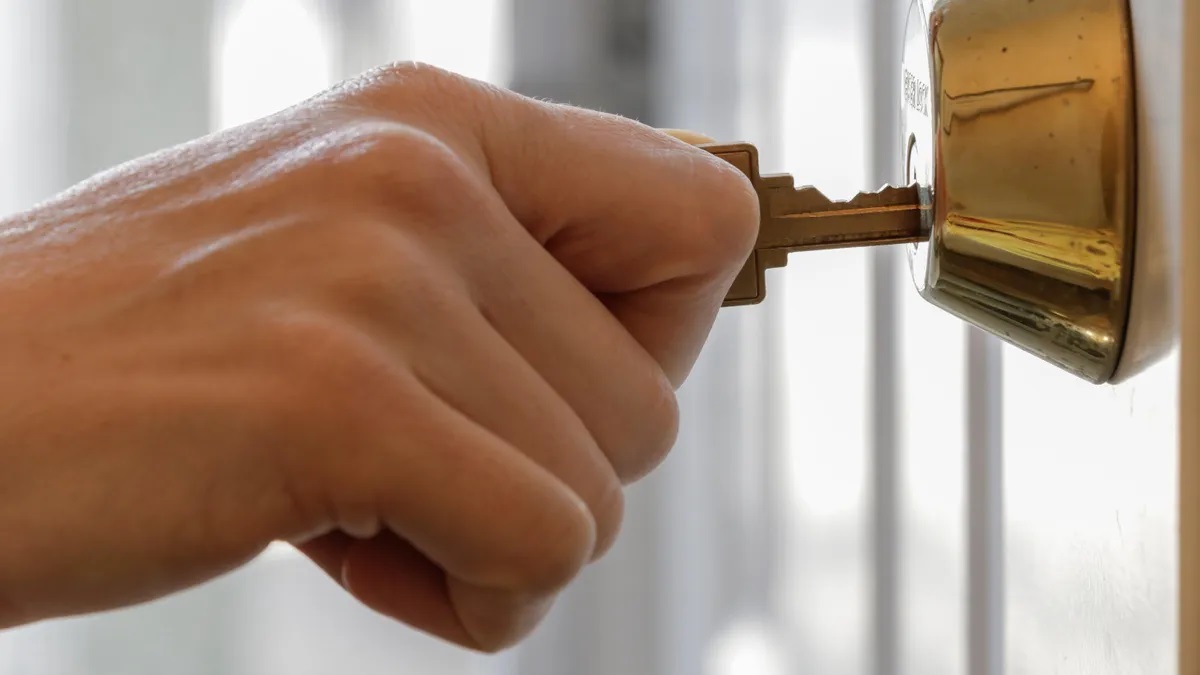
Read more: How To Fix A Sticky Lock On A Door
Reasons for a Sticky Door
A sticky door can have multiple causes, and understanding the underlying reason is crucial for effectively addressing the problem. Here are some common reasons why doors tend to stick:
- Humidity and Weather Changes: Moisture in the air can cause wooden doors to absorb the moisture, leading to expansion and warping. This can result in a door that no longer fits properly within its frame, causing it to stick.
- Swelling of the Door: Similarly, wooden doors can swell due to prolonged exposure to humidity or water. This can cause the door to become larger than the frame, resulting in friction and difficulty when opening or closing the door.
- Paint or Finish Buildup: Over time, paint or finish buildup can accumulate around the edges of the door, causing it to rub against the frame. This can create resistance and make the door stick.
- Loose Hinges: If the hinges securing the door to the frame are loose, it can cause misalignment and make the door stick. The weight of the door may shift, causing it to rub against the frame or floor.
- Uneven Floors: A floor that is not level can affect the alignment of the door and result in sticking. The door may rub against the floor or frame when opened or closed.
- Worn or Damaged Hardware: The hardware components of the door, including hinges, latches, and strike plates, can wear out or become damaged over time. This can cause misalignment and sticking.
Identifying the specific cause of the stickiness will help you determine the appropriate solution. In some cases, a simple adjustment or lubrication may be all that’s needed, while in other cases, more extensive repairs or replacements may be necessary.
Now that you have a better understanding of the reasons behind a sticky door, let’s move on to the tools and materials you’ll need to fix it.
Tools and Materials Needed
Before you begin fixing a sticky door, it’s important to gather the necessary tools and materials. Here is a list of items you will likely need:
- Screwdriver: A screwdriver will be essential for tightening any loose screws on the hinges or other hardware.
- Pliers: Pliers may come in handy for removing stubborn hinge pins or adjusting hardware.
- Sanding Block or Sandpaper: A sanding block or sandpaper will be needed for sanding down any areas on the door that are sticking or rubbing against the frame.
- Lubricant: A lubricant such as WD-40 or silicone spray will be useful for lubricating hinges, latches, and other moving parts of the door.
- Paint Scraper: If there is excessive paint or finish buildup on the edges of the door, a paint scraper can be used to scrape it away.
- Wood Putty or Filler: If there are any minor cracks or dents in the wood, wood putty or filler can be used to repair them.
- Saw or Planer: In some cases where the door is significantly swollen or misshapen due to moisture, a saw or planer may be necessary to trim and reshape the door.
- Tape Measure: A tape measure will be useful for measuring and ensuring accurate adjustments.
- Replacement Parts: Depending on the severity of the issue, you may need to purchase replacement hinges, strike plates, or other door hardware.
Having these tools and materials on hand will make the door repair process smoother and more efficient. It’s always a good idea to gather everything you need before you start, so you don’t have to interrupt the project to search for missing items.
Now that you’re prepared with the necessary tools and materials, let’s move on to the step-by-step instructions for fixing a sticky door.
Step-by-Step Instructions to Fix a Sticky Door
Now it’s time to dive into the step-by-step process of fixing a sticky door. These instructions will help you identify the cause of the stickiness and guide you through the necessary repairs or adjustments. Let’s get started:
- Inspecting the Door and Frame: Begin by examining the door and frame for any visible signs of damage, misalignment, or rubbing. Look for areas where the door is sticking or creating friction when opened or closed.
- Identifying the Cause of Stickiness: Based on your inspection, determine the reason behind the door sticking. Is it due to damage, misalignment, humidity, or something else? This will help you choose the appropriate solution.
- Tightening Loose Hinges: If you notice any loose screws or hinges, use a screwdriver to tighten them. This will help realign the door and reduce friction.
- Lubricating the Door Hinges and Latch: Apply a lubricant, such as WD-40 or silicone spray, to the hinges, latch, and other moving parts of the door. This will reduce friction and allow the door to glide more smoothly.
- Sanding the Door’s Edges: If there are areas on the door that are rubbing against the frame, use a sanding block or sandpaper to gently sand them down. Be careful not to remove too much material, as it may affect the door’s fit.
- Adjusting the Strike Plate: If the door is not latching properly, adjust the strike plate by loosening the screws and shifting it slightly to align it with the door latch. Tighten the screws once the adjustment is made.
- Repairing or Replacing Warped or Damaged Parts: If the door is significantly warped or damaged, you may need to repair or replace certain parts. Use wood putty or filler for minor cracks or dents, or consider replacing hinges or other hardware if necessary.
- Testing and Fine-Tuning the Door: Once you’ve completed the necessary repairs and adjustments, test the door by opening and closing it several times. Make any additional fine-tuning adjustments to ensure smooth operation.
Following these step-by-step instructions will help you fix a sticky door and restore its functionality. Remember, the specific steps and techniques may vary depending on the cause and severity of the stickiness.
Now that you know how to fix a sticky door, it’s time to put these instructions into practice. Say goodbye to frustrating door stickiness and enjoy the smooth operation of your doors once again.
Inspecting the Door and Frame
The first step in fixing a sticky door is to thoroughly inspect both the door and the frame. This inspection will help you identify any visible signs of damage, misalignment, or rubbing that may be causing the stickiness. Here’s what you should do:
- Observe the Door: Take a close look at the door from various angles. Look for any obvious signs of damage, such as cracks or warping. Also, pay attention to areas where the door appears to be sticking or creating friction when opened or closed.
- Check the Frame: Examine the frame around the door. Look for any misalignment or damage, such as gaps or cracks. Pay attention to areas where the door is rubbing against the frame when opened or closed.
- Note the Problematic Areas: Take note of the specific areas on the door and the frame where you observe sticking or rubbing. These are the areas that may require further attention during the repair process.
- Assess the Overall Condition: Evaluate the overall condition of the door and frame. Consider factors such as moisture exposure, paint or finish buildup, and previous repairs. These factors can help you understand the underlying cause of the stickiness.
- Take Measurements: Measure the door and the frame to ensure they are properly aligned. Use a tape measure to check for any differences in width or height that may be contributing to the stickiness.
By inspecting the door and frame, you will have a better understanding of the existing problems and potential causes of the stickiness. This information will guide you in choosing the most appropriate solutions and repairs.
Now that the door and frame inspection is complete, you can move on to the next steps in fixing the sticky door. Determine the cause of the stickiness and proceed with the necessary repairs or adjustments.
Read more: How To Store Sticky Buns
Identifying the Cause of Stickiness
After inspecting the door and frame, the next step in fixing a sticky door is to identify the specific cause of the stickiness. Understanding the underlying issue will help you determine the appropriate solution and ensure a long-lasting fix. Here are some common causes of stickiness to consider:
- Humidity and Weather Changes: Moisture in the air can cause a wooden door to absorb the moisture, leading to expansion and warping. This can result in a door that no longer fits properly within its frame, causing it to stick.
- Swelling of the Door: Prolonged exposure to humidity or water can cause a door to swell. This can lead to misalignment and difficulty in opening or closing the door smoothly.
- Paint or Finish Buildup: Over time, paint or finish buildup can accumulate around the edges of the door. This can cause the door to rub against the frame, resulting in sticking and resistance.
- Loose Hinges: If the hinges securing the door to the frame are loose, it can cause misalignment and make the door stick. The weight of the door may shift, causing it to rub against the frame or floor.
- Uneven Floors: A floor that is not level can affect the alignment of the door and result in sticking. The door may rub against the floor or frame when opened or closed.
- Worn or Damaged Hardware: The hardware components of the door, including hinges, latches, and strike plates, can wear out or become damaged over time. This can cause misalignment and sticking.
Consider the observations you made during the inspection and the symptoms of the stickiness. Did you notice excessive moisture, visible swelling, or rubbing against the frame or floor? By identifying the cause, you can focus your repairs and adjustments on addressing the specific issue.
In some cases, there may be multiple factors contributing to the stickiness. Take into account all the potential causes and prioritize the ones that seem most significant. This will help you address the main culprits and improve the overall functionality of the door.
Once you have identified the cause or causes of the stickiness, you can move on to the appropriate steps to fix the door. Whether it’s tightening loose hinges, sanding down problem areas, or addressing other issues, the solution will become clearer once you understand the underlying cause.
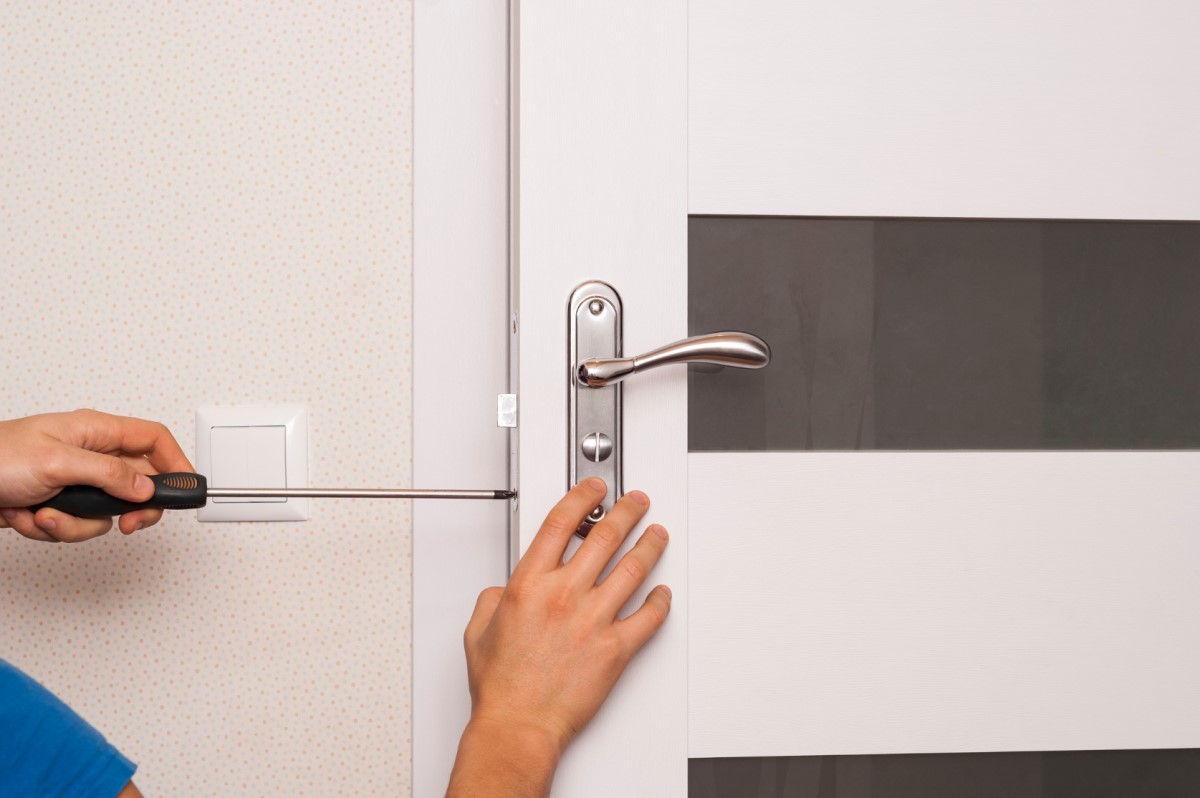
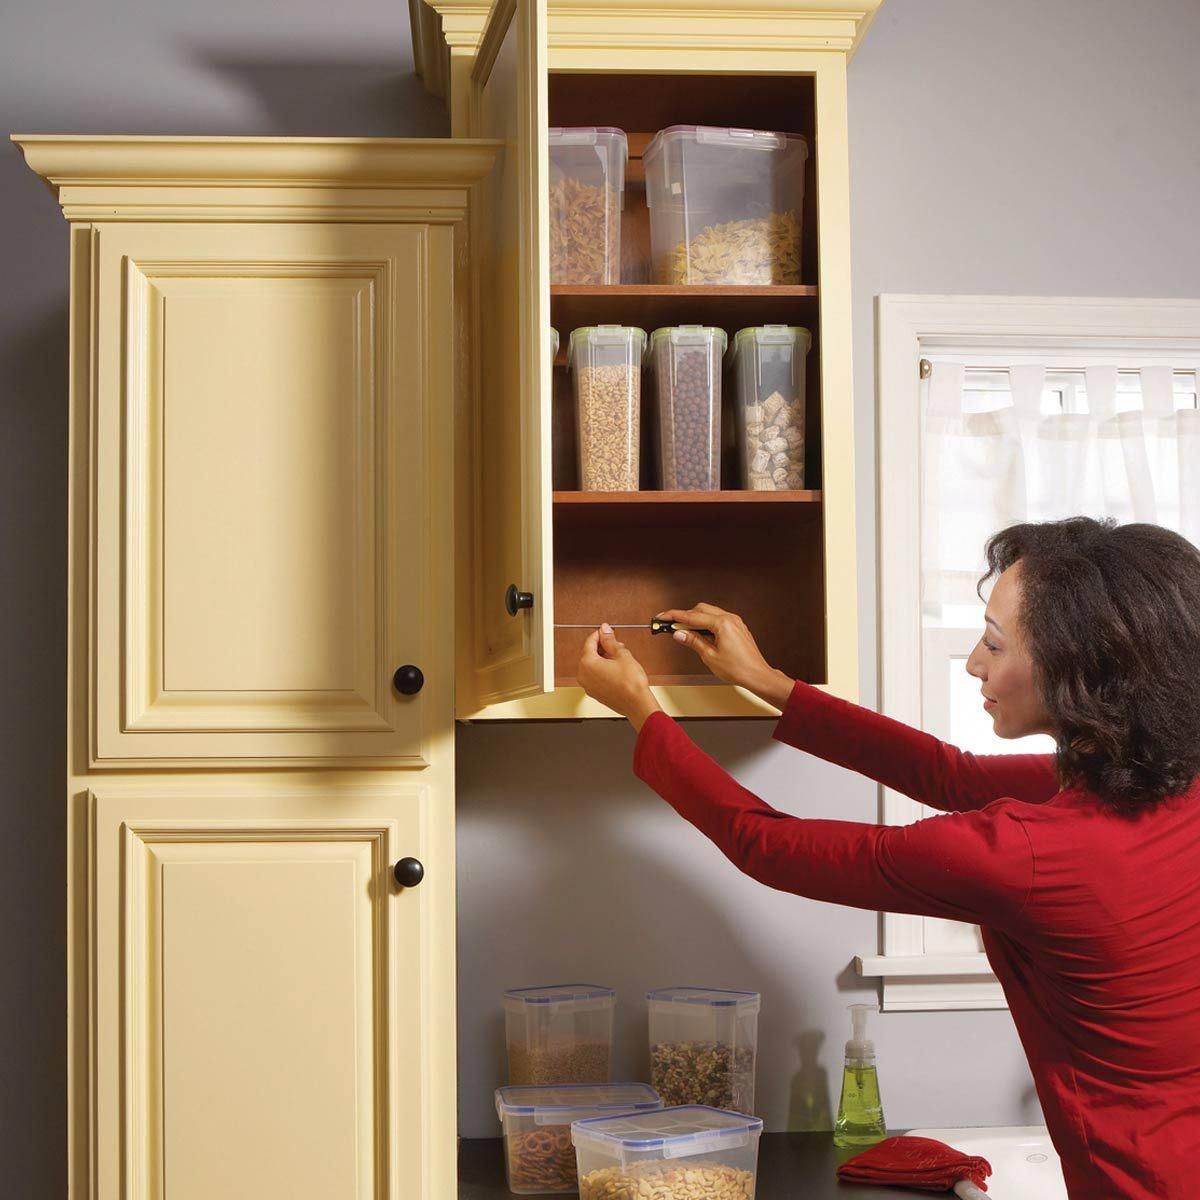
Tightening Loose Hinges
One of the common causes of a sticky door is loose hinges. Over time, the screws that hold the hinges in place can become loose, causing the door to sag or misalign and resulting in sticking or rubbing against the frame. Follow these step-by-step instructions to tighten loose hinges and improve the door’s functionality:
- Inspect the Hinges: Examine each hinge carefully to identify any loose screws or hinges. Look for visible gaps or movement between the hinge plates and the door or frame.
- Tighten the Screws: Using a screwdriver that matches the size of the hinge screws, begin by tightening any loose screws. Start from the top hinge and work your way down to the bottom hinge.
- Reposition the Hinge: If tightening the screws does not adequately fix the issue, you may need to reposition the hinge slightly. Loosen the screws just enough to allow for movement, and then adjust the hinge so that it aligns properly with the door and frame.
- Tighten the Screws Again: Once the hinge is properly repositioned, make sure to tighten the screws securely. Be careful not to overtighten, as it may strip the holes or damage the wood.
- Test the Door: Open and close the door several times to check if it still sticks or rubs against the frame. If the sticking issue persists, you may need to repeat the process on the other hinges or consider other potential causes.
Tightening loose hinges can help realign the door and address misalignment, which is often a contributor to stickiness. It is a relatively simple fix that can have a significant impact on the door’s smooth operation. However, if the hinges are severely damaged or worn, it may be necessary to replace them entirely for optimal results.
Remember, each hinge should be checked individually, as multiple loose hinges can compound the sticking problem. By taking the time to tighten the hinges properly, you can eliminate one of the common causes of a sticky door and ensure better functionality.
Now that you have tightened the loose hinges, proceed to the next steps in the door repair process to further address the stickiness and restore the proper operation of the door.
One tip for fixing a sticky door is to check the hinges and tighten any loose screws. Sometimes a sticky door can be caused by misaligned hinges, so adjusting them can help the door open and close smoothly.
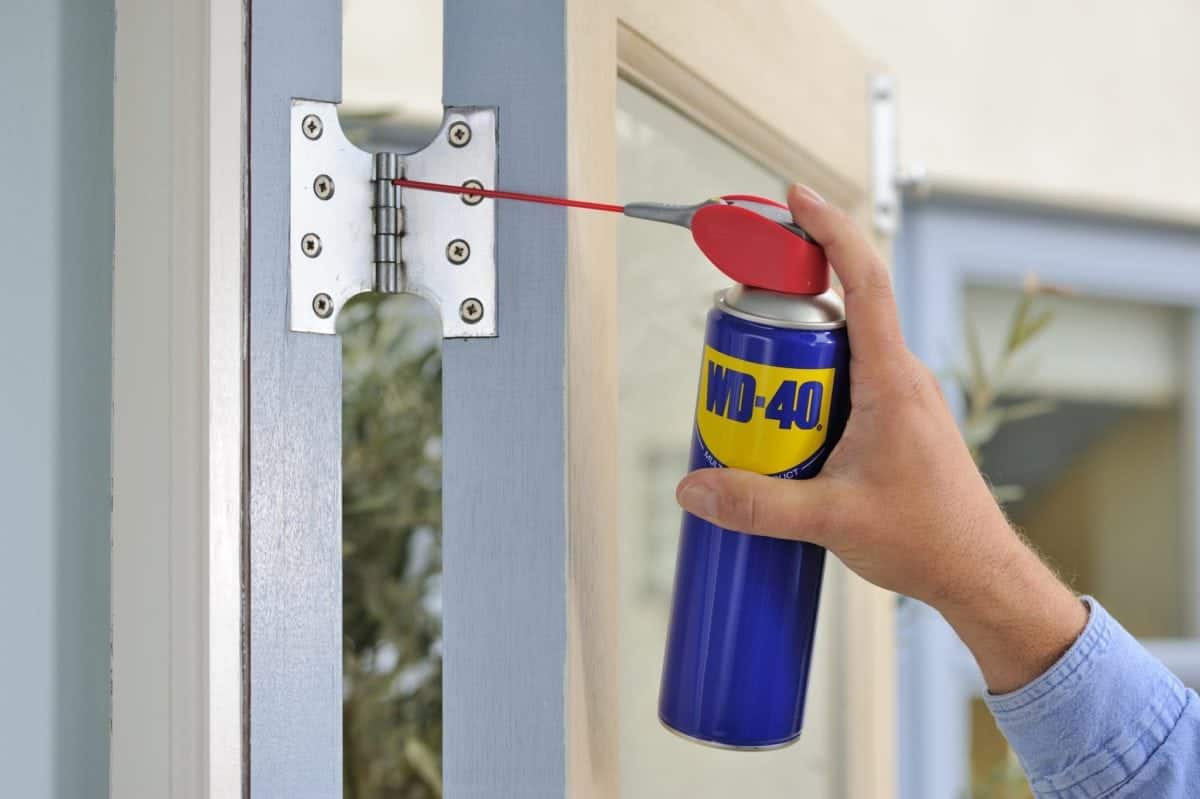
Lubricating the Door Hinges and Latch
Lubricating the door hinges and latch is an essential step in fixing a sticky door. Over time, the hinges and latch can become dry, rusty, or caked with dirt and debris, leading to friction and difficulty in opening or closing the door. Follow these steps to effectively lubricate the door hinges and latch:
- Gather the Lubricant: Choose a suitable lubricant for your specific door hinges and latch. Popular options include WD-40, silicone spray, or graphite powder.
- Clean the Hinges and Latch: Use a cloth or brush to remove any dirt, grime, or rust from the hinges and latch. Make sure to clean both the hinge plates and the pins.
- Apply the Lubricant: Spray or apply a small amount of lubricant directly onto the hinge pins, hinge plates, and latch mechanism. Be sure to cover all moving parts and areas that may be causing friction.
- Move the Door: Open and close the door multiple times to allow the lubricant to spread evenly. This will help distribute the lubricant and loosen any tight or sticky areas.
- Wipe off Excess Lubricant: Use a clean cloth to wipe away any excess lubricant from the hinges and latch. This will help prevent an accumulation of dirt and ensure a cleaner appearance.
- Repeat if Necessary: If the door still shows signs of stickiness, repeat the lubrication process. Sometimes, multiple applications may be required, especially for heavily used or older doors.
Lubricating the door hinges and latch reduces friction, allowing the door to move smoothly and effortlessly. It helps eliminate the rubbing and sticking that can occur when these components are dry or dirty. Regular maintenance and lubrication can also prevent future sticking issues and prolong the lifespan of the door hardware.
Remember, different lubricants may work better for specific types of doors or conditions. Consult the manufacturer’s instructions or seek professional advice if you’re unsure about the best lubricant to use.
With the door hinges and latch effectively lubricated, continue to the next steps to address any remaining factors that may be contributing to the stickiness.
Sanding the Door’s Edges
If the door is sticking due to areas where it rubs against the frame, sanding the door’s edges can help create a smoother surface and alleviate the friction. Here’s how you can sand the door’s edges to fix the stickiness:
- Identify the Problematic Areas: Examine the door closely to identify the specific areas where it is sticking or rubbing against the frame. These are the areas that require sanding.
- Remove the Door: To make the sanding process easier, you may need to remove the door from its hinges. Carefully lift the door off the hinges by tapping out the hinge pins or by unscrewing the hinges.
- Choose the Sanding Tool: Depending on the severity and location of the sticking, you can use a sanding block or sandpaper. A sanding block provides better control and even sanding, while sandpaper can be folded or wrapped around a stiff object.
- Start Sanding: Holding the sanding block or sandpaper, gently sand the areas where the door is sticking against the frame. Use smooth, even strokes with light pressure. Avoid removing too much material, as it may lead to gaps or misalignment.
- Check Frequently: Stop sanding periodically to check your progress. Test the door by fitting it back into the frame and opening and closing it. Continue sanding until the sticking or rubbing is minimized.
- Smooth the Edges: Once the sticking is resolved, switch to a fine-grit sandpaper to smooth the sanded edges. This will ensure a seamless transition between the sanded areas and the rest of the door.
- Remove Dust: After sanding, use a soft brush or cloth to remove any sanding dust from both the door and the frame. This will prevent the dust from interfering with the door’s smooth operation.
- Reinstall the Door: Once the sanding is complete and the door is tested for smooth operation, you can reattach the door by inserting the hinge pins or reinstalling the hinges.
Sanding the door’s edges helps eliminate excess material and provides a better fit within the frame. By smoothing the rough areas and reducing friction, you can ensure the door glides smoothly when opened or closed.
Remember to take your time and sand carefully, as removing too much material can adversely affect the door’s alignment. It’s also a good idea to wear protective goggles and a mask to prevent dust inhalation during the sanding process.
With the door’s edges properly sanded, move on to the next steps to address any remaining sticking issues and complete the door repair process.
Read more: How To Store Sticky Rice
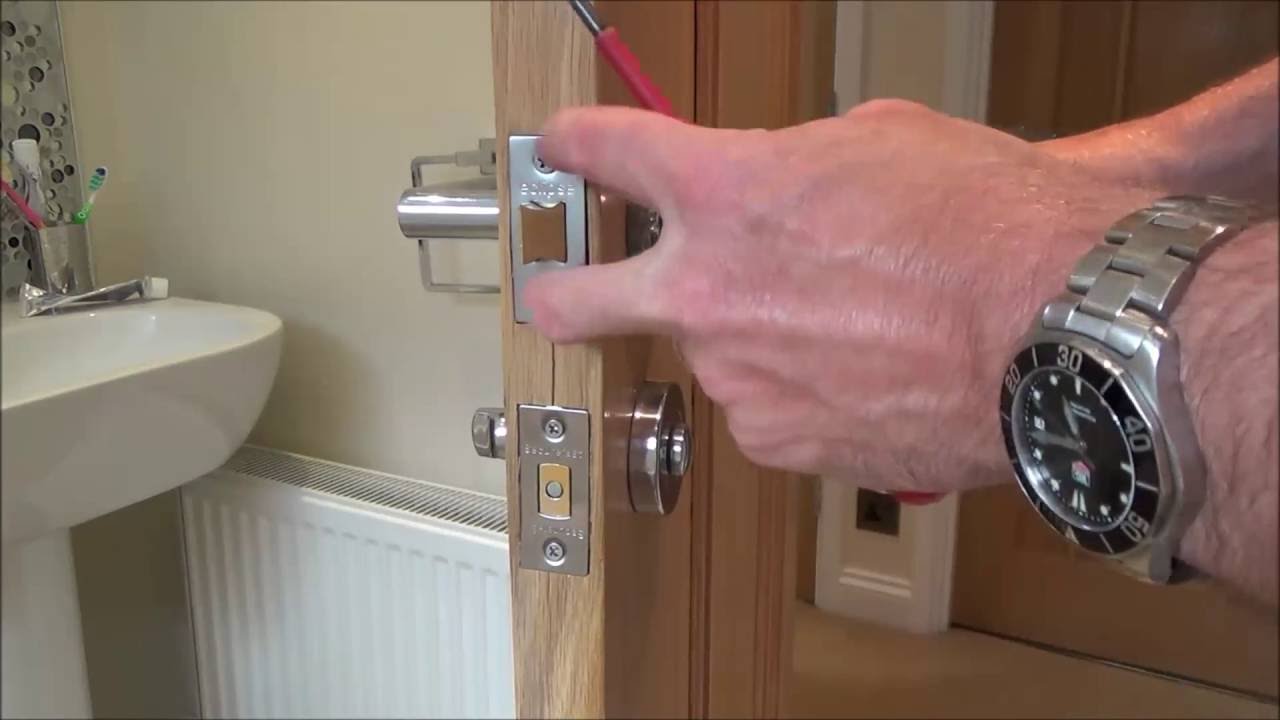
Adjusting the Strike Plate
If the door is still sticking after tightening the hinges and sanding the edges, the strike plate may need adjustment. The strike plate is the metal plate attached to the door frame in which the door latch engages. Here’s how you can adjust the strike plate to help resolve the stickiness:
- Inspect the Alignment: Close the door and observe the alignment of the latch and strike plate. Notice if the latch bolt aligns properly with the hole in the strike plate or if it is misaligned, causing the door to stick.
- Loosen the Screws: With the door closed, loosen the screws that secure the strike plate to the door frame. Do not remove them completely; just loosen them enough to allow for adjustment.
- Shift the Strike Plate: Using your hand or a screwdriver, shift the strike plate slightly in the direction needed to align it with the latch bolt. This may involve moving it up, down, or sideways, depending on the misalignment.
- Tighten the Screws: Once the strike plate is properly aligned with the latch bolt, tighten the screws securely. Ensure that the strike plate is firmly fixed to the door frame without any wobbling or movement.
- Test the Door: Open and close the door to check if the stickiness is resolved. If the door still sticks, you may need to loosen the screws again and make further adjustments until the proper alignment is achieved.
- Check Latch Security: While ensuring the proper alignment, make sure the latch bolt engages smoothly and securely into the strike plate without excessive force or resistance.
Adjusting the strike plate allows the latch bolt to fit securely and smoothly into the strike plate’s hole, reducing friction and stickiness. It is important to be patient and make small adjustments gradually until the desired alignment is achieved.
In some cases, the strike plate may be worn or too damaged to be adjusted effectively. If this is the case, it may be necessary to replace the strike plate with a new one to ensure a proper fit.
Once the strike plate is adjusted or replaced, test the door’s functionality by opening and closing it multiple times to ensure it glides smoothly and no longer sticks. If the stickiness persists, you may need to consider other potential causes or seek professional assistance.
With the strike plate adjusted, move on to the next steps to address any remaining sticking issues and complete the repair process.
Repairing or Replacing Warped or Damaged Parts
If your door is still sticking after following the previous steps, it’s possible that there are warped or damaged parts that need to be repaired or replaced. Here’s what you can do:
- Inspect the Damaged Area: Examine the door closely to identify any warped or damaged parts. Look for cracks, splintering, or areas where the wood is significantly misshapen.
- Assess the Severity: Determine the extent of the damage. If it’s a minor issue, you may be able to repair it yourself. However, for more severe damage, you may need to consider professional help or replacing the affected parts.
- Repairing Minor Damage: If the damage is minor, you can use wood putty or filler to repair cracks or dents. Apply the putty or filler according to the product instructions, smooth it out, and allow it to dry. Once dry, sand the repaired area to achieve a seamless finish.
- Replacing Damaged Parts: In cases where the damage is extensive or irreparable, you may need to replace the affected parts. This can include replacing a warped door panel, hinge, or other hardware components. Measure the damaged parts and purchase the appropriate replacements from a hardware store.
- Installation: Remove the damaged parts by unscrewing them or carefully sawing them off if necessary. Install the new parts following the manufacturer’s instructions. Use proper tools and techniques to ensure a secure and accurate fit.
- Test the Door: After repairing or replacing the warped or damaged parts, test the door by opening and closing it multiple times. Check for any remaining stickiness or rubbing against the frame.
Repairing or replacing warped or damaged parts may require some additional time and effort, but it can be crucial for resolving persistent stickiness. By addressing the root cause of the issue, you can ensure that the door functions properly and smoothly.
If you’re unsure about your repair skills or the extent of the damage, it’s advisable to consult a professional carpenter or door repair specialist. They can provide expert guidance, recommend appropriate solutions, and ensure a long-lasting fix.
Now that you’ve repaired or replaced any warped or damaged parts, you’re almost done with the door repair process. Proceed to the final step to fine-tune the door and complete the repairs.
Testing and Fine-Tuning the Door
After addressing the various causes of stickiness and performing the necessary repairs and adjustments, the final step is to test and fine-tune the door to ensure its smooth operation. Follow these steps to fine-tune the door:
- Close and Open the Door: Close the door and open it to check for any remaining sticking or rubbing against the frame. Pay attention to any areas that may require further adjustment.
- Inspect for Clearance: Observe the door as it opens and closes. Ensure that it has enough clearance from the frame and floor to move freely without any obstructions or interference.
- Make Final Adjustments: If the door still sticks or rubs in certain areas, use your observations to make further adjustments. This may include minor sanding, repositioning of hinges, or modifying the strike plate to achieve an optimal fit.
- Check the Latch: Confirm that the door’s latch engages smoothly and securely into the strike plate. The latch should fully extend and retract without resistance or excessive force.
- Test the Door Swing: Check the door swing in both directions to ensure that it opens and closes smoothly and without any resistance. The door should not bind or drag against the floor or frame.
- Repeat the Test: Open and close the door several times to make sure that the sticking issue has been adequately resolved. Take note of any further adjustments that may be necessary.
- Final Inspection: Once you are satisfied with the door’s operation, inspect the overall appearance and functionality. Ensure that the door is aligned properly within the frame and that any repaired or replaced parts blend seamlessly.
By thoroughly testing and fine-tuning the door, you can ensure that it opens and closes smoothly without any sticking or rubbing. This final step helps confirm the success of your repair efforts and provides a functional and visually appealing result.
Remember, periodic maintenance and care are essential to keep the door operating smoothly in the long term. Regularly inspect the hinges, lubricate the moving parts, and address any minor issues promptly to prevent them from escalating into major problems.
Congratulations! You have successfully fixed your sticky door, restoring its functionality and improving your daily living experience.
Conclusion
Dealing with a sticky door can be a frustrating experience, but with the right knowledge and techniques, you can fix the problem and restore smooth functionality. By following the step-by-step instructions in this guide, you have learned how to address various causes of stickiness and perform necessary repairs and adjustments.
From inspecting the door and frame to identifying the causes of stickiness, tightening loose hinges, lubricating the door hardware, sanding the door’s edges, adjusting the strike plate, repairing or replacing warped or damaged parts, and finally testing and fine-tuning the door, you have taken the necessary steps to address the stickiness and improve the door’s performance.
Remember that each door may have unique characteristics, and the specific issues and solutions may vary. It’s essential to adapt the techniques to your specific situation and exercise caution throughout the repair process.
Regular maintenance and care are key to prevent future stickiness and ensure the long-lasting functionality of your doors. Keep hinges properly lubricated, periodically inspect for damage or misalignment, and address any minor issues promptly before they escalate.
By investing time and effort in fixing your sticky door, you have not only improved its functionality but also enhanced the overall aesthetics and convenience of your living space. No more struggling or frustration when opening or closing your doors!
If you encounter any challenges beyond your expertise or if the stickiness persists despite your efforts, don’t hesitate to seek professional assistance from a carpenter or door repair specialist. They have the knowledge and experience to diagnose and resolve more complex door issues.
With your newly acquired knowledge and the comprehensive steps outlined in this guide, you are well-equipped to tackle sticky doors and enjoy the smooth operation of your doors once again. Congratulations on a job well done!
Frequently Asked Questions about How To Fix A Sticky Door
Was this page helpful?
At Storables.com, we guarantee accurate and reliable information. Our content, validated by Expert Board Contributors, is crafted following stringent Editorial Policies. We're committed to providing you with well-researched, expert-backed insights for all your informational needs.


0 thoughts on “How To Fix A Sticky Door”