Home>Home Maintenance>How To Fix My Air Conditioning
Home Maintenance
How To Fix My Air Conditioning
Modified: October 29, 2024
Learn how to fix your air conditioning with our helpful home maintenance tips. Keep your house cool and comfortable all year round.
(Many of the links in this article redirect to a specific reviewed product. Your purchase of these products through affiliate links helps to generate commission for Storables.com, at no extra cost. Learn more)
Introduction
Welcome to the world of home maintenance! In this article, we will be discussing a common issue that many homeowners face: air conditioning problems. Whether you are dealing with a malfunctioning AC unit or simply want to learn how to fix it yourself, you have come to the right place.
Having a well-functioning air conditioning system is essential, especially during the hot summer months. It not only keeps you cool and comfortable but also helps maintain proper indoor air quality. However, like any other machine, your air conditioner may encounter some issues from time to time.
Before you panic and call a professional, it’s important to understand that not all air conditioning problems require a technician’s intervention. In fact, many AC issues can be resolved by following a few basic troubleshooting steps. By learning how to fix your air conditioning yourself, you can save both time and money.
In this article, we will guide you through the process of diagnosing and solving common air conditioning problems. We will provide you with simple and practical solutions that will have your AC unit up and running again in no time.
It’s important to note that while we will cover some troubleshooting steps that are safe for homeowners to handle, there are certain tasks that should be left to professional technicians. We will discuss these situations and provide guidance on when it is best to call for professional help.
So, if you are ready to tackle your air conditioning problems head-on and become a DIY home maintenance expert, let’s dive right into the world of air conditioner troubleshooting!
Key Takeaways:
- Regularly cleaning or replacing air filters, checking thermostat settings, and inspecting the condenser unit can help troubleshoot common air conditioning problems and improve system efficiency.
- Professional help is necessary for refrigerant leaks, electrical issues, unusual noises, insufficient cooling, constant cycling, and advanced repairs or replacements. Regular maintenance and tune-ups by a professional technician are also recommended for optimal AC performance.
Read more: How To Fix Car Air Conditioning
Understanding the Problem
When it comes to fixing your air conditioning, the first step is to understand the problem at hand. By identifying the underlying issue, you can effectively troubleshoot and find the most appropriate solution.
One common problem with air conditioning units is that they fail to cool the room effectively. This could be due to various factors, such as a faulty compressor, refrigerant leaks, or blocked airflow. It’s important to narrow down the cause of the issue before attempting any repairs.
Another problem that homeowners often encounter is strange noises coming from the AC unit. These noises can range from rattling and buzzing to squealing and grinding. The source of the noise could be a loose component, worn-out fan belt, or a malfunctioning motor. Pinpointing the exact cause will help you address the issue correctly.
Leakage is another common problem that affects air conditioning units. If you notice water pooling around your indoor unit or if there is moisture around the vents, it’s likely that your AC is leaking. This could be due to a clogged condensate drain, improper installation, or a refrigerant leak.
In some cases, the air conditioning unit may not turn on at all. This can be frustrating, especially during hot summer days. The problem might lie in a faulty thermostat, electrical issues, or a malfunctioning compressor. Understanding why your AC isn’t turning on will guide you in finding a solution.
Lastly, reduced airflow is another common issue homeowners face. If you find that the air coming out of your vents is weak or not as cold as it should be, there could be a blockage in your air filters or ductwork. Additionally, a malfunctioning blower motor or a dirty condenser coil can also restrict airflow.
By understanding the specific problem you are facing, you can target your troubleshooting efforts and address the issue more effectively. In the next section, we will walk you through some basic troubleshooting steps to help you diagnose and fix your air conditioning problem.
Basic Troubleshooting Steps
Before you call a professional or start disassembling your air conditioning unit, it’s crucial to follow some basic troubleshooting steps. These initial steps can often resolve minor issues and save you time and money.
Step 1: Check the Power Supply
The first thing you should check is whether your AC unit is receiving power. Make sure the power switch on the unit, as well as the circuit breaker and fuse box, are all in the ‘on’ position. If there is still no power, you may need to call an electrician to fix any electrical issues.
Step 2: Clean or Replace Air Filters
Clogged or dirty air filters can restrict airflow and reduce the efficiency of your air conditioning unit. Locate the air filters (usually found behind a panel or grille on the indoor unit) and check their condition. If they are dirty or clogged, clean them by gently vacuuming or rinse them with water. If the filters are old or damaged, replace them with new ones.
Step 3: Check the Thermostat Settings
Ensure that the thermostat is set to the desired temperature and mode (cooling, heating, or fan). It’s worth checking the batteries of your thermostat and replacing them if needed. If the thermostat is programmable, double-check your settings to ensure they align with your comfort needs.
Step 4: Inspect the Condenser Unit
Head outside and inspect the condenser unit, located typically on the side or back of your house. Ensure that it is free from debris, such as leaves, branches, and dirt. Remove any obstructions that may be blocking airflow to the unit. Additionally, check if the fan and condenser coils are clean and free from dirt accumulation.
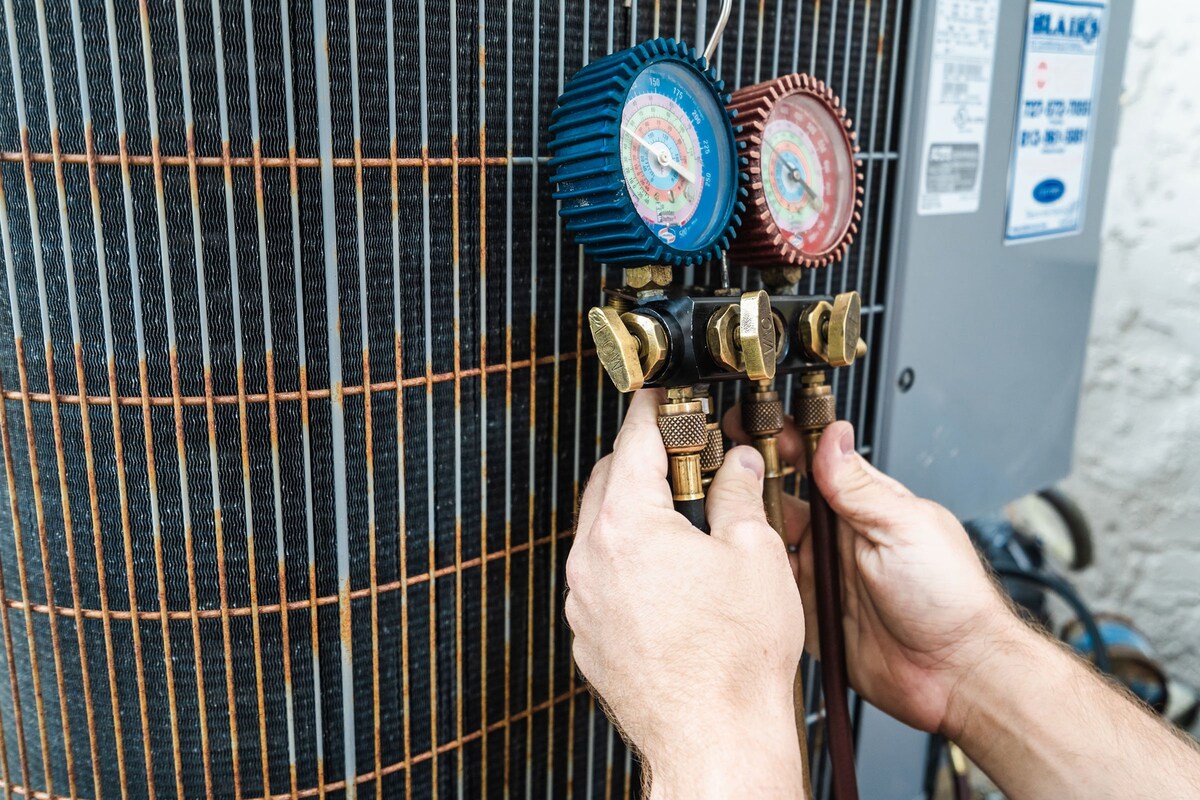
Step 5: Check for Refrigerant Leaks
If your air conditioner is not cooling properly, there may be a refrigerant leak. Look for any signs of oil or refrigerant stains around the unit or on the refrigerant lines. If you suspect a leak, it’s best to contact a professional technician who can properly diagnose and repair the issue.
Step 6: Clear the Condensate Drain
A clogged condensate drain can cause water leakage and affect the performance of your air conditioning unit. Locate the condensate drain pipe, usually connected to the indoor unit, and clear any blockages by using a shop vacuum or a long, flexible brush. It’s essential to perform this task carefully to avoid damaging the drainpipe.
Step 7: Clean the Outdoor Unit
In addition to clearing debris around the condenser unit, it’s important to clean the unit itself. Gently hose down the exterior of the unit to remove dirt and dust accumulation. Avoid using high-pressure water, as it can damage delicate components.
By following these basic troubleshooting steps, you can often resolve common air conditioning problems. However, if the issue persists or if you are uncomfortable performing these tasks, it’s advisable to seek professional help. In the next section, we will discuss when and why you should call a technician to fix your air conditioning unit.
Checking the Power Supply
One of the first steps you should take when troubleshooting your air conditioning unit is to check the power supply. A malfunctioning AC unit may simply be a result of a power issue, and identifying and resolving this problem can save you time and money.
Here’s what you should do:
Step 1: Check the Power Switch
First, locate the power switch on your AC unit, usually near the outdoor condenser or on the wall next to the indoor unit. Ensure that the power switch is in the ‘on’ position. It’s not uncommon for the power switch to accidentally get turned off, so double-checking this is a quick and easy first step.
Step 2: Inspect the Circuit Breaker and Fuse Box
If the power switch is on but your AC unit still doesn’t have power, you’ll want to examine the circuit breaker and fuse box. Locate the breaker panel and check if the circuit breaker specific to your AC unit has tripped. If it has, switch it back on.
If your home has a fuse box instead of a circuit breaker, check to see if any fuses related to the air conditioning system have blown. If you find a blown fuse, replace it with a new one of the same amperage rating.
Step 3: Consider Power Surges
In the event of a power surge, your air conditioner’s safety feature may have been triggered, cutting off power to the unit. To reset this safety feature, turn off the power to the AC unit for a few minutes by switching off the circuit breaker or unplugging it. After a short period, switch the power back on.
If your air conditioner still doesn’t have power after following these steps, it’s advisable to contact a professional electrician to inspect your electrical system. They will be able to identify any underlying issues and provide the necessary solutions for restoring power to your AC unit.
Remember, tampering with electrical components without proper knowledge can be dangerous. If you are unsure about handling electrical tasks, it’s always best to seek help from a licensed professional.
Checking the power supply is an essential first step in troubleshooting your air conditioning unit. By ensuring that your AC unit has a proper power connection, you can eliminate electrical issues as the cause of any problems. In the next steps, we will explore other aspects of your AC unit that may lead to malfunctioning and how to address them.
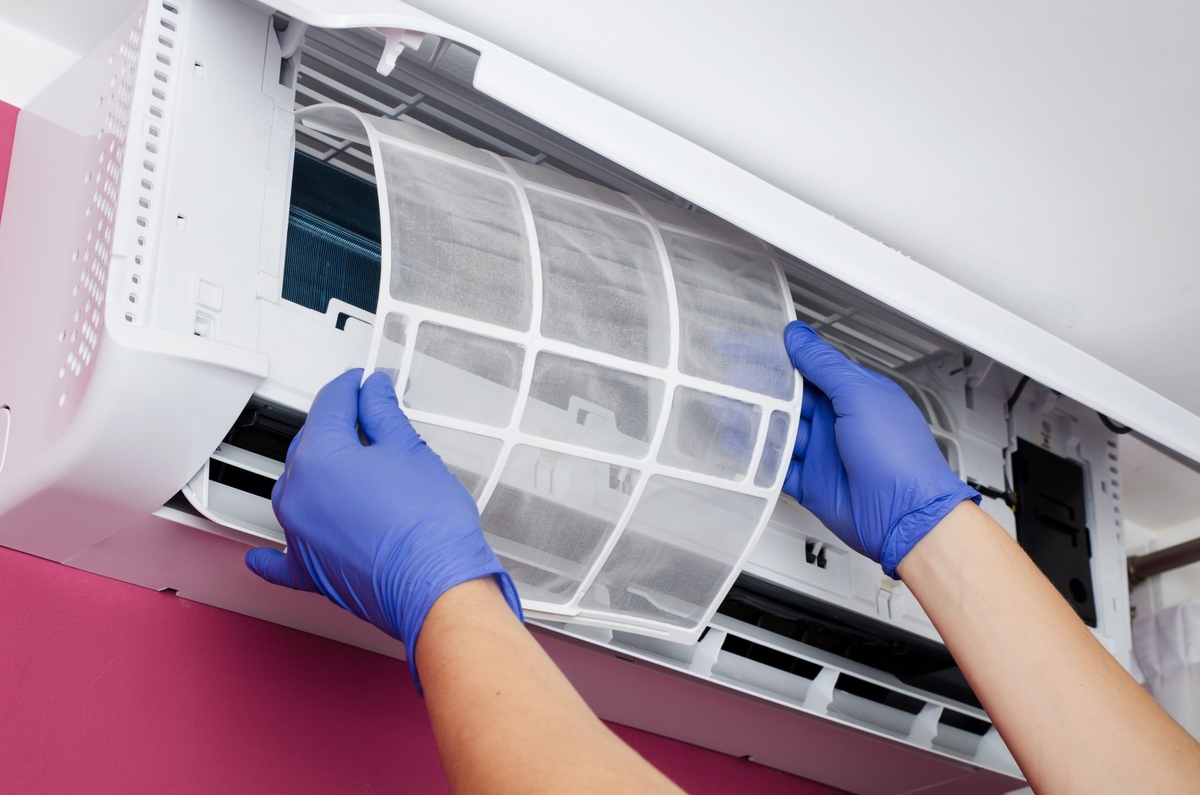
Cleaning the Air Filters
Cleaning the air filters of your air conditioning unit is a crucial maintenance task that can greatly improve its performance and efficiency. Over time, air filters can accumulate dirt, dust, and other debris, hindering proper airflow and reducing the effectiveness of your AC unit. By regularly cleaning and maintaining the air filters, you can ensure that your air conditioner operates at its optimal capacity.
Here are the steps to clean your air filters:
Step 1: Locate the Air Filters
The air filters are usually located behind a panel or grille on the indoor unit of your air conditioner. Refer to your owner’s manual or consult the manufacturer’s website for exact instructions on locating the filters for your specific AC unit.
Step 2: Remove the Air Filters
Once you have located the air filters, carefully remove them from their housing. Depending on the type of filters in your unit, this may involve sliding them out, unfastening clips, or releasing a latch.
Step 3: Inspect the Filters
Take a close look at the filters and assess their condition. Look for signs of dirt, dust, debris, or discoloration. If the filters appear dirty or clogged, they need to be cleaned. If the filters are damaged or torn, they should be replaced with new ones.
Step 4: Clean the Filters
If the filters are reusable, cleaning them is a straightforward process. You can either vacuum the filters using a soft brush attachment or rinse them with water. If rinsing, be sure to follow the manufacturer’s instructions and allow the filters to dry completely before reinstallation.
Note: Some air filters cannot be cleaned and must be replaced. Refer to your owner’s manual or manufacturer’s instructions for guidance on whether your filters are reusable or disposable.
Step 5: Reinstall the Filters
Once the filters are dry (if rinsed) or you have replaced them with new ones (if necessary), carefully reinstall them into their original position. Ensure that the filters are properly aligned and securely in place.
Regularly cleaning or replacing your air filters is recommended every 1 to 3 months, depending on factors such as your area’s air quality and the frequency of AC usage. By keeping your filters clean, you prevent debris from obstructing airflow, which can lead to issues such as reduced cooling capacity and increased energy consumption.
Additionally, clean air filters help maintain better indoor air quality by reducing the circulation of dust, pollen, and other allergens. This is especially important for individuals with respiratory conditions or allergies.
Now that you have successfully cleaned your air filters, you can move on to the next troubleshooting steps to ensure your air conditioning unit is in optimal condition.
Read more: How To Clean My Car Air Conditioning
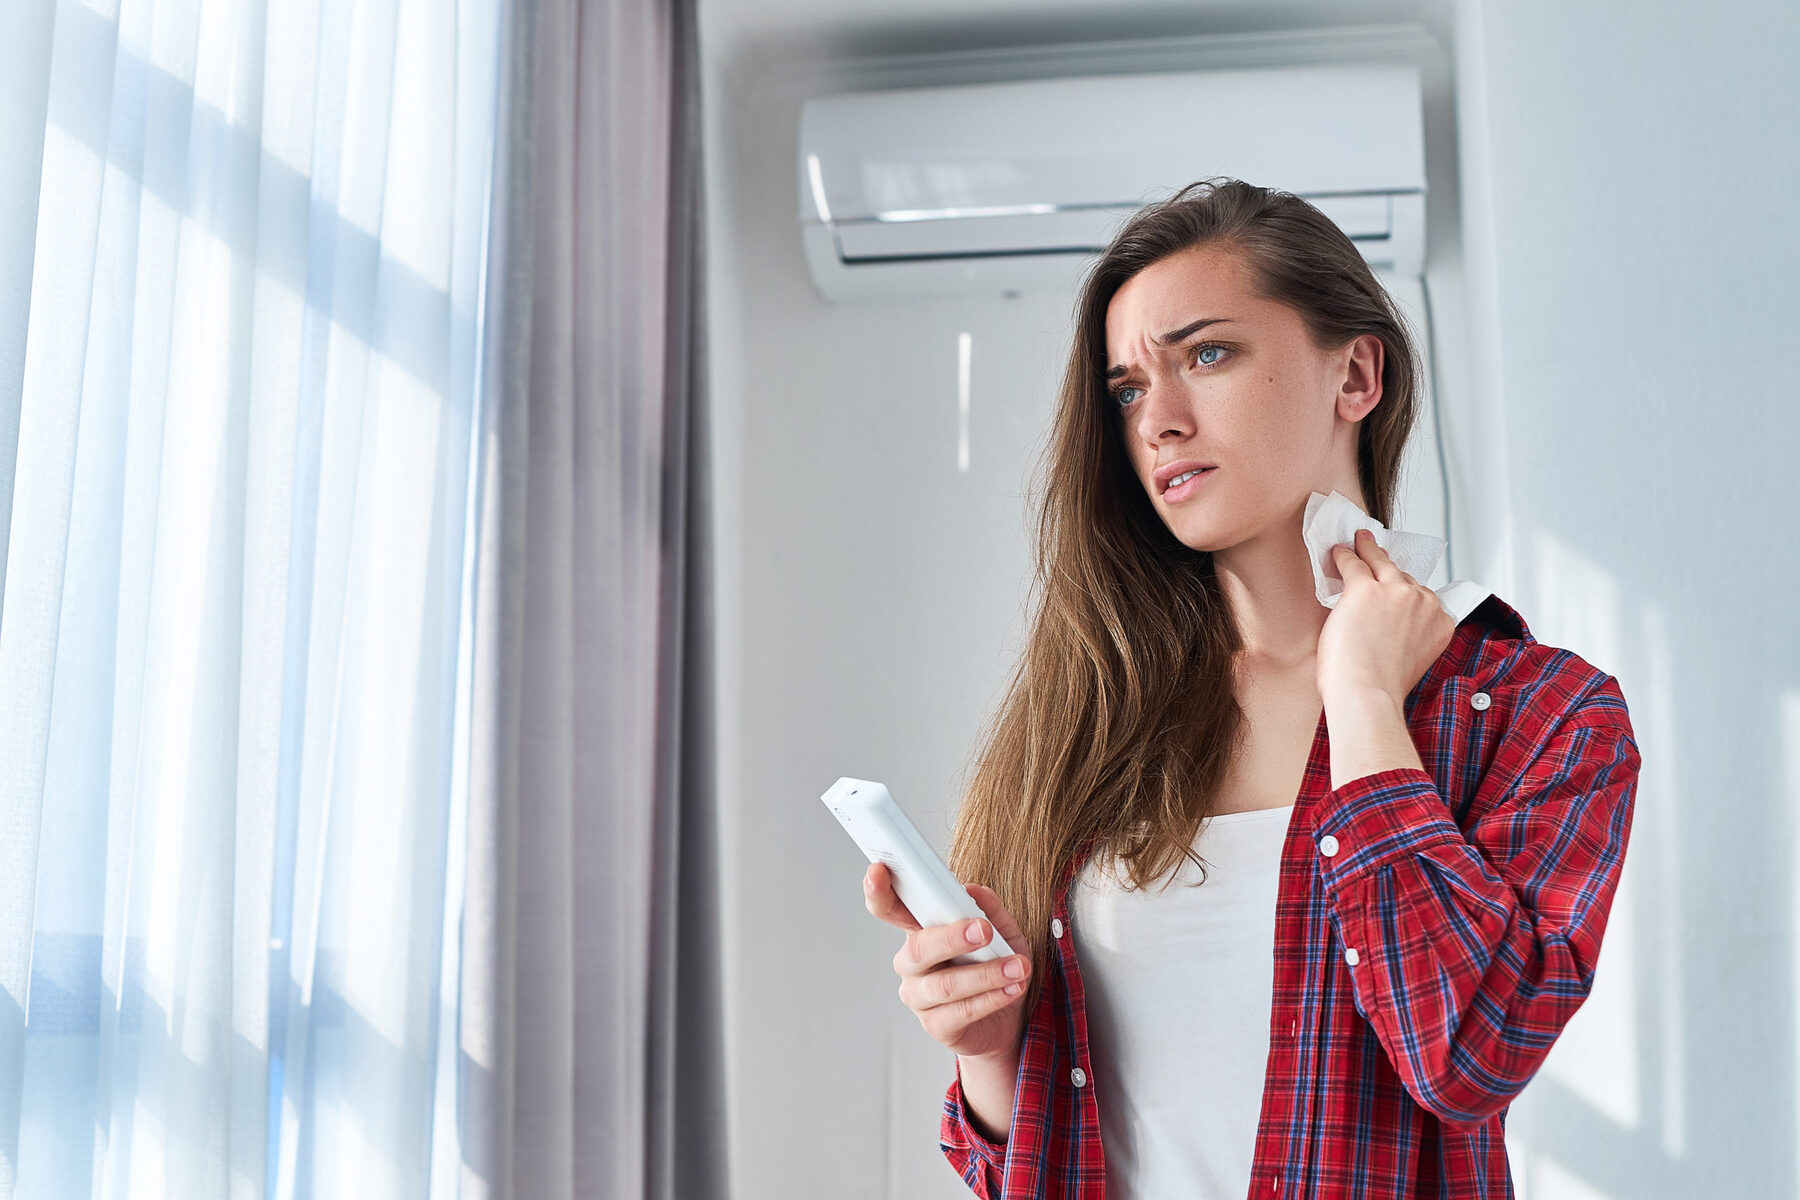
Checking the Thermostat Settings
The thermostat plays a crucial role in regulating the temperature and controlling the operation of your air conditioning unit. If your AC isn’t cooling properly or not turning on at all, it’s important to check the thermostat settings to ensure they are configured correctly.
Here’s how to check the thermostat settings:
Step 1: Set the Desired Temperature
Start by setting the thermostat to the desired temperature. Make sure the temperature setting is appropriate for your comfort needs. For optimal energy efficiency, it’s generally recommended to set the thermostat to around 78 degrees Fahrenheit during the summer months.
Step 2: Check the Mode
Ensure that the thermostat is set to the cooling mode. Some thermostats have multiple modes, including heating, cooling, and fan-only. Select the cooling mode to allow your air conditioning unit to provide cold air.
Step 3: Verify the Fan Setting
Check the fan setting on your thermostat. It can typically be set to “Auto” or “On.” When set to “Auto,” the fan will only run when the AC is actively cooling the air. When set to “On,” the fan will run continuously, even when the AC isn’t actively cooling. For most situations, setting the fan to “Auto” is recommended for more energy-efficient operation.
Step 4: Check the Batteries
If your thermostat operates on batteries, check if they need to be replaced. Low batteries can cause the thermostat to malfunction or display inaccurate temperature readings. Replace the batteries with fresh ones and ensure they are correctly inserted.
Step 5: Calibrate the Thermostat
If you suspect that the thermostat is not displaying the correct temperature or is not accurately controlling your AC unit, you may need to recalibrate it. Refer to the manufacturer’s instructions for your specific model to learn how to calibrate the thermostat. Some thermostats have a calibration function to ensure accurate temperature readings.
Step 6: Reset the Thermostat
If you’ve made any changes to the thermostat settings and want to ensure they take effect, you can perform a thermostat reset. This involves turning off the power to the thermostat by flipping the appropriate circuit breaker or removing the batteries (if applicable), waiting for a minute or two, and then restoring the power. The thermostat should restart and apply the new settings.
By checking the thermostat settings and ensuring they are correctly configured, you can eliminate any potential issues related to incorrect temperature settings or mode selection. However, if your AC unit still isn’t functioning properly after checking the thermostat, it may be necessary to move on to further troubleshooting steps or seek professional assistance.
In the next sections, we will explore additional aspects of your air conditioning unit that may require attention and how to address them.
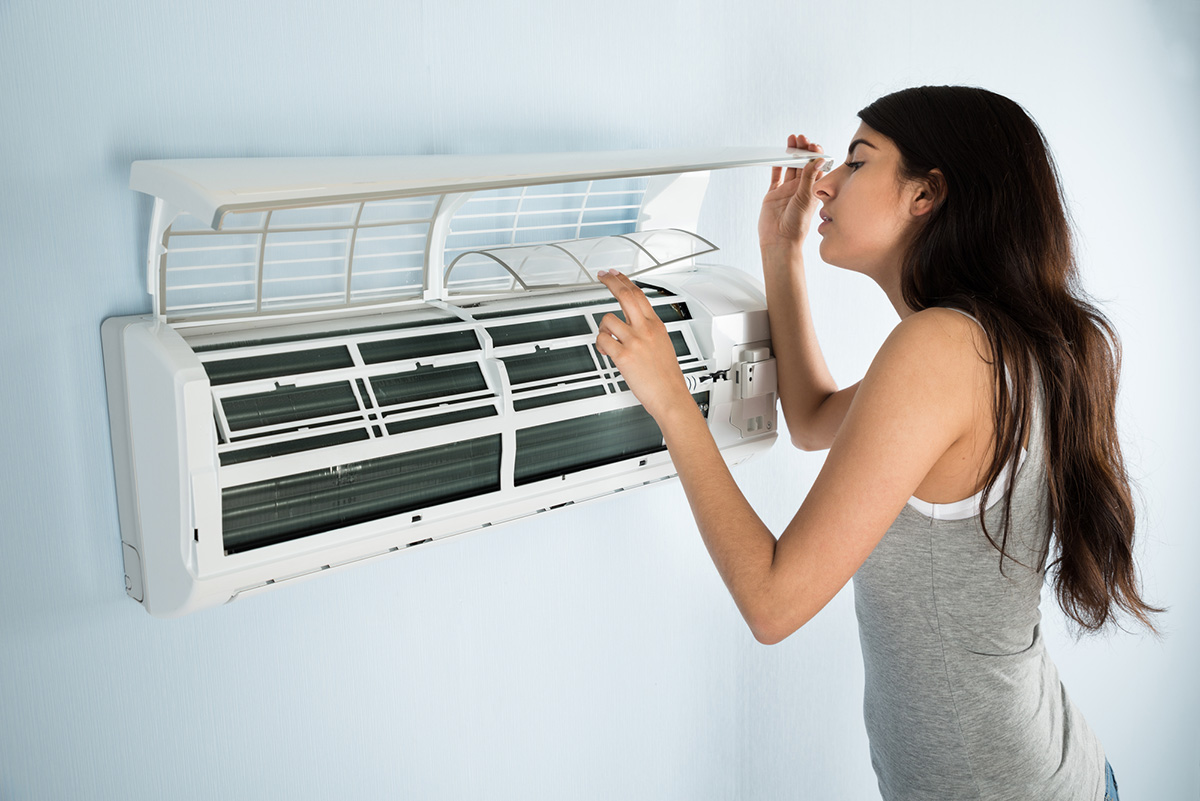
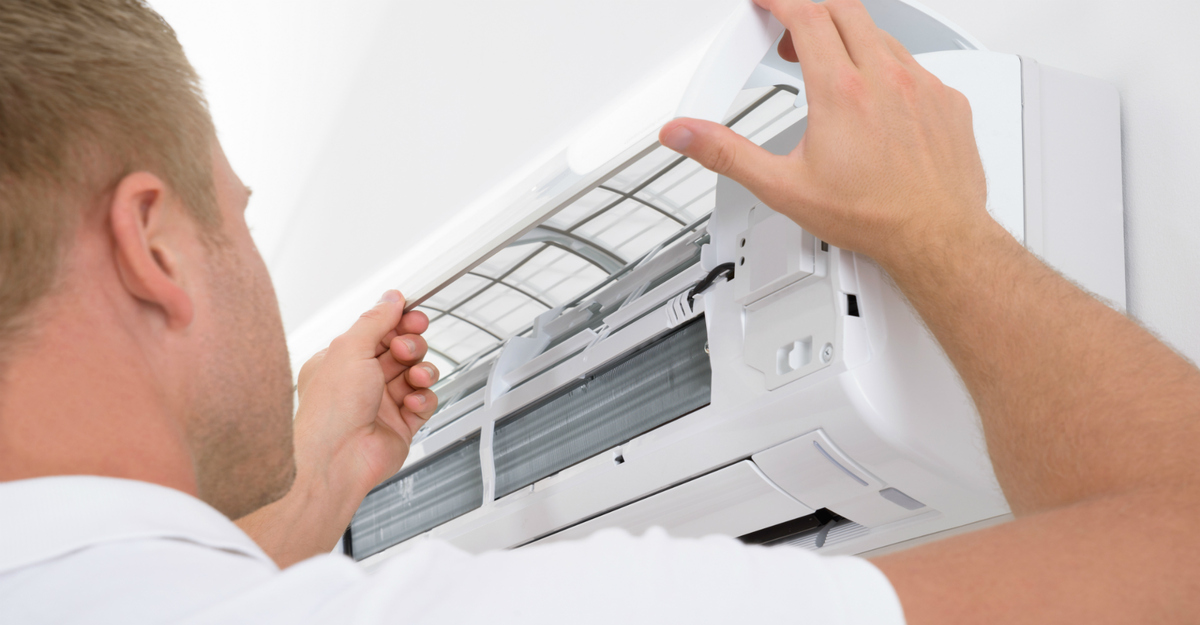
Check the air filters regularly and replace them if they are dirty. Clogged filters can restrict airflow and reduce the efficiency of your air conditioning system.
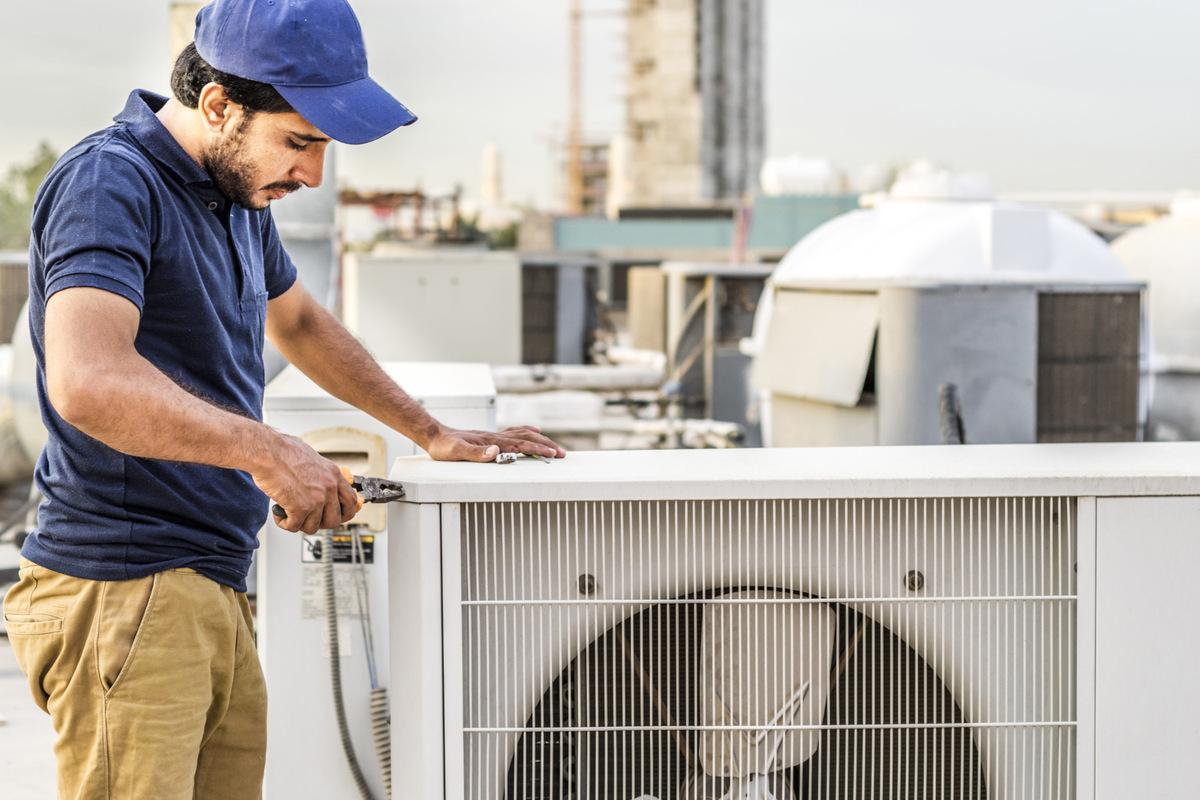
Inspecting the Condenser Unit
The condenser unit is a vital component of your air conditioning system, responsible for releasing heat from inside your home to the outside environment. Inspecting the condenser unit regularly can help identify any issues that may be affecting the performance of your AC. By taking the time to inspect and maintain the condenser unit, you can ensure that it functions efficiently and effectively.
Follow these steps to inspect the condenser unit:
Step 1: Turn Off the Power
Prior to inspecting the condenser unit, it’s important to turn off the power for safety reasons. Locate the electrical disconnect switch near the unit and flip it to the “off” position. Alternatively, you can turn off the circuit breaker dedicated to the condenser unit at the main electrical panel.
Step 2: Remove Debris
Clear away any debris that may have accumulated around the condenser unit. This includes leaves, grass, dirt, and other forms of debris. Use a brush or broom to gently sweep away the debris, being careful not to damage any delicate components of the unit.
Step 3: Inspect the Fins
Examine the aluminum fins on the condenser unit carefully. These fins are responsible for dissipating heat and can easily become bent or damaged. If you notice any bent fins, use a fin comb or a small, flathead screwdriver to carefully straighten them. Be gentle to avoid causing more damage.
Step 4: Clean the Fins
If the fins are dirty or covered in grime, it’s important to clean them for optimal performance. You can do this by using a soft brush or a vacuum cleaner with a brush attachment. Gently brush or vacuum away any dirt and debris that has accumulated on the fins. Avoid using high-pressure water sprays, as they can damage the fins.
Step 5: Check the Fan Blades
Inspect the fan blades on the condenser unit for any signs of damage or excessive wear. Look for cracks, chips, or loose blades. If you notice any issues, it’s best to contact a professional technician for further assessment and repair.
Step 6: Clear Obstructions
Ensure that there are no obstructions blocking the movement of the fan blades. Remove any leaves, twigs, or other debris that may have gotten stuck between the blades or around the base of the unit. Obstructions can interfere with the proper functioning of the condenser fan and affect the overall performance of the AC unit.
Step 7: Check the Level
It’s important to ensure that the condenser unit is level. Use a level tool or a smartphone app to check the levelness of the unit. If it is not level, you can place shims under the unit to achieve proper alignment. A level condenser unit ensures optimal performance and extends the lifespan of the air conditioning system.
Inspecting the condenser unit is an essential part of maintaining your air conditioning system. By keeping the condenser unit clean and free from obstructions, you can promote better airflow, enhance energy efficiency, and prolong the lifespan of your AC unit.
If you notice any major issues or are unsure about the inspection process, it is recommended to consult a professional technician who can provide expert guidance and assistance.
In the next section, we will address another important aspect of air conditioning maintenance: checking for refrigerant leaks.
Checking for Refrigerant Leaks
Refrigerant is an essential component of your air conditioning system. It absorbs heat from inside your home and releases it outside, allowing for efficient cooling. However, over time, refrigerant leaks may occur, resulting in reduced cooling performance and increased energy consumption. It’s important to check for refrigerant leaks regularly to ensure your AC system operates at its best.
Here’s how to check for refrigerant leaks:
Step 1: Look for Signs of Leakage
Inspect the area around your indoor and outdoor AC units for any visible signs of refrigerant leakage. Look for oil stains or greasy residues on the unit or on the refrigerant lines. These can be indications of refrigerant leaks. If you notice any signs of leakage, it’s important to take immediate action by contacting a professional technician.
Step 2: Listen for Hissing Sounds
Refrigerant leaks often produce a distinctive hissing sound. If you hear hissing sounds coming from your AC unit, it may be a sign of a refrigerant leak. It’s important to have a qualified technician diagnose and repair the leak promptly to prevent further damage to your AC system.
Step 3: Check for Icing or Frost
Icing or frost buildup on the refrigerant lines or evaporator coils can be a result of refrigerant leaks. If you notice excessive ice or frost on these components, it’s a strong indicator that refrigerant is leaking from the system. Turn off the AC unit and contact a professional technician to identify and fix the leak.
Step 4: Measure the Refrigerant Levels
Checking the refrigerant levels requires specialized tools and equipment. This is best done by a professional technician who can accurately measure the refrigerant levels and identify any discrepancies. If the refrigerant levels are found to be low, it indicates a potential leak that needs to be addressed.
Step 5: Addressing Refrigerant Leaks
If you suspect a refrigerant leak in your air conditioning system, it is important to contact a professional HVAC technician. Attempting to repair the leak yourself can be dangerous and may void your warranty. A qualified technician will have the necessary tools and expertise to accurately locate and repair the leak, as well as recharge the refrigerant to the correct levels.
Refrigerant leaks not only impact the cooling performance of your air conditioning system but also have environmental implications. Refrigerants can contribute to ozone depletion and climate change if released into the atmosphere. Therefore, it’s crucial to address refrigerant leaks promptly and responsibly.
Regular maintenance and inspections by a professional technician can help identify and prevent refrigerant leaks before they cause significant damage to your AC system. By taking proactive measures and addressing any issues promptly, you can ensure that your air conditioning system operates efficiently and effectively.
In the next section, we will discuss another vital aspect of air conditioning maintenance: clearing the condensate drain.
Clearing the Condensate Drain
The condensate drain is an essential component of your air conditioning system that removes the moisture produced during the cooling process. Over time, the condensate drain can become clogged with dirt, debris, and algae, leading to water leakage and potential damage to your AC unit. It’s important to regularly clear the condensate drain to ensure proper functioning and prevent any issues.
Here’s how to clear the condensate drain:
Step 1: Locate the Condensate Drain
The condensate drain is typically located near the indoor air handler unit or on the side of the air conditioner. Refer to your AC unit’s manual or consult a professional technician to locate the condensate drain for your specific system.
Step 2: Turn Off the Power
Before working on the condensate drain, it’s important to turn off the power to your air conditioning system. Locate the electrical disconnect switch near the unit or turn off the corresponding circuit breaker in your main electrical panel. Safety should always be a priority when working with electrical systems.
Step 3: Clear the Drain Opening
Inspect the condensate drain opening for any visible clogs or blockages. Use a small brush or pipe cleaner to gently remove any debris that may be obstructing the drain opening. Be careful not to push the obstruction further into the drain or damage the drainpipe.
Step 4: Flush the Drain with Water
Once you have cleared the drain opening, use a mixture of warm water and mild detergent to flush out any remaining debris from the drain. Pour the solution into the drain opening and allow it to flow through the drainpipe. This will help remove any accumulated dirt or algae growth.
Step 5: Use a Wet/Dry Vacuum
If the condensate drain is severely clogged and the water doesn’t drain properly, you can use a wet/dry vacuum to suck out the blockage. Attach the vacuum hose to the drain opening or use a specialized attachment if available. Apply suction to remove the clog, and repeat the process if necessary until the drain is clear.
Step 6: Repeat Regularly
To prevent future clogs, it’s important to repeat the above steps regularly as part of your air conditioning maintenance routine. Cleaning the condensate drain every 3 to 6 months is recommended, but may vary depending on factors such as local humidity levels and air quality.
By clearing the condensate drain regularly, you can prevent water leakage, reduce the risk of mold growth, and maintain the efficiency of your air conditioning system. However, if you encounter persistent clogs or have difficulty clearing the drain, it’s advisable to seek assistance from a professional technician.
In the next section, we will discuss another crucial maintenance task: cleaning the outdoor unit of your air conditioner.
Read more: Why Is My Air Conditioning Blowing Hot Air
Cleaning the Outdoor Unit
The outdoor unit of your air conditioning system, also known as the condenser unit, is exposed to the elements and can accumulate dirt, debris, and vegetation over time. Cleaning the outdoor unit regularly is essential for maintaining optimal performance and efficiency. By keeping the outdoor unit clean, you allow for better airflow and prevent potential issues that could affect the overall functioning of your AC system.
Here are the steps to clean the outdoor unit:
Step 1: Turn Off the Power
Before you start cleaning the outdoor unit, it’s crucial to turn off the power to your air conditioning system. Locate the electrical disconnect switch near the unit or switch off the corresponding circuit breaker in your main electrical panel. This ensures your safety while working on the unit.
Step 2: Remove Debris
Inspect the outdoor unit for any visible debris, such as leaves, grass, dirt, or twigs. Use a soft brush or gloved hands to gently remove the debris from the unit. Clear the area around the unit as well to prevent debris from getting sucked into the system during operation.
Step 3: Clean the Fins
The condenser fins on the outdoor unit can become dirty or clogged, hindering proper airflow. Use a garden hose with low to moderate pressure to spray water through the fins, starting from the top and working your way down. This will help dislodge dirt and debris trapped between the fins.
For more stubborn dirt or debris, you can use a fin comb or a soft brush to carefully clean between the fins. Be gentle to avoid bending or damaging the delicate fins. Avoid using high-pressure water jets, as they can damage the fins or push the dirt further into the unit.
Step 4: Trim Vegetation
Ensure there is adequate clearance around the outdoor unit by trimming any vegetation, bushes, or tall grass that may be encroaching on the unit. Maintain a clearance of at least two feet to allow for proper airflow and prevent the unit from becoming restricted or obstructed.
Step 5: Straighten Bent Fins
If you notice any bent fins during the cleaning process, use a fin comb or a small, flathead screwdriver to carefully straighten them. Gently align the fins with the edge of the unit, being cautious not to cause further damage. Straightening the fins improves airflow and enhances the overall efficiency of the condenser unit.
Step 6: Allow the Unit to Dry
After cleaning, allow the unit to dry completely before restoring power. This will help prevent any electrical issues that may arise from moisture entering the system. Once the outdoor unit is dry, you can turn on the power and resume normal operation.
Regularly cleaning the outdoor unit of your air conditioning system significantly contributes to its longevity and performance. By keeping the unit free from debris and ensuring proper airflow, you can optimize the cooling capacity and energy efficiency of your AC system.
If you encounter any difficulties during the cleaning process or notice any issues with the outdoor unit, it is advisable to seek professional assistance from a qualified HVAC technician.
In the next section, we will discuss when it’s necessary to call a professional technician for help with your air conditioning system.
Professional Help: When to Call a Technician
While many air conditioning issues can be resolved through basic troubleshooting and maintenance tasks, there are times when it is necessary to call a professional technician. Recognizing when to seek professional help is crucial to ensure the proper and safe functioning of your air conditioning system. Here are some situations in which it is advisable to call a technician:
1. Refrigerant Leaks:
If you suspect a refrigerant leak in your AC system, it’s best to leave the diagnosis and repair to a professional. Handling refrigerant requires specialized knowledge and equipment. A trained technician will be able to safely and accurately identify the leak, repair it, and recharge the refrigerant to the correct levels.
2. Electrical Issues:
If you experience electrical problems with your air conditioning system, such as frequent tripping of circuit breakers or power fluctuations, it is important to call an electrician or a technician specializing in HVAC systems. Working with electrical components can be dangerous, and a trained professional can safely diagnose and address any electrical issues.
3. Strange Noises or Unusual Odors:
If you notice unusual noises, such as grinding, squealing, or banging, coming from your AC unit, or if you detect strange odors, it may indicate a mechanical or electrical problem. These issues should be evaluated by a professional technician to avoid further damage or potential safety hazards.
4. Insufficient Cooling or Poor Airflow:
If your air conditioning system is not cooling your home adequately or if you’re experiencing weak airflow, it may be a sign of a more complex issue. A professional technician can conduct a thorough assessment to determine the underlying cause and recommend the appropriate repairs or adjustments.
5. Constant Cycling On and Off:
When your AC system consistently cycles on and off without reaching the desired temperature, it could indicate a problem with the thermostat, compressor, or other components. An HVAC technician can diagnose the issue and provide the necessary repairs to restore the proper operation of the system.
6. Advanced Repairs or Replacements:
For complex repairs or component replacements, it is best to leave the job to a professional technician. They have the expertise and experience to safely handle intricate repairs and ensure that all components are installed correctly to prevent further issues.
7. Regular Maintenance and Tune-Ups:
Even if your air conditioning system is functioning properly, it is recommended to schedule regular maintenance and tune-ups by a professional technician. They can perform essential tasks such as inspecting and cleaning internal components, checking refrigerant levels, and optimizing system performance. Regular maintenance helps improve energy efficiency and extends the lifespan of your AC unit.
Remember that attempting DIY repairs or working on your air conditioning system without proper knowledge or qualifications can lead to further damage, safety hazards, and voided warranties. It is always best to consult a professional technician who has the necessary expertise and tools to diagnose and repair your air conditioning system effectively and safely.
In the following section, we will conclude our article and provide a summary of the key points discussed.
Conclusion
Maintaining a properly functioning air conditioning system is essential for a cool and comfortable home environment. By following the troubleshooting steps and maintenance tasks outlined in this article, you can address common air conditioning problems and ensure optimal performance of your AC unit.
We started by understanding the various problems that can arise, such as cooling issues, strange noises, leakage, and reduced airflow. By identifying the specific problem, you can target your troubleshooting efforts effectively.
We then discussed the importance of basic troubleshooting steps, such as checking the power supply, cleaning or replacing air filters, and inspecting thermostat settings. These steps can often resolve minor issues and improve the operation of your air conditioning system.
Inspecting the condenser unit and checking for refrigerant leaks are two essential maintenance tasks covered in this article. By keeping the condenser unit clean, straightening the fins, and ensuring proper clearance, you can promote better airflow and prevent potential problems. Checking for refrigerant leaks is crucial for maintaining system efficiency and addressing any leaks promptly.
Furthermore, clearing the condensate drain and cleaning the outdoor unit are important tasks that help prevent water leakage, maintain proper drainage, and enhance the performance of your air conditioning system.
While DIY maintenance tasks are essential, there are instances where professional help is necessary. Refrigerant leaks, electrical issues, unusual noises or odors, insufficient cooling, constant cycling, and advanced repairs or replacements should be handled by qualified HVAC technicians.
Regular professional maintenance and tune-ups are also recommended to ensure optimal performance and extend the lifespan of your AC unit.
By following these guidelines and addressing air conditioning problems in a timely manner, you can keep your home cool and comfortable while also saving money on energy bills and preventing costly repairs.
Remember to consult your AC unit’s manual for specific instructions and, if in doubt, don’t hesitate to seek assistance from a professional technician.
We hope this article has provided you with useful insights and practical tips for troubleshooting and maintaining your air conditioning system. Stay cool and enjoy the benefits of a properly functioning AC unit!
Frequently Asked Questions about How To Fix My Air Conditioning
Was this page helpful?
At Storables.com, we guarantee accurate and reliable information. Our content, validated by Expert Board Contributors, is crafted following stringent Editorial Policies. We're committed to providing you with well-researched, expert-backed insights for all your informational needs.