Home>Home Maintenance>How Often Do You Need To Put Freon In Your Air Conditioner
Home Maintenance
How Often Do You Need To Put Freon In Your Air Conditioner
Modified: April 22, 2024
Learn about the frequency of adding Freon to your air conditioner for optimal home maintenance. Keep your system running smoothly.
(Many of the links in this article redirect to a specific reviewed product. Your purchase of these products through affiliate links helps to generate commission for Storables.com, at no extra cost. Learn more)
Introduction
When it comes to keeping your home comfortable, your air conditioner plays a crucial role. It’s responsible for maintaining a cool and pleasant indoor environment, especially during the scorching summer months. One of the key components that ensures the smooth operation of your air conditioner is Freon.
In this article, we will explore the importance of understanding Freon and its role in your air conditioning system. We will also discuss how often you may need to recharge or add Freon to your air conditioner, along with some helpful maintenance tips.
Key Takeaways:
- Regular maintenance by a professional HVAC technician is crucial for keeping your air conditioner’s Freon levels optimal, ensuring efficient cooling and a comfortable indoor environment.
- DIY maintenance tips, such as keeping the outdoor unit clean and changing air filters, can help maintain optimal Freon levels, but tasks like Freon recharging should be left to professional HVAC technicians for safety and accuracy.
Read more: How Often To Put Freon In Air Conditioner
What is Freon?
Freon is a refrigerant commonly used in air conditioning systems. It is a brand name for a type of hydrochlorofluorocarbon (HCFC), specifically R-22. The refrigerant circulates through the air conditioner’s coils and absorbs the heat from the indoor air, cooling it down.
Freon is known for its ability to rapidly absorb and release heat, making it an ideal choice for air conditioning systems. This refrigerant has been widely used in residential and commercial air conditioners for many years.
Understanding the Role of Freon in an Air Conditioner
The primary role of Freon in an air conditioner is to facilitate the cooling process. When the indoor air is drawn into the air conditioner, it passes over the evaporator coil. The Freon inside the coil absorbs the heat from the air, turning from a liquid to a gas.
The gaseous Freon then travels to the condenser coil located outside the house. Here, it releases the absorbed heat to the outdoor air and transforms back into a liquid form. This cycle repeats continuously, ensuring that the indoor air remains cool and comfortable.
Factors Affecting Freon Levels
Over time, the Freon levels in your air conditioner may decrease. There are several factors that can contribute to a loss of refrigerant:
- Normal wear and tear: As your air conditioner operates, it undergoes regular wear and tear. This can lead to small leaks in the coils or connections, resulting in a gradual loss of Freon.
- Improper installation: If your air conditioner was not installed correctly, it may have loose or damaged connections that can cause Freon leaks.
- Accidental damage: External factors such as severe weather conditions or accidental physical damage can also cause leaks in the refrigerant lines.
It’s important to note that Freon is a regulated substance due to its potential impact on the environment. The production of R-22 Freon has been phased out in many countries, and more environmentally-friendly refrigerants, such as R-410A, are now commonly used.
Key Takeaways:
- Regular maintenance by a professional HVAC technician is crucial for keeping your air conditioner’s Freon levels optimal, ensuring efficient cooling and a comfortable indoor environment.
- DIY maintenance tips, such as keeping the outdoor unit clean and changing air filters, can help maintain optimal Freon levels, but tasks like Freon recharging should be left to professional HVAC technicians for safety and accuracy.
Read more: How Often To Put Freon In Air Conditioner
What is Freon?
Freon is a type of refrigerant that is used in air conditioning systems to facilitate the cooling process. It is a brand name for a specific hydrochlorofluorocarbon (HCFC) called R-22. The term “Freon” has become synonymous with air conditioning refrigerants, even though it is technically a brand name and refers specifically to R-22.
R-22 Freon is a colorless, odorless gas that is commonly used as a refrigerant in residential and commercial air conditioners. It has excellent heat-absorbing properties, which makes it an ideal choice for cooling applications. However, it is important to note that the production of R-22 Freon has been phased out in many countries due to its impact on the environment.
Freon works on a basic principle called the refrigeration cycle. In this cycle, a refrigerant travels through the air conditioning system, changing from a gas to a liquid and back again, absorbing and releasing heat in the process.
When the air conditioner is turned on, the compressor compresses the gaseous Freon, raising its temperature and pressure. This high-pressure gas then flows into the condenser coil, located outside the house. As the hot gas contacts the cooler outdoor air, it releases heat and condenses into a high-pressure liquid.
The liquid Freon then travels to the evaporator coil, which is located inside the house. Here, the liquid refrigerant expands through a small valve, causing a rapid drop in pressure. As a result, the Freon evaporates into a gas and absorbs heat from the indoor air, cooling it down.
The cool air is then circulated back into the house via the air conditioning system’s ductwork, while the warm Freon gas flows back to the compressor to start the cycle again.
It is important to note that Freon is a controlled substance due to its environmental impact. R-22 Freon, in particular, is known to contribute to ozone depletion. In response to growing environmental concerns, many countries have phased out the production and use of R-22, transitioning to more environmentally-friendly refrigerants, such as R-410A.
If you have an older air conditioning system that uses R-22 Freon, it is recommended to consult with a licensed HVAC professional to discuss your options for transitioning to a newer and more environmentally-friendly refrigerant.
Understanding the Role of Freon in an Air Conditioner
Freon plays a vital role in the functioning of an air conditioning system. It is the refrigerant that enables the cooling process, allowing the system to maintain a comfortable indoor temperature. Understanding the role of Freon can help you appreciate its importance in keeping your home cool during hot summer days.
When you turn on your air conditioner, the Freon circulates through a closed-loop system, undergoing a continuous cycle of evaporation and condensation. The refrigeration process begins with the compressor, which pressurizes the gaseous Freon, turning it into a high-pressure, high-temperature vapor.
The hot vapor then flows through the condenser coil, which is located outside your home. As the outdoor air passes over the coil, the heat from the vapor is released, causing the Freon to condense into a high-pressure liquid. This heat transfer process cools down the refrigerant, preparing it for the next stage of the cycle.
The liquid Freon then travels through a series of valves and tubes into the evaporator coil, which is located inside your home. As the indoor air moves over the cold evaporator coil, the liquid Freon evaporates into a gas, absorbing the heat from the surrounding air. This phase change from liquid to gas occurs due to the low pressure inside the evaporator coil.
As the refrigerant absorbs heat, it cools down the air passing over the evaporator coil. The cool air is then blown back into your home through the ductwork by the blower fan. At the same time, the now gaseous Freon returns to the compressor to restart the cycle.
It’s important to note that the Freon doesn’t get used up or consumed during this process. It simply changes its state from a gas to a liquid and vice versa. This is why an air conditioning system doesn’t require regular refills of Freon under normal circumstances.
However, over time, there can be some natural loss of Freon due to small leaks in the system. These leaks can occur in the refrigerant lines, valves, or even at the connections between components. If the refrigerant level drops too low, it can impact the efficiency and cooling capacity of your air conditioner.
Regular maintenance is crucial to ensure the optimal performance of your air conditioning system. An HVAC technician can inspect your system for any leaks and recharge the Freon if needed. Additionally, they can check the overall functioning of the system and address any other potential issues that may affect its performance.
By understanding the role of Freon in your air conditioner, you can appreciate its importance in maintaining a cool and comfortable indoor environment. It’s essential to prioritize regular maintenance and address any Freon-related issues to ensure the longevity and efficiency of your air conditioning system.
Factors Affecting Freon Levels
The levels of Freon in your air conditioner can be affected by various factors, which may lead to a decrease in refrigerant levels over time. It’s important to be aware of these factors to understand why your air conditioner may need a Freon recharge or maintenance.
Normal wear and tear:
As your air conditioner operates, its components undergo regular wear and tear. Over time, this can cause small leaks to develop in the coils or connections of the system. Even tiny leaks can gradually lead to a loss of Freon from the system. It’s important to note that even a slight Freon leak can significantly impact the performance and efficiency of your air conditioner.
Improper installation:
If your air conditioner was not installed correctly, it may have loose or damaged connections that can cause Freon leaks. Poor installation practices can lead to gaps or improper sealing of the refrigerant lines, resulting in Freon leakage. It’s essential to ensure that your air conditioner is installed by a qualified professional using proper techniques and materials to minimize the risk of leaks.
Accidental damage:
External factors can also cause damage to your air conditioner and result in Freon leaks. Severe weather conditions, such as hailstorms or strong winds, can cause physical damage to the outdoor unit, leading to refrigerant leaks. Similarly, accidental bumps or impacts to the unit can also cause damage to the refrigerant lines. It’s important to be cautious and protect your air conditioner from potential hazards.
Quality of the equipment and components:
The quality of the air conditioning equipment and its components can also affect the likelihood of Freon leaks. Cheaper or lower-quality materials may be more prone to degradation or failure, resulting in leaks over time. Investing in high-quality equipment and components from reputable manufacturers can reduce the risk of Freon leaks and ensure the longevity of your system.
Lack of regular maintenance:
Regular maintenance is crucial for the proper functioning of your air conditioner and to avoid potential Freon leaks. A lack of routine maintenance can lead to neglected or worn-out components, increasing the risk of refrigerant leaks. It’s recommended to schedule regular maintenance appointments with a qualified HVAC technician who can inspect your system, check for leaks, and perform any necessary repairs or preventative measures.
It’s important to address Freon leaks promptly to prevent further damage to your air conditioner and ensure optimal performance. If you suspect a Freon leak or your air conditioner is not cooling efficiently, it’s best to consult with a licensed HVAC professional who can diagnose the issue and recommend the appropriate course of action. They can perform a thorough inspection, repair any leaks, and recharge the Freon if necessary to restore your air conditioner’s functionality.
Signs That Your Air Conditioner Needs Freon
Freon is an essential component in your air conditioning system, and its proper level is crucial for efficient cooling. If your air conditioner is low on Freon, it can result in inadequate cooling and reduced performance. It’s important to be aware of the signs that indicate your air conditioner may need a Freon recharge. Here are some common signs to look out for:
1. Warm or insufficient cooling:
If you notice that your air conditioner is not cooling your home as effectively as it used to, or if the air coming from the vents feels warm, it could be a sign of low Freon. Insufficient cooling can indicate that there is not enough refrigerant circulating in the system to absorb and remove heat from the indoor air.
2. Longer cooling cycles:
Another indication of low Freon levels is extended cooling cycles. If your air conditioner is constantly running for longer periods without reaching the desired temperature, it could be struggling to cool the air due to a decrease in refrigerant. This can lead to higher energy bills and discomfort in your home.
3. Ice or frost buildup on the refrigerant lines:
Examine the outdoor refrigerant lines. If you notice ice or frost accumulation on the lines, it may indicate a Freon leak. A leaking refrigerant can cause a drop in pressure, resulting in the formation of ice or frost on the lines. This is a clear sign that your air conditioner is in need of a professional inspection and potential Freon recharge.
4. Hissing or bubbling noises:
If you hear hissing or bubbling noises coming from your air conditioner, it could indicate a Freon leak. The sound of escaping refrigerant is often accompanied by decreased cooling performance. If you notice unusual sounds coming from your air conditioner, it’s advisable to have it checked by a qualified HVAC technician to assess the situation and make any necessary repairs.
5. Rapid cycling:
Rapid cycling refers to the frequent turning on and off of your air conditioner. This can occur when the system is struggling to maintain the desired temperature due to a lack of refrigerant. If you notice your air conditioner constantly cycling on and off within a short period, it may be a sign that it needs a Freon recharge.
6. Increased energy bills:
If your energy bills have significantly increased without any changes in your usage patterns, it could be a red flag that your air conditioner is not functioning efficiently. Low Freon levels can cause your air conditioner to work harder, consuming more energy to cool your home. Monitoring your energy bills can help you identify any abnormal spikes and potential issues with your air conditioner.
If you suspect that your air conditioner is low on Freon or you notice any of these signs, it’s essential to consult with a licensed HVAC professional. They can conduct a thorough inspection, identify any Freon leaks, and recharge the refrigerant to restore your air conditioner’s optimal performance. Taking prompt action will not only help you stay cool during the summer but also prevent any further damage to your air conditioning system.
How Often Should You Put Freon in Your Air Conditioner?
The frequency at which you need to put Freon in your air conditioner can vary depending on several factors. In an ideal scenario, the refrigerant in your air conditioner should last the lifetime of the system and should not need to be replenished. However, there are instances where a Freon recharge may be necessary. Let’s explore the factors that can determine how often you should put Freon in your air conditioner:
1. Age of the air conditioning system:
If your air conditioner is relatively new and uses a more modern refrigerant like R-410A, you are less likely to have Freon-related issues. These newer refrigerants are designed to be more durable and have a longer lifespan. However, older systems that use the now phased-out R-22 Freon may require more frequent recharges due to leaks or natural deterioration over time.
2. Proper installation:
A professional installation plays a significant role in the longevity of your air conditioning system and the likelihood of Freon leaks. A properly installed system with well-sealed refrigerant lines and connections is less likely to experience refrigerant leaks. On the other hand, a poorly installed system can lead to leaks that may require more frequent Freon replenishment.
3. Maintenance and regular inspections:
Maintaining your air conditioning system and scheduling regular inspections with a qualified HVAC technician can help detect any Freon leaks early on. By catching and repairing leaks promptly, you can minimize the amount of Freon that needs to be replenished. Regular maintenance also ensures that your air conditioner is running efficiently, reducing the risk of refrigerant loss.
4. Environmental factors:
The environment in which your air conditioner operates can also impact the frequency of Freon recharges. Extreme weather conditions, such as severe heat or cold, can put additional strain on the system and potentially lead to increased refrigerant loss. Additionally, the presence of contaminants or pollutants in the air can contribute to system degradation and subsequent refrigerant leaks.
5. Size and capacity of the air conditioner:
The size and capacity of your air conditioning system can affect the amount of Freon it requires. Larger systems generally have a greater refrigerant capacity and may require more Freon to maintain optimal performance. Smaller systems, on the other hand, may have a smaller refrigerant charge and may need less frequent recharges.
It’s important to note that under normal conditions, your air conditioner should not require frequent Freon recharges. Freon is not consumed or used up during the cooling process; it simply circulates through the system. Therefore, if you find yourself needing to recharge your system with Freon frequently, it is an indication of a potential issue, such as a refrigerant leak, that should be addressed by a professional HVAC technician.
In summary, the frequency of putting Freon in your air conditioner depends on various factors, including the age of the system, proper installation, regular maintenance, environmental conditions, and system size. By ensuring proper installation, conducting regular inspections, and addressing any issues promptly, you can minimize the need for Freon recharges and maintain the optimal performance of your air conditioning system.
The Importance of Regular Maintenance
Regular maintenance is essential for the proper functioning and longevity of your air conditioning system. It involves routine inspections, cleaning, and necessary repairs to ensure that your system operates efficiently and continues to provide optimal cooling comfort. Here are several reasons why regular maintenance is important:
1. Enhances energy efficiency:
A well-maintained air conditioning system operates more efficiently, which can lead to significant energy savings. During a maintenance visit, the technician will clean and inspect various components, including the coils, filters, and fan blades. Removing dirt, dust, and debris from these parts allows the system to operate at peak performance, reducing energy consumption and lowering utility bills.
2. Improves indoor air quality:
Air conditioners not only cool the air but also help filter out pollutants and allergens. However, without regular maintenance, the filters can become clogged, decreasing their effectiveness in capturing these particles. By regularly cleaning or replacing the filters, you can sustain good indoor air quality and reduce the risk of respiratory issues for you and your family.
3. Extends the lifespan of the system:
Proper maintenance can significantly extend the lifespan of your air conditioning system. Regular inspections allow technicians to identify and address any small issues or wear and tear before they develop into major problems. By catching and fixing issues early, you can prevent costly repairs or the need for premature system replacement.
4. Minimizes the risk of breakdowns:
By scheduling regular maintenance, you can reduce the chances of unexpected system breakdowns during hot summer months when you rely heavily on your air conditioner. During maintenance visits, technicians can detect and resolve any potential problems, such as refrigerant leaks, faulty electrical connections, or worn-out components. This proactive approach ensures the reliable and uninterrupted operation of your system when you need it the most.
5. Preserves manufacturer warranties:
Many air conditioning manufacturers require regular maintenance as part of their warranty terms. If you neglect regular maintenance, it could potentially void your warranty, leaving you responsible for any repairs or replacements. Adhering to the manufacturer’s maintenance requirements helps protect your investment and provides peace of mind knowing that you have warranty coverage if needed.
6. Detects refrigerant leaks and ensures proper Freon levels:
During maintenance visits, HVAC technicians can check the refrigerant levels of your air conditioning system. Low or improper levels of Freon can impact the cooling performance and efficiency of your system. By identifying and addressing refrigerant leaks or adjusting the refrigerant levels, technicians can ensure that your system operates optimally and efficiently.
Regular maintenance is crucial for maintaining the performance, efficiency, and longevity of your air conditioning system. It not only improves energy efficiency and indoor air quality but also minimizes the risk of breakdowns and preserves manufacturer warranties. By investing in routine maintenance, you can enjoy a consistently comfortable home and avoid costly repairs or premature system replacement.
DIY Tips for Maintaining Optimal Freon Levels
Maintaining optimal Freon levels in your air conditioning system is crucial for its efficient operation and cooling performance. While it’s recommended to have a professional HVAC technician perform regular maintenance, there are some DIY tips you can follow to help maintain the refrigerant levels. Here are a few tips:
Read more: How To Remove Freon From An Air Conditioner
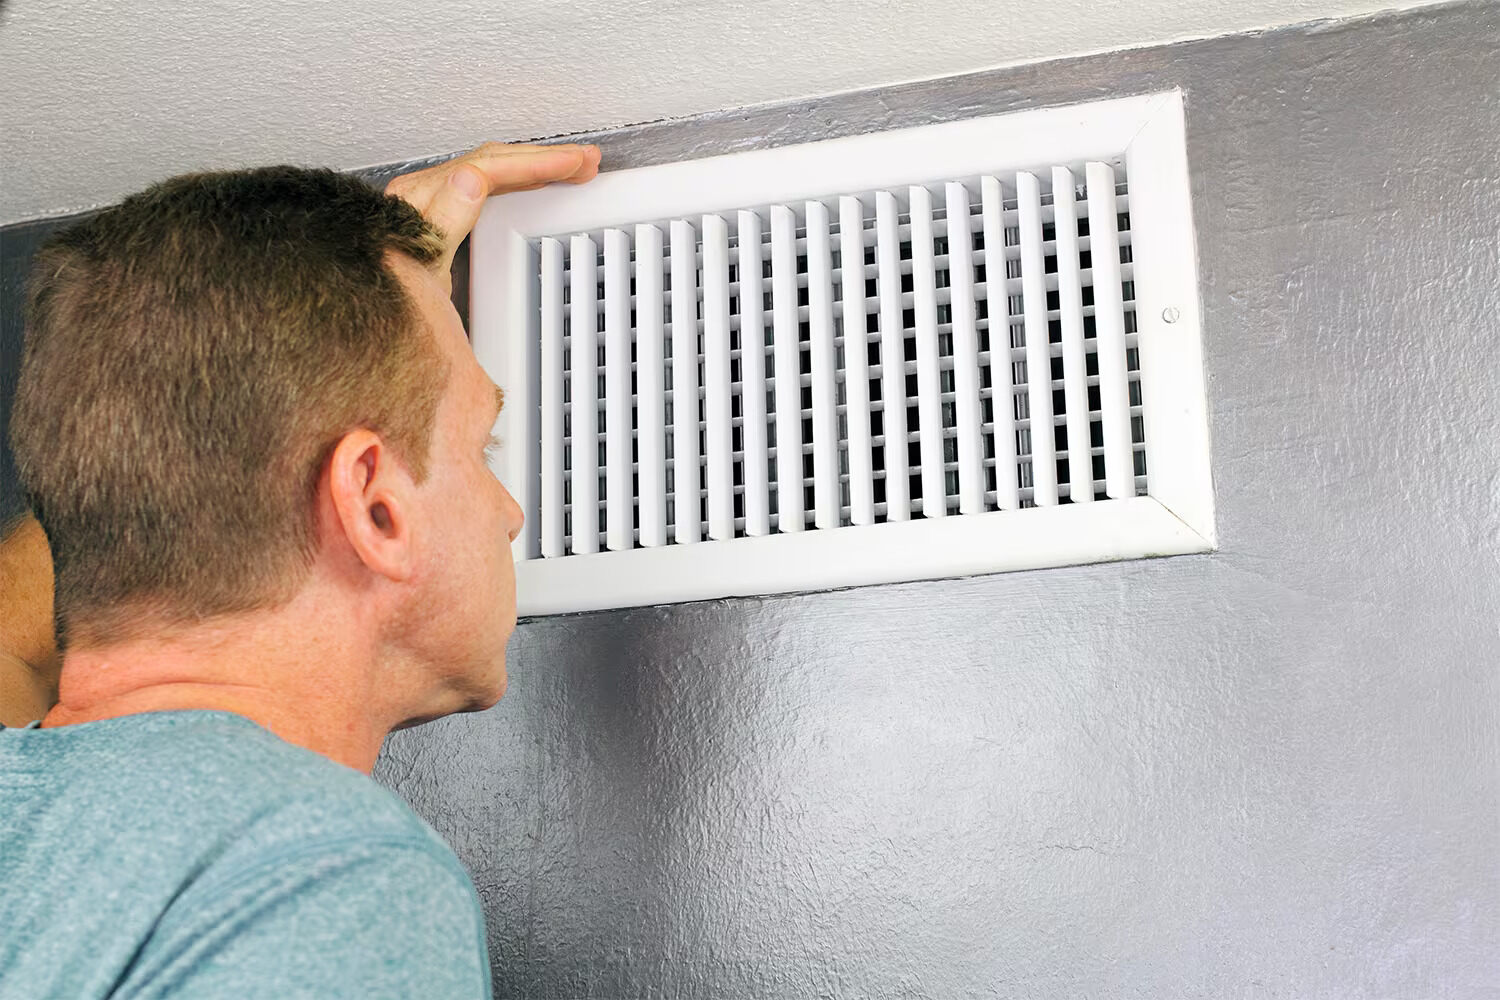
1. Keep the outdoor unit clean:
Regularly inspect and clean the outdoor unit of your air conditioner. Remove any debris, such as leaves, dirt, or grass clippings, that may accumulate around the unit. A clean unit allows for proper airflow, preventing overheating and reducing the strain on the system. Better airflow helps maintain the optimal pressure and temperature needed for the Freon to operate efficiently.
2. Change or clean air filters:
Regularly inspect and change your air filters, following the manufacturer’s recommendations. Clogged or dirty air filters can restrict airflow and cause the evaporator coil to freeze. This can lead to a drop in pressure and reduced Freon levels. Clean filters help ensure that the air conditioner operates at its best and maintains optimal cooling capacity.
3. Check for air leaks:
Inspect the areas around your doors and windows for any air leaks. Sealing these leaks with weatherstripping or caulking helps prevent the loss of cooled air, keeping your home more comfortable and reducing the workload on the air conditioning system. When your home is properly sealed, the air conditioner doesn’t have to work as hard to cool the space, reducing the need for excessive Freon usage.
4. Clean the evaporator coils:
The evaporator coils are responsible for absorbing heat from the indoor air. Over time, these coils can accumulate dirt and debris, affecting their ability to efficiently transfer heat. Use a soft brush to gently clean the coils, or consider using a specialized coil cleaner as recommended by the manufacturer. Clean coils aid in proper heat transfer and help maintain ideal refrigerant levels.
5. Monitor for unusual signs:
Keep an eye out for any signs of refrigerant leaks, such as hissing sounds, frost or ice formation on the refrigerant lines, or reduced cooling performance. If you notice any of these signs, it’s best to contact a professional HVAC technician to inspect and repair the system. Timely detection and resolution of leaks can help maintain optimal Freon levels and protect the overall efficiency of your air conditioner.
While these DIY tips are beneficial for maintaining your air conditioning system, it’s important to remember that Freon-related maintenance and recharging should be performed by a qualified HVAC technician. They have the knowledge, tools, and expertise to properly handle the refrigerant and carry out any necessary repairs or maintenance tasks.
By following these DIY tips and scheduling regular professional maintenance, you can help ensure that your air conditioning system maintains optimal Freon levels, operates efficiently, and delivers reliable cooling performance for years to come.
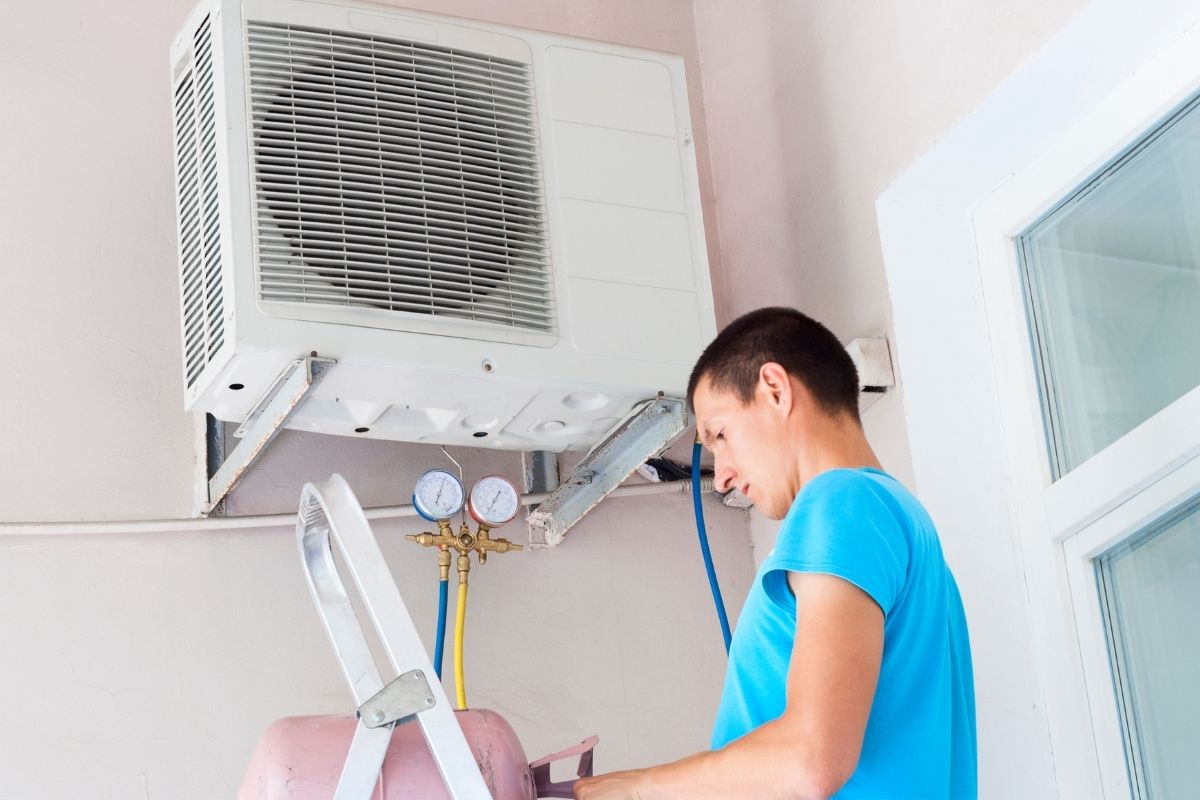
Hiring a Professional for Freon Recharging
When it comes to maintaining the optimal Freon levels in your air conditioning system, it is crucial to hire a professional HVAC technician for freon recharging. While there are some DIY maintenance tasks you can perform, recharging the refrigerant should be left to the experts. Here are a few reasons why it’s important to hire a professional for Freon recharging:
1. Safety and expertise:
Handling refrigerants like Freon requires specialized knowledge and training. HVAC technicians have the necessary expertise to safely handle and recharge refrigerant in air conditioning systems. They are familiar with the proper procedures, safety protocols, and environmental regulations associated with refrigerant handling. By hiring a professional, you can ensure that the process is carried out safely and effectively.
2. Proper diagnosis of system issues:
A professional HVAC technician can accurately diagnose any issues with your air conditioning system that may require Freon recharging. They have the knowledge and experience to determine whether low refrigerant levels are the root cause of the problem or if there are other underlying issues affecting the system’s performance. By addressing the underlying cause, they can ensure that your system operates optimally and efficiently.
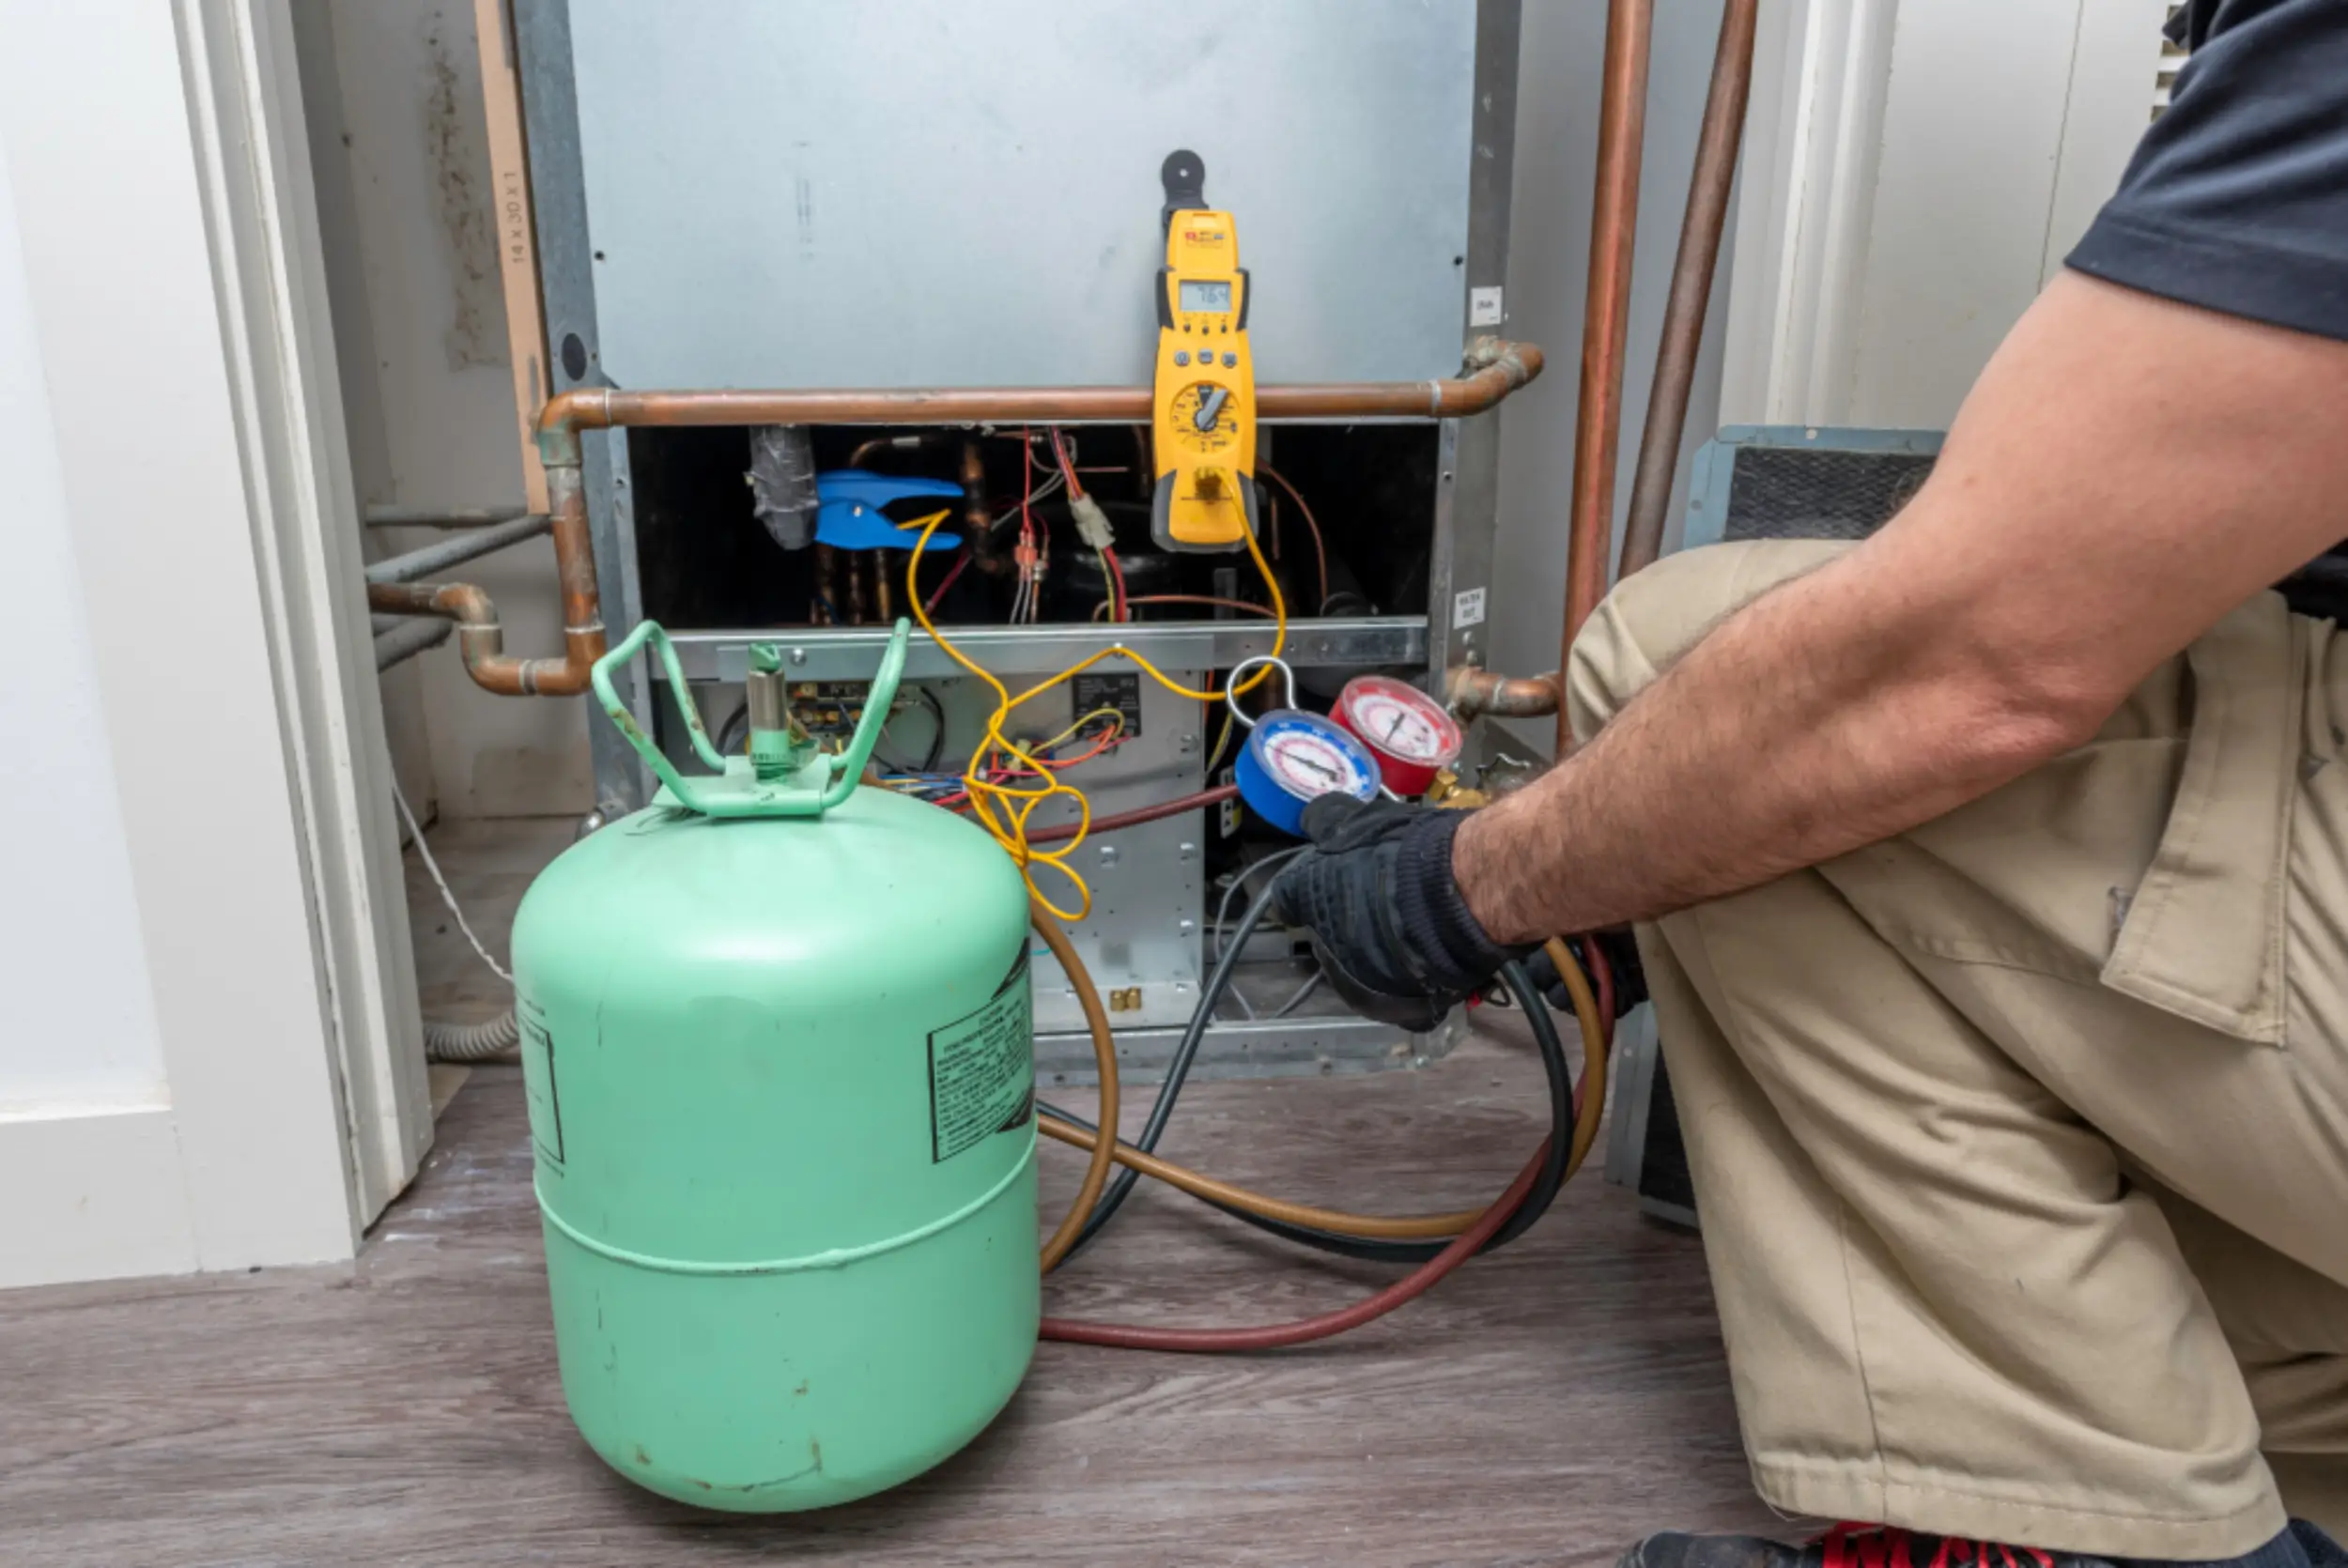
3. Identifying and fixing refrigerant leaks:
Low Freon levels often indicate a refrigerant leak in the system. HVAC technicians are trained to locate and repair these leaks using specialized tools and equipment. Simply recharging the system without addressing the leaks will only result in a temporary fix. Professionals can identify the source of the leaks, perform the necessary repairs, and then recharge the system with the appropriate amount of refrigerant.
4. Correct refrigerant type and quantity:
Using the correct refrigerant type and quantity is crucial for the proper functioning of your air conditioning system. HVAC technicians have the expertise to identify the specific refrigerant requirements for your system based on its make, model, and manufacturer guidelines. They ensure that the appropriate refrigerant is used and that the system is charged with the correct amount to maintain optimal performance.
5. Maintaining system warranty:
Hiring a professional HVAC technician for Freon recharging ensures that you comply with the system’s warranty requirements. Most air conditioning manufacturers require professional installation, maintenance, and repairs to uphold the warranty terms. By hiring a qualified technician, you can prevent any potential warranty voids and ensure that you have coverage for any future repair or replacement needs.
6. Long-term cost savings:
While hiring a professional may involve an upfront cost, it can lead to long-term cost savings. Professionals will accurately diagnose any issues, fix refrigerant leaks, and ensure that your system is running at optimal efficiency. This translates to energy savings and reduced utility bills. Additionally, addressing problems early on can help prevent major system breakdowns that require costly repairs or premature system replacement.
When it comes to Freon recharging and maintaining optimal refrigerant levels in your air conditioning system, it is essential to rely on the expertise of a professional HVAC technician. They have the knowledge, experience, and tools necessary to safely and effectively handle refrigerant, diagnose system issues, locate and repair leaks, and ensure the long-term performance and efficiency of your air conditioner.
Read more: How Do You Clean An Air Conditioner
Conclusion
Maintaining optimal Freon levels in your air conditioning system is crucial for ensuring efficient cooling and a comfortable indoor environment. Understanding the role of Freon and recognizing the signs that indicate your air conditioner needs a Freon recharge are essential for keeping your system running smoothly.
Regular maintenance is key to prolonging the lifespan of your air conditioning system and maintaining optimal refrigerant levels. Hiring a professional HVAC technician for routine maintenance tasks, including Freon recharging, is highly recommended. These experts have the knowledge, skills, and equipment to handle refrigerants safely and effectively, diagnose system issues, address refrigerant leaks, and ensure the system operates at its best.
In addition to professional maintenance, there are some DIY tips you can follow to help maintain optimal Freon levels. Keeping the outdoor unit clean, changing or cleaning air filters regularly, checking for air leaks, cleaning the evaporator coils, and monitoring for any signs of refrigerant leaks are all important steps to take to keep your system in good shape.
Regular maintenance not only enhances energy efficiency and improves indoor air quality but also extends the lifespan of your air conditioning system and minimizes the risk of breakdowns. It also helps to preserve manufacturer warranties, which can provide valuable coverage for potential repairs or replacements.
By investing in regular maintenance and addressing any issues promptly, you can ensure that your air conditioning system operates efficiently, delivers reliable cooling performance, and provides optimal comfort for you and your family.
Remember, when it comes to Freon recharging or any other refrigerant-related tasks, it is best to leave it to the professionals. They have the expertise and experience needed to handle refrigerants safely and accurately recharge your system to maintain the proper refrigerant levels.
In conclusion, by prioritizing regular maintenance, hiring professionals for Freon recharging, and following proper DIY maintenance tips, you can ensure that your air conditioning system remains in top condition, providing you with reliable and efficient cooling for years to come.
Frequently Asked Questions about How Often Do You Need To Put Freon In Your Air Conditioner
Was this page helpful?
At Storables.com, we guarantee accurate and reliable information. Our content, validated by Expert Board Contributors, is crafted following stringent Editorial Policies. We're committed to providing you with well-researched, expert-backed insights for all your informational needs.