Home>Home Maintenance>How To Take Before And After Photos Of Home Repair
Home Maintenance
How To Take Before And After Photos Of Home Repair
Modified: March 6, 2024
Learn how to capture stunning before and after photos of your home repairs with our expert tips and tricks. Enhance your home maintenance projects with visually striking imagery.
(Many of the links in this article redirect to a specific reviewed product. Your purchase of these products through affiliate links helps to generate commission for Storables.com, at no extra cost. Learn more)
Introduction
Welcome to the world of home maintenance and repair! Whether you’re a professional contractor or a DIY enthusiast, documenting your home improvement projects is undoubtedly a valuable endeavor. One of the most effective ways to showcase the transformative power of your skills is through before and after photos.
Before and after photos serve as a visual story of the work you’ve done. They provide a compelling narrative that enhances your credibility and attracts potential clients or admiring friends and family. From a marketing standpoint, before and after photos help you stand out from the competition, as they demonstrate your expertise and the quality of your work.
However, taking captivating before and after photos requires more than just pointing and shooting. To capture the essence of your home repair projects, you need the right equipment, an understanding of lighting and composition techniques, and the ability to enhance your photos through editing.
In this article, we will guide you through the process of taking before and after photos of home repairs. We’ll cover everything from selecting the right equipment to editing and enhancing your photos. By the end, you’ll be equipped with the knowledge and skills needed to showcase your work in a visually striking and professional manner.
### Word count: 187
Key Takeaways:
- Transform your home repair projects with captivating before and after photos. Showcase your expertise, attract clients, and leave a lasting impression through visual storytelling.
- From choosing the right equipment to showcasing your work, master the art of before and after photos to stand out in the home maintenance industry.
Why Before and After Photos are Important
Before and after photos are not just a collection of images; they play a crucial role in the home maintenance and repair industry. Here are a few reasons why before and after photos are important:
- Visual Storytelling: Before and after photos allow you to tell a story of transformation. They showcase the initial condition of a space or a problem area and illustrate the positive changes made through your repairs or renovations. This visual storytelling can captivate potential clients, highlighting your ability to bring about significant improvements.
- Evidence of Expertise: By showcasing before and after photos, you provide concrete evidence of your skills and expertise. Seeing the dramatic changes you’ve made to a property instills confidence in your audience and sets you apart from competitors. It becomes clear that you have the knowledge and ability to undertake complex home repair projects.
- Marketing and Promotion: Before and after photos are powerful marketing tools. They can be shared on your website, social media platforms, and even featured in brochures or advertisements. These visual representations of your work catch the eye and generate interest among potential clients. They showcase the value of your services and entice people to learn more about your work.
- Educating and Inspiring: Before and after photos can be educational and inspiring to others who aspire to undertake similar home improvement projects. By sharing your photos publicly, you contribute to a community of DIY enthusiasts, sparking ideas and providing guidance for those looking to make improvements in their own homes.
- Building Trust: Before and after photos are tangible evidence of your trustworthiness and reliability. They demonstrate that you have successfully completed projects in the past and that you can be trusted to deliver similarly impressive results. This builds confidence and encourages potential clients to choose your services over others.
Ultimately, before and after photos are essential tools for showcasing your skills, marketing your services, and building credibility in the home maintenance and repair industry. They provide a visual representation of your expertise and enable you to leave a lasting impression on your audience.
### Word count: 344
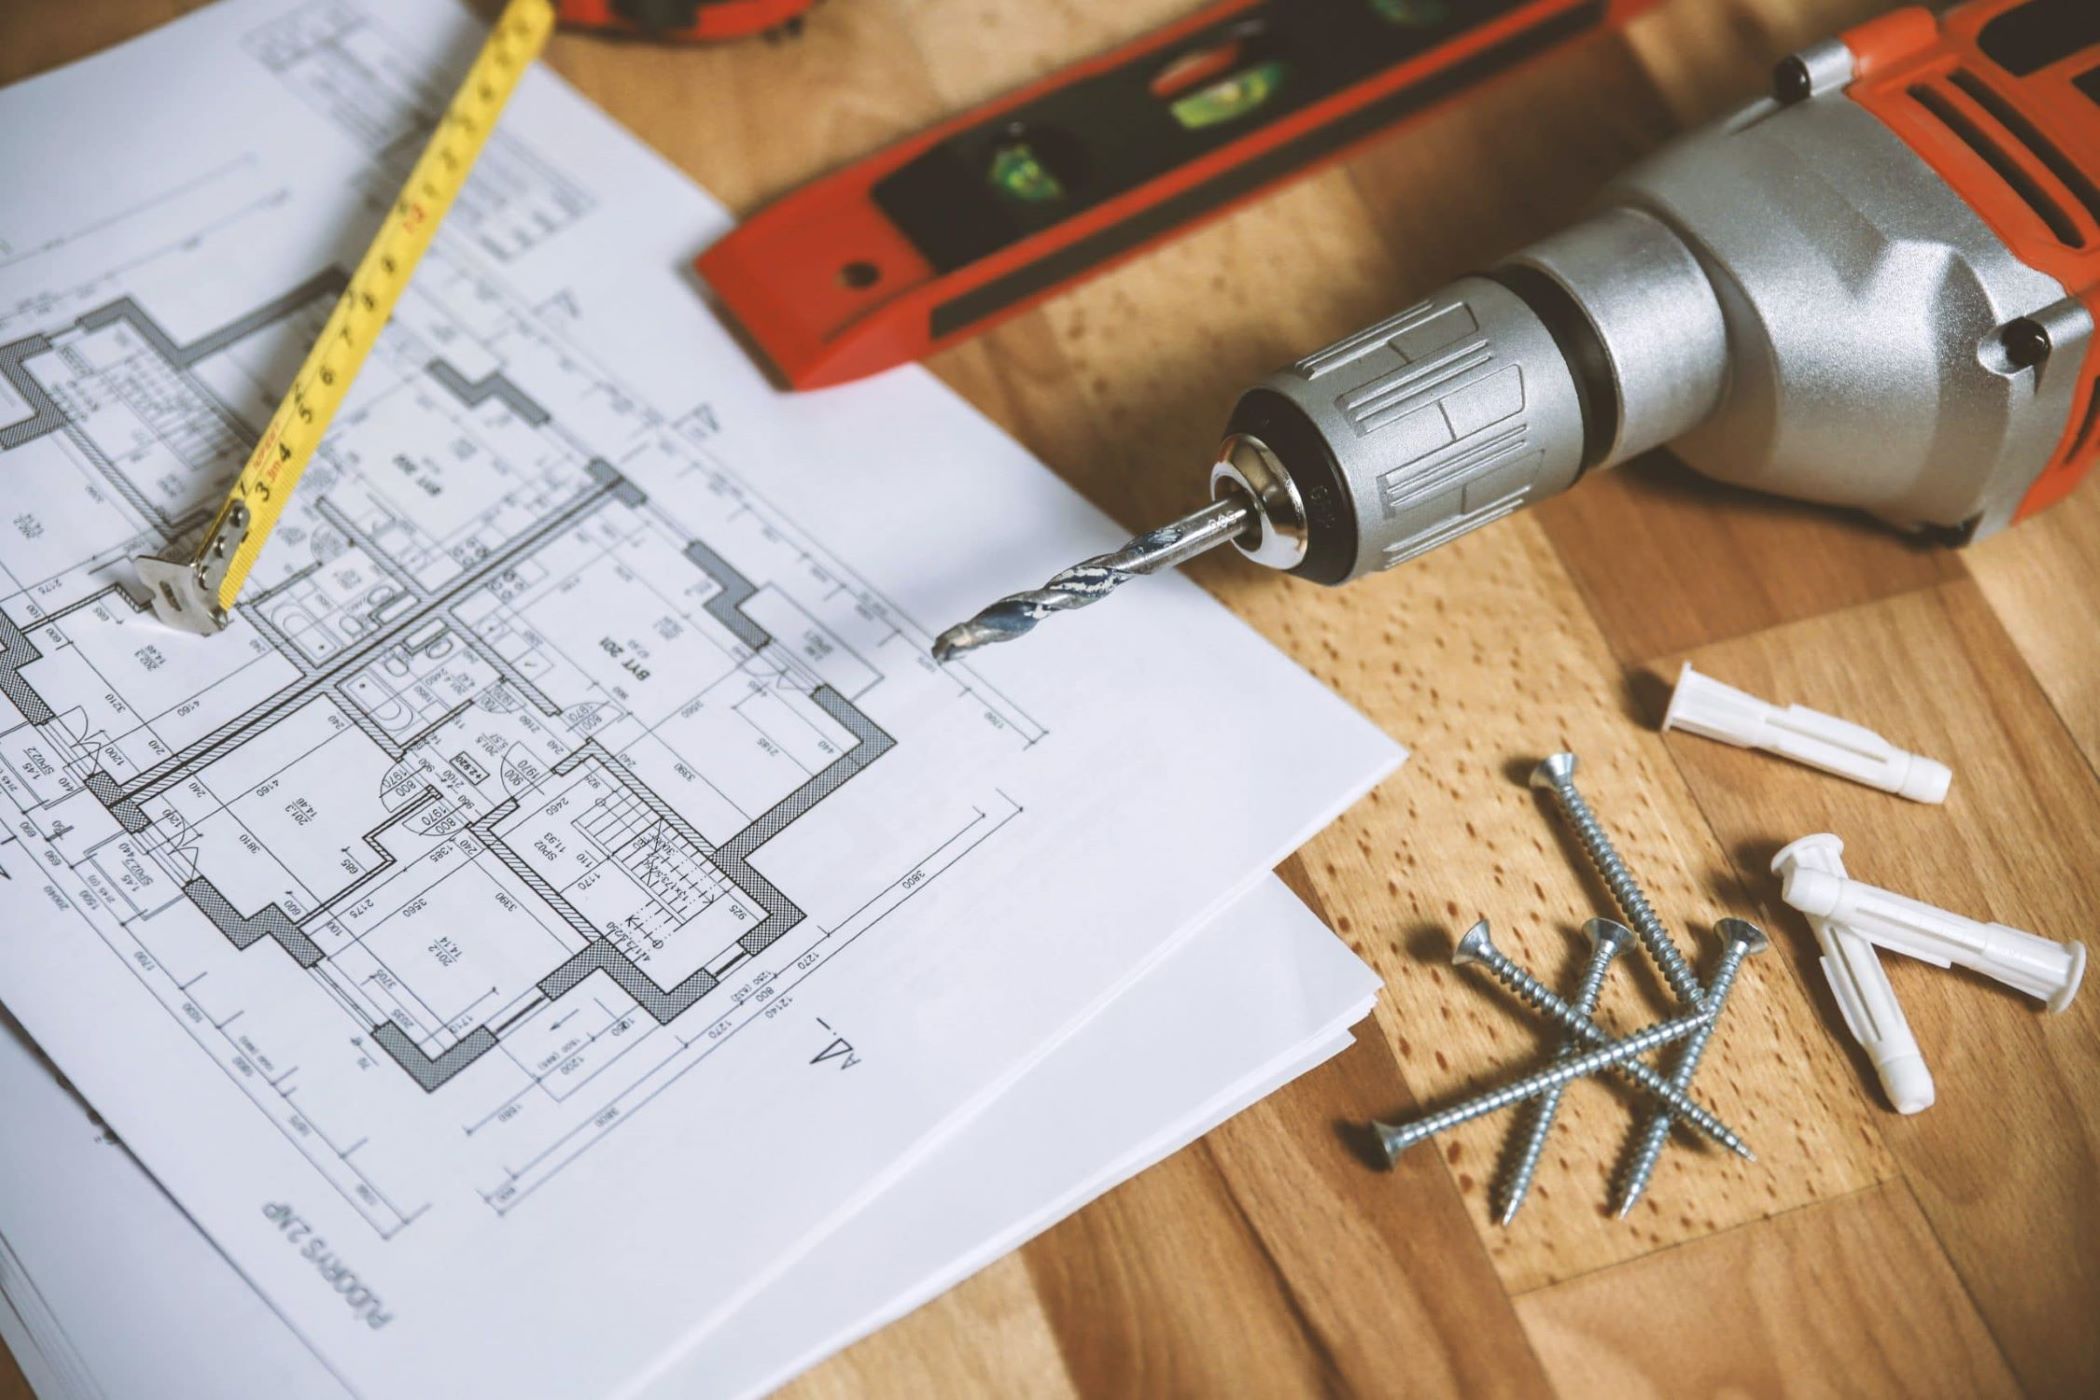
Choosing the Right Equipment
When it comes to capturing before and after photos of your home repair projects, having the right equipment can make all the difference. Here are some essential tools you’ll need:
- Digital Camera: Invest in a good digital camera that allows you to shoot high-quality photos with manual settings. While smartphone cameras have improved significantly, a dedicated digital camera will offer more control over settings like exposure, focus, and white balance.
- Wide-Angle Lens: A wide-angle lens is essential for capturing the entire scene in cramped spaces or large rooms. It allows you to include more details and provide a comprehensive view of the area you’re documenting. Look for a lens with a focal length between 10mm and 24mm for optimal results.
- Sturdy Tripod: A tripod is invaluable for stability, especially when shooting in low light conditions or for long exposures. Look for a tripod that is sturdy and easily adjustable to different heights. This will help eliminate any blurriness or camera shake, resulting in crisp and sharp images.
- Remote Shutter Release: A remote shutter release allows you to trigger the camera without physically touching it, further reducing the risk of camera shake. This is particularly useful when capturing long-exposure shots or self-portraits in before and after photos.
- External Flash: While natural lighting is generally preferred, there may be instances where additional light is needed to properly illuminate the space. An external flash with adjustable settings can help overcome challenging lighting conditions and ensure that details are captured accurately.
- Memory Cards and Batteries: Carry extra memory cards and batteries to avoid running out of storage or power during a photo shoot. It’s better to be prepared and have extras on hand to continue capturing the crucial before and after moments of your project.
Remember, investing in good equipment will pay off in the long run. High-quality photos will not only enhance your portfolio but also impress potential clients and elevate your professional image.
Next, we’ll explore the importance of lighting and composition techniques to enhance your before and after photos.
### Word count: 333
Lighting and Composition Techniques
When capturing before and after photos of your home repair projects, understanding lighting and composition techniques is crucial for creating visually appealing and impactful images. Here are some tips to help you get the best results:
1. Natural Lighting: Whenever possible, utilize natural lighting as it provides a more authentic representation of the space. Open blinds or curtains to let in as much natural light as possible. Avoid using harsh direct sunlight, as it can create harsh shadows or blown-out areas. Instead, aim for soft, diffused lighting, like during the early morning or late afternoon.
2. Artificial Lighting: In cases where natural lighting is insufficient, you can supplement it with artificial lighting sources. Use adjustable lamps or light fixtures to evenly illuminate the space. Experiment with different angles and intensities to achieve the desired effect. Be mindful of color temperature to maintain consistent lighting throughout the before and after photos.
3. Composition: Pay attention to the composition of your photos to make them visually appealing and engaging. The rule of thirds is a helpful guideline—imagine dividing your frame into a grid of nine equal squares, and place the key elements along the grid lines or at their intersection points. This adds balance and interest to your photos.
4. Perspective: Experiment with different perspectives to capture the details and unique aspects of your home repair project. Take photos from different angles—high, low, and eye-level—to add variety and showcase different features. Explore interesting angles and framing techniques to make your photos more visually interesting.
5. Focus and Depth of Field: Determine the focal point of your photo and ensure it is sharp and in focus. Use a wider aperture (smaller f-stop number) to create a shallow depth of field, which can help isolate the subject and create a more professional-looking image.
6. Framing and Leading Lines: Use elements within the space to create natural framing or leading lines to guide the viewer’s eyes through the before and after images. This could be a doorway, a window, or even a piece of furniture. These techniques add depth and structure to your photos.
7. Declutter and Stage: Before taking your photos, ensure the space is clean, organized, and free of clutter. Remove any distracting objects that could take away from the main subject of the photo. Consider staging the area by adding small decorative touches or props that enhance the overall ambiance.
By applying these lighting and composition techniques, you can elevate the visual impact of your before and after photos, making them more appealing and memorable. In the next section, we’ll dive into capturing the “before” photos effectively.
### Word count: 400
Capturing the “Before” Photos
The “before” photos capture the initial state of the area before any repairs or renovations take place. These photos serve as a reference point for comparison once the project is complete. Here are some tips for effectively capturing the “before” photos:
1. Document the Entire Space: Start by getting a comprehensive view of the area you’re focusing on. Capture wide-angle shots that showcase the full space, including the walls, floors, and any existing issues or damages that need to be addressed. This provides a clear visual representation of the starting point for your project.
2. Focus on Details: While wide-angle shots are important, don’t forget to zoom in and capture detailed shots of specific problem areas or damages. These close-up shots will add depth to your before and after series and highlight the specific issues that will be addressed during the repair or renovation process.
3. Angle and Perspective: Experiment with different angles and perspectives to create impactful before photos. Capture shots from various heights, such as crouching low or standing on a ladder, to provide different viewpoints. This can help emphasize the severity of the problem and give your audience a comprehensive understanding of the space.
4. Use Measurements or Scale Items: To provide a sense of scale, include measurements or objects of known size in your before photos. This could be a measuring tape, a ruler, or even a common household item. By doing so, you give viewers a reference point to understand the size and scope of the repairs or renovations that will take place.
5. Capture Multiple Angles: Take photos from different angles to capture the space from various perspectives. This will provide a more comprehensive view and help tell the full story of the area being repaired or renovated. Remember to vary your shots, including both wide-angle and close-up images.
6. Lighting and Exposure: Pay attention to the lighting conditions when capturing “before” photos. Ensure the space is well-lit to accurately represent the current state. Avoid using flash whenever possible, as it may create unnatural highlights and shadows. Adjust your camera settings, such as exposure compensation, to capture the most authentic representation of the space.
7. Include Relevant Proposals: If you have any drawings, floor plans, or reference images that depict the planned repairs or renovations, include them in your “before” photos. This helps viewers understand the vision for the project and provides a clear contrast between the initial condition and the desired outcome.
Remember, the “before” photos play a crucial role in demonstrating the transformation that will take place. They provide a baseline for comparison, allowing viewers to appreciate the progress made during the project. With these tips, you’ll be able to effectively capture the “before” photos and set the stage for the remarkable changes to come.
### Word count: 442
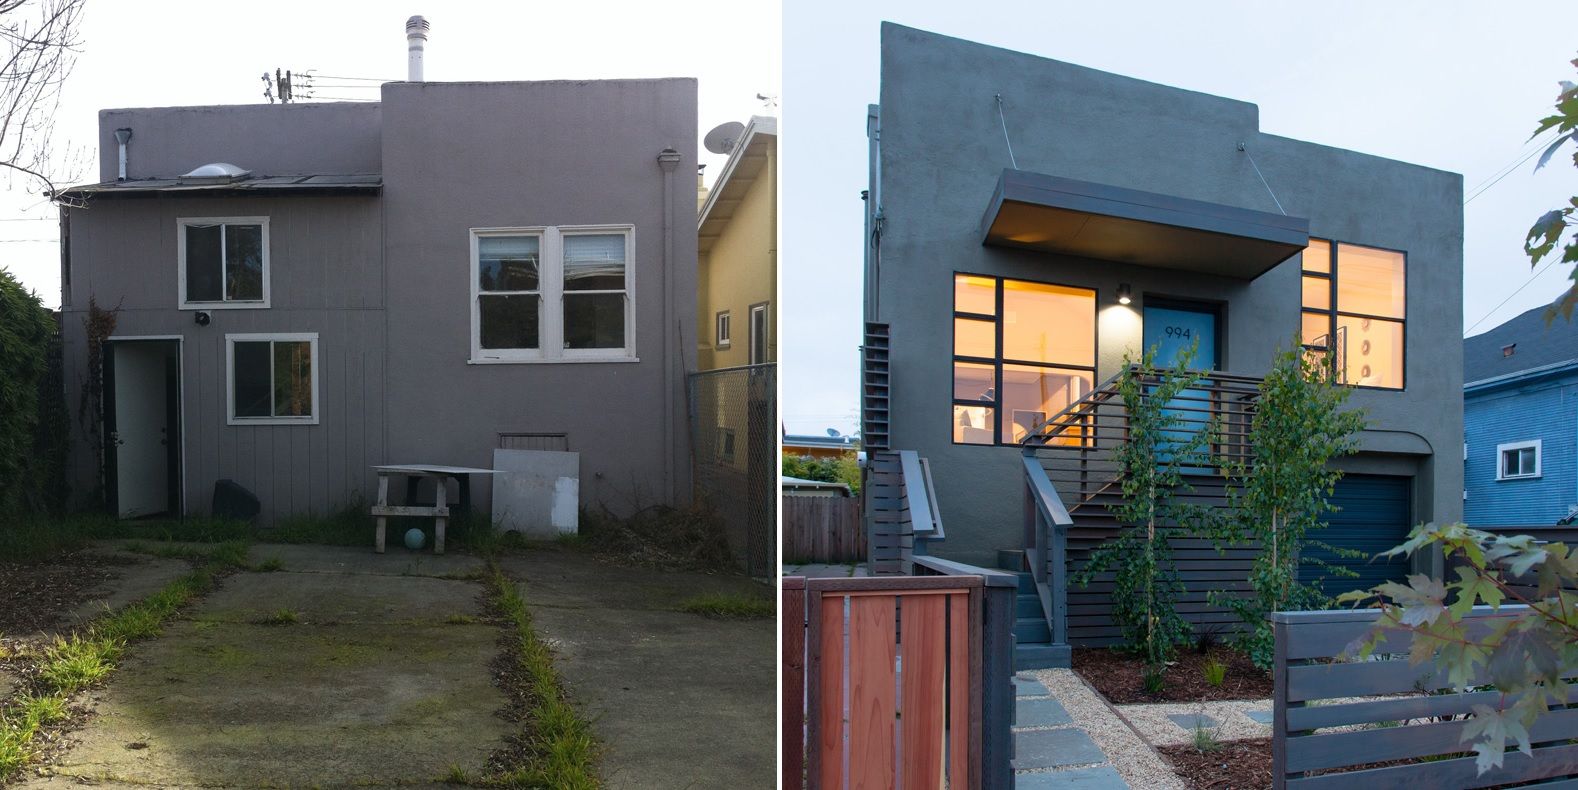
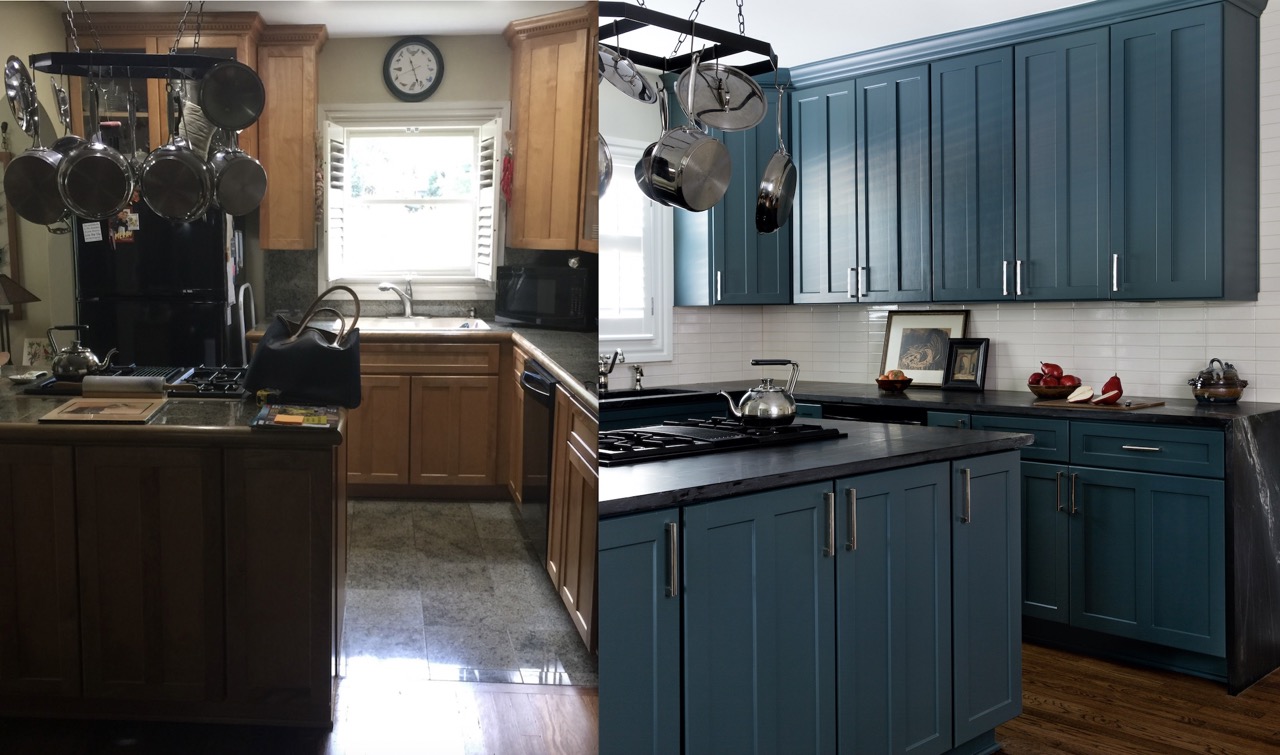
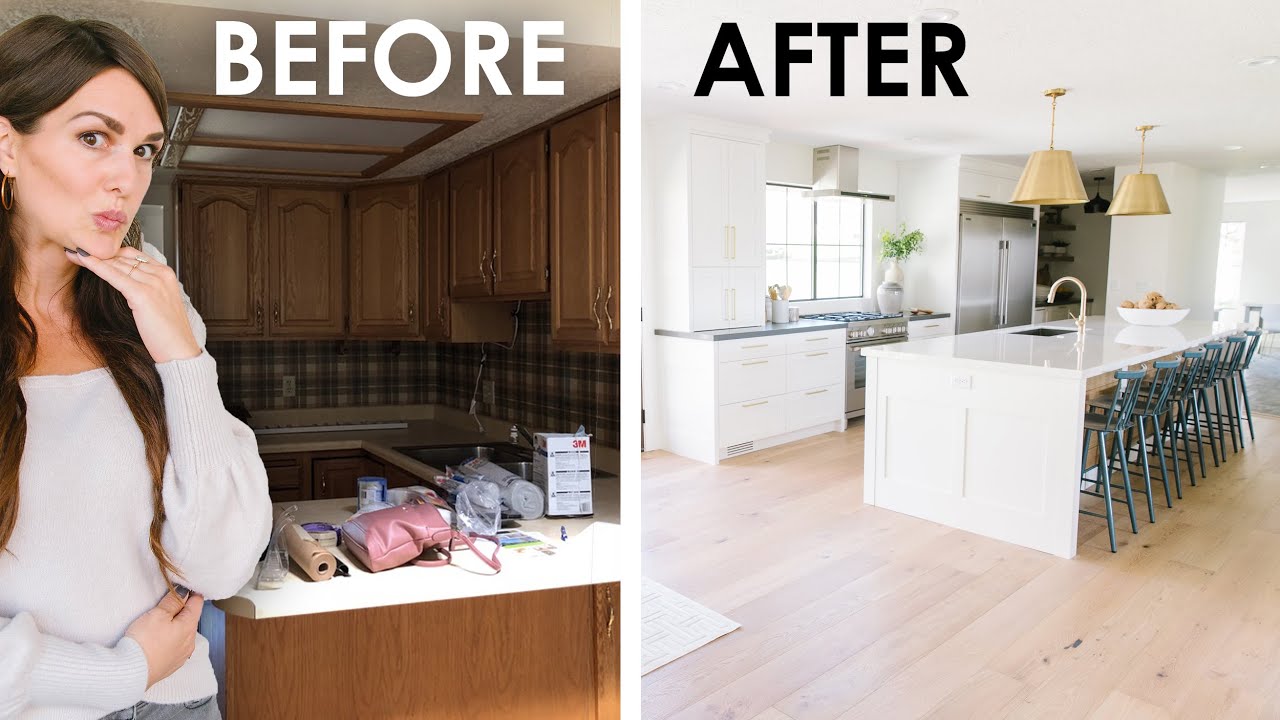
When taking before and after photos of home repair, make sure to use the same angle and lighting for both shots to clearly show the difference.
Read more: Where To Take Wildflower Photos
Capturing the “After” Photos
After putting in all the hard work and completing the home repair project, it’s time to capture the “after” photos. These photos highlight the remarkable transformation that has taken place. Here are some tips to ensure you capture captivating “after” photos:
1. Showcase the Entire Space: Begin by capturing wide-angle shots that showcase the entire space. This allows viewers to see the overall impact of the repairs or renovations. Make sure to include all the areas that were part of the project, capturing the walls, floors, and any new features or elements that have been added.
2. Highlight Key Areas and Upgrades: In addition to capturing the entire space, focus on highlighting the specific areas or upgrades that were the main focus of the project. Zoom in and capture close-up shots of the new fixtures, materials, or finishes to showcase the attention to detail and craftsmanship that went into the work.
3. Before and After Comparison: If possible, try to recreate the exact angle and perspective of the “before” photos to provide a clear comparison between the initial condition and the transformed space. This helps viewers fully appreciate the impact of the repairs or renovations.
4. Pay Attention to Lighting: Ensure that the lighting in your “after” photos accurately represents the space and highlights the improvements. Natural lighting is usually the most desirable option, but if needed, use supplemental lighting techniques to enhance the space’s features. Avoid overexposure by adjusting your camera settings accordingly.
5. Balance the Composition: Pay attention to the composition of your “after” photos to create visually pleasing images. Use the rule of thirds or other composition techniques to balance the elements within the frame. Consider the placement of furniture or decorative pieces to create a harmonious and inviting atmosphere.
6. Show Functionality and Use: Demonstrate the functionality and use of the repaired or renovated space by photographing it in action. For example, if you’ve improved a kitchen, capture a photo with a beautifully set table or someone cooking. This helps viewers imagine themselves using the space and adds depth to your portfolio.
7. Pay Attention to Details: Don’t forget to capture the smaller details that make the project complete. Focus on features such as new hardware, trim work, or carefully installed tile patterns. These details contribute to the overall aesthetic and demonstrate your attention to quality.
8. Before and After Collage: Consider creating a “before and after” collage to showcase the transformation in a single image. This allows viewers to quickly grasp the impact of the project and creates an engaging visual representation of your work.
By following these tips, you can ensure that your “after” photos effectively capture and highlight the remarkable changes made during the home repair project. These photos will serve as a testament to your skills and expertise, leaving a lasting impression on your audience.
### Word count: 484
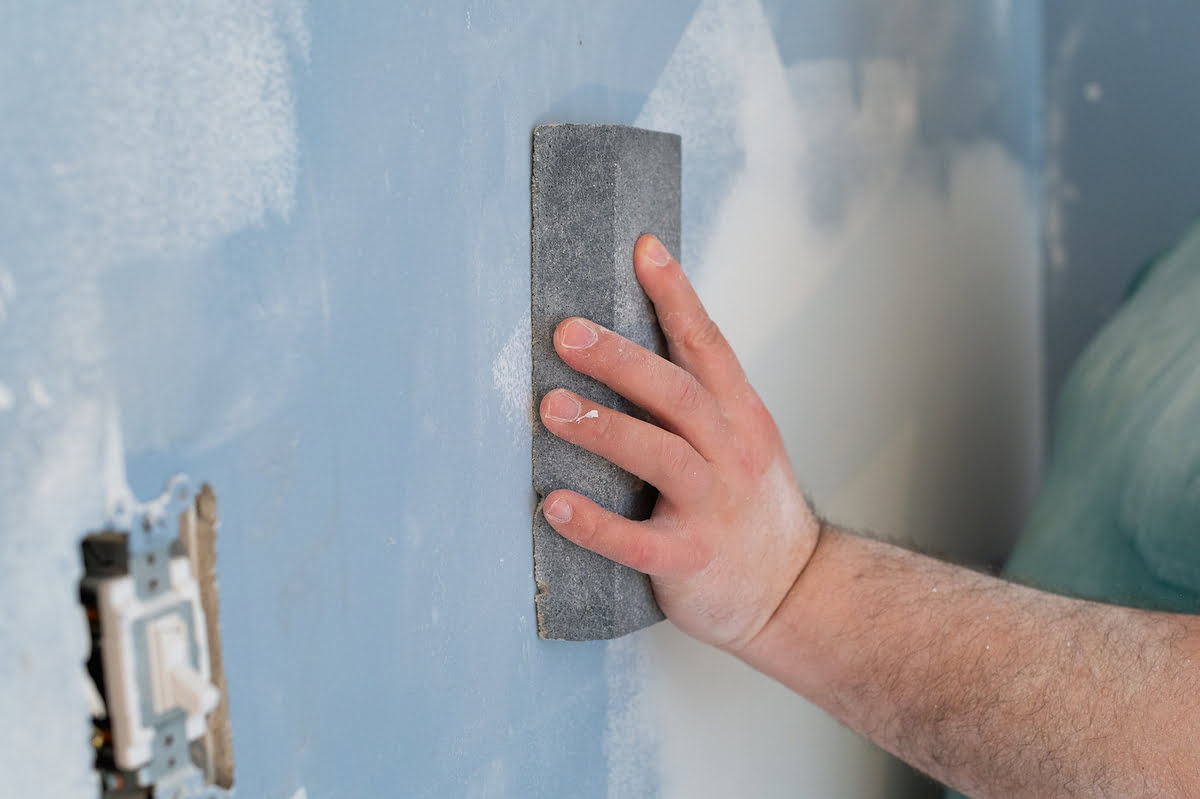
Editing and Enhancing Your Photos
Once you’ve captured the before and after photos of your home repair project, the next step is to edit and enhance them to showcase your work in the best possible way. Here are some key editing techniques to consider:
1. Adjusting Exposure and Contrast: Use photo editing software to adjust the exposure and contrast of your photos. This helps to bring out the details and make the colors pop. Be careful not to overdo it; aim for a natural and balanced look.
2. Correcting White Balance: Sometimes the lighting conditions during the photo shoot can result in inaccurate colors. Use the white balance adjustment in your editing software to ensure the colors are true to life. Experiment with different presets or manually adjust the temperature and tint until you achieve the desired effect.
3. Cropping and Straightening: Crop your photos to remove any distracting elements or to improve the composition. Straighten any tilted horizons or lines to give your photos a polished look. Pay attention to proportions and balance when cropping, ensuring the focus remains on the subject.
4. Sharpening and Clarity: Enhance the sharpness of your photos to make the details stand out. Use the sharpening tools in your editing software to add clarity and crispness to the images. However, be cautious not to over-sharpen, as it can create unnatural artifacts.
5. Removing Blemishes or Distractions: If there are any imperfections or distractions in the photos, such as dust or unwanted objects, use the spot removal or healing tools to remove them. This helps to create a clean and professional-looking image.
6. Enhancing Colors: Boost and enhance the colors in your photos, making them more vibrant and visually appealing. Use the saturation and vibrance adjustments to achieve the desired effect. Be mindful of maintaining natural colors and avoiding overly saturated or unrealistic tones.
7. Applying Filters or Presets: Experiment with different filters or presets to add a unique touch to your photos. These can help enhance the mood or create a cohesive look across your before and after series. However, remember to use them tastefully and sparingly, ensuring they complement the subject matter.
8. Consistency and Branding: Maintain a consistent editing style and apply a cohesive look throughout your before and after photos. This helps to create a professional and recognizable brand identity. Develop a signature editing style that sets your work apart from others.
Remember that editing should enhance your photos and not alter them beyond recognition. Strive for a natural and authentic representation of your work while bringing out the best qualities of each image.
Once you have edited and enhanced your photos, save them in a web-optimized format and consider creating a digital portfolio or gallery where you can showcase your before and after images to potential clients or anyone interested in your work.
### Word count: 503
Showcasing Your Work through Before and After Photos
Now that you have captured and enhanced your before and after photos, it’s time to showcase your work to the world. Here are some effective ways to present your before and after photos:
1. Website or Portfolio: Create a dedicated section on your website or portfolio to showcase your before and after photos. Organize them in a visually appealing and user-friendly manner, allowing visitors to easily navigate through your projects. Provide brief descriptions and key details for each project to give context and highlight your expertise.
2. Social Media: Share your before and after photos on social media platforms to reach a wider audience. Utilize popular platforms like Instagram, Facebook, and Pinterest to captivate and engage potential clients. Include compelling captions and relevant hashtags to attract attention and drive traffic to your website or portfolio.
3. Online Directories and Review Sites: Submit your before and after photos to relevant online directories and review sites specific to the home maintenance and repair industry. These platforms provide an opportunity to showcase your work to a targeted audience actively seeking home improvement services.
4. Case Studies and Success Stories: Use your before and after photos to create case studies or success stories that highlight the challenges you faced, the solutions you implemented, and the remarkable transformations achieved. Share these stories with potential clients to demonstrate your problem-solving abilities and the value you can provide.
5. Before and After Collages: Create visually striking before and after collages that showcase the transformation in a single image. This side-by-side comparison allows viewers to see the immediate impact of your work and adds a wow factor to your portfolio or social media posts.
6. Client Testimonials: Pair your before and after photos with client testimonials to further validate your skills and customer satisfaction. Testimonials provide social proof and add credibility to your work. Include quotes from clients who were impressed with the quality of the repairs or renovations captured in your photos.
7. Before and After Videos: Consider creating short videos that take viewers on a visual journey from the “before” state to the stunning “after” result. Use video editing software to combine your before and after photos, add music or narration, and create an engaging medium to showcase your work.
8. Presentations and Events: Utilize your before and after photos in presentations or events such as home improvement expos, industry conferences, or networking gatherings. These visual representations of your work can leave a lasting impression on potential clients, creating memorable connections and opportunities.
Remember to customize your approach based on your target audience and the platforms you are using. Tailor your content to appeal to the needs and interests of your potential clients.
By effectively showcasing your before and after photos, you will undoubtedly attract attention, differentiate yourself from competitors, and position yourself as a skilled and professional home maintenance and repair expert.
### Word count: 486
Conclusion
Capturing before and after photos of your home repair projects is a powerful way to showcase your skills, attract potential clients, and leave a lasting impression. By following the tips and techniques discussed in this article, you can effectively showcase the transformative power of your work and establish yourself as a trusted professional in the home maintenance and repair industry.
From choosing the right equipment to understanding lighting and composition techniques, each step plays a vital role in capturing captivating before and after photos. The “before” photos provide a visual baseline, highlighting the initial condition and the areas in need of repair or renovation. The “after” photos showcase the remarkable changes made, emphasizing your expertise and attention to detail.
Through the editing and enhancement process, you can refine your photos to ensure they truly represent the quality of your work. Adjusting exposure and contrast, correcting white balance, and removing distractions all contribute to creating visually appealing images. Consistency in editing style and branding helps to create a strong and recognizable presence.
Once your photos are captured and enhanced, it’s time to showcase your work. Utilize your website, social media platforms, online directories, and case studies to reach your target audience and generate interest in your services. Remember to accompany your before and after photos with client testimonials and success stories to further validate and reinforce your expertise.
By effectively communicating the transformation achieved through your before and after photos, you can inspire and educate others while establishing yourself as a reliable and skilled professional. You have the power to captivate potential clients, leave a lasting impression on your audience, and elevate your professional brand in the home maintenance and repair industry.
So, grab your camera, capture those stunning before and after shots, and let your work speak for itself through the power of visual storytelling.
### Word count: 343
Frequently Asked Questions about How To Take Before And After Photos Of Home Repair
Was this page helpful?
At Storables.com, we guarantee accurate and reliable information. Our content, validated by Expert Board Contributors, is crafted following stringent Editorial Policies. We're committed to providing you with well-researched, expert-backed insights for all your informational needs.