Home>Home Maintenance>Why Is There A Clicking Noise When The Car Air Conditioner Is On
Home Maintenance
Why Is There A Clicking Noise When The Car Air Conditioner Is On
Modified: October 28, 2024
Experiencing a clicking noise when your car's air conditioner is on? Find out why and how to fix it through our expert home maintenance tips.
(Many of the links in this article redirect to a specific reviewed product. Your purchase of these products through affiliate links helps to generate commission for Storables.com, at no extra cost. Learn more)
Introduction
Welcome to our comprehensive guide on common home maintenance issues and how to fix them. In this article, we will be addressing the annoying clicking noise that can occur when the air conditioner is on in a car. If you’ve ever experienced this problem, you know how frustrating it can be to drive with a constant clicking sound in the background. Not only is it distracting, but it may also indicate an underlying issue with your car’s air conditioning system.
Understanding the causes of this clicking noise is essential in order to identify and resolve the problem. Luckily, most of the causes can be easily fixed with some basic troubleshooting and maintenance. In some cases, however, professional assistance may be required. Regardless, addressing the issue promptly can help prevent further damage to your car’s air conditioning system and ensure your comfort while driving.
So, why does this clicking noise occur when the air conditioner is on in a car? There are several possible culprits, ranging from minor issues to more serious underlying problems. In the following sections, we will delve into the most common causes of the clicking noise and provide you with detailed steps on how to fix them.
It’s important to note that while this article is focused on car air conditioners, many of the causes and solutions discussed can also apply to other types of air conditioning systems.
Now, let’s dive into the causes of clicking noise in a car air conditioner and explore the solutions to resolve this annoying issue.
Key Takeaways:
- Don’t ignore the clicking noise in your car’s air conditioner! Check and fix issues like faulty blend door actuators, low refrigerant levels, and worn-out compressor clutches to enjoy a quiet and comfortable drive.
- Regular maintenance, such as cleaning or replacing air filters, can prevent clicking noises in your car’s air conditioner. Address issues promptly and seek professional help when needed for a peaceful driving experience.
Read more: AC Clicking Noise When Turned On
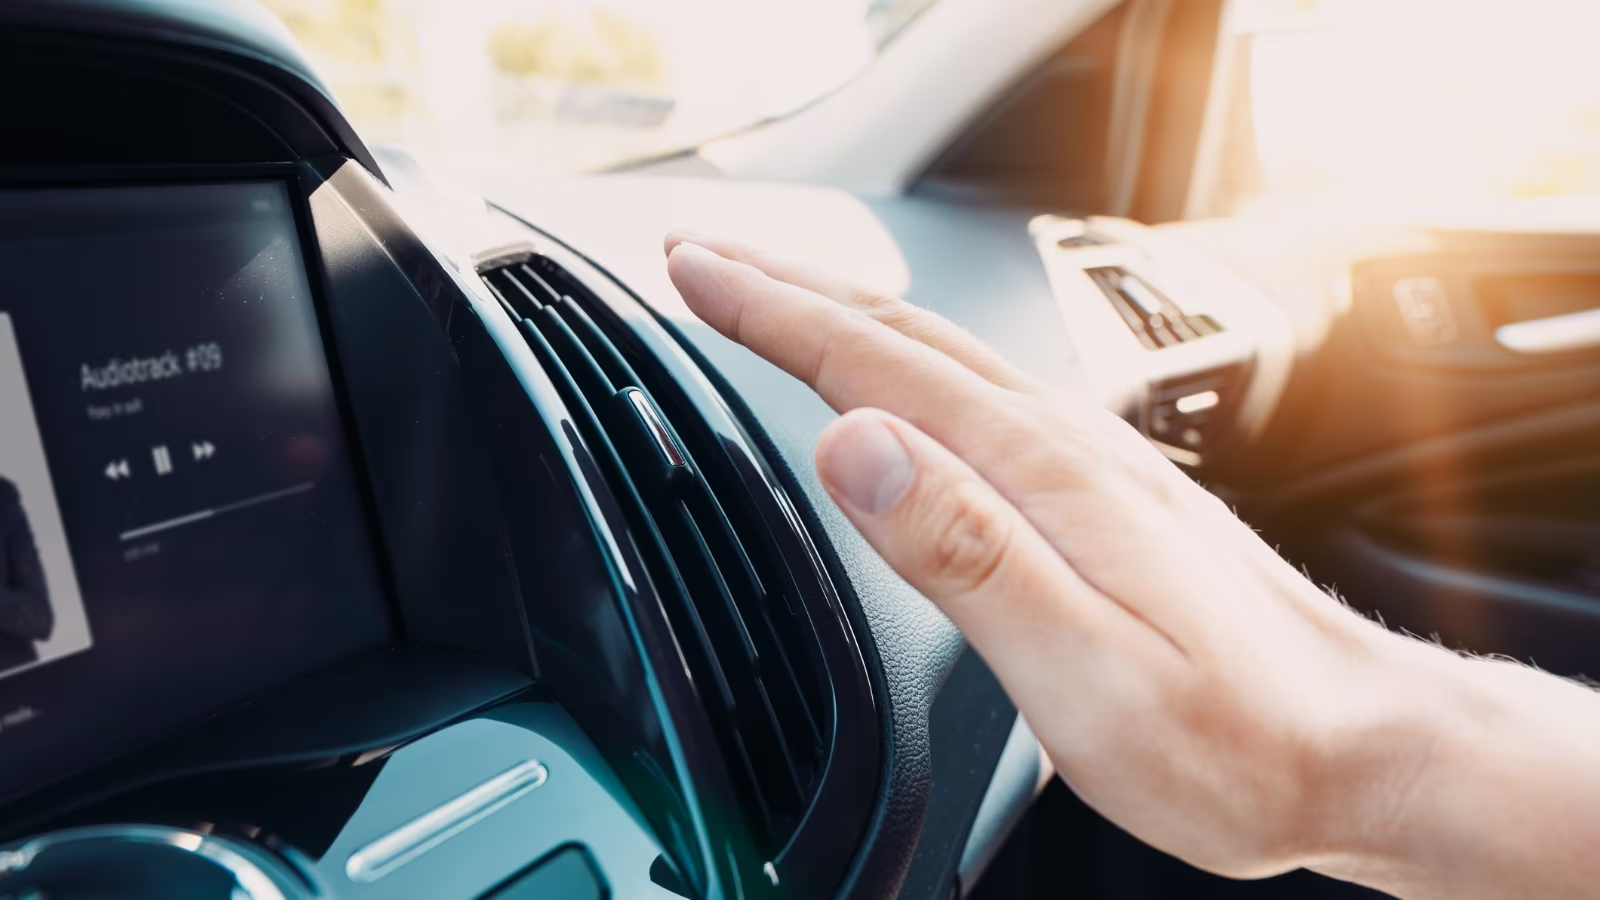
Causes of Clicking Noise in Car Air Conditioner
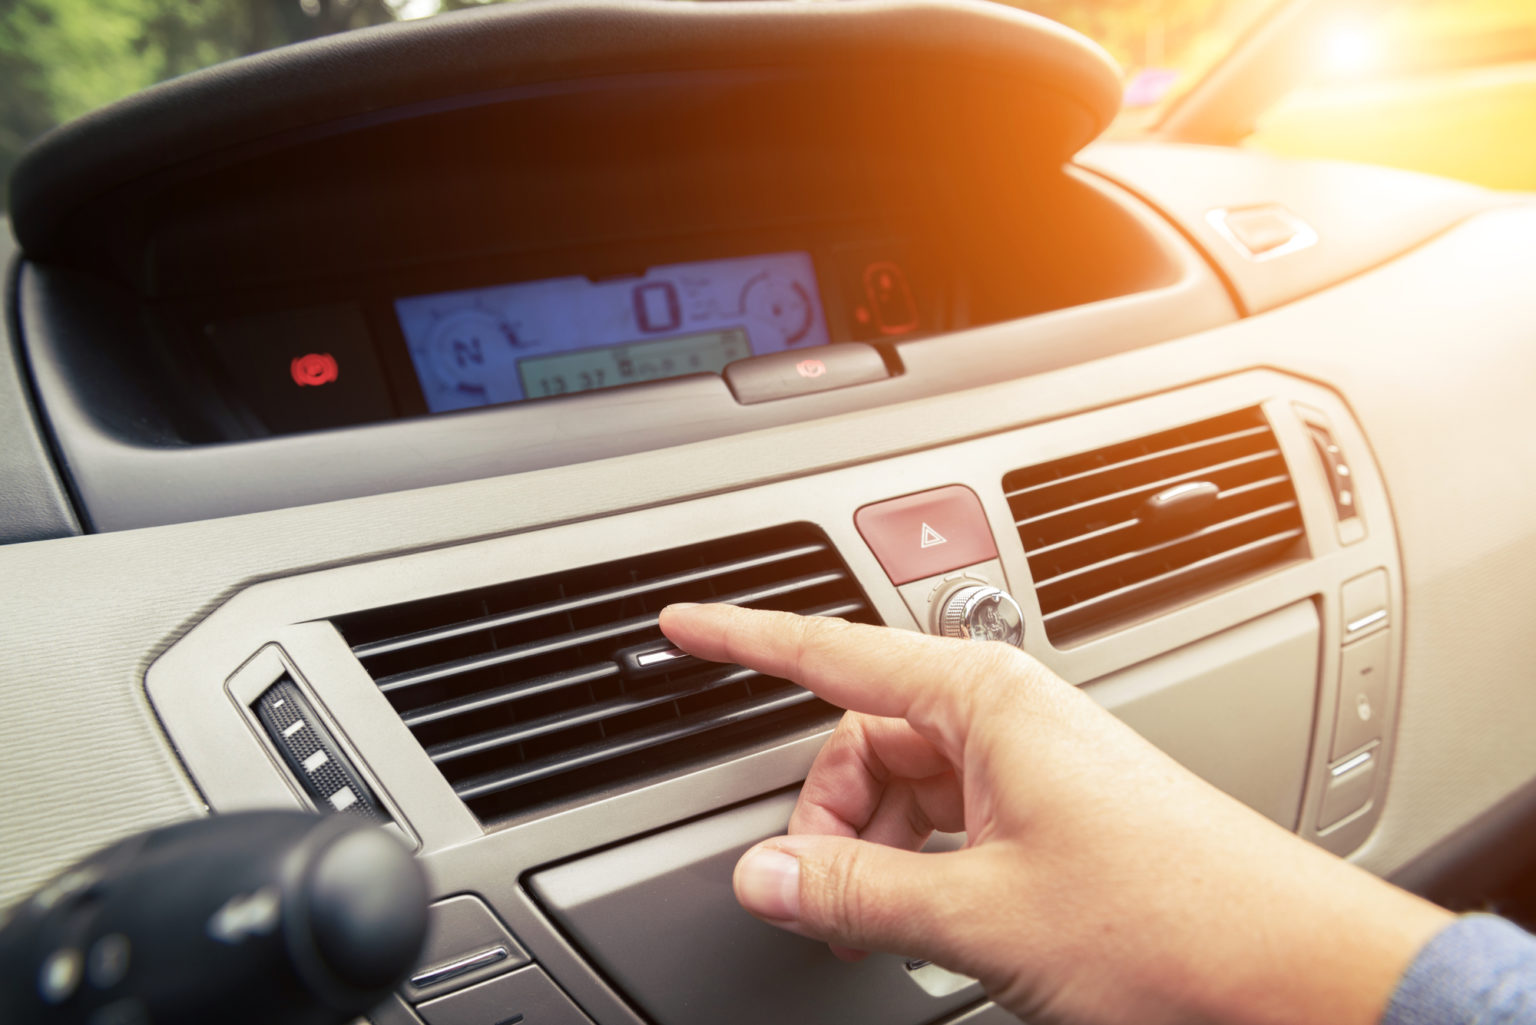
When you hear a clicking noise coming from your car’s air conditioner, it could be an indication of various underlying issues. Identifying the cause of the clicking noise is the first step towards resolving the problem. Here are some common causes:
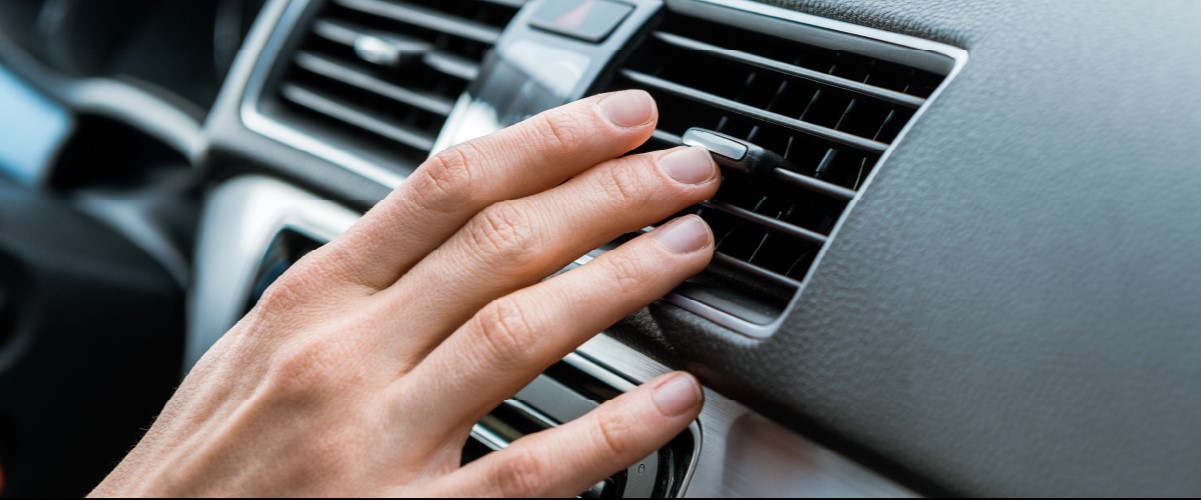
- Faulty Blend Door Actuator: The blend door actuator controls the flow of air between the different vents in your car. If it becomes faulty or gets stuck, it can create a clicking noise as it tries to move the blend door.
- Low Refrigerant Level: Insufficient refrigerant can cause the air conditioning system to malfunction. Low refrigerant levels can lead to a clicking noise as the compressor tries to engage but fails due to the lack of refrigerant.
- Worn-out Compressor Clutch: The compressor clutch is responsible for engaging and disengaging the compressor. Over time, the clutch can wear out, resulting in a clicking noise when it tries to engage properly.
- Dirty or Clogged Air Filters: Dirty or clogged air filters can restrict the flow of air through the vents, causing the system to work harder and produce a clicking noise. Regularly cleaning or replacing the air filters can help alleviate this issue.
- Malfunctioning Expansion Valve: The expansion valve regulates the flow of refrigerant into the evaporator coil. If it becomes defective, it can cause a clicking noise as it struggles to control the refrigerant flow.
- Loose or Damaged Fan Belt: A loose or damaged fan belt can lead to a clicking noise when the air conditioner is turned on. If the belt is worn out or misaligned, it may not provide the necessary tension, resulting in the clicking sound.
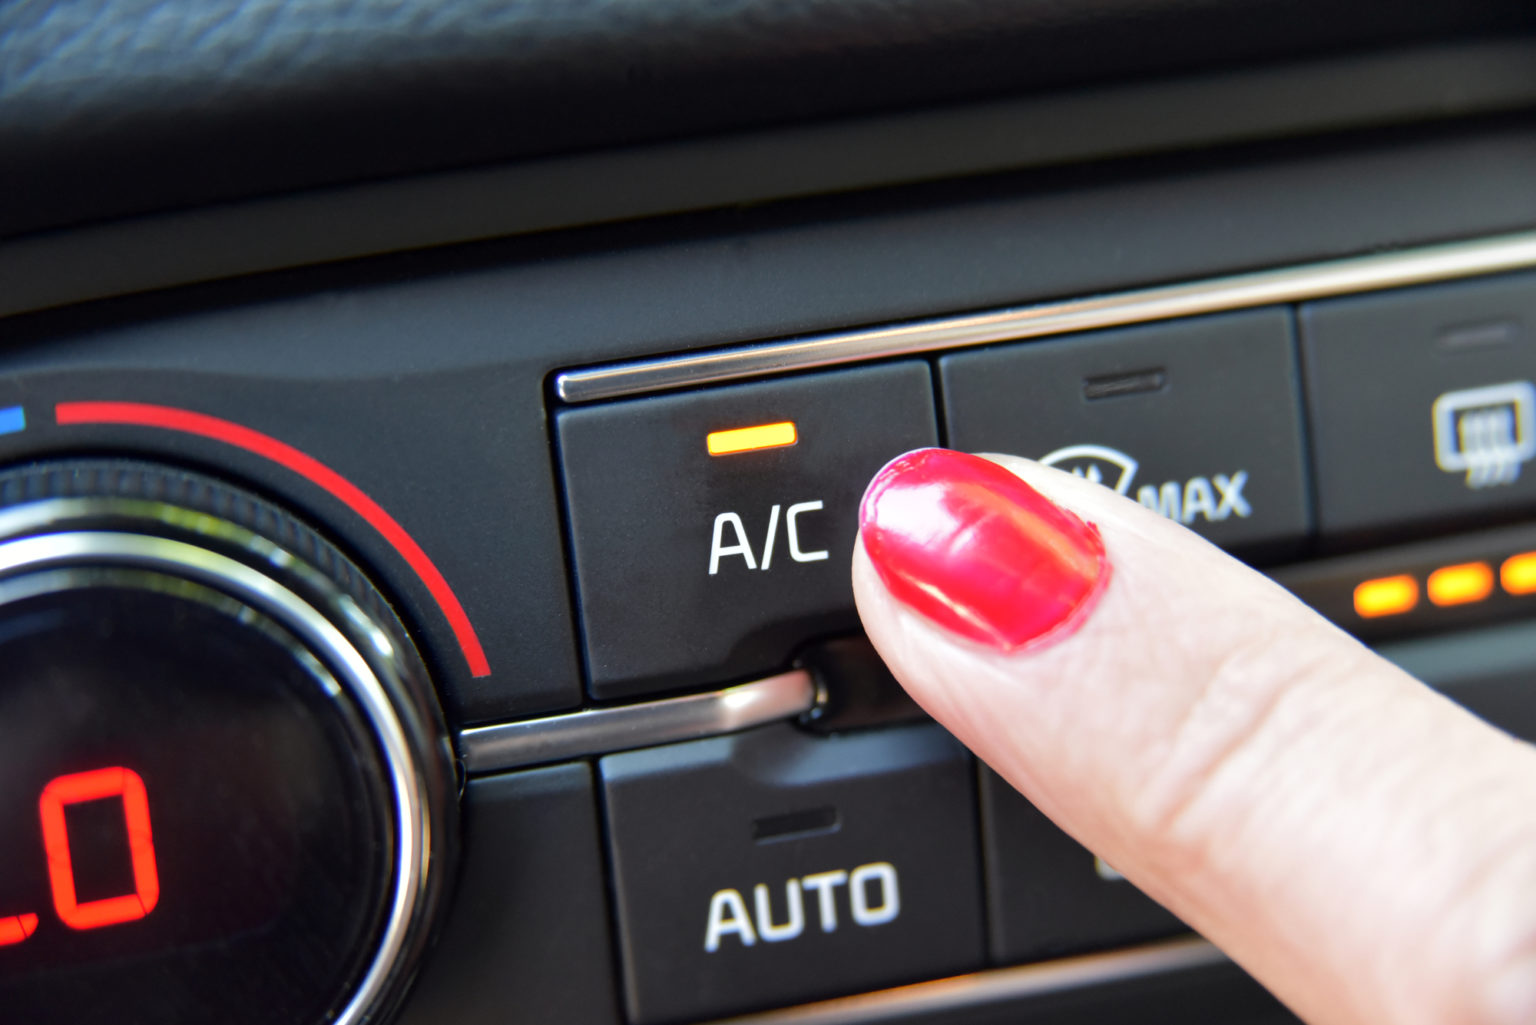
- Defective AC Relay: The AC relay controls the flow of electricity to the compressor. If the relay malfunctions, it can cause the compressor to repeatedly turn on and off, creating a clicking noise.
- Faulty AC Pressure Switch: The AC pressure switch monitors the pressure of the refrigerant in the system. If the switch is faulty, it may send incorrect signals to the compressor, causing it to click on and off repeatedly.
Now that we have identified the possible causes of the clicking noise in a car air conditioner, let’s move on to the solutions to address each issue effectively.
Faulty Blend Door Actuator
A faulty blend door actuator is a common cause of clicking noise in a car air conditioner. The blend door actuator is responsible for directing the airflow between different vents in the car’s HVAC system. When it becomes faulty or gets stuck, it can create a clicking noise as it tries to move the blend door but fails to do so smoothly.
To fix this issue, follow these steps:
- Locate the blend door actuator: The blend door actuator is usually located behind the dashboard on the passenger side of the car. Consult your vehicle’s manual or search online for the specific location in your car model.
- Remove the blend door actuator: Use a screwdriver or socket wrench to remove the screws or bolts securing the blend door actuator. Disconnect any electrical connectors attached to it.
- Inspect the blend door actuator: Check for any obvious signs of damage or wear, such as broken gears or a stuck mechanism. If you notice any issues, replace the blend door actuator with a new one.
- Install the new blend door actuator: Position the new blend door actuator in place and secure it with the screws or bolts. Reconnect any electrical connectors that were disconnected.
- Test the air conditioner: Start the car and turn on the air conditioner to check if the clicking noise has disappeared. Make sure the airflow is properly distributed across various vents.
If the clicking noise persists after replacing the blend door actuator, it may be necessary to seek professional help. A mechanic or HVAC specialist can diagnose the issue more accurately and provide further guidance.
Remember to always refer to your vehicle’s manual or consult a professional for specific instructions and guidance based on your car’s make and model.
Now that we have addressed the faulty blend door actuator, let’s move on to the next common cause of clicking noise in a car air conditioner.
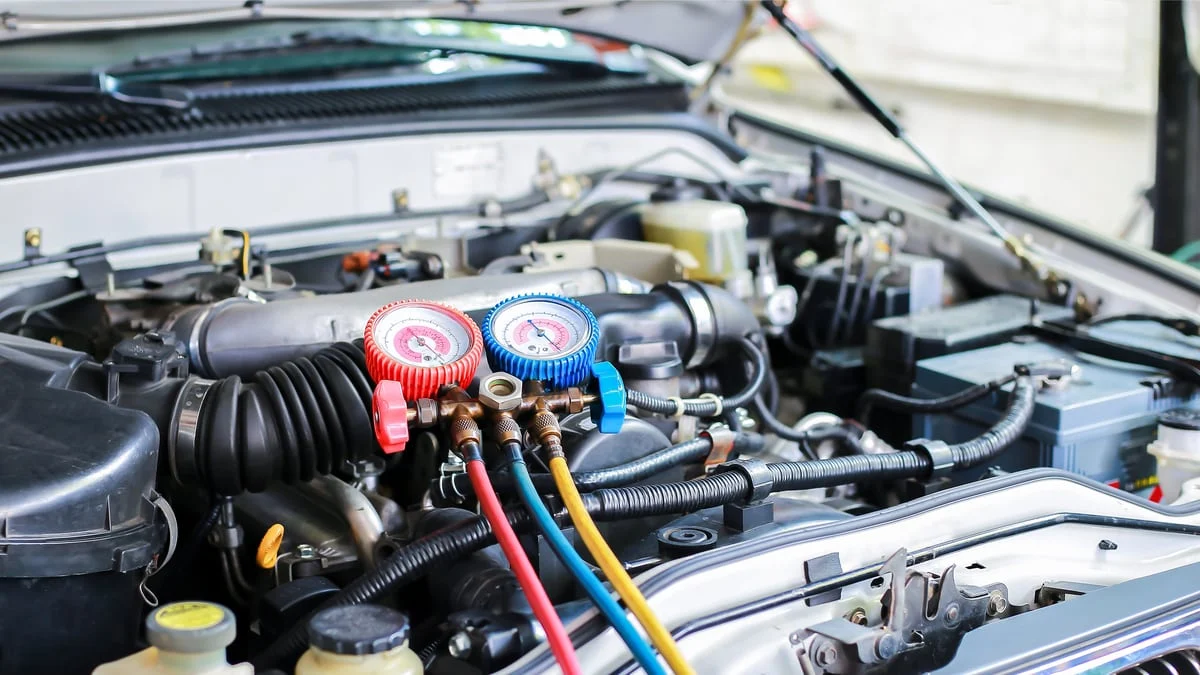
Low Refrigerant Level
Another common cause of clicking noise in a car air conditioner is a low refrigerant level. Refrigerant is a vital component of the air conditioning system as it absorbs and releases heat to cool the air. When the refrigerant level is low, the air conditioner may struggle to function properly, leading to a clicking noise.
To address this issue, follow these steps:
- Check the refrigerant level: Consult your vehicle’s manual to locate the refrigerant access point. Typically, it is located near the condenser or compressor. Use a refrigerant pressure gauge to check the current level of refrigerant. If it is below the recommended level, it indicates a refrigerant leak or insufficient charging.
- Inspect for refrigerant leaks: If the refrigerant level is low, it is essential to inspect for any visible signs of leaks. Look for oil stains or greenish residue around the fittings, hoses, or components of the air conditioning system. Leaks can occur due to damaged components or worn-out seals.
- Repair the leaks: If you find any leaks, it is crucial to address them before recharging the refrigerant. Depending on the severity of the leak, you may need to replace a specific component or repair the damaged area. Consult a professional mechanic or HVAC specialist for proper diagnosis and repair.
- Recharge the refrigerant: Once the leaks are repaired, you can recharge the refrigerant to the recommended level. Follow the instructions provided by the refrigerant manufacturer or seek assistance from a professional to ensure proper charging.
- Test the air conditioner: Start the car and turn on the air conditioner to check if the clicking noise has resolved. Verify that cool air is coming out of the vents and the system is functioning optimally.
It’s important to note that handling refrigerant can be hazardous and requires specialized knowledge and equipment. If you’re unfamiliar with the process or unsure about your abilities, it’s best to consult a professional mechanic or HVAC specialist for assistance.
Now that we have addressed the issue of low refrigerant level, let’s explore the next possible cause of clicking noise in a car air conditioner.
Worn-out Compressor Clutch
A worn-out compressor clutch can be another common cause of clicking noise in a car air conditioner. The compressor clutch engages and disengages the compressor, which is responsible for pressurizing the refrigerant and circulating it through the air conditioning system. Over time, the clutch may wear out, resulting in a clicking noise when it attempts to engage properly.
To address this issue, follow these steps:
- Locate the compressor: The compressor is typically located on the engine side of the air conditioning system. It is connected to the engine through a belt and has a clutch mechanism at the front.
- Inspect the compressor clutch: Visually inspect the compressor clutch for any signs of wear or damage. Check for loose or broken components, worn-out friction surfaces, or excessive rust or corrosion. If you notice any issues, it may be necessary to replace the compressor clutch.
- Remove and replace the compressor clutch: Detach the drive belt from the compressor by loosening the tensioner pulley. Depending on the specific model of your car, you may need to remove additional components, such as the fan or radiator, to gain access to the clutch assembly. Once you have access to the clutch, remove the retaining bolts or clips and disconnect any electrical connectors. Replace the worn-out clutch with a new one.
- Reinstall the compressor clutch: Secure the new compressor clutch in place using the retaining bolts or clips. Reconnect any electrical connectors that were disconnected. Ensure that all components are properly aligned and tightened according to the manufacturer’s specifications.
- Test the air conditioner: Start the car and turn on the air conditioner to check if the clicking noise has been resolved. Listen for any abnormal sounds and verify that the air conditioning system is functioning properly.
If you are not confident in performing these steps yourself, it is recommended to seek assistance from a professional mechanic or automotive technician. They have the necessary expertise and tools to handle the compressor clutch replacement effectively and safely.
Now that we have addressed the worn-out compressor clutch, let’s move on to the next possible cause of clicking noise in a car air conditioner.
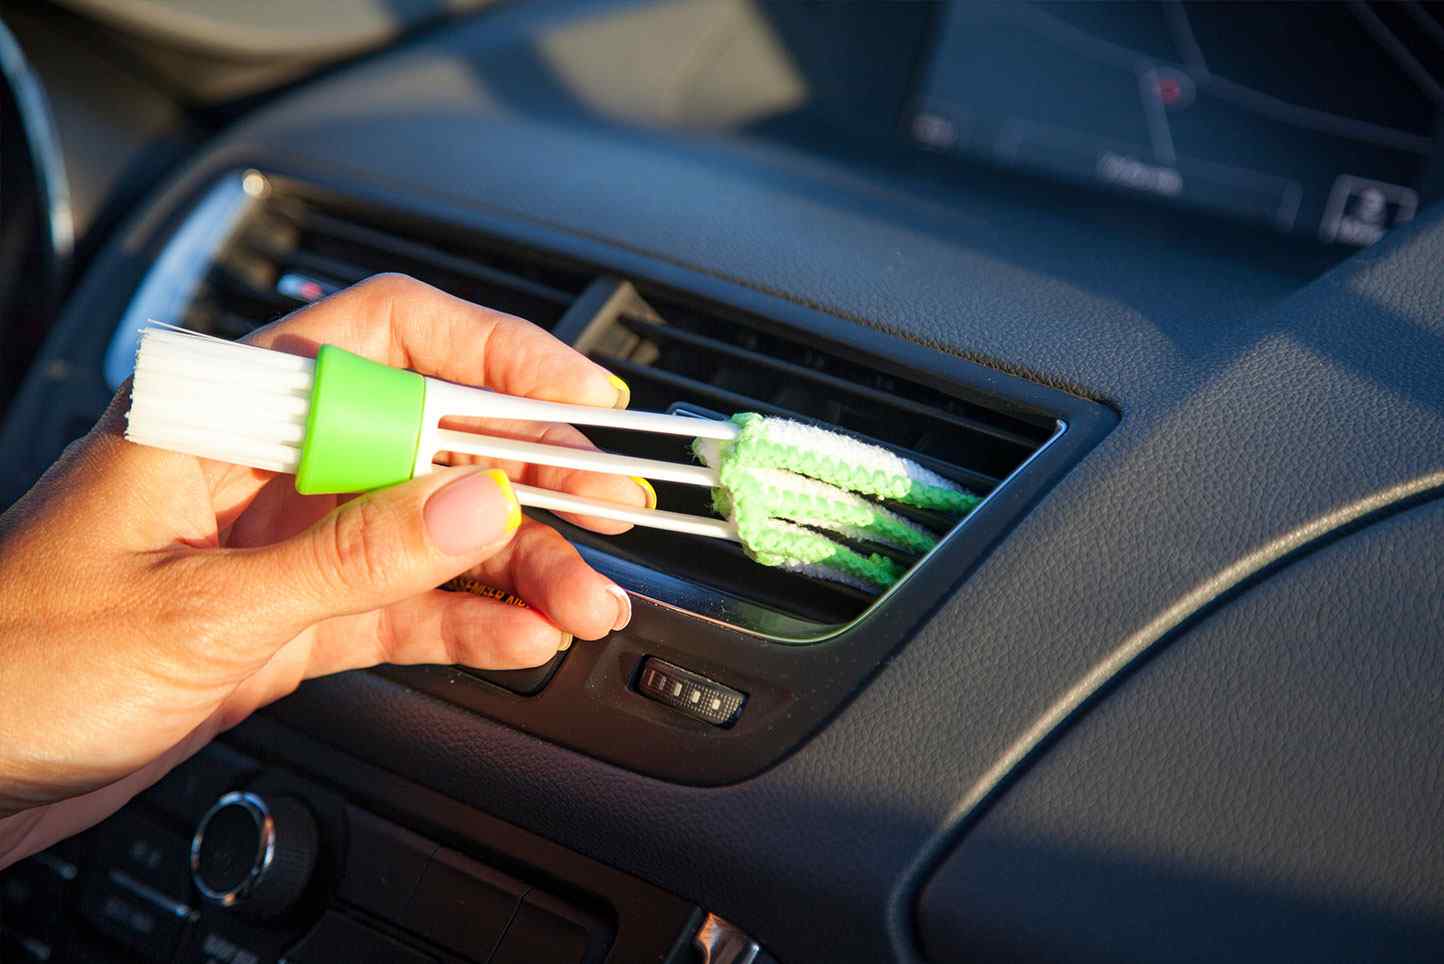
Dirty or Clogged Air Filters
Dirty or clogged air filters can contribute to a clicking noise in a car air conditioner. The air filters are responsible for capturing dust, debris, and other particles from the outside air before it enters the system. When the filters become dirty or clogged, they can restrict the airflow, causing the air conditioner to work harder and produce abnormal sounds, including clicking noises.
Here’s how you can address this issue:
- Locate the air filters: The air filters are typically located under the hood of the car, near the intake area. Consult your vehicle’s manual or search online for the specific location in your car model.
- Inspect the air filters: Remove the air filter housing cover and inspect the filters for dirt, dust, and debris. If they appear dirty or clogged, it is time to clean or replace them.
- Clean the air filters: If the filters are reusable, use compressed air or a vacuum cleaner to remove the accumulated dirt and debris. Ensure that you clean both sides of the filter thoroughly. Be careful not to damage the filter’s delicate material during the cleaning process.
- Replace the air filters: If the air filters are disposable or if they are excessively dirty and cannot be effectively cleaned, it is best to replace them with new filters. Consult your vehicle’s manual or consult a professional to ensure you purchase the correct filters for your car model.
- Reinstall the air filters: Once the filters are cleaned or replaced, carefully reinstall them in the correct orientation. Ensure that they are securely fitted and that the air filter housing cover is properly closed.
- Test the air conditioner: Start the car and turn on the air conditioner to check if the clicking noise has been resolved. Pay attention to the airflow and listen for any abnormal sounds. A clean or new air filter should improve the efficiency of the air conditioning system and help eliminate clicking noises.
Regularly checking and maintaining the air filters is essential for optimal performance and air quality in your car’s air conditioning system. It is recommended to clean or replace the air filters at least once or twice a year, depending on your driving conditions and the manufacturer’s recommendations.
If the clicking noise persists despite cleaning or replacing the air filters, it may be necessary to seek professional assistance to diagnose and address any other underlying issues with the air conditioning system.
We have now addressed the issue of dirty or clogged air filters. Let’s move on to the next possible cause of clicking noise in a car air conditioner.
Malfunctioning Expansion Valve
A malfunctioning expansion valve can be a culprit behind the clicking noise in a car air conditioner. The expansion valve is responsible for regulating the flow of refrigerant into the evaporator coil. If it becomes defective, it can cause the refrigerant flow to be disrupted, leading to abnormal sounds like clicking.
Here’s how you can address this issue:
- Locate the expansion valve: The expansion valve is typically located near the firewall, on the passenger side of the engine compartment. Consult your vehicle’s manual or search online for the specific location in your car model.
- Inspect the expansion valve: Examine the expansion valve for any obvious signs of damage or malfunction. Look for leaks, corrosion, or loose connections. If you notice any issues, it may be necessary to replace the expansion valve.
- Disconnect the refrigerant lines: Use the appropriate tools, such as wrenches or pliers, to disconnect the refrigerant lines connected to the expansion valve. Be cautious as refrigerant may be released during this process. Ensure that you follow proper safety precautions and handle refrigerant responsibly.
- Remove the old expansion valve: Unscrew or unbolt the old expansion valve from its mounting position. Carefully remove it from the system, ensuring not to damage any surrounding components or fittings.
- Install the new expansion valve: Position the new expansion valve in place and secure it with the appropriate screws or bolts. Reconnect the refrigerant lines and make sure they are properly tightened.
- Recharge the refrigerant: If any refrigerant was lost during the process, it is crucial to recharge the system with the appropriate amount of refrigerant. Consult your vehicle’s manual or seek professional assistance to ensure proper recharging.
- Test the air conditioner: Start the car and turn on the air conditioner to check if the clicking noise has been resolved. Listen for any abnormal sounds and verify that the air conditioning system is functioning optimally.
It is important to note that handling refrigerant and working on the air conditioning system requires specialized knowledge and equipment. If you are not experienced or confident in performing these steps, it is recommended to seek assistance from a professional mechanic or HVAC specialist.
Now that we have addressed the malfunctioning expansion valve, let’s move on to the next possible cause of clicking noise in a car air conditioner.
Loose or Damaged Fan Belt
A loose or damaged fan belt can be a common cause of clicking noise in a car air conditioner. The fan belt, also known as the serpentine belt, drives various components of the engine, including the air conditioning compressor. If the belt becomes loose or damaged, it can create a clicking sound as it slips or rubs against the pulleys.
Here’s how you can address this issue:
- Locate the fan belt: The fan belt is typically located at the front of the engine, connecting the crankshaft pulley to various other components, including the air conditioning compressor. Refer to your vehicle’s manual or search online for the specific location and routing of the fan belt in your car model.
- Inspect the fan belt: Visually inspect the fan belt for signs of wear, cracks, fraying, or looseness. If you notice any issues, it may be necessary to tighten or replace the fan belt.
- Tighten the fan belt: If the fan belt is loose, use a wrench or ratchet with the appropriate socket to adjust the tension. Refer to your vehicle’s manual for the recommended tension specifications, as they may vary depending on the make and model of your car. Once tightened, ensure that the belt has the correct tension and does not slip or sag.
- Replace the fan belt: If the fan belt is severely damaged or has exceeded its service life, it is best to replace it. To do so, release the tension on the belt by loosening the tensioner pulley. Remove the old belt and install a new one according to the manufacturer’s instructions and the belt routing diagram.
- Inspect other belt-driven components: While addressing the fan belt, take the opportunity to inspect other belt-driven components, such as the alternator, power steering pump, and water pump. Check for any signs of wear or damage and address any issues you may find.
- Test the air conditioner: Start the car and turn on the air conditioner to check if the clicking noise has been resolved. Ensure that the fan belt is properly aligned, tensioned, and does not produce any abnormal sounds during operation.
If you are unsure or uncomfortable performing these steps, it is recommended to seek assistance from a professional mechanic or automotive technician. They have the necessary expertise and tools to handle the fan belt tightening or replacement effectively and safely.
We have now addressed the issue of a loose or damaged fan belt. Let’s move on to the next possible cause of clicking noise in a car air conditioner.
Defective AC Relay
A defective AC relay can be a potential cause of clicking noise in a car air conditioner. The AC relay is responsible for controlling the flow of electricity to the air conditioning compressor. If the relay malfunctions, it can cause the compressor to repeatedly turn on and off, resulting in a clicking noise.
To address this issue, follow these steps:
- Locate the AC relay: The AC relay is typically located in the fuse box or relay panel under the hood of the car. Refer to your vehicle’s manual or search online for the specific location of the AC relay in your car model.
- Identify the faulty relay: Inspect the AC relays to identify the faulty one. Check for any signs of damage, such as burnt terminals or melted plastic. You may also use a multimeter to test the functionality of each relay.
- Replace the faulty AC relay: Once you have identified the defective relay, remove it by pulling it straight out of the socket. Ensure that the replacement relay matches the specifications of the original relay. Insert the new relay into the socket firmly until it clicks into place.
- Test the air conditioner: Start the car and turn on the air conditioner to check if the clicking noise has been resolved. Listen for any abnormal sounds and verify that the air conditioning system is functioning properly without any rapid cycling of the compressor.
If the clicking noise persists after replacing the AC relay, it is advisable to consult a professional mechanic or automotive technician. They have the necessary tools and expertise to diagnose any other potential issues with the air conditioning system, such as an electrical problem or a faulty compressor clutch.
Remember to always refer to your vehicle’s manual or seek professional assistance for specific instructions and safety precautions when working with electrical components.
We have now addressed the issue of a defective AC relay. Let’s move on to the final possible cause of clicking noise in a car air conditioner.
Faulty AC Pressure Switch
A faulty AC pressure switch can also be a potential cause of clicking noise in a car air conditioner. The AC pressure switch is responsible for monitoring the pressure of the refrigerant in the system. If the switch becomes faulty, it may send incorrect signals to the compressor, causing it to click on and off repeatedly.
To address this issue, follow these steps:
- Locate the AC pressure switch: The AC pressure switch is typically located near the AC compressor or in the refrigerant line. Consult your vehicle’s manual or search online for the specific location of the AC pressure switch in your car model.
- Inspect the AC pressure switch: Inspect the AC pressure switch for any signs of damage, corrosion, or loose connections. Test the switch using a multimeter to check if it is functioning properly. If you suspect it to be faulty, it may be necessary to replace the AC pressure switch.
- Replace the AC pressure switch: If you determine that the AC pressure switch is indeed faulty, disconnect the electrical connectors attached to it. Unscrew or unbolt the old switch and remove it from the system. Install the new AC pressure switch in its place, ensuring it is securely fastened and the electrical connectors are properly reconnected.
- Test the air conditioner: Start the car and turn on the air conditioner to check if the clicking noise has been resolved. Listen for any abnormal sounds and monitor the functioning of the air conditioning system. The compressor should engage smoothly without excessive clicking on and off.
If the clicking noise persists after replacing the AC pressure switch, it is recommended to consult a professional mechanic or HVAC specialist. They have the necessary knowledge and specialized equipment to diagnose and address any other potential issues with the air conditioning system.
Remember to always refer to your vehicle’s manual or seek professional assistance for specific instructions and safety precautions when working with electrical components.
We have now addressed the issue of a faulty AC pressure switch. With the possible causes of clicking noise in a car air conditioner covered, it’s time to conclude our comprehensive guide.
If you hear a clicking noise when your car’s air conditioner is on, it could be a sign of a failing AC compressor or a loose component. It’s best to have a professional mechanic inspect and repair the issue to prevent further damage.
How to Fix Clicking Noise in Car Air Conditioner
If you’re experiencing a clicking noise when the air conditioner is on in your car, it’s important to address the issue promptly to ensure your comfort and prevent further damage to the system. Here is a summary of the steps to fix the clicking noise in a car air conditioner:
- Identify the cause: Determine the underlying cause of the clicking noise by inspecting common components such as the blend door actuator, refrigerant level, compressor clutch, air filters, expansion valve, fan belt, AC relay, and AC pressure switch.
- Perform necessary repairs or replacements: Depending on the identified causes, carry out the appropriate repairs or replacements. This may involve replacing the blend door actuator, refilling the refrigerant level, repairing or replacing the compressor clutch, cleaning or replacing the air filters, repairing or replacing the expansion valve, tightening or replacing the fan belt, repairing or replacing the AC relay, and fixing or replacing the AC pressure switch.
- Follow specific instructions: Consult your vehicle’s manual or seek guidance from professionals for specific instructions on locating, repairing, or replacing the identified components. It’s important to follow these instructions carefully to ensure safety and proper installation.
- Test the air conditioner: After making the necessary repairs or replacements, start the car and turn on the air conditioner to check if the clicking noise has been resolved. Ensure that the air conditioning system functions smoothly without any abnormal sounds.
However, it’s important to note that while some of these steps can be performed by car owners with basic knowledge of car maintenance, certain tasks, such as handling refrigerant or complex electrical components, are best left to professionals who have the necessary expertise and tools. Seeking professional assistance ensures proper diagnosis and resolution of the issue.
Regular maintenance and inspection of your car’s air conditioning system can help prevent future issues and ensure it functions optimally. Clean or replace air filters regularly, check refrigerant levels, and have your system inspected by a professional at recommended intervals.
By addressing the clicking noise in your car’s air conditioner, you can enjoy a comfortable driving experience without annoying distractions. If you’re unsure about any steps or encounter difficulties during the process, don’t hesitate to seek guidance from a professional mechanic or HVAC specialist.
Always refer to your vehicle’s manual for specific instructions and safety precautions, and prioritize your safety and the proper functioning of your air conditioning system.
We hope this guide has provided you with valuable information and guidance on how to fix the clicking noise in your car’s air conditioner. Safe travels and stay cool!
Disclaimer: The information provided in this article is for informational purposes only. Consult your vehicle’s manual and seek professional assistance for specific guidance and instructions based on your car’s make and model.
Check and Replace Blend Door Actuator
The blend door actuator is responsible for controlling the airflow between different vents in your car’s HVAC system. If it becomes faulty or gets stuck, it can create a clicking noise when the air conditioner is on. Here’s how you can check and replace the blend door actuator:
- Locate the blend door actuator: The blend door actuator is typically located behind the dashboard on the passenger side of the car. Refer to your vehicle’s manual or search online for the specific location in your car model.
- Remove the blend door actuator: Use a screwdriver or socket wrench to remove the screws or bolts securing the blend door actuator. Disconnect any electrical connectors attached to it.
- Inspect the blend door actuator: Examine the blend door actuator for any signs of damage or wear, such as broken gears or a stuck mechanism. If you observe any issues, it’s time to replace the blend door actuator.
- Install the new blend door actuator: Position the new blend door actuator in place and secure it with the screws or bolts. Reconnect any electrical connectors that were disconnected earlier.
- Test the air conditioner: Start the car and turn on the air conditioner to check if the clicking noise has disappeared. Ensure that the airflow is properly distributed across the vents.
If the clicking noise persists even after replacing the blend door actuator, it’s advisable to consult a professional mechanic or HVAC specialist, as there may be underlying issues causing the problem. They have the expertise and tools to diagnose the issue accurately and provide further guidance.
Refrain from forcing or applying excessive pressure while removing or installing the blend door actuator, as it may cause damage to other components or the dashboard. It’s important to follow the specific instructions provided in your vehicle’s manual or seek professional assistance.
Regular maintenance of your car’s HVAC system, including checking and replacing the blend door actuator if necessary, can help ensure optimal performance and comfort while driving. Stay cool and enjoy a pleasant drive without the annoying clicking noise!
Remember to prioritize your safety and the safety of others while working on your car. If you are uncertain about any step or lack the necessary skills, it’s best to seek assistance from a professional mechanic or automotive technician.
We hope these steps help you in checking and replacing the blend door actuator and address the clicking noise issue in your car’s air conditioner. Happy driving!
Disclaimer: The information provided in this article is for informational purposes only. Consult your vehicle’s manual and seek professional assistance for specific guidance and instructions based on your car’s make and model.
Refill Refrigerant Level
Insufficient refrigerant level is a common cause of clicking noise in a car air conditioner. When the refrigerant level is low, the air conditioning system may not function properly and produce the clicking noise. Here’s how you can refill the refrigerant level:
- Locate the refrigerant access point: The refrigerant access point is typically located near the condenser or compressor. Refer to your vehicle’s manual or search online for the specific location in your car model.
- Check the refrigerant level: Use a refrigerant pressure gauge to check the current level of refrigerant. If it is below the recommended level, it indicates a refrigerant leak or insufficient charging.
- Inspect for refrigerant leaks: If the refrigerant level is low, it’s important to inspect for any visible signs of leaks. Look for oil stains or greenish residue around the fittings, hoses, or components of the air conditioning system. Leaks can occur due to damaged components or worn-out seals.
- Repair the leaks: If you find any leaks, it is crucial to address them before refilling the refrigerant. Depending on the severity of the leak, you may need to replace a specific component or repair the damaged area. Consult a professional mechanic or HVAC specialist for proper diagnosis and repair.
- Recharge the refrigerant: Once the leaks are repaired, you can recharge the refrigerant to the recommended level. Follow the instructions provided by the refrigerant manufacturer or seek assistance from a professional to ensure proper charging.
- Test the air conditioner: Start the car and turn on the air conditioner to check if the clicking noise has been resolved. Verify that cool air is coming out of the vents and the system is functioning optimally.
It’s essential to note that handling refrigerant can be hazardous and requires specialized knowledge and equipment. If you’re unfamiliar with the process or unsure about your abilities, it’s best to consult a professional mechanic or HVAC specialist for assistance.
Regularly checking and maintaining the refrigerant level in your car’s air conditioning system can help prevent future issues and ensure it operates efficiently. If you suspect a refrigerant leak or notice a decrease in cooling performance, it’s crucial to address it promptly to avoid further damage to the system.
By refilling the refrigerant level, you can improve the functionality of your car’s air conditioner and enjoy a comfortable driving experience without the annoying clicking noise.
Remember to refer to your vehicle’s manual or seek professional assistance for specific instructions and safety precautions when working with refrigerant and the air conditioning system.
We hope these steps help you in refilling the refrigerant level and resolving the clicking noise issue in your car’s air conditioner. Drive comfortably and stay cool!
Disclaimer: The information provided in this article is for informational purposes only. Consult your vehicle’s manual and seek professional assistance for specific guidance and instructions based on your car’s make and model.
Read more: Why Is The Car Air Conditioner Not Cooling
Repair or Replace Compressor Clutch
A worn-out or damaged compressor clutch can be a common cause of clicking noise in a car air conditioner. The compressor clutch is responsible for engaging and disengaging the air conditioning compressor, which pressurizes the refrigerant and circulates it through the system. If the clutch is worn-out, it may produce a clicking noise when it attempts to engage properly. Here’s how you can repair or replace the compressor clutch:
- Locate the compressor: The compressor is typically located on the engine side of the air conditioning system. It is connected to the engine through a belt and contains the compressor clutch at the front.
- Inspect the compressor clutch: Visually inspect the compressor clutch for any signs of wear, damage, or misalignment. Check for loose or broken components, worn-out friction surfaces, or excessive rust or corrosion. If you notice any issues, it may be necessary to repair or replace the compressor clutch.
- Repair the compressor clutch: In some cases, the compressor clutch can be repaired by adjusting the clutch gap or replacing specific components. Consult a professional mechanic or HVAC specialist for a thorough inspection and repair of the clutch if necessary.
- Replace the compressor clutch: If the compressor clutch is severely damaged or cannot be effectively repaired, it’s best to replace it. To do so, follow these steps:
- Release the tension on the belt by loosening the tensioner pulley.
- Detach the drive belt from the compressor pulley.
- Remove any other components, such as the fan or radiator, that may be obstructing access to the clutch assembly.
- Unscrew or unbolt the old compressor clutch and carefully remove it from the system.
- Install the new compressor clutch, ensuring it is properly aligned and the necessary components are securely fastened.
- Reinstall any other components that were removed.
- Tighten the tensioner pulley to restore tension on the belt.
- Test the air conditioner: Start the car and turn on the air conditioner to check if the clicking noise has been resolved. Listen for any abnormal sounds and verify that the air conditioning system is functioning properly without the clicking noise.
If you are uncertain or uncomfortable performing these steps yourself, it is recommended to seek assistance from a professional mechanic or automotive technician. They have the necessary expertise and tools to handle the repair or replacement of the compressor clutch effectively and safely.
Regular maintenance and inspection of the compressor clutch and other components in the air conditioning system can help prevent future issues and ensure optimal performance. Follow the manufacturer’s recommended maintenance schedule and address any potential problems promptly.
We hope these steps help you in repairing or replacing the compressor clutch and resolving the clicking noise issue in your car’s air conditioner. Drive comfortably and enjoy a cool and quiet ride!
Disclaimer: The information provided in this article is for informational purposes only. Consult your vehicle’s manual and seek professional assistance for specific guidance and instructions based on your car’s make and model.
Clean or Replace Air Filters
Dirty or clogged air filters can contribute to a clicking noise in a car air conditioner. The air filters are responsible for capturing dust, pollen, and other particles from the outside air before it enters the system. When the filters become dirty or clogged, they can restrict the airflow and cause the air conditioner to work harder, leading to abnormal sounds like clicking. Here’s how you can clean or replace the air filters:
- Locate the air filters: The air filters are usually located under the hood of the car, near the intake area. Refer to your vehicle’s manual or search online for the specific location in your car model.
- Inspect the air filters: Remove the air filter housing cover and visually inspect the filters for dirt, dust, and debris. If they appear dirty or clogged, it is time to clean or replace them.
- Clean the air filters: If the filters are reusable, you can clean them by following these steps:
- Tap the filters gently against a hard surface to dislodge loose dirt and debris.
- Use a soft brush or compressed air to remove stubborn dirt and debris from both sides of the filters.
- Rinse the filters with water in the direction opposite to the airflow to wash away remaining dirt.
- Allow the filters to dry completely before reinstalling them.
- Replace the air filters: If the air filters are disposable or are excessively dirty and cannot be effectively cleaned, it is best to replace them. The replacement filters should be of the same size and specifications as the original ones. Simply remove the old filters and fit the new filters into the air filter housing.
- Reinstall the air filters: Once the filters are cleaned or replaced, carefully reinstall them in the correct orientation. Ensure that they are securely fitted and that the air filter housing cover is properly closed.
- Test the air conditioner: Start the car and turn on the air conditioner to check if the clicking noise has been resolved. Listen for any abnormal sounds and monitor the airflow. Clean or new air filters should help improve the efficiency of the air conditioning system and eliminate clicking noises.
Regularly checking and maintaining the air filters in your car’s air conditioning system is essential for optimal performance and air quality. Clean or replace the filters at least once or twice per year, depending on your driving conditions and the manufacturer’s recommendations.
If the clicking noise persists after cleaning or replacing the air filters, it may be necessary to seek professional assistance to diagnose and address any other potential issues with the air conditioning system.
Always refer to your vehicle’s manual or consult a professional for specific instructions and safety precautions when working with air filters and the air conditioning system.
We hope these steps help you in cleaning or replacing the air filters and resolving the clicking noise issue in your car’s air conditioner. Breathe in clean and cool air as you enjoy your drive!
Disclaimer: The information provided in this article is for informational purposes only. Consult your vehicle’s manual and seek professional assistance for specific guidance and instructions based on your car’s make and model.
Repair or Replace Expansion Valve
A malfunctioning expansion valve can cause a clicking noise in a car air conditioner. The expansion valve regulates the flow of refrigerant into the evaporator coil. If it becomes defective, it can result in disrupted refrigerant flow and the production of clicking sounds. Here’s how you can repair or replace the expansion valve:
- Locate the expansion valve: The expansion valve is typically located near the firewall in the engine compartment. Refer to your vehicle’s manual or search online for the specific location in your car model.
- Inspect the expansion valve: Examine the expansion valve for any signs of damage, leaks, or corrosion. Look for loose connections or fittings. If you identify any issues, it may be necessary to repair or replace the expansion valve.
- Perform repairs (if possible): In some cases, the expansion valve can be repaired rather than replaced. It may be a matter of cleaning or tightening loose parts. Consult a professional mechanic or HVAC specialist for a thorough inspection and advice on whether repairs are possible.
- Replace the expansion valve: If repairs are not possible or if the expansion valve is severely damaged, it is best to replace it. To do so, follow these steps:
- Disconnect the refrigerant lines attached to the expansion valve. Be cautious as refrigerant may be released during this process. Consult your vehicle’s manual or seek professional assistance to properly handle refrigerant.
- Unscrew or unbolt the old expansion valve from its mounting position. Take note of the position of any gaskets or O-rings.
- Install the new expansion valve, ensuring proper alignment and attachment. Replace any gaskets or O-rings as necessary, following the manufacturer’s specifications.
- Reconnect the refrigerant lines, making sure they are properly tightened.
- Ensure all connections are secure before moving on to the next step.
- Test the air conditioner: Start the car and turn on the air conditioner to check if the clicking noise has been resolved. Listen for any abnormal sounds and verify that the air conditioning system is functioning properly without the clicking noise.
It’s important to note that working with refrigerant and the air conditioning system requires specialized knowledge and equipment. If you’re unsure about the process or lack the necessary skills, it’s best to seek assistance from a professional mechanic or HVAC specialist.
Regular maintenance and inspection of your car’s air conditioning system, including the expansion valve, can help identify and resolve issues early on. This ensures optimal performance and prolongs the lifespan of the system components.
Remember to refer to your vehicle’s manual or consult a professional for specific instructions and safety precautions when working with the expansion valve and refrigerant.
We hope these steps help you in repairing or replacing the expansion valve and resolving the clicking noise issue in your car’s air conditioner. Enjoy comfortable and cool rides without any distracting sounds!
Disclaimer: The information provided in this article is for informational purposes only. Consult your vehicle’s manual and seek professional assistance for specific guidance and instructions based on your car’s make and model.
Tighten or Replace Fan Belt
A loose or damaged fan belt can cause a clicking noise in a car air conditioner. The fan belt is responsible for driving various components in the engine, including the air conditioning compressor. If the belt is loose or worn out, it can slip or produce friction, resulting in the clicking sound. Here’s how you can tighten or replace the fan belt:
- Locate the fan belt: The fan belt is typically located at the front of the engine, connected to various components, including the air conditioning compressor. Refer to your vehicle’s manual or search online for the specific location and routing of the fan belt in your car model.
- Inspect the fan belt: Visually inspect the fan belt for signs of wear, cracks, or fraying. Check for proper tension – a properly tensioned belt should have a slight amount of give when pressed with moderate pressure. If you notice any issues, such as excessive wear or looseness, it may be necessary to tighten or replace the fan belt.
- Tighten the fan belt: If the fan belt is loose, follow these steps to tighten it:
- Locate the belt tensioner pulley – this is usually a spring-loaded pulley that applies tension to the belt.
- Using a wrench or ratchet with the appropriate socket, rotate the belt tensioner in the direction indicated in your vehicle’s manual to release tension on the belt.
- While holding the tensioner in the released position, use your other hand to adjust the position of the belt by applying gentle pressure. Make sure the belt is properly aligned and properly seated on all pulleys.
- Slowly release the tensioner, allowing it to apply tension to the belt. Double-check that the tension is correct and that the belt is properly aligned.
- Replace the fan belt if necessary: If the fan belt is excessively worn, cracked, or damaged, it is best to replace it. To do so, follow these steps:
- Locate the belt tensioner pulley and release tension on the belt as discussed earlier.
- Remove the old belt by sliding it off the pulleys.
- Refer to your vehicle’s manual or search online for the correct routing of the new belt.
- Install the new belt by following the correct routing, ensuring it is properly seated on all pulleys.
- Release the tensioner slowly, allowing it to apply tension to the new belt.
- Test the air conditioner: Start the car and turn on the air conditioner to check if the clicking noise has been resolved. Listen for any abnormal sounds and monitor the operation of the air conditioning system. With a properly tightened or replaced fan belt, the air conditioner should operate smoothly without the clicking noise.
If you’re unsure about adjusting the belt tension or replacing the fan belt yourself, it’s recommended to seek assistance from a professional mechanic or automotive technician. They have the necessary expertise and tools to perform the task effectively and safely.
Regularly inspecting and maintaining the fan belt is crucial for the proper functioning of your car’s air conditioning system. Over time, belts may become loose or worn out, so it’s essential to address any issues promptly to avoid additional damage to the components.
Always refer to your vehicle’s manual or consult a professional for specific instructions and safety precautions when working with the fan belt and the engine components.
We hope these steps help you in tightening or replacing the fan belt and resolving the clicking noise issue in your car’s air conditioner. Drive comfortably and enjoy cool breezes without any distracting sounds!
Disclaimer: The information provided in this article is for informational purposes only. Consult your vehicle’s manual and seek professional assistance for specific guidance and instructions based on your car’s make and model.
Read more: Car Sputters When Air Conditioner Is On
Repair or Replace AC Relay
A defective AC relay can be a potential cause of clicking noise in a car air conditioner. The AC relay controls the flow of electricity to the air conditioning compressor. If the relay malfunctions, it can cause the compressor to repeatedly turn on and off, resulting in a clicking noise. Here’s how you can repair or replace the AC relay:
- Locate the AC relay: The AC relay is typically located in the fuse box or relay panel under the hood of the car. Refer to your vehicle’s manual or search online for the specific location of the AC relay in your car model.
- Identify the faulty relay: Inspect the AC relays to identify the faulty one. Look for any signs of damage, such as burnt terminals or melted plastic. You may also use a multimeter to test the functionality of each relay.
- Perform repairs (if possible): In some cases, the AC relay can be repaired. It may be a matter of cleaning the relay or replacing a specific component. Consult a professional mechanic or automotive electrician for a thorough inspection and advice on whether repairs are possible.
- Replace the AC relay: If repairs are not possible or if the AC relay is severely damaged, it’s best to replace it. To do so, follow these steps:
- Disconnect the negative terminal of the car battery to prevent any electrical short circuits.
- Remove the faulty relay by gently pulling it out of its socket. Some relays may require additional steps, such as releasing clips or unlatching connectors.
- Dispose of the faulty relay properly according to local regulations.
- Insert the new relay into the socket, ensuring it is properly aligned and fully seated.
- Reconnect the negative terminal of the car battery.
- Test the air conditioner: Start the car and turn on the air conditioner to check if the clicking noise has been resolved. Listen for any abnormal sounds and verify that the air conditioning system is functioning properly without the clicking noise.
If you’re unsure about repairing or replacing the AC relay yourself, it’s recommended to seek assistance from a professional mechanic or automotive electrician. They have the necessary expertise and tools to perform the task effectively and safely.
Regularly inspecting and maintaining the electrical components, including the AC relay, in your car’s air conditioning system is crucial for optimal performance. If you notice any signs of malfunction or damage, it’s important to address them promptly to avoid further issues.
Remember to refer to your vehicle’s manual or consult a professional for specific instructions and safety precautions when working with electrical components.
We hope these steps help you in repairing or replacing the AC relay and resolving the clicking noise issue in your car’s air conditioner. Enjoy a cool and quiet ride!
Disclaimer: The information provided in this article is for informational purposes only. Consult your vehicle’s manual and seek professional assistance for specific guidance and instructions based on your car’s make and model.
Fix or Replace AC Pressure Switch
A faulty AC pressure switch can also be a potential cause of clicking noise in a car air conditioner. The AC pressure switch monitors the pressure of the refrigerant in the system. If the switch becomes faulty, it may send incorrect signals to the compressor, causing it to click on and off repeatedly. Here’s how you can fix or replace the AC pressure switch:
- Locate the AC pressure switch: The AC pressure switch is typically located near the AC compressor or in the refrigerant line. Refer to your vehicle’s manual or search online for the specific location of the AC pressure switch in your car model.
- Inspect the AC pressure switch: Examine the AC pressure switch for any signs of damage, corrosion, loose connections, or faulty wiring. Test the switch using a multimeter to check if it is sending the correct signals. If you identify any issues, it may be necessary to fix or replace the AC pressure switch.
- Fix the AC pressure switch (if possible): In some cases, the AC pressure switch can be fixed by cleaning or adjusting it. Ensure that all connections are secure and that there are no loose or damaged wires. Consult a professional mechanic or HVAC specialist for a thorough inspection and assistance in fixing the switch if necessary.
- Replace the AC pressure switch: If the AC pressure switch is severely damaged or cannot be effectively fixed, it is best to replace it. Follow these steps:
- Disconnect the electrical connectors attached to the AC pressure switch.
- Unscrew or unbolt the old AC pressure switch from its mounting position.
- Install the new AC pressure switch, ensuring it is properly aligned and securely fastened.
- Reconnect the electrical connectors to the new AC pressure switch.
- Test the air conditioner: Start the car and turn on the air conditioner to check if the clicking noise has been resolved. Listen for any abnormal sounds and verify that the air conditioning system is functioning properly without the clicking noise.
If you’re not confident in fixing or replacing the AC pressure switch yourself, it’s recommended to seek assistance from a professional mechanic or HVAC specialist. They have the necessary expertise and tools to perform the task effectively and safely.
Regular maintenance and inspection of your car’s air conditioning system, including the AC pressure switch, can help prevent future issues and ensure optimal performance. Addressing any malfunctioning components promptly helps ensure the efficient and reliable operation of the air conditioning system.
Remember to refer to your vehicle’s manual or consult a professional for specific instructions and safety precautions when working with electrical components.
We hope these steps help you in fixing or replacing the AC pressure switch and resolving the clicking noise issue in your car’s air conditioner. Enjoy a cool and peaceful ride!
Disclaimer: The information provided in this article is for informational purposes only. Consult your vehicle’s manual and seek professional assistance for specific guidance and instructions based on your car’s make and model.
Conclusion
Dealing with a clicking noise in your car’s air conditioner can be frustrating, but by understanding the common causes and following the appropriate steps to fix them, you can enjoy a comfortable and quiet driving experience once again. In this comprehensive guide, we have explored the various reasons behind the clicking noise and provided step-by-step instructions on how to address each issue.
We discussed common causes such as a faulty blend door actuator, low refrigerant level, worn-out compressor clutch, dirty or clogged air filters, malfunctioning expansion valve, loose or damaged fan belt, defective AC relay, and a faulty AC pressure switch. For each cause, we outlined the necessary steps to check, repair, or replace the component as needed.
It is essential to remember that while some of these steps can be performed by car owners with basic knowledge and tools, other tasks may require professional assistance. It is crucial to prioritize safety and ensure the proper functioning of your air conditioning system.
Regular maintenance of your car’s air conditioning system, including routine inspections, cleaning or replacing air filters, and addressing issues promptly, can help prolong the lifespan of the components and prevent future problems.
By employing the information and instructions provided in this guide, you can confidently tackle the clicking noise in your car’s air conditioner and restore a peaceful and comfortable driving environment.
Remember, always consult your vehicle’s manual and seek professional assistance for specific guidance based on your car’s make and model. It is also crucial to prioritize safety, follow proper safety precautions, and handle refrigerant and electrical components responsibly.
We hope this guide has been helpful to you in resolving the clicking noise issue in your car’s air conditioner. Stay cool, enjoy your rides, and drive safely!
Disclaimer: The information provided in this article is for informational purposes only. Consult your vehicle’s manual and seek professional assistance for specific guidance and instructions based on your car’s make and model.
Frequently Asked Questions about Why Is There A Clicking Noise When The Car Air Conditioner Is On
Was this page helpful?
At Storables.com, we guarantee accurate and reliable information. Our content, validated by Expert Board Contributors, is crafted following stringent Editorial Policies. We're committed to providing you with well-researched, expert-backed insights for all your informational needs.