Articles
How To Jump 3 Wire AC Pressure Switch
Modified: October 20, 2024
Learn how to correctly jump a 3 wire AC pressure switch with our informative articles. Gain valuable knowledge on troubleshooting and repairing your AC system.
(Many of the links in this article redirect to a specific reviewed product. Your purchase of these products through affiliate links helps to generate commission for Storables.com, at no extra cost. Learn more)
Introduction
The AC pressure switch is an essential component of the air conditioning system in your vehicle. It is responsible for monitoring the pressure of the refrigerant in the AC system and ensuring that it is within the optimal range. If the pressure goes above or below the specified limits, the pressure switch will trigger a signal that shuts off the compressor to prevent damage to the system.
There are instances where you may need to jump the 3 wire AC pressure switch in order to bypass it temporarily, such as when troubleshooting the AC system or testing the compressor. Jumping the pressure switch essentially bypasses its operation and allows you to manually control the compressor. However, it is important to note that jumping the pressure switch should only be done temporarily and as a troubleshooting step, as the pressure switch plays a vital role in the proper functioning and safety of the AC system.
In this article, we will guide you through the process of jumping a 3 wire AC pressure switch. We will explain the steps involved, the tools and materials you will need, and provide some important safety precautions to keep in mind during the process.
Disclaimer: It is important to exercise caution when working on your vehicle’s AC system. If you are not confident in your abilities or do not have the necessary experience, it is recommended to seek professional help or consult the manufacturer’s manual for your specific vehicle model.
Key Takeaways:
- Jumping the 3 wire AC pressure switch can be a temporary troubleshooting step to manually control the compressor for testing purposes, but it should be approached with caution and only done as a last resort.
- Prioritize safety and follow proper procedures when jumping the pressure switch, including disconnecting the power, identifying and removing the wires, testing the system, and reconnecting the power to ensure proper functioning of the AC system.
Read more: How To Test HVAC Low Pressure Switch
Understanding the 3 Wire AC Pressure Switch
The 3 wire AC pressure switch is a type of pressure switch commonly used in many vehicles’ air conditioning systems. It is designed to monitor the pressure levels of the refrigerant and provide a signal to the compressor to turn on or off based on the pressure readings. The switch consists of three wires that are connected to different components of the AC system.
The three wires in the AC pressure switch are typically labeled as follows:
- Power wire: This wire supplies power to the pressure switch. It is usually connected to a constant source of electrical power.
- Ground wire: This wire is connected to the vehicle’s ground or negative battery terminal, providing a reference point for electrical flow.
- Signal wire: This wire is responsible for transmitting the pressure readings from the switch to the compressor. It sends a signal to the compressor to either engage or disengage based on the pressure levels detected by the switch.
The operation of the 3 wire AC pressure switch is relatively simple. When the pressure in the AC system is within the acceptable range, the switch will send a signal to the compressor to turn on and start cooling. This allows the refrigerant to flow through the system, absorbing heat and providing cool air. However, if the pressure exceeds the specified limits, indicating a potential issue with the system, the pressure switch will send a signal to the compressor to shut off and prevent further damage.
Some common indications that the AC pressure switch may be faulty include the AC system not cooling properly, the compressor not engaging when the AC is turned on, or intermittent cooling. In such cases, it may be necessary to troubleshoot the pressure switch and temporarily jump it to determine if it is the source of the problem.
Jumping the 3 wire AC pressure switch bypasses its normal operation and allows you to manually control the compressor to test its functionality. It is important to note that jumping the pressure switch should only be done as a temporary troubleshooting step. If the issue persists or the AC system continues to malfunction, it is recommended to consult a professional for further inspection and repair.
Tools and Materials Needed
Before you begin the process of jumping a 3 wire AC pressure switch, it’s important to gather the necessary tools and materials. Having everything prepared in advance will help streamline the process and ensure a smoother experience. Here is a list of the tools and materials you will need:
- Socket wrench set: You will need a socket wrench set with various sizes to remove any necessary bolts or screws.
- Wire clamps: Wire clamps will be needed to securely connect and support the jumped wires.
- Wire cutters and strippers: These tools are essential for cutting and stripping the necessary wires.
- Electrical tape: Electrical tape will be used to insulate and secure the jumped wires.
- Wire connectors: Wire connectors will be used to securely connect the jumped wires to ensure proper conductivity.
- Insulated gloves: It’s always a good idea to wear insulated gloves to protect yourself from any potential electrical shocks or accidents.
- Safety glasses: Safety goggles will provide eye protection from any possible debris or hazards during the process.
- Owner’s manual: It’s recommended to have the owner’s manual or a vehicle repair guide handy for reference specific to your vehicle model.
It is crucial to have the correct tools and materials on hand before starting the process. This will ensure that you can work efficiently and safely without any unnecessary setbacks or complications.
Remember to always prioritize safety when working on your vehicle. If you are unsure about any step or lack the necessary experience, it is recommended to seek professional assistance or consult a trusted mechanic. Working with the electrical components of your vehicle can be dangerous if not handled properly, so take the necessary precautions to protect yourself and avoid any accidents or injuries.
Step 1: Safety Precautions
When working on any component of your vehicle’s air conditioning system, including jumping the 3 wire AC pressure switch, it’s important to prioritize safety. By taking the necessary precautions, you can prevent accidents, injuries, and potential damage to your vehicle. Here are some safety measures to keep in mind before proceeding with the process:
- Turn off the engine: Make sure the engine is turned off and the key is removed from the ignition before starting any work on the AC system. This will prevent any accidental engagement of the compressor or electrical system.
- Let the system cool down: Before beginning any work, allow the AC system to cool down for at least 15-20 minutes. Some components may become extremely hot during operation and can cause burns if touched.
- Wear protective gear: It’s essential to wear proper protective gear, such as insulated gloves and safety glasses, to protect yourself from electrical shocks and potential debris during the process.
- Consult the owner’s manual: Familiarize yourself with the specific instructions and safety guidelines provided in the owner’s manual or repair guide for your vehicle model. This will give you a better understanding of the AC system and any precautions specific to your vehicle.
- Disconnect the battery: To ensure there is no electrical flow or risk of short-circuiting during the process, disconnect the negative terminal of the vehicle’s battery before starting any electrical work.
- Handle refrigerant with caution: If you suspect that there may be a refrigerant leak in your AC system, do not attempt to jump the pressure switch. Handling refrigerants requires specialized equipment and training. It’s always best to consult a professional in these situations.
- Work in a well-ventilated area: When working with any chemicals or refrigerants, make sure you are in a properly ventilated area to avoid inhaling harmful fumes.
- Take breaks if needed: If you’re working in a hot environment, take regular breaks to prevent overheating and dehydration.
By following these safety precautions, you can minimize the risk of accidents and ensure a safe working environment while jumping the 3 wire AC pressure switch. It’s important to remember that if you’re unsure about any step or lack the necessary experience, it’s best to seek professional assistance or consult a trusted mechanic. Your safety should always be the top priority when working on your vehicle.
Step 2: Locating the AC Pressure Switch
Before you can jump the 3 wire AC pressure switch, you need to locate its position in your vehicle’s air conditioning system. The pressure switch is typically located near the receiver-drier or accumulator, which is a container that removes moisture and debris from the refrigerant. Here is a step-by-step guide to help you locate the AC pressure switch:
- Refer to the owner’s manual: The owner’s manual or vehicle repair guide will often provide information on the location of various components, including the AC pressure switch. Consult the manual specific to your vehicle to find this information.
- Inspect the AC system components: Visually inspect the AC system components, starting in the engine bay. Look for any components that are connected to the refrigerant lines, such as the receiver-drier or accumulator. The pressure switch is usually mounted directly on or near these components.
- Follow the refrigerant lines: Trace the refrigerant lines from the compressor, usually located near the front of the engine, toward the front of the vehicle. The lines will lead to the condenser and then to the receiver-drier or accumulator. The pressure switch is typically located on the side of this component.
- Look for electrical connectors: The AC pressure switch will have an electrical connector connected to it. Look for a connector with multiple wires coming out of it. This connector will be part of the 3 wire AC pressure switch setup.
- Identify the switch: Once you have located the electrical connector, you can determine the position of the pressure switch. It will be a small metal or plastic component attached to the AC system, usually with a single mounting bolt or screw.
Remember to approach the pressure switch with caution and avoid applying excessive force. Take note of any other components or wires near the pressure switch to ensure you can easily access and work on it without causing damage to other parts of the AC system. If you are having trouble locating the pressure switch or are unsure about its identification, it may be helpful to consult a professional mechanic or refer to an online forum or community specific to your vehicle make and model.
Once you have successfully located the 3 wire AC pressure switch, you can proceed to the next step of disconnecting the power before jumping the switch.
Read also: 9 Amazing AC Pressure Switch for 2025
Step 3: Disconnecting the Power
Before jumping the 3 wire AC pressure switch, it is crucial to disconnect the power to ensure your safety and prevent any electrical accidents. The power to the AC system must be completely shut off to avoid any potential hazards. Here is a step-by-step guide on how to disconnect the power:
- Turn off the engine: Ensure that the engine is completely turned off and the key is removed from the ignition. This will prevent any accidental activation of the AC system while you’re working on it.
- Locate the fuse panel: The fuse panel is usually located in the engine compartment or under the dashboard on the driver’s side. Consult your vehicle’s owner’s manual to find the exact location.
- Identify the AC system fuse: Look for the fuse that is related to the AC system. It is typically labeled as “AC,” “HVAC,” or “Air Conditioning.” Refer to the fuse diagram on the inside of the fuse panel cover or in the owner’s manual for clarification.
- Remove the AC system fuse: Use a pair of needle-nose pliers or a fuse puller tool to carefully remove the AC system fuse from its socket. Pull the fuse straight out and set it aside in a safe place where it won’t get lost or damaged.
- Verify power loss: With the AC system fuse removed, turn the ignition key to the “ON” position without starting the engine. Check to make sure that there is no power going to the AC system. Test the AC controls and verify that the system does not respond or turn on.
By following these steps, you can ensure that the power to your vehicle’s AC system is completely disconnected. This will help minimize any potential electrical risks while you continue with the process of jumping the 3 wire AC pressure switch.
Remember to handle the fuse carefully and avoid touching any electrical contacts while removing it. If you encounter any difficulties or are unsure about any step, consult your vehicle’s owner’s manual or seek guidance from a professional mechanic.
Next, we will move on to Step 4, which involves identifying the wires connected to the AC pressure switch.
When jumping a 3-wire AC pressure switch, make sure to identify the common, normally open, and normally closed terminals. Use a jumper wire to connect the common and normally open terminals to bypass the switch for testing purposes. Always refer to the manufacturer’s instructions for specific guidance.
Step 4: Identifying the Wires
Before jumping the 3 wire AC pressure switch, it is important to identify and understand the different wires connected to the switch. This will ensure that you correctly identify the wires that need to be jumped. Here is a step-by-step guide on how to identify the wires:
- Refer to the owner’s manual: The owner’s manual or vehicle repair guide will often provide information on the wiring diagram for the AC system. Consult the manual specific to your vehicle to find this information.
- Inspect the wires: Observe the wires connected to the electrical connector of the pressure switch. Typically, there will be three wires connected to the switch: power, ground, and signal.
- Identify the power wire: The power wire is usually connected to a constant source of electrical power, such as a fuse or relay. It is often colored red or orange, but it can vary depending on the vehicle make and model. This wire will supply the electrical power to the pressure switch.
- Identify the ground wire: The ground wire is connected to the vehicle’s ground or negative battery terminal. It provides a reference point for electrical flow. The ground wire is commonly colored black or brown.
- Identify the signal wire: The signal wire is responsible for transmitting the pressure readings from the switch to the compressor. It sends a signal to the compressor to either engage or disengage based on the pressure levels detected by the switch. The color of the signal wire can vary, so consult your vehicle’s wiring diagram or refer to the owner’s manual to accurately identify it.
Take note of the color coding and position of the wires connected to the pressure switch. This will help you in the next step when it comes to removing and jumping the wires. If you are having trouble identifying the wires or are unsure about any step, it may be helpful to consult a professional mechanic or refer to an online forum or community specific to your vehicle make and model.
Once you have successfully identified the wires, you are ready to proceed to Step 5, which involves removing the wires from the pressure switch.
Step 5: Removing the Wires from the Pressure Switch
Before you can jump the 3 wire AC pressure switch, you will need to remove the existing wires from the switch. This will allow you to create a temporary connection between the necessary wires. Here is a step-by-step guide on how to remove the wires from the pressure switch:
- Ensure the power is disconnected: Before working with any electrical components, make sure the power to the AC system is disconnected. Refer to Step 3 to ensure the AC system fuse has been removed.
- Prepare the necessary tools: Get your wire clamps, wire cutters, and strippers ready. You may also need a small flat-head screwdriver to help pry off any connectors.
- Identify the wire connectors: Take a close look at the wire connectors connected to the pressure switch. Most connectors will have some type of locking mechanism that needs to be released before the wires can be disconnected.
- Release the locking mechanism: Use a small flat-head screwdriver or your fingers to release the locking mechanism on each wire connector. This may involve pushing down on a tab or sliding a latch to the side.
- Disconnect the wires: Once the locking mechanism is released, gently pull on each wire connector to disconnect it from the pressure switch. Be careful not to pull on the wires themselves, as this could damage them.
- Label the wires (optional): If you want to ensure that you reconnect the wires correctly after jumping the pressure switch, you may want to label or make a note of which wire connects to which terminal on the pressure switch.
Remember to handle the wires with care while removing them from the pressure switch. Avoid twisting or pulling too hard, as this can damage the wires or their connectors. If you encounter any difficulties or are unsure about any step, consult your vehicle’s owner’s manual or seek guidance from a professional mechanic.
Once you have successfully removed the wires from the pressure switch, you can proceed to the next step of jumping the pressure switch.
Step 6: Jumping the Pressure Switch
Jumping the 3 wire AC pressure switch involves creating a temporary connection between the necessary wires to bypass the switch. This will allow you to manually control the compressor for troubleshooting or testing purposes. Follow this step-by-step guide to jump the pressure switch:
- Ensure the power is disconnected: Before working with any electrical components, make sure the power to the AC system is disconnected by removing the AC system fuse as mentioned in Step 3 of this guide.
- Identify the necessary wires: Refer to Step 4 to identify the power, ground, and signal wires connected to the pressure switch. Remember their positions and color coding.
- Prepare the wire connectors: Ensure you have wire connectors that fit the size of the wires you are working with. These connectors will allow you to create a temporary connection between the necessary wires.
- Strip the ends of the wires: Use wire cutters and strippers to carefully strip a small portion of insulation from the ends of the necessary wires. This will expose the conductive metal underneath.
- Create the temporary connections: Connect the stripped ends of the power wire and the signal wire together using a wire connector. This will bypass the pressure switch and create a continuous connection between these two wires.
- Insulate the connections: Once the temporary connections are made, wrap each connection with electrical tape to insulate and secure them. This will help prevent any accidental contact or short-circuiting.
It is important to note that jumping the pressure switch should only be done as a temporary troubleshooting step. Once you have completed any necessary testing or troubleshooting, you should reconnect the pressure switch and restore the system to its original configuration.
If you are unsure about any step or lack the necessary experience, it is recommended to seek professional assistance or consult a trusted mechanic. Working with the electrical components of your vehicle can be dangerous if not handled properly, so take the necessary precautions to protect yourself and avoid any accidents or injuries.
Next, we will move on to Step 7, which involves testing the system after jumping the pressure switch.
Read more: How to Bypass 3 Wire GE Washer Lid Switch
Step 7: Testing the System
After jumping the 3 wire AC pressure switch, it is important to test the system to ensure it is functioning properly. Here are the steps to test the system:
- Reconnect the power: Before starting the testing process, ensure that you have fully reconnected the power to the AC system. Refer to Step 3 to make sure the AC system fuse is securely inserted into its socket.
- Turn on the AC system: Start the engine and turn on the AC system. Set the controls to the desired temperature and fan speed.
- Check for compressor engagement: Observe whether the compressor engages when the AC system is turned on. You should hear a click or a noticeable change in engine sound when the compressor engages. If the compressor does not engage, there may be an issue with the connections or other components in the system.
- Monitor the cooling performance: Allow the AC system to run for a few minutes and monitor the cooling performance. Check if cold air is being blown through the vents and if the temperature inside the vehicle is decreasing.
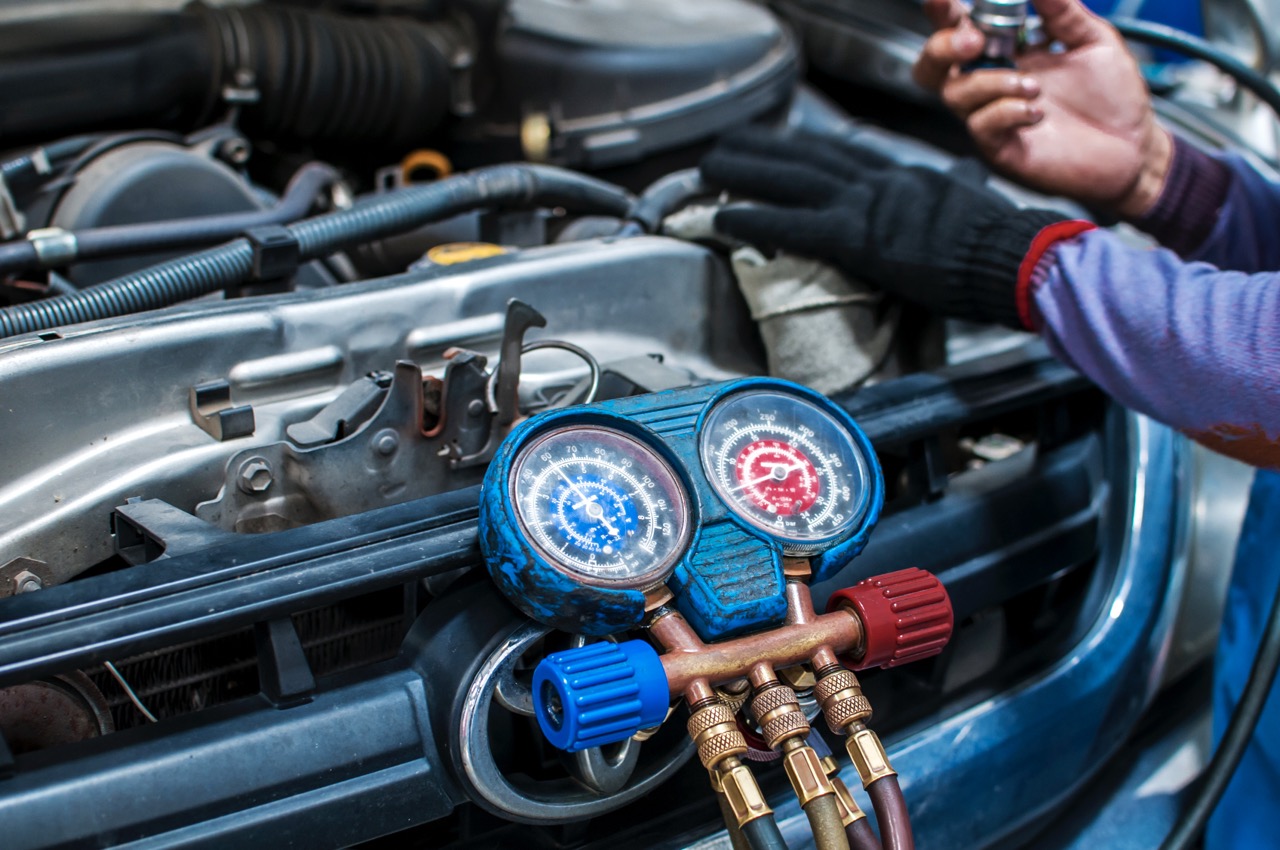
- Monitor pressure readings: If you have access to pressure gauges, monitor the pressure readings on the low and high-pressure sides of the AC system. They should fall within the recommended range for your vehicle.
- Look for signs of leaks or irregularities: While the AC system is running, visually inspect the components for any signs of refrigerant leaks, abnormal noises, or irregularities.
If you notice any issues during the testing process, it may indicate a problem with the AC system. It is recommended to consult a professional mechanic or AC specialist to diagnose and repair any issues. When you have completed the testing and troubleshooting process, it is important to re-establish the proper connections and restore the pressure switch to its original configuration.
Remember, jumping the pressure switch should only be done as a temporary troubleshooting step. If the issue persists or the AC system continues to malfunction, it is recommended to consult a professional for further inspection and repair.
With the system tested and functioning properly, you can move on to the final step, Step 8, which involves reconnecting the power to the AC system.
Step 8: Reconnecting the Power
After completing the necessary tests and troubleshooting, it is important to reconnect the power to the AC system. This step ensures that the system can operate under normal conditions. Follow these steps to reconnect the power:
- Turn off the engine: First, make sure the engine is turned off and the key is removed from the ignition.
- Locate the AC system fuse: Refer to the fuse panel in your vehicle and locate the slot for the AC system fuse.
- Insert the AC system fuse: Take the AC system fuse that you removed in Step 3 and carefully reinsert it into its designated slot. Ensure that it is fully seated and secured in place.
- Verify power restoration: Once the AC system fuse is in place, turn the ignition key to the “ON” position without starting the engine. Verify that power is restored to the AC system by testing the AC controls and checking if the system responds and turns on.
- Start the engine and test the AC system: Start the engine and test the AC system by setting the desired temperature and fan speed. Monitor the system to ensure that cold air is blowing through the vents and that the system is functioning as expected.
- Check for any abnormal signs: While the system is running, inspect the components visually for any signs of leaks, unusual noises, or irregularities. If you notice anything unusual, it is recommended to consult a professional mechanic for further inspection and repair.
By following these steps, you can ensure that the power is reconnected properly and the AC system is fully functional. It is important to remember that jumping the pressure switch should only be done as a temporary troubleshooting step. If the issue persists or the AC system continues to malfunction, it is recommended to consult a professional for further inspection and repair.
With the power reconnected, you have completed the process of jumping the 3 wire AC pressure switch and testing the AC system. It is important to exercise caution and prioritize safety while working on your vehicle’s electrical system. If you are unsure about any step or lack the necessary experience, it is always best to seek professional assistance or consult a trusted mechanic.
Thank you for following this step-by-step guide. We hope it helped you in effectively jumping the AC pressure switch and troubleshooting your AC system.
Conclusion
Jumping the 3 wire AC pressure switch can be a useful troubleshooting step when dealing with issues in your vehicle’s air conditioning system. However, it is important to approach this process with caution, follow proper safety measures, and only perform it as a temporary solution.
In this article, we have covered the steps involved in jumping the pressure switch, including identifying the wires, removing and jumping the wires, testing the system, and reconnecting the power. By following these steps and taking the necessary precautions, you can effectively troubleshoot your AC system and determine if the pressure switch is causing any issues.
It is crucial to remember that jumping the pressure switch should only be done temporarily and as a troubleshooting step. If you are unsure about any step or lack the necessary experience, it is always advised to seek professional assistance or consult a trusted mechanic. Working with the electrical components of your vehicle can be potentially dangerous if not handled properly.
Additionally, remember that the AC pressure switch plays a vital role in the proper functioning and safety of the AC system. If your AC system continues to experience issues or malfunctions, it is recommended to consult a professional for further inspection and repair.
By following this guide and utilizing the proper tools and materials, you can safely jump the 3 wire AC pressure switch and troubleshoot your AC system effectively. Always prioritize your safety and the proper operation of your vehicle’s AC system.
Thank you for reading this article, and we hope it has provided you with valuable insights and knowledge regarding jumping the 3 wire AC pressure switch.
Once you've mastered jumping a 3 wire AC pressure switch, why stop there? Expanding your DIY skills can save you time and money. If you're planning to enhance your garage with power tools or lighting, understanding how to safely run overhead electrical wire is crucial. Our next guide walks you through this process step-by-step, ensuring you handle electrical wiring safely and efficiently. Don't miss out on this essential read for your next home improvement project!
Frequently Asked Questions about How To Jump 3 Wire AC Pressure Switch
Was this page helpful?
At Storables.com, we guarantee accurate and reliable information. Our content, validated by Expert Board Contributors, is crafted following stringent Editorial Policies. We're committed to providing you with well-researched, expert-backed insights for all your informational needs.


0 thoughts on “How To Jump 3 Wire AC Pressure Switch”