
Articles
How To Check The Refrigerant Level Of An AC
Modified: October 20, 2024
Learn how to check the refrigerant level of an AC with this informative article. Ensure your air conditioner is running efficiently and effectively.
(Many of the links in this article redirect to a specific reviewed product. Your purchase of these products through affiliate links helps to generate commission for Storables.com, at no extra cost. Learn more)
Introduction
When it comes to keeping your home cool during those hot summer months, your air conditioning (AC) system plays a vital role. One of the key components of an AC system is the refrigerant, which is responsible for absorbing and releasing heat to create a comfortable indoor environment.
However, over time, the refrigerant level in your AC system can decrease, leading to inefficient cooling and potentially causing damage to the system. This is why it’s important to regularly check the refrigerant level and ensure that it is within the recommended range.
In this article, we will guide you through the process of checking the refrigerant level of an AC system. We will explain what refrigerant is, discuss the signs of a low refrigerant level, and provide you with a step-by-step guide on how to check the refrigerant level yourself.
By following this guide, you will be able to ensure that your AC system is running efficiently, saving you money on energy bills and extending the lifespan of your equipment. So let’s get started!
Key Takeaways:
- Regularly checking the refrigerant level of your AC system is crucial for maintaining optimal cooling performance, preventing damage, and saving on energy bills. Stay proactive and enjoy a comfortable indoor environment!
- Understanding the signs of low refrigerant levels and following a step-by-step guide to checking and maintaining the refrigerant level will help prolong the lifespan of your AC system and ensure efficient operation. Stay cool and confident in your AC system’s performance!
Read more: How To Check Refrigerant Level In HVAC
Understanding Refrigerant in AC Systems
Before we dive into the process of checking the refrigerant level of an AC system, let’s first understand what refrigerant is and its role in cooling your home.
Refrigerant is a chemical compound that circulates through your AC system, absorbing heat from the indoor air and releasing it to the outdoor environment. It undergoes a continuous cycle of evaporation and condensation, changing from a gas to a liquid and back again.
The most commonly used refrigerant in residential AC systems is called R-410A (also known as Puron). This refrigerant is preferred over older alternatives like R-22 (Freon) because it is more environmentally friendly and doesn’t contribute to ozone depletion.
The refrigerant in your AC system is responsible for transferring heat from inside your home to the outdoors, effectively cooling down the indoor air. It works in conjunction with other components of the AC system, such as the compressor, condenser, and evaporator, to create a cool and comfortable environment.
It’s important to note that your AC system operates with a specific amount of refrigerant, known as the charge. This charge is carefully determined by the manufacturer to ensure optimal performance and efficiency. If the refrigerant level drops below the recommended charge, it can lead to various issues, including reduced cooling capacity and increased energy consumption.
Now that you have a basic understanding of refrigerant and its role in your AC system, let’s move on to the signs that indicate a low refrigerant level.
Signs of Low Refrigerant Level
A low refrigerant level in your AC system can have several noticeable signs. If you experience any of the following symptoms, it may indicate that your AC system is low on refrigerant:
- Weak or Warm Airflow: If your AC system is blowing out weak or warm air instead of cool air, it could be a sign that the refrigerant level is low. Insufficient refrigerant hinders the system’s ability to extract heat from the indoor air, resulting in reduced cooling capacity.
- Increased Energy Bills: A low refrigerant level forces your AC system to work harder to achieve the desired cooling, leading to increased energy consumption. If you notice a sudden spike in your energy bills without any other major changes, it could be due to a refrigerant leak or low refrigerant level.
- Ice Buildup on Evaporator Coils: When the refrigerant level is low, the evaporator coils can become excessively cold, causing moisture in the air to freeze on the coils. If you see ice buildup on the evaporator coils, it could be a sign of a refrigerant issue.
- Longer Cooling Cycles: If your AC system runs for extended periods to achieve the desired temperature, it might be due to a low refrigerant level. Insufficient refrigerant slows down the cooling process, forcing the system to work harder and longer to cool the air.
- Audible Hissing or Bubbling Noises: A refrigerant leak in your AC system can result in hissing or bubbling sounds. If you hear these unusual noises coming from your AC unit, it is essential to have it inspected for any leaks or low refrigerant levels.
If you notice any of these signs, it’s crucial to address the issue promptly to prevent further damage to your AC system and ensure optimal cooling performance. Now that you are familiar with the signs of low refrigerant level, let’s move on to the tools and equipment required to check the refrigerant level of an AC system.
Regularly check the refrigerant level of your AC by using a pressure gauge to ensure it is within the manufacturer’s recommended range. Low levels can indicate a leak or other issue that needs to be addressed.
Tools and Equipment Required
Checking the refrigerant level of an AC system requires a few essential tools and equipment. Before you begin the process, make sure you have the following items:
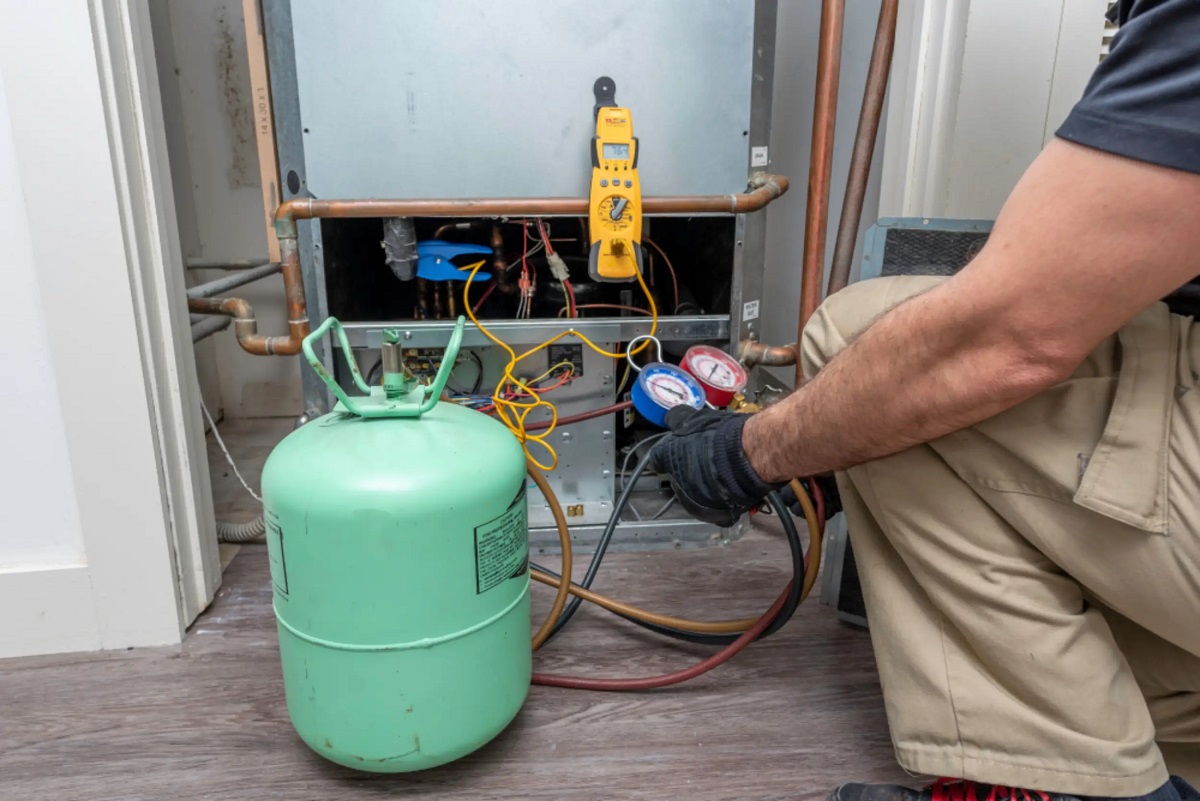
- AC Gauges: AC gauges, also known as manifold gauges, are used to measure the pressure levels of the refrigerant in the AC system. These gauges consist of high and low-pressure hoses and pressure readings to determine if the refrigerant level is within the acceptable range.
- Refrigerant Charging Hose: A refrigerant charging hose is used to connect the AC gauges to the service valve of the AC system. It allows for the transfer of refrigerant from the gauges to the AC system.
- Refrigerant Can Tap: A refrigerant can tap is a device used to puncture the top of a refrigerant can. It allows the refrigerant to flow into the charging hose and into the AC system. Make sure the can tap is compatible with the type of refrigerant you are using.
- Protective Gloves and Safety Glasses: It’s important to protect yourself while working with refrigerant. Wearing protective gloves and safety glasses will help prevent any contact with the refrigerant, which can cause skin irritation and eye damage.
- Leak Detection Solution: In case you suspect a refrigerant leak, having a leak detection solution can be helpful. This solution is applied to the AC system’s components, and if there is a leak, it will produce bubbles, indicating the location of the leak.
It’s crucial to ensure that you have all the necessary tools and equipment before attempting to check the refrigerant level. This will make the process smoother and more efficient. Once you have gathered the required tools, you are ready to proceed with checking the refrigerant level of your AC system.
Step-by-Step Guide to Checking Refrigerant Level
Now that you have the necessary tools and equipment, let’s walk through the step-by-step process of checking the refrigerant level in your AC system:
- Turn Off the AC System: Before you begin, ensure that the AC system is turned off. This is important for your safety and to avoid any interference during the process.
- Locate the Service Valves: The service valves are typically located on the outdoor unit of the AC system. There are two valves, a larger one known as the high-pressure valve and a smaller one known as the low-pressure valve. The low-pressure valve is usually covered with a protective cap.
- Connect the AC Gauges: Attach the high and low-pressure hoses of the AC gauges to the corresponding service valves. Make sure they are securely connected to prevent any leaks.
- Open the Valves: Slowly open the valves on the AC gauges. This will allow the pressure readings to stabilize and provide accurate readings of the refrigerant levels. Take note of the pressure readings displayed on the gauges.
- Refer to Manufacturer Specifications: Consult the manufacturer’s specifications or the AC system’s manual to determine the acceptable pressure range for your specific model. This will serve as a reference to determine if the refrigerant level is within the recommended range.
- Compare Pressure Readings: Compare the pressure readings on the gauges to the manufacturer’s specifications. If the readings are within the acceptable range, the refrigerant level is adequate. However, if the readings are lower than the specified range, it indicates a low refrigerant level.
- Detect Refrigerant Leaks: If the pressure readings are below the recommended range, you may have a refrigerant leak. Use the leak detection solution to identify any leaks in the AC system. Apply the solution to the components and look for bubbles, which indicate the presence of a leak.
- Add Refrigerant (If Necessary): If the refrigerant level is low or if you have detected a leak, it may be necessary to add refrigerant to the system. Follow the manufacturer’s instructions for adding refrigerant and use the refrigerant can tap to introduce the refrigerant into the AC system.
- Recheck the Refrigerant Level: After adding refrigerant, recheck the pressure readings on the gauges to ensure that the refrigerant level is now within the acceptable range. If the readings are within the recommended range, you have successfully topped up the refrigerant level.
It’s important to mention that checking and adding refrigerant to an AC system can be a complex task. If you are unsure or uncomfortable performing this procedure yourself, it is best to seek assistance from a licensed HVAC professional to ensure the job is done correctly.
By following this step-by-step guide, you can effectively check the refrigerant level of your AC system and address any issues promptly. Regularly monitoring and maintaining the refrigerant level will contribute to the efficient operation of your AC system and provide optimal cooling performance.
Conclusion
Checking the refrigerant level of your AC system is an important maintenance task that ensures optimal cooling performance and energy efficiency. By understanding the signs of a low refrigerant level and following a step-by-step guide, you can effectively monitor and address any issues with the refrigerant in your AC system.
By regularly checking the refrigerant level, you can identify and address any leaks or low levels promptly, preventing further damage to your AC system and ensuring that it operates at its best. This not only prolongs the lifespan of your equipment but also helps you save on energy bills by maintaining optimal efficiency.
Remember to gather the necessary tools and equipment before starting the process, and always refer to the manufacturer’s specifications for the acceptable pressure range of your AC system. If you are unsure or uncomfortable with checking the refrigerant level yourself, it is advisable to seek assistance from a licensed HVAC professional to ensure the job is done safely and correctly.
Taking the time to check the refrigerant level of your AC system is a worthwhile investment in maintaining its performance and ensuring a comfortable indoor environment. By being proactive in this maintenance task, you can enjoy the full benefits of your AC system and have peace of mind knowing that it is running efficiently.
We hope that this comprehensive guide has provided you with the necessary knowledge and confidence to check the refrigerant level of your AC system. Stay cool and enjoy the comfort of a properly functioning AC system!
Frequently Asked Questions about How To Check The Refrigerant Level Of An AC
Was this page helpful?
At Storables.com, we guarantee accurate and reliable information. Our content, validated by Expert Board Contributors, is crafted following stringent Editorial Policies. We're committed to providing you with well-researched, expert-backed insights for all your informational needs.


0 thoughts on “How To Check The Refrigerant Level Of An AC”