Home>Home Security and Surveillance>How To Reset Nooie Outdoor Camera

Home Security and Surveillance
How To Reset Nooie Outdoor Camera
Modified: May 6, 2024
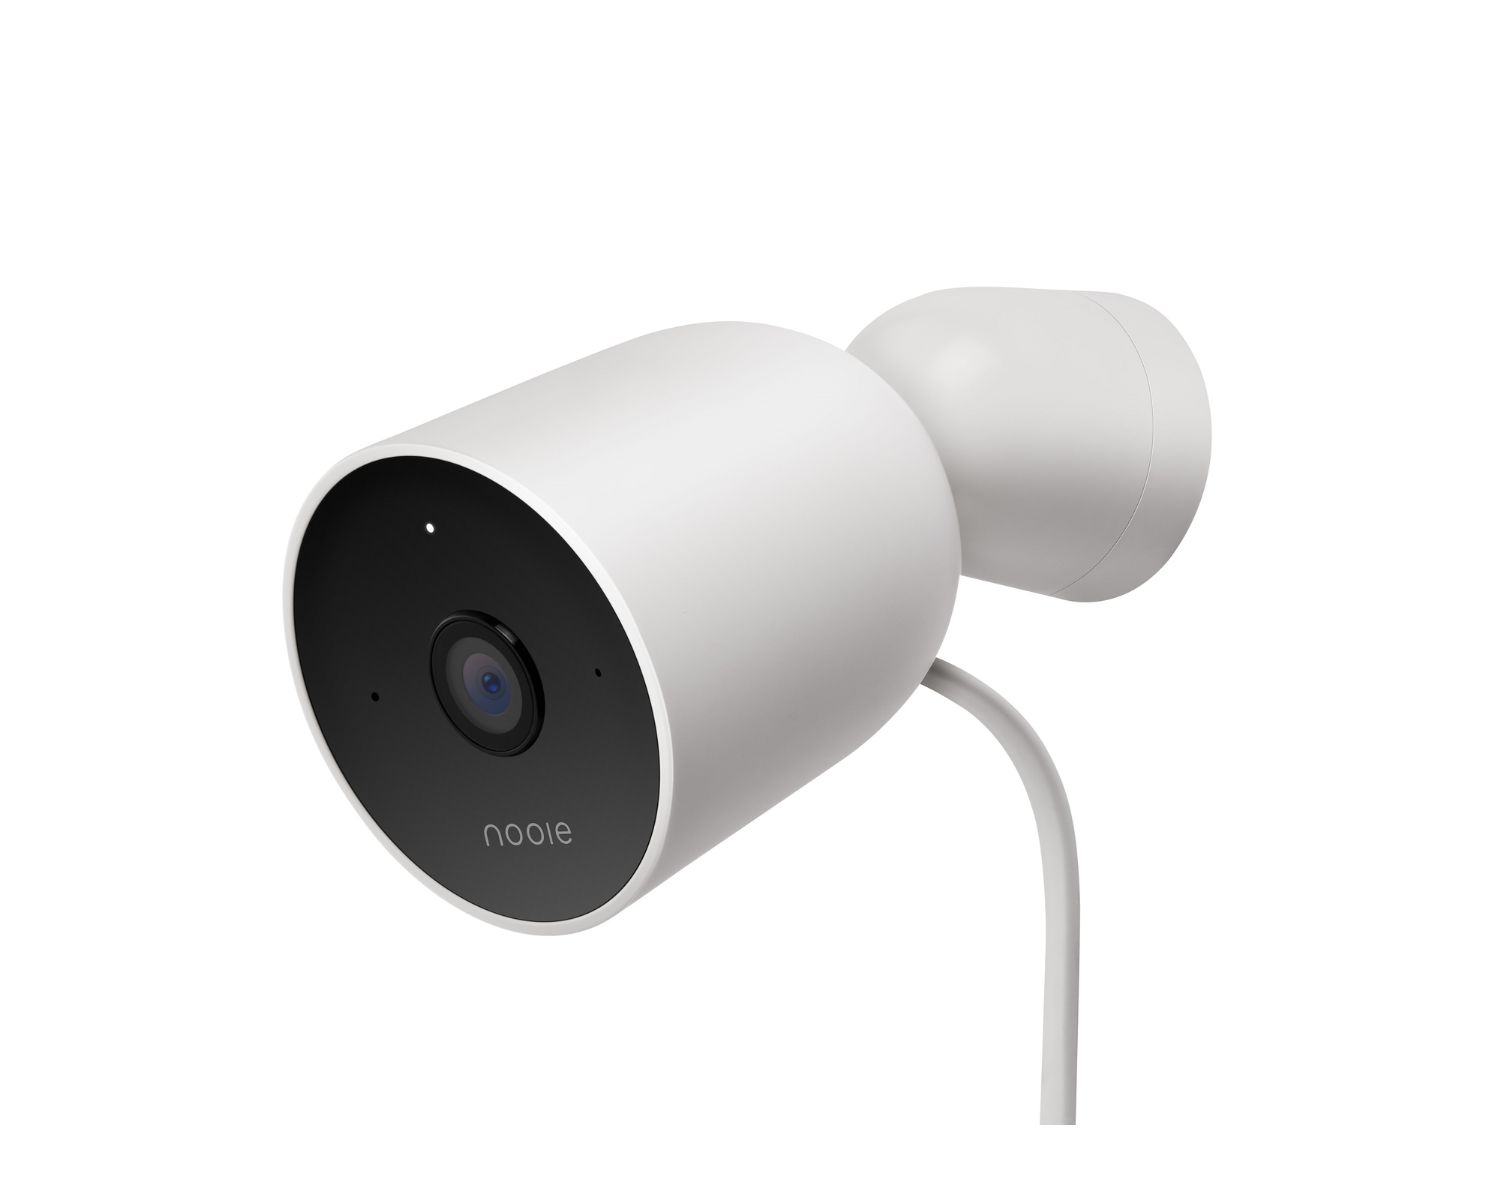
Looking to reset your Nooie Outdoor Camera? Our guide provides step-by-step instructions for ensuring the optimal functionality of your home security and surveillance system.
(Many of the links in this article redirect to a specific reviewed product. Your purchase of these products through affiliate links helps to generate commission for Storables.com, at no extra cost. Learn more)
Introduction
Welcome to our guide on how to reset your Nooie outdoor camera. As a homeowner, ensuring the safety and security of your property is of paramount importance. With the advancements in technology, outdoor surveillance cameras have become an integral part of home security systems. These cameras provide round-the-clock surveillance, allowing you to monitor your property from anywhere at any time.
However, there may come a time when you encounter issues with your Nooie outdoor camera, such as connectivity problems or configuration issues. In such cases, resetting your camera can be an effective troubleshooting step. Resetting the camera will restore it to its default settings, allowing you to start afresh and resolve any technical issues you may be facing.
In this guide, we will walk you through the step-by-step process of resetting your Nooie outdoor camera. So, let’s get started on getting your camera back up and running smoothly.
Key Takeaways:
- Easily troubleshoot Nooie outdoor camera issues by following a simple reset process. Power off, locate the reset button, hold it, wait for the reset, and reconfigure the camera for smooth functionality.
- Enjoy peace of mind with a reliable and secure outdoor surveillance solution. Reset and reconfigure your Nooie outdoor camera to ensure effective home security monitoring.
Read more: How To Reset An Insteon Outdoor Camera
Step 1: Power off the camera
The first step in resetting your Nooie outdoor camera is to power it off. Locate the power source of your camera, which is usually a power adapter or a set of batteries. Follow the manufacturer’s instructions to safely power off the camera.
If your camera is connected to a power adapter, you can simply unplug it from the power source. If it is battery-powered, remove the batteries from the camera. Make sure to disconnect any external power sources to ensure a complete power-off.
Powering off the camera is crucial as it allows the device to completely shut down and clear any temporary data or settings. This ensures that the reset process is successful and that the camera will start from scratch when powered back on.
Once you have successfully powered off the camera, you can proceed to the next step of the reset process.
Step 2: Locate the reset button
After powering off your Nooie outdoor camera, the next step is to locate the reset button. The reset button is a small, recessed button usually found on the back or bottom of the camera. Its exact location may vary slightly depending on the model of your Nooie camera.
Take a close look at the camera and search for a small, circular button that is labeled as “RESET” or has a similar indicator. In some cases, the reset button may be inside a small pinhole, requiring you to use a paperclip or a similar tool to press it.
It is important to note that pressing the reset button will delete all the existing settings and configurations of your Nooie outdoor camera. This includes your Wi-Fi network information, camera access credentials, and any personalized settings. So, before proceeding with the reset, make sure to take note of any important configurations you may want to reapply later.
Once you have located the reset button, you are ready to move on to the next step and initiate the resetting process for your Nooie outdoor camera.
Step 3: Press and hold the reset button
Now that you have located the reset button on your Nooie outdoor camera, it’s time to initiate the reset process. To do this, you will need to press and hold the reset button for a specific duration.
Using your finger or a small tool, gently press and hold the reset button. The duration for which you need to hold the button may vary depending on the model of your camera. Typically, you will need to hold the button for around 10 to 20 seconds.
During this time, you might notice some visual cues indicating that the reset process has been initiated. This can include the camera LED flashing or turning off temporarily. Keep holding the reset button until you are confident that the reset process has started.
By pressing and holding the reset button, you are essentially triggering the camera to restore its default settings and clear any previous configurations. This is an essential step to ensure a complete reset of your Nooie outdoor camera.
Once you have held the reset button for the required duration, you can proceed to the next step of the reset process.
To reset your Nooie Outdoor Camera, locate the reset button on the camera and hold it down for 10 seconds until the LED indicator blinks. This will restore the camera to its factory settings.
Step 4: Wait for the camera to reset
After pressing and holding the reset button on your Nooie outdoor camera, it’s time to wait for the camera to reset. This process may take a few minutes, so exercise patience during this step.
While the camera is resetting, it will go through a series of internal processes to restore the default settings and configurations. During this time, you may observe certain indicators that signify the progress of the reset process.
One common indicator is the camera’s LED light. It may flash or blink in a specific pattern to indicate that the reset process is underway. Additionally, you may also notice the camera turning off and then turning back on again.
It’s important to refrain from interrupting the reset process by unplugging the camera or pressing the reset button again. Doing so could disrupt the reset process and may lead to incomplete or unsuccessful reset.
Allow the camera sufficient time to complete the reset process. Typically, it takes a few minutes for the Nooie outdoor camera to fully reset. Once you are confident that the reset process has finished, you can move on to the final step of the reset process.
Read more: How To Reset Wyze Outdoor Camera
Step 5: Reconfigure the camera
Now that the Nooie outdoor camera has been successfully reset, it’s time to reconfigure it to get it back up and running. Follow these steps to ensure a smooth reconfiguration process:
- Power on the camera: Plug in the power adapter or insert the batteries to power on the camera again. Wait for the camera to fully boot up, which usually takes a few moments.
- Connect to Wi-Fi: Use the Nooie mobile app or your camera’s web interface to connect the camera to your Wi-Fi network. Follow the on-screen instructions provided by the app or interface to enter your Wi-Fi network name and password. Ensure that you have a stable internet connection during this step.
- Camera placement: Choose the ideal location for your Nooie outdoor camera, considering factors such as visibility, monitoring angles, and weather resistance. Mount the camera securely, following the manufacturer’s instructions.
- Adjust camera settings: Once the camera is connected to your Wi-Fi network and securely mounted, you can customize the camera settings according to your preferences. This includes adjusting motion detection sensitivity, setting up notification alerts, and configuring recording options.
- Test the camera: After reconfiguring the camera, it’s crucial to test its functionality. Make sure you can access the camera’s live feed on your smartphone, tablet, or computer. Additionally, check if motion detection and recording features are working correctly.
By following these steps, you will be able to easily reconfigure your Nooie outdoor camera and restore its functionality after the reset. It’s important to note that you may need to consult the camera’s user manual or the Nooie support documentation for specific instructions based on your camera model.
Remember to secure your camera’s access with a strong, unique password to ensure the highest level of security for your home surveillance system.
With the camera reconfigured and ready to go, you can now enjoy the peace of mind that comes with having a reliable and secure outdoor surveillance solution.
Conclusion
Resetting your Nooie outdoor camera can be a useful troubleshooting step when you encounter technical issues or need to start afresh with the camera’s configurations. By following the step-by-step guide outlined in this article, you can easily reset your camera and get it back up and running smoothly.
Remember to power off the camera before locating the reset button. Once found, press and hold the reset button for the required duration. Allow the camera sufficient time to reset, and refrain from interrupting the process. After the reset, you can reconfigure the camera by connecting it to Wi-Fi, adjusting settings, and testing its functionality.
By taking these steps, you ensure that your Nooie outdoor camera is ready to provide you with reliable and effective surveillance for your home security needs. Additionally, always consult the camera’s user manual or reach out to Nooie support for any specific instructions or concerns.
With your Nooie outdoor camera reset and reconfigured, you can enjoy the peace of mind that comes with knowing your property is being monitored and protected. Whether you’re away from home or simply want to keep an eye on things, your Nooie camera will be there to provide you with the security and surveillance you need.
Remember to regularly check and update your camera’s firmware and change your password to ensure the highest level of security. With proper maintenance, your Nooie outdoor camera will continue to serve you and your home for years to come.
Now that you've mastered resetting your Nooie Outdoor Camera, why not get a bit creative with your home security setup? Our next article offers some ingenious yet unobtrusive ways to keep an eye on your property. You'll learn about clever spots and unsuspecting items around your house perfect for concealing cameras, ensuring your surveillance system blends seamlessly with your home decor. Dive into our article on creative hidden camera ideas and take your home surveillance strategy to the next level.
Frequently Asked Questions about How To Reset Nooie Outdoor Camera
Was this page helpful?
At Storables.com, we guarantee accurate and reliable information. Our content, validated by Expert Board Contributors, is crafted following stringent Editorial Policies. We're committed to providing you with well-researched, expert-backed insights for all your informational needs.
