Home>Home Security and Surveillance>What Is The Significance Of 1, 5, And 10 On The Motion Detector

Home Security and Surveillance
What Is The Significance Of 1, 5, And 10 On The Motion Detector
Modified: November 1, 2024
Discover the significance of 1, 5, and 10 on the motion detector for home security and surveillance. Uncover key insights to enhance your home's safety.
(Many of the links in this article redirect to a specific reviewed product. Your purchase of these products through affiliate links helps to generate commission for Storables.com, at no extra cost. Learn more)
Introduction
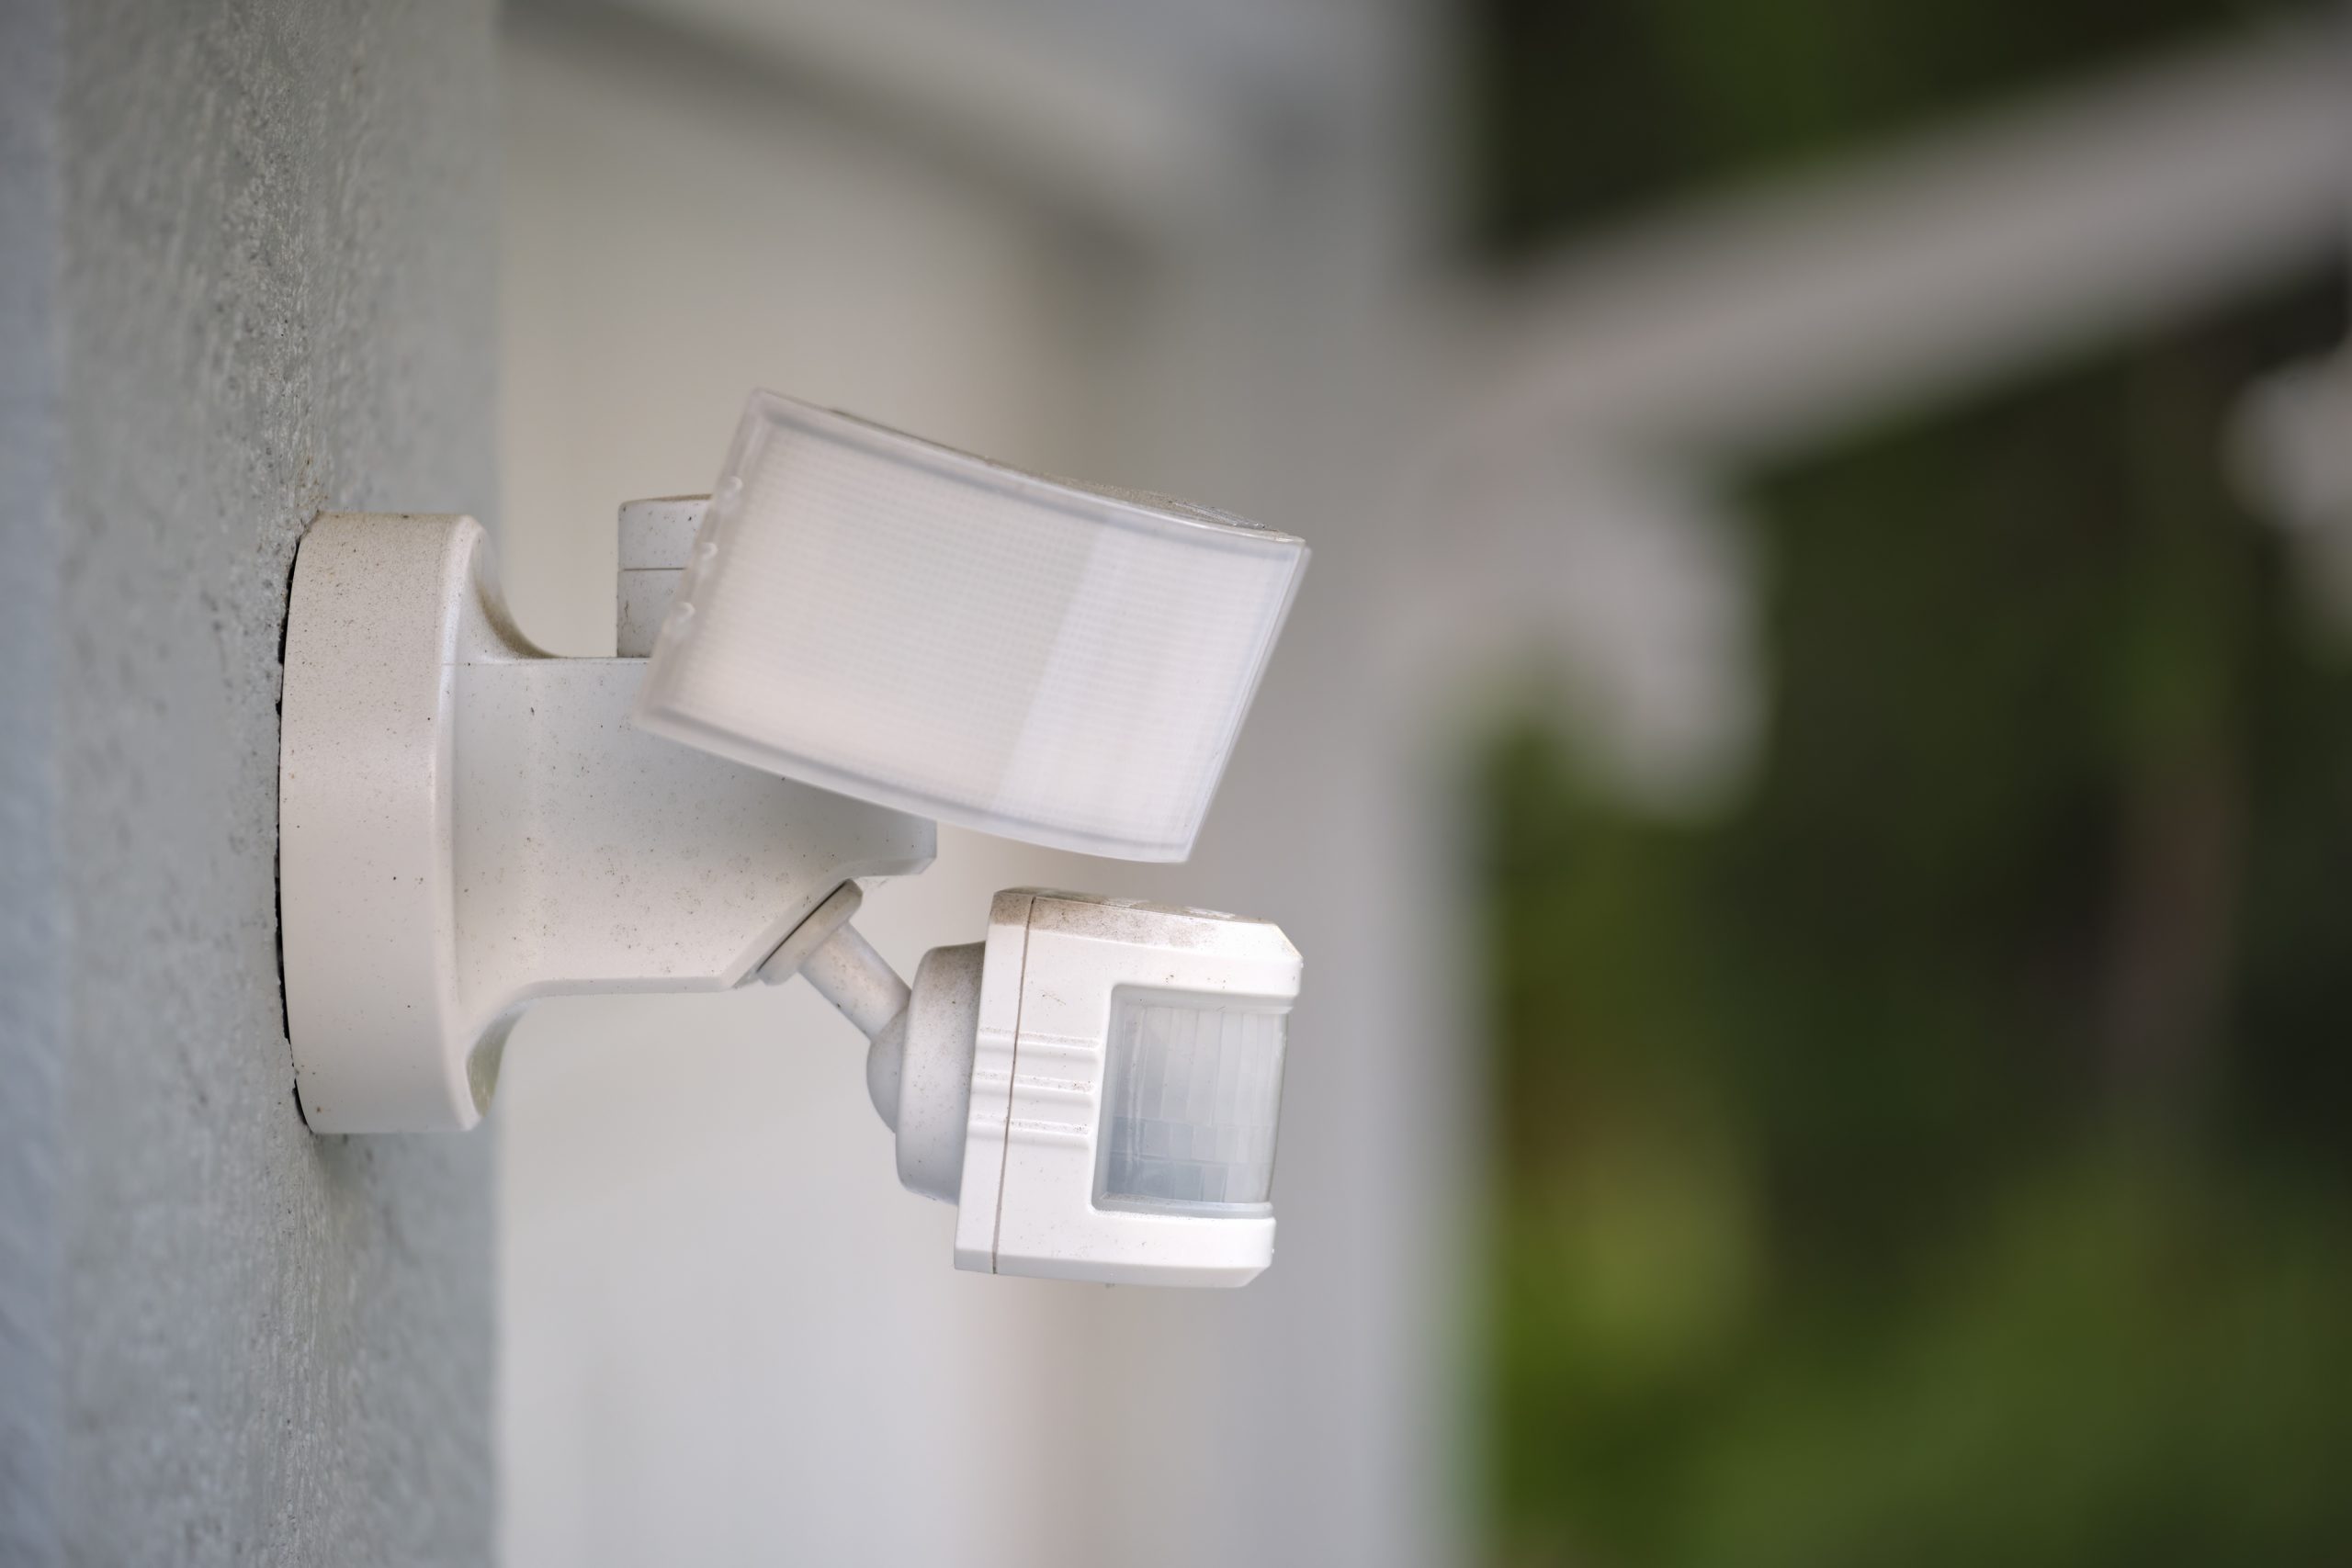
Motion detectors are essential components of home security systems, designed to detect movement and trigger alarms or notifications. These devices play a crucial role in protecting our homes and providing a sense of security. However, understanding the significance of specific settings on motion detectors, such as 1, 5, and 10, is essential in optimizing their effectiveness. These settings determine the range, sensitivity, and detection distance of the motion detector, ensuring accurate and reliable results.
When it comes to setting up a motion detector, it is important to have a clear understanding of how these settings work and their implications for home security. In this article, we will explore the significance of the 1, 5, and 10 settings on motion detectors, and why it is important to choose the appropriate setting based on our specific needs.
By familiarizing ourselves with these settings, we can make informed decisions when setting up a motion detector, ensuring optimal performance and reducing the chances of false alarms. Let’s dive into the details and unlock the hidden potential behind the numbers 1, 5, and 10 on motion detectors.
Key Takeaways:
- Choose the right number (1, 5, or 10) on your motion detector to match the size of the area you want to monitor. This ensures accurate detection and minimizes false alarms.
- Adjust the sensitivity and range settings on your motion detector to reduce false alarms caused by minor movements or environmental factors. Customizing these settings ensures reliable home security.
Read more: What Is Rexing V1 Motion Detector
Understanding the Range
Range settings on motion detectors determine the distance at which the sensor can detect motion. This setting allows you to control the coverage area of the motion detector. The significance of the 1, 5, and 10 range options lies in the different coverage areas they provide.
Let’s break down the significance of each range option:
1 Range Option: This setting provides a narrow detection range, typically suitable for small spaces or specific areas that require precise motion detection. For example, if you want to monitor a specific doorway or a small room, setting the range to 1 would ensure that only movements within that immediate area trigger the motion detector.
5 Range Option: Setting the range to 5 expands the detection area to cover a larger space. This option is ideal for monitoring larger rooms or common areas in your home. It allows the motion detector to detect movement within a broader range, providing comprehensive coverage and minimizing blind spots.
10 Range Option: The 10 range option provides the widest coverage area, making it suitable for outdoor use or monitoring large outdoor spaces. This setting enables the motion detector to detect movements from a considerable distance. It is commonly used in areas such as yards, driveways, or gardens, where maximum coverage is required.
When determining the appropriate range setting for your motion detector, consider the specific area you want to monitor and the level of coverage required. Choosing the correct range option ensures that the motion detector effectively detects any activity within the desired area while minimizing the chances of false alarms outside of the intended range.
Now that we understand the significance of the range settings on motion detectors, let’s move on to explore the importance of sensitivity levels and their impact on motion detection.
Sensitivity Levels
Sensitivity settings on motion detectors determine how responsive the sensor is to detecting motion. The significance of the 1, 5, and 10 sensitivity options lies in the level of sensitivity they offer. Let’s explore the explanations and implications of each sensitivity option:
1 Sensitivity Option: Setting the sensitivity to 1 indicates the lowest sensitivity level. This option is ideal for environments where minimal motion is expected or where there may be background movement that is not of concern. For example, if you have pets in your home, setting the sensitivity to 1 can help prevent false alarms triggered by their movements.
5 Sensitivity Option: The sensitivity level of 5 strikes a balance between sensitivity and the ability to filter out unnecessary triggers. This option is suitable for most typical home environments, where you want to detect significant movements while minimizing false alarms caused by subtle or irrelevant motion.
10 Sensitivity Option: Setting the sensitivity to 10 indicates the highest level of sensitivity. This option ensures that even the slightest motion is detected. It is typically used in high-security situations or locations where any movement needs to be promptly identified, such as in commercial or industrial settings. Keep in mind that a higher sensitivity level may also result in an increased potential for false alarms, especially in environments with regular background motion.
Choosing the right sensitivity level depends on the specific needs and circumstances of your home security setup. It is crucial to strike a balance between detecting relevant motion and minimizing false alarms. Experimenting with different sensitivity levels allows you to find the optimal setting for your motion detector.
Now that we’ve covered sensitivity levels, let’s move on to discuss how the 1, 5, and 10 settings affect the detection distance of motion detectors.
Detection Distance
The 1, 5, and 10 settings on motion detectors not only determine the range and sensitivity but also have implications for the detection distance of the device. Let’s discuss how these settings affect the detection distance and the importance of choosing the optimal setting for different scenarios.
1 Setting: When the motion detector is set to 1, the detection distance is relatively short. This means that it will only detect motion within a close proximity to the sensor. This setting is useful in situations where you only need to monitor a specific area or when you want to reduce the chances of false alarms due to distant movements. However, it may not be suitable for larger spaces where broader coverage is required.
5 Setting: Setting the motion detector to 5 will extend the detection distance, allowing it to sense motion in a broader range compared to the setting of 1. This is ideal for monitoring medium-sized rooms or areas where a moderate coverage area is desired. The 5 setting strikes a balance between range, sensitivity, and detection distance, making it suitable for most home security setups.
10 Setting: The 10 setting offers the maximum detection distance for the motion detector. This setting is typically utilized in outdoor areas or large spaces where long-range detection is necessary. It allows the sensor to pick up motion from a considerable distance, ensuring comprehensive coverage. However, keep in mind that the 10 setting may also increase the chances of false alarms caused by movements that are too far away or outside of the intended surveillance area.
Choosing the optimal detection distance setting depends on the specific requirements of your home security system. Consider the size of the area you want to monitor, the level of granular detection needed, and the potential for false alarms. By selecting the right detection distance setting, you can ensure that your motion detector effectively detects any relevant activity while minimizing false alarms from far-off movements.
Now that we understand the significance of the 1, 5, and 10 settings on motion detectors in terms of range, sensitivity, and detection distance, let’s explore how these settings are applied in home security systems.
The numbers 1, 5, and 10 on a motion detector usually represent the sensitivity level. Lower numbers make the detector less sensitive, while higher numbers make it more sensitive. Adjust the setting based on the size of the area and the type of motion you want to detect.
Application in Home Security
The 1, 5, and 10 settings on motion detectors have a significant impact on the effectiveness of home security systems. Choosing the right setting is crucial to ensure proper coverage and accurate motion detection. Let’s explore how these settings are applied in home security:
1 Setting: The 1 setting is ideal for small spaces or specific areas within your home that require precise motion detection. For instance, if you want to monitor a particular entryway or a small room, setting the motion detector to 1 ensures that it focuses on detecting movements in that immediate area. This option provides targeted coverage and minimizes the chances of false alarms triggered by activity outside the intended surveillance area.
5 Setting: Setting the motion detector to 5 is a well-balanced option for most home security setups. It provides moderate coverage for larger rooms or common areas, allowing you to monitor a broader range of activity. The 5 setting strikes the right balance between sensitivity and range, ensuring accurate detection while minimizing false alarms caused by irrelevant or subtle motion. It is a popular choice for standard home security applications.
10 Setting: The 10 setting is ideal for outdoor use or monitoring large outdoor spaces. It provides the widest coverage area, making it suitable for yards, driveways, gardens, or other outdoor areas where maximum surveillance is required. With the 10 setting, the motion detector can detect movement from a significant distance, enhancing the security of your outdoor premises. However, it is important to carefully adjust the sensitivity level to avoid false alarms triggered by distant or unrelated movements.
When setting up your home security system, it is crucial to understand the specific needs of your property and choose the appropriate setting for each motion detector. Take into consideration the size and layout of your home, the areas that require monitoring, and the potential risks or vulnerabilities. By selecting the right setting, you can ensure that your motion detectors provide the necessary coverage and accurately detect any suspicious activity.
Now that we’ve explored the application of the 1, 5, and 10 settings in home security, let’s shift our focus to the considerations for using motion detectors outdoors.
Considerations for Outdoor Use
When using a motion detector outdoors, there are several factors to consider to ensure optimal performance and accurate motion detection. Let’s explore these considerations and understand how the 1, 5, and 10 settings contribute to outdoor motion detection:
Weatherproofing: Outdoor motion detectors should be specifically designed to withstand various weather conditions. Look for motion detectors with a high IP (Ingress Protection) rating, which indicates their resistance to dust and water. Ensure that the motion detector has proper weatherproofing to prevent damage from rain, snow, or extreme temperatures.
Mounting and Positioning: Proper mounting and positioning of outdoor motion detectors are crucial for effective detection. Mount the device at an appropriate height and angle to cover the desired area. Avoid placing the motion detector too close to objects that may obstruct its view or too far away from the area you want to monitor. Consider the range and detection distance settings (1, 5, or 10) based on the specific requirements of your outdoor space.
Environmental Factors: Outdoor environments can introduce additional challenges for motion detection. Factors such as moving trees, vegetation, nearby road traffic, or falling debris can trigger false alarms. Adjusting the sensitivity level (1, 5, or 10) can help reduce false alarms caused by these environmental factors while still detecting relevant motion.
Targeted Areas: Identify the specific areas you want to monitor outdoors and set the motion detector’s range and detection distance accordingly. If you want to monitor a specific entryway or walkway, setting the range to 1 can ensure precise detection within that area. For larger outdoor spaces like a backyard or driveway, the 5 or 10 settings may be more suitable to cover a broader range.
Lighting Conditions: Consider the lighting conditions of your outdoor space. Some motion detectors have built-in features like infrared sensors or adjustable light sensitivity to compensate for low-light or nighttime conditions. Adjusting the sensitivity and range settings appropriately helps optimize detection accuracy in different lighting situations.
By taking these considerations into account and adjusting the 1, 5, and 10 settings accordingly, you can maximize the effectiveness of outdoor motion detection. Careful planning and customization based on your specific outdoor security needs will ensure reliable and accurate monitoring of your outdoor spaces.
Now that we’ve examined the considerations for outdoor use, let’s dive into how the 1, 5, and 10 settings contribute to reducing false alarms and enhancing overall security.
False Alarm Prevention
False alarms can be a nuisance and cause unnecessary stress or anxiety. Fortunately, the 1, 5, and 10 settings on motion detectors play a crucial role in reducing false alarms and ensuring accurate detection. Let’s explore the ways in which these settings help prevent false alarms:
Sensitivity Adjustment: One of the main causes of false alarms is overly sensitive motion detectors that detect even the slightest movement. By adjusting the sensitivity setting (1, 5, or 10), you can find the right balance that filters out irrelevant or subtle motion, reducing the chances of false alarms. Lower sensitivity settings (1) are suitable for environments with minimal or expected background motion, while higher settings (10) are often used in high-security situations.
Range Control: The range setting on motion detectors influences the coverage area. By choosing an appropriate range (1, 5, or 10), you can limit the motion detector’s focus to specific areas, reducing the chances of false alarms triggered by activity outside the intended surveillance area. A smaller range (1) is suitable for monitoring specific spots, while a larger range (10) is ideal for wide outdoor spaces.
Environmental Factors: Environmental factors, such as moving objects, wind-blown foliage, or nearby traffic, can trigger false alarms. Adjusting the range and sensitivity settings helps fine-tune the motion detector’s response to these factors. For example, decreasing the sensitivity or narrowing the range can minimize false alarms caused by tree branches swaying in the wind.
Testing and Optimization: It is important to test and optimize the motion detector settings to find the right balance between sensitivity and range for your specific environment. Test the device in various conditions and adjust the settings accordingly to ensure reliable detection while minimizing false alarms. Regular maintenance and updates to the motion detector settings can help further prevent false alarms over time.
By finding the right balance between sensitivity and range, you can significantly reduce false alarms and improve the overall reliability of your home security system. Customizing the 1, 5, and 10 settings based on your specific needs and environmental factors ensures accurate detection of suspicious activity while minimizing false alarms.
Now that we’ve explored false alarm prevention, let’s summarize the significance of the 1, 5, and 10 settings on motion detectors and their implications for choosing the appropriate settings based on specific needs.
Conclusion
Understanding the significance of the 1, 5, and 10 settings on motion detectors is crucial for optimizing the effectiveness of home security systems. By summarizing their significance and implications, we can appreciate the importance of choosing the appropriate settings based on specific needs.
The 1, 5, and 10 settings on motion detectors represent different range options that determine the coverage area, sensitivity levels, and detection distance. The 1 setting provides a narrow coverage area, making it suitable for small spaces, while the 5 setting offers moderate coverage for larger rooms or common areas. The 10 setting provides the widest coverage area, making it ideal for outdoor use or monitoring large spaces.
Similarly, the sensitivity settings (1, 5, and 10) control how responsive the motion detector is to detecting motion. The 1 setting offers lower sensitivity, reducing the chances of false alarms triggered by minor movements. The 5 setting strikes a balance between sensitivity and filtering out unnecessary triggers. The 10 setting offers the highest sensitivity, ensuring even the slightest motion is detected, making it suitable for high-security situations.
Considerations for selecting the appropriate settings include the specific area to be monitored, environmental factors, lighting conditions, and the potential for false alarms. By adjusting the range, sensitivity, and detection distance settings, false alarms can be minimized while ensuring accurate and timely detection of relevant activity.
In conclusion, understanding the significance of the 1, 5, and 10 settings on motion detectors allows us to make informed decisions when setting up our home security systems. By customizing the settings to suit our specific needs, we can ensure proper coverage, accurate detection, and a reduction in false alarms.
So, the next time you set up a motion detector, remember to consider the significance of the 1, 5, and 10 settings and adjust them accordingly. By doing so, you can enhance the effectiveness of your home security system and enjoy the peace of mind that comes with knowing your property is well-protected.
Frequently Asked Questions about What Is The Significance Of 1, 5, And 10 On The Motion Detector
Was this page helpful?
At Storables.com, we guarantee accurate and reliable information. Our content, validated by Expert Board Contributors, is crafted following stringent Editorial Policies. We're committed to providing you with well-researched, expert-backed insights for all your informational needs.