Home>Ideas and Tips>DIY Guide: Installing A Garbage Disposal

Ideas and Tips
DIY Guide: Installing A Garbage Disposal
Modified: October 27, 2024
Learn how to install a garbage disposal yourself with our step-by-step DIY guide. Save money and time with easy-to-follow instructions.
(Many of the links in this article redirect to a specific reviewed product. Your purchase of these products through affiliate links helps to generate commission for Storables.com, at no extra cost. Learn more)
Installing a garbage disposal is a DIY project that can save you money and time compared to hiring a professional plumber. With the right tools and some basic knowledge, you can replace your old disposal or install a new one in your kitchen. This guide will walk you through each step of the process, ensuring that your installation is smooth and leak-free.
Choosing the Right Garbage Disposal
Before starting your installation, it's crucial to choose the right garbage disposal for your needs. Here are some factors to consider:
Size of Your Sink
The size of your sink is a critical factor in choosing the right garbage disposal. Most standard sinks have a drain opening between 3-1/2 and 4 inches in diameter. Ensure that the disposal you choose fits this standard size to avoid any complications during installation.
Amount of Food Waste
Consider the amount of food waste you generate in your household. If you have a large family or frequently cook, you'll need a disposal with more horsepower. Typically, disposals range from 1/3 horsepower to 1 horsepower, with higher horsepower models capable of handling more substantial amounts of waste.
Type of Disposal
There are two primary types of garbage disposals: continuous feed and batch feed.
- Continuous Feed Disposals: These are the most commonly installed models. They operate when the switch is turned on and the water is running. A power outlet is necessary to turn the unit on and off.
- Batch Feed Disposals: These models operate only when the magnetic stopper is in place, preventing accidental items from being dropped into the disposal. They are ideal for homes where an electrical switch isn’t readily available or for households with children.
Gathering Necessary Tools and Materials
To ensure a successful installation, gather all the necessary tools and materials before starting:
Tools Required
- Adjustable Wrench or Crescent Wrench: For tightening and loosening connections.
- Screwdriver: Both Phillips and regular screwdrivers are necessary.
- Plumber’s Putty: For creating a seal around the sink flange.
- Power Cord: If your new disposal does not come with a pre-installed power cord, you'll need one.
- Basic Tools: Hacksaw, hammer, hex wrench, pliers, and safety glasses.
Materials Required
- Garbage Disposal Unit: The new disposal unit you're installing.
- Sink Mount Assembly: The mounting ring and snap ring that secure the disposal to the sink.
- Discharge Tube: For transporting food waste from the disposal to the sewage or septic system.
- Mounting Ring and Snap Ring: These parts hold the disposal in place on the sink.
- Plumber’s Putty: For sealing around the sink flange.
- Discharge Pipe: Connects the disposal to the drainpipe.
- Power Cord: Connects the disposal to an electrical outlet.
Step-by-Step Instructions
Step 1: Disconnect the Pipes and Remove the Strainer
- Turn Off Power: Switch off the electrical power to the kitchen at the circuit breaker or fuse box.
- Remove Cabinet Doors: If possible, remove the cabinet doors to provide better access to the area under the sink.
- Disconnect Drainpipe: Remove any drainpipes connected to the old disposal.
- Remove Strainer: Take out any strainer or filter from the sink drain.
Read more: DIY Guide To Installing Wainscoting
Step 2: Apply Plumbers Putty
- Clean Area Around Drain: Ensure the area around the drain is clean and free of any debris.
- Apply Putty: Apply a generous amount of plumber’s putty around the bottom of the sink flange.
- Center Flange: Place the sink flange in the drain opening and press it firmly and evenly to create a good seal.
Step 3: Install Sink Mounting Assembly
- Attach Mounting Assembly: Attach the mounting assembly to the drain by placing it there and tightening the mounting screws.
- Ensure Firm Connection: Take your time to ensure that the assembly is firmly connected to the sink as this step is crucial for stability.
Step 4: Attach Discharge Tube
- Tighten Connection: Tighten the connection between the discharge tube and the sink drain.
- Insert Tube: Insert the discharge tube into the pipe and tighten it securely.
- Ensure Firm Fastening: Ensure that any breaches in this connection could result in water damage or sewage backups by firmly fastening both ends.
Step 5: Secure Unit with Mounting Ring and Snap Ring
- Attach Mounting Ring: Attach the mounting ring to the disposal and fasten it with screws.
- Place Snap Ring: Place the snap ring over the mounting ring and tighten it to hold the unit in place.
- Prevent Shifting: Ensure that it is firmly fixed to prevent any problems with shifting or moving while in operation.
Step 6: Connect Power Cord
- Remove Cover Plate: Remove any cover plate on the bottom of the unit.
- Match Colored Wires: Match colored wires on both ends (white to white, black to black) using wire caps.
- Secure Grounding Wire: Connect grounding wire over green screw and tighten it.
- Reattach Cover Plate: Reattach any cover plate after connecting wires.
Step 7: Mount New Garbage Disposal
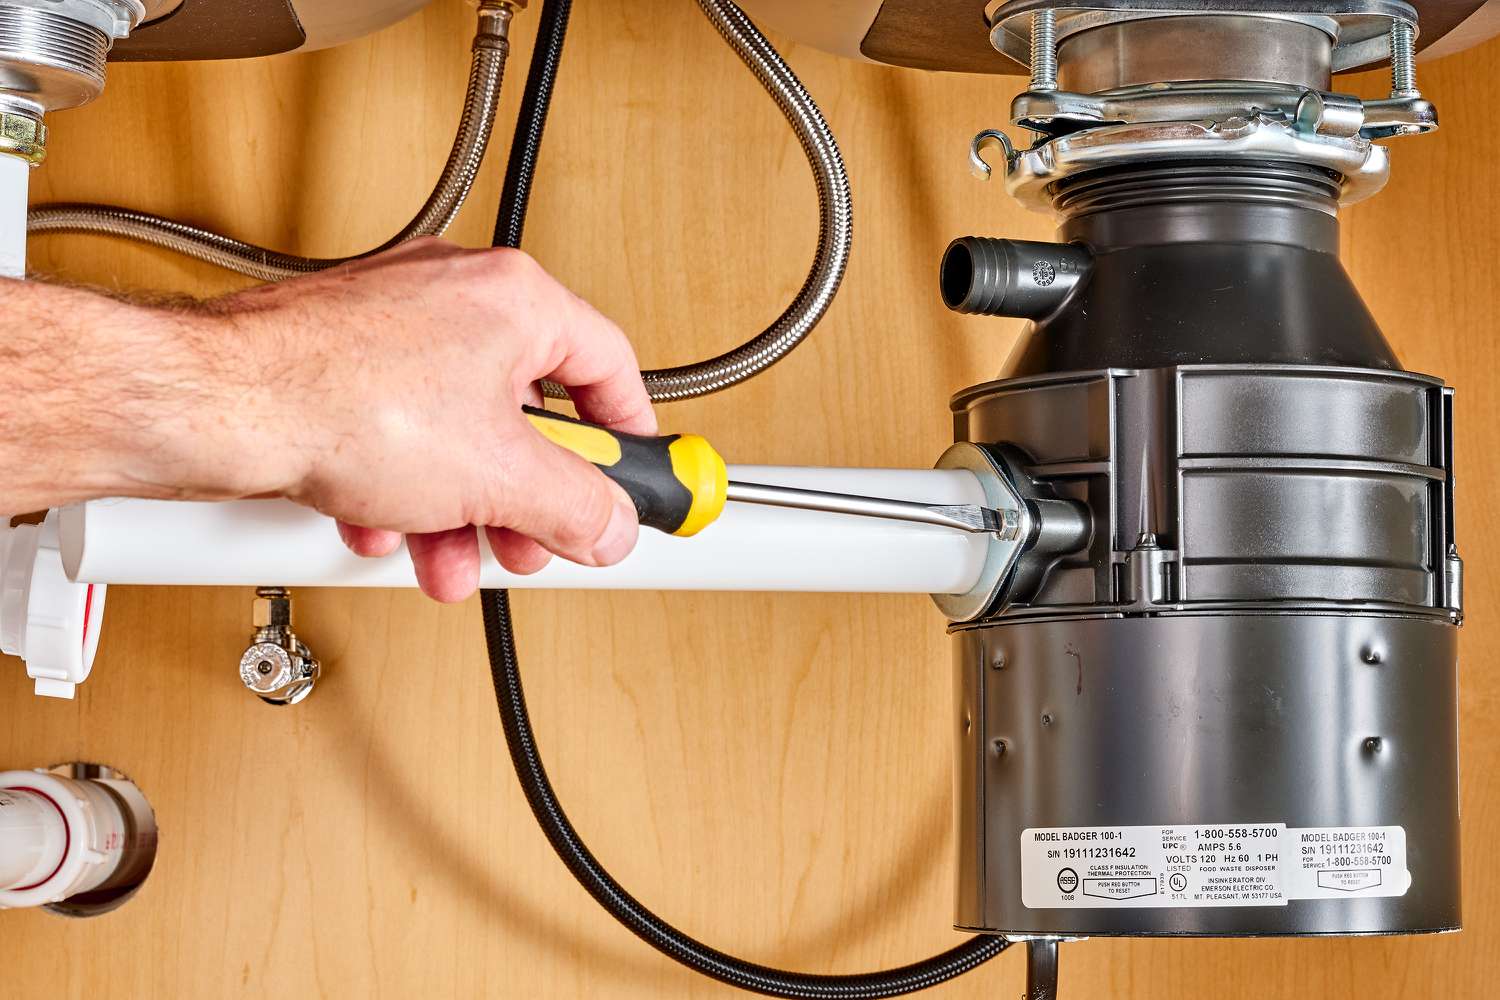
- Align Mounting Tabs: Align three mounting tabs with mounting ring using wrench provided (or screwdriver).
- Lock into Place: Turn tabs until they lock into place securely.
- Face Outlet Correctly: Ensure outlet faces drain pipe correctly during mounting process.
Step 8: Connect Discharge Tube and Dishwasher Drain
- Attach Gasket: Attach gasket provided with disposal kit around discharge tube before connecting it securely.
- Tighten Connections: Tighten all connections firmly but avoid over-tightening which may cause damage later on.
Additional Steps for Dishwasher Hookup
If you're connecting your new garbage disposal to a dishwasher:
- Remove Knockout Plug: Use hammer and screwdriver to tap out knockout plug from inlet where dishwasher drain attaches.
- Insert Disposal: Insert disposal unit ensuring all parts fit snugly before proceeding further steps mentioned above regarding power cord connection etc.,
Read more: DIY Guide To Installing Floating Shelves
Testing Connections
After completing all steps mentioned above test connections thoroughly by placing stopper into sink drain filling up water checking leaks finally plugging disposal turning power checking functionality ensuring everything works smoothly without any issues arising later down line
Troubleshooting Common Issues
During installation process some common issues might arise here’s how you can troubleshoot them effectively:
Leaks Around Sink Flange
Ensure proper application plumber’s putty around sink flange creating tight seal preventing leaks occurring later stages installation process
Disposal Not Turning On
Check power cord connections ensuring proper matching colored wires avoiding any short circuits occurring during operation causing disposal not turning on expected manner
Noise During Operation
Check alignment disposal outlet ensuring correct positioning avoiding any blockages occurring within pipes causing noise during operation
Was this page helpful?
At Storables.com, we guarantee accurate and reliable information. Our content, validated by Expert Board Contributors, is crafted following stringent Editorial Policies. We're committed to providing you with well-researched, expert-backed insights for all your informational needs.




0 thoughts on “DIY Guide: Installing A Garbage Disposal”