Home>Articles>How To Remove Electrical Cord From Garbage Disposal
Articles
How To Remove Electrical Cord From Garbage Disposal
Modified: August 27, 2024
Learn how to safely remove an electrical cord from a garbage disposal with this informative article. Follow step-by-step instructions and avoid potential hazards.
(Many of the links in this article redirect to a specific reviewed product. Your purchase of these products through affiliate links helps to generate commission for Storables.com, at no extra cost. Learn more)
Introduction
Removing an electrical cord from a garbage disposal may seem like a challenging task, but with the right knowledge and guidance, it can be a straightforward process. Whether you are replacing a damaged electrical cord or simply need to disconnect it temporarily for maintenance or repair, following the proper steps ensures a safe and efficient removal.
In this article, we will guide you through the step-by-step process of removing an electrical cord from a garbage disposal. By following these instructions, you can avoid any potential risks and successfully disconnect the cord without damaging the disposal unit or electrical components.
Before you begin, it’s essential to prioritize your safety. Make sure to turn off the power supply to the garbage disposal and unplug it from the electrical outlet. Additionally, use caution and consider wearing protective gloves throughout the process.
Now, let’s jump into the steps required to remove an electrical cord from a garbage disposal, ensuring a smooth and hassle-free experience!
Key Takeaways:
- Safely removing an electrical cord from a garbage disposal involves unplugging the unit, locating the cord, disconnecting wire connectors, and releasing the clamp or strain relief before carefully pulling out the cord.
- Prioritize safety by turning off the power supply, wearing protective gloves, and assessing potential obstacles when removing an electrical cord from a garbage disposal. Always consider consulting a professional electrician if unsure.
Read more: How To Remove Garbage Disposal From Sink
Step 1: Unplug the garbage disposal
The first and most crucial step in removing the electrical cord from a garbage disposal is to ensure it is completely unplugged from the power source. This will prevent any potential electrical shock or damage during the removal process.
To unplug the garbage disposal, locate the electrical outlet that supplies power to it. It is typically found under the sink or in a nearby cabinet. Carefully follow the cord from the disposal unit to the outlet. Once you have located the outlet, firmly grasp the plug and gently pull it out to disconnect it.
It is important to note that some garbage disposals may be hardwired directly to the electrical supply. If this is the case, you will need to turn off the circuit breaker that supplies power to the disposal before proceeding with the removal process. Always prioritize safety and take the necessary precautions to avoid any electrical hazards.
By unplugging the garbage disposal, you ensure that there is no active power running through the electrical cord, reducing the risk of accidents or injury during the removal process.
Now that you have successfully unplugged the garbage disposal, you can move on to the next step of removing the electrical cord.
Step 2: Locate the electrical cord
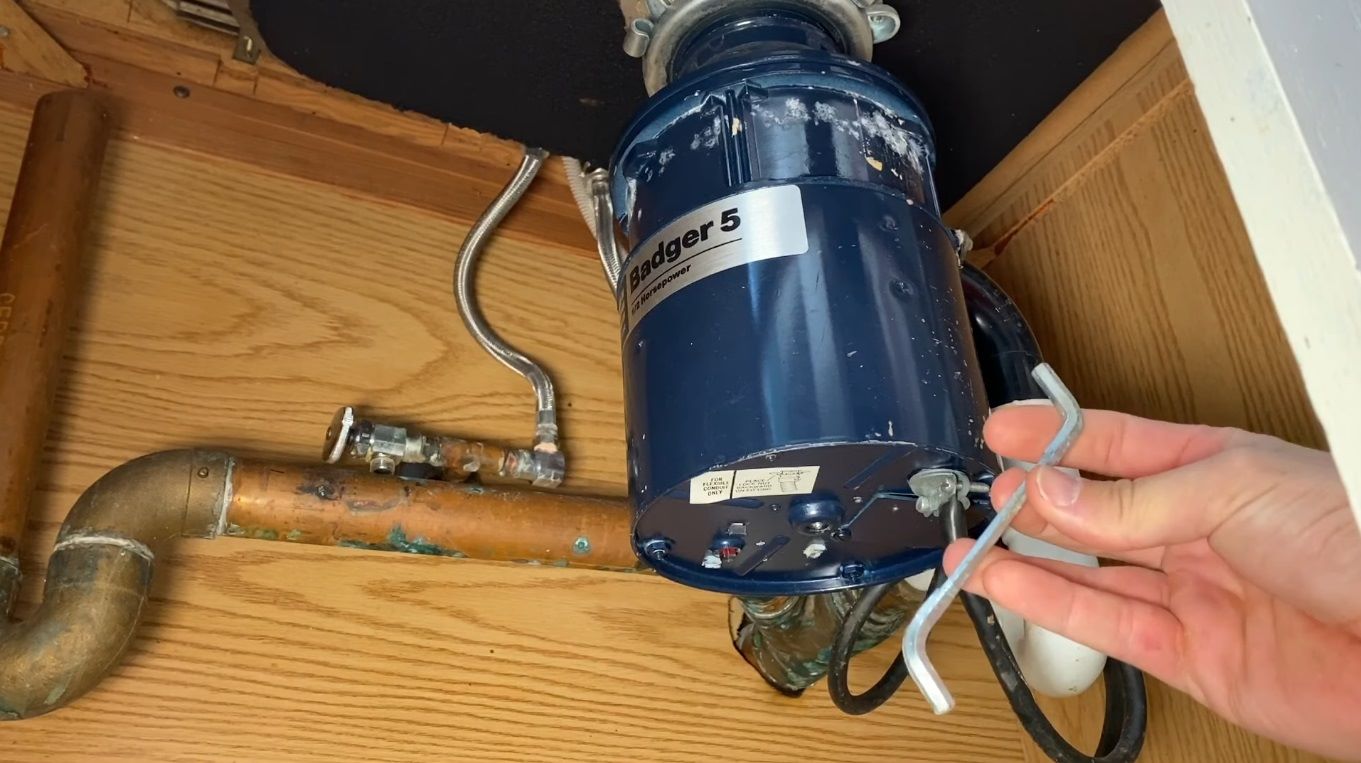
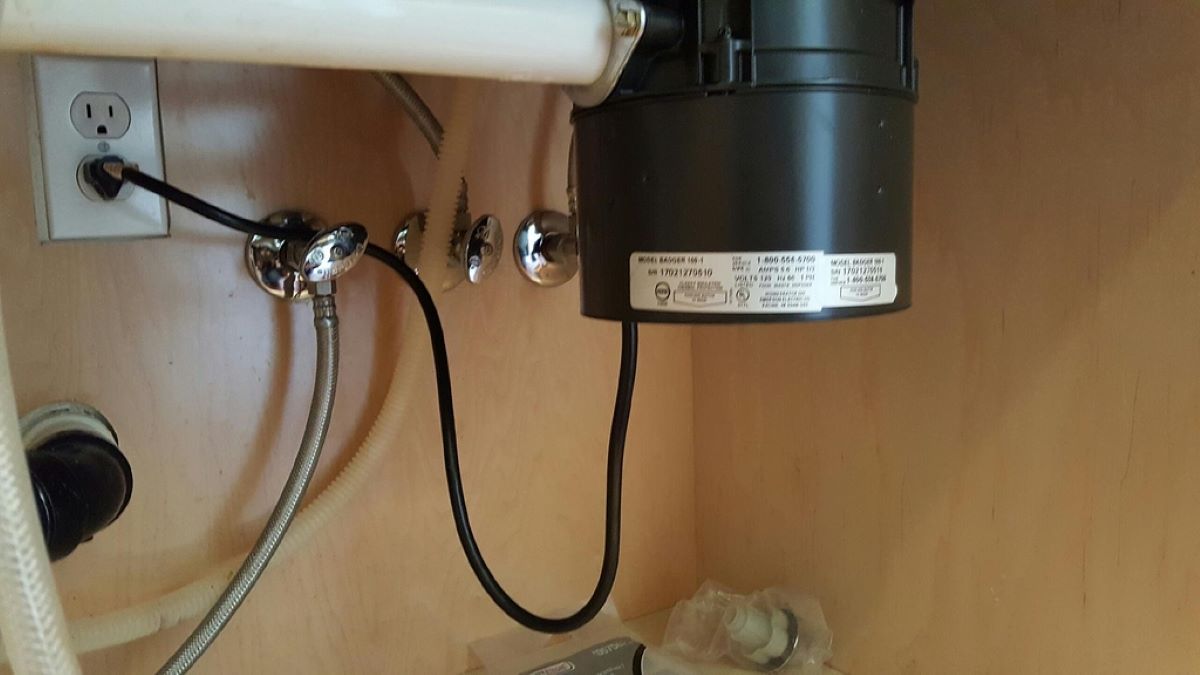
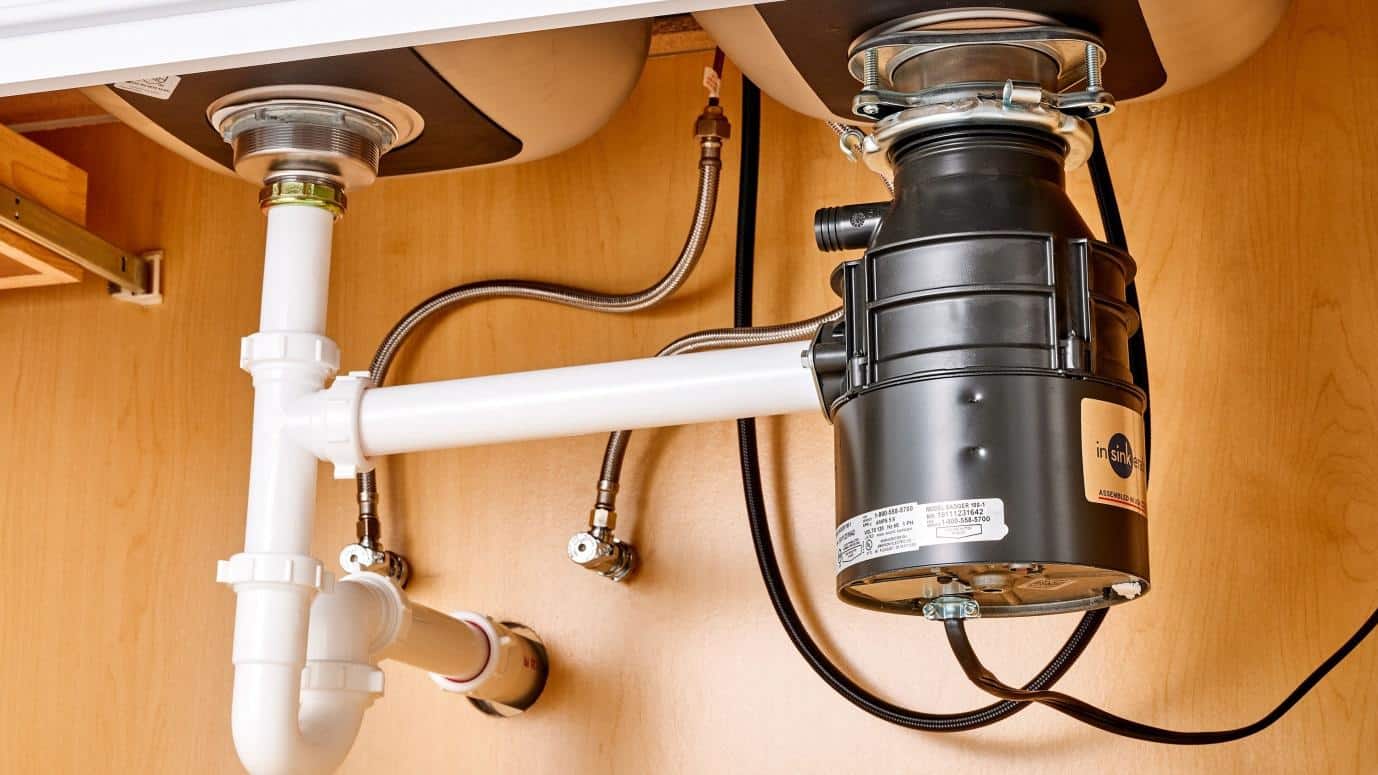
After safely unplugging the garbage disposal, the next step is to locate the electrical cord that is connected to it. The electrical cord is responsible for supplying power to the disposal unit, and it can usually be found under the sink where the disposal is installed.
First, clear any items or clutter from under the sink to provide better access to the garbage disposal. Look for the area where the disposal unit is mounted. You may need a flashlight to properly see the electrical cord and its connection points.
The electrical cord is typically a thick, flexible cable made of rubber or PVC material. It extends from the bottom or side of the disposal unit and connects to a power source, either an outlet or a junction box.
Take note of any obstacles that might impede your access to the electrical cord, such as pipes or other plumbing components. Carefully assess the situation and plan accordingly to safely maneuver around these obstacles during the removal process.
It’s important to be mindful that the electrical cord may be routed through a strain relief or clamp to secure it in place. These components help protect the cord from tension and strain, and they may need to be removed or loosened to disconnect the cord.
Once you have located the electrical cord and assessed the situation, you are ready to move on to the next step and begin removing the cord from the garbage disposal.
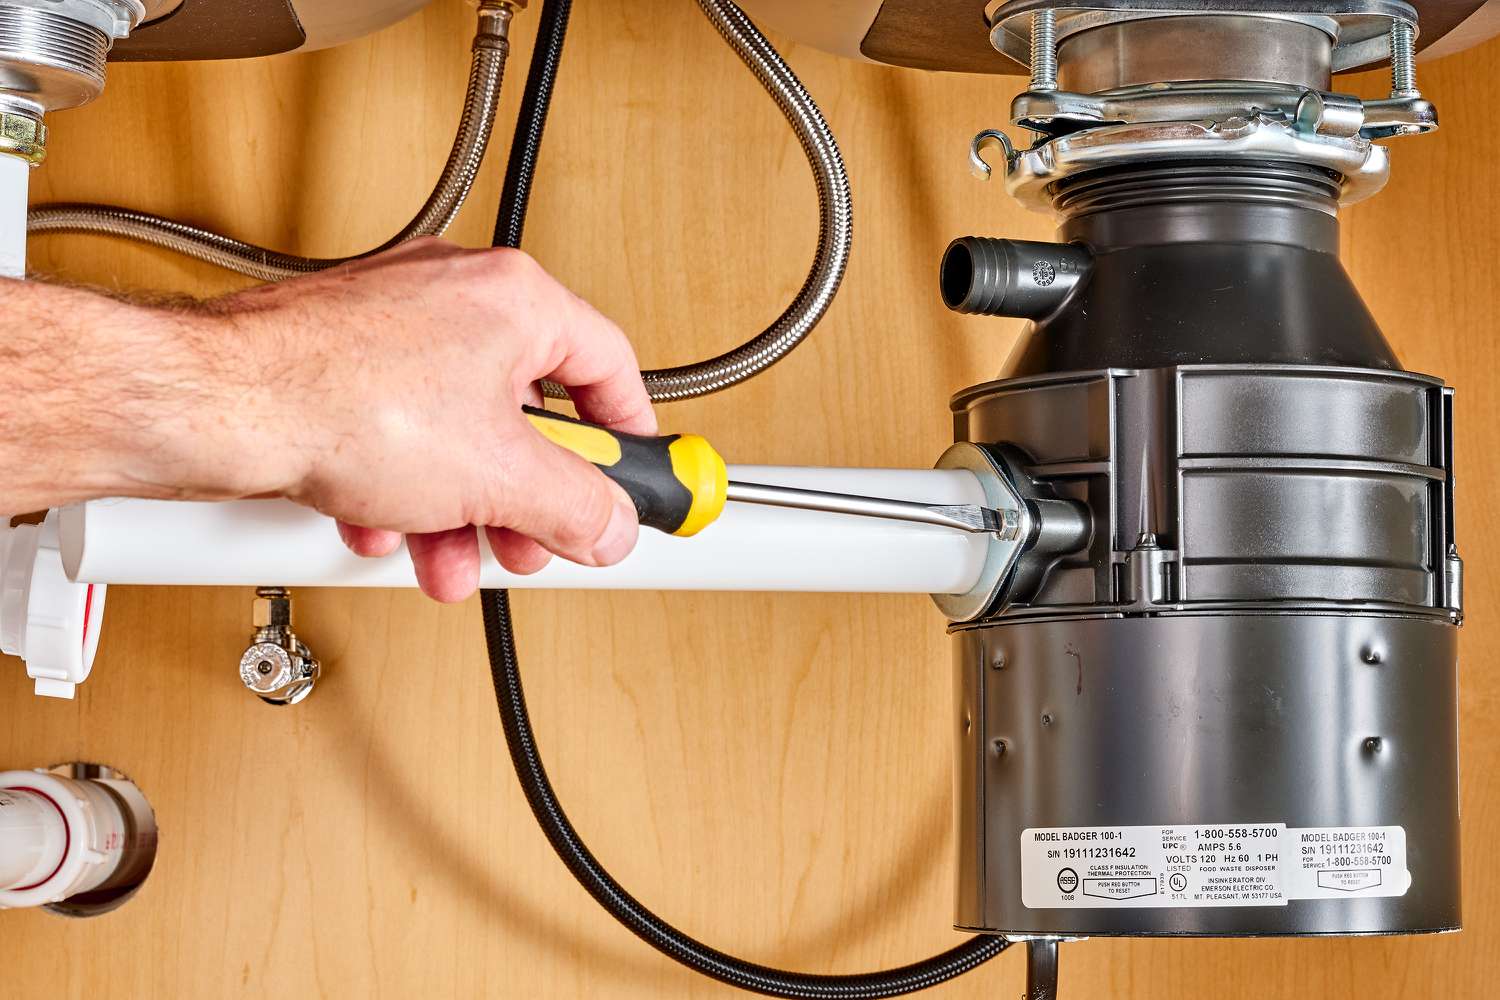
Step 3: Remove the cover plate
With the electrical cord located, the next step in removing it from the garbage disposal is to remove the cover plate. The cover plate is a protective panel that conceals the electrical connections and provides access to the cord.
To remove the cover plate, you will need a screwdriver or a suitable tool that matches the screws securing the plate in place. Most cover plates are held in position by two or more screws.
Start by identifying the screws that secure the cover plate. They are usually located on the side or bottom of the disposal unit. Insert the screwdriver into the screw heads and rotate counterclockwise to loosen and remove the screws.
Once the screws are removed, carefully lift and separate the cover plate from the garbage disposal. Set it aside in a safe place where it won’t get misplaced or damaged. Keep in mind that some cover plates may have tabs or hooks that need to be disengaged before completely removing the plate.
Removing the cover plate will expose the electrical connections and give you a better view of the cord and its attachment points. Take a moment to inspect the electrical connections to ensure they are secure and free from any signs of damage or corrosion.
With the cover plate removed, you are now ready to move on to the next step of disconnecting the wire connectors from the electrical cord.
Step 4: Disconnect the wire connectors
After removing the cover plate, the next step is to disconnect the wire connectors from the electrical cord. The wire connectors are responsible for creating a secure and reliable connection between the cord and the disposal unit’s electrical wiring.
Before proceeding, it’s important to ensure that the power supply to the garbage disposal is still turned off and the unit is unplugged. Safety should always be a top priority when working with electrical connections.
Inspect the wire connectors for any signs of looseness or damage. They are typically cylindrical plastic pieces that connect the individual wires of the electrical cord to the corresponding wires of the disposal unit.
To disconnect the wire connectors, grip the connector firmly and gently twist it counterclockwise. This motion will loosen the connection, allowing you to separate the wires. You may need to exert a bit of force, but be cautious not to apply excessive pressure that could damage the connectors or wires.
Once the wire connectors are detached, untangle the wires to create a clear view of the cord’s connection point. Take a moment to assess the condition of the wires and make sure there are no signs of fraying or damage.
If necessary, use wire cutters or strippers to trim any frayed or damaged sections of the wires. It’s essential to have clean and intact wire ends for a proper and secure reconnection later on.
By disconnecting the wire connectors, you have successfully separated the electrical cord from the disposal unit’s wiring. Now, proceed to the next step of releasing the clamp or strain relief holding the cord in place.
Before attempting to remove the electrical cord from the garbage disposal, make sure to turn off the power at the circuit breaker to avoid any risk of electric shock. Then, carefully disconnect the cord from the power source and the disposal unit.
Step 5: Release the clamp or strain relief
After disconnecting the wire connectors, the next step in removing the electrical cord from a garbage disposal is to release the clamp or strain relief that secures the cord in place. The clamp or strain relief prevents excessive tension on the cord and keeps it firmly attached to the disposal unit.
Take a close look at the area where the cord enters the disposal unit. You will likely see a clamp or strain relief fitted around the cord. It may be made of metal or plastic and is designed to hold the cord securely.
To release the clamp or strain relief, locate the fastening mechanism that holds it in place. It may be a screw, a latch, or a locking mechanism that needs to be disengaged to free the cord.
Using the appropriate tool, such as pliers or a screwdriver, loosen or remove the fastening mechanism to release the clamp or strain relief. Be careful not to damage the cord or the disposal unit while doing so.
Once the clamp or strain relief is loosened or removed, gently pull the cord away from the disposal unit. You may need to wiggle it slightly to free it from any remaining tension or resistance.
Ensure that the cord is completely detached from the disposal unit and that there are no remaining attachments or obstructions. Take this opportunity to inspect the clamp or strain relief for any signs of damage or wear. If necessary, replace it with a new one to ensure secure and reliable cord attachment in the future.
With the clamp or strain relief released and the cord separated from the disposal unit, you are prepared to move on to the next step of pulling out the electrical cord from the garbage disposal.
Step 6: Pull out the electrical cord
Now that you have released the clamp or strain relief, it’s time to remove the electrical cord from the garbage disposal. This step involves carefully pulling out the cord from the disposal unit, taking care to avoid causing any damage or strain.
Begin by firmly gripping the cord near the base where it connects to the disposal unit. With a gentle and steady motion, start pulling the cord straight outwards. It may require some effort, as the cord may be held in place by residual tension or debris.
As you pull the cord, pay close attention to any resistance or obstacles that may hinder its smooth removal. Take care to avoid tugging or yanking the cord forcefully, as this can damage the cord or the disposal unit.
If at any point the cord seems stuck or won’t come out easily, stop pulling and reassess the situation. Check for any signs of entanglement, debris, or obstructions that may be preventing the cord from being removed. Clear away any obstacles or gently wiggle the cord to loosen it.
Continue pulling the cord until it is fully removed from the garbage disposal. Keep the cord straight and avoid any unnecessary twisting or bending to prevent damage to the internal wires.
Upon successful removal of the electrical cord, inspect both ends for any signs of damage, fraying, or deterioration. If the cord is in poor condition, it is recommended to replace it with a new one before reconnecting the garbage disposal.
By completing this step, you have successfully pulled out the electrical cord from the garbage disposal. Now, it’s time to wrap up the process by either replacing the cover plate or concluding the removal if not needed.
Step 7: Replace the cover plate (optional)
In the final step of removing an electrical cord from a garbage disposal, you have the option to replace the cover plate. The cover plate serves the purpose of providing protection and a finished appearance to the electrical connections of the disposal unit.
If you plan to reattach the electrical cord in the future or simply want to keep the disposal unit’s wiring concealed, replacing the cover plate is recommended. However, if you are permanently removing the disposal unit or have other plans for the area, skipping this step is acceptable.
To replace the cover plate, align it properly with the corresponding screw holes on the disposal unit. Gently position the plate over the electrical connections and press it into place. Ensure that the plate sits flush against the unit without any gaps or misalignments.
Once the cover plate is properly positioned, secure it in place by inserting and tightening the screws that were removed earlier. Use a screwdriver or the appropriate tool to rotate the screws clockwise until they are snug but not overly tightened.
Ensure that the cover plate is securely fastened, but be careful not to overtighten the screws, as this can damage the plate or the disposal unit.
If you decide not to replace the cover plate, make sure to safely store it in a designated area where it won’t get lost or damaged. It may be beneficial to keep the cover plate for future use or if you plan to reinstall a garbage disposal at a later time.
Congratulations! You have successfully completed the process of removing the electrical cord from a garbage disposal. By following these steps, you have ensured a safe and proper disconnection of the cord from the disposal unit.
Remember, if you plan to reconnect the electrical cord in the future or replace the disposal unit, it is essential to follow the appropriate installation instructions and ensure that the connections are secure.
If you are permanently removing the disposal unit or have any concerns about working with electrical components, it is always advisable to consult a professional electrician for assistance.
Thank you for reading this guide, and we hope it has been helpful in your endeavor to remove the electrical cord from a garbage disposal!
Conclusion
Removing an electrical cord from a garbage disposal may seem daunting at first, but with the right knowledge and careful execution, it can be a straightforward process. By following the step-by-step instructions provided in this guide, you can safely and effectively remove the electrical cord without causing any damage to the disposal unit or compromising your safety.
From unplugging the garbage disposal and locating the electrical cord to removing the cover plate, disconnecting the wire connectors, releasing the clamp or strain relief, and finally pulling out the electrical cord, each step plays a crucial role in the successful removal process.
Remember to prioritize safety throughout the entire procedure. Always make sure to unplug the disposal unit and turn off the power supply before starting any work. Take necessary precautions, such as wearing protective gloves, and address any potential obstacles or obstructions that may hinder the removal process.
Whether you are replacing a damaged electrical cord, performing maintenance on the garbage disposal, or permanently removing the unit, following these steps will facilitate a smooth and efficient cord removal.
After successfully removing the electrical cord from the disposal unit, you have the option to replace the cover plate for a finished appearance or leave it off if it suits your needs. Either way, ensure that the cover plate is securely attached or safely stored for future use.
While removing an electrical cord from a garbage disposal can be done independently, if you have any doubts or concerns, it is always advisable to consult a professional electrician for assistance. They can provide expert guidance and ensure the work is completed safely and correctly.
We hope this guide has provided you with the information and confidence you need to remove an electrical cord from a garbage disposal. By following the steps outlined in this article, you can successfully disconnect the cord and proceed with your desired maintenance or replacement plans.
Remember to exercise caution, prioritize safety, and always be mindful of the power supply. With these considerations in mind, you can tackle the process with ease and accomplish your goal of removing the electrical cord from the garbage disposal unit.
Thank you for reading, and best of luck with your cord removal project!
Now that you've mastered removing an electrical cord from your garbage disposal, why not take your DIY skills to the next level? If you're planning on enhancing your garage with power tools or more lighting, understanding how to run overhead electrical wire is essential. Our next guide breaks down the process into manageable steps, ensuring safety and efficiency from start to finish. Don't miss out on this chance to boost your home improvement prowess!
Frequently Asked Questions about How To Remove Electrical Cord From Garbage Disposal
Was this page helpful?
At Storables.com, we guarantee accurate and reliable information. Our content, validated by Expert Board Contributors, is crafted following stringent Editorial Policies. We're committed to providing you with well-researched, expert-backed insights for all your informational needs.


0 thoughts on “How To Remove Electrical Cord From Garbage Disposal”