Home>Furniture & Design>Bathroom Accessories>How To Unclog A Garbage Disposal With A Plunger
Bathroom Accessories
How To Unclog A Garbage Disposal With A Plunger
Modified: October 19, 2024
Learn how to effectively unclog a garbage disposal using a plunger. Discover the best techniques for clearing blockages in your bathroom accessories.
(Many of the links in this article redirect to a specific reviewed product. Your purchase of these products through affiliate links helps to generate commission for Storables.com, at no extra cost. Learn more)
Introduction
Dealing with a clogged garbage disposal can be a frustrating and inconvenient experience. Whether it's caused by food particles, grease buildup, or foreign objects, a clogged garbage disposal can disrupt your daily routine and lead to unpleasant odors in the kitchen. However, with the right approach and a few simple tools, you can effectively unclog your garbage disposal and restore it to full functionality.
In this comprehensive guide, we will walk you through the step-by-step process of using a plunger to unclog a garbage disposal. By following these instructions, you can tackle the issue with confidence and avoid the need for costly professional assistance. With a bit of patience and the proper technique, you can quickly resolve the clog and get your garbage disposal back in working order.
So, if you're ready to take on the challenge of unclogging your garbage disposal, let's dive into the essential steps and safety precautions to ensure a successful outcome. With the right knowledge and approach, you can effectively address the issue and prevent future clogs, allowing you to enjoy a smoothly functioning garbage disposal once again.
Key Takeaways:
- Safety first! Always turn off the power, use protective gear, and avoid harsh chemicals when unclogging a garbage disposal. Prioritize safety to prevent accidents and injuries.
- Plunging is powerful! Use a plunger to dislodge the clog in your garbage disposal. Apply firm and rhythmic plunging motions to break up the obstruction and restore proper functionality.
Step 1: Safety Precautions
Before attempting to unclog a garbage disposal, it's crucial to prioritize safety to prevent accidents and injuries. The garbage disposal unit is a powerful appliance that can pose risks if not handled with care. By adhering to the following safety precautions, you can minimize the likelihood of accidents and ensure a secure environment for the unclogging process.
-
Turn Off the Power: Begin by disconnecting the power supply to the garbage disposal unit. This can typically be done by locating the circuit breaker or the dedicated power switch for the disposal under the sink. Ensure that the power is completely turned off to avoid the risk of electric shock during the unclogging process.
-
Avoid Contact with Blades: Never insert your hand or any tools into the garbage disposal unit without confirming that the power is switched off. The sharp blades inside the disposal can cause severe injuries if they are inadvertently activated while attempting to clear the clog.
-
Use Protective Gear: Consider wearing protective gloves to shield your hands from potential sharp edges or debris within the disposal. Additionally, safety goggles can provide protection against any splashing or debris dislodged during the unclogging process.
-
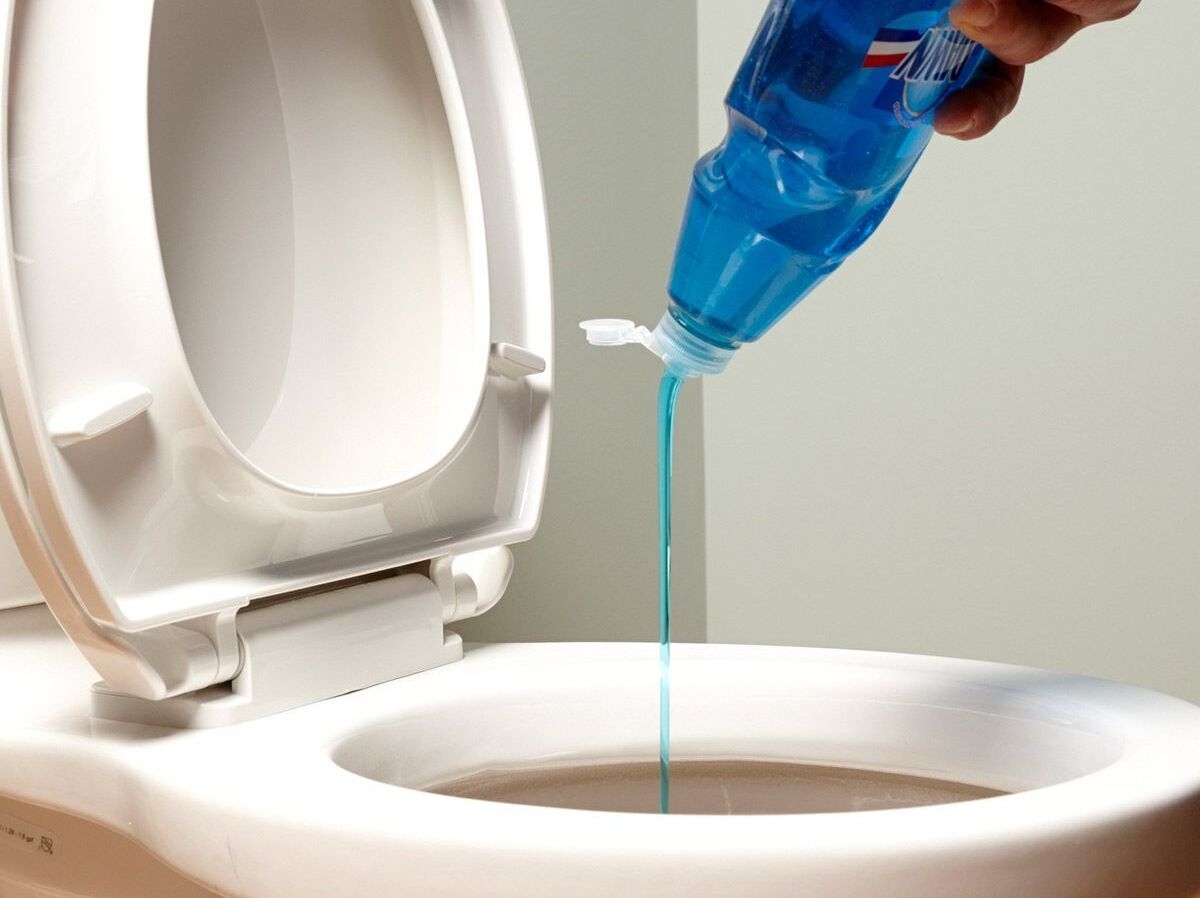
Exercise Caution with Chemicals: Refrain from using harsh chemical drain cleaners to unclog the garbage disposal, as they can be hazardous and may cause damage to the unit. Opt for safer, environmentally friendly methods such as using a plunger to dislodge the clog.
-
Keep the Area Clear: Ensure that the area around the garbage disposal is clear of any obstructions or potential tripping hazards. This will create a safe and unobstructed workspace for performing the unclogging procedure.
By prioritizing safety precautions, you can mitigate the risks associated with unclogging a garbage disposal and create a secure environment for the task at hand. These measures are essential for safeguarding yourself and others from potential harm, allowing you to approach the unclogging process with confidence and peace of mind.
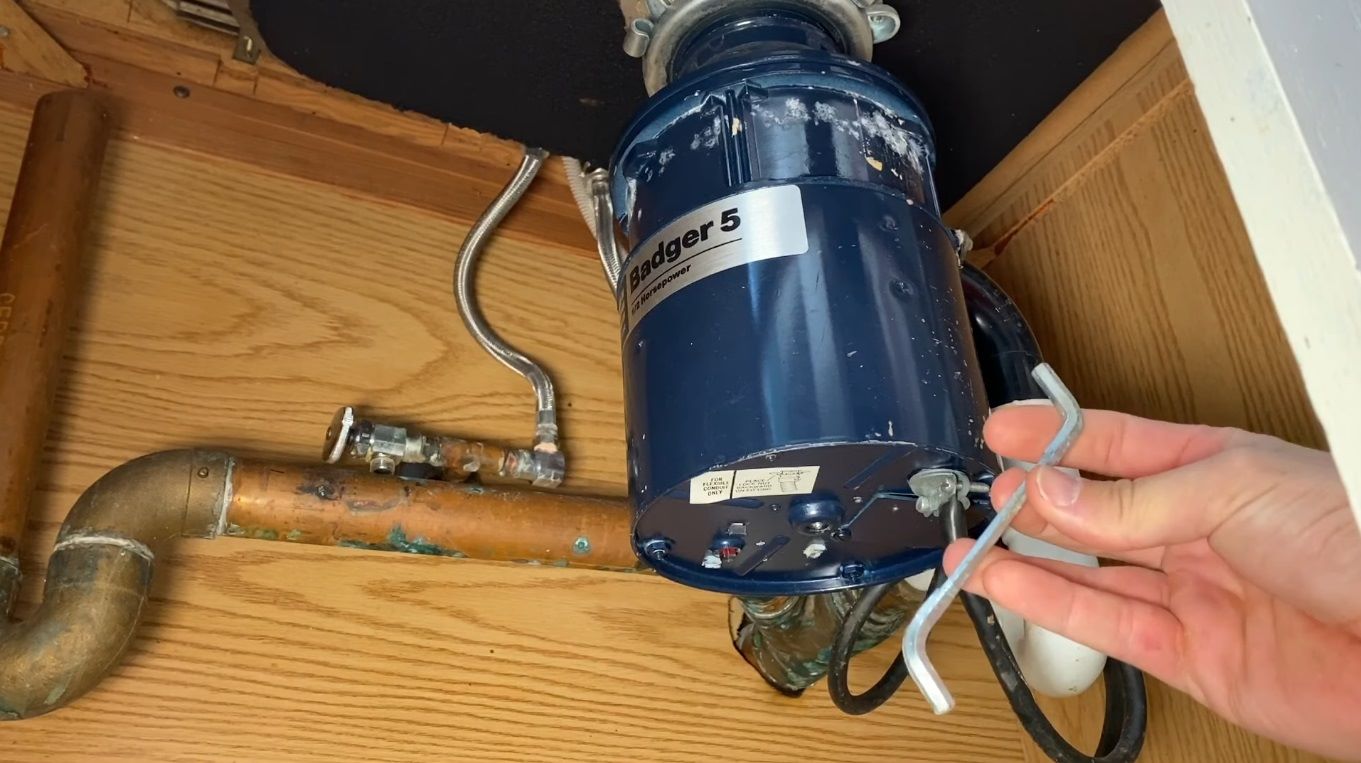
Step 2: Turn Off the Power
Ensuring the power is completely disconnected from the garbage disposal unit is a critical safety measure that cannot be overlooked. Before initiating any unclogging efforts, it is imperative to eliminate the risk of electric shock by deactivating the power supply. This step is fundamental in creating a secure environment for the unclogging process and mitigating potential hazards.
To begin, locate the circuit breaker panel in your home or the dedicated power switch specifically designated for the garbage disposal. It is typically situated under the sink, within close proximity to the disposal unit. Once you have identified the appropriate power source, proceed to switch it off to cut off the electricity supply to the garbage disposal.
Verifying that the power is completely turned off is essential to prevent any accidental activation of the disposal unit during the unclogging procedure. This precautionary measure ensures that the sharp blades and internal mechanisms of the disposal remain stationary and pose no threat of causing injuries or damage.
It is advisable to use a voltage tester or a reliable electrical device to confirm that the power has been effectively disconnected. This additional step provides an extra layer of assurance and helps to guarantee a safe working environment for the subsequent stages of the unclogging process.
By diligently adhering to the protocol of turning off the power, you demonstrate a commitment to safety and responsible handling of electrical appliances. This proactive approach not only safeguards against potential accidents but also sets the foundation for a smooth and secure unclogging experience.
Remember, the safety of yourself and others is paramount when dealing with the maintenance and repair of household appliances. By prioritizing the proper disconnection of power, you establish a secure environment that allows you to proceed with confidence and peace of mind as you address the clog in the garbage disposal.
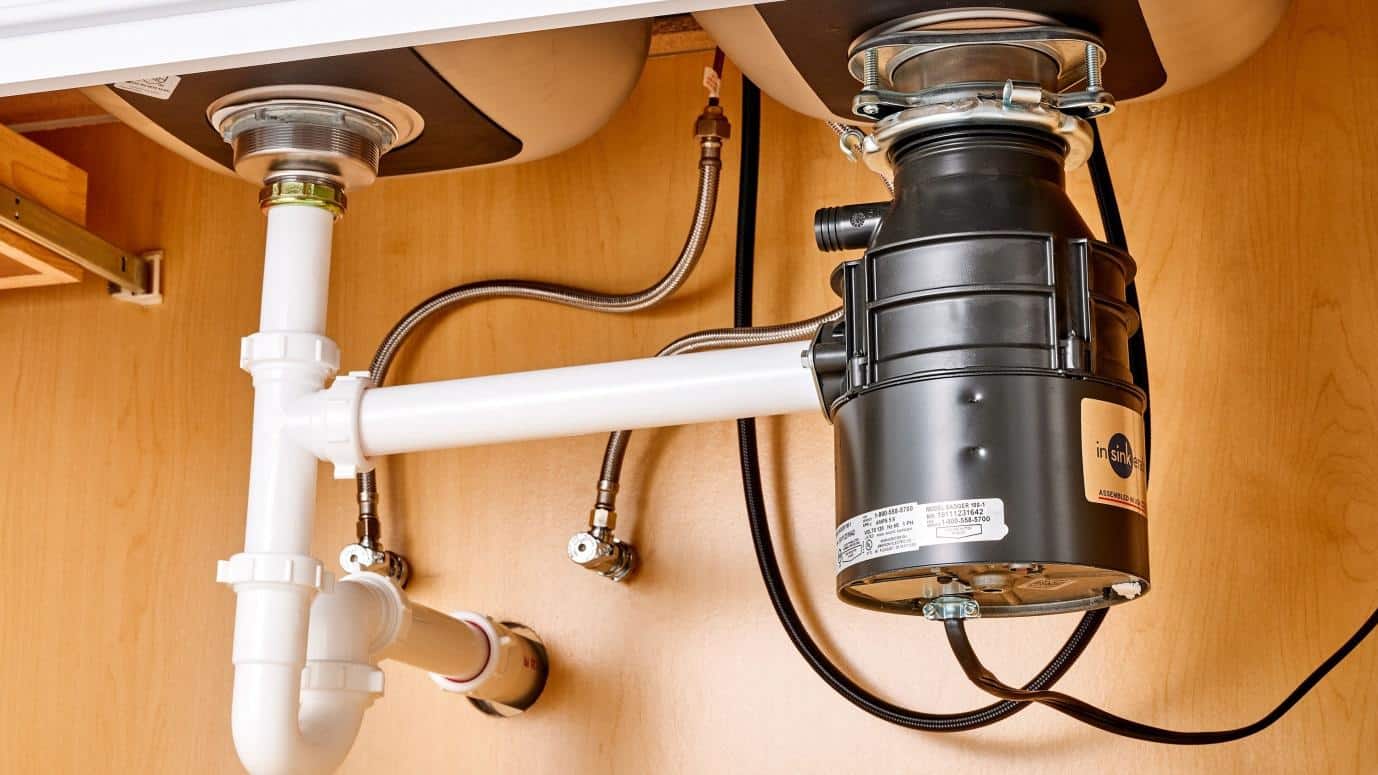
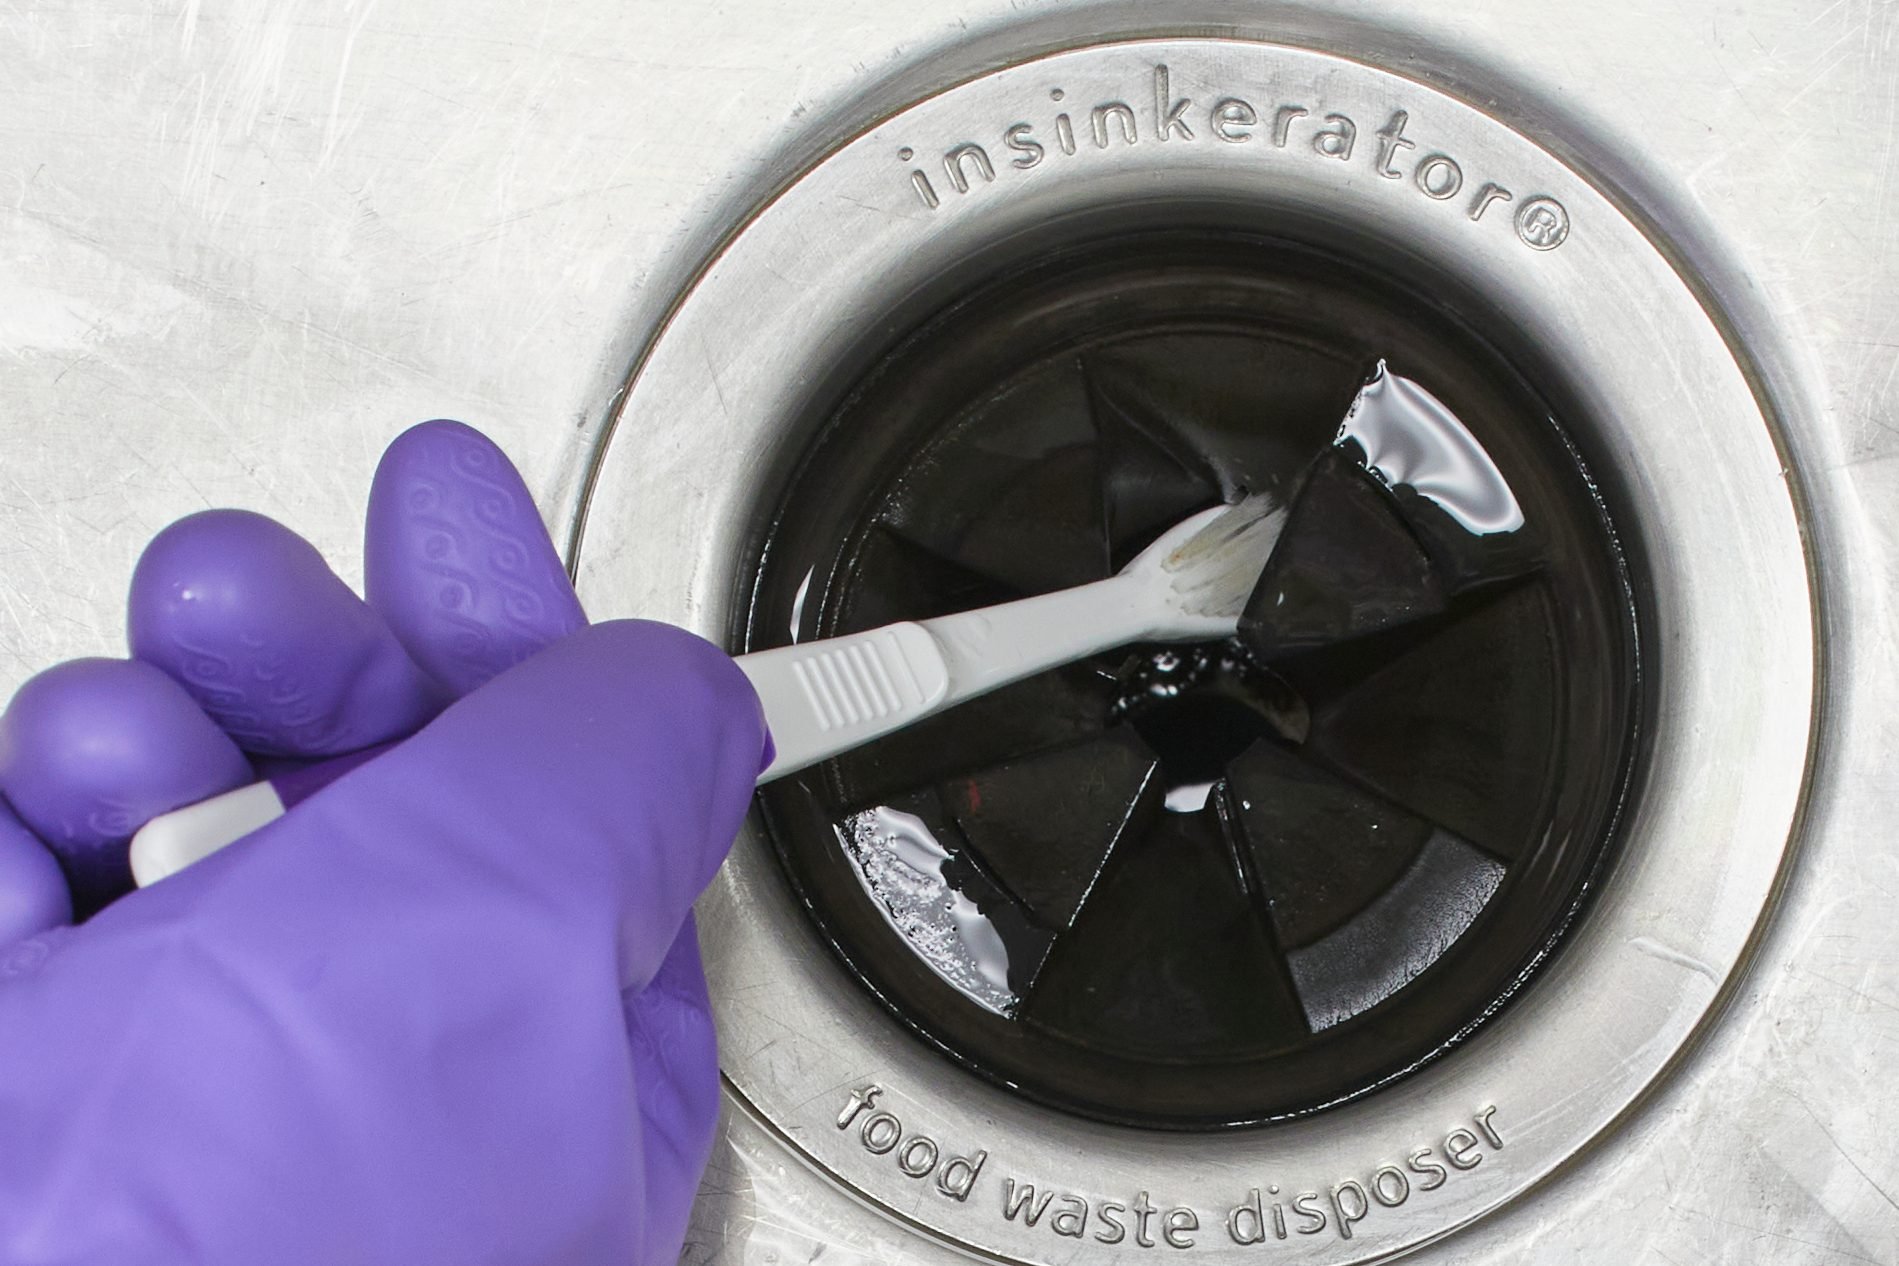
Step 3: Use a Flashlight to Inspect
After ensuring the power is turned off, the next crucial step in unclogging a garbage disposal involves using a flashlight to thoroughly inspect the interior of the unit. This visual assessment is essential for identifying the nature and location of the clog, allowing you to strategize the most effective approach for dislodging the obstruction.
Begin by retrieving a reliable flashlight with a strong beam to provide ample illumination within the disposal unit. Position yourself in a comfortable and stable stance, ensuring that you have a clear view of the interior chamber of the garbage disposal. Direct the beam of the flashlight into the disposal, carefully observing any visible debris, food particles, or foreign objects that may be contributing to the clog.
During the inspection, pay close attention to the following key areas:
-
Visible Debris: Look for any discernible buildup of food scraps, grease, or solid materials that may be obstructing the grinding mechanism of the disposal. Take note of the quantity and distribution of the debris to gauge the extent of the clog.
-
Foreign Objects: Scan the interior of the disposal for any foreign objects such as utensils, small kitchen tools, or non-disposable items that may have inadvertently fallen into the unit. Identifying and removing these objects is crucial for restoring the proper functionality of the disposal.
-
Residual Liquid: Check for any residual liquid or standing water within the disposal chamber, as this may indicate a partial blockage that is impeding the drainage process. Understanding the presence of liquid can inform your approach to effectively clearing the clog.
By meticulously examining the interior of the garbage disposal with a flashlight, you gain valuable insights into the specific characteristics of the clog. This visual assessment empowers you to tailor your unclogging strategy to address the unique factors contributing to the obstruction. Additionally, it allows you to proceed with a targeted and informed approach, maximizing the likelihood of successfully clearing the clog and restoring the disposal to optimal functionality.
Remember, the thorough inspection with a flashlight sets the stage for the subsequent steps in the unclogging process, enabling you to proceed with confidence and precision as you work towards resolving the issue.
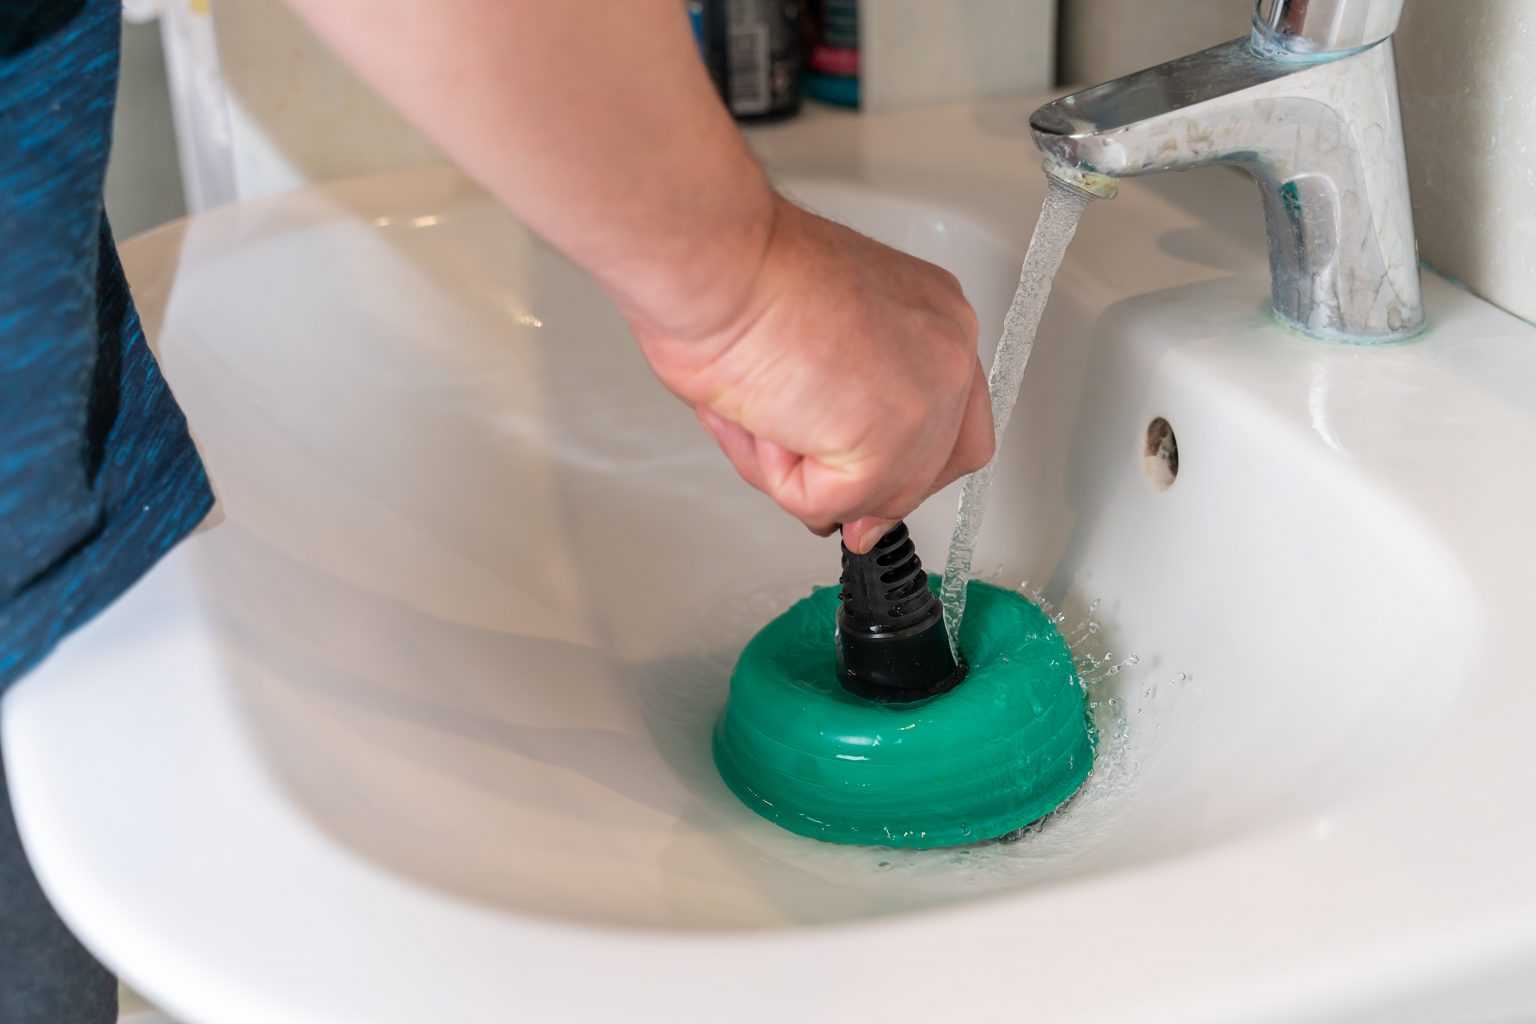
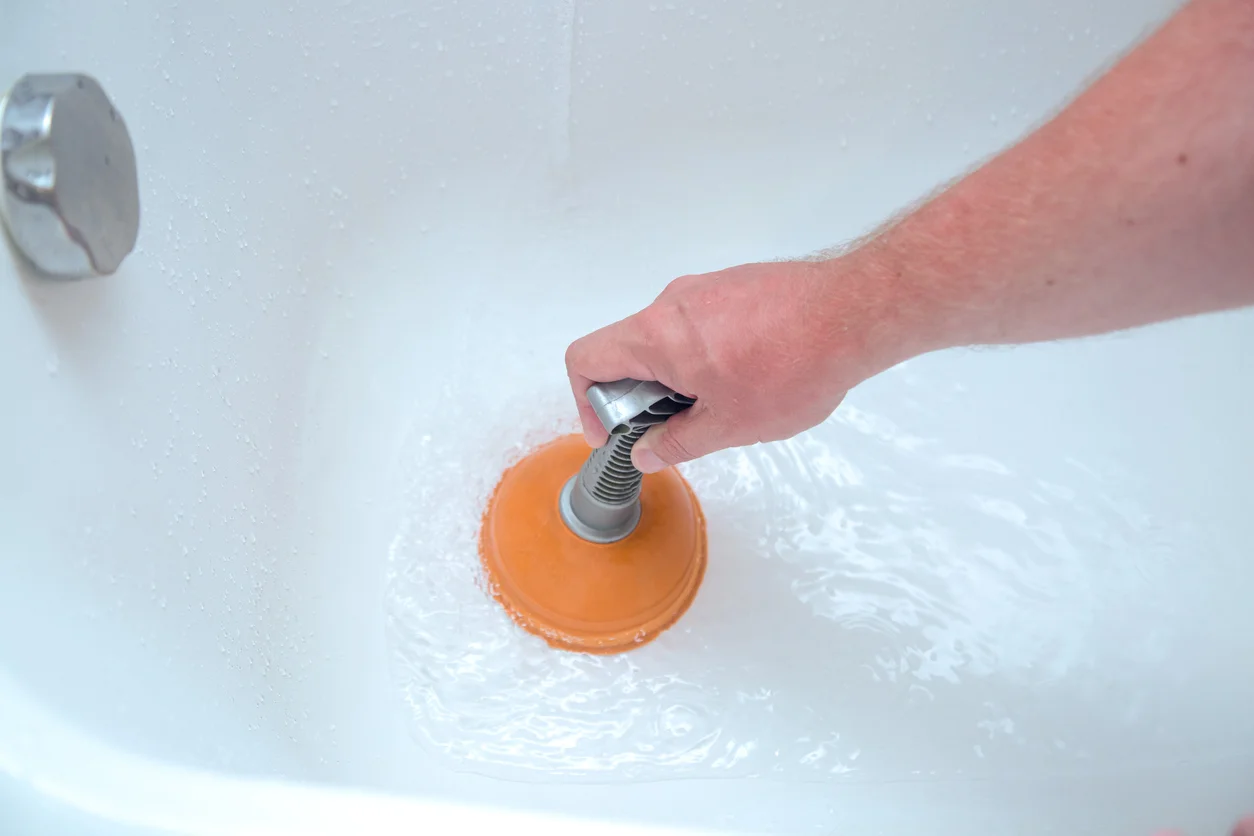
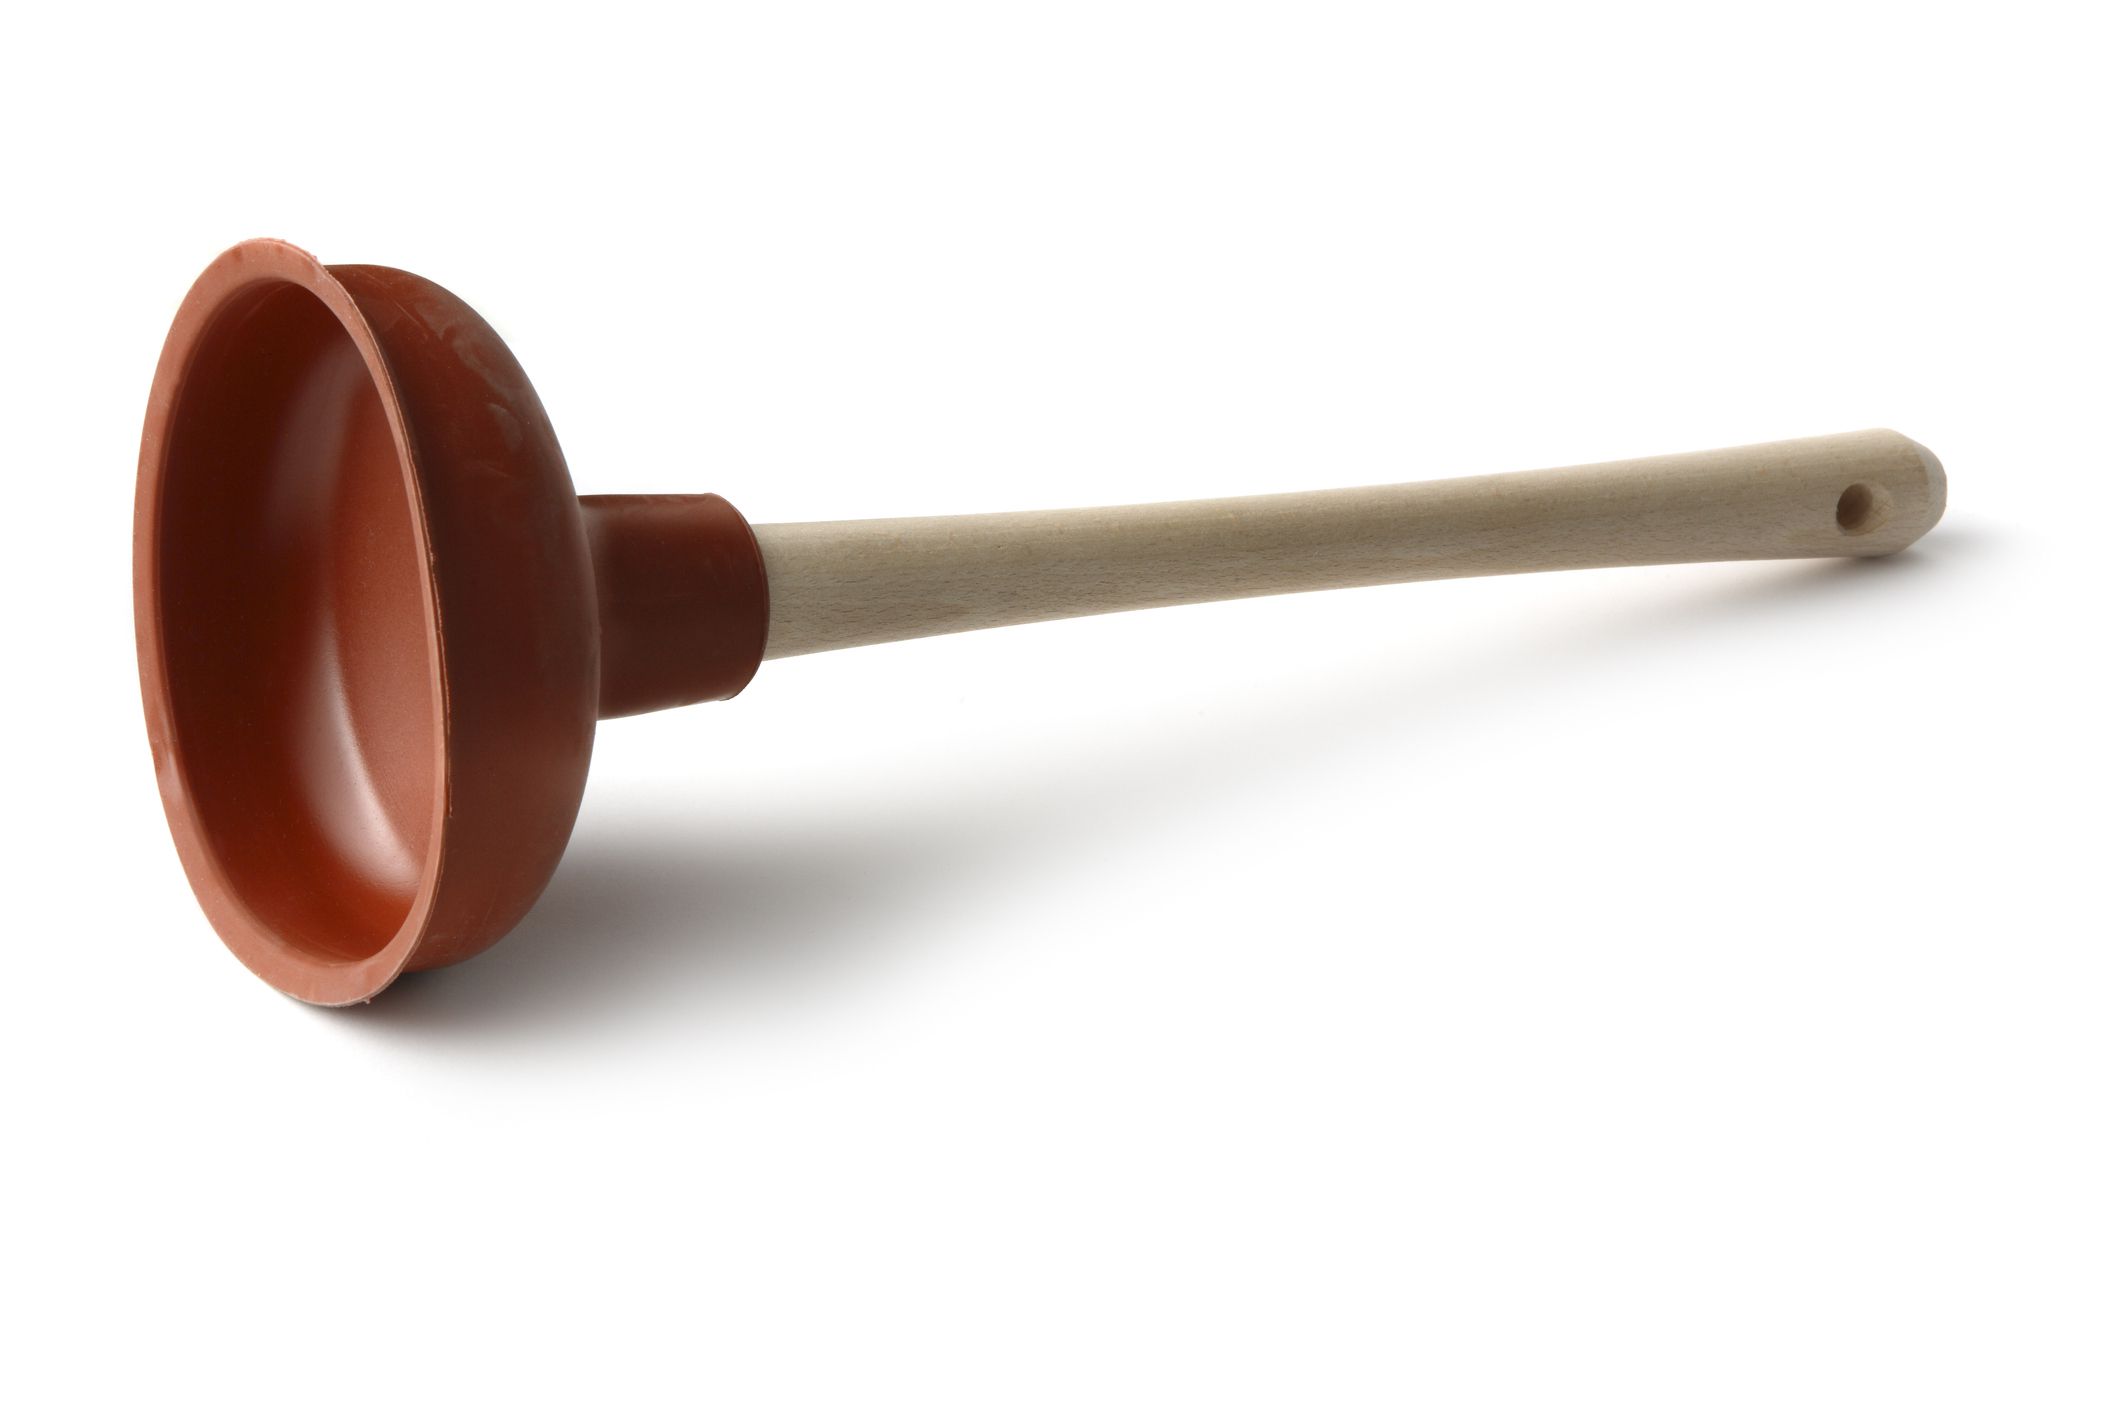
Turn off the disposal and insert a plunger. Cover the drain and plunge up and down several times. Remove the plunger and turn the disposal back on to check if it’s unclogged.
Step 4: Plunge the Garbage Disposal
With the inspection completed and the power safely turned off, it's time to proceed with the pivotal step of plunging the garbage disposal to dislodge the clog. The use of a plunger provides a simple yet effective method for applying pressure and suction to break up and remove the obstruction within the disposal unit.
To begin, select a standard sink plunger with a rubber cup that can create a tight seal over the drain opening of the garbage disposal. Ensure that the plunger is clean and free of any debris or residue to maintain optimal suction during the unclogging process. Position the plunger directly over the drain opening, ensuring a secure and airtight seal is formed between the rubber cup and the surface of the disposal.
With the plunger in place, apply firm and rhythmic plunging motions to generate pressure and suction within the disposal unit. The goal is to dislodge the clog by creating a forceful back-and-forth movement that helps to break up the obstruction and facilitate its removal. It's important to maintain a steady and controlled rhythm while plunging, allowing the pressure to build and release in a consistent manner.
As you continue plunging, be attentive to any changes in resistance or movement within the disposal. You may notice shifts in the obstruction or changes in the drainage pattern, indicating that the plunging action is effectively impacting the clog. Persist with the plunging process, adjusting the angle and intensity of the plunging motions as needed to maximize the effectiveness of the technique.
Throughout the plunging procedure, it's essential to maintain the integrity of the seal between the plunger and the drain opening. This ensures that the pressure and suction generated by the plunging action are concentrated within the disposal unit, directly targeting the clog and promoting its dislodgment. Consistent and deliberate plunging efforts can gradually break down the obstruction, allowing it to be flushed out of the disposal.
Once you feel that the clog has been sufficiently dislodged and broken up, carefully remove the plunger from the drain opening. Take a moment to visually inspect the disposal chamber with a flashlight, checking for any signs of residual debris or obstruction. If necessary, repeat the plunging process to further clear the disposal and ensure that the clog has been effectively addressed.
By effectively plunging the garbage disposal, you harness the power of pressure and suction to combat the clog and restore the unit to proper functionality. This straightforward yet impactful technique offers a practical and accessible approach to addressing clogs, empowering you to take proactive measures in maintaining the efficiency of your garbage disposal.
Read more: DIY Guide: Installing A Garbage Disposal
Step 5: Test the Garbage Disposal
After completing the plunging process, it is essential to conduct a thorough test of the garbage disposal to verify that the clog has been successfully cleared and that the unit is functioning as intended. This critical step allows you to assess the effectiveness of the unclogging efforts and ensure that the disposal is capable of processing food waste and draining water without any lingering issues.
To begin the testing process, carefully restore the power supply to the garbage disposal unit by reactivating the circuit breaker or power switch that was previously turned off. Once the power is restored, refrain from immediately running the disposal and instead proceed with a series of deliberate and methodical checks to validate its operational status.
Start by running cold water into the sink and then activating the garbage disposal. Listen attentively for any unusual noises, grinding sounds, or signs of strain that may indicate lingering debris or partial obstruction within the unit. Observe the flow of water and the disposal's ability to process and expel the water without any signs of backup or slow drainage.
As the disposal operates, pay close attention to the overall performance and functionality, noting any irregularities or indications of persistent clogging. It is advisable to allow the disposal to run for an extended period, ensuring that it can effectively process food waste and clear the drain without encountering any impediments.
Following the initial test, it is recommended to introduce a small amount of food waste into the disposal, such as fruit scraps or vegetable peels, to gauge its ability to grind and expel the material without encountering resistance. This practical assessment provides valuable insight into the disposal's capacity to handle typical kitchen waste and confirms that the unclogging process has yielded the desired results.
Throughout the testing phase, remain vigilant for any signs of recurrent clogging, drainage issues, or abnormal operation of the garbage disposal. If any concerns or irregularities are observed during the testing process, it may indicate the need for further unclogging measures or professional inspection to address underlying issues.
By diligently testing the garbage disposal, you can confidently verify the success of the unclogging process and ensure that the unit is fully operational. This proactive approach allows you to identify and address any potential residual clogging or performance issues, ultimately restoring the functionality of the disposal and enabling you to resume regular usage without the burden of persistent clogs or drainage complications.
Conclusion
In conclusion, successfully unclogging a garbage disposal with a plunger involves a systematic approach that prioritizes safety, thorough inspection, and strategic intervention. By adhering to essential safety precautions, including turning off the power and using protective gear, you create a secure environment for addressing the clog while minimizing the risk of accidents or injuries.
The use of a flashlight to inspect the interior of the disposal unit plays a pivotal role in identifying the nature and location of the clog. This visual assessment empowers you to tailor your unclogging strategy to address the unique factors contributing to the obstruction, setting the stage for a targeted and informed approach.
The plunging process, a fundamental step in the unclogging procedure, harnesses the power of pressure and suction to dislodge the clog and restore the proper functionality of the disposal. By applying firm and controlled plunging motions, you can effectively break up the obstruction and facilitate its removal, ultimately clearing the disposal and promoting unimpeded drainage.
Following the unclogging efforts, conducting a comprehensive test of the garbage disposal is crucial for verifying the success of the procedure and ensuring that the unit is fully operational. This testing phase allows you to assess the disposal's ability to process food waste and expel water without encountering any lingering issues, providing valuable insight into the effectiveness of the unclogging process.
By diligently following these steps and precautions, you can confidently address clogs in your garbage disposal, restoring its functionality and preventing future disruptions. With the right knowledge and approach, you can effectively tackle clogs and maintain the efficiency of your garbage disposal, allowing you to enjoy a smoothly functioning kitchen appliance.
In essence, the process of unclogging a garbage disposal with a plunger not only resolves immediate clogging issues but also empowers you to take proactive measures in maintaining the efficiency of your household appliances. By prioritizing safety, thorough inspection, and strategic intervention, you can effectively address clogs and ensure the optimal functionality of your garbage disposal, contributing to a seamless and hassle-free kitchen experience.
Frequently Asked Questions about How To Unclog A Garbage Disposal With A Plunger
Was this page helpful?
At Storables.com, we guarantee accurate and reliable information. Our content, validated by Expert Board Contributors, is crafted following stringent Editorial Policies. We're committed to providing you with well-researched, expert-backed insights for all your informational needs.


0 thoughts on “How To Unclog A Garbage Disposal With A Plunger”