Home>Ideas and Tips>DIY Guide: Installing Under-Cabinet Lighting In Your Kitchen
Ideas and Tips
DIY Guide: Installing Under-Cabinet Lighting In Your Kitchen
Modified: October 28, 2024
Enhance your kitchen's ambiance with our DIY guide to installing under-cabinet lighting. Step-by-step instructions for a modern, well-lit space.
(Many of the links in this article redirect to a specific reviewed product. Your purchase of these products through affiliate links helps to generate commission for Storables.com, at no extra cost. Learn more)
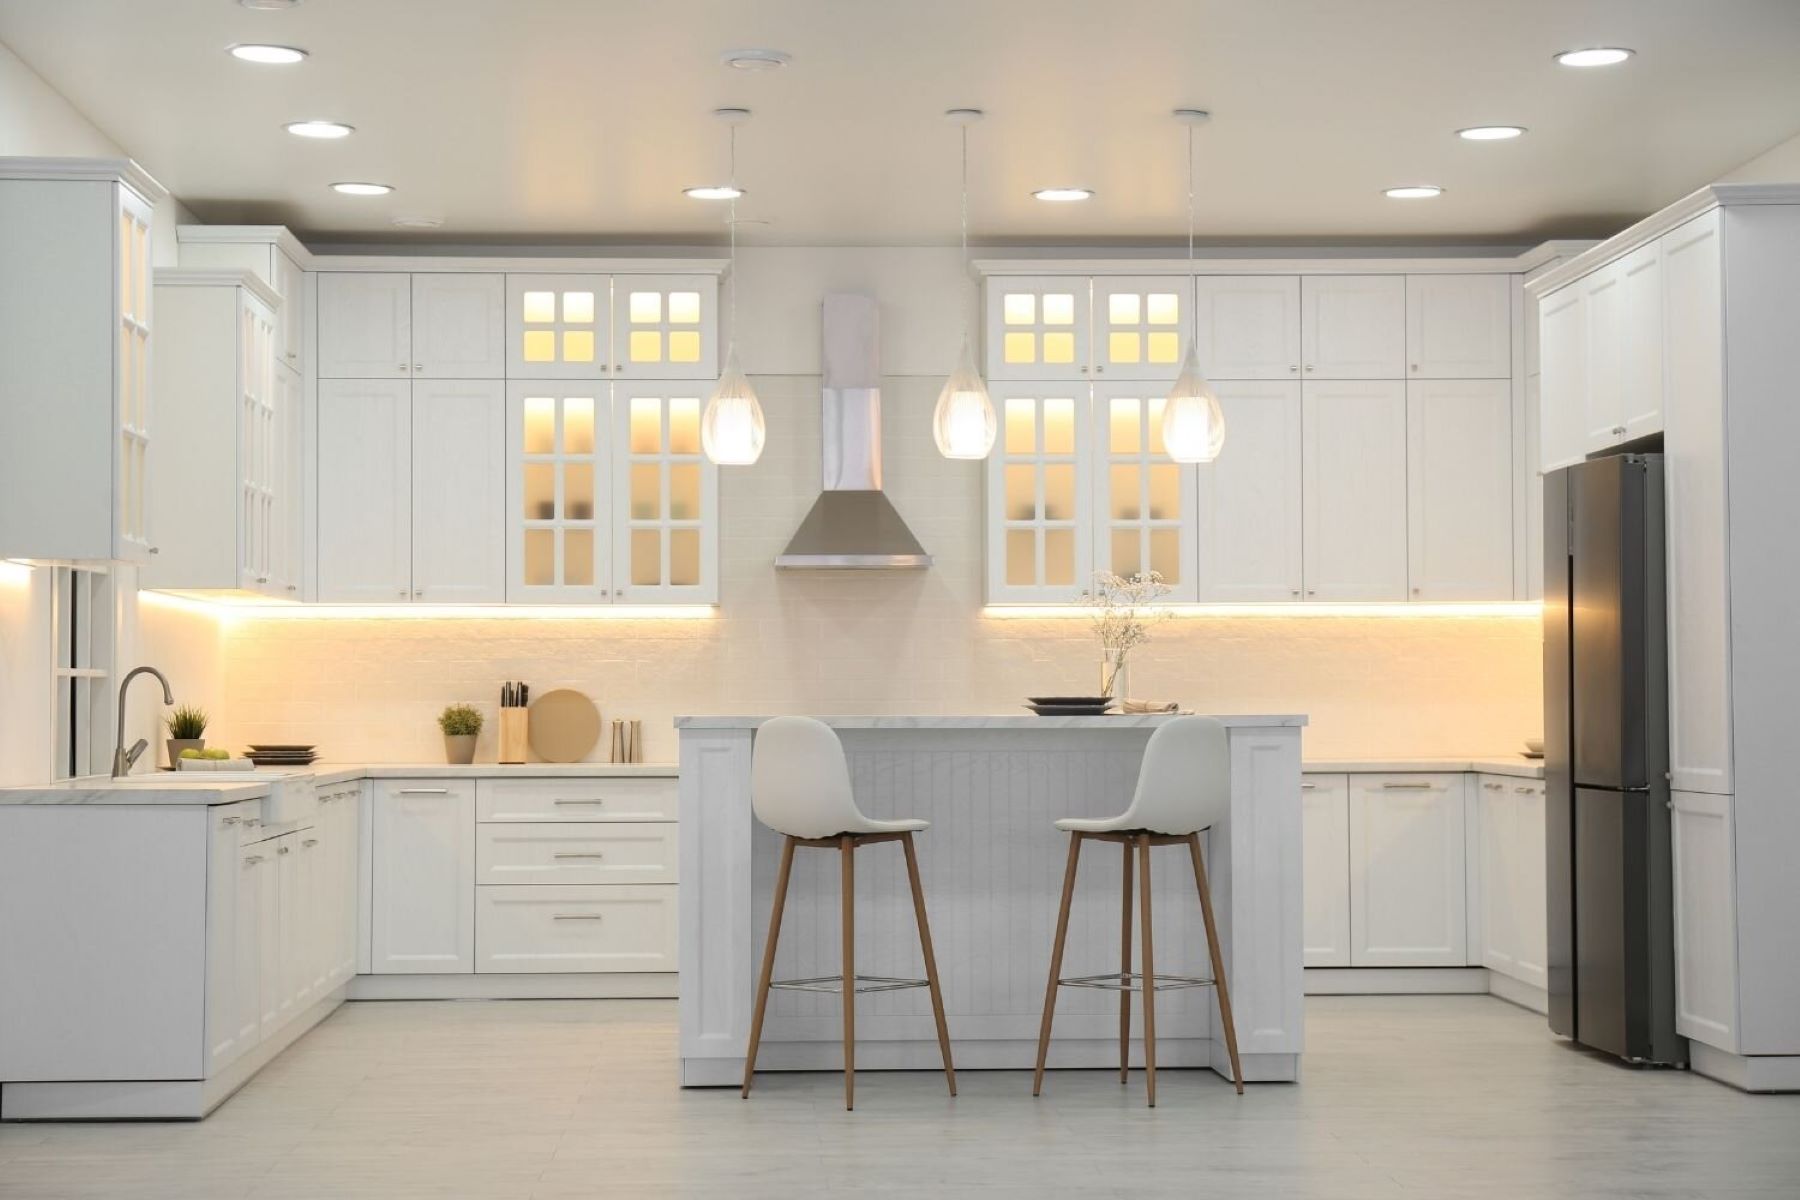
Installing under-cabinet lighting in your kitchen is a fantastic way to enhance the ambiance and functionality of your space. Not only does it provide additional lighting, but it also highlights the beautiful countertops and backsplash, making your kitchen look more inviting and modern. In this comprehensive guide, we will walk you through the steps to install under-cabinet lighting in your kitchen, from preparing the area to hiding the cords.
Step 1: Prepare Your Area and Understand Your Layout
Before you start the installation process, it's crucial to prepare your area and understand your kitchen layout. This includes identifying the sections where you want to install the under-cabinet lighting and determining how many lights you'll need. For example, if you have two sections of cabinets, you might want to install two separate sets of lights.
Understanding Your Layout
Each kitchen is unique, with different cabinet sizes and configurations. Understanding your layout will help you plan the installation more effectively. For instance, if you have a long run of cabinets, you might want to install continuous rows of lights for even distribution.
Tools and Materials Needed
To begin, gather all the necessary tools and materials. These typically include:
- LED Light Strips: These are the main components that will provide the lighting.
- LED Drivers (or Transformers): These are necessary for powering the LED strips.
- Switches: You'll need a switch to control the lights.
- Wiring: This includes the necessary electrical wires for connecting the lights to the power source.
- Mounting Channels: These are used to secure the LED strips under the cabinets.
- Drill and Drill Bits: For drilling holes in the cabinets.
- Wire Strippers: For stripping the insulation off electrical wires.
- Electrical Tape: For securing wires.
- Cord Hiders: To hide the cords on the inside of the cabinets.
Step 2: Understand How All of the LED Components Connect Together
Before you start drilling holes or cutting any materials, it's essential to understand how all the LED components connect together. This includes knowing how to connect the LED strips to the drivers and how to wire them to the switches.
Connecting LED Strips
LED strips usually come with connectors that allow you to daisy-chain them together. This means you can connect multiple strips end-to-end without needing additional wiring. However, it's crucial to follow the manufacturer's instructions for connecting these strips correctly.
Wiring and Installing Drivers
The drivers or transformers are necessary for converting standard household voltage (120V) to the low voltage required by LED strips (usually 12V). These components should be installed according to the manufacturer's instructions and should be placed in a location where they are easily accessible but not visible.
Step 3: Drill Necessary Holes
Once you have a clear understanding of your layout and how all the components connect, it's time to start drilling holes in your cabinets. The holes will serve as pathways for running the electrical wires through.
Drilling Holes
Use a drill with appropriate drill bits to create holes in the back of your cabinets. The size of the holes will depend on the size of your wiring. Make sure to drill holes at strategic locations where you can easily pull the wires through without any obstructions.
Step 4: Cut Mounting Channels to Length
After drilling holes, you'll need to cut mounting channels to fit under your cabinets. These channels provide a secure place for attaching the LED strips.
Cutting Mounting Channels
Mounting channels usually come in standard lengths but may need to be cut to fit specific cabinet sizes. Use a hacksaw or a utility knife to cut these channels into manageable pieces.
Step 5: Cut and Connect LED Light Strips
With all your materials ready, it's time to cut and connect your LED light strips.
Cutting LED Strips
Cut the LED strips according to your needs, ensuring that each section is long enough to cover the area under one set of cabinets.
Connecting LED Strips
Connect each section of the LED strip using the connectors provided by the manufacturer. Make sure all connections are secure and won't come loose over time.
Step 6: Attach LED Strip Light Mounting Channels to Cabinets
Now that you have your LED strips connected, it's time to attach them securely under your cabinets using mounting channels.
Attaching Mounting Channels
Use double-sided mounting strips like Scotch Mount Extreme if necessary, as they provide a firm and secure attachment without damaging the aluminum channels or cabinets. Adhere these strips to the back side of mounting channels before attaching them under cabinets.
Securing LED Strips
Once mounted, ensure that each section of lighting is firmly attached under each set of cabinets. This will prevent any movement or sagging over time.
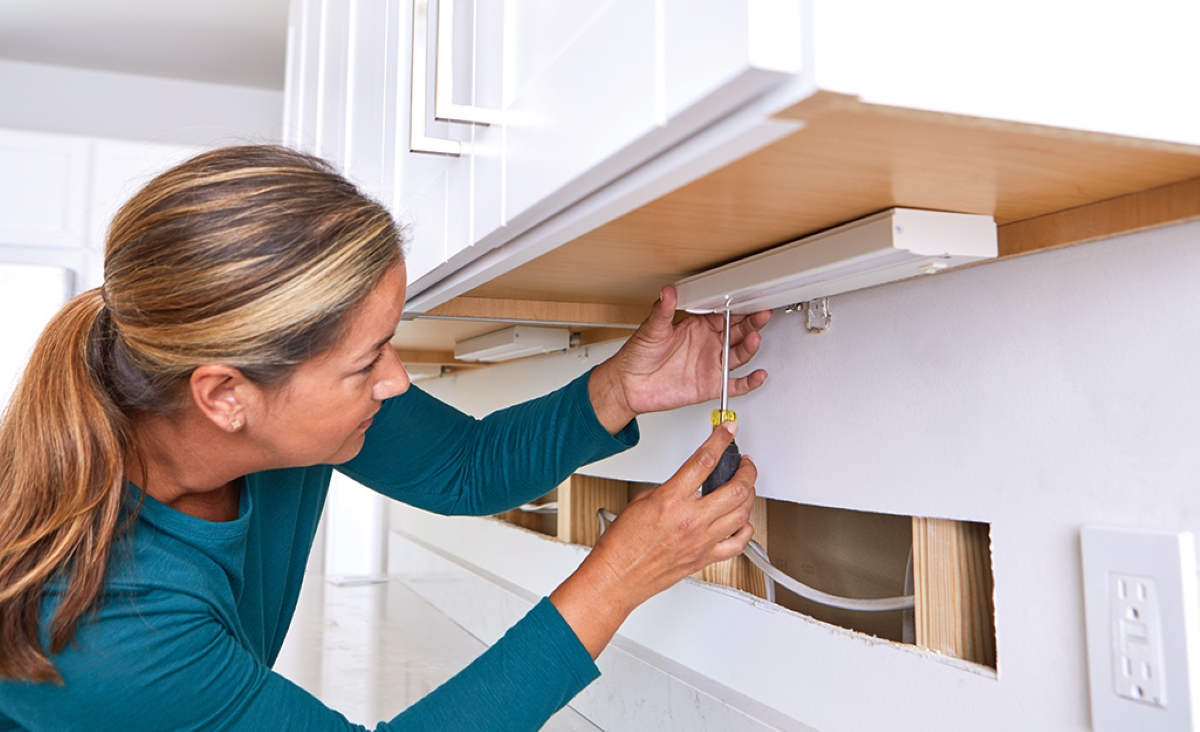
Step 7: Hide Cords on the Inside of Cabinets
One of the most challenging parts of installing under-cabinet lighting is hiding cords on the inside of cabinets without any visible damage or obstructions.
Using Cord Hiders
Use cord hiders made by Legrand or similar brands to secure wires inside cabinets. These hiders come in various shapes and sizes, including straight sections and corner pieces. Cut them down to size as needed and place them along wires before filling cabinets with items.
Securing Wire Channels
Additionally, use electrical tape or cable ties to secure wire channels where necessary, especially around corners or bends where wires might snag against other objects inside cabinets.
Step 8: Final Testing and Installation
After completing all steps above, perform a final test before plugging everything into power outlets.
Testing Connections
Use a voltage tester to ensure all connections are safe and functioning correctly before plugging them into power sources.
Plugging In
Once everything has been tested successfully, plug in all connections ensuring that lights turn on smoothly without any flickering issues.
Additional Tips and Considerations
Choosing Supplies Wisely
Choosing the right supplies can make or break your project's success. Consider factors like color temperature (warm white vs cool white), brightness levels (measured in lumens), and durability when selecting LED strips and drivers.
Planning Ahead
Planning ahead saves time and reduces stress during installation processes. Measure spaces accurately before cutting materials ensuring proper fitment without any leftovers which could lead to confusion later down line during assembly phases.
Hiring Professional Help When Needed
If unsure about any part involving electrical work especially wiring connections consider hiring professional electrician who specializes such tasks ensuring safety standards met throughout entire process avoiding potential hazards associated improper handling electrical components within homes environments where safety paramount above all else always remember!
Conclusion
Installing under-cabinet lighting in your kitchen is an achievable DIY project that can significantly enhance its ambiance while providing functional lighting solutions making spaces look more inviting modernized overall appearance wise too By following these steps carefully considering each detail along way ensuring everything runs smoothly without hiccups encountered during process itself ultimately leading towards successful completion project end result being beautifully illuminated kitchen area enjoyed daily basis moving forward ahead future endeavors alike!
References:
- Just a Girl and Her Blog: How to Install Under Cabinet Lighting in the Kitchen Using LED Light Strips.
- Family Handyman: How to Install Under Cabinet Lighting in Your Kitchen.
- DIY Declassified: DIY Kitchen Under Cabinet Lighting.
- Joyfully Growing Blog: DIY Cabinet Lighting: 30-Minute How-To Guide.
This comprehensive guide provides step-by-step instructions along with valuable tips considerations ensuring successful installation under-cabinet lighting kitchens everywhere
Was this page helpful?
At Storables.com, we guarantee accurate and reliable information. Our content, validated by Expert Board Contributors, is crafted following stringent Editorial Policies. We're committed to providing you with well-researched, expert-backed insights for all your informational needs.


0 thoughts on “DIY Guide: Installing Under-Cabinet Lighting In Your Kitchen”