Home>Ideas and Tips>DIY Guide To Installing A Stair Runner

Ideas and Tips
DIY Guide To Installing A Stair Runner
Modified: October 28, 2024
Enhance your staircase with our DIY guide to installing a stair runner. Learn step-by-step instructions, tools needed, and tips for a perfect finish.
(Many of the links in this article redirect to a specific reviewed product. Your purchase of these products through affiliate links helps to generate commission for Storables.com, at no extra cost. Learn more)
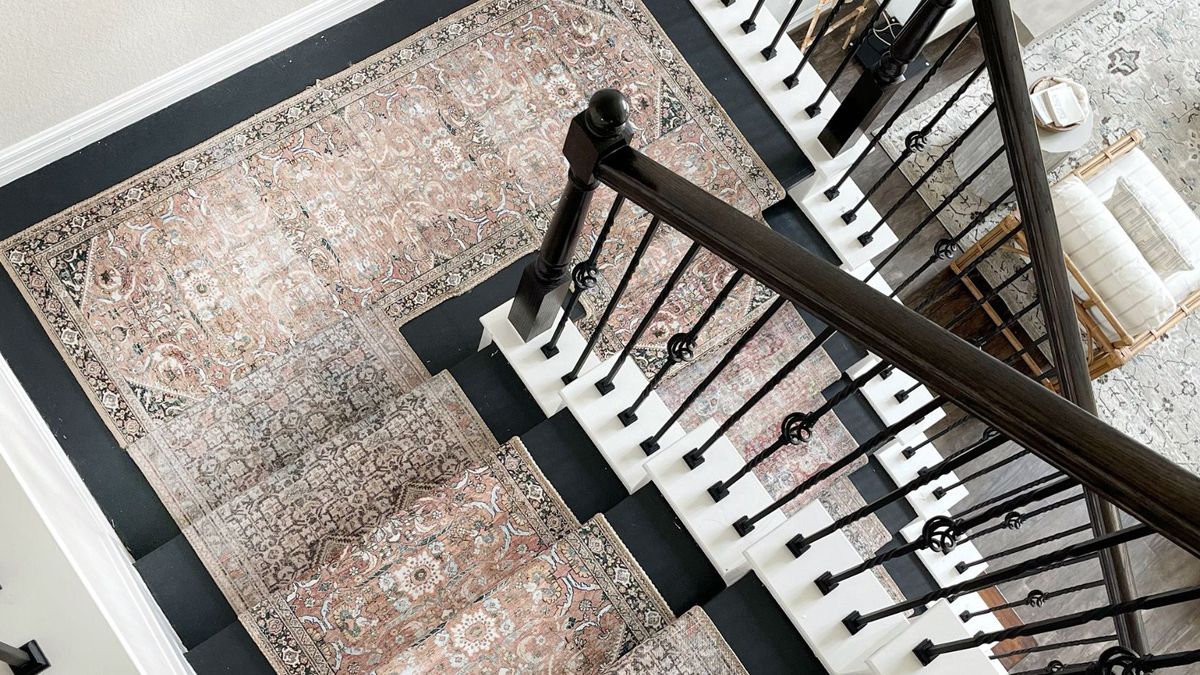
Installing a stair runner can be a fantastic way to enhance the aesthetic and functionality of your staircase. Not only does it add a touch of elegance, but it also provides cushioning and traction, making it safer for everyone in the household. In this comprehensive guide, we will walk you through the steps to install a stair runner, covering everything from preparation to completion.
Why Install a Stair Runner?
Before diving into the installation process, let's explore why you might want to install a stair runner. Here are some compelling reasons:
- Aesthetic Appeal: Stair runners come in a variety of colors, patterns, and materials, allowing you to customize your stairs to match your home's decor. Whether you prefer bold stripes or a subtle texture, there's a runner to suit every style.
- Safety: The primary benefit of a stair runner is its ability to provide traction. This is particularly important for households with young children, pets, or elderly members who may be more prone to slips and falls.
- Comfort: The cushioning provided by a stair runner makes each step feel softer and more comfortable underfoot.
- Noise Reduction: By covering the treads, stair runners can significantly reduce the noise associated with footsteps, creating a more peaceful environment.
- Wooden Tread Protection: The runner acts as a protective layer for the wooden treads, shielding them from wear and tear.
Read more: How To Install Runner On Stairs
Materials and Tools Needed
Before you start, it's essential to gather all the necessary materials and tools. Here’s a list of what you’ll need:
Materials
- Stair Runner: Choose a runner that fits your style and budget. Popular options include cotton, sisal or jute, synthetic fibers, and wool.
- Rug Pad: A non-slip rug pad is crucial for ensuring the runner stays in place.
- Carpet Tape: Double-sided carpet tape helps secure the rug pad to the treads.
- Staples: You’ll need staples of different sizes (5/8-inch and 9/16-inch) for securing the runner.
- Tackless Strips: These are used to create a smooth surface for the runner.
- Carpet Glue: For added security, you can use carpet glue to attach the runner to the risers.
- Painter’s Tape: For marking the placement of the runner on each tread.
Tools
- Carpet Knife: For cutting the carpet pad and runner.
- Carpet Tool: A knee kicker helps stretch and secure the carpet pad.
- Combination Square: Ensures accurate measurements and placement.
- Pneumatic Stapler: A staple gun makes it easier to attach the runner to the treads and risers.
- Rubber Mallet: For tapping the runner into place.
- Measuring Tape: Essential for measuring your stairs accurately.
- Scissors: For cutting any excess material or tape.
- Needle-Nose Pliers: Useful for reaching into tight spaces to secure staples.
Preparing Your Stairs
Before installing your stair runner, you may need to prepare your stairs by removing any existing carpet or runner. Here’s how you can do it:
Read more: How To Install A Carpet Runner On Stairs
Removing Old Carpet or Runner
If you have an existing rug, runner, or carpet on your stairs that needs to go, this process may take some time. Here are the steps:
- Remove Old Staples: Use needle-nose pliers to carefully remove the old staples from the treads and risers.
- Pull Out Old Carpet: Start at the top of the stairs and work your way down, pulling out the old carpet or runner. Be careful not to damage the underlying wood.
- Clean the Stairs: Once the old carpet is removed, clean the stairs thoroughly to ensure a smooth installation process.
Measuring Your Stairs
Accurate measurements are crucial for a successful installation. Here’s how you can measure your stairs:
- Measure Riser Height: Measure the height of one riser from the top of the tread to the bottom of the next tread.
- Measure Tread Depth: Measure the depth of one tread from the back of the tread to the front.
- Calculate Total Length: Add these measurements together and multiply by the number of stairs you need to cover with the runner.
- Add Extra Length: Add an extra 12 inches to ensure you have enough material for any irregularities or landings.
For example, if your treads measure 10.5 inches and your risers measure 9 inches, and you have 17 stairs, your calculation would be:
[ 19.5 text{ inches} times 17 text{ stairs} = 331.5 text{ inches} ÷ 12 = 27.625 text{ feet} (rounded up to 28 feet) ]
Step-by-Step Installation Guide
Now that you have your materials and have prepared your stairs, it’s time to start installing your stair runner. Here’s a detailed step-by-step guide:
Step 1: Lay Out Tackless Strips
- Mark Placement: Measure the width of the stair tread, subtract the width of the rug, and divide by two to determine how far from the skirtboard and balusters the tackless strip should be placed.
- Cut Tackless Strips: Use sheet-metal snips to cut tackless strips 2 inches shorter than the runner width. Ensure there’s a nail within a couple inches of each end.
- Place Tackless Strips: Place a scrap piece of strip flush against the riser and center the cut strip between layout marks. Butt it against the scrap and nail into place.
Read more: How To Install Carpet Stair Runner
Step 2: Fit Carpet Pad
- Cut Carpet Pad: Cut carpet pad the same width as the tackless strips and 3 inches longer than the depth of the tread.
- Attach Pad: Butt pad to front edge of tackless strip and fasten edge of pad to tread with 9⁄16-inch staples spaced every 3 inches.
- Secure Pad: Pull pad tight around nosing and staple every 3 inches into underside of nosing.
Step 3: Secure Runner to First Riser
- Check Alignment: Check end of runner with framing square if not square, mark then cut along backing with carpet knife.
- Apply Glue: Dab cut edges with latex carpet glue to prevent fraying.
- Unroll Runner: Unroll runner up 3 or 4 treads ensuring it’s between layout marks.
- Attach Runner: Push end of runner against floor at bottom of first riser and line up runner between layout marks.
- Staple Runner: Staple end of runner to bottom of riser every 3 inches.
Step 4: Attach Runner to Treads
- Line Up Runner: Line up runner between layout marks on first tread ensuring it’s centered properly.
- Staple Runner: Use pneumatic stapler to staple runner securely along treads every 3 inches.
Step 5: Fasten Runner to Riser
- Secure Runner: Continue securing runner along risers using staples every 3 inches ensuring it’s tight against both treads and risers.
Step 6: Connect Two Runners (If Necessary)
If one runner won’t reach the bottom of your stairs, it’s easy to seamlessly connect two separate runners by hiding the transition under the lip of a tread.
Tips and Tricks
Here are some additional tips that can make your installation process smoother:
- Use Painter’s Tape: Use painter’s tape to mark where the runner should hit on each step before nailing it in place.
- Cut Corners Carefully: When using the waterfall method, clip 3 inches off corners where pad curves around nosing to hide pad edges.
- Treat Runners with Fabric Guard: Consider treating your runners with fabric guard for added durability.
- Join Runners at Back of Tread: When joining multiple runners, do so at back of tread rather than under bullnose for cleaner look.
Common Challenges
While installing a stair runner is generally an easy DIY project, there are some common challenges you might encounter:
- Irregular Landings: Measuring landings accurately can be tricky; it’s best to get a little extra material for these areas.
- Runner Alignment: Keeping the runner centered can be challenging; use markers and painter’s tape to ensure straight alignment.
- Staple Placement: Make sure staples are placed securely but not too tightly as this can cause damage to underlying wood.
Conclusion
Installing a stair runner is a rewarding DIY project that can significantly enhance both the aesthetic appeal and functionality of your staircase. With these steps and tips, you should be able to complete this project successfully. Remember to take your time, measure accurately, and use the right tools for a smooth installation process. Whether you’re looking to add color, texture, or simply improve safety on your stairs, a stair runner is an excellent choice that can make a big impact in your home.
By following this guide, you’ll be able to transform your plain wooden stairs into an elegant focal point that adds warmth and comfort underfoot while providing traction and reducing noise. So why wait? Start measuring your stairs today and get ready to enjoy the benefits of having a beautifully installed stair runner in your home
Was this page helpful?
At Storables.com, we guarantee accurate and reliable information. Our content, validated by Expert Board Contributors, is crafted following stringent Editorial Policies. We're committed to providing you with well-researched, expert-backed insights for all your informational needs.





0 thoughts on “DIY Guide To Installing A Stair Runner”