Home>Technology>Home Entertainment Systems>How To Set Up A Karaoke System With Home Theater

Home Entertainment Systems
How To Set Up A Karaoke System With Home Theater
Modified: August 16, 2024
Learn how to set up a karaoke system with a home entertainment system for the ultimate party experience. Transform your home into a karaoke hotspot with these easy steps.
(Many of the links in this article redirect to a specific reviewed product. Your purchase of these products through affiliate links helps to generate commission for Storables.com, at no extra cost. Learn more)
Introduction
Setting up a karaoke system with a home theater can transform your living space into an entertainment hub for family and friends. Whether you're hosting a party or simply enjoying a fun night in, a well-designed karaoke setup can elevate the overall experience. By integrating audio and video components, you can create an immersive environment that enhances the joy of singing and listening to music.
In this comprehensive guide, we will walk you through the process of assembling a karaoke system within your home theater setup. From selecting the right equipment to fine-tuning the audio and video settings, we will cover every aspect to ensure a seamless and enjoyable karaoke experience for all.
The beauty of a home karaoke system lies in its versatility. It can cater to various occasions, from casual gatherings to lively celebrations. With the right setup, you can easily switch between karaoke sessions and regular movie nights, making the most of your home entertainment space.
As we delve into the intricacies of setting up a karaoke system with a home theater, you will gain valuable insights into the technical aspects of audio-visual integration. By following the steps outlined in this guide, you can create a dynamic and engaging environment that resonates with the energy of a professional karaoke bar.
So, let's embark on this exciting journey of transforming your home theater into a multifaceted entertainment zone. By the end of this guide, you will be equipped with the knowledge and skills to set up a captivating karaoke system that amplifies the joy of music and brings people together in a harmonious celebration of sound and camaraderie.
Key Takeaways:
- Transform your home theater into a karaoke hub by choosing the right equipment, setting up the audio system, and adjusting sound and video settings for an immersive and engaging experience.
- Create lasting memories and strengthen connections by testing your karaoke system to ensure optimal functionality, empowering everyone to unleash their vocal prowess and immerse themselves in the joy of music.
Read more: How To Set Up A Home Theater
Choosing the Right Equipment
Selecting the right equipment is pivotal in creating a captivating karaoke experience within your home theater. The foundation of a seamless karaoke setup lies in the quality and compatibility of the audio and video components. Here's a detailed breakdown of the essential equipment you'll need to curate an immersive karaoke system:
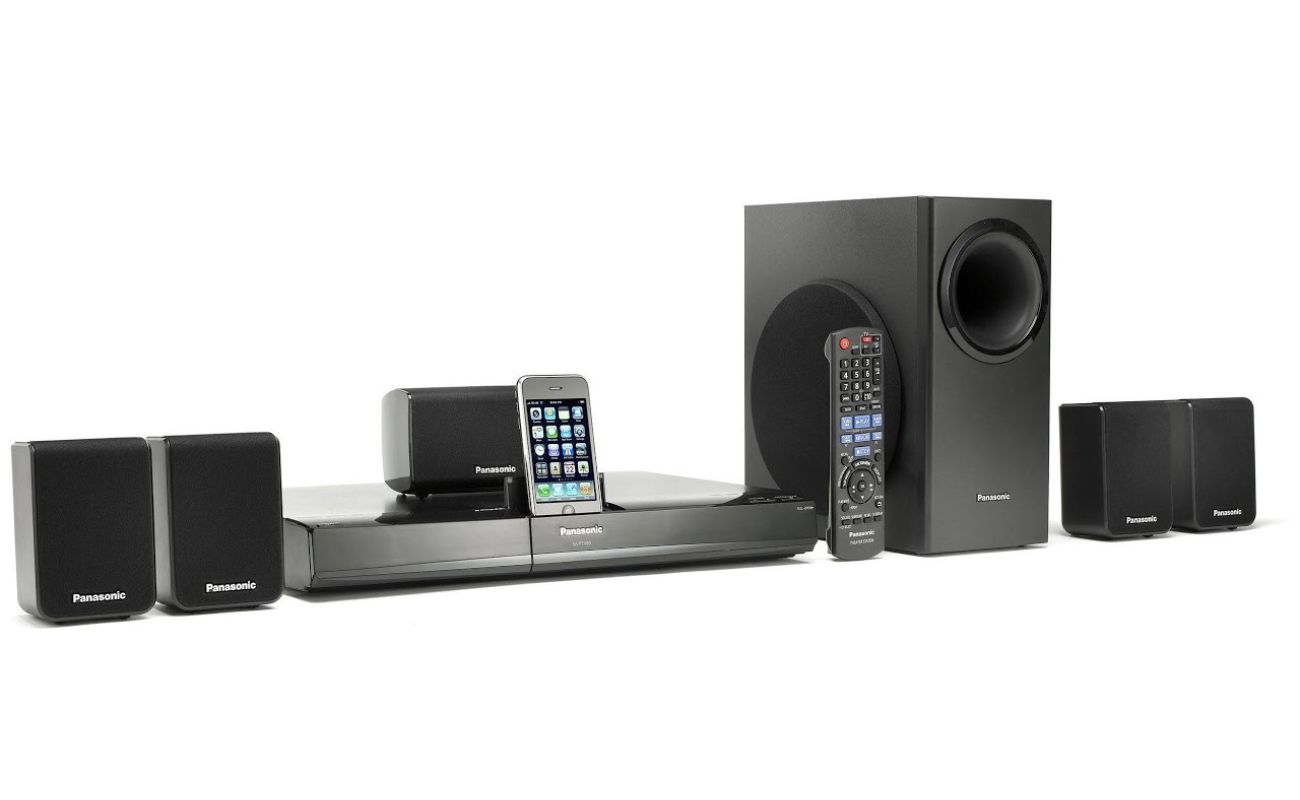
1. Karaoke Machine:
The heart of your karaoke setup, the karaoke machine, serves as the central hub for playing karaoke tracks and managing audio inputs. Look for a machine that supports various media formats, including CD+G, MP3, and DVD, to ensure compatibility with a wide range of karaoke discs and digital files. Additionally, opt for a machine with built-in digital signal processing (DSP) for vocal enhancement and echo control, enhancing the overall audio quality.
2. Microphones:
Invest in high-quality microphones to capture the nuances of vocal performances. Wireless microphones offer freedom of movement and eliminate the hassle of tangled cables, contributing to a seamless karaoke experience. Consider acquiring microphones with adjustable sensitivity and clear sound reproduction to elevate the audio output during karaoke sessions.
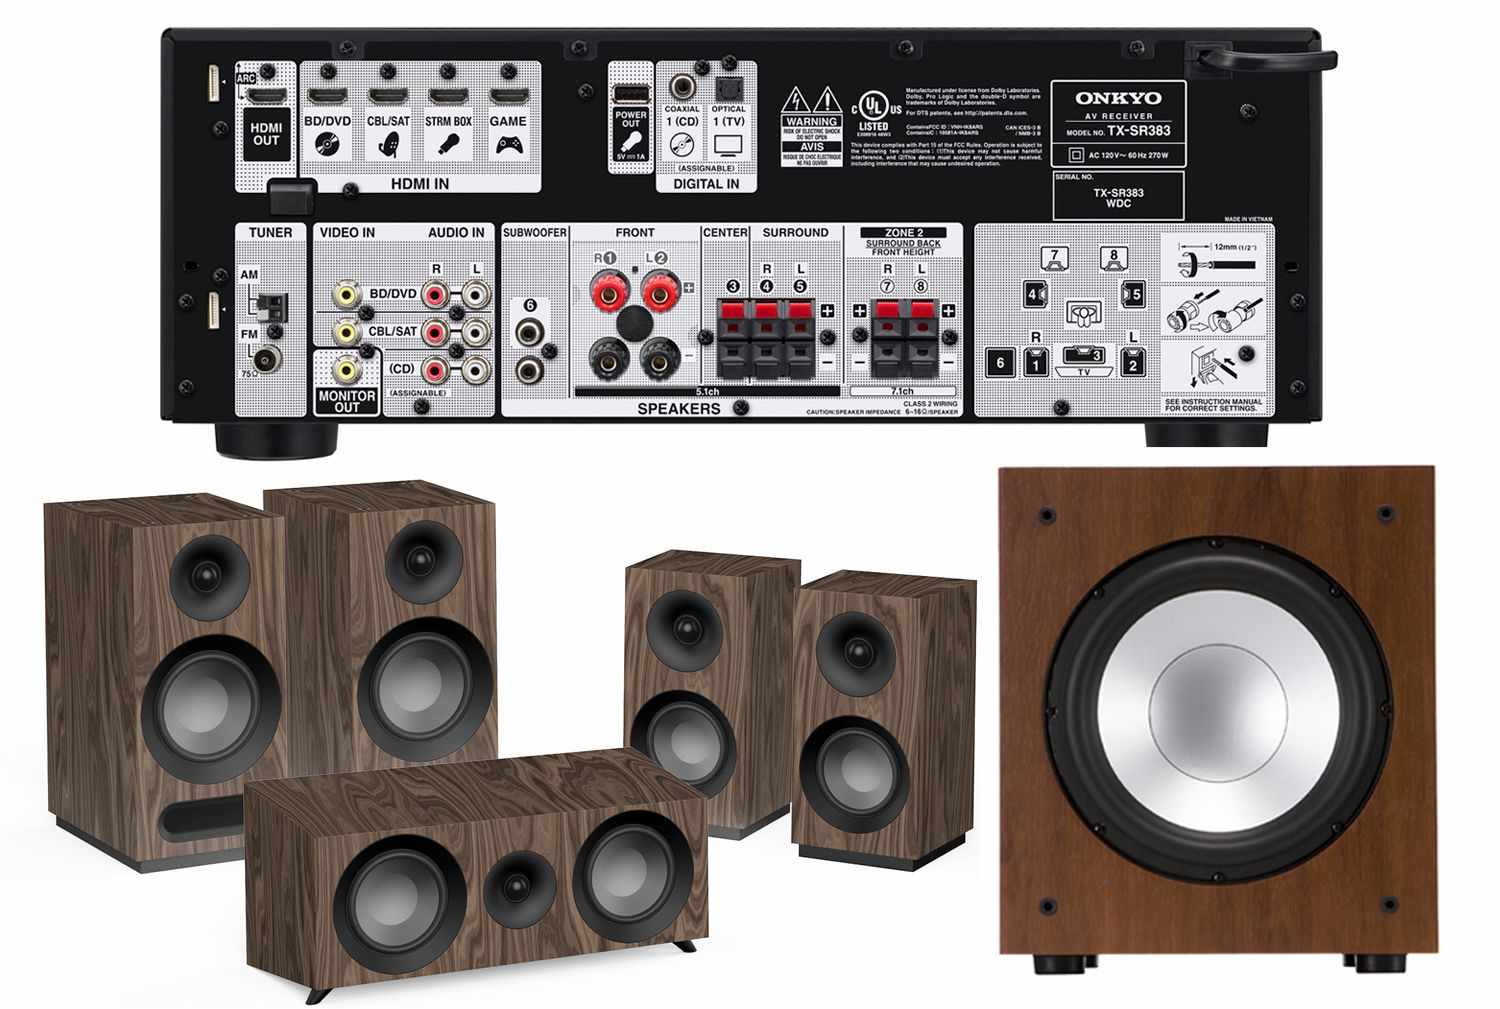
3. Audio Receiver:
Integrate a reliable audio receiver into your home theater system to amplify the audio output from the karaoke machine. Ensure that the receiver supports multiple audio channels and offers equalization options to fine-tune the sound according to individual preferences. Look for a receiver with HDMI inputs to facilitate seamless connectivity with your TV or projector, enabling synchronized audio-visual playback.
Read more: How To Set Up Sonos Home Theater
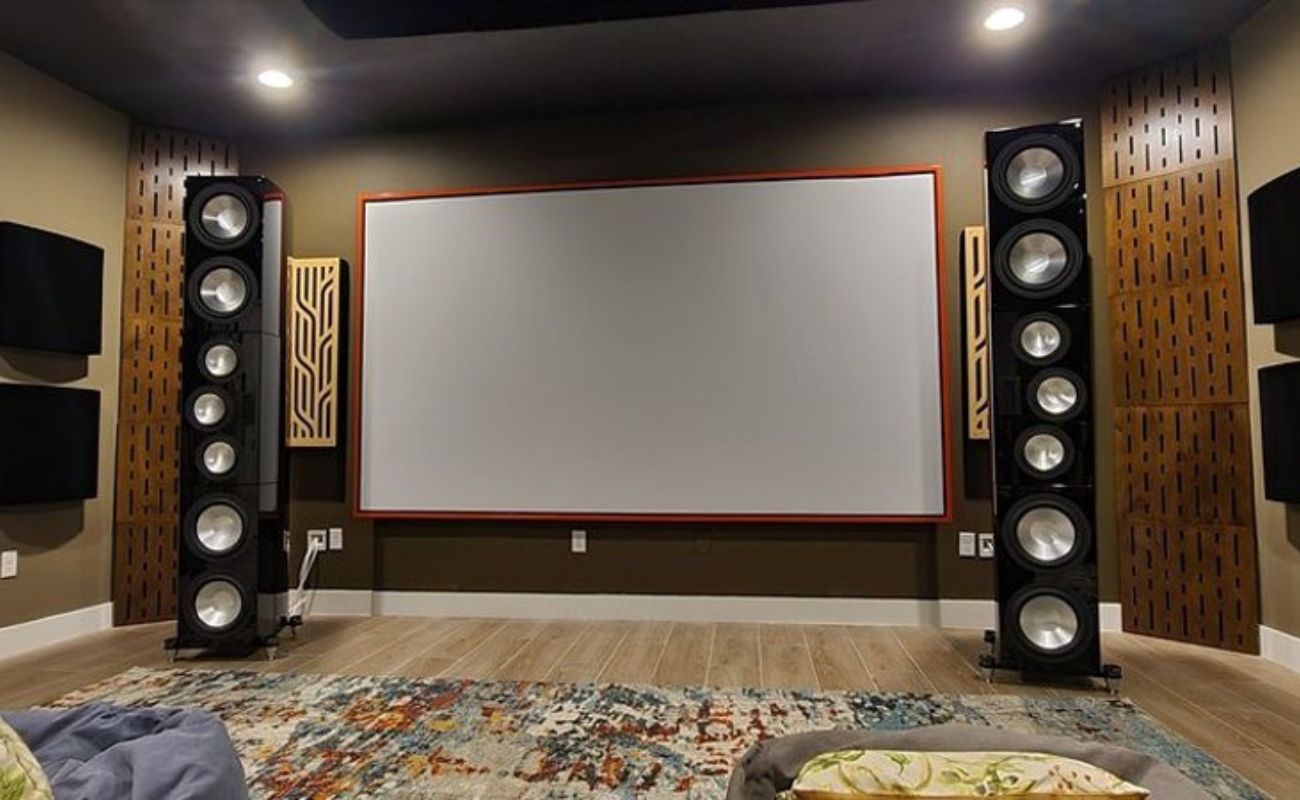
4. Display Screen:
Select a high-definition display screen, such as a television or projector, to showcase karaoke lyrics and visuals. The screen should offer vibrant color reproduction and crisp image clarity to enhance the visual appeal of the karaoke experience. Consider the size and placement of the display screen to ensure optimal visibility for all participants, creating an inclusive and engaging environment.
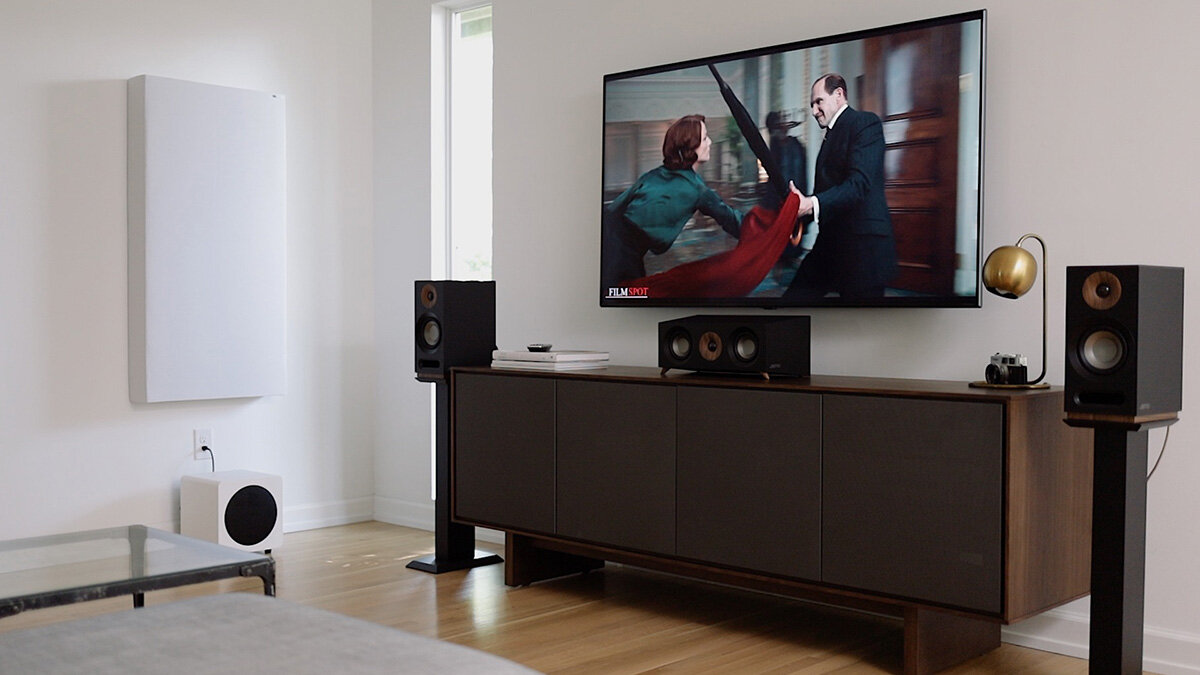
5. Audio Speakers:
Invest in a robust set of audio speakers that deliver clear and balanced sound across the entire entertainment space. Opt for speakers with wide frequency response and ample power handling capacity to accommodate the dynamic range of karaoke tracks. Position the speakers strategically to achieve optimal sound dispersion and create an immersive audio environment that complements the visual spectacle of karaoke performances.
By carefully selecting and integrating these essential components, you can lay a solid foundation for a captivating karaoke system within your home theater. The seamless synergy between the karaoke machine, microphones, audio receiver, display screen, and audio speakers will culminate in a harmonious blend of audio-visual excellence, setting the stage for memorable karaoke sessions that resonate with the joy of music and camaraderie.
Setting Up the Audio System
Setting up the audio system is a crucial step in creating a captivating karaoke experience within your home theater. By seamlessly integrating the audio components, you can ensure optimal sound quality and vocal clarity during karaoke sessions. Here's a comprehensive guide to setting up the audio system for your home karaoke setup:
1. Audio Receiver Connection:
Begin by connecting the audio output of the karaoke machine to the designated input ports on the audio receiver. Utilize high-quality audio cables, such as HDMI or optical cables, to maintain signal integrity and minimize audio interference. Ensure that the connections are secure and that the audio receiver is configured to receive input from the karaoke machine.
Read more: How To Set Up Alexa With Home Theater
2. Speaker Configuration:
Position the audio speakers strategically to achieve balanced sound dispersion across the entertainment space. Consider the acoustics of the room and aim to create an immersive audio environment that complements the visual spectacle of karaoke performances. Adjust the speaker placement and orientation to optimize sound projection and minimize audio reflections for a pristine listening experience.
3. Equalization and Audio Settings:
Access the audio receiver's equalization settings to fine-tune the sound output according to individual preferences. Experiment with the equalizer presets or manually adjust the frequency bands to enhance vocal clarity and optimize the audio balance for karaoke tracks. Pay attention to the bass, midrange, and treble levels to achieve a well-rounded sound profile that accentuates the nuances of vocal performances.
4. Microphone Integration:
Connect the wireless microphones to the designated microphone input ports on the audio receiver. Ensure that the microphone channels are configured to accommodate the number of microphones in use. Adjust the microphone sensitivity and gain settings to prevent audio feedback and optimize vocal pickup, allowing for clear and distortion-free vocal reproduction during karaoke sessions.
5. Sound Calibration:
Utilize the audio receiver's built-in calibration tools, such as automatic speaker setup systems or room correction features, to optimize the audio output based on the acoustic characteristics of the room. Follow the on-screen prompts or manual instructions to calibrate the speaker levels, distance, and frequency response, ensuring a cohesive and balanced soundstage that elevates the karaoke experience.
By meticulously setting up the audio system, you can create a dynamic and immersive audio environment that enhances the joy of karaoke within your home theater. The seamless integration of the karaoke machine, audio receiver, speakers, and microphones will culminate in a harmonious blend of audio excellence, setting the stage for memorable karaoke sessions that resonate with the joy of music and camaraderie.
Read more: How To Set Up A Home Theater Projector
Connecting the Microphones
Connecting the microphones is a pivotal step in establishing a seamless and engaging karaoke experience within your home theater setup. By ensuring proper microphone integration, you can elevate vocal clarity and empower performers to express themselves with confidence. Here's a detailed guide on connecting the microphones to optimize their functionality and enhance the overall karaoke experience.
1. Wireless Microphone Setup:
If you've opted for wireless microphones, begin by inserting fresh batteries into each microphone to ensure uninterrupted performance throughout the karaoke session. Most wireless microphones operate on standard AA or AAA batteries, and it's essential to use high-quality batteries to prolong the operational lifespan and minimize the risk of sudden power depletion during performances.
2. Receiver Pairing:
Wireless microphones typically come with a dedicated receiver unit that facilitates seamless communication between the microphones and the audio system. Start by connecting the receiver unit to the designated microphone input ports on the audio receiver. Once connected, power on the receiver unit and initiate the pairing process according to the manufacturer's instructions. This typically involves pressing a designated pairing button on the receiver and the corresponding button on each microphone to establish a secure wireless connection.
3. Microphone Sensitivity Adjustment:
After pairing the wireless microphones with the receiver, access the microphone sensitivity settings on the audio receiver to fine-tune the input levels for optimal vocal pickup. Adjust the sensitivity controls to prevent audio feedback and ensure clear sound reproduction without distortion. It's advisable to conduct a sound check by speaking or singing into each microphone to gauge the audio levels and make necessary adjustments to achieve balanced vocal output.
Read more: How To Hook Up A Sony Home Theater System
4. Microphone Placement:
Position the wireless microphones within easy reach of the performers, allowing for unrestricted movement and expressive gestures during karaoke performances. Consider the comfort and convenience of the individuals using the microphones and ensure that the microphone placement enables seamless transitions between performers without interrupting the flow of the karaoke session.
5. Sound Check:
Conduct a comprehensive sound check to verify the functionality and clarity of each microphone. Encourage volunteers to test the microphones by singing or speaking at varying volumes to assess the vocal pickup and ensure consistent sound reproduction across all microphones. Use this opportunity to fine-tune the microphone sensitivity and equalization settings to accommodate different vocal styles and preferences.
By meticulously connecting the microphones and optimizing their functionality, you can create a conducive environment for expressive and engaging karaoke performances within your home theater. The seamless integration of wireless microphones with the audio system will empower performers to unleash their vocal prowess and immerse themselves in the joy of music, fostering a vibrant and inclusive karaoke experience for all participants.
Adjusting the Sound and Video Settings
Fine-tuning the sound and video settings is a pivotal phase in optimizing the karaoke experience within your home theater setup. By meticulously adjusting these settings, you can ensure optimal audio-visual synchronization and enhance the overall immersive quality of the karaoke sessions. Here's a comprehensive guide to adjusting the sound and video settings to elevate the karaoke experience:
Sound Settings:
-
Equalization Adjustment:
Access the equalization settings on the audio receiver or karaoke machine to fine-tune the sound output. Experiment with the equalizer presets or manually adjust the frequency bands to enhance vocal clarity and optimize the audio balance for karaoke tracks. Pay attention to the bass, midrange, and treble levels to achieve a well-rounded sound profile that accentuates the nuances of vocal performances. -
Echo Control:
If your karaoke machine features built-in digital signal processing (DSP), explore the echo control settings to add depth and ambiance to the vocal performances. Adjust the echo intensity and delay parameters to create a captivating acoustic environment that complements the dynamics of karaoke singing. Strike a balance to avoid overwhelming the vocals with excessive echo effects while maintaining a subtle and immersive reverberation. -
Microphone Effects:
Some karaoke machines offer dedicated microphone effects, such as reverb and voice modulation. Experiment with these effects to add a touch of creativity and personalization to the vocal performances. Encourage performers to explore different microphone effects and select the ones that enhance their vocal delivery, contributing to a diverse and engaging karaoke experience.
Video Settings:
-
Display Calibration:
Access the display settings on your television or projector to calibrate the visual parameters for optimal karaoke display. Adjust the brightness, contrast, and color settings to ensure vibrant and crisp visuals that complement the lyrical content of the karaoke tracks. Aim for a balanced visual presentation that enhances the legibility of the lyrics and creates an inviting visual backdrop for the karaoke performances. -
Lyric Display Options:
If your karaoke machine supports customizable lyric display options, explore the settings to adjust the font size, color, and scrolling speed of the lyrics. Tailor the lyric display to accommodate the viewing preferences of the participants, ensuring clear and visually appealing on-screen lyrics that facilitate seamless sing-along experiences. -
Background Visuals:
Some karaoke machines offer the option to display dynamic background visuals or animations during karaoke playback. Explore the visual enhancement settings to activate captivating background visuals that complement the mood of the karaoke tracks. Select visually engaging backgrounds that resonate with the energy of the songs, adding an extra layer of visual immersion to the karaoke experience.
By meticulously adjusting the sound and video settings, you can create a captivating audio-visual environment that elevates the joy of karaoke within your home theater. The seamless integration of optimized sound and visually appealing displays will set the stage for memorable karaoke sessions that resonate with the joy of music and camaraderie.
Testing the System
Once you have set up the karaoke system within your home theater, it's crucial to conduct comprehensive testing to ensure that all components are functioning optimally. Testing the system allows you to identify any potential issues and make necessary adjustments before hosting karaoke sessions or gatherings. Here's a detailed guide on testing the karaoke system to validate its functionality and performance:
Audio and Microphone Testing:
-
Sound Check: Initiate a sound check to verify the audio output from the speakers. Play a variety of music tracks and adjust the volume levels to ensure balanced sound reproduction across different genres. Pay attention to the clarity and depth of the audio, ensuring that the speakers deliver a rich and immersive listening experience.
-
Microphone Evaluation: Test each microphone individually to assess vocal pickup and clarity. Encourage volunteers to sing or speak into the microphones while monitoring the audio levels. Verify that the wireless microphones maintain stable connectivity and deliver clear vocal reproduction without interference or dropout.
-
Vocal Enhancement: Experiment with the vocal enhancement features, such as echo control and microphone effects, to gauge their impact on the overall karaoke experience. Fine-tune the settings to achieve optimal vocal presence and ambiance, ensuring that the vocal performances are enhanced without overpowering the underlying music.
Video and Display Testing:
-
Lyric Display Verification: Play a sample karaoke track and review the on-screen lyric display. Ensure that the lyrics are legible and synchronized with the music, allowing participants to follow along seamlessly. Adjust the lyric display options, such as font size and scrolling speed, to optimize the readability of the on-screen lyrics.
-
Visual Calibration: Evaluate the visual parameters of the display screen, including brightness, contrast, and color accuracy. Verify that the visuals complement the lyrical content and create an inviting backdrop for karaoke performances. Make adjustments to enhance the visual appeal and ensure a captivating visual experience for all participants.
Integration and Compatibility Testing:
-
Audio-Visual Synchronization: Play a karaoke track and observe the synchronization between the audio output and on-screen lyrics. Verify that the audio and visual elements align seamlessly, creating a cohesive and immersive karaoke experience. Address any discrepancies in synchronization to maintain a harmonious audio-visual presentation.
-
Device Connectivity: Test the connectivity between the karaoke machine, audio receiver, and display screen. Ensure that all devices communicate effectively and that the audio and video signals are transmitted without latency or distortion. Troubleshoot any connectivity issues to establish a seamless integration of the karaoke system components.
By conducting thorough testing of the karaoke system, you can identify and resolve any potential issues, ensuring that the system is primed for engaging and memorable karaoke sessions. The testing phase serves as a crucial quality assurance step, allowing you to fine-tune the system and create an immersive karaoke environment that resonates with the joy of music and camaraderie.
Conclusion
In conclusion, the process of setting up a karaoke system within your home theater encompasses a harmonious blend of technical integration and creative expression. By carefully selecting the right equipment, fine-tuning the audio-visual settings, and conducting comprehensive testing, you can create a captivating environment that amplifies the joy of music and fosters a sense of camaraderie among participants.
The journey of transforming your home theater into a multifaceted entertainment zone begins with the selection of essential equipment, including a versatile karaoke machine, high-quality microphones, a reliable audio receiver, a vibrant display screen, and robust audio speakers. The seamless synergy between these components lays the foundation for a dynamic karaoke system that adapts to various occasions, from casual gatherings to lively celebrations.
As you delve into the intricacies of setting up the audio system, connecting the microphones, and adjusting the sound and video settings, you gain valuable insights into the technical nuances of audio-visual integration. The meticulous calibration of sound parameters, microphone sensitivity, and visual displays culminates in an immersive environment that enhances the joy of karaoke within your home theater.
The testing phase serves as a crucial quality assurance step, allowing you to validate the functionality and performance of the karaoke system. Through comprehensive audio and video testing, you can identify and address any potential issues, ensuring that the system is primed for engaging and memorable karaoke sessions.
Ultimately, the culmination of these efforts results in a captivating karaoke system that transcends the boundaries of traditional home entertainment. The seamless integration of optimized sound, visually appealing displays, and wireless microphones empowers performers to unleash their vocal prowess and immerse themselves in the joy of music. Whether you're hosting a lively karaoke party or enjoying a casual sing-along session, the immersive karaoke experience within your home theater creates lasting memories and strengthens social connections.
In essence, the process of setting up a karaoke system with a home theater is a testament to the transformative power of technology and creativity. It enables individuals to express themselves through music, fostering a sense of unity and celebration within the comfort of their own homes. By embracing the art of karaoke within the home theater environment, you open the door to a world of musical exploration and shared experiences, enriching the fabric of everyday life with the harmonious rhythms of joy and togetherness.
Frequently Asked Questions about How To Set Up A Karaoke System With Home Theater
Was this page helpful?
At Storables.com, we guarantee accurate and reliable information. Our content, validated by Expert Board Contributors, is crafted following stringent Editorial Policies. We're committed to providing you with well-researched, expert-backed insights for all your informational needs.

0 thoughts on “How To Set Up A Karaoke System With Home Theater”