Home>Ideas and Tips>DIY Guide to Installing Sliding Barn Door Hardware
Ideas and Tips
DIY Guide to Installing Sliding Barn Door Hardware
Modified: October 20, 2024
Learn how to install a sliding barn door with our step-by-step DIY guide. Add style and functionality to your home with ease.
(Many of the links in this article redirect to a specific reviewed product. Your purchase of these products through affiliate links helps to generate commission for Storables.com, at no extra cost. Learn more)
Installing a sliding barn door is a fantastic way to add both character and functionality to any room in your home. These doors are not only stylish but also provide a space-saving alternative to traditional swinging doors. With the right tools and a bit of patience, you can easily install a sliding barn door yourself. In this comprehensive guide, we will walk you through each step of the process, from preparation to final installation.
Before You Begin
Before diving into the installation process, there are several things you need to consider and prepare:
Read more: DIY Guide To Installing A Barn Door
Space Requirements
- Wall Space: Sliding barn doors work best when there is enough empty wall space next to the opening that the door can slide completely open. Double barn doors require open wall space on both sides of the doorway.
- Obstructions: Be mindful of the location of light switches, electrical outlets, and heating or cooling registers on the walls. You might need to relocate these fixtures to ensure smooth operation of the door.
- Door Size: The barn door should be wide enough to completely cover the doorway with an inch or two of overhang on both sides and about one inch at the top. It should also be tall enough so that there is about a half inch of space between the bottom of the door and the floor when it’s hung on the track.
Tools and Materials
-
Tools:
- Miter saw
- Cordless drill
- Driver bits
- Combination square
- Level
- Stud finder
- Drill press (optional)
- Wrench
- Socket wrench
- Pencil and marker
-
Materials:
- Barn door hardware kit (including track, rollers, anti-jump disks, and door guides)
- Backer board (matching your trim wall or door color)
- Screws and lag bolts
- Washers
- Wood filler (if necessary)
- Paint (if necessary)
- Soft close kit (optional)
Preparing Your Space
Once you’ve confirmed that your space can accommodate a barn door, it’s time to prepare it for installation:
-
Measure the Space: Measure the width and height of your doorway to ensure that your barn door will fit perfectly. Double-check that there is enough empty wall space next to the opening for the door to slide completely open.
-
Mark Studs: Use a stud finder to locate the studs above and below the doorway. For single doors, start about three to four inches above the hinge side of the opening and repeat for the length of the backer board. For double doors, measure the stud positions and transfer them to your backer board, ensuring they are centered and straight across the board.
-
Drill Holes: Drill two holes at each stud location with a countersink bit. Then, copy these holes onto the track and pre-drill following the manufacturer’s instructions.
-
Attach Backer Board: Enlist the help of another person to attach the backer board to the wall first. Secure one end to the studs with a wood screw, inserting the head right below the wood surface. Keep the board level and insert the rest of the screws. Use wood filler and paint as needed to cover screw heads.
-
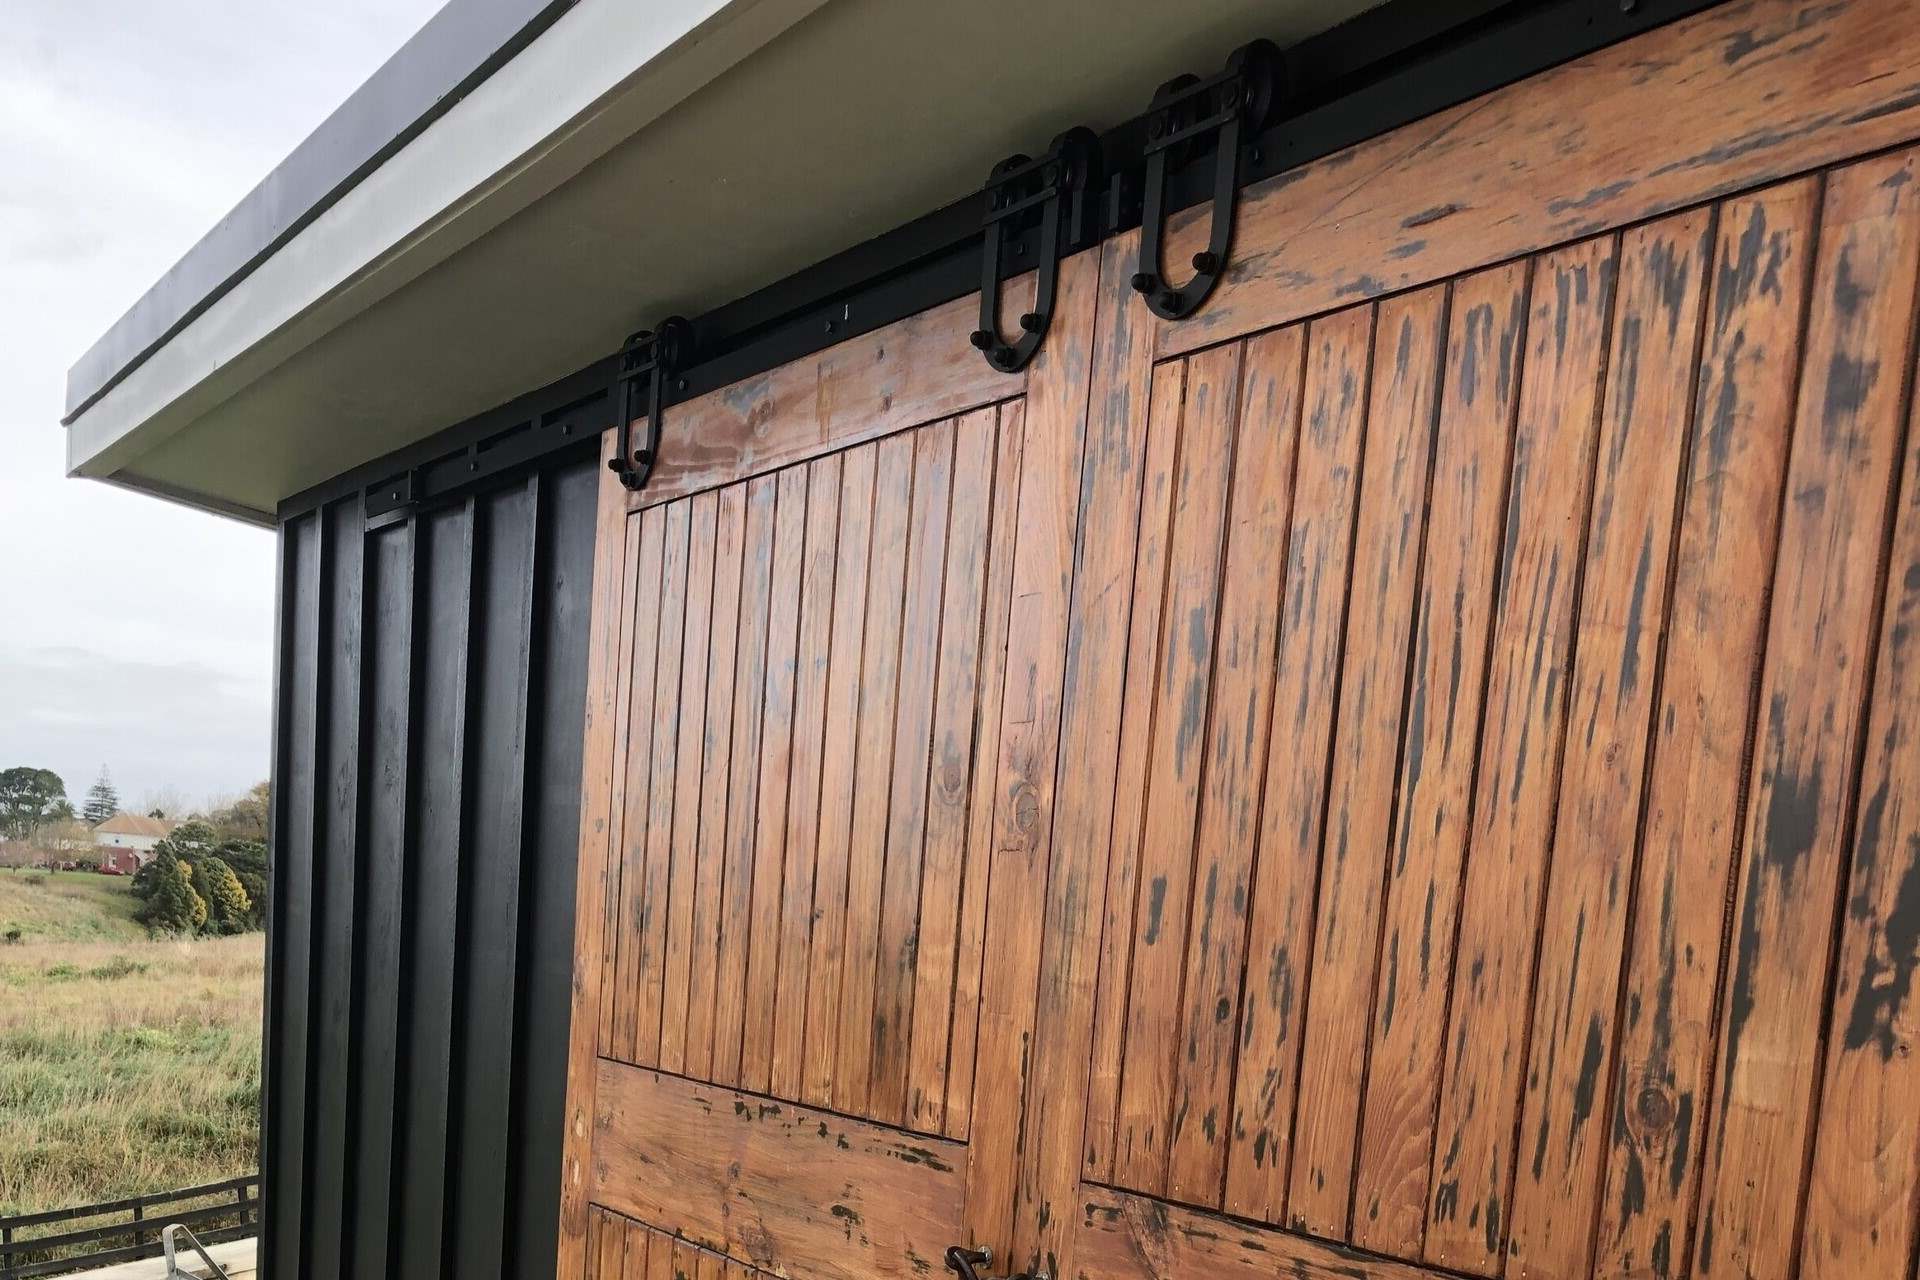
Install Track: Align the track with the backer board holes and use included spacers, lag bolts, and washers to fasten it to the board. Keep the track level and tighten lag bolts with a wrench. For concrete walls, pre-drill fastener holes with a masonry bit and install using masonry anchors and lag bolts.
Installing the Barn Door Hardware
Now that your space is prepared, it’s time to install the barn door hardware:
-
Install Track Stops: Slide a stopper onto each end of the track. These stops ensure that the door doesn’t slide off the track when it’s open or closed.
-
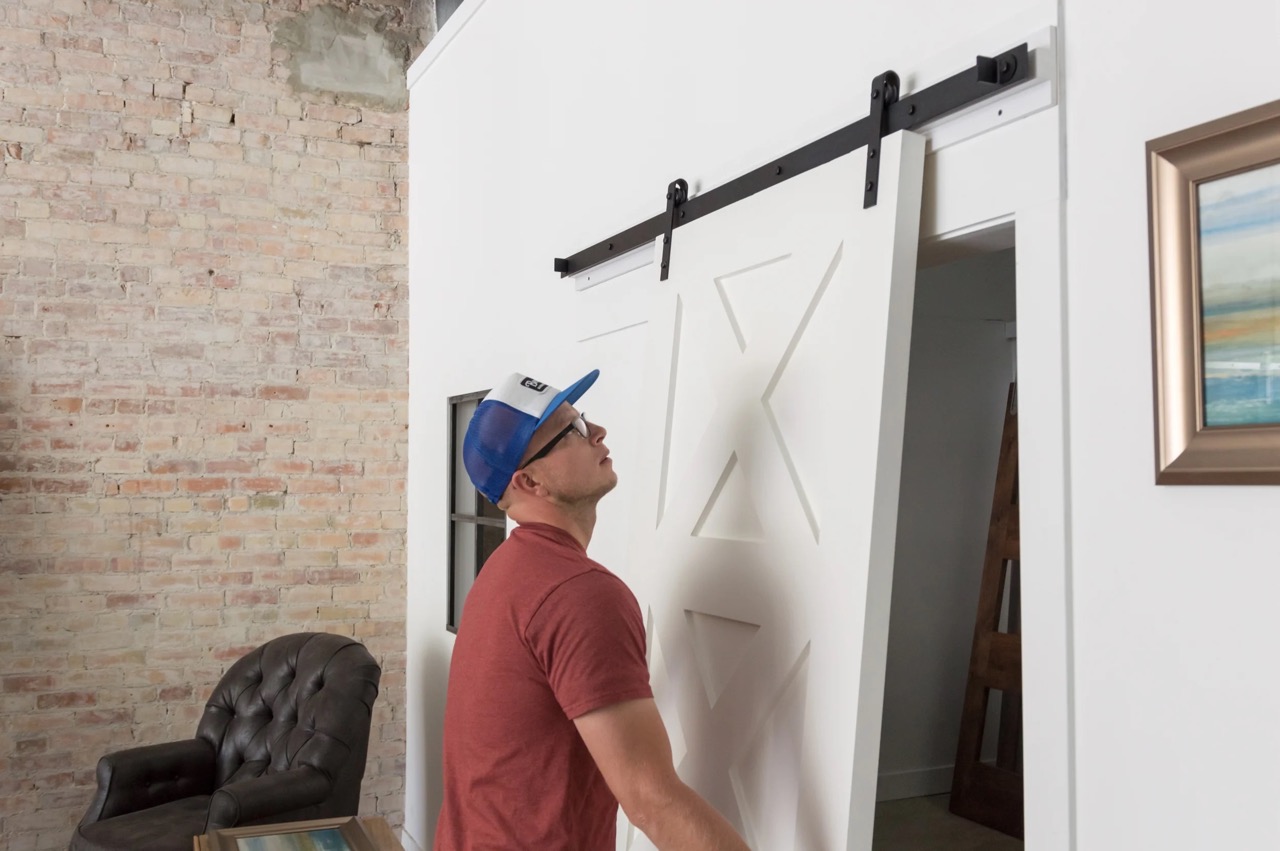
Prepare Door: Follow the instructions in your kit for preparing the door. This typically involves drilling pilot holes for roller hardware and door pulls. Use a wrench to secure them with provided screws.
-
Attach Roller Hardware & Pull: Position roller hardware and door pulls according to your kit’s instructions. Use a template provided in some kits to make this step easier.
-
Hang Your Door: Lift the door and place the wheels on the metal track. Heavy doors will require two people for lifting. Test the door to see that it slides correctly.
-
Install Door Guides: Attach door guides to keep the door from wobbling when it’s open or closed. Some guides fit into a groove milled in the bottom of the door, while others are installed to guide from the sides.
-
Final Checks: Test the door again to ensure it opens and closes smoothly. Double-check that anti-jump disks are in place and door stoppers are tight. The barn door should glide smoothly, and all hardware should feel sturdy and secure.
Read more: DIY Guide To Installing A French Door
Adding Optional Features
While not necessary, adding a soft close kit can enhance your barn door experience. This kit prevents the door from slamming shut and serves as a latch when the door is open or closed.
Maintenance Tips
After hanging your barn door, keep it clean and in working order:
- Clean Hardware: Routinely wipe down the hardware and track with a soft cloth and mild cleaner.
- Clean Door: Use oil soap formulated for wood to clean the door. Clean glass inserts with glass cleaner.
- Avoid Harsh Cleaners: Do not use harsh cleaners that contain bleach or coarse rags or steel wool on the door or door hardware.
- Tighten Screws: Tighten screws if they loosen, and replace any hardware if it becomes damaged.
Conclusion
Installing a sliding barn door is a rewarding DIY project that can add both style and functionality to your home. By following these steps and considering the necessary preparations, you can ensure that your barn door operates smoothly and safely. Remember to take care of your barn door by regularly cleaning and maintaining it to keep it sturdy and functional for years to come.
If you’re looking for more DIY project ideas or need additional guidance, consider visiting The Home Depot’s website or YouTube channel for more instructional videos and expert advice. With the right tools and a bit of patience, you can transform any room in your home with the charm and functionality of a sliding barn door.
Was this page helpful?
At Storables.com, we guarantee accurate and reliable information. Our content, validated by Expert Board Contributors, is crafted following stringent Editorial Policies. We're committed to providing you with well-researched, expert-backed insights for all your informational needs.


0 thoughts on “DIY Guide to Installing Sliding Barn Door Hardware”