Home>Interior Design>Designers Share Baseboard Painting Hack For Small Spaces
Interior Design
Designers Share Baseboard Painting Hack For Small Spaces
Modified: January 19, 2024
Learn how interior designers paint baseboards in small spaces with this genius hack. Achieve a flawless finish with our expert tips and tricks.
(Many of the links in this article redirect to a specific reviewed product. Your purchase of these products through affiliate links helps to generate commission for Storables.com, at no extra cost. Learn more)
Introduction
If you’re looking to give your small space a fresh and updated look, one simple and cost-effective way to do so is by painting your baseboards. Baseboards not only add a finishing touch to a room, but they also protect the walls from scuffs and damage. However, painting baseboards in small spaces can be tricky and time-consuming, especially when it comes to reaching tight corners and edges.
Fortunately, interior designers have come up with a baseboard painting hack specifically tailored to small spaces. In this article, we will guide you through a step-by-step process on how to achieve professional-looking results while saving time and effort.
Before we jump into the details, it’s important to note that preparation is key. Make sure you have all the necessary materials on hand, including paint, brushes, sandpaper, painter’s tape, and drop cloths. Additionally, ensure that the area is well-ventilated and clean before you begin.
Now, let’s dive into the step-by-step process of painting baseboards in small spaces.
Key Takeaways:
- Elevate the style of your small space with a fresh and updated look by painting your baseboards. Follow professional interior designers’ step-by-step process for flawless results in less time and effort.
- Choosing the right baseboard paint, effective use of painter’s tape, and attention to detail in application are key to achieving professional-looking baseboards. Don’t underestimate the impact of this simple and cost-effective update for your small space.
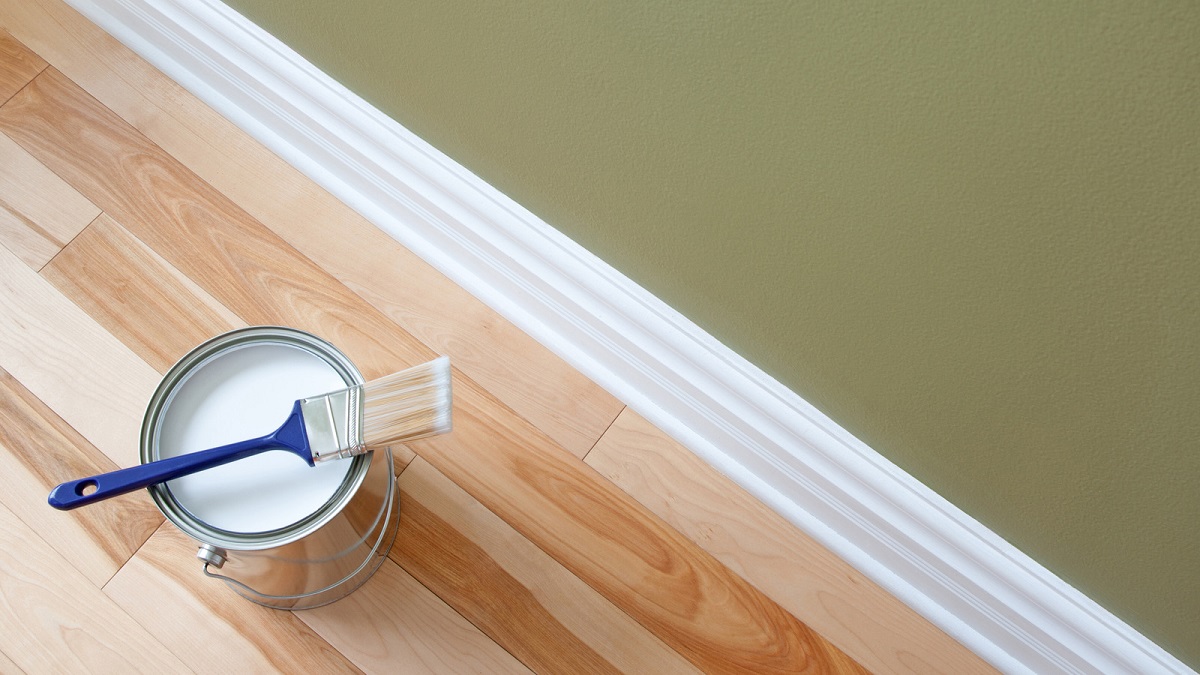
Step 1: Choosing the right baseboard paint
When it comes to selecting the right paint for your baseboards, there are a few factors to consider. First and foremost, opt for a paint finish that is durable and easy to clean. Semi-gloss or satin finishes are popular choices for baseboards as they offer a smooth, washable surface.
Next, consider the color of your baseboard paint. While most people choose white or off-white for a classic look, don’t be afraid to experiment with different colors to add a pop of personality and style to your small space. Just ensure that the color complements the overall color scheme of the room.
Another important consideration is the type of paint. If your baseboards are made of wood, choose a paint that is specifically designed for wood surfaces. This will ensure proper adhesion and longevity. For non-wood surfaces, such as PVC or MDF, look for a paint that is suitable for those materials.
Lastly, check the paint’s drying time. Opt for a fast-drying paint, as it will prevent smudges and accidental damage during the painting process. Additionally, choose a paint that has low or no volatile organic compounds (VOCs) to minimize any strong odors and ensure better air quality in your small space.
By carefully selecting the right baseboard paint, you can ensure a smooth and long-lasting finish that complements your small space perfectly.
Step 2: Preparing the baseboards
Before you begin painting, it’s crucial to properly prepare the baseboards to ensure a flawless finish. Here’s a step-by-step guide on how to prepare your baseboards:
- Clean the baseboards: Start by thoroughly cleaning the baseboards to remove any dust, dirt, or grime. Use a mild detergent or a mixture of water and vinegar to gently scrub the surface. Allow the baseboards to dry completely before moving on to the next step.
- Sand the baseboards: If your baseboards have an existing glossy finish, it is essential to lightly sand them to create a rough surface. This helps the new paint adhere better. Use a fine-grit sandpaper and sand in the direction of the grain. Wipe away any sanding residue with a damp cloth.
- Repair any imperfections: Inspect the baseboards for any cracks, dents, or holes. Fill these imperfections with a suitable wood filler and smooth it out with a putty knife. Once the filler is dry, sand it down gently until it is level with the rest of the baseboard surface.
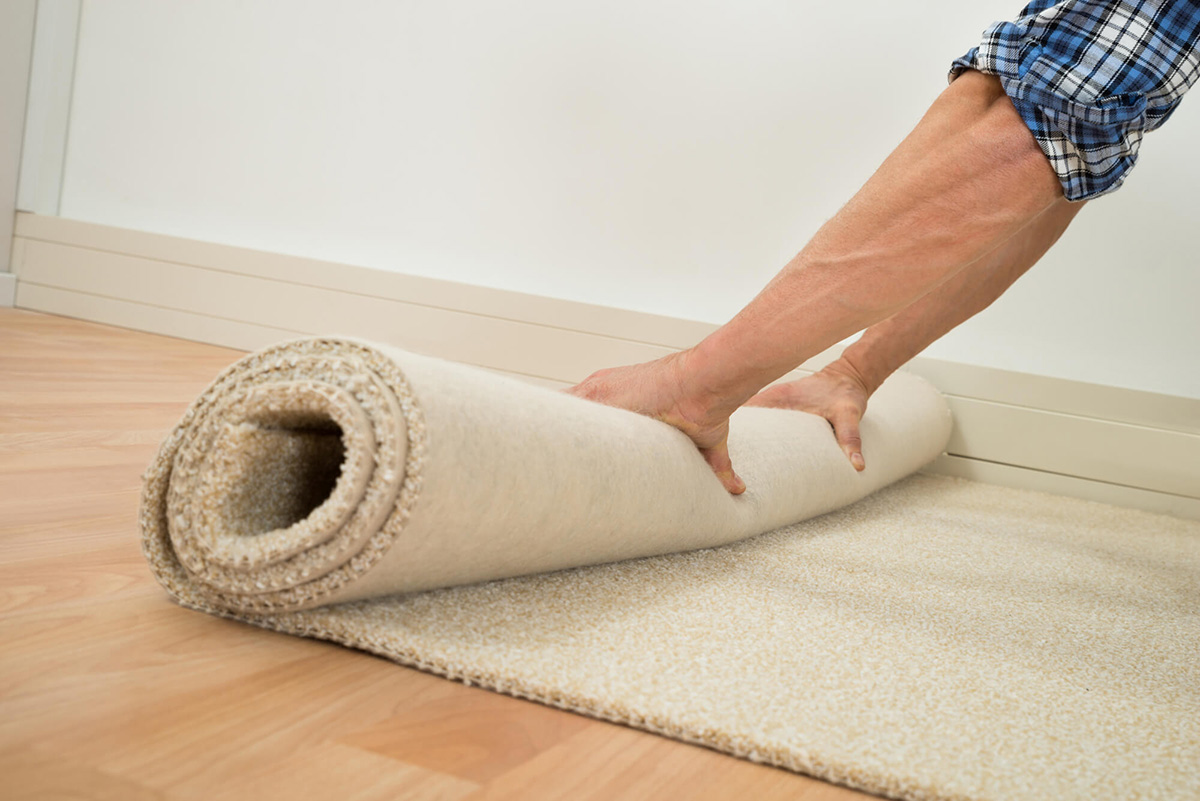
- Protect the floor: To prevent paint drips and spills from damaging your flooring, lay down drop cloths or old sheets along the baseboard area. Secure them with tape or weights to keep them in place during the painting process.
By carefully preparing the baseboards, you’ll create a clean and smooth canvas for your paint, resulting in a professional-looking finish. Take the time to properly clean, sand, repair, and protect the baseboards before moving on to the next step.
Step 3: Protecting the surrounding surfaces
Before you start painting your baseboards, it’s crucial to protect the surrounding surfaces, such as walls and flooring, from accidental paint splatters or drips. Here’s what you need to do to safeguard these areas:
- Apply painter’s tape: Use painter’s tape to create a clean boundary between the baseboards and the walls or flooring. Carefully apply the tape along the edges of the baseboards, pressing it firmly to ensure a tight seal. Make sure the tape is straight and level.
- Cover the floor: Lay additional drop cloths or plastic sheets on the floor to catch any paint drips or spills. Secure them with tape or weights to keep them in place. Ensure that the drop cloths or sheets cover a wide enough area to protect your flooring from any accidental paint splatters.
- Protect the walls: If you are painting the baseboards against a wall, it’s a good idea to use additional protective measures to safeguard the wall from paint splatters. Place drop cloths or plastic sheets along the wall, extending beyond the height of the baseboards, and secure them in place with tape or weights.
By taking the time to properly protect the surrounding surfaces, you can paint your baseboards with confidence, knowing that you won’t accidentally damage your walls or flooring. The painter’s tape, drop cloths, and plastic sheets act as barriers and ensure a clean and professional finish.
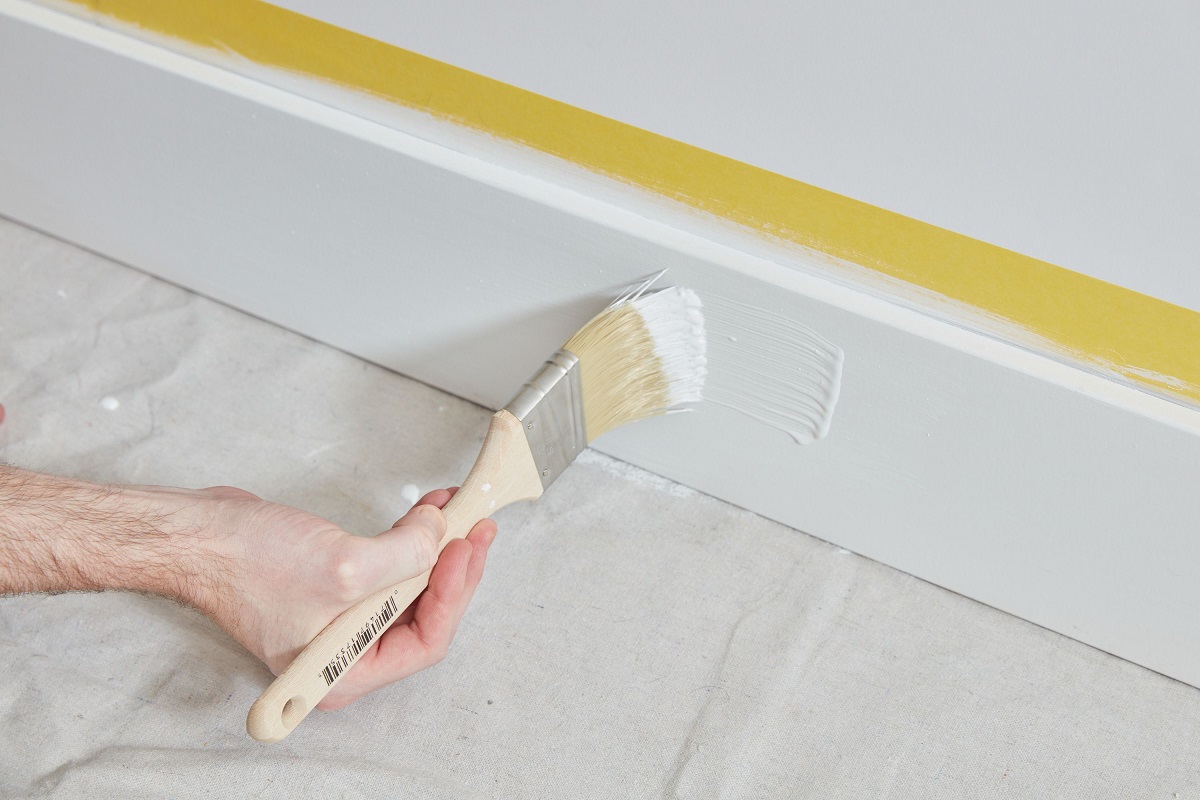
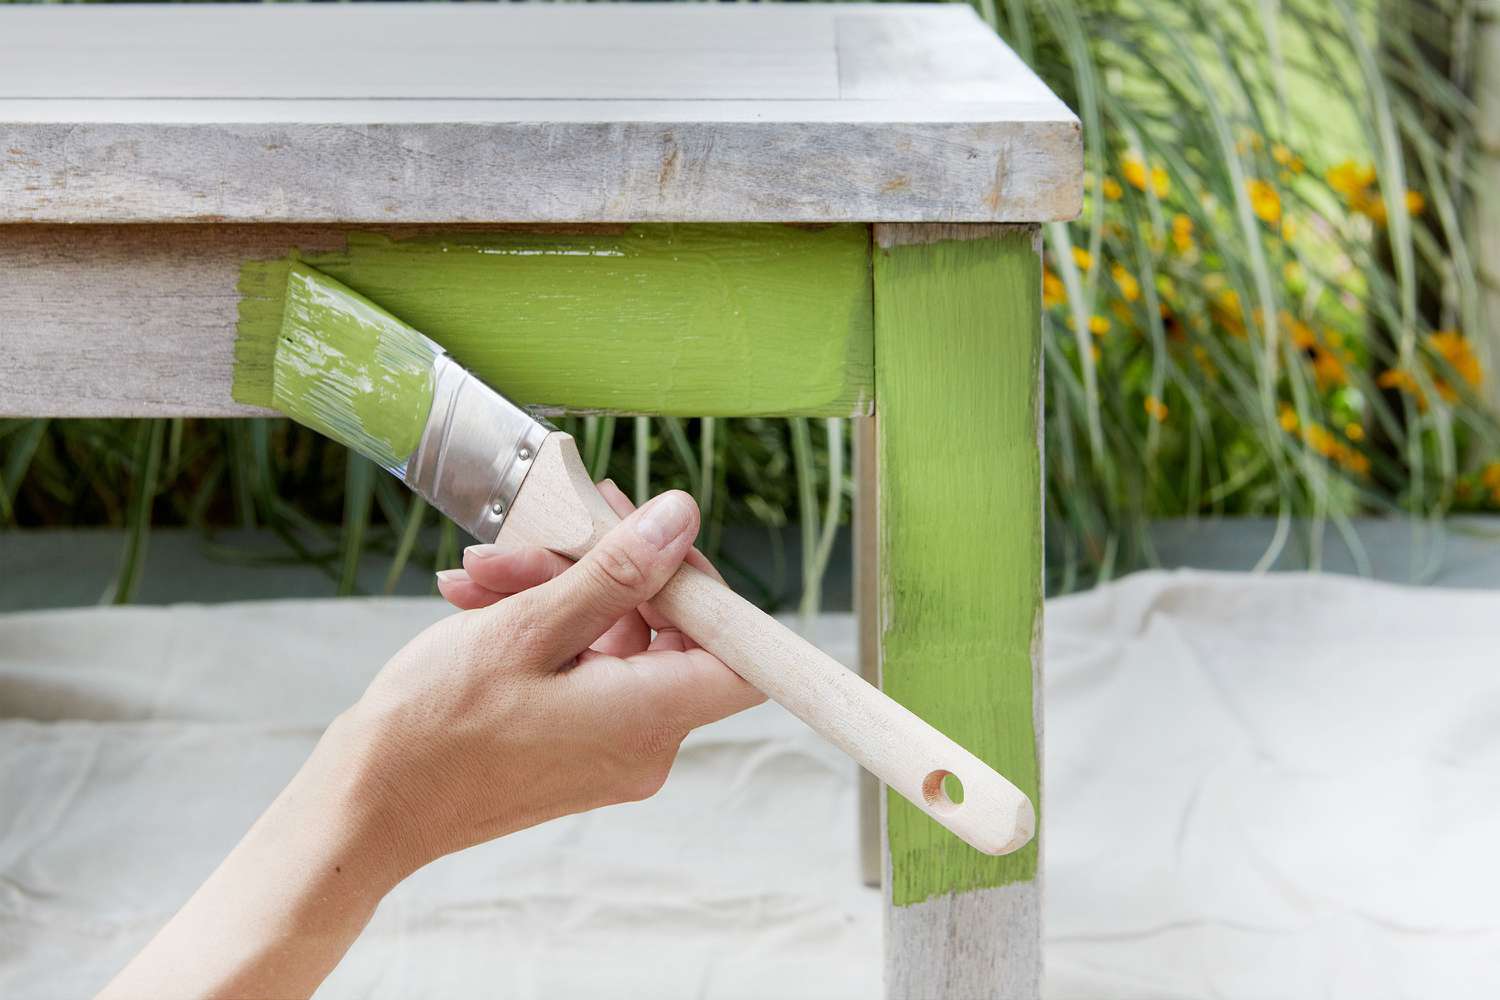
When painting baseboards in small spaces, use a small angled brush to carefully apply the paint, and use painter’s tape to protect the walls and floor from any accidental drips or smudges.
Step 4: Using painter’s tape effectively
Painter’s tape is a valuable tool when it comes to achieving clean and precise paint lines along your baseboards. Here are some tips on using painter’s tape effectively:
- Clean and dry the baseboards: Before applying the painter’s tape, ensure that the baseboards are thoroughly cleaned and dry. This will help the tape adhere better and prevent any paint from seeping underneath.
- Choose the right tape: Select a painter’s tape that is specifically designed for delicate surfaces, like baseboards. Look for a tape that is easy to apply and remove without leaving any residue or damaging the paint.
- Apply the tape: Begin by applying the tape along the edge of the baseboard where it meets the wall or floor. Press the tape firmly to create a tight seal. If you have difficult corners or angles, consider using a putty knife or a credit card to smooth out any wrinkles or bubbles in the tape.
- Seal the edges: To prevent paint from seeping underneath the tape, use a small brush to apply a thin layer of the baseboard paint color along the edge of the tape. This helps create a seal and ensures clean lines.
- Remove the tape at the right time: After you have finished painting the baseboards, it’s important to remove the painter’s tape while the paint is still wet. This prevents the paint from drying and potentially peeling off when the tape is removed. Gently and slowly pull the tape at a 45-degree angle away from the baseboard, ensuring a clean and crisp edge.
- Inspect and touch up: Once the tape is removed, inspect the baseboards for any areas that may require touch-ups. Use a small brush or a q-tip to carefully fix any imperfections or stray paint marks.
By using painter’s tape effectively, you can achieve sharp and professional-looking paint lines along your baseboards, enhancing the overall appearance of your small space.
Step 5: Applying the baseboard paint
Now that you have prepared the baseboards and protected the surrounding surfaces, it’s time to start applying the baseboard paint. Follow these steps to ensure a smooth and even application:
- Stir the paint: Before you begin painting, stir the baseboard paint thoroughly to ensure that the color and consistency are well-mixed. Use a paint stirrer or a wooden stick to stir the paint from the bottom of the can.
- Start with the brush: Begin by using a high-quality angled brush to paint the baseboards. Start at one end and work your way along the baseboards, applying an even coat of paint. Use steady and controlled strokes to achieve a clean and smooth finish. Pay attention to the corners and edges, ensuring that the paint is evenly distributed.
- Work in small sections: To prevent the paint from drying too quickly, it’s best to work in small sections at a time. This allows you to focus on achieving an even application without rushing. Once you have finished painting one section, move on to the next, overlapping the edges slightly to ensure a seamless finish.
- Apply multiple coats if necessary: Depending on the color and type of paint you are using, you may need to apply multiple coats to achieve the desired opacity and color intensity. Allow each coat to dry fully before applying the next. Refer to the paint manufacturer’s instructions for recommended drying times.
- Smooth out any drips or lines: As you paint, keep an eye out for any drips, brush lines, or uneven spots. If you notice any imperfections, use a dry brush or a small roller to gently smooth them out before the paint dries.
By following these steps and taking your time with the application process, you can ensure a flawless and professionally-painted finish for your baseboards in your small space.
Step 6: Making touch-ups and cleanups
After you have finished painting the baseboards, it’s time to make any necessary touch-ups and complete the cleanup process. Follow these steps to ensure a polished and professional result:
- Inspect the baseboards: Take a close look at the freshly painted baseboards and check for any areas that may need touch-ups or corrections. Look for uneven paint coverage, drips, or smudges.
- Fix minor imperfections: Use a small brush or a q-tip to carefully touch up any small imperfections or areas that didn’t receive enough paint. Dip the brush into the baseboard paint and gently apply it to the affected areas. Blend the touch-up paint with the rest of the baseboard for a seamless finish.
- Remove painter’s tape: Once the touch-up paint is dry, it’s time to remove the painter’s tape. Slowly and gently pull the tape at a 45-degree angle, away from the baseboards. This will reveal clean and crisp paint lines.
- Clean up: Dispose of the drop cloths, plastic sheets, and any debris from the painting process. Clean your brushes or rollers according to the paint manufacturer’s instructions. Use soap and water for latex-based paints and appropriate solvents for oil-based paints.
- Inspect the final result: Once the area is cleaned up, take a step back and admire your freshly painted baseboards. Make sure to check the overall appearance for any missed spots or areas that may still need some attention.
By performing these touch-ups and completing the cleanup process, you can ensure that your baseboards look flawless and professionally finished in your small space. Take the time to correct any imperfections and leave the area tidy and clean once you’re done.
Conclusion
Painting the baseboards in your small space can make a significant difference in the overall look and feel of the room. By following the step-by-step process outlined in this article, you can achieve professional-looking results while saving time and effort.
Choosing the right baseboard paint, preparing the baseboards, and protecting the surrounding surfaces are crucial steps in ensuring a smooth and flawless finish. Effective use of painter’s tape helps create clean and precise paint lines, while the application of the baseboard paint itself requires attention to detail and patience.
Remember to make touch-ups and clean up any areas that may need additional attention. By following these steps, you can ensure that your baseboards are beautifully painted and enhance the overall aesthetic of your small space.
So, if you’re looking to give your small space a fresh and updated look, don’t underestimate the impact of painting your baseboards. With the right technique and a little bit of time and effort, you can transform your space and achieve professional-like results.
So go ahead, grab your paintbrushes, and get ready to elevate the style of your small space with freshly painted baseboards!
Frequently Asked Questions about Designers Share Baseboard Painting Hack For Small Spaces
Was this page helpful?
At Storables.com, we guarantee accurate and reliable information. Our content, validated by Expert Board Contributors, is crafted following stringent Editorial Policies. We're committed to providing you with well-researched, expert-backed insights for all your informational needs.


0 thoughts on “Designers Share Baseboard Painting Hack For Small Spaces”