Home>Interior Design>How To Organize Cleaning Supplies: 12 Expert Tips
Interior Design
How To Organize Cleaning Supplies: 12 Expert Tips
Modified: October 28, 2024
Discover expert tips on how to efficiently organize your cleaning supplies, enhancing your interior design. Transform your space with these 12 practical techniques.
(Many of the links in this article redirect to a specific reviewed product. Your purchase of these products through affiliate links helps to generate commission for Storables.com, at no extra cost. Learn more)
Introduction
Welcome to the world of interior design! If you have an eye for aesthetics and a passion for transforming spaces, you’re in the right place. With the right knowledge and techniques, you can create stunning and functional spaces that reflect your personal style and meet the needs of your clients.
Whether you are an aspiring interior designer looking to launch your career or a homeowner seeking inspiration for your next home project, this article is here to guide you. We will explore the fundamentals of interior design, from understanding different design styles to effectively utilizing color, texture, and lighting.
Interior design is more than just picking out pretty decorations. It involves careful planning, attention to detail, and a thorough understanding of the principles that make a space aesthetically pleasing and functional. It is about creating a harmonious balance between form and function, while keeping the client’s needs and preferences in mind.
In this article, we will dive deep into the world of interior design and explore various aspects that will help you create beautiful and inviting spaces. We will discuss the importance of understanding your client’s lifestyle, the role of mood boards and floor plans in the design process, and the art of selecting the perfect furniture and accessories to enhance a space.
Additionally, we will explore the significance of color psychology and how different colors can evoke specific emotions and set the mood in a room. We will also delve into the power of lighting and how it can transform a space from dull and boring to warm and inviting.
Furthermore, we will discuss the importance of considering sustainability and incorporating eco-friendly design practices into your projects. We will explore how you can use sustainable materials and implement energy-efficient solutions to create environmentally conscious spaces that contribute to a healthier planet.
Throughout the article, we will provide practical tips, inspirational ideas, and real-life examples to guide you on your interior design journey. Whether you are working on a residential or commercial project, we have you covered.
So buckle up and get ready to learn and be inspired. Let’s explore the fascinating world of interior design and discover how you can turn any space into a masterpiece.
Key Takeaways:
- Streamline your cleaning routine by decluttering and categorizing your supplies. Utilize clear storage containers, vertical space, and designated areas to keep items easily accessible and organized.
- Ensure safety and efficiency by storing cleaning supplies separately from food storage, disposing of expired products, and maintaining a detailed inventory. Implement wall-mounted storage solutions for added functionality and visual appeal.
Tip 1: Evaluate and Declutter Cleaning Supplies
When it comes to organizing your cleaning supplies, the first step is to evaluate what you have and declutter any unnecessary items. Over time, it’s easy for cleaning supplies to accumulate and take up valuable space.
Start by gathering all your cleaning supplies in one area. This allows you to see exactly what you have and take stock of any duplicates or expired products. Check the labels for expiration dates and dispose of any items that are no longer effective or safe to use.
Next, assess the condition of your cleaning tools and equipment. Are there any brushes with worn-out bristles or mop heads that have seen better days? Consider replacing them with new ones to ensure optimal cleaning performance.
Now that you have narrowed down your cleaning supplies to the essentials, you can think about how to best organize them. Group similar items together, such as all-purpose cleaners, glass cleaners, and bathroom cleaners. This will make it easier to locate the products you need when cleaning specific areas of your home.
If you have multiple cleaning products for the same purpose, such as different brands of glass cleaners, evaluate their effectiveness and choose the one that works best for you. Streamlining your cleaning supplies will not only save space, but also make it easier to keep track of what you have and what needs replenishing.
Consider donating any unused or unopened cleaning supplies that are still in good condition. Local shelters, community centers, or charitable organizations may accept these donations and put them to good use.
Remember, the goal is to have a well-organized collection of cleaning supplies that are useful and accessible. By decluttering and evaluating your inventory, you can create a more efficient cleaning routine and regain control of your cleaning space.
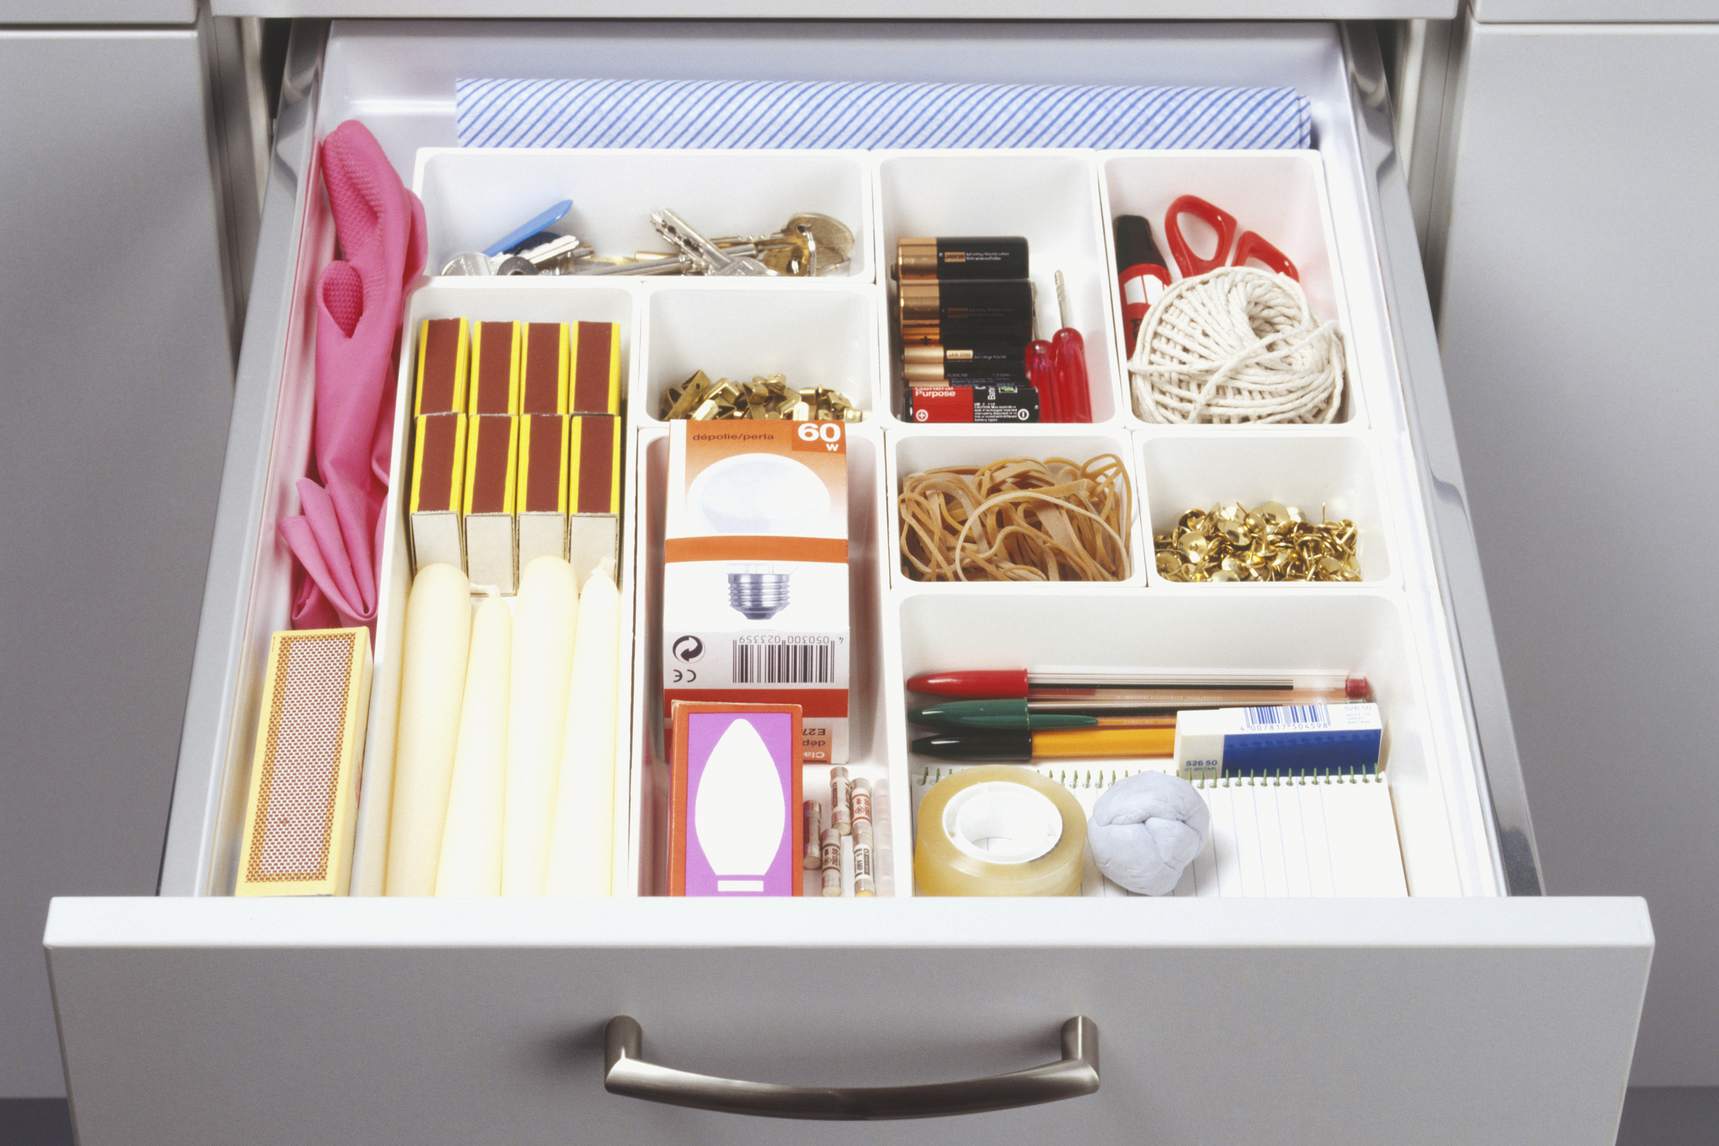
Tip 2: Categorize Cleaning Supplies by Room or Purpose
One of the key principles of organizing cleaning supplies is to categorize them based on the room or purpose they serve. This not only helps you locate the necessary supplies quickly but also ensures that you have the right tools for each cleaning task.
Start by identifying the different areas of your home or office that require specific cleaning products. For example, you may have a set of cleaners specifically designed for the bathroom, kitchen, or windows. Sort the supplies accordingly and designate separate storage areas for each category.
When categorizing cleaning supplies, it’s also helpful to consider the different cleaning tasks you need to perform. Some common categories include surface cleaners, glass cleaners, carpet cleaners, and laundry products.
Consider creating a cleaning supply checklist for each room or task. This will help you keep track of the supplies you need to have on hand and make it easier to restock when necessary.
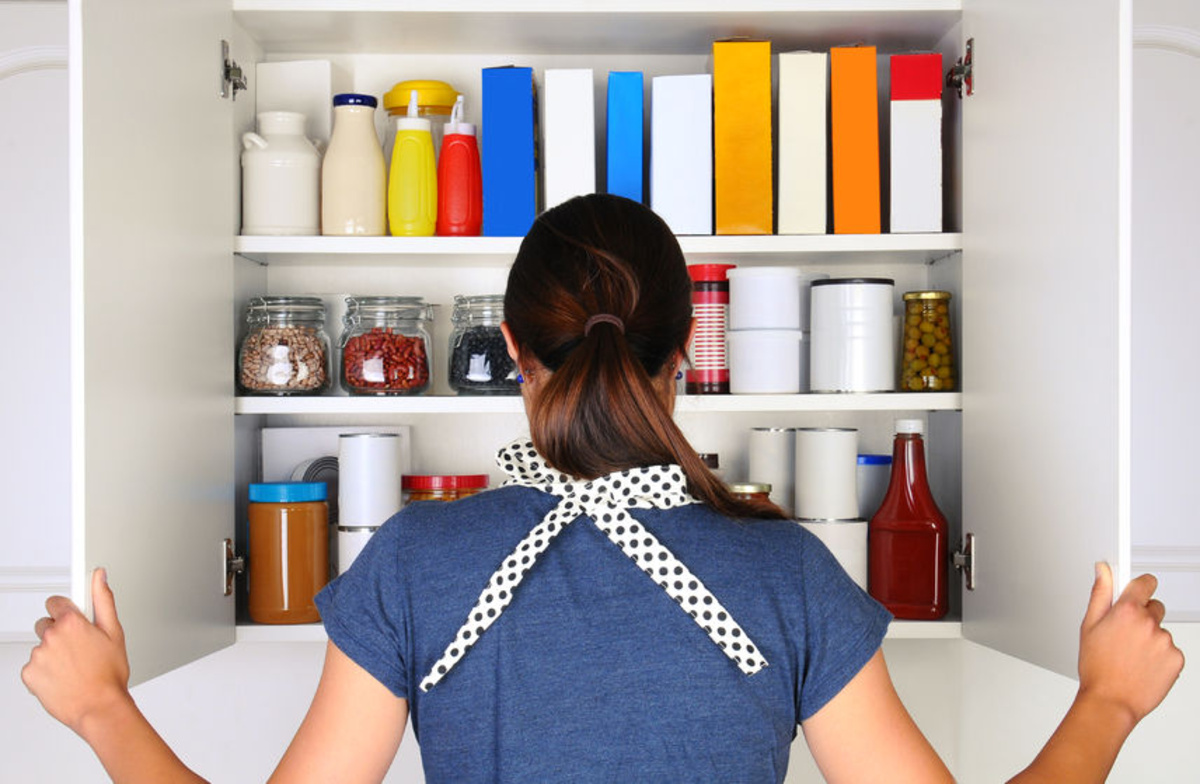
Once you have categorized your cleaning supplies, store them in separate containers or shelves. Transparent storage containers are particularly useful as they allow you to easily identify the contents without opening each container.
If you have limited space, consider utilizing vertical storage solutions. Install shelves or invest in hanging organizers that can maximize the available space and keep your supplies within reach.
Labeling is another crucial aspect of organizing cleaning supplies. Clearly label each container or shelf with the corresponding category or room. This will not only help you find what you need quickly but also make it easier for others to locate supplies when they assist with cleaning.
Remember to regularly review and update your categorization system. As you introduce new cleaning products or change your cleaning routine, adjust the categories accordingly to ensure that your organization remains efficient and functional.
By categorizing your cleaning supplies by room or purpose, you can streamline your cleaning process, save time, and ensure that you have all the necessary supplies on hand for every cleaning task.
Tip 3: Use Clear Storage Containers
When it comes to organizing your cleaning supplies, using clear storage containers offers numerous benefits. Not only do they provide a clean and uniform look to your storage area, but they also make it easier to locate and access the items you need.
Clear storage containers allow you to see the contents at a glance, eliminating the need to open each container to find a specific cleaning product. This saves you time and effort, especially when you’re in the middle of a cleaning task and need to quickly grab the right supplies.
Investing in a set of clear storage containers also promotes a sense of order and cleanliness. With everything neatly arranged and visible, you can create a visually pleasing and organized space – something that is essential in an interior design standpoint.
When selecting clear storage containers, opt for ones that are durable and stackable. These qualities make it easier to maximize your storage space and keep your cleaning supplies neatly organized. Look for containers with secure lids to prevent spills and keep your supplies fresh and uncontaminated.
If you prefer a more eco-friendly option, consider using clear glass or plastic containers with reusable labels. This allows you to reduce waste by avoiding disposable packaging and promotes sustainable practices.
In addition to storing cleaning products, clear containers are also effective for organizing small items like brushes, sponges, or cleaning cloths. You can designate separate containers for different types of tools, ensuring that everything has its proper place.
One tip for utilizing clear storage containers is to group similar items together. For example, you can have a container dedicated to all-purpose cleaners, another for window cleaning supplies, and a separate one for bathroom cleaning products. This further enhances your organization system and makes it easier to find what you need.
Remember to label each container appropriately to indicate its contents. This adds an extra level of organization and makes it effortless to locate specific items.
By using clear storage containers, you can create a visually appealing and efficient system for organizing your cleaning supplies. With everything clearly visible and neatly arranged, you’ll be able to tackle your cleaning tasks with ease and maintain a clutter-free space.
Tip 4: Utilize Vertical Storage Space
When you’re organizing your cleaning supplies, it’s important to make the most of the available space in your storage area. One effective way to do this is by utilizing vertical storage solutions.
Vertical storage allows you to take advantage of the height of your storage area and frees up valuable floor space. This not only maximizes your storage capacity but also keeps your cleaning supplies easily accessible and within reach.
One option for vertical storage is to install shelving units or bookcases. These provide multiple levels of storage and allow you to organize your cleaning supplies based on different categories or purposes.
When using shelves, consider using baskets or bins to further divide and categorize your cleaning supplies. This helps to keep items organized and prevents them from shifting or falling over.
If you have limited wall space, consider using over-the-door organizers or hanging storage solutions. These are particularly useful for storing smaller cleaning tools or supplies that you use frequently. You can hang them on the back of a closet door or a wall-mounted organizer to maximize vertical space.
Another option for vertical storage is using a pegboard. Pegboards provide a versatile and customizable solution for hanging and organizing cleaning tools. They are easy to install and allow you to arrange your supplies based on your preferences and needs.
When utilizing vertical storage, it’s important to keep safety in mind. Make sure that any shelving units or hanging organizers are securely mounted to the wall or door. This prevents accidents and ensures that your cleaning supplies are stored safely.
Additionally, consider the weight-bearing capacity of your chosen storage solutions. Heavier items should be placed on sturdier shelves or lower levels to avoid any potential damage or accidents.
By utilizing vertical storage space, you can effectively store and organize your cleaning supplies while maximizing the available space in your storage area. This not only keeps your supplies easily accessible but also helps to create a neat and tidy environment.
Tip 5: Create a Designated Cleaning Supplies Area
When it comes to organizing your cleaning supplies, one of the most important tips is to create a designated area specifically for storing and accessing your cleaning products and tools. Having a dedicated space for your cleaning supplies helps to keep them organized, easily accessible, and separate from other household items.
Start by identifying an area in your home or office that can be designated as your cleaning supplies zone. This could be a cabinet, a specific section of a pantry or closet, or even a utility room or laundry area. The key is to choose a space that is convenient and easily accessible for your cleaning needs.
In this designated area, set up shelves, drawers, or cabinets to store your cleaning supplies. This not only keeps them organized but also prevents them from getting misplaced or scattered throughout the house. Choose storage solutions that work best for your specific needs and the size of your cleaning supplies collection.
Consider installing hooks or hangers on the inside of cabinet doors or on nearby walls to hang cleaning tools such as brooms, mops, or dusters. This helps optimize storage space and keeps these items off the floor, making them easily accessible when needed.
Having a designated cleaning supplies area also helps streamline your cleaning routine. You know exactly where to find the products you need, saving you valuable time and effort. It eliminates the frustration of searching for specific cleaning items or realizing that you’ve run out of a necessary product right in the middle of cleaning.
When creating your designated cleaning supplies area, keep in mind the safety of the space. If you have children or pets, consider using childproof locks for cabinets or storing hazardous cleaning products in higher, secure areas.
Labeling is another important aspect of your cleaning supplies area. Clearly label storage containers, shelves, or drawers to indicate the contents or the designated category of cleaning supplies. This not only helps you locate items quickly but also ensures that everything is returned to its proper place after use.
By creating a designated cleaning supplies area, you’ll have a central hub for all your cleaning needs. It keeps your cleaning products organized, easily accessible, and separate from other household items, making your cleaning routine more efficient and enjoyable.
Tip 6: Label Storage Containers
When it comes to organizing your cleaning supplies, one simple yet effective tip is to label your storage containers. Proper labeling not only enhances the visual appearance of your storage area but also makes it easier to locate specific cleaning products quickly and efficiently.
Start by selecting the type of labeling system you prefer. You can choose pre-made labels specifically designed for organizing cleaning supplies, or you can create your own labels using adhesive tape, label stickers, or even a label maker. The key is to choose a labeling method that is clear, legible, and suits your personal style.
When labeling your storage containers, consider using descriptive and specific labels that indicate the contents of each container. For example, instead of simply labeling a container as “cleaning supplies,” you can specify the type of supplies it contains, such as “all-purpose cleaners” or “window cleaning tools.”
Using color-coding can also be a helpful labeling technique. Assign a specific color to each category of cleaning supplies or to different rooms in your home. This adds an extra layer of organization and makes it easier to quickly identify the relevant containers.
Place labels on the front or top of the storage containers, ensuring they are easily visible and accessible. This allows you to quickly locate the desired cleaning product without having to search through multiple containers.
Consistency is key when labeling your storage containers. Make sure to maintain a consistent labeling system throughout your cleaning supplies area. This ensures clarity and avoids confusion when retrieving or organizing your cleaning products.
For maximum efficiency, consider placing labels both on the containers themselves and on the shelves or drawers where they are stored. This provides a clear visual cue for the proper placement of each container after use, ensuring that everything stays organized and in its designated spot.
Regularly review and update your labels as needed. Over time, you may introduce new cleaning products or change the categorization of your supplies, so it’s important to keep your labels current to reflect these changes.
By labeling your storage containers, you create a structured and organized system for your cleaning supplies. This saves you time and effort by allowing you to quickly find what you need, ensuring that your cleaning routine is more efficient and stress-free.
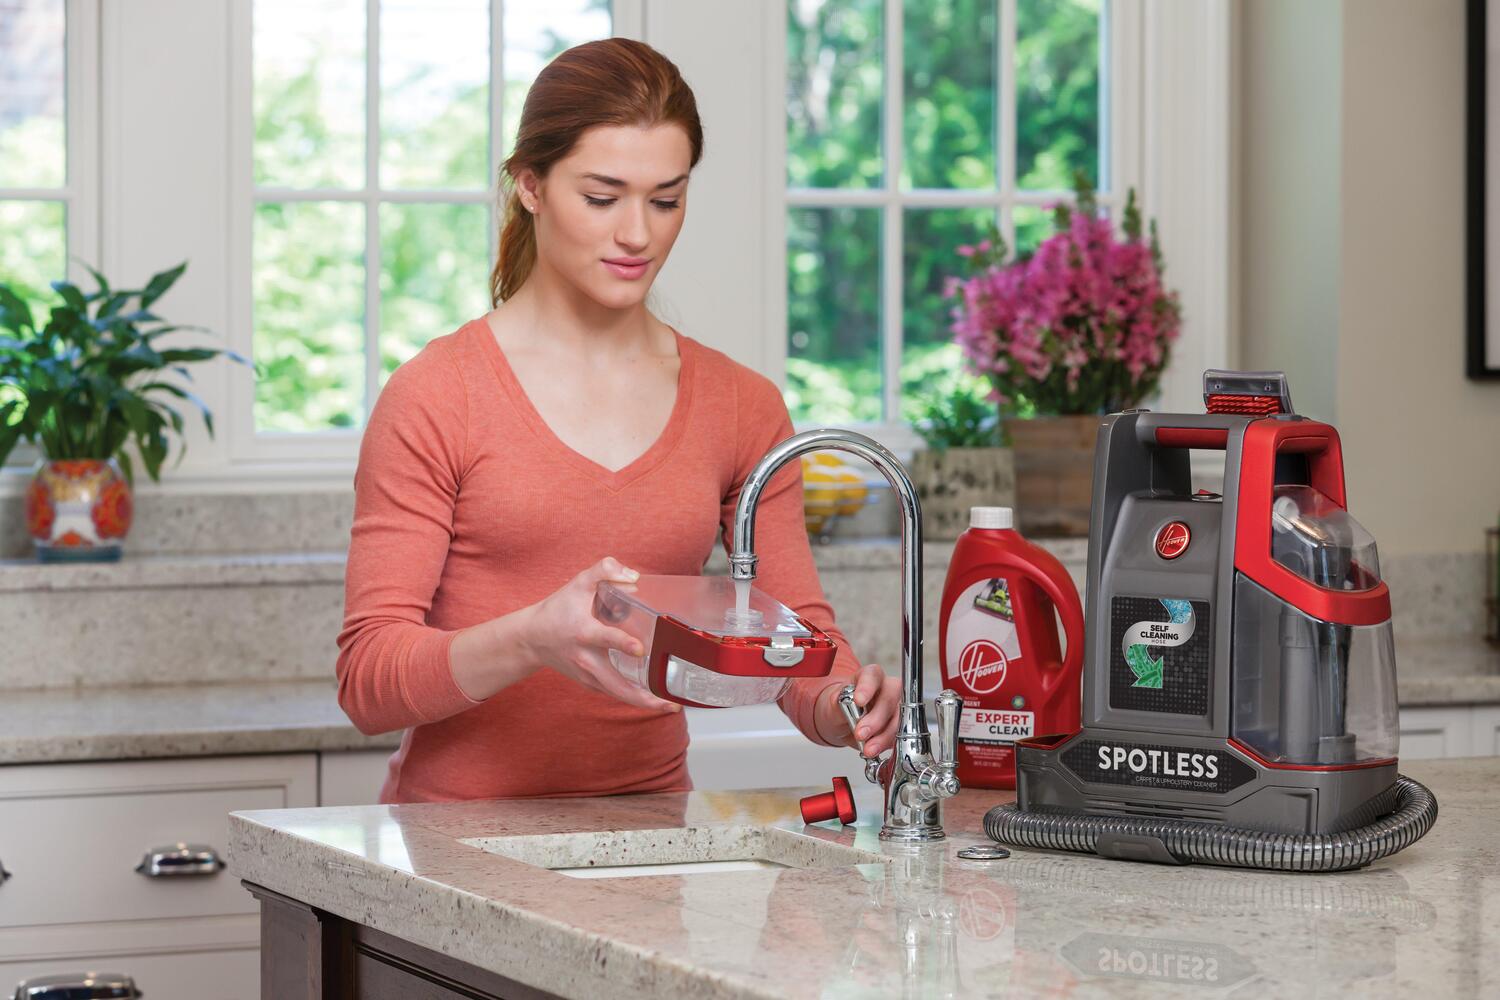
Store cleaning supplies in a designated area, such as under the sink or in a closet, to keep them organized and easily accessible. Use bins or caddies to group similar items together for quick and efficient cleaning.
Tip 7: Keep Frequently Used Supplies Easily Accessible
When organizing your cleaning supplies, it’s essential to keep the frequently used items easily accessible. These are the supplies you reach for most often, so having them within reach saves you time and effort during your cleaning routine.
Start by identifying the cleaning products and tools that you use on a regular basis. These might include all-purpose cleaners, microfiber cloths, sponges, or your favorite scrub brush. Keep these items in a convenient location where you can easily grab them when needed.
One approach is to allocate a specific section or shelf in your cleaning supplies area for frequently used items. This dedicated space ensures that these supplies are always within arm’s reach, eliminating the need to search through multiple containers or shelves.
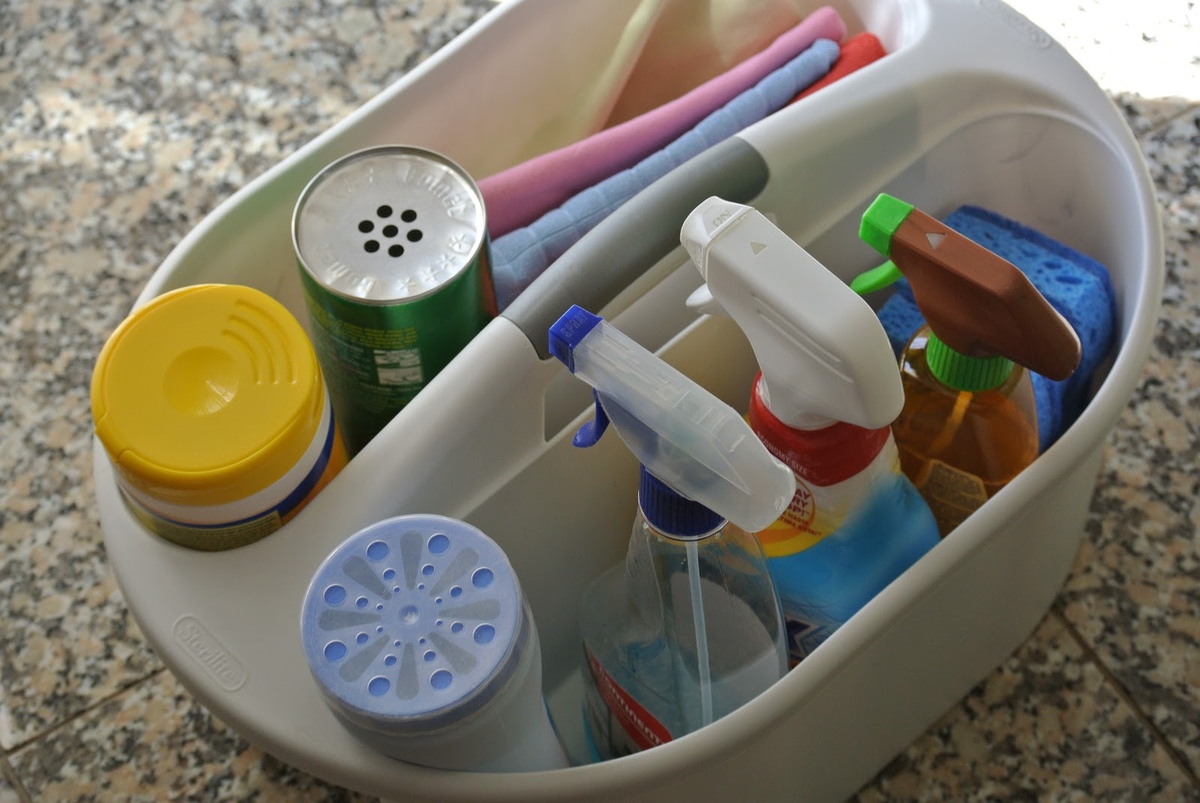
Consider using a caddy or a portable organizer to gather your go-to cleaning supplies. This allows you to carry them around as you move from room to room, saving you from continuously going back to your storage area to retrieve items.
If you prefer to keep your frequently used supplies visible, you can also use wall-mounted organizers or hooks to hang them. This not only keeps them easily accessible but also adds a decorative touch to your cleaning space.
Another helpful tip is to keep a small cleaning kit on each floor of your home or multiple kits in different areas of your office. These kits should contain the essential cleaning supplies and tools needed for quick touch-ups or unexpected spills, ensuring that you can easily address cleaning tasks as they arise.
Regularly assess your cleaning routine and make adjustments to your accessible supplies. As your cleaning needs or preferences change, be open to rearranging the items in your accessible area to best suit your current situation.
By keeping frequently used supplies easily accessible, you streamline your cleaning routine and improve efficiency. You save valuable time and effort by having your go-to products within reach, making your cleaning tasks quicker and more convenient.
Tip 8: Store Cleaning Tools Separately
When organizing your cleaning supplies, it’s essential to store your cleaning tools separately from your cleaning products. This ensures that your tools are protected, easily accessible, and in good condition when you need them for your cleaning tasks.
Start by identifying the various cleaning tools you use regularly, such as mops, brooms, dustpans, brushes, and vacuum cleaners. These tools can take up a significant amount of space and can easily become tangled or damaged when stored together with your cleaning products.
Designate a separate storage area for your cleaning tools, ideally in a location close to where you typically use them. This could be a broom closet, a laundry room, or a dedicated area in your cleaning supplies zone.
Consider investing in toolspecific organizers or wall-mounted racks designed to hold your cleaning tools. These organizers typically have hooks, slots, or clips to securely hold items such as brooms, mops, and brushes, keeping them upright and preventing damage to their bristles or heads.
Ensure that your storage area allows for easy access to the tools. You should be able to retrieve them without having to move or remove other items. This saves you time and frustration, especially in the midst of cleaning tasks when you need to grab the appropriate tool quickly.
Clean your tools regularly to prevent the buildup of dirt, dust, and grime. This helps to maintain their efficiency and extend their lifespan. Store them in a clean and dry area after use to prevent the growth of mold or bacteria.
If space is limited and you need to store your cleaning tools alongside other supplies, consider using separate containers or compartments within your storage area. This helps to keep the tools organized and prevents them from getting entangled or damaged.
Labeling or using color-coded systems can be beneficial when storing your cleaning tools separately. This ensures that each tool has its designated storage space, making it easier to find and return them after use.
By storing your cleaning tools separately, you protect them from damage, extend their longevity, and make them easily accessible. This allows you to efficiently tackle your cleaning tasks with the right tools at hand, ensuring a thorough and effective cleaning routine.
Tip 9: Consider Using Wall-Mounted Storage Solutions
When it comes to organizing your cleaning supplies, utilizing wall-mounted storage solutions can be a game-changer. Not only do they help maximize your storage space, but they also keep your cleaning products easily accessible and visually organized.
Wall-mounted storage solutions come in various forms, including shelves, racks, hooks, and baskets. Here are some ideas on how to use them effectively:
- Install shelves on your walls to create additional storage space for your cleaning supplies. You can place containers or bins on these shelves to organize smaller items, such as brushes, sponges, and scrubbers. This keeps your cleaning products off the countertop or floor, making it easier to maintain a neat and clutter-free space.
- Consider using pegboards, which are versatile and customizable. You can add hooks, baskets, and compartments to hold your cleaning tools and smaller items. This allows you to create a visually appealing and efficient storage system for your cleaning supplies.
- Use adhesive hooks or wall-mounted racks to hang brooms, mops, dustpans, and other large items. This not only saves floor space but also keeps your tools easily accessible. Make sure the hooks or racks are sturdy enough to hold the weight of your tools.
- If you have a smaller cleaning space or need to save wall space, consider using over-the-door organizers. These can be hung on the inside of a closet or utility room door and provide pockets or compartments for storing smaller cleaning supplies.
- Label each wall-mounted storage solution to ensure everything has its designated place. This makes it easy for you to locate specific items and promotes a sense of order and organization.
When installing wall-mounted storage solutions, make sure they are securely fastened to the wall to avoid accidents or damage. Use appropriate mounting hardware and follow the manufacturer’s instructions for installation.
Wall-mounted storage solutions not only optimize your storage space but also add a decorative element to your cleaning area. They can be functional and aesthetically pleasing, enhancing the overall appearance of your cleaning supplies zone.
By utilizing wall-mounted storage solutions, you can efficiently organize your cleaning supplies, keep them easily accessible, and free up valuable floor and countertop space. This creates a clean and functional environment for your cleaning routine, making it easier and more enjoyable.
Tip 10: Store Cleaning Supplies Away from Food Storage
When organizing your cleaning supplies, it’s important to ensure that they are stored separately from your food storage areas. This is crucial for maintaining a safe and hygienic environment, preventing any cross-contamination between cleaning products and edible items.
Start by identifying the areas in your home that are designated for food storage, such as the pantry, cabinets, or refrigerator. These spaces should be reserved solely for food, beverages, and other consumable items.
When storing your cleaning supplies, choose a separate location that is away from your food storage areas. This can be a separate cabinet, shelf, or designated area in your cleaning supplies zone.
When storing cleaning products, ensure that they are properly sealed and stored in their original containers. This prevents any leakage or spillage that could potentially contaminate nearby food items.
Consider using clear storage containers or bins to further separate your cleaning supplies from your food storage areas. This provides an additional layer of protection and ensures that there is a clear distinction between the two categories of items.
Label each container or bin clearly to indicate that it contains cleaning supplies and should not be mistaken for food items. This helps prevent any accidental mix-up or confusion.
When organizing your cleaning supplies, keep in mind that some cleaning products may have strong odors or fumes that can taint nearby food items. Store these products in a designated area that is well-ventilated and away from any food storage areas.
If you have limited space and need to store some cleaning supplies in close proximity to food storage areas, ensure that they are properly sealed and stored on separate shelves or in separate containers.
Regularly inspect your cleaning supplies for any signs of leaking or damage. Dispose of any products that have been compromised to maintain a clean and safe environment.
By storing your cleaning supplies separately from your food storage areas, you ensure the safety and integrity of your edible items. This prevents any potential cross-contamination and promotes a healthy and hygienic living space.
Tip 11: Dispose of Expired or Unused Products Regularly
When it comes to organizing your cleaning supplies, it’s important to regularly check for and dispose of expired or unused products. This not only helps declutter your storage area but also ensures that you are using effective and safe cleaning products.
Start by going through your collection of cleaning supplies and check the expiration dates on each product. Expired products may not be as effective as they should be, and in some cases, they can even be potentially harmful.
Dispose of any cleaning products that are past their expiration dates. Make sure to follow the specific guidelines or recommendations for disposing of household chemical waste in your local area. Many communities have designated drop-off points or events for safe disposal of expired or unused cleaning supplies.
Additionally, assess the cleaning products that you may have purchased but never used. If you have products that have been sitting idle for an extended period, consider donating them to local shelters, community centers, or charitable organizations that may be in need of such items.
Regularly review your cleaning supplies inventory to determine what products you use frequently and which ones you rarely or never use. This can help you streamline your collection and avoid unnecessary clutter.
As you purchase new cleaning products, be mindful of your consumption habits. Only buy what you know you will use within a reasonable timeframe to prevent excessive accumulation of unused items.
Remember to store your cleaning supplies in a cool, dry place to maintain their effectiveness and prolong their shelf life. Proper storage helps prevent premature expiration and ensures that your products are ready for use when needed.
By regularly disposing of expired or unused cleaning products, you maintain a clutter-free and efficient cleaning supplies collection. You are left with products that are safe, effective, and ready to tackle your cleaning tasks.
Tip 12: Maintain a Cleaning Supplies Inventory
When it comes to organizing your cleaning supplies, maintaining an inventory is a valuable practice. This helps you stay organized, ensure that you have all the necessary supplies on hand, and avoid running out of essential items when you need them the most.
Start by creating a list of all the cleaning supplies you have in your collection. Include both the products and the tools you use for your cleaning tasks. You can categorize the inventory by room or purpose to make it easier to navigate.
Periodically review your inventory and update it as needed. Remove any items that you have disposed of or no longer use, and add new ones that you’ve acquired. This ensures that your inventory remains accurate and up to date.
When restocking your cleaning supplies, refer to your inventory to determine which items need replenishing. This prevents you from accidentally running out of essential cleaning products when you need them most.
Consider setting up a designated area or a storage system within your cleaning supplies zone to keep track of your inventory. You can use a whiteboard, a spreadsheet, or even a dedicated notebook to document your inventory. Choose a method that works best for you and ensures easy access and updating.
Take advantage of technology to help you maintain your inventory. There are various mobile apps available that allow you to create and manage inventories, making it convenient to track and update your cleaning supplies on the go.
Ensure that your inventory system is easily accessible and understandable. Use clear labels, categories, or color-coding to organize your inventory effectively. This streamlines the process of finding and restocking the necessary cleaning supplies.
Regularly review your inventory to assess the efficiency and effectiveness of the cleaning products and tools you’re currently using. If you come across new or improved products, consider testing them out and updating your inventory if they prove to be more suitable for your needs.
By maintaining a cleaning supplies inventory, you stay organized, avoid running out of essential items, and ensure that your cleaning routine is efficient and effective. It helps you stay on top of your cleaning tasks and keeps your cleaning supplies collection in check.
Conclusion
Organizing your cleaning supplies is not only about creating a visually appealing space but also about optimizing the functionality and efficiency of your cleaning routine. By following the tips outlined in this article, you can create a well-organized and easily accessible system for your cleaning supplies.
First, take the time to evaluate and declutter your cleaning supplies. Get rid of any expired or unnecessary items to streamline your collection. Categorize your supplies by room or purpose, making it easier to find what you need when cleaning specific areas.
Consider using clear storage containers to store your cleaning supplies. This allows you to see the contents at a glance, simplifying the process of locating specific items. Utilize vertical storage space by installing shelves, racks, or hooks to maximize your storage capacity.
Create a designated cleaning supplies area to keep everything in one place. Label your storage containers to make it easy to find and return items. Keep frequently used supplies easily accessible to save time during your cleaning routine. Store cleaning tools separately to protect them and keep them in good condition.
Utilize wall-mounted storage solutions to further optimize your storage space and add a decorative touch to your cleaning area. Keep your cleaning supplies separate from your food storage to maintain a safe and hygienic environment.
Dispose of expired or unused products regularly to declutter your space and ensure that you’re using effective and safe cleaning supplies. Lastly, maintain a cleaning supplies inventory to stay organized and ensure that you always have the necessary supplies on hand.
By implementing these tips, you can create a well-organized, functional, and visually pleasing space for your cleaning supplies. Organizing your cleaning supplies not only enhances the efficiency of your cleaning routine but also contributes to a cleaner, healthier, and more enjoyable living environment.
Frequently Asked Questions about How To Organize Cleaning Supplies: 12 Expert Tips
Was this page helpful?
At Storables.com, we guarantee accurate and reliable information. Our content, validated by Expert Board Contributors, is crafted following stringent Editorial Policies. We're committed to providing you with well-researched, expert-backed insights for all your informational needs.


0 thoughts on “How To Organize Cleaning Supplies: 12 Expert Tips”