Home>Interior Design>How to Tile Over Tiles To Save Time And Money
Interior Design
How to Tile Over Tiles To Save Time And Money
Modified: August 28, 2024
Learn how to save time and money on your interior design project by tiling over existing tiles. Our expert tips will guide you through the process.
(Many of the links in this article redirect to a specific reviewed product. Your purchase of these products through affiliate links helps to generate commission for Storables.com, at no extra cost. Learn more)
Introduction
When it comes to renovating your home, one of the most common and expensive projects is removing and replacing old tiles. However, what if there was a way to save time and money by tiling over existing tiles? That’s right – it’s possible to refresh the look of your space without the hassle of removing the old tiles.
Tiling over tiles can be a great option if you’re on a budget or short on time. It can also be an excellent solution if the existing tiles are still in good condition and don’t have major issues like cracks or loose pieces. Not only does tiling over tiles save you the hassle of tile removal, but it can also give your space a fresh and updated look.
In this article, we will guide you through the process of tiling over tiles and share some essential tips to ensure a successful and long-lasting result. So, let’s dive in and learn how to transform your space with this cost-effective solution.
Key Takeaways:
- Save time and money by tiling over existing tiles, avoiding the hassle and cost of tile removal. Proper preparation, adhesive application, and grout sealing are essential for a successful and enduring DIY tiling project.
- Tiling over tiles provides an opportunity to transform your space with a fresh aesthetic while maintaining functionality. Careful assessment, surface preparation, and meticulous tiling and grouting are key to achieving beautiful and long-lasting results.
Assessing the Existing Tiles
Before you begin tiling over existing tiles, it’s crucial to assess the condition of the tiles. Take a close look at the surface to identify any cracks, loose tiles, or signs of water damage. It’s also important to check if the existing tiles are firmly adhered to the substrate.
If you notice any major issues like extensive damage or loose tiles, it’s recommended to remove the old tiles completely. Tiling over damaged or unstable tiles can lead to problems down the line, such as cracked or uneven new tiles.
On the other hand, if the existing tiles are in good condition and firmly set, you can proceed with tiling over them. Keep in mind that tiling over tiles will add some height to the floor or wall, so consider this factor when planning your project.
Additionally, evaluate the overall look and style of the existing tiles. Are they outdated or do they clash with your desired aesthetic? Tiling over tiles provides a fresh canvas for your new tiles, allowing you to completely transform the look and feel of the space while avoiding the time-consuming process of tile removal.
Take some time to carefully consider the condition, stability, and appearance of the existing tiles before moving forward with tiling over them. This will ensure that you achieve the best possible result and a beautiful, long-lasting finish.
Preparing the Surface
Once you have assessed the condition of the existing tiles and decided to proceed with tiling over them, it’s important to prepare the surface properly for the new tiles. Proper preparation will ensure good adhesion and durability of the new tile installation.
The first step is to thoroughly clean the existing tiles to remove any dirt, grease, or grime. Use a mild detergent and warm water to scrub the surface. You can also use a degreaser if necessary. Rinse the tiles thoroughly and allow them to dry completely before moving to the next step.
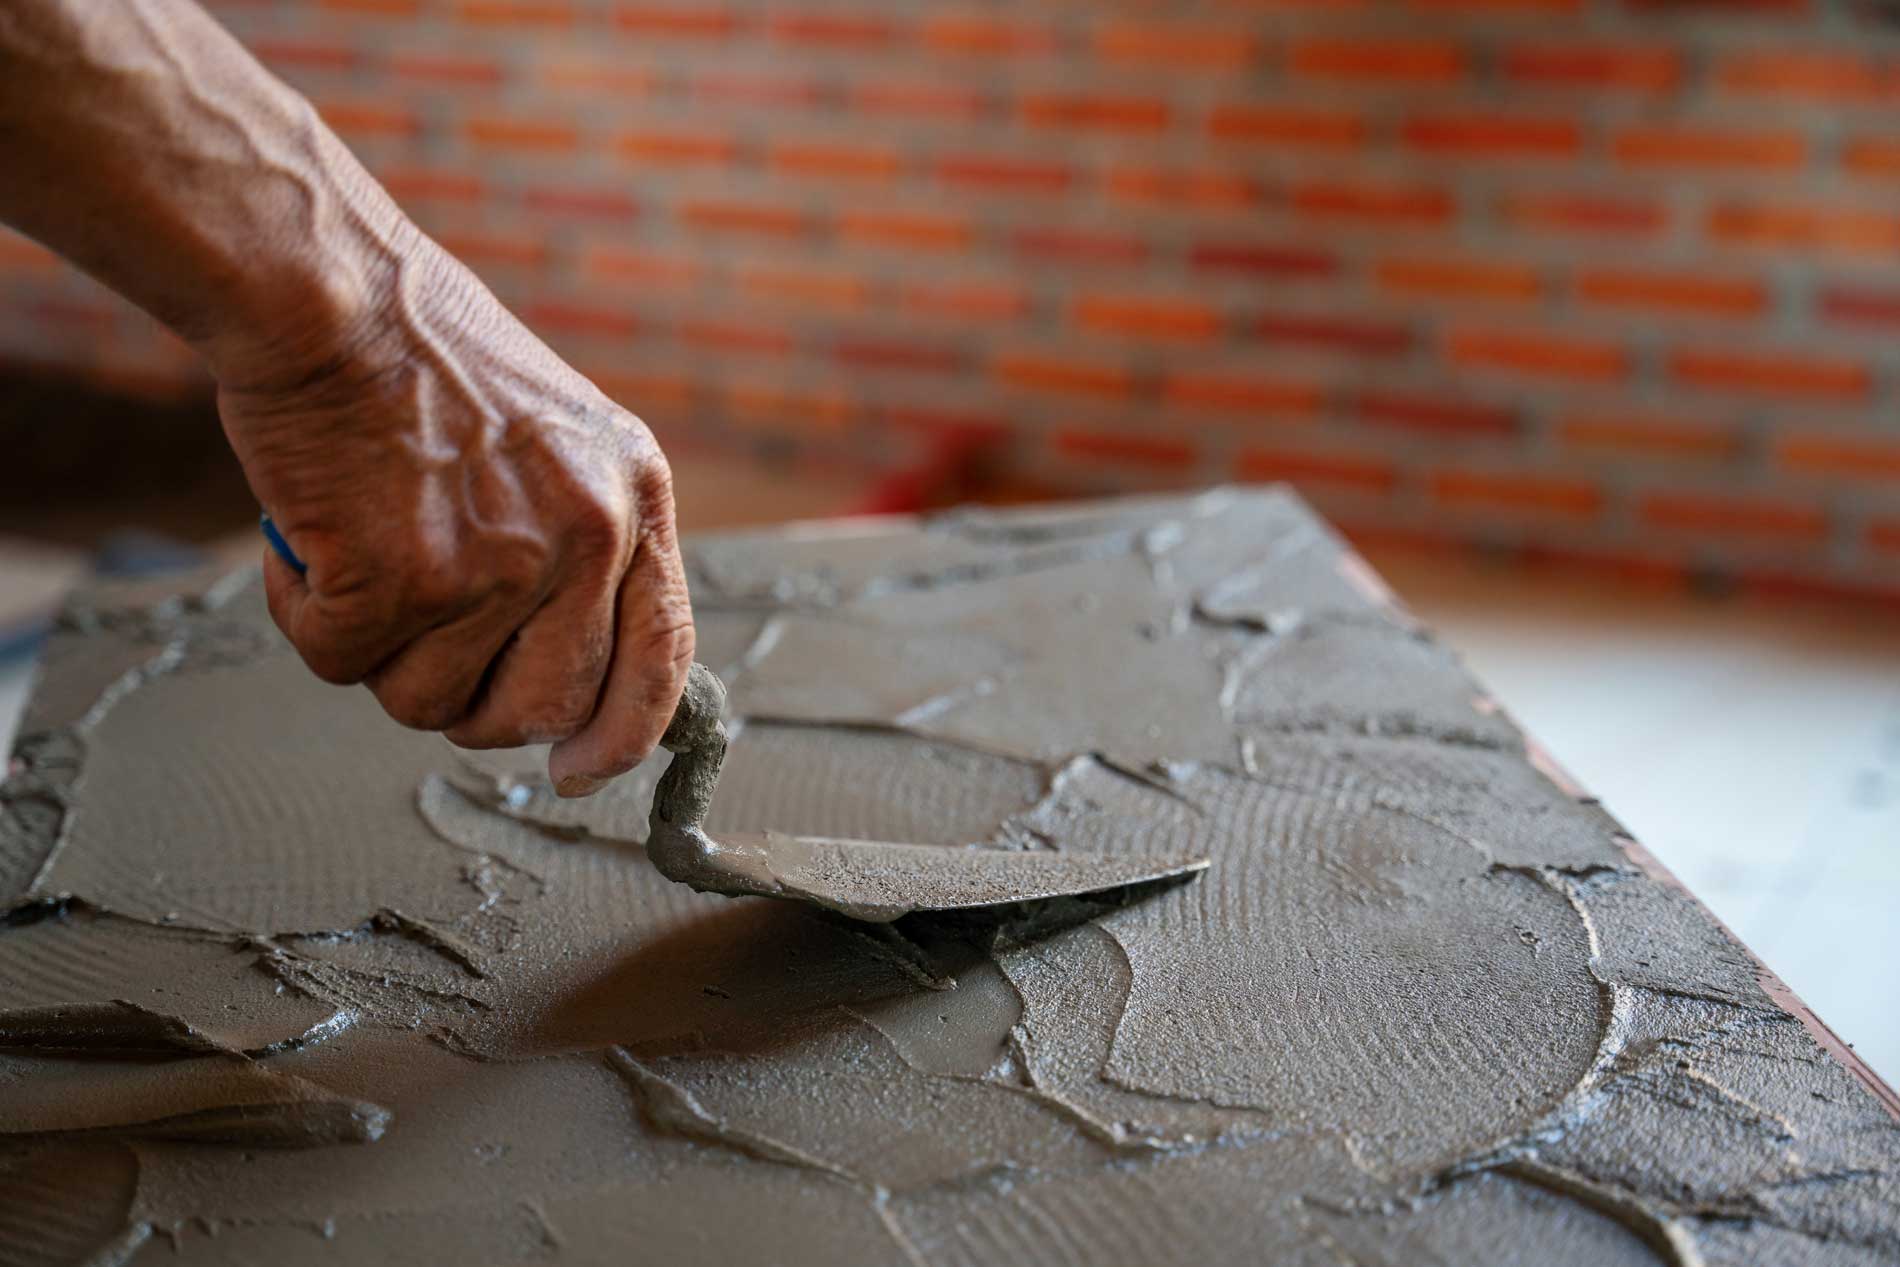
After cleaning, it’s time to roughen up the surface of the existing tiles to improve adhesion. This can be done by sanding the tiles with sandpaper or using a floor or wall sander. The goal is to create a slightly rough texture that will help the adhesive bond well with the tiles.
Before sanding, make sure to wear protective goggles and a mask to avoid inhaling dust particles. Start with a medium-grit sandpaper and gradually move to a finer grit to achieve the desired texture. Remember to clean the surface again after sanding to remove any debris.
Once the surface is cleaned and roughened, it’s recommended to apply a primer. A primer creates a strong bond between the existing tiles and the adhesive, ensuring a secure installation. Choose a primer suitable for the type of tiles you have and follow the manufacturer’s instructions for application.
Applying a primer is especially important if the existing tiles have a glossy or smooth surface, as these surfaces can hinder adhesion. The primer will help the adhesive adhere better to the tiles and provide a solid foundation for the new tiles.
By properly preparing the surface, you set the stage for a successful tiling project. Cleaning, sanding, and applying a primer will ensure strong adhesion and increase the longevity of the new tile installation. Take your time with this step to achieve the best results.
Cleaning the Tiles
Before tiling over the existing tiles, it’s essential to ensure that they are clean and free from any dirt, grime, or residue. Cleaning the tiles thoroughly will not only improve the adhesion of the new tiles but also create a clean and fresh surface for your project.
Start by removing any loose dirt or debris from the tiles using a broom or vacuum cleaner. Pay special attention to the grout lines, as they can trap dirt and become discolored over time. Use a grout brush or a toothbrush to scrub the grout lines and remove any built-up dirt.
Next, prepare a cleaning solution using a mild detergent or tile cleaner and water. Avoid using harsh chemicals or abrasive cleaners, as they can damage the existing tiles. Follow the manufacturer’s instructions for diluting the cleaner and apply it to the tiles.
Using a sponge or a soft cloth, gently scrub the tiles in a circular motion to remove any dirt or stains. Pay extra attention to areas that may be more prone to staining, such as near the stove or in the bathroom. Rinse the tiles thoroughly with clean water to remove any traces of the cleaning solution.
If there are any stubborn stains or discoloration on the tiles, you can use a mild bleach solution or a specialized tile stain remover. Apply the solution to the stained area and let it sit for a few minutes before scrubbing with a brush. Rinse well with water afterward to remove any residue.
Once you have cleaned the tiles to your satisfaction, allow them to dry completely before proceeding with the tiling project. Moisture on the surface can hinder proper adhesion of the new tiles, so it’s essential to ensure that the tiles are completely dry.
Cleaning the existing tiles is a crucial step in tiling over tiles. By removing dirt, grime, and stains, you create a clean and smooth surface for the new tiles, ensuring a successful and beautiful installation. Take your time with this step to achieve the best possible results.
Sanding the Tiles
Before tiling over existing tiles, it’s important to prepare the surface by sanding the tiles. Sanding helps to create a textured surface that promotes better adhesion of the new tiles and ensures a long-lasting installation.
Start by selecting the appropriate sandpaper grit. For most cases, a medium grit sandpaper, around 80-120 grit, should suffice. However, if the tiles have a glossy or smooth surface, you may need to use a coarser grit sandpaper, such as 60 grit, to achieve the desired texture.
Wear protective goggles and a mask before you begin sanding to protect yourself from any dust or particles that may be released during the process. If possible, work in a well-ventilated area or use a fan to help disperse the dust.
Using a sanding block or sanding pad, start sanding the surface of the tiles in a circular motion. Apply even pressure to ensure consistent sanding across the entire surface. Pay particular attention to areas with glossy or smooth finishes, as they require more sanding to create a rougher texture.
Continue sanding until the surface of the tiles feels slightly rough to the touch. This rough texture will provide a better grip for the adhesive and improve the bond between the existing tiles and the new ones.
After sanding, it’s important to remove any dust or debris left behind. Use a damp cloth or sponge to wipe down the tiles, ensuring that all dust particles are removed. Allow the tiles to dry completely before moving on to the next step.
Keep in mind that sanding may not be suitable for all types of tiles, such as delicate or brittle tiles. Before sanding, check the manufacturer’s recommendations or consult with a professional to ensure that sanding is safe and appropriate for your specific type of tiles.
Sanding the tiles is an important step in preparing the surface for tiling over existing tiles. By creating a rough texture, you enhance the adhesive bond and ensure the longevity of the new tile installation. Take your time and be thorough in your sanding process for the best results.
Read more: How To Save Money On Thermostat
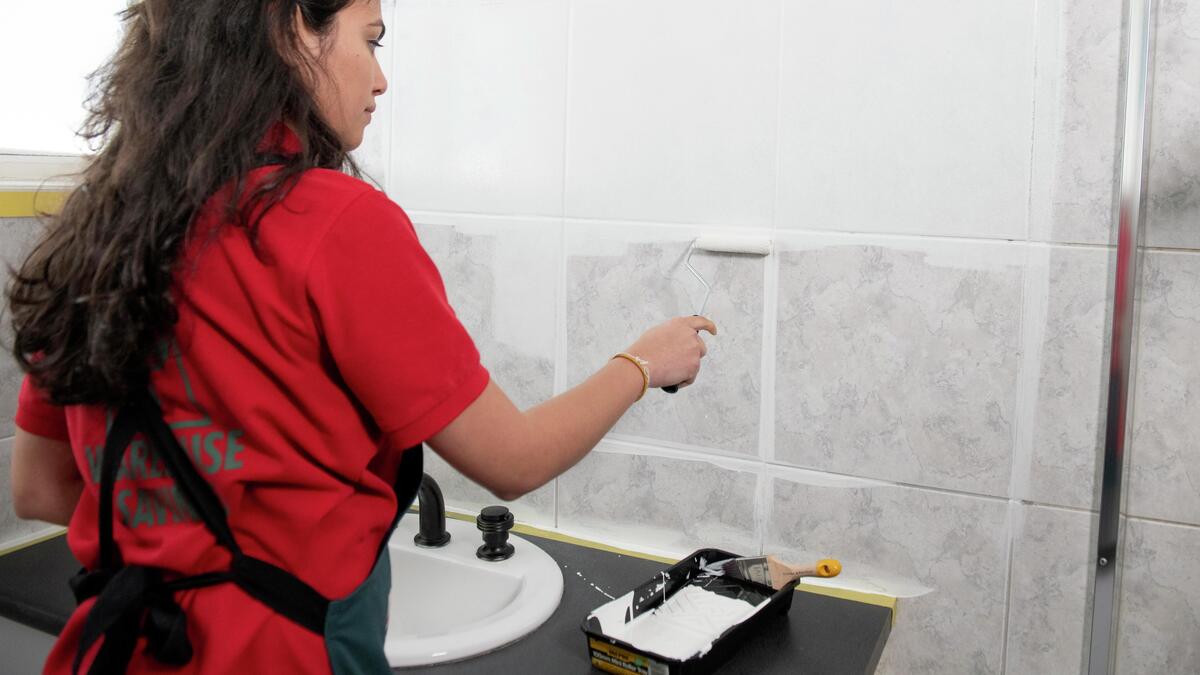
Applying a Primer
Once you have cleaned and sanded the tiles, the next crucial step before tiling over them is to apply a primer. A primer creates a strong bond between the existing tiles and the adhesive, ensuring a secure and long-lasting tile installation.
Before applying the primer, make sure the surface is clean and free from any dust or debris. Use a damp cloth to wipe down the tiles and remove any remaining particles. Allow the tiles to dry completely before proceeding.
Choose a primer that is suitable for the type of tiles you have and follow the manufacturer’s instructions for application. Most primers come in liquid form and can be applied with a brush or roller. Make sure to work in a well-ventilated area to avoid inhaling any fumes.
Start by pouring a small amount of primer into a paint tray or a clean container. Dip the brush or roller into the primer and remove any excess by tapping it against the edge of the tray or container.
Apply the primer to the tiles in even strokes, working in small sections at a time. Make sure to cover the entire surface of the existing tiles, including the edges and corners. Apply a thin and consistent layer of the primer, ensuring that it does not pool or create drips.
Allow the primer to dry according to the manufacturer’s instructions. Typically, it takes a few hours for the primer to fully dry. Avoid applying adhesive or installing the new tiles until the primer is completely dry to ensure a strong bond.
Priming is especially important if the existing tiles have a glossy or smooth surface, as these surfaces can hinder proper adhesion of the adhesive. The primer creates a rougher and more porous surface, allowing the adhesive to bond effectively with the existing tiles.
By applying a primer, you improve the adhesion strength and overall durability of the new tile installation. Take your time with this step to ensure a thorough and even application of the primer for the best results.
When tiling over existing tiles, make sure to clean and roughen the surface for better adhesion. Use a high-quality tile adhesive to ensure the new tiles stick properly. This will save you time and money by avoiding the need to remove the old tiles.
Choosing the New Tiles
Once you have prepared the existing tiles and applied the primer, it’s time to choose the new tiles for your tiling project. This step is an exciting opportunity to completely transform the look and style of your space.
When selecting the new tiles, consider the overall aesthetic you want to achieve. Take into account the color scheme, texture, and size of the tiles. Are you looking for a sleek and modern look or a more traditional and rustic style?
Consider the functionality of the space as well. If you’re tiling a bathroom or kitchen, choose tiles that are water-resistant and easy to clean. For areas with heavy foot traffic, opt for durable and slip-resistant tiles.
Take advantage of various tile materials, such as ceramic, porcelain, natural stone, or glass, to create different visual effects and textures. Each material has its own unique characteristics and requires specific care and maintenance.
Another important aspect to consider is the size and layout of the tiles. Larger tiles can create an illusion of a bigger space and minimize the number of grout lines, while smaller tiles allow for more intricate designs and patterns.
Don’t be afraid to get creative with your tile selection. Consider mixing and matching different tile shapes, colors, or patterns to create a unique and personalized look. Experiment with tile samples and visualize how they will complement your existing decor and furnishings.
In addition to aesthetics, set a budget for your tile selection. Tiles come in a wide range of prices, so it’s important to choose options that fit within your budget without compromising quality.
Before making a final decision, it’s helpful to consult with tile experts or interior designers who can provide guidance and recommendations based on your specific needs and style preferences.
Remember, your choice of new tiles will greatly impact the overall look and feel of your space. Take your time, do your research, and choose tiles that reflect your personal style while also meeting your practical requirements.
Applying Adhesive
Once you have chosen the perfect tiles for your project, it’s time to apply the adhesive and start tiling over the existing tiles. The adhesive is a crucial component that ensures the new tiles bond securely to the surface and withstand the test of time.
Before you begin, make sure you have selected the appropriate adhesive for your chosen tiles and the surface you’re working on. Follow the manufacturer’s instructions regarding the mixing instructions and drying time for the adhesive.
Start by mixing the adhesive according to the manufacturer’s instructions. Typically, you will need to mix the adhesive with water until you achieve a smooth and spreadable consistency. Use a clean bucket and a mixing paddle or a drill with a mixing attachment.
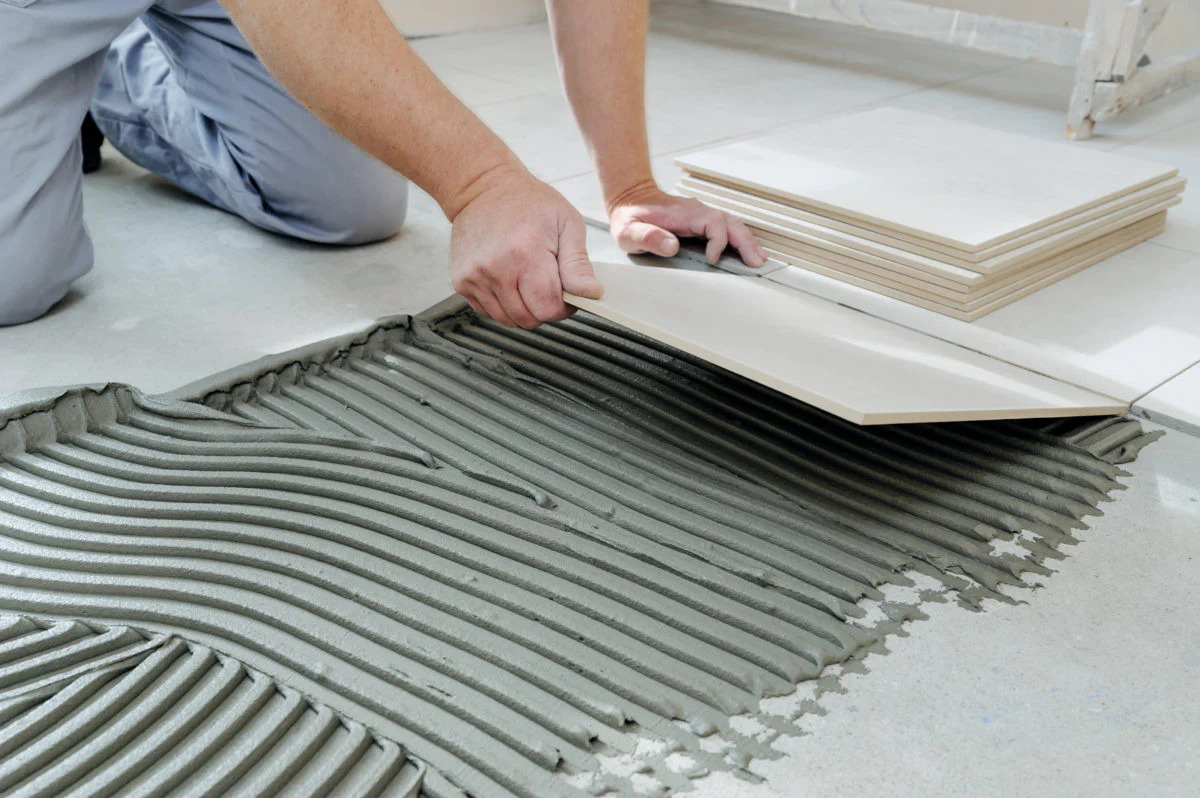
Once the adhesive is mixed, apply it to the surface using a notched trowel. Begin in one corner of the area and work in small sections, ensuring even coverage of adhesive. Hold the trowel at a 45-degree angle and spread the adhesive over the existing tiles, creating a thin and consistent layer.
Use the notched side of the trowel to create grooves in the adhesive. This helps to ensure proper adhesion and allows for air to escape when you press the tiles onto the surface. The size of the notches on the trowel will depend on the size and type of tiles you’re using, so refer to the manufacturer’s recommendations.
Remember to work in manageable sections, as the adhesive will begin to dry and form a skin after a certain amount of time. It’s crucial to tile while the adhesive is still wet to achieve a solid bond between the existing tiles and the new ones.
As you apply the adhesive, be mindful of the tile layout and spacing. Use tile spacers or wedges to maintain consistent spacing between the tiles. This will ensure a professional and uniform finish.
After applying the adhesive, allow it to dry for the recommended amount of time before moving forward with tile installation. This is typically a few hours, but it’s important to follow the specific drying guidelines provided by the adhesive manufacturer.
Applying the adhesive accurately and evenly is essential for a successful tile installation. Take your time, work in small sections, and ensure proper coverage and notch depth to achieve a strong bond between the existing tiles and the new ones.
Installing the New Tiles
With the adhesive applied and dried, it’s time to start installing the new tiles over the existing tiles. This step brings your vision to life and begins to transform the space into a fresh and updated area.
Before you begin, lay out a plan for your tile installation. Start by finding the center point of the area where you want to begin tiling. This will ensure that your tiles are evenly distributed and aligned with the room’s layout.
Spread a small amount of adhesive onto the back of the first tile using a notched trowel, ensuring the adhesive covers the entire surface. Press the tile firmly onto the adhesive, using a slight twisting motion to ensure a good bond. Pay attention to the spacing between the tiles, using tile spacers or wedges to maintain consistent and even gaps.
Continue applying adhesive and installing the tiles one by one, following your predetermined layout plan. Use a tile cutter or a wet saw to cut tiles to the desired size and shape when needed. Remember to wear safety goggles and follow proper cutting techniques when using these tools.
As you work, periodically check the level of the tiles using a spirit level to ensure they are flat and even. Adjust as necessary before the adhesive begins to set. Also, use a tile saw or a grinder to make any necessary adjustments to ensure a proper fit around corners, edges, and fixtures.
Take your time and be meticulous with your tile installation. Make sure each tile is properly placed and aligned before moving on to the next one. It’s important to maintain consistent spacing, levelness, and alignment throughout the entire installation process.
After installing all the tiles, allow the adhesive to cure according to the manufacturer’s instructions. This may take several hours or even days, depending on the specific adhesive used.
Once the adhesive has fully cured, remove the tile spacers or wedges and clean any excess adhesive from the tiles and grout lines. Use a damp sponge or cloth to wipe down the tiles and remove any residue.
Installing the new tiles requires patience, precision, and attention to detail. Take your time, follow proper installation techniques, and ensure each tile is properly placed for a beautiful and professional result.
Read more: How To Save Money On A Renovation
Grouting the Tiles
After the tiles have been installed, the next step in tiling over existing tiles is to grout the spaces between them. Grout not only fills in the gaps, but it also provides stability, prevents moisture penetration, and enhances the aesthetic appeal of the tiled surface.
Before you begin the grouting process, ensure that the adhesive has fully cured according to the manufacturer’s instructions. This will ensure a solid foundation for the grout and prevent any shifting or movement of the tiles.
Start by selecting the grout color that complements your tile design and overall aesthetic. Grout comes in various colors and finishes, allowing you to achieve different looks, from seamless and subtle to contrasting and bold. Consider the size of your grout lines as well, as this can either emphasize or minimize the appearance of the individual tiles.
Mix the grout according to the manufacturer’s instructions, using a clean bucket and a grout mixing paddle or a margin trowel. The consistency should be similar to peanut butter, easily spreadable but not too runny.
Apply the grout to the tiled surface using a grout float or a rubber grout trowel. Hold the float at a 45-degree angle and work the grout into the joints, ensuring the gaps are fully filled. Use a diagonal motion to prevent the grout from being pulled out of the joints. Remove any excess grout from the tile surface as you go.
After applying the grout, allow it to set for a few minutes, or as directed by the manufacturer. Do not wait too long before cleaning the excess grout, as it can become difficult to remove once it starts to harden.
Using a damp sponge or a grout haze remover, gently wipe away the excess grout from the tile surface. Rinse the sponge or cloth in clean water frequently to avoid smearing the grout. Take your time and ensure that the grout lines are cleaned well, leaving a consistent and smooth finish.
Allow the grout to dry completely for the recommended time. This can range from a few hours to several days, depending on the type of grout and environmental conditions.
Once the grout is fully dry, use a soft cloth or a grout sealer applicator to apply an appropriate grout sealer. This will help protect the grout from stains, water penetration, and discoloration. Follow the manufacturer’s instructions for the application and drying time of the grout sealer.
Grouting the tiles is one of the final steps in tiling over existing tiles. Take your time, follow proper grouting techniques, and ensure that each grout line is filled and cleaned properly for a polished and professional finish.
Sealing the Grout
After the grout has completely dried, the final step in tiling over existing tiles is to seal the grout. Sealing the grout is an important process that helps protect it from stains, moisture, and discoloration, ensuring its longevity and maintaining its appearance over time.
Before you begin, make sure the grout is fully cured, which typically takes about 48 to 72 hours. Check the manufacturer’s instructions for the specific drying time recommended for the grout you used.
Start by selecting a grout sealer that is appropriate for the type of grout you’ve used. There are various types of grout sealers available, including penetrating sealers and surface sealers. Penetrating sealers are absorbed into the grout, providing protection from within, while surface sealers create a protective barrier on the surface of the grout.
Read and follow the manufacturer’s instructions regarding the application of the grout sealer. Some sealers may require dilution, while others may be ready-to-use. Use a small brush or an applicator specifically designed for grout sealing.
Apply the grout sealer onto the grout lines, ensuring that it is evenly distributed. Work in small sections and avoid getting the sealer on the tiles. If any sealer gets on the tiles, wipe it off immediately to prevent staining or a hazy residue.
Allow the sealer to penetrate the grout for the recommended amount of time, typically about 10-15 minutes. This allows the sealer to be absorbed into the grout and provide maximum protection.
After the required time has passed, wipe away any excess sealer from the tile surface using a clean and dry cloth. Make sure to remove all traces of sealer from the tiles to avoid leaving a hazy film.
Allow the grout sealer to dry completely before exposing the tiled surface to water or foot traffic. This could take anywhere from a few hours to 24 hours, depending on the specific sealer and environmental conditions.
It’s important to note that grout sealers require periodic reapplication. The frequency of resealing depends on the type of sealer used and the amount of usage the tiled surface receives. Refer to the manufacturer’s recommendations for the resealing schedule.
Sealing the grout is the final step in tiling over existing tiles. This important process protects the grout, prolongs its lifespan, and keeps the tiled surface looking clean and fresh. Take the time to seal the grout properly for long-lasting and beautiful results.
Conclusion
Tiling over existing tiles can be a cost-effective and time-saving solution to update the look of your space. By assessing the condition of the existing tiles, preparing the surface, and following the proper steps, you can achieve a successful and long-lasting tile installation.
Tiling over tiles allows you to avoid the hassle of tile removal and reduce the overall cost of your renovation project. It also provides an opportunity to transform the aesthetic of your space, whether it’s creating a modern, sleek look or adding a touch of traditional elegance.
Throughout the tiling process, it’s crucial to pay attention to the details. Thoroughly clean and sand the existing tiles to ensure proper adhesion. Apply a primer to create a strong bond between the existing tiles and the adhesive. Choose the right tiles to align with your design vision and functional needs. Apply the adhesive evenly, ensuring each tile is placed with care. Grout the tiles meticulously to achieve a professional finish, and seal the grout to protect it from stains and moisture.
Remember that successful tiling over tiles requires patience, precision, and attention to detail. Whether you’re tackling a bathroom, kitchen, or any other tiled space, taking the time to properly prepare and execute the tiling process will yield beautiful and enduring results.
As with any home improvement project, it’s always a good idea to consult professionals or seek advice from experienced individuals to ensure you are following the correct procedures and using the appropriate materials for your specific tiling project.
So, why go through the hassle and expense of removing the existing tiles when you can achieve stunning results by tiling over them? Embrace the opportunity to revitalize your space with a fresh, new look and enjoy the satisfaction of a successful DIY tiling project.
Frequently Asked Questions about How To Tile Over Tiles To Save Time And Money
Was this page helpful?
At Storables.com, we guarantee accurate and reliable information. Our content, validated by Expert Board Contributors, is crafted following stringent Editorial Policies. We're committed to providing you with well-researched, expert-backed insights for all your informational needs.


0 thoughts on “How to Tile Over Tiles To Save Time And Money”