Home>Articles>How To Install Peel And Stick Tile Over Existing Tile

Articles
How To Install Peel And Stick Tile Over Existing Tile
Modified: February 25, 2024
Learn how to install peel and stick tile over your existing tile with our step-by-step guide. Browse our articles for expert tips and advice.
(Many of the links in this article redirect to a specific reviewed product. Your purchase of these products through affiliate links helps to generate commission for Storables.com, at no extra cost. Learn more)
Introduction
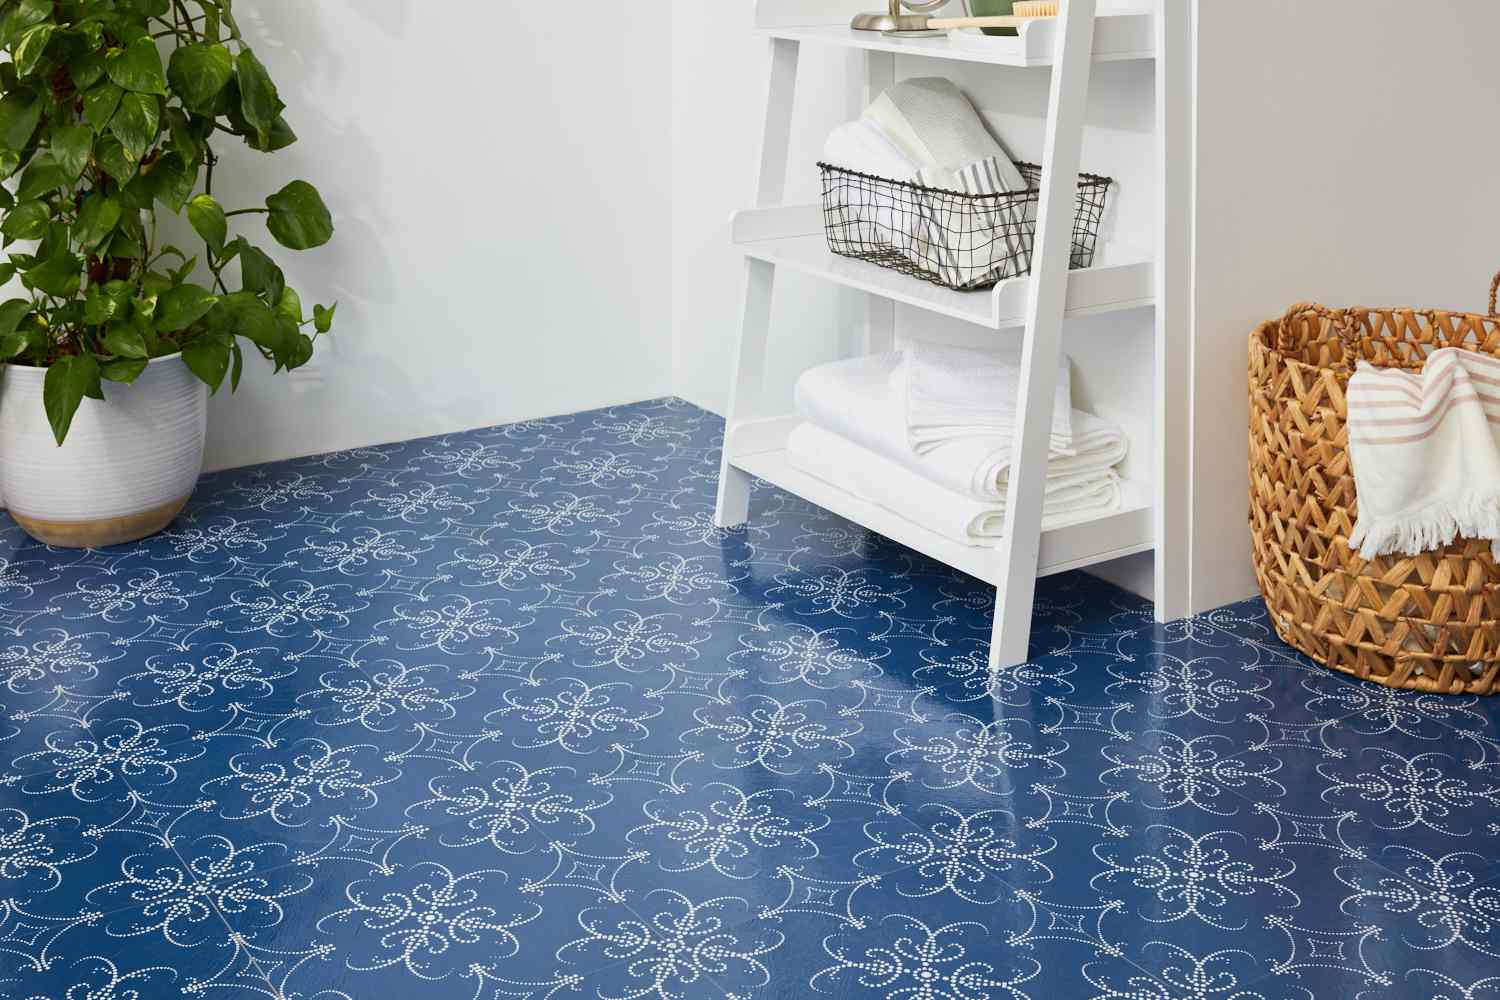
Installing peel and stick tile over existing tile is a cost-effective and convenient way to upgrade the look of your space without the hassle and expense of removing the old tile. Whether you’re looking to refresh a tired bathroom, kitchen, or any other tiled area, peel and stick tile offers a quick and easy solution. In this article, we will guide you through the process of installing peel and stick tile over existing tile, covering everything from preparation to installation.
Peel and stick tile, also known as self-adhesive or adhesive-backed tiles, is a type of flooring that comes with a pre-applied adhesive on the back. This adhesive allows the tile to stick directly to the existing tile surface, creating a sturdy and durable bond.
One of the main advantages of installing peel and stick tile over existing tile is its affordability. It eliminates the need to remove the existing tile, which can be time-consuming and costly. Instead, you can achieve a fresh new look by simply applying the peel and stick tiles directly on top. This makes it an ideal choice for those on a budget or looking for a temporary renovation option.
Another benefit is the convenience and ease of installation. Peel and stick tiles are designed to be user-friendly, even for beginners. With their self-adhesive backing, they can be easily applied without the need for special tools or professional assistance. This makes it a great DIY project that can be completed over a weekend.
Additionally, peel and stick tile comes in a wide range of designs, colors, and patterns, allowing you to customize your space to your personal style and preference. Whether you prefer a sleek and modern look or a more traditional aesthetic, there is a peel and stick tile option to suit your taste.
Before diving into the installation process, it’s important to properly prepare the existing tile surface to ensure a successful and long-lasting result. This includes cleaning the tile thoroughly, sanding the surface to create a better adhesive bond, and applying a primer if necessary.
In the following sections, we will go into detail on each step of the installation process, guiding you through the preparation, measuring and cutting, and the application of the peel and stick tiles. We will also provide tips on how to seal the edges and seams to achieve a professional-looking finish.
By the end of this article, you will have the knowledge and confidence to transform your space with peel and stick tile, giving your tiles a fresh and stylish update without the hassle of removing and replacing them.
Key Takeaways:
- Transform your space with peel and stick tile, a cost-effective and convenient solution for upgrading without the hassle of removing existing tile. Enjoy design flexibility, easy installation, and durability.
- Achieve a professional and visually appealing installation by properly preparing the existing tile surface, cleaning the new peel and stick tiles, measuring and cutting accurately, and sealing the edges and seams.
Read more: How To Install Peel And Stick Tile
Benefits of Installing Peel and Stick Tile Over Existing Tile
When it comes to renovating or updating your space, installing peel and stick tile over existing tile offers numerous benefits. Not only is it a cost-effective option, but it also provides convenience, flexibility, and a wide range of design possibilities. Let’s explore the advantages of choosing peel and stick tile for your next project.
1. Cost-Effective: One of the primary benefits of installing peel and stick tile over existing tile is its affordability. Traditional tile replacement can be expensive, requiring professional labor and additional materials. By opting for peel and stick tile, you can save a significant amount of money by avoiding the costs associated with tile removal.
2. Time-Saving: Removing existing tile can be a time-consuming process, involving the use of specialized tools and techniques. With peel and stick tile, the installation process is quick and straightforward, allowing you to complete the project in a fraction of the time.
3. Easy Installation: Peel and stick tile is designed for easy installation, making it accessible to both beginners and experienced DIY enthusiasts. The self-adhesive backing eliminates the need for additional adhesives or complicated tools, simplifying the process and allowing anyone to achieve professional-looking results.
4. Versatility: Peel and stick tile comes in a wide variety of designs, colors, and patterns, offering endless possibilities for customization. Whether you prefer a classic ceramic look or a modern mosaic design, you can find peel and stick tiles to suit your style and enhance the aesthetic of your space.
5. Temporary Renovation: If you’re looking for a temporary renovation option or want to experiment with different tile styles, peel and stick tile is the perfect solution. It allows you to easily update your space without the long-term commitment or difficulty of removing and replacing traditional tiles.
6. Durability: Though peel and stick tile may seem lightweight, it is engineered to provide durability and withstand daily wear and tear. The adhesive backing ensures a secure and long-lasting bond, creating a sturdy floor or wall surface that can withstand foot traffic, moisture, and cleaning.
7. Easy Maintenance: Peel and stick tile is designed to be easy to clean and maintain. With its smooth and waterproof surface, a simple wipe-down with mild detergent and water is usually enough to keep it looking clean and vibrant. This convenience makes peel and stick tile a popular choice for high-traffic areas such as kitchens and bathrooms.
8. Eco-Friendly Option: By installing peel and stick tile over existing tile, you’re promoting sustainability by reducing waste. Rather than sending the old tiles to a landfill, you can repurpose your space with an eco-friendly solution.
Installing peel and stick tile over existing tile offers a plethora of benefits that make it an attractive choice for homeowners and DIY enthusiasts. From cost savings and ease of installation to design flexibility and durability, this versatile flooring option provides a convenient and affordable way to transform your space with minimal time and effort.
Preparing the Existing Tile Surface
Before installing peel and stick tile over existing tile, it is crucial to properly prepare the surface. This preparation ensures that the adhesive of the new tiles adheres securely and provides a smooth and long-lasting finish. Below are the essential steps to take when preparing the existing tile surface:
- Clean the Tiles: Start by thoroughly cleaning the existing tiles to remove any dirt, grime, grease, or residue. Use a mild detergent or tile cleaner and a sponge or mop to scrub the tiles. Pay attention to the grout lines as well. Rinse the tiles with clean water and allow them to dry completely before proceeding to the next step.
- Sand the Surface: Next, you’ll need to create a rough surface for better adhesion. Use a medium-grit sandpaper or a sanding block to lightly roughen the surface of the existing tiles. This step helps to remove the gloss and allows the adhesive on the peel and stick tiles to grip better. Sanding also helps with leveling any uneven areas or rough edges. After sanding, be sure to clean up any dust or debris left behind.
- Repair Damaged Tiles and Grout: Inspect the existing tiles for any cracks, chips, or loose sections. If you come across any damaged tiles, replace them before installing the peel and stick tiles. Additionally, check the grout lines for any cracks or gaps. Fill in these areas with grout and ensure that it is completely dried and hardened before moving forward.
- Check for Moisture Issues: Before proceeding with the installation, it is essential to verify that there are no underlying moisture issues with the existing tile. Moisture can compromise the adhesive bond and lead to the growth of mold or mildew. Use a moisture meter to check the moisture levels or perform a simple plastic sheet test on the tiles. If there are signs of excessive moisture, address the problem before proceeding with the peel and stick tile installation.
- Apply a Primer (if necessary): Depending on the condition of the existing tile and the type of peel and stick tile you are using, applying a primer may be beneficial. Primer helps to create a better bonding surface, particularly if you are installing the peel and stick tile in high-moisture areas such as bathrooms or kitchens. Follow the manufacturer’s instructions when applying the primer and allow it to dry completely before moving on to the next step.
Properly preparing the existing tile surface ensures that the peel and stick tiles adhere securely and that any underlying issues are addressed. Taking the time to clean, sand, repair, check for moisture, and apply a primer if necessary will set the foundation for a successful installation and a beautiful finished result.
Cleaning the Existing Tile
Before installing peel and stick tile over existing tile, it is crucial to thoroughly clean the surface. Cleaning the existing tiles ensures that the adhesive on the peel and stick tiles adheres properly and provides a smooth and long-lasting finish. Follow these steps to effectively clean the existing tile:
- Gather the Right Supplies: Start by gathering all the necessary cleaning supplies. You will need a mild detergent or tile cleaner, a mop or sponge, a bucket of warm water, and a clean, lint-free cloth or towel.
- Sweep or Vacuum: Begin by sweeping or vacuuming the tile surface to remove any loose dirt, dust, or debris. Pay attention to the corners, edges, and grout lines to ensure thorough cleaning.
- Mix the Cleaning Solution: In the bucket of warm water, add a small amount of mild detergent or tile cleaner. Be sure to read the instructions on the cleaner for the correct dilution ratio. Mix the solution until it is well combined.
- Start Cleaning: Dip the mop or sponge into the cleaning solution and wring out any excess liquid. Begin mopping the tile surface, starting from one corner and working your way towards the opposite end. Apply gentle pressure and scrub any stained or stubborn areas. Ensure that you cover the entire tile surface, including the grout lines.
- Pay Attention to Grout Lines: Grout can become discolored or stained over time. To clean the grout lines, use a small brush or an old toothbrush dipped in the cleaning solution. Scrub the grout lines in a circular motion, applying some extra pressure on stained areas. Rinse the brush regularly in the cleaning solution to ensure effective cleaning.
- Rinse the Tiles: After scrubbing the tiles and grout, rinse the mop or sponge in clean water and wring out any excess liquid. Go over the tile surface again, this time using clean water to remove any soap residue or cleaner. Rinse the mop or sponge regularly to ensure that you are not spreading dirty water across the tiles.
- Dry the Surface: Once you have completed the cleaning process, use a clean, lint-free cloth or towel to dry the tile surface. Ensure that the tiles are completely dry before proceeding with the peel and stick tile installation. Any remaining moisture can hinder the adhesive bond between the old and new tiles.
Cleaning the existing tile is an essential step before installing peel and stick tile. By removing dirt, grime, and grease, you create a clean surface that allows the adhesive on the peel and stick tiles to bond effectively. Following these steps will ensure that your tile surface is ready for the next phase of the installation process.
Sanding the Existing Tile
When installing peel and stick tile over existing tile, it is important to sand the surface to create a better adhesive bond. Sanding the existing tile helps remove the glossy finish and provides a textured surface for the peel and stick tiles to adhere to. Here is a step-by-step guide on how to sand the existing tile:
- Gather the Necessary Supplies: Before you begin, gather the supplies you will need. You will need medium-grit sandpaper or a sanding block, safety goggles, a dust mask, and a clean cloth or towel.
- Prepare the Work Area: Ensure you have a well-ventilated work area and cover any nearby surfaces or furniture to protect them from dust and debris. Put on your safety goggles and dust mask for protection.
- Sand the Tile: Start by sanding the surface of the existing tile. Hold the sandpaper or sanding block at a slight angle and apply light to moderate pressure. Move the sandpaper or sanding block in a circular motion, covering the entire tile surface. Avoid pressing too hard, as that can damage the tile.
- Focus on Problem Areas: Pay extra attention to areas that have a glossy or slippery finish, such as those near the edges or corners of the tiles. These areas may require additional sanding to remove the gloss completely.
- Check the Progress: Stop sanding periodically to assess the progress. Wipe away the dust and debris with a clean cloth or towel to see if the glossy finish has been sufficiently removed. If necessary, continue sanding until the tiles have a slightly rough texture.
- Remove the Dust: After sanding, it is important to remove the dust and debris from the surface. Use a vacuum cleaner or a damp cloth to carefully remove any remaining particles from the tiles. Ensure that the surface is clean and free of dust before moving on to the next step.
Sanding the existing tile helps create a roughened surface that promotes better adhesion for the peel and stick tiles. The textured surface allows the adhesive to bond effectively, providing a secure and long-lasting installation.
Remember to take proper precautions when sanding, such as wearing protective eyewear and a dust mask to avoid inhaling particles. Keep the work area well-ventilated and clean up any dust or debris promptly to maintain a safe and clean environment.
By following these steps and adequately sanding the existing tile, you are ensuring optimal surface preparation for the successful installation of peel and stick tiles.
Applying Primer
Applying a primer is an important step when installing peel and stick tile over existing tile, especially if you are working with a high-moisture area or if the existing tile has a particularly smooth surface. The primer helps improve the adhesive bond between the old and new tiles, ensuring a strong and durable installation. Follow these steps to apply primer effectively:
- Gather the Supplies: Before you begin, gather the necessary supplies. You will need a tile primer recommended for your specific peel and stick tile and a paintbrush or roller for application.
- Prepare the Surface: Start by thoroughly cleaning and sanding the existing tile, as we discussed in previous sections. Ensure that the surface is dry and free of any dust or debris before proceeding with the primer application.
- Mix the Primer (if required): If your primer requires mixing, read the manufacturer’s instructions carefully and follow the recommended dilution ratio. Prepare the primer mixture accordingly in a separate container or bucket.
- Apply the Primer: Using a paintbrush or roller, apply a thin and even layer of primer onto the surface of the existing tile. Work in small sections to ensure thorough coverage. Be careful not to oversaturate the surface, as excessive primer can affect the adhesive bond.
- Allow Drying Time: Once the primer is applied, allow it to dry completely. Follow the manufacturer’s instructions for the recommended drying time, as it may vary depending on the primer used. Avoid walking or placing any heavy objects on the primed surface during this time.
- Inspect the Primer Coat: After the initial coat of primer has dried, inspect the surface for any missed spots or areas that may require additional primer. Apply a second coat to these areas if needed, ensuring consistent coverage across the entire surface.
- Final Drying Period: After applying the final coat of primer, allow sufficient time for it to fully dry and cure. This will ensure that the primer creates a strong bond between the existing tile and the peel and stick tiles. Refer to the manufacturer’s instructions for the recommended drying time.
Applying primer before installing peel and stick tile helps promote better adhesion and enhances the durability of the installation. The primer acts as a bonding agent, providing a strong foundation for the adhesive to adhere to.
Remember to choose a tile primer that is specifically recommended for use with peel and stick tiles. Following the manufacturer’s instructions and allowing adequate drying time will ensure that the primer performs optimally and sets the stage for a successful installation.
By following these steps and properly applying primer, you are taking an extra precautionary measure to enhance the longevity and stability of your peel and stick tile installation.
Before installing peel and stick tile over existing tile, make sure the existing tile is clean, dry, and free of any loose or damaged pieces. Use a primer to ensure the adhesive sticks properly to the old tile surface.
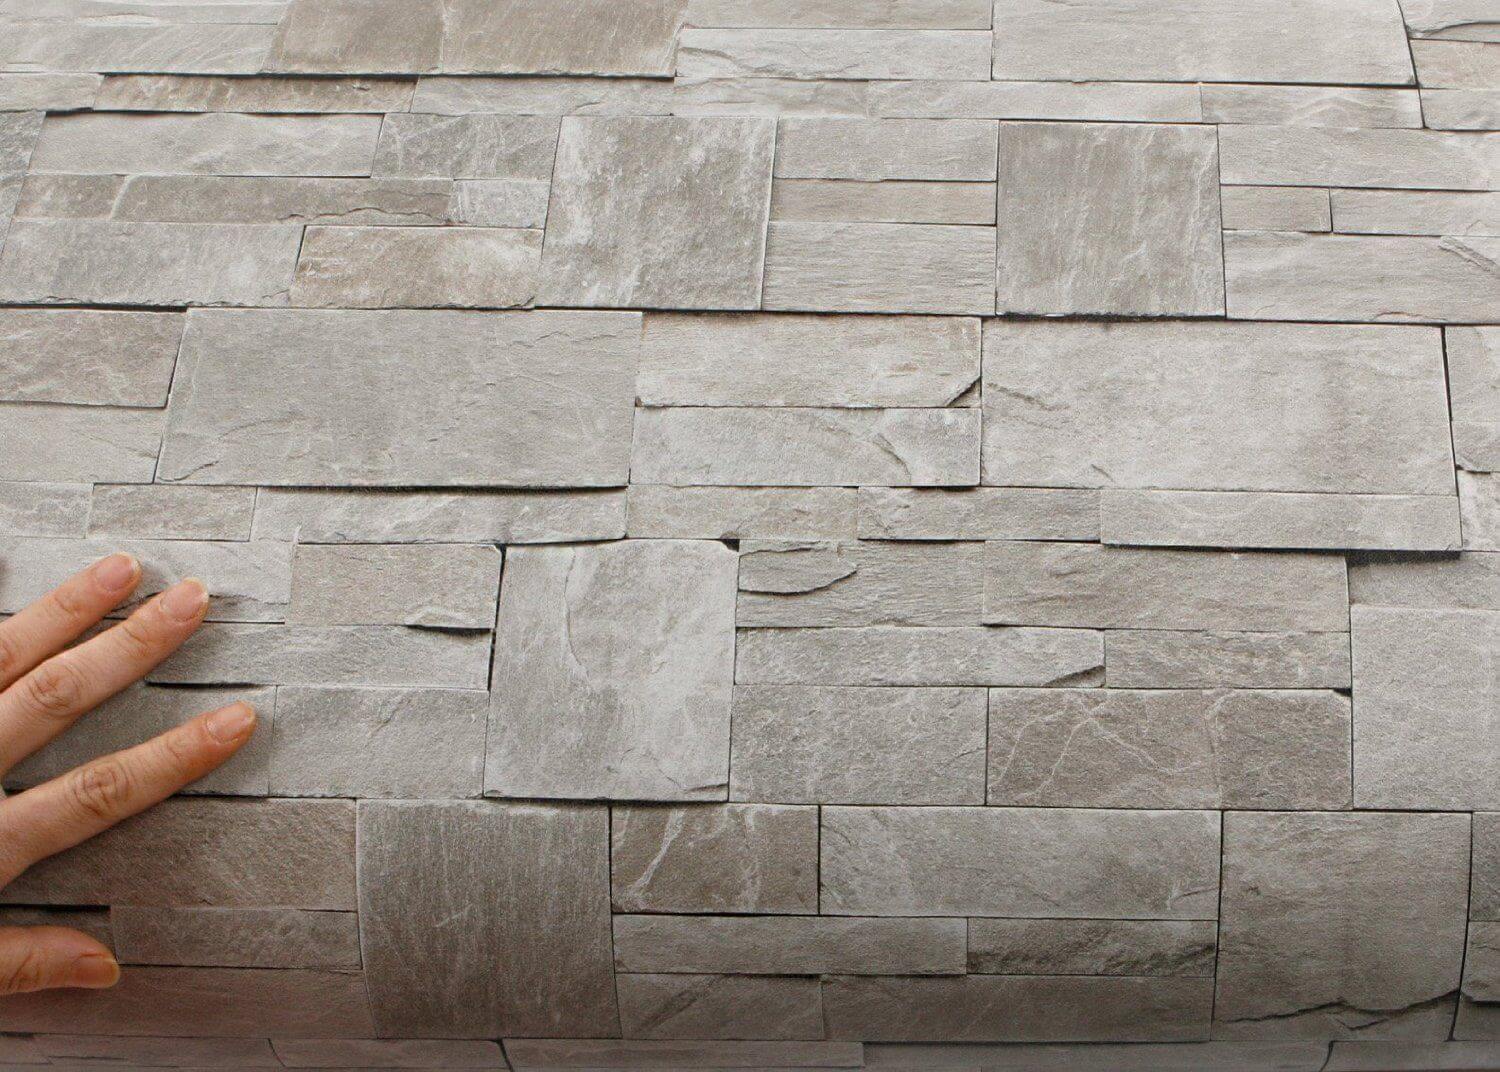
Choosing the Right Peel and Stick Tile
When it comes to installing peel and stick tile over existing tile, selecting the right peel and stick tile is essential for achieving the desired aesthetic and ensuring a successful installation. With a wide range of styles, colors, and materials to choose from, consider the following factors to make an informed decision:
- Style: Consider the overall style and theme of your space. Whether you prefer a modern, rustic, classic, or contemporary look, choose a peel and stick tile that complements your existing décor. Take into account the color scheme, patterns, and textures to achieve a cohesive and harmonious design.
- Material: Peel and stick tiles are available in various materials, including vinyl, ceramic, glass, and natural stone. Each material has its own characteristics, durability, and maintenance requirements. Determine the best material based on your specific needs and the area where the tiles will be installed. For example, vinyl is a popular choice for high-moisture areas, while ceramic or natural stone may be preferred in more formal or decorative spaces.
- Size and Shape: Peel and stick tiles come in different sizes and shapes, such as square, rectangular, hexagon, or mosaic. Consider the size of your existing tile and the desired layout. Smaller tiles can create intricate patterns, while larger tiles can provide a sleek and modern aesthetic. Additionally, consider the size of the room and how the tiles will visually impact the overall space.
- Thickness: Pay attention to the thickness of the peel and stick tiles. Thicker tiles may be more durable and better suited for high-traffic areas, while thinner tiles can be easier to cut and install. Consider the balance between durability and flexibility based on your specific requirements.
- Adhesive Quality: Look for peel and stick tiles with a strong adhesive backing. A high-quality adhesive ensures that the tiles stay securely in place, even in areas prone to moisture or temperature fluctuations. Read product reviews and recommendations to gauge the adhesive performance and reliability of the peel and stick tiles you are considering.
- Budget: Set a budget for your project and look for peel and stick tiles that fall within your price range. Consider the cost per square foot and determine the quantity of tiles needed to cover your space. Remember to factor in any additional tools or materials required for installation, such as grout or sealant.
Take the time to research and compare different peel and stick tile options before making your final decision. Consider consulting with professionals or seeking advice from experienced tile installers to gain insights into the best choice for your specific project.
Ultimately, choosing the right peel and stick tile will contribute to the overall success and satisfaction of your installation. By considering factors such as style, material, size, adhesive quality, and budget, you can make a well-informed decision and achieve a beautiful and long-lasting result.
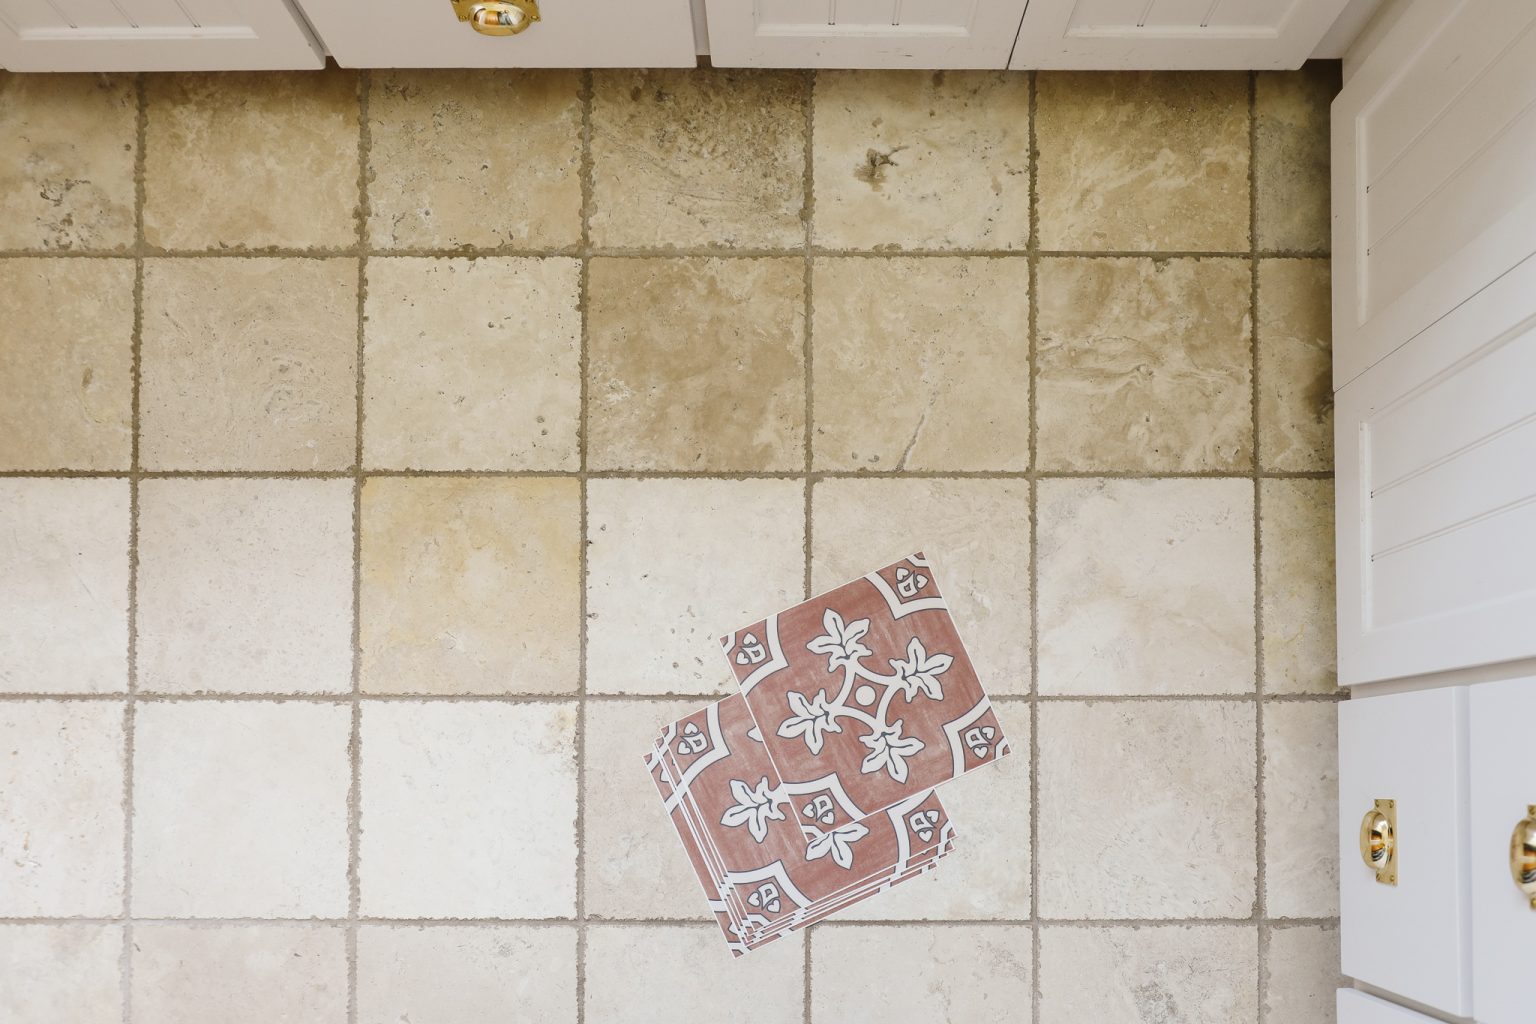
Preparing the New Peel and Stick Tile
Before installing the new peel and stick tile over existing tile, it is important to properly prepare the tiles themselves. Preparing the new peel and stick tile ensures that they are ready to be applied and maximizes their adhesive strength. Here are the steps to effectively prepare the new peel and stick tile:
- Unpack and Inspect: Begin by unpacking the peel and stick tile and inspecting each tile for any visible defects, damages, or irregularities. It is essential to identify any issues before installation to avoid any problems during the process. If you come across any damaged or defective tiles, set them aside and contact the manufacturer for assistance.
- Acclimate the Tiles: Depending on the material of the peel and stick tiles, it may be necessary to acclimate them to the room’s temperature and humidity. Follow the manufacturer’s guidelines regarding acclimation time and conditions. This step helps prevent any expansion or contraction of the tiles after installation.
- Trim off Excess Edges (if needed): Some peel and stick tiles may have excess edges or borders that need to be trimmed off. Use a sharp utility knife or scissors to carefully trim away any excess material. Ensure that the cuts are neat and even for a clean final result. Take caution and follow the manufacturer’s instructions to avoid damaging the tiles.
- Check for Proper Alignment: Verify that the tiles are aligned correctly before installation. Measure and compare the dimensions of the tiles to ensure they are consistent. You can also visually inspect the tiles to ensure they are in the desired pattern or design. If necessary, make any adjustments or rearrangements before proceeding.
- Allow Tiles to Flatten (if needed): Some peel and stick tiles may arrive rolled or folded, which can result in curled edges or uneven surfaces. To flatten the tiles, place them in a room with a stable temperature and leave them undisturbed for a period of time following the manufacturer’s recommendations. This step allows the tiles to flatten and settle before installation.
- Keep Tiles in a Clean and Dust-Free Environment: Maintain a clean and dust-free area to store the tiles before installation. Ensure that the tiles are not exposed to excessive dust, dirt, moisture, or direct sunlight. Keeping the tiles in a controlled environment helps preserve their quality and adhesive integrity.
Preparing the new peel and stick tile is an important step in ensuring a smooth and successful installation process. By inspecting the tiles, acclimating them to the environment, trimming excess edges, aligning them correctly, allowing for flattening, and storing in a clean environment, you are setting the stage for a seamless application of the peel and stick tiles.
By following these steps and properly preparing the new peel and stick tile, you can proceed with confidence, knowing that your installation will result in a visually appealing and resilient finished product.
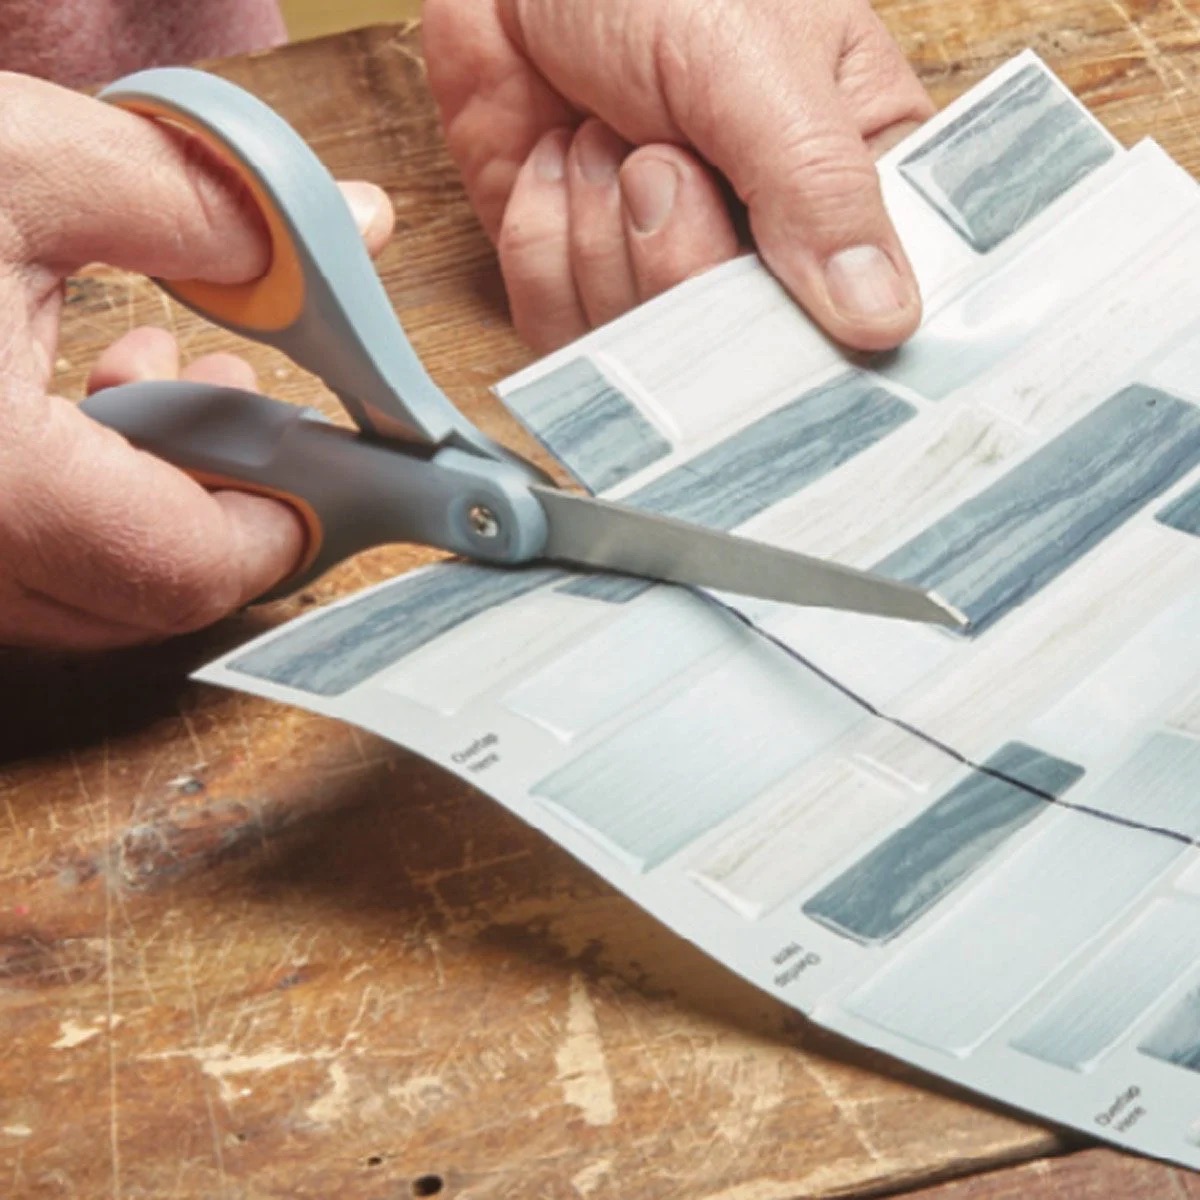
Measuring and Cutting the Peel and Stick Tile
Accurate measurements and precise cutting are crucial steps in the installation of peel and stick tile. Properly measuring and cutting the tiles ensure a seamless fit and a professional-looking finish. Here are the steps to effectively measure and cut the peel and stick tile:
- Gather the Necessary Tools: Before you begin, gather the tools you will need for measuring and cutting the peel and stick tile. These may include a tape measure, a pencil or marker, a straightedge or ruler, and a sharp utility knife or tile cutter.
- Measure the Area: Take precise measurements of the space where the peel and stick tile will be installed. Measure the length and width of the area and calculate the total square footage needed. Ensure that your measurements account for any fixtures, corners, or irregularities in the space.
- Transfer Measurements to the Tile: Using a pencil or marker, transfer the measurements onto the backing of the peel and stick tile. Make sure to mark the appropriate dimensions accurately. Double-check your measurements before proceeding with cutting.
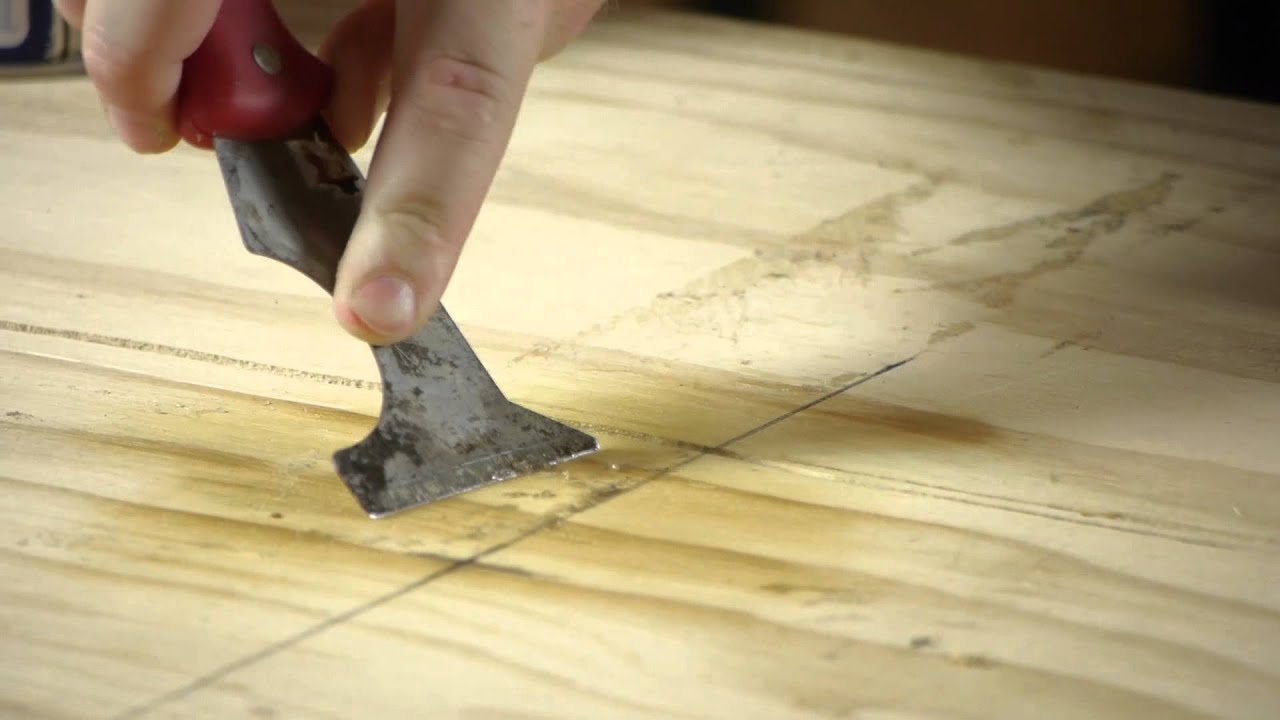
- Cut the Tile: Place the tile on a flat surface and align a straightedge or ruler along your marked lines. Using a sharp utility knife or tile cutter, carefully score the surface of the tile along the straightedge. Apply downward pressure to ensure a clean and precise cut. Repeat the scoring process as needed to achieve the desired cut.
- Snap or Finish the Cut: Once you have scored the tile, you can either snap it along the score line (if using a tile cutter) or finish the cut with a utility knife. Be cautious and follow the manufacturer’s instructions for snapping or finishing the cut. As you work, ensure that the cut edges are clean and straight.
- Test the Fit: After cutting a tile, carefully place it in its designated spot to check the fit. Ensure that the tile aligns with the surrounding tiles and that there are no gaps or overlaps. If necessary, make further adjustments or recut the tile until you achieve a proper fit.
- Repeat the Process: Repeat the measuring and cutting process for each peel and stick tile needed to cover the entire area. Take your time and be patient, ensuring accuracy with each cut. Remember to measure and cut extra tiles to accommodate any fixtures, corners, or intricate patterns.
Measuring and cutting the peel and stick tile accurately is crucial for achieving a seamless and professional-looking installation. By following these steps and using the proper tools, you can ensure that each tile fits perfectly in its designated spot and creates a cohesive and visually appealing overall design.
Remember to work slowly and cautiously when cutting the peel and stick tile, prioritizing safety and accuracy. Take breaks if needed, and double-check your measurements before proceeding. With careful attention to detail, measuring, and cutting, your installation will yield excellent results.
Read more: What Is Peel And Stick Tile
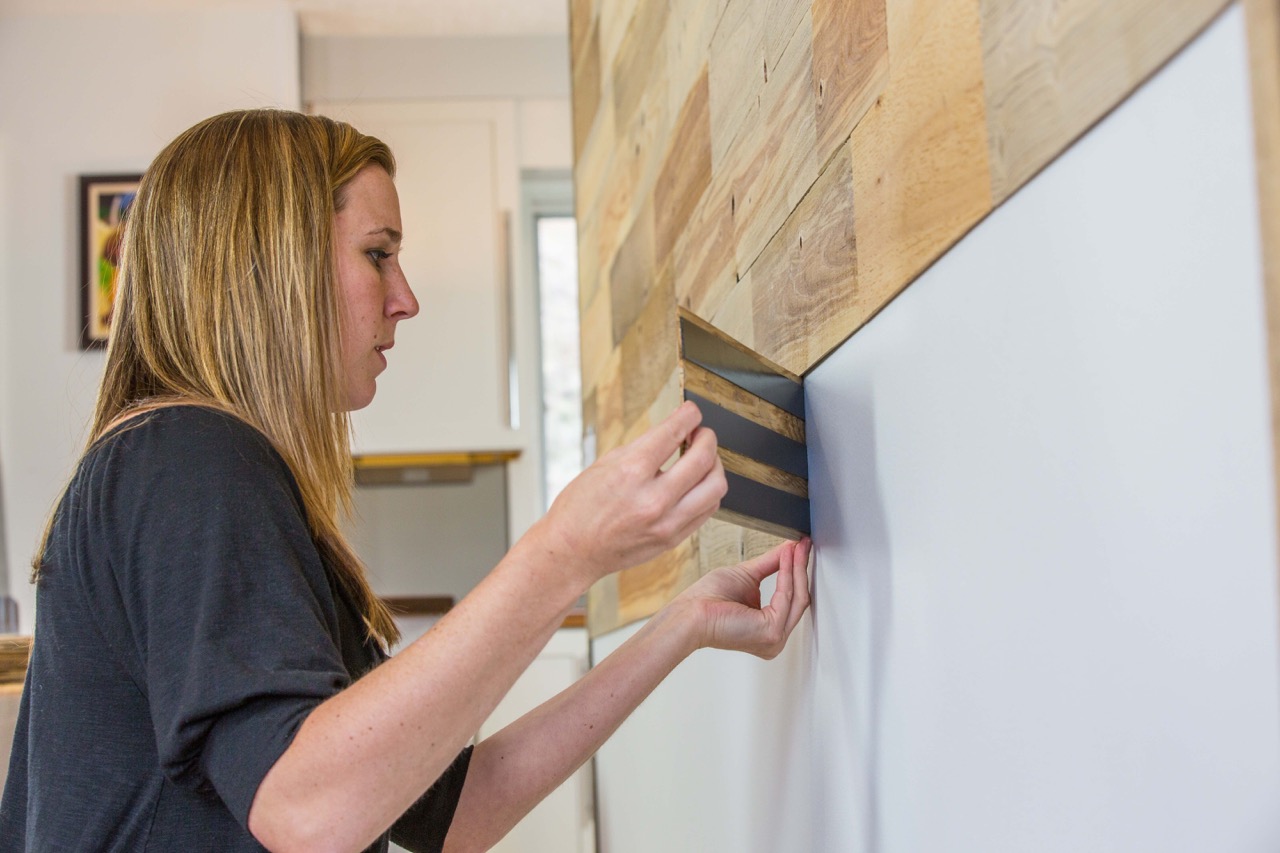
Installing the Peel and Stick Tile
Now that you have prepared the existing tile, cleaned the new peel and stick tiles, and measured and cut them to size, it’s time to move onto the installation phase. Installing peel and stick tile over existing tile is a straightforward process that can be accomplished with a few simple steps. Follow the instructions below to ensure a successful installation:
- Start with a Clean Surface: Ensure that the existing tile surface is clean and free of any dust, debris, or moisture. Any contaminants on the surface can hinder the adhesive bond, so it’s crucial to have a clean and dry base.
- Remove the Backing: Peel back a small portion of the backing from one corner of a peel and stick tile. Be careful not to touch the adhesive with your fingers. As you continue applying the tile, gradually remove the backing as you go, revealing the sticky adhesive beneath.
- Position and Place: Align the exposed adhesive side of the tile with the desired spot on the existing tile surface. Begin with one corner or edge of the area and press the tile firmly into place. Use a rolling pin or a flat, sturdy object to ensure proper adhesion and to smooth out any air bubbles or wrinkles.
- Continue Installation: Continue to peel back the backing from the tile and press it firmly onto the existing tile surface, working in a systematic pattern. Ensure that each tile is aligned properly with the adjacent tiles, maintaining even spacing and alignment throughout the installation. Use a straightedge or ruler to guide you, if necessary.
- Apply Pressure: Once a tile is in position, apply firm pressure across the entire surface, using a rolling pin or flat object. This will help create a strong bond between the peel and stick tile and the existing tile.
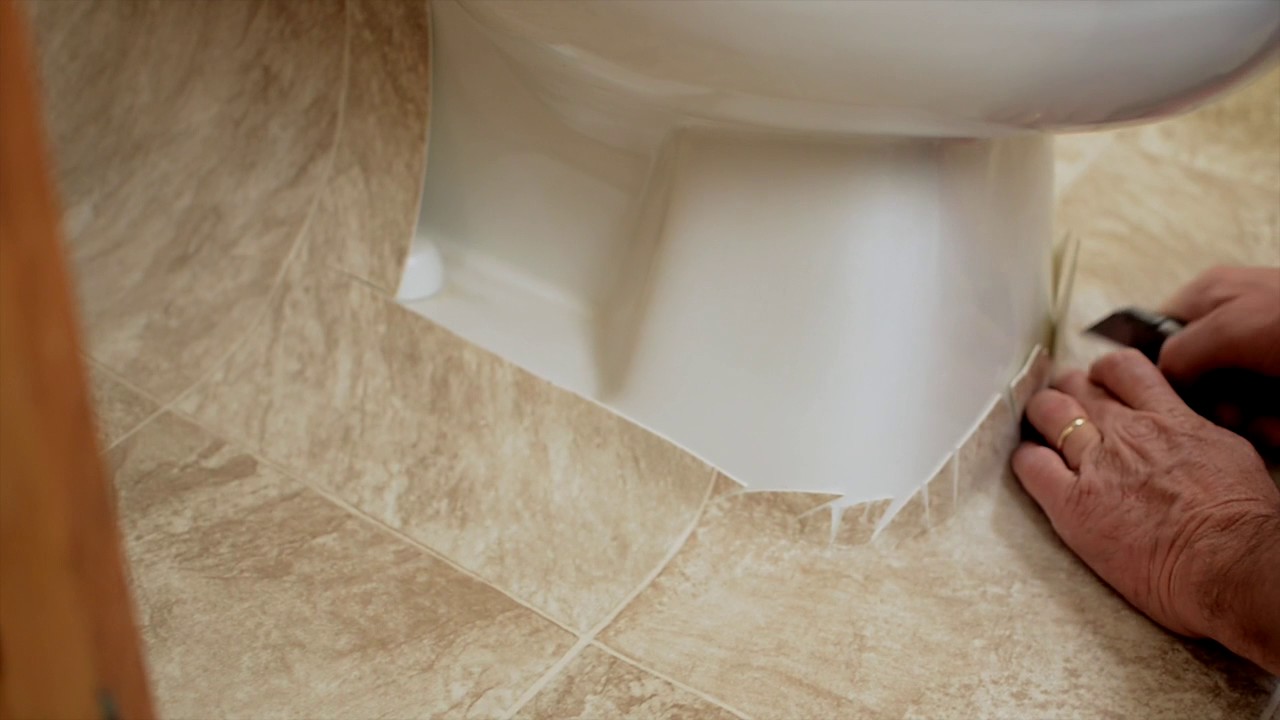
- Trim and Adjust as Needed: As you reach the edges of the installation area, you may need to trim or adjust the size of some peel and stick tiles. Use a sharp utility knife or scissors to carefully trim the tiles to fit properly. Ensure that the edges are clean and straight for a professional finish.
- Complete the Installation: Repeat the process of positioning, pressing, and trimming until you have installed all the peel and stick tiles to cover the entire area. Take your time and check the alignment and spacing between tiles regularly to maintain a uniform look.
Remember to work carefully and slowly during the installation process, ensuring each tile is pressed firmly onto the surface with no visible air bubbles or wrinkles. Take breaks as needed and step back occasionally to assess the overall progress and alignment of the installed tiles.
After completing the installation, allow the peel and stick tiles to adhere to the existing tile surface for the recommended time specified by the manufacturer. This will ensure a strong and durable bond between the two surfaces.
Congratulations! You have successfully installed peel and stick tiles over the existing tile, transforming the look of your space with minimal effort and expense. Now, move on to the final step of sealing the edges and seams.
Sealing the Edges and Seams
After installing peel and stick tiles over existing tile, it is important to seal the edges and seams to ensure a professional and finished look. Sealing the edges and seams not only enhances the appearance of the installation but also provides added protection against moisture and dirt. Here’s how you can effectively seal the edges and seams:
- Gather the Necessary Supplies: Before you start, gather the supplies needed for sealing the edges and seams. This may include a high-quality tile sealant or caulk, a caulking gun, a putty knife or scraper, and a damp cloth for cleaning.
- Prepare the Surface: Ensure that the surface is clean and dry before applying the sealant. Use a damp cloth to wipe away any dirt, dust, or debris that may have accumulated during the installation process. Allow the surface to dry completely before proceeding.
- Load the Caulking Gun: If using a caulking gun, load the cartridge of sealant into the gun and cut the tip to the desired width. Ensure that the opening is wide enough to create a smooth and consistent bead of sealant.
- Apply the Sealant: Starting from one corner or edge, carefully apply a thin and even bead of sealant along the edge or seam where the peel and stick tiles meet the existing tile. Hold the caulk gun at a 45-degree angle and steadily move along the edge, squeezing the trigger to release the sealant. Maintain a consistent pressure to ensure a uniform application.
- Smooth and Shape the Sealant: After applying the sealant, use a putty knife or scraper to smooth and shape the bead of sealant. Hold the tool at a slight angle and gently run it along the sealed edge or seam to create a neat and flush finish. Wipe away any excess sealant with a damp cloth before it dries.
- Continue Sealing: Repeat the process for all edges and seams that require sealing. Take your time to maintain a steady hand and ensure even application and smooth finishing. Pay attention to corners, transitions, and areas where the peel and stick tiles meet fixtures or walls.
- Allow the Sealant to Cure: Once the edges and seams are sealed, allow the sealant to cure according to the manufacturer’s instructions. This curing process ensures that the sealant forms a durable and watertight bond.
Sealing the edges and seams of the peel and stick tile installation provides a polished and professional appearance while offering additional protection against moisture and dirt infiltration. It helps prolong the lifespan of the installation and ensures that it remains visually appealing for years to come.
Remember to follow the manufacturer’s instructions regarding cure time and any specific cleaning or maintenance recommendations for the sealant used. Proper maintenance and periodic inspections of the sealed edges and seams will help maintain their integrity and continue to protect the installation over time.
By following these steps to seal the edges and seams, you are completing the installation process with the finishing touch that enhances the overall look and durability of your peel and stick tile installation.
Conclusion
Installing peel and stick tile over existing tile offers a convenient, cost-effective, and transformative solution for upgrading the look of your space. By following the steps outlined in this article, you can achieve a professional and visually appealing installation while avoiding the time-consuming and costly process of removing the old tile.
Throughout the installation process, it is crucial to properly prepare the existing tile surface, clean the new peel and stick tiles, measure and cut them accurately, and apply them carefully and securely to the existing tile. These steps, along with sealing the edges and seams, ensure a successful and long-lasting installation.
The benefits of choosing peel and stick tile go beyond cost savings and convenience. With a wide range of designs, materials, and styles available, you can customize your space to reflect your personal taste and aesthetic preferences. Peel and stick tile also offers versatility as a temporary renovation option, allowing you to experiment with different styles without the commitment of permanent changes.
Remember to take proper precautions and adhere to safety guidelines while working on your installation project. Use appropriate tools, protect yourself with safety gear, and work in a well-ventilated area.
As you complete your peel and stick tile installation, step back and appreciate the transformative effect it has on your space. The upgraded look and added functionality will breathe new life into your kitchen, bathroom, or any other tiled area.
We hope that this comprehensive guide has provided valuable insights and guidance for installing peel and stick tile over existing tile. Whether you’re a seasoned DIY enthusiast or new to home improvement projects, the information shared here will help you achieve a successful and satisfying result.
Enjoy your newly upgraded space, and may your peel and stick tile installation bring you years of beauty and satisfaction.
Frequently Asked Questions about How To Install Peel And Stick Tile Over Existing Tile
Was this page helpful?
At Storables.com, we guarantee accurate and reliable information. Our content, validated by Expert Board Contributors, is crafted following stringent Editorial Policies. We're committed to providing you with well-researched, expert-backed insights for all your informational needs.


0 thoughts on “How To Install Peel And Stick Tile Over Existing Tile”